How to Fix KERNEL MODE HEAP CORRUPTION on Windows 11

Get Free Scanner and check your computer for errors
Fix It NowTo fix found issues, you have to purchase the full version of Combo Cleaner. Free trial available. Combo Cleaner is owned and operated by Rcs Lt, the parent company of PCRisk.com read more.
How to Fix KERNEL MODE HEAP CORRUPTION on Windows 11
The KERNEL MODE HEAP CORRUPTION BSoD error can occur for various reasons, mainly memory-related issues, such as faulty RAM. Nevertheless, it can also occur due to driver and software-related.

This error often occurs when launching or after launching video games like Escape from Tarkov, Rainbow Six Siege, DayZ, Rust, Call of Duty Modern Warfare 3, and Valorant, which are very resource-intensive.
What Is KERNEL MODE HEAP CORRUPTION?
The KERNEL MODE HEAP CORRUPTION stop code error indicates that the kernel mode heap manager detected corruption in the heap or a specific data structure. This error is, thus, triggered when your system
What Causes KERNEL MODE HEAP CORRUPTION?
- Insufficient page file size. In most cases, you will get this error due to memory leaks or insufficient page file size. If the RAM module is not bad. increasing the page file size (virtual memory) may fix this error.
- Faulty RAM sticks. RAM sticks seldom go bad, but if they do, they give read/write errors, and you may start getting this error. Test your RAM for defective RAM sticks.
- Outdated or faulty device drivers. Outdated or faulty drivers, particularly graphics card drivers, may cause your system to become unstable and crash with the KERNEL MODE HEAP CORRUPTION error. Update all or as many device drivers as you can, chipset graphics card, network adapter USB, etc.
- Corrupted or missing system files. This error may occur when your system detects missing or corrupted system files that are crucial to system stability. Running Deployment Image & Servicing Management (DISM) and System File Checker (SFC) scans will fix all missing and corrupt files.
- Software conflicts. While rare, this error may be triggered by conflicting software in some cases. To verify that this error is caused by conflicting software, boot up your PC in Clean Boot mode. With Clean Boot mode, you can disable all third-party software and non-essential Windows processes. Also, if you have AMD StoreMI on your PC, uninstall it, as it is known to trigger this error.
If your PC crashes randomly or cannot stay running long enough to perform the fixes, please boot it up in Safe Mode, which disables all but the most necessary operating system components. Your PC will boot into WinRE after two consecutive failed attempts to start Windows.
Video Tutorial on How to Fix KERNEL MODE HEAP CORRUPTION
Table of Contents:
- Introduction
- Method 1. Run the Windows Memory Diagnostic Tool
- Method 2. Run Driver Verifier Manager
- Method 3. Update Device Drivers
- Method 4. Run the Deployment Image & Servicing Management (DISM) and System File Checker (SFC) Scans
- Method 5. Increase Page File Size (Virtual Memory)
- Video Tutorial on How to Fix KERNEL MODE HEAP CORRUPTION
Download Computer Malware Repair Tool
It is recommended to run a free scan with Combo Cleaner - a tool to detect viruses and malware on your device. You will need to purchase the full version to remove infections. Free trial available. Combo Cleaner is owned and operated by Rcs Lt, the parent company of PCRisk.com read more.
Method 1. Run the Windows Memory Diagnostic Tool
If your Random Access Memory (RAM) is faulty, run the Windows Memory Diagnostic tool. The tool will test your RAM for faults. If the scan detects problems, you will need to replace some or all of your RAM modules.
If your PC cannot run long enough to initiate the scan, try booting it in Safe Mode or Safe Mode with Networking. You can boot into Safe Mode by following steps 1-7.
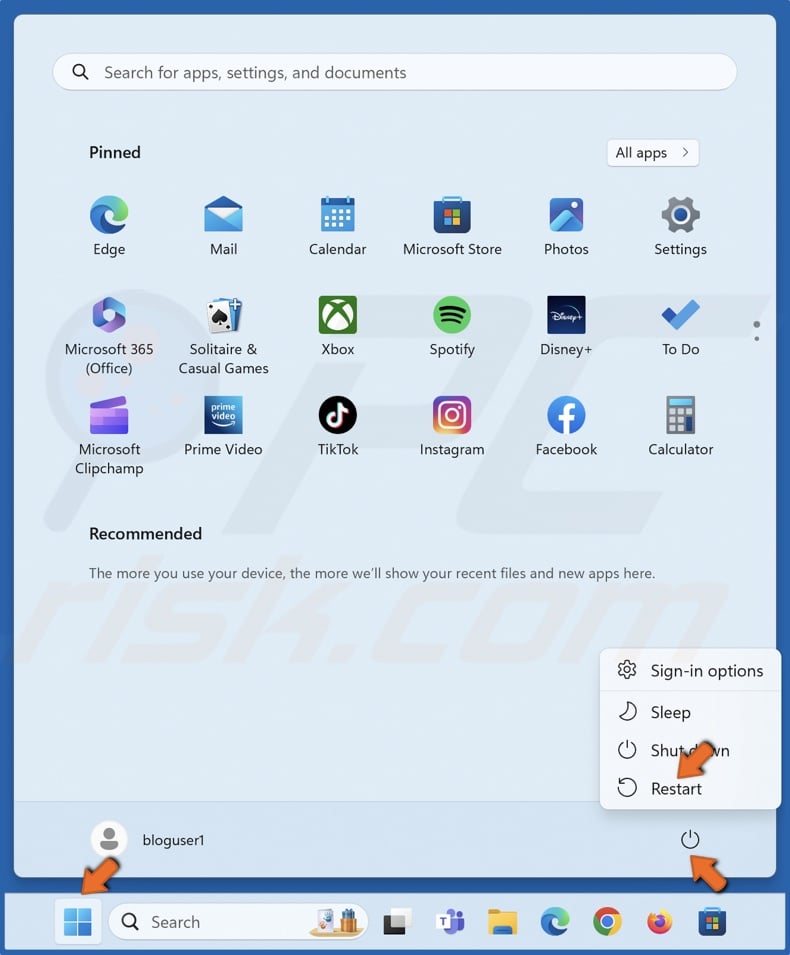
1. Open the Windows Start menu and click the Power button.
2. Hold down the Shift key and click Restart.
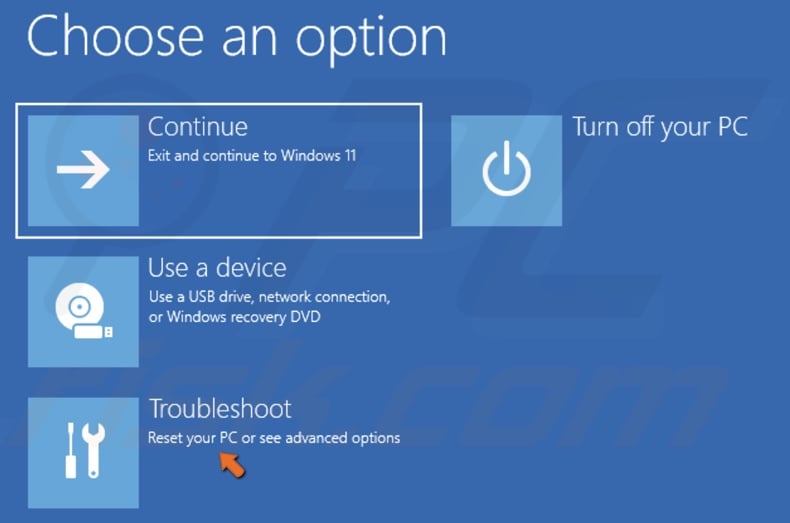
3. Select Troubleshoot.
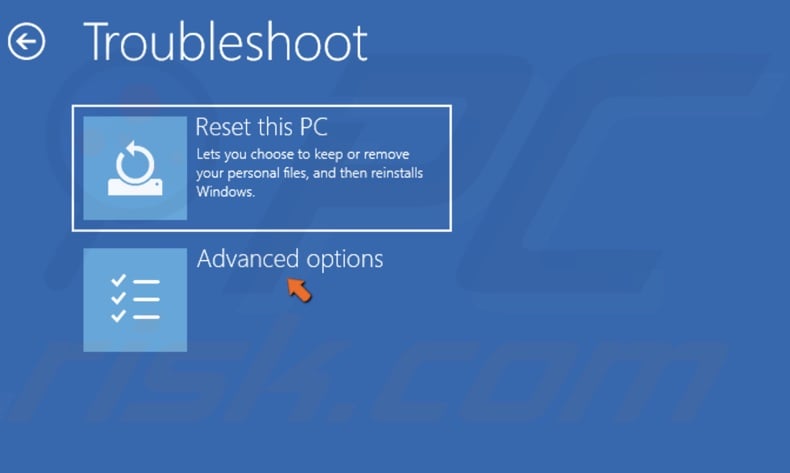
4. Select Advanced options.
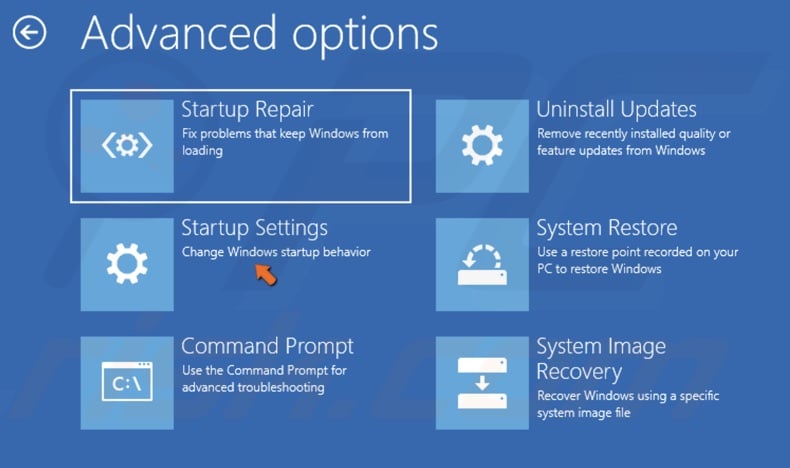
5. Select Startup Settings.
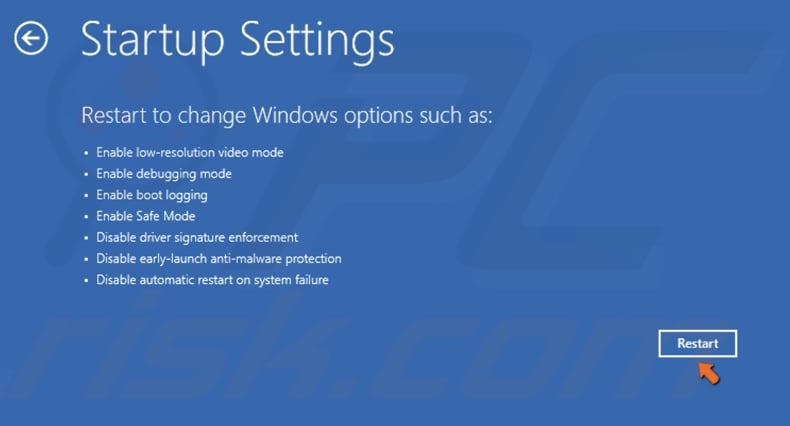
6. Click Restart.

7. Press the 5 or F5 key to boot your PC into Safe Mode with Networking.
8. Hold down Windows+R keys to open Run.
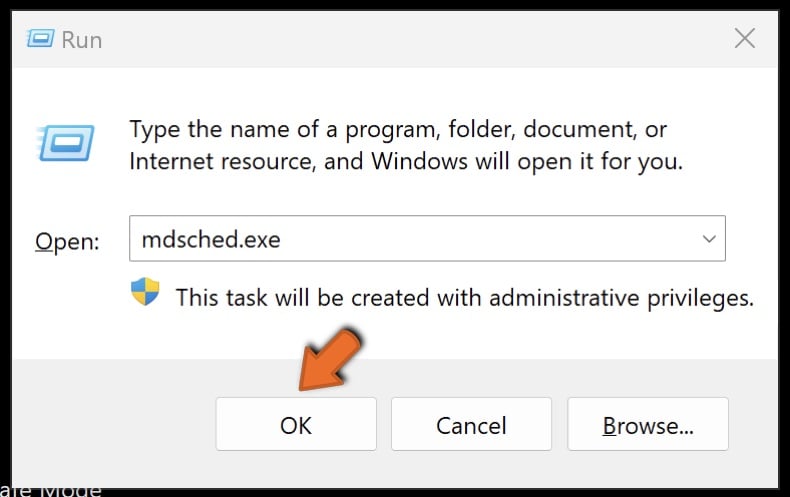
9. Type mdsched.exe in Run and click OK.
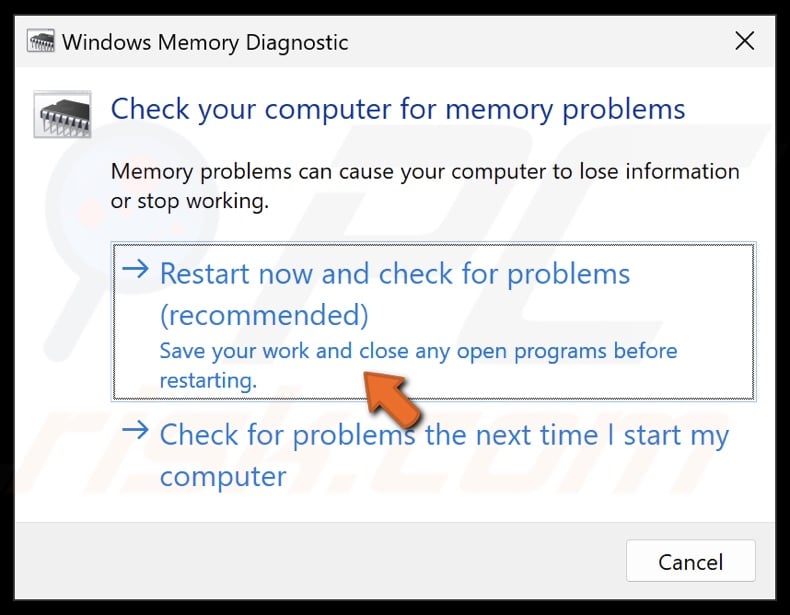
10. In the Windows Memory Diagnostic window, click Restart now and check for problems.
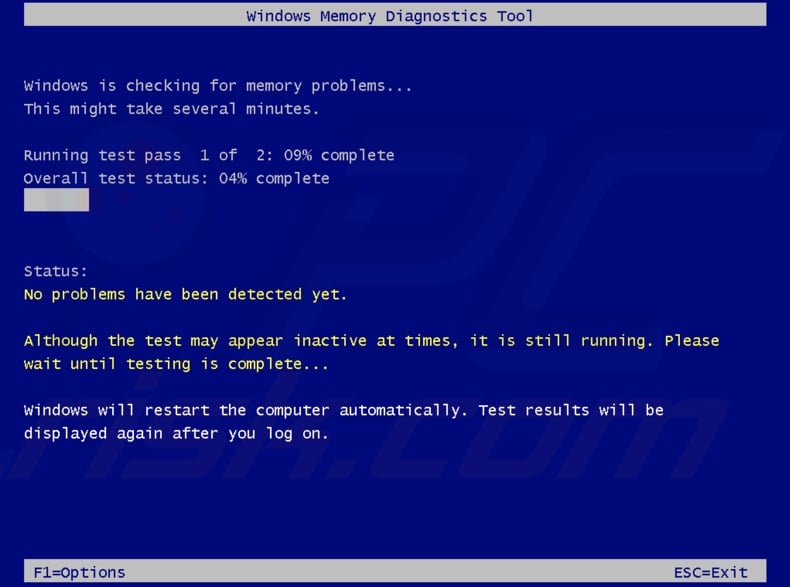
Your PC will restart and diagnose the memory. Once the diagnostic process is complete, your PC will boot up normally.
11. Once your PC boots up, open the diagnosis report. The report will let you know if your memory is faulty.
12. Hold down Windows+R keys to open Run.
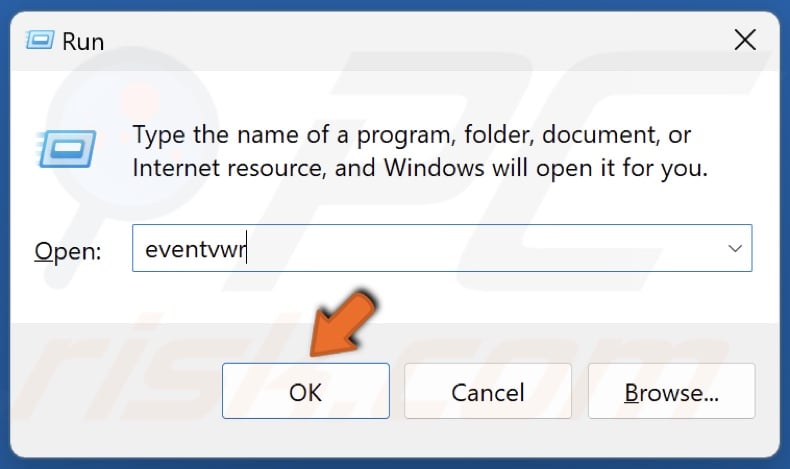
13. Type eventvwr in Run and click OK.
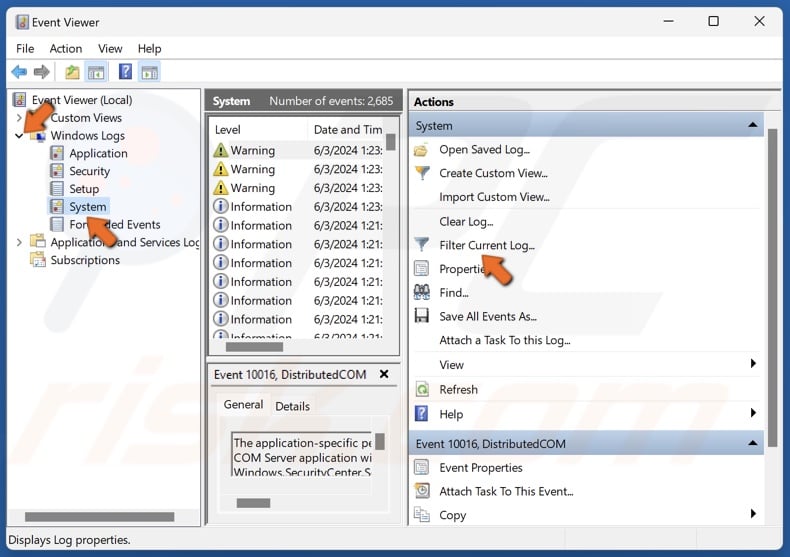
14. In Event Viewer, navigate to Windows Logs > System.
15. In the right pane, click Filter Current Log.
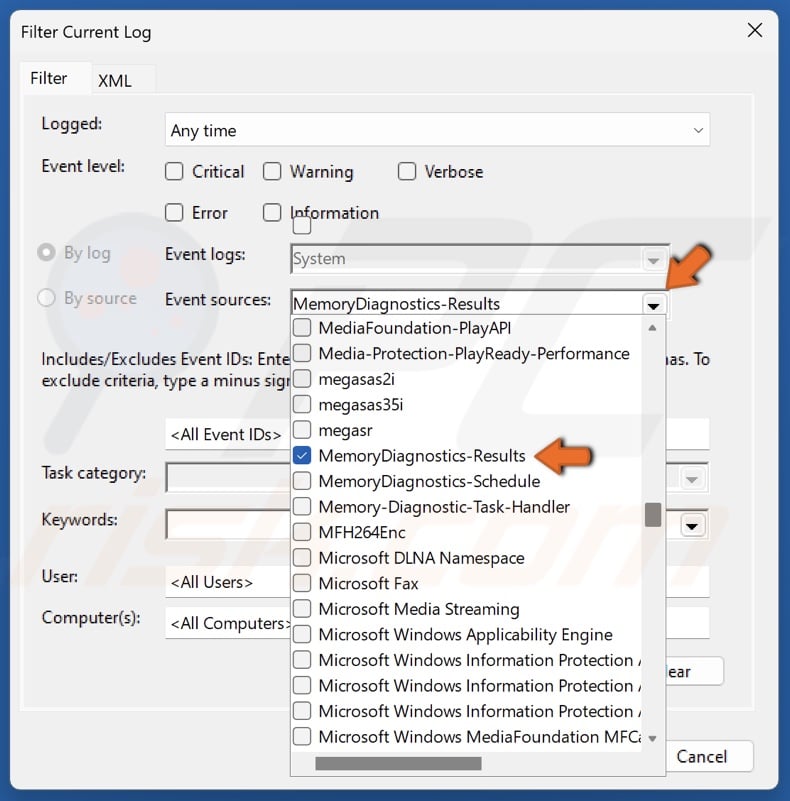
16. Open the Event sources drop-down menu and select MemoryDiagnostics-Results.
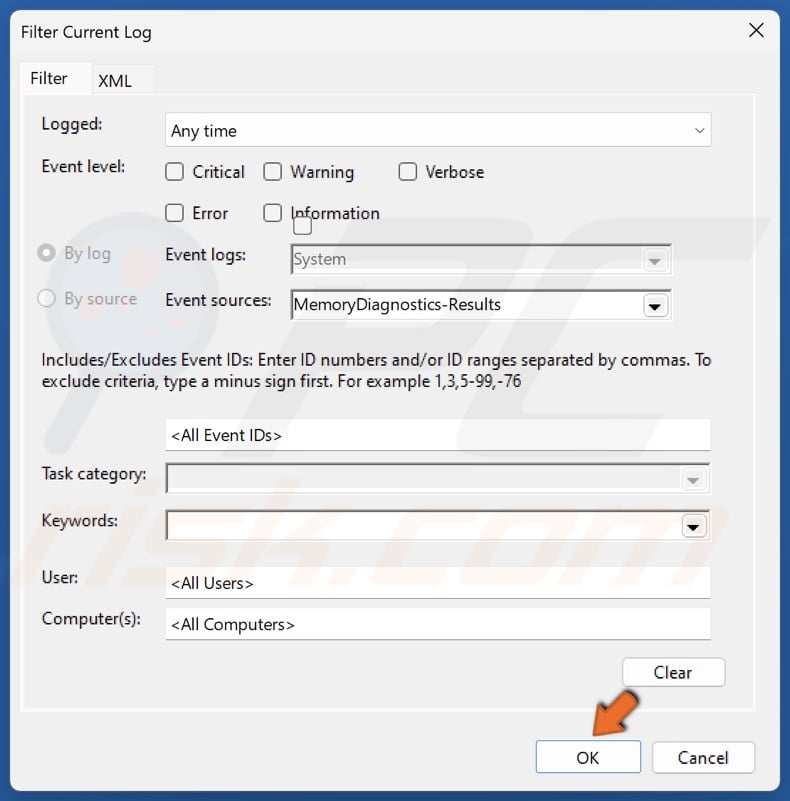
17. Click OK.
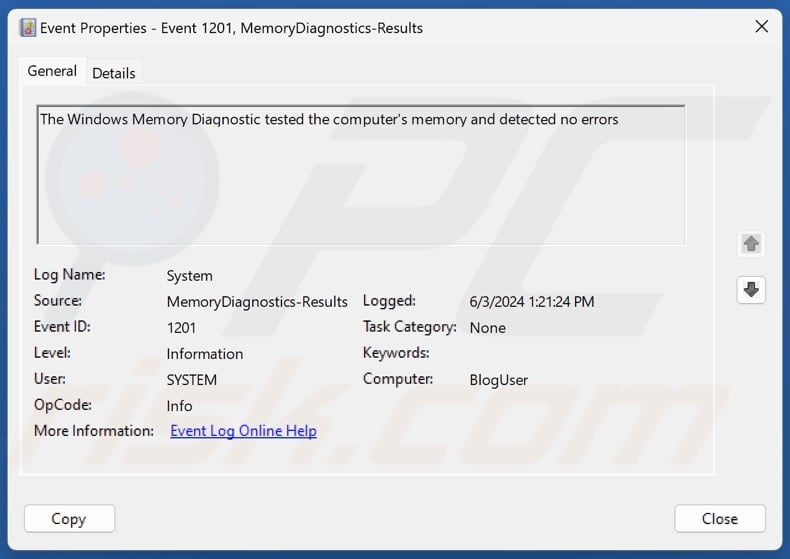
18. Double-click the results log. If there are memory errors, consider replacing your RAM. If there are no memory errors, proceed with the following fixes.
Method 2. Run Driver Verifier Manager
Run Driver Verifier Manager to determine whether the issue causing KERNEL MODE HEAP CORRUPTION is caused by corrupted or incompatible drivers. The Driver Verifier Manager will determine which drivers are faulty, but you will have to manually roll back, reinstall, or update them to fix the error.
1. Hold down Windows+R keys to open Run.
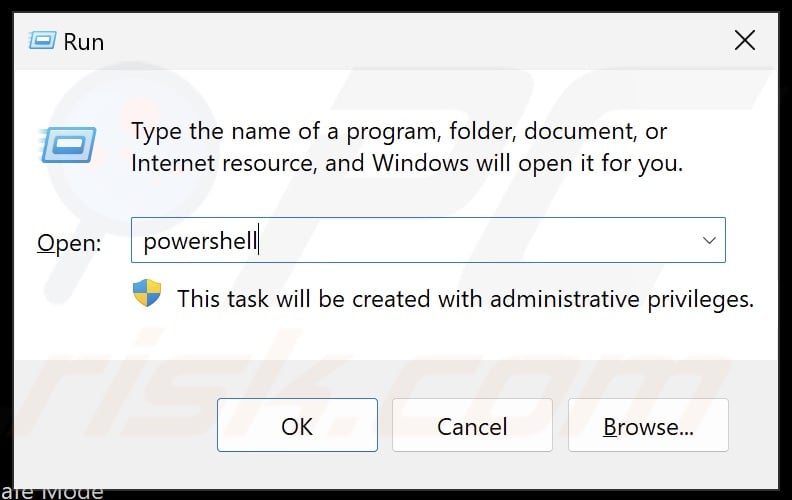
2. Type PowerShell in Run and hold down Ctrl+Shift+Enter keys to open PowerShell as an administrator.
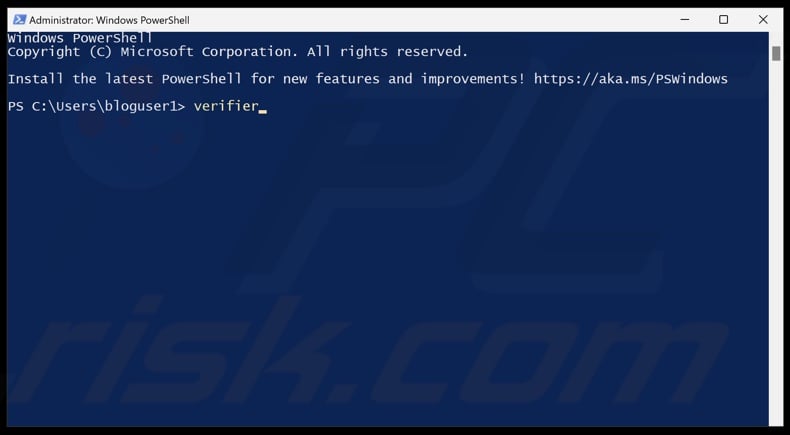
3. In PowerShell, type verifier, and press Enter.

4. Tick Create standard settings and click Next.

5. Then, tick Automatically select all drivers installed on this computer and click Finish.
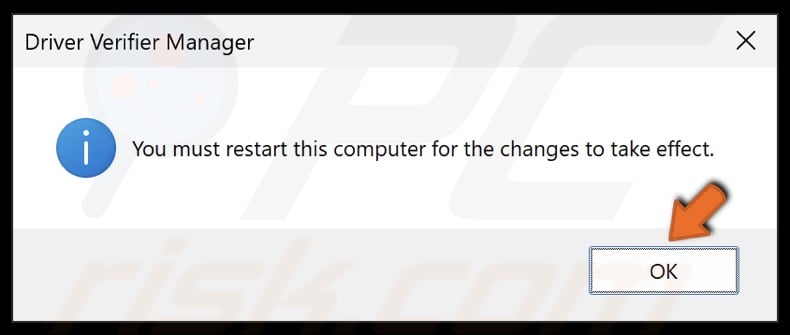
6. Click OK and restart your PC.
7. Hold down Windows+R keys to open Run.
8. Type PowerShell in Run and hold down Ctrl+Shift+Enter keys to open PowerShell as an administrator.
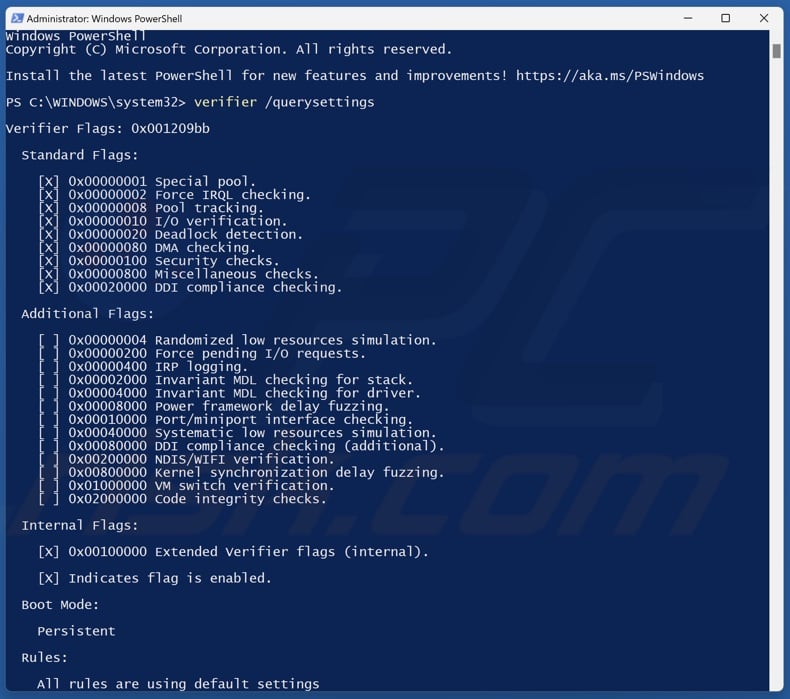
9. In PowerShell, type verifier /querysettings, and press Enter. This command will show you the current Driver Verifier settings.
10. You will need to use your computer with Driver Verifier enabled and wait until it crashes again with the KERNEL MODE HEAP CORRUPTION error. Windows will save the crash information as a DMP file.
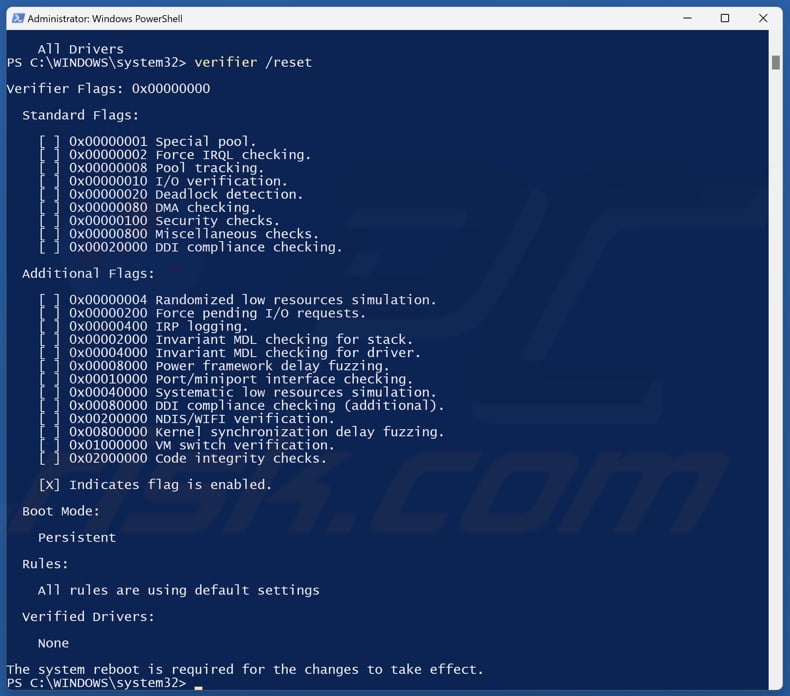
11. After a crash, type in verifier /reset and press Enter. This command will disable the Driver Verifier.
12. Close PowerShell and restart your PC.
13. To determine which driver caused the error, download BlueScreenView to view DMP files.
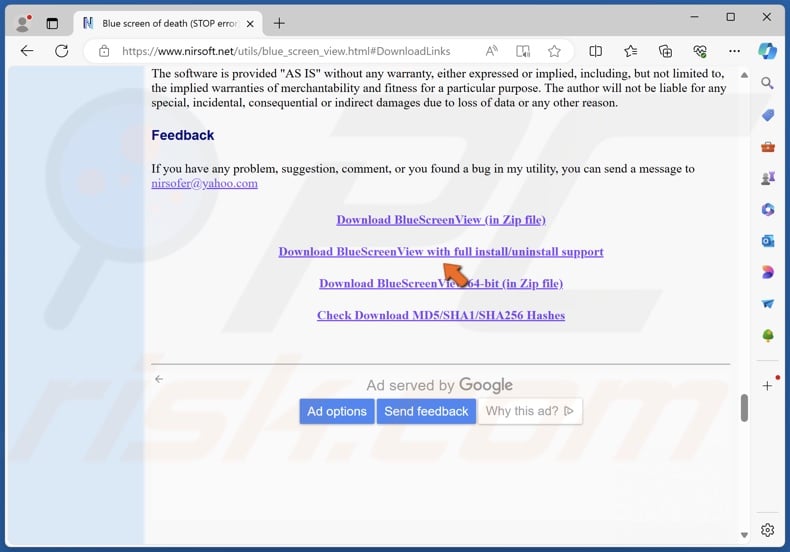
14. Open your web browser and go to the BlueScreenView download page.
15. Click Download BlueScreenView with full install/uninstall support.
16. Run the bluescreenview_setup once it's downloaded.
17. Follow the installation wizard guide.
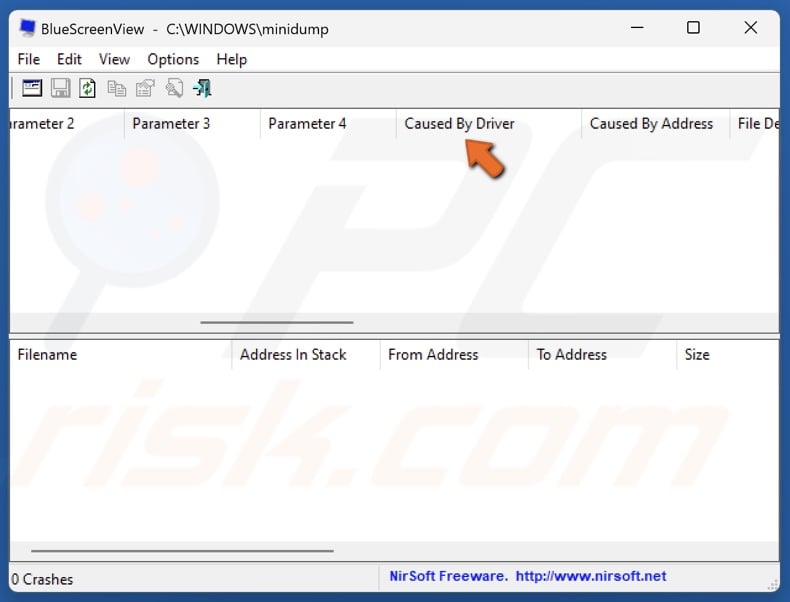
18. Select the most recent file and scroll horizontally to the Caused by Driver column. The file name will allow you to identify which driver caused the crash.
19. Then, proceed to reinstall, update, or roll back the corrupted driver.
Method 3. Update Device Drivers
In many cases, the KERNEL MODE HEAP CORRUPTION error occurs due to a corrupted or incompatible driver, often the GPU driver.
However, updating the GPU driver doesn’t always work. You need to completely remove the driver using DDU (Display Driver Uninstaller) and install the latest driver or downgrade to an older version.
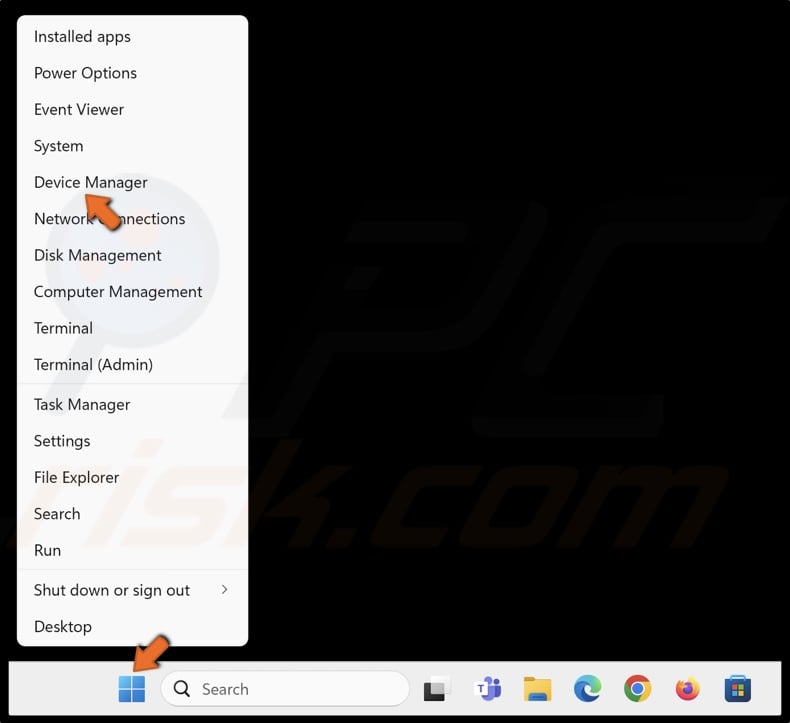
1. Right-click the Windows Start button and select Device Manager.
2. Go through the devices list and look for devices with a yellow triangle and an exclamation mark. This symbol indicates an issue with the device.
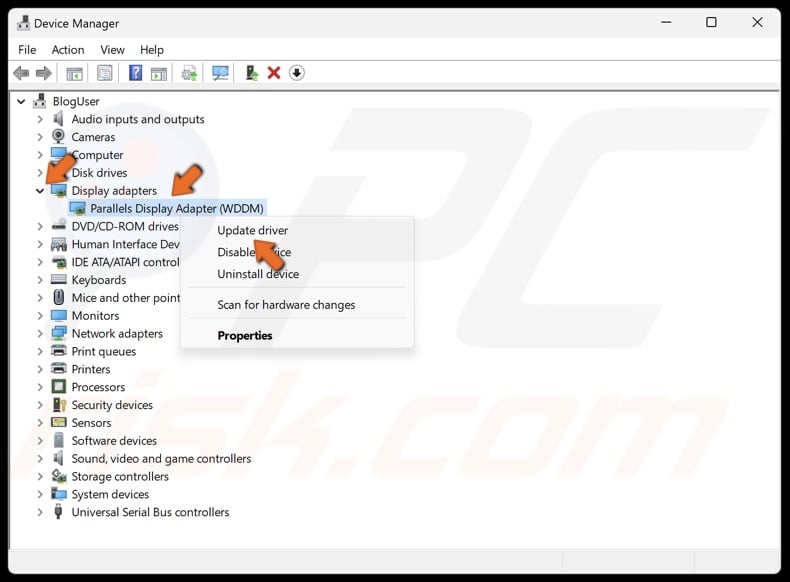
3. Right-click the device and click Update driver.
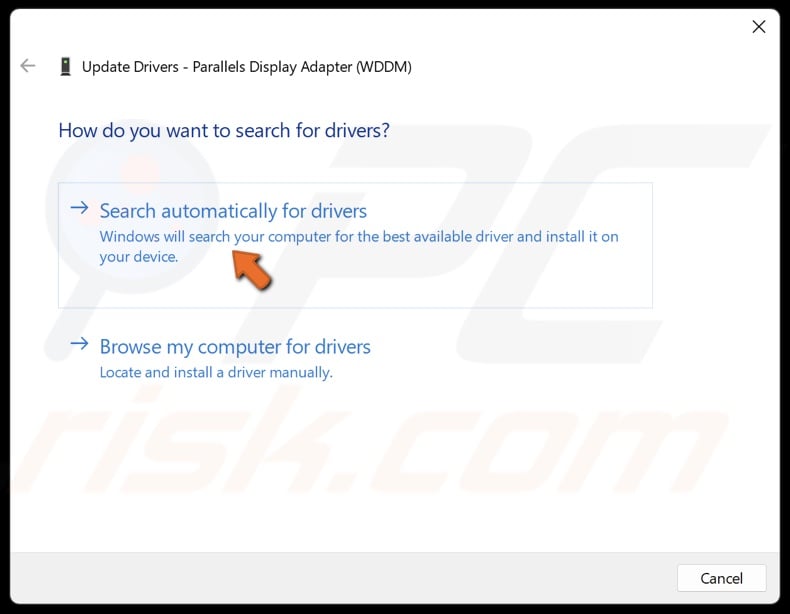
4. Select Search automatically for drivers. Windows will automatically install the best driver available on your computer.

5. Alternatively, select Browse my computer for drivers.
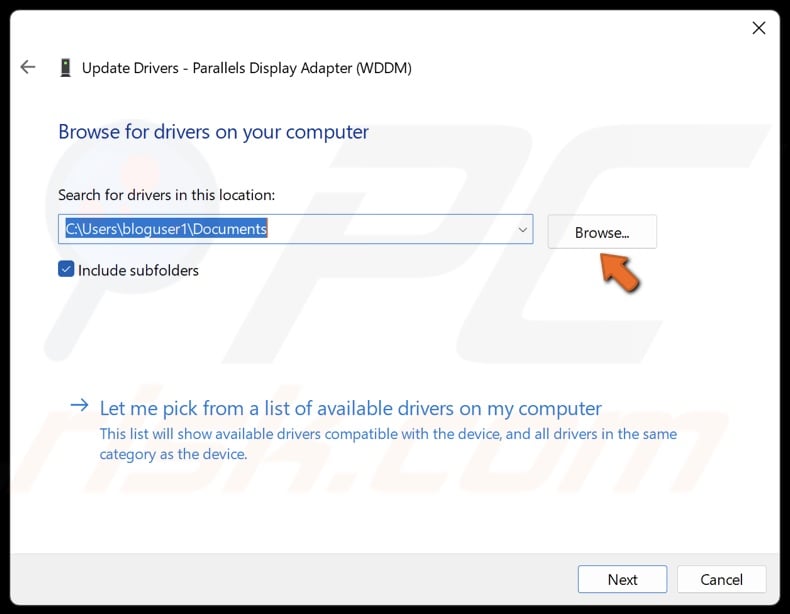
6. Click Browse and select a driver downloaded from the device vendor’s website. You can also download the graphics card drivers for Intel, Nvidia, and AMD manually from their respective websites.

7. Alternatively, select Let me pick from a list of available drivers on my computer.
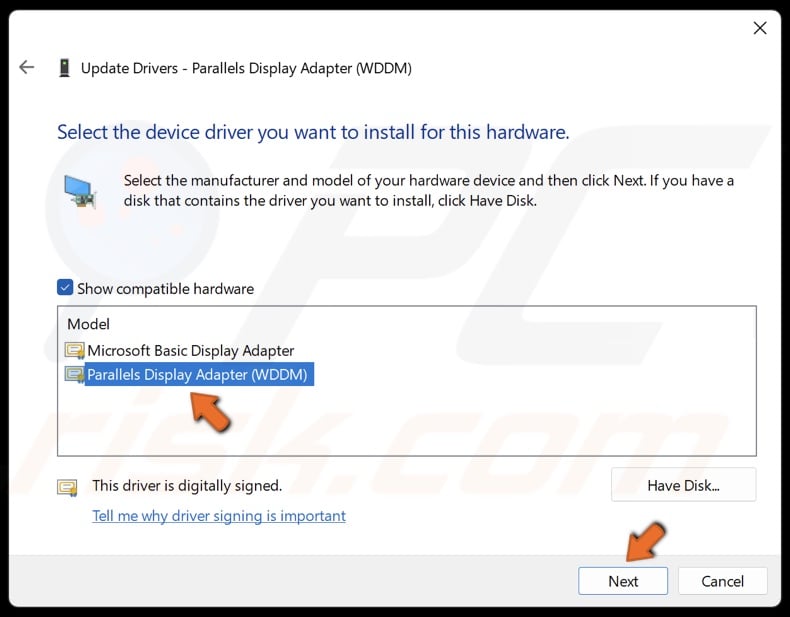
8. Select a compatible driver from the drivers list and click Next.
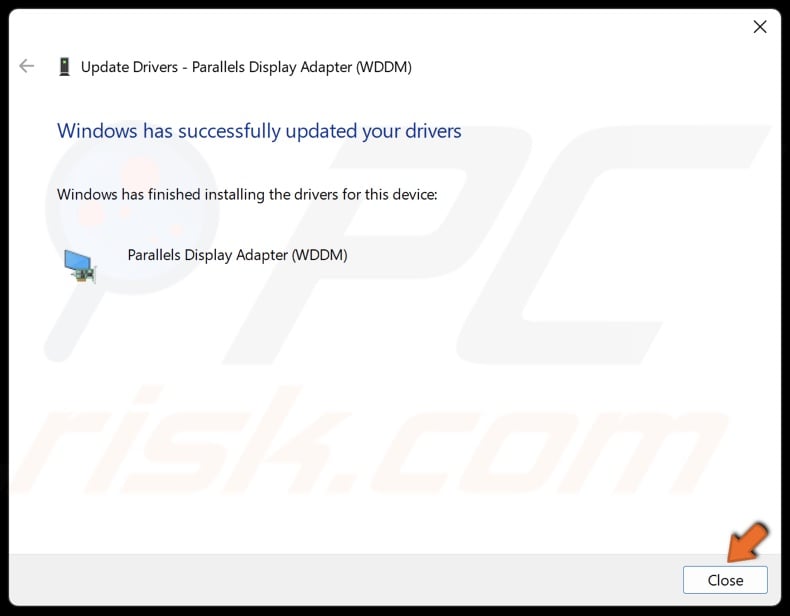
9. Click Close after installing the driver and restart your PC.
However, while likely, your GPU may not be the exact cause for the error, so make sure to update as many device drivers as possible using Device Manager.
Method 4. Run the Deployment Image & Servicing Management (DISM) and System File Checker (SFC) Scans
You may get the KERNEL MODE HEAP CORRUPTION error due to corrupted system files. To repair and replace corrupted and missing system files, run DISM and SFC commands.
Deployment Image Servicing and Management (DISM) is a command-line tool for repairing a damaged or corrupted Windows image. System File Checker (SFC) is a utility for repairing and replacing corrupted Windows system files.
1. Hold down Windows+R keys to open Run.
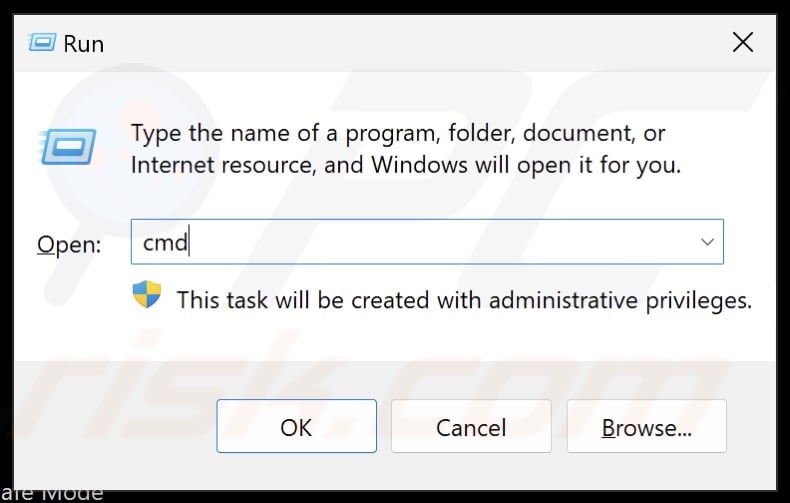
2. Type in CMD in Run and hold down Ctrl+Shift+Enter keys to open Command Prompt as an administrator.
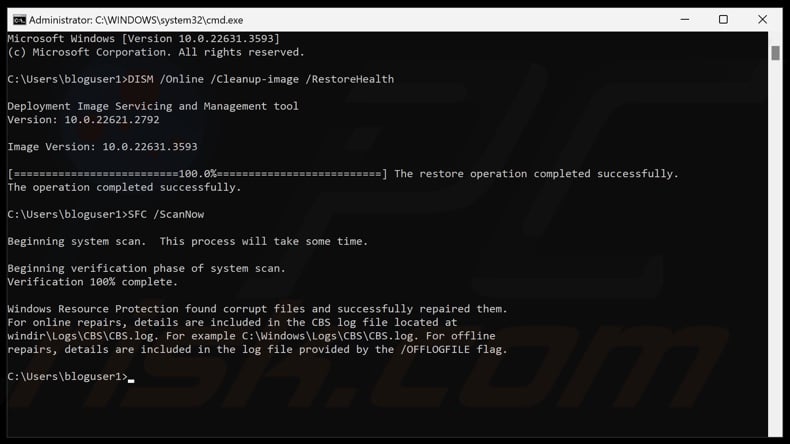
3. Type DISM /Online /Cleanup-Image /RestoreHealth and press Enter.
4. Type SFC /ScanNow and press Enter.
5. Close the Command Prompt and restart your PC.
Method 5. Increase Page File Size (Virtual Memory)
Virtual memory is a cache for data that doesn’t require immediate recall and, thus, doesn’t need to be loaded into RAM. In Windows, virtual memory is adjusted automatically, but it may not be enough. By increasing the virtual memory, you may fix the KERNEL MODE HEAP CORRUPTION error.
1. Hold down Windows+R keys to open Run.
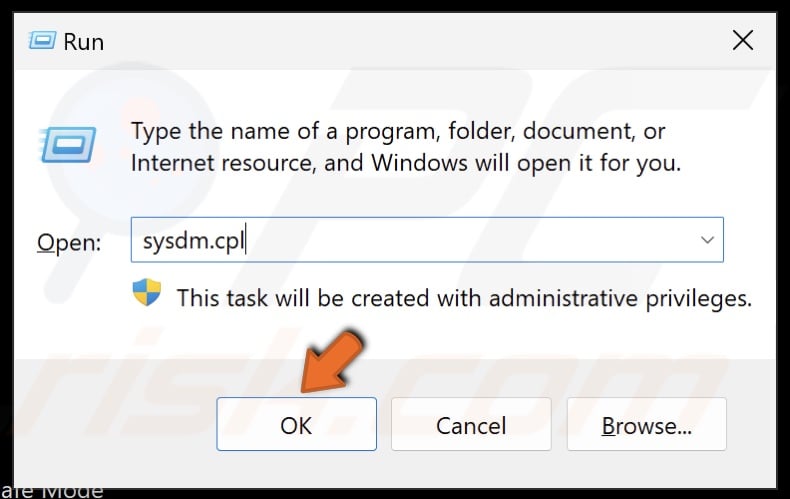
2. Type sysdm.cpl in Run and click OK.
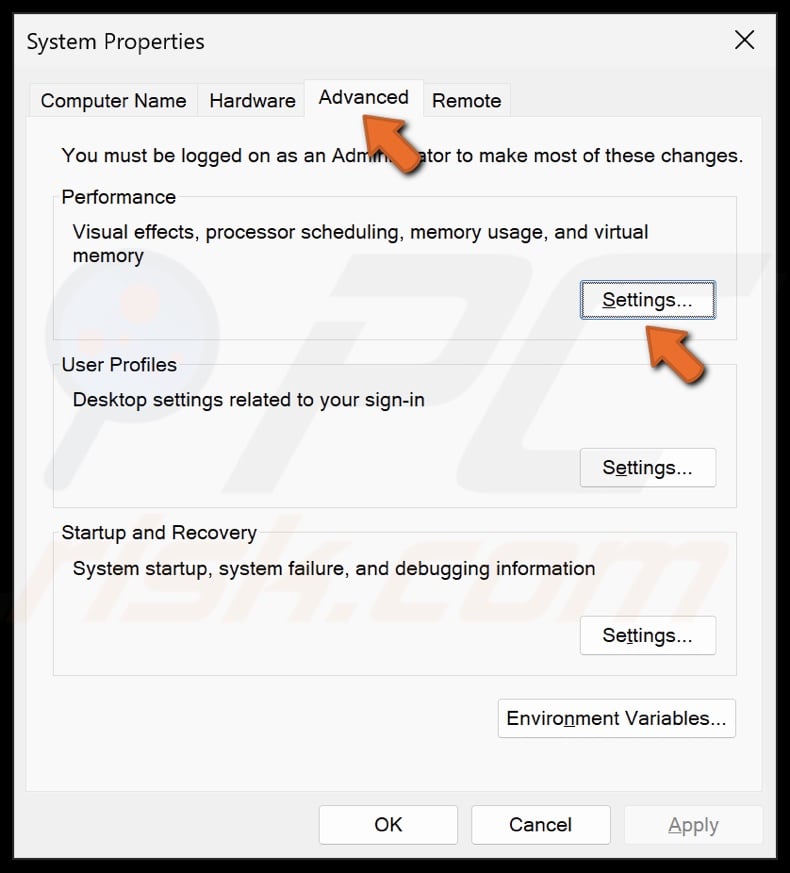
3. In System Properties, select the Advanced tab.
4. Under Performance, click Settings.
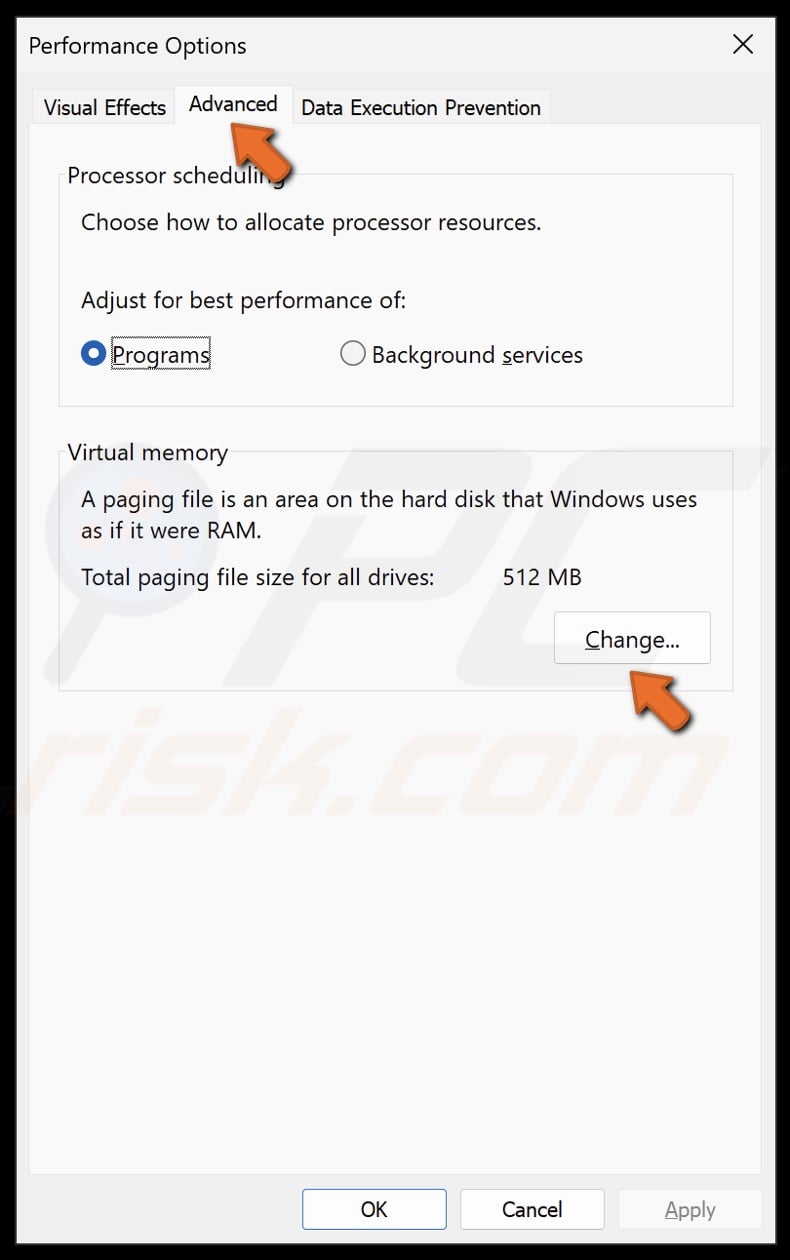
5. In Performance Options, select the Advanced tab.
6. In the Virtual memory section, click Change.
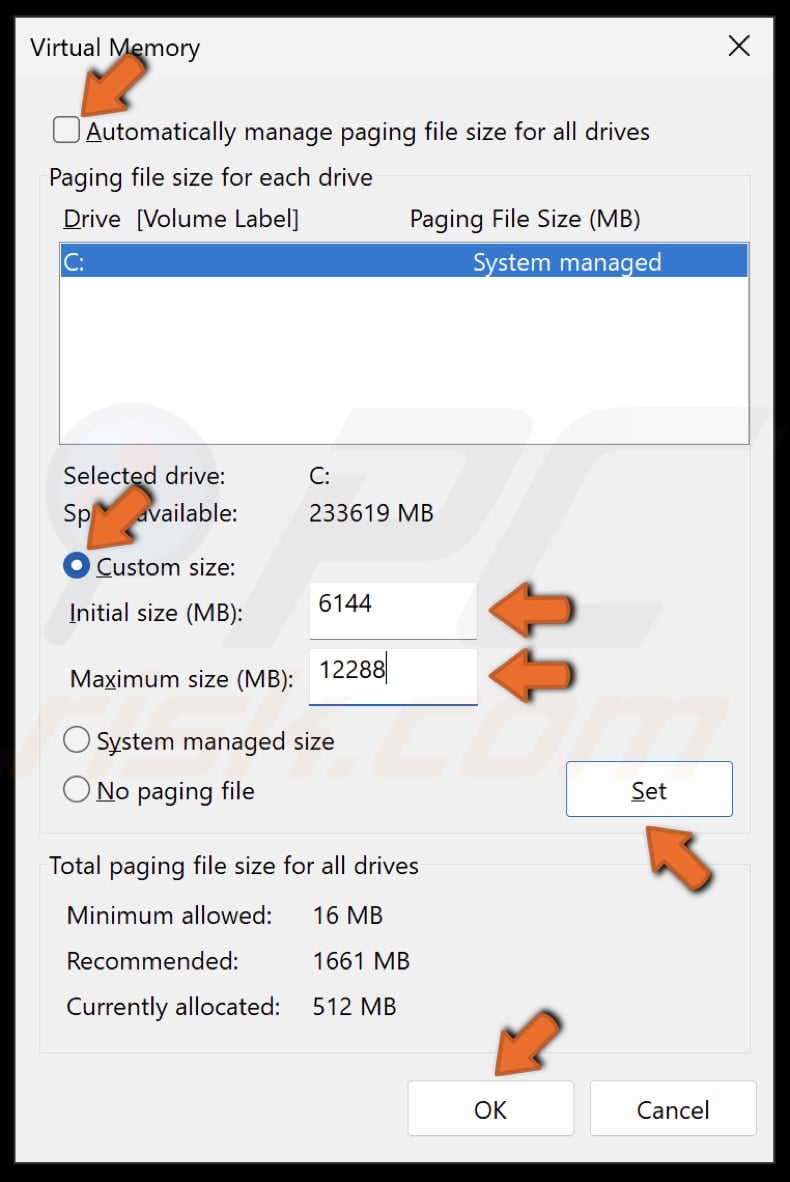
7. Unmark the Automatically manage paging for file size for all drives checkbox.
8. In the Paging file size for each drive section, select the Custom size option.
9. Microsoft recommends setting the Initial size of virtual memory at 1.5 times and the Maximum size of no more than 3 times the total available RAM on the computer. Therefore, if you have 2 GB (2,048 MB) of RAM, the virtual memory can be set to a maximum of 6 GB (6,144 MB).
10. Set the Initial size (MB) and the Maximum size (MB). These settings will define the initial size of disk space to be allocated for virtual memory. The initial size can be matched to the maximum size, or both can be increased.
11. Click Set to save the Initial and Maximum virtual memory size.
12. Click OK to close the Virtual Memory window.
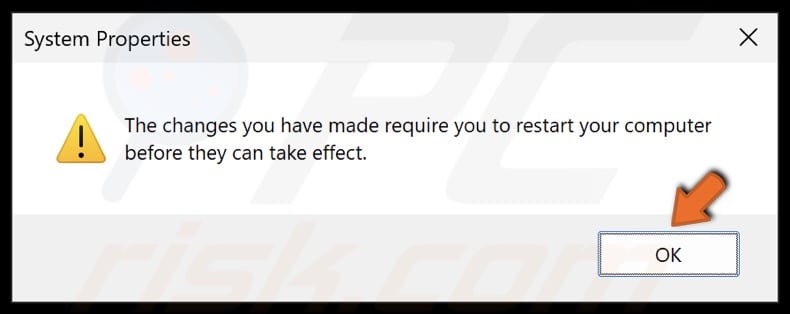
13. Click OK when prompted.
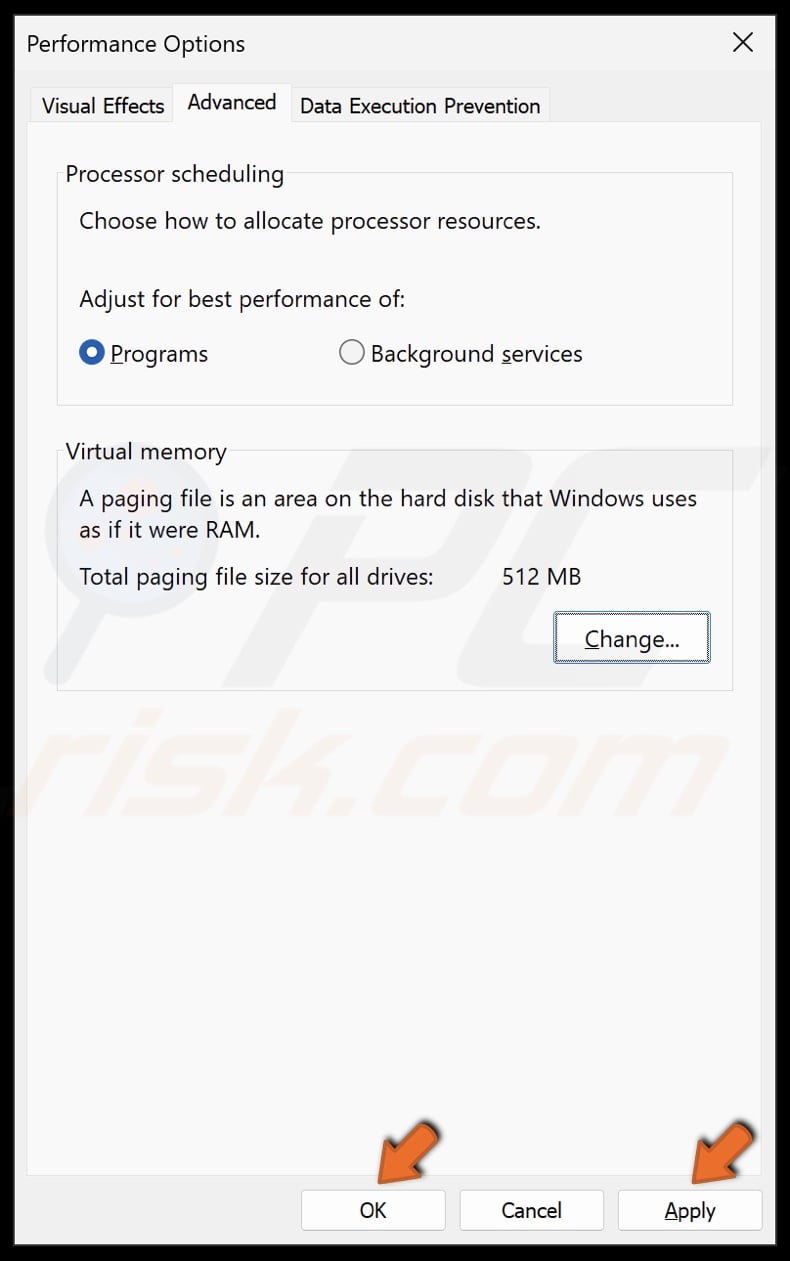
14. Click Apply and click OK.
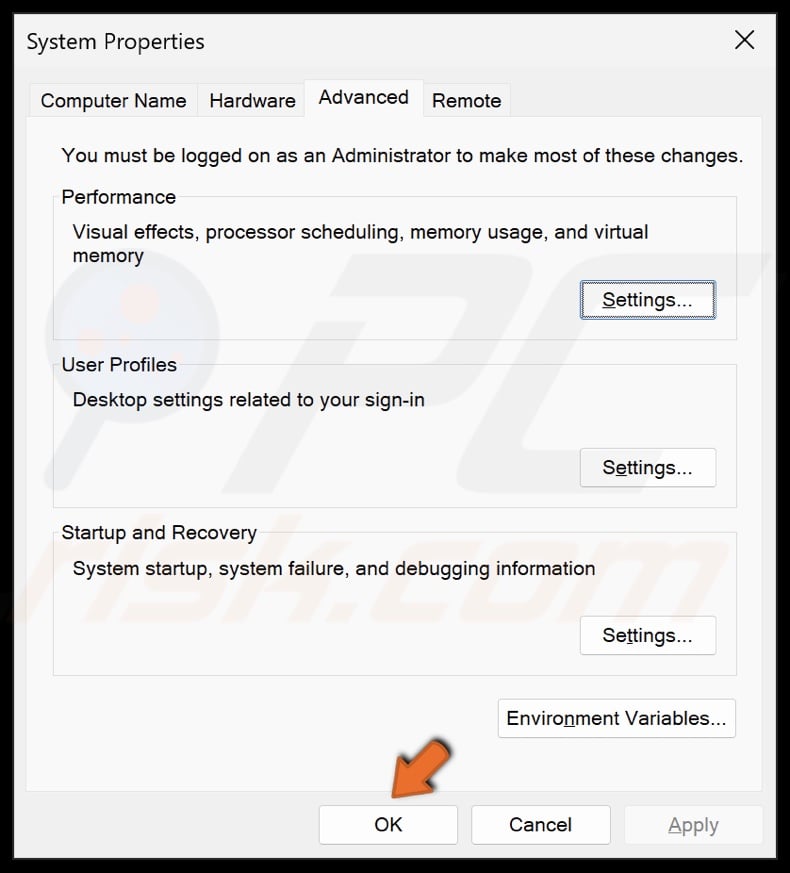
15. Click OK in System Properties.
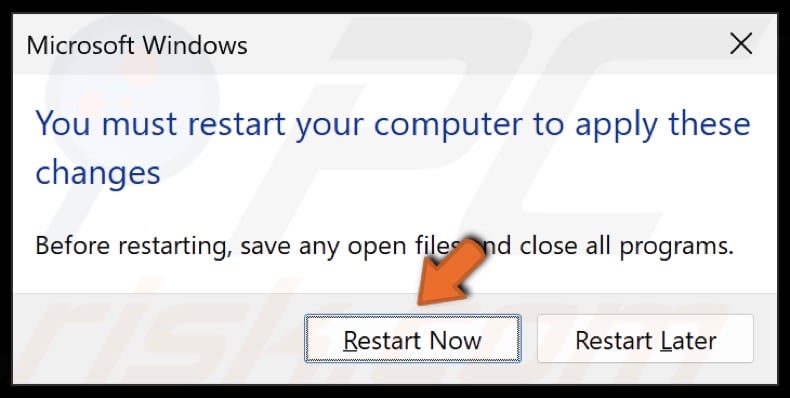
16. Click Restart Now when prompted.
Did this article help you fix KERNEL MODE HEAP CORRUPTION on your PC? Let us know in the Discussion section below.
Share:

Rimvydas Iliavicius
Researcher, author
Rimvydas is a researcher with over four years of experience in the cybersecurity industry. He attended Kaunas University of Technology and graduated with a Master's degree in Translation and Localization of Technical texts. His interests in computers and technology led him to become a versatile author in the IT industry. At PCrisk, he's responsible for writing in-depth how-to articles for Microsoft Windows.
▼ Show Discussion