How to Fix "The action cannot be completed because the file is open in another program" Error

Get Free Scanner and check your computer for errors
Fix It NowTo fix found issues, you have to purchase the full version of Combo Cleaner. Free trial available. Combo Cleaner is owned and operated by Rcs Lt, the parent company of PCRisk.com read more.
How to Fix “The action cannot be completed because the file is open in another program” Error on Windows 10
When you try to rename, delete, or move a file or folder, you might receive the message, “The action cannot be completed because the file is open in another program.” This guide describes several possible ways to resolve this problem.

The message gives no information regarding the program that has the file or folder open and might be displayed even if you have closed the programs that were previously accessing the file.
This error message can be very frustrating if you cannot move or delete the file or folder you are working with. This error message is generated when the folder or files within the folder are locked because they are being used by Windows or another program running in Windows.
The “The action cannot be completed because the file is open in another program” error message can cause many problems since it prevents access to and removal of specific files.
Video Showing How to Fix ‘The action cannot be completed because the file is open in another program’ Error
Table of Contents:
- Introduction
- Restart File Explorer
- Remove Thumbnails Using Disk Cleanup
- Disable Thumbnails Using File Explorer Options
- Disable Thumbnails Using Performance Options
- Disable Thumbnails Using Registry Editor
- Disable Preview Pane
- Launch Folder Windows In A Separate Process
- End Problematic Process
- End COM Surrogate Process
- Update Your .NET Framework
- Remove Thumbs.db File Using Command Prompt
- Optimize Folders
- Perform A Clean Boot
- Update Your Windows
- Empty Your Recycle Bin
- Video Showing How to Fix ‘The action cannot be completed because the file is open in another program’ Error
Download Computer Malware Repair Tool
It is recommended to run a free scan with Combo Cleaner - a tool to detect viruses and malware on your device. You will need to purchase the full version to remove infections. Free trial available. Combo Cleaner is owned and operated by Rcs Lt, the parent company of PCRisk.com read more.
Restart File Explorer
For this one, you will need to use Task Manager. Task manager is a system monitor program used to provide information about the processes and programs running on a computer and the general status of the computer. Some implementations can also be used to terminate processes and programs and change processes’ priorities.
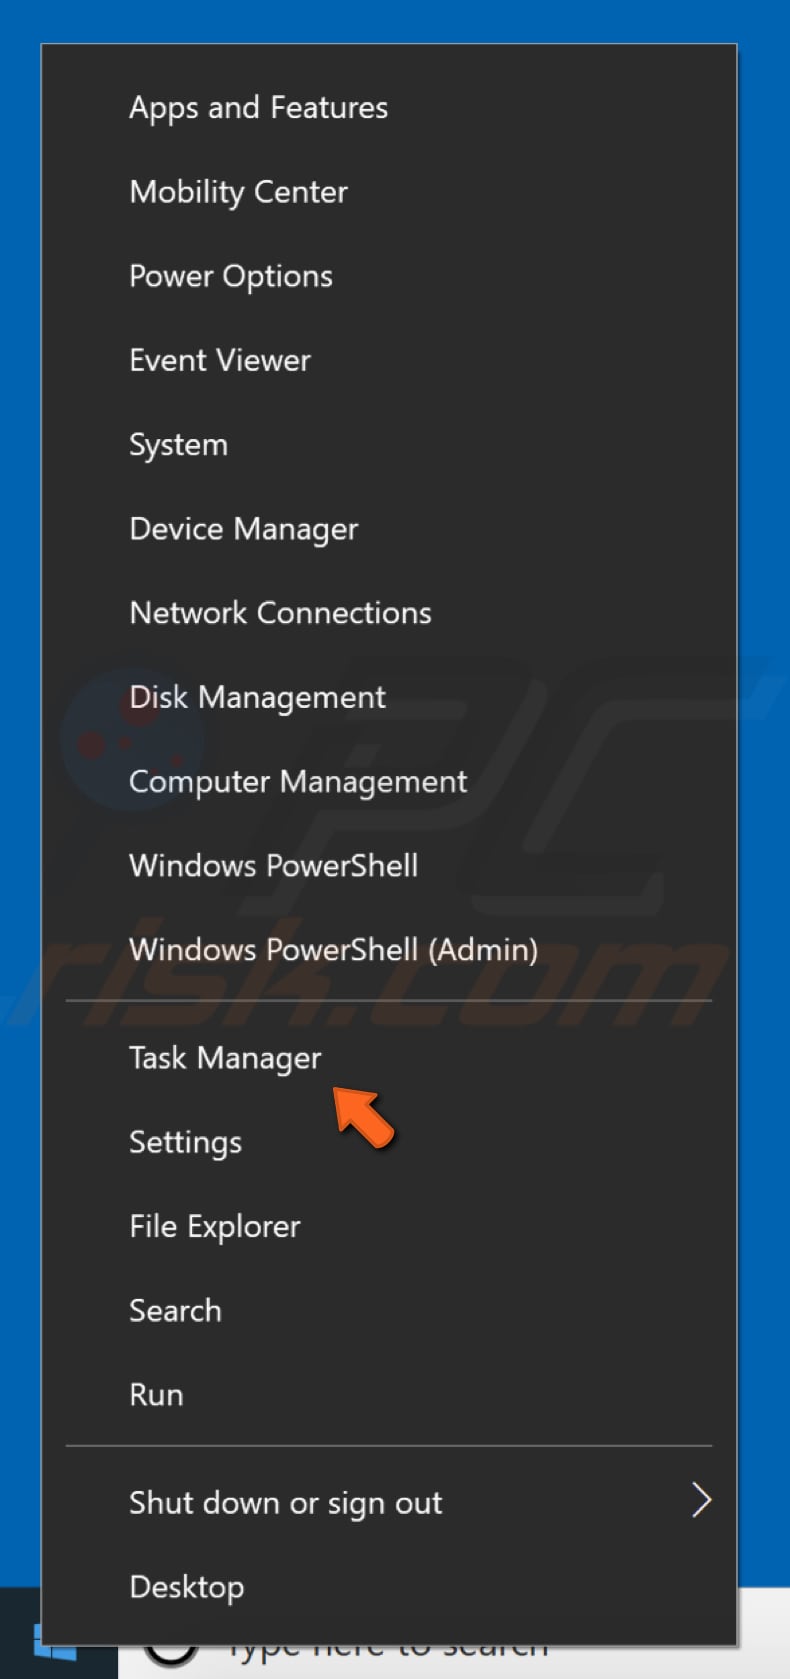
To open Task Manager, press Ctrl + Alt + Delete on your keyboard or right-click the Start menu and select “Task Manager.”
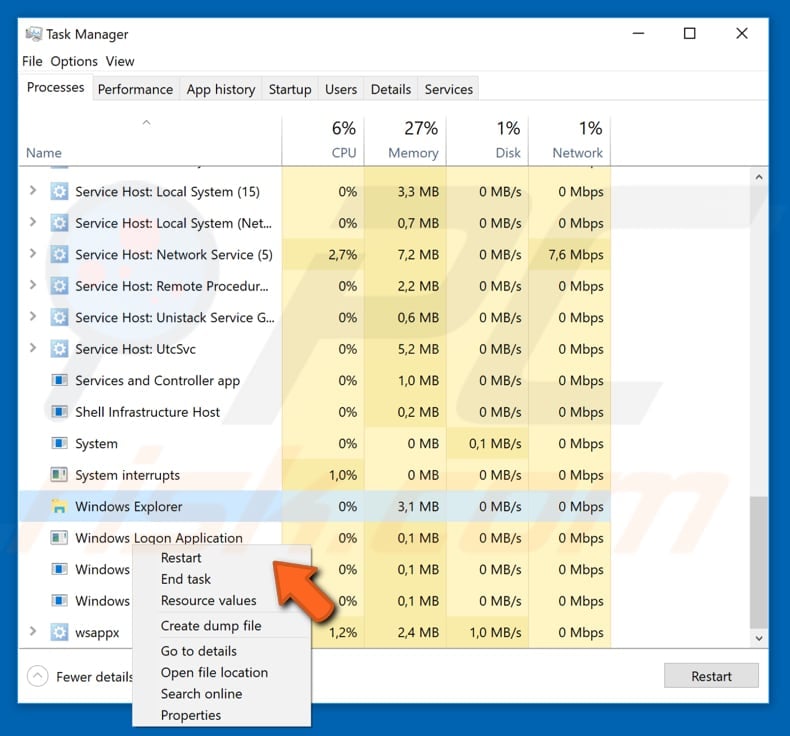
In Task Manager, scroll down to find “Windows Explorer,” right-click on it and select “Restart” from the drop-down menu, or simply select it (by clicking it) and click “Restart” on the bottom-right corner.
Restarting File Explorer (Windows Explorer) is one of the easiest solutions. Still, it is only temporary - “The action cannot be completed because the file is open in another program” problem might reoccur. Nevertheless, we recommend you try this solution first.
Remove Thumbnails Using Disk Cleanup
“The action cannot be completed because the file is open in another program” error can be caused by thumbnails. Windows keeps a copy of all of your picture, video, and document thumbnails so they can be displayed quickly when you open a folder.
If you delete these thumbnails, they will be automatically recreated when needed. You can fix this problem by removing thumbnails with Disk Cleanup.
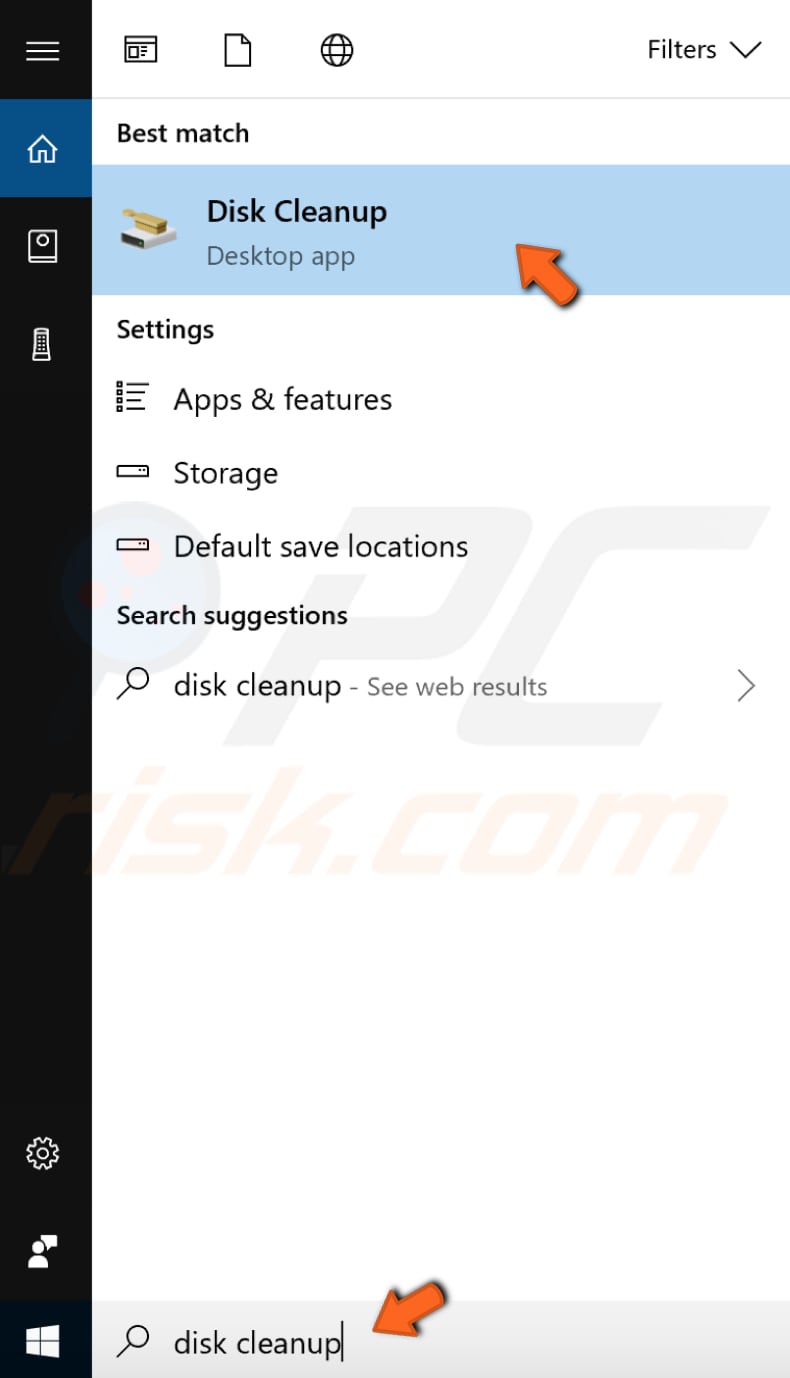
To run Disk Cleanup, type “disk cleanup” in Search and click the “Disk Cleanup” result.
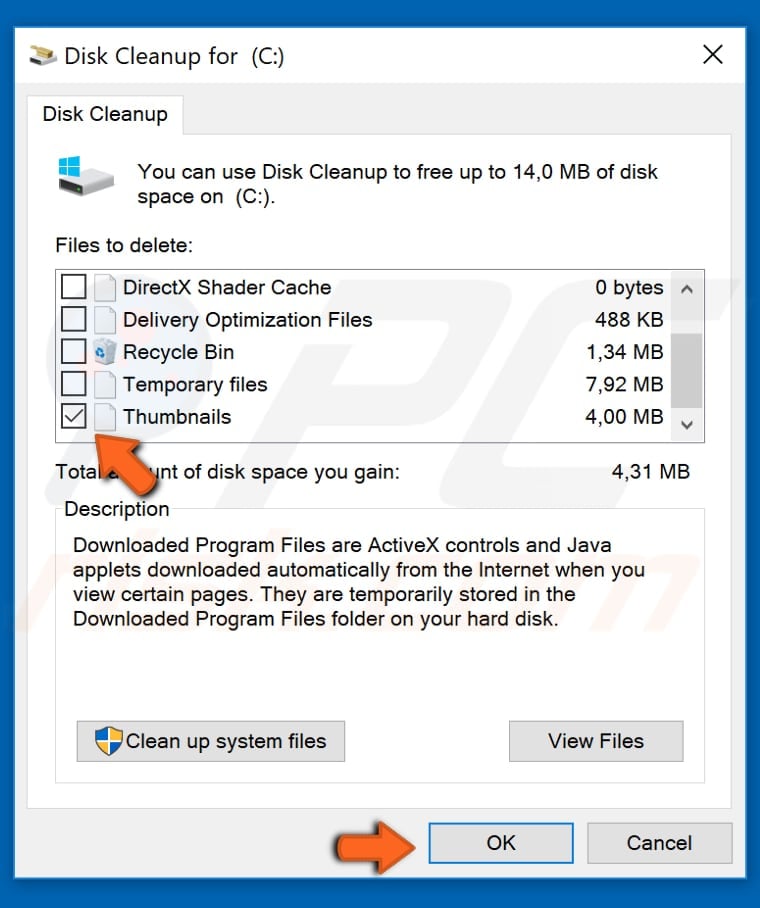
You will see a list of files to be deleted. Find “Thumbnails” and mark the checkbox near it. Click “OK.” Disk Cleanup will remove thumbnails and other selected files. The problem should now be fixed. If it appears again, try to remove thumbnails using Disk Cleanup again.
Disable Thumbnails Using File Explorer Options
This thumbnail cache is used to store thumbnail images for Windows Explorer’s thumbnail view on Microsoft Windows operating systems. This speeds up the display of images, as these smaller images do not need to be recalculated every time the user views the folder. Windows stores thumbnails of graphics files and certain document and movie files, in the Thumbnail Cache file, including the following formats: JPEG, BMP, GIF, PNG, TIFF, AVI, PDF, PPTX, DOCX, HTML, and many others.
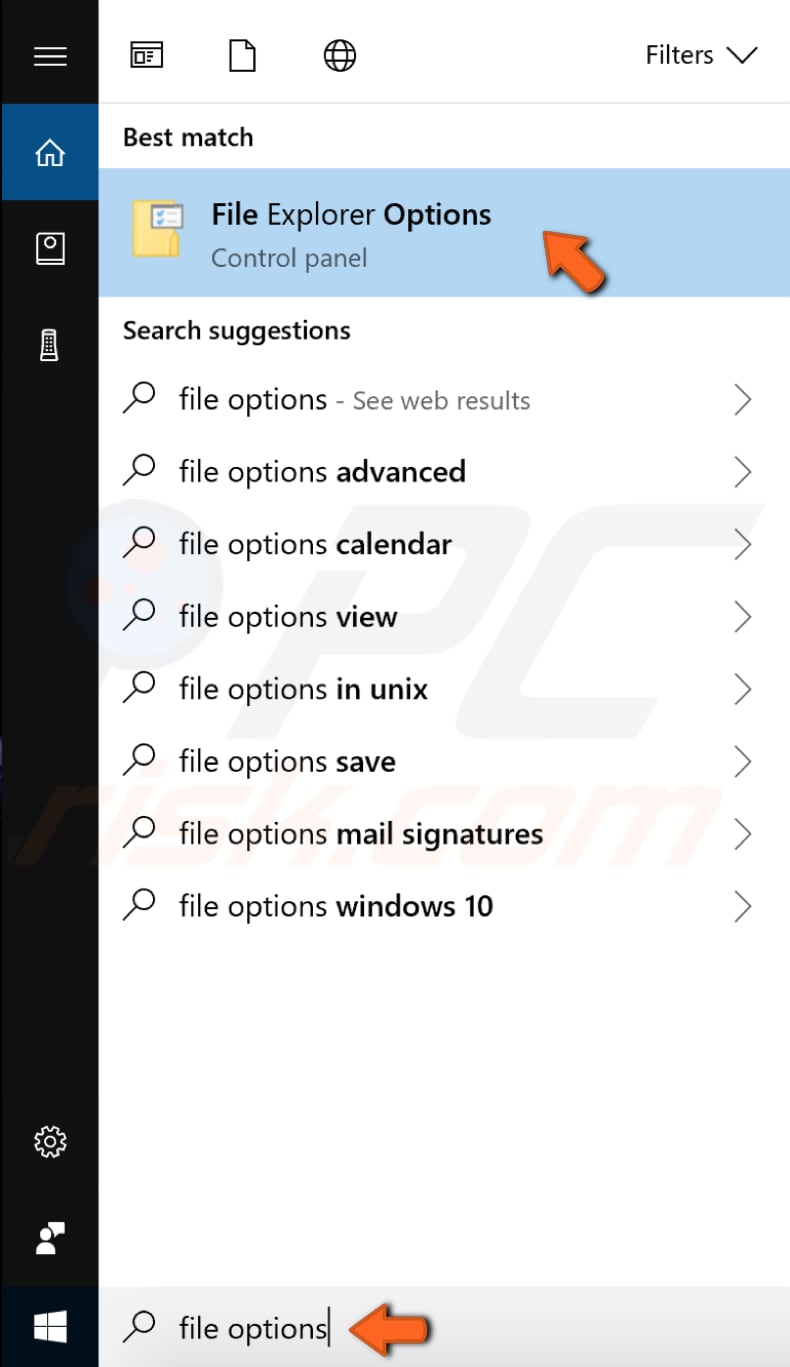
You can disable thumbnails entirely by adjusting File Explorer options. Type “file options” in Search and click the “File Explorer Options” result to open it.
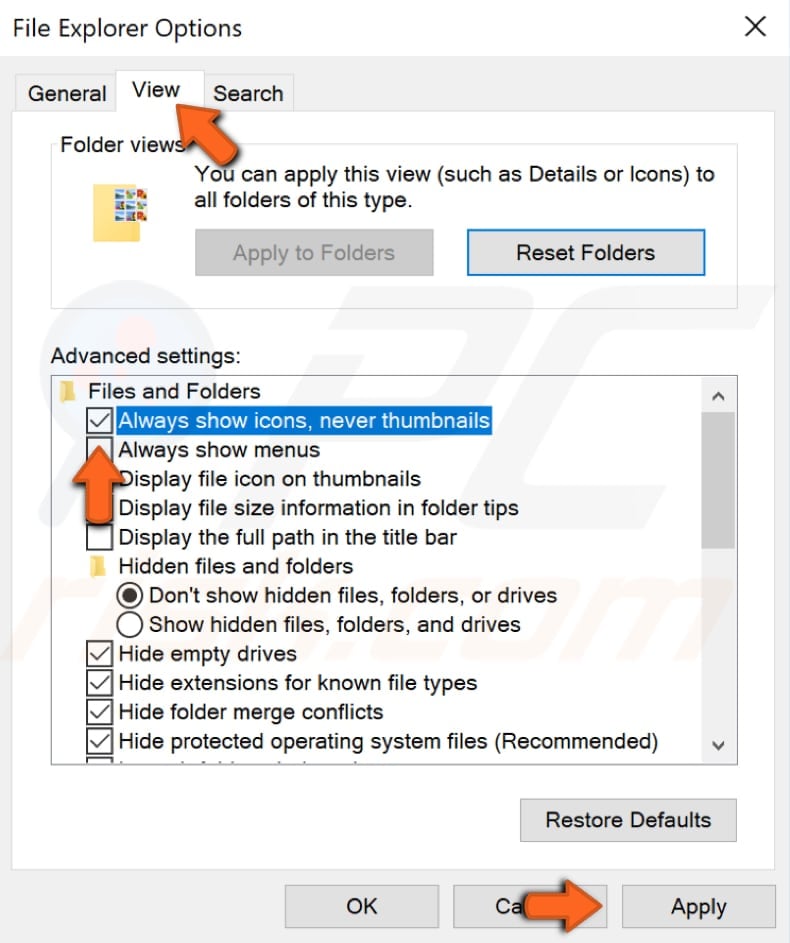
Go to the “View” tab and check the “Always show icons, never thumbnails” checkbox. Click “Apply” and then “OK” to exit File Explorer Options and save the changes.
Disable Thumbnails Using Performance Options
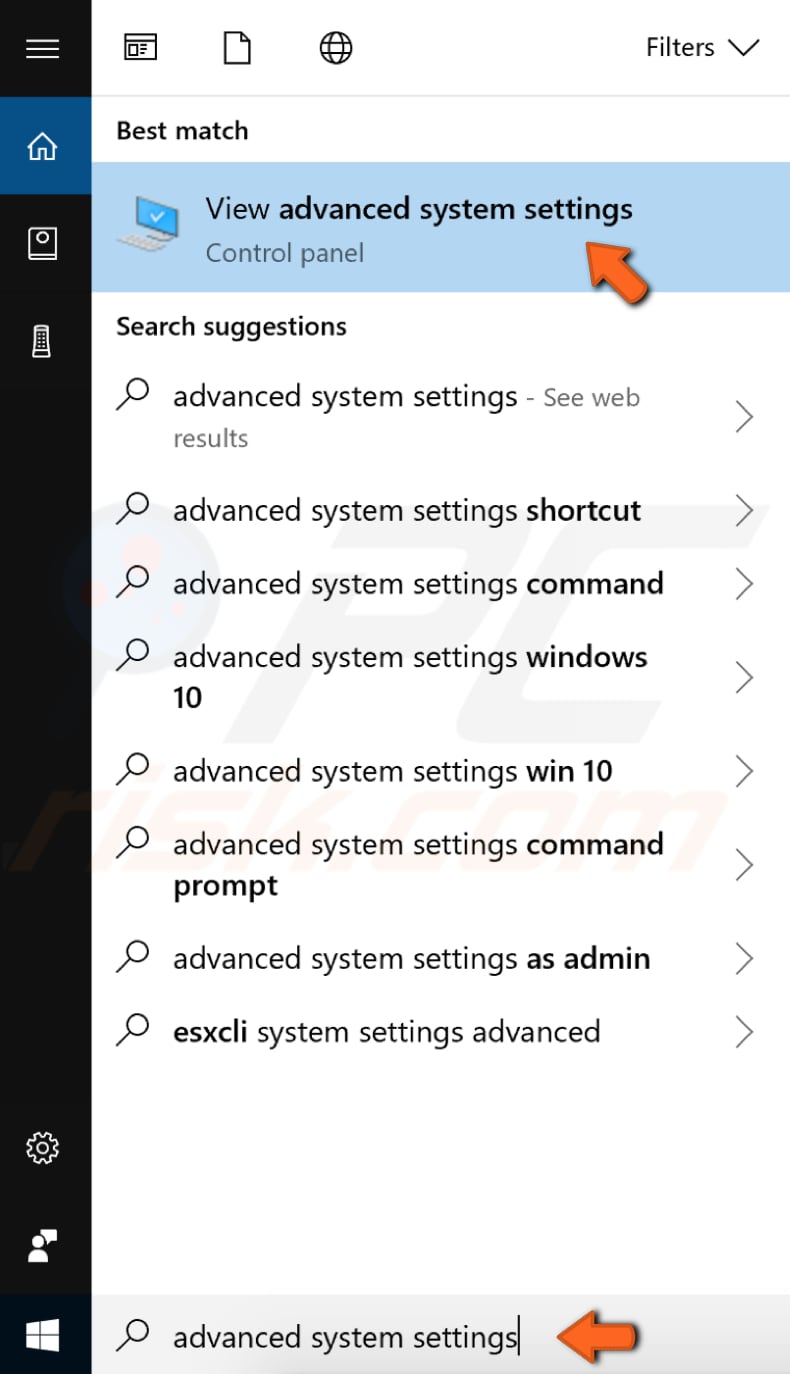
You can also disable thumbnails by adjusting Performance options. Type “advanced system settings” in Search and click the “View advanced system settings” result to open it.
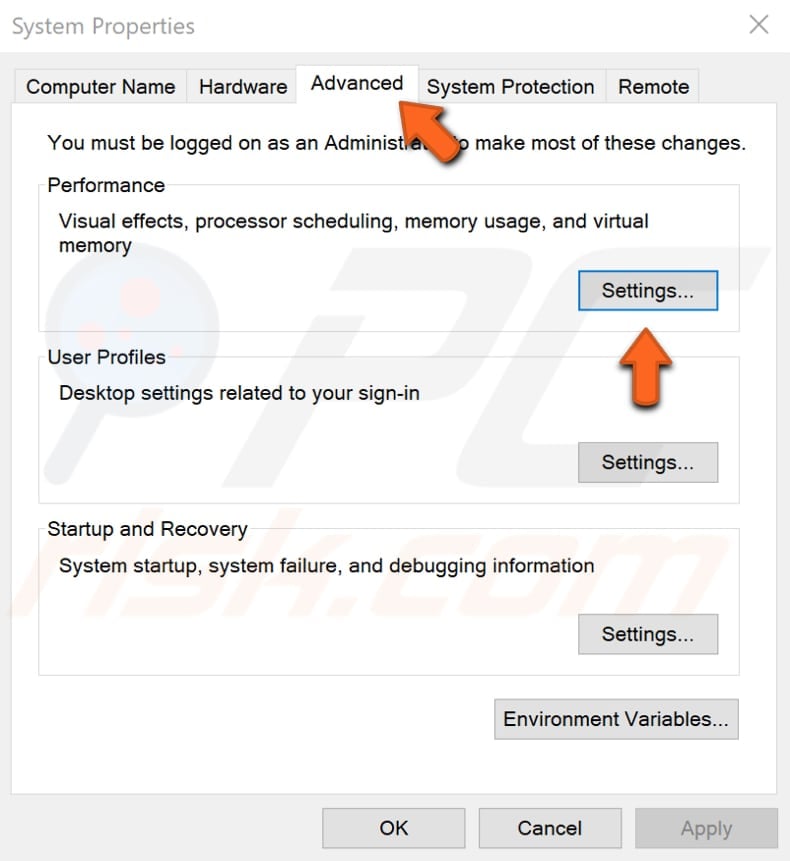
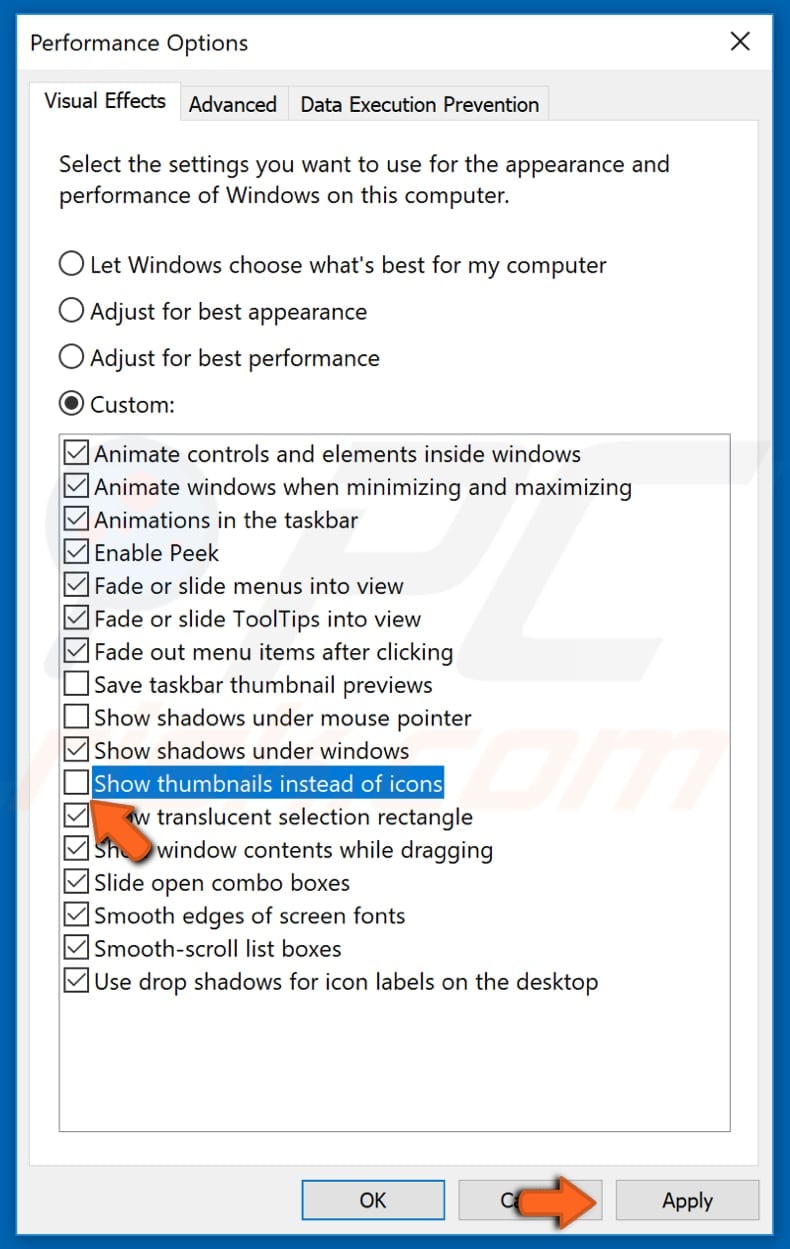
In the System Properties window under the “Advanced” tab, click “Settings...”. This will open the Performance Options window.
In the Performance Options window, you will see a list of visual effects available on the Windows 10 operating system. Find “Show thumbnails instead of icons” and uncheck this option. Click “Apply” and then “OK” to save the changes. Check if the error message still appears.
Disable Thumbnails Using Registry Editor
Windows Registry usually referred to as just the registry, is a collection of databases of configuration settings in Microsoft Windows operating systems. A wide variety of advanced settings can only be changed by directly editing the registry. Some other settings may be accessible through Group Policy – but the Group Policy editor is only included on Professional editions of Windows. The registry allows you to change most settings that can be accessed through Group Policy.
Note: Editing the registry is risky, and it can cause irreversible damage to your installation if you do not do it correctly.
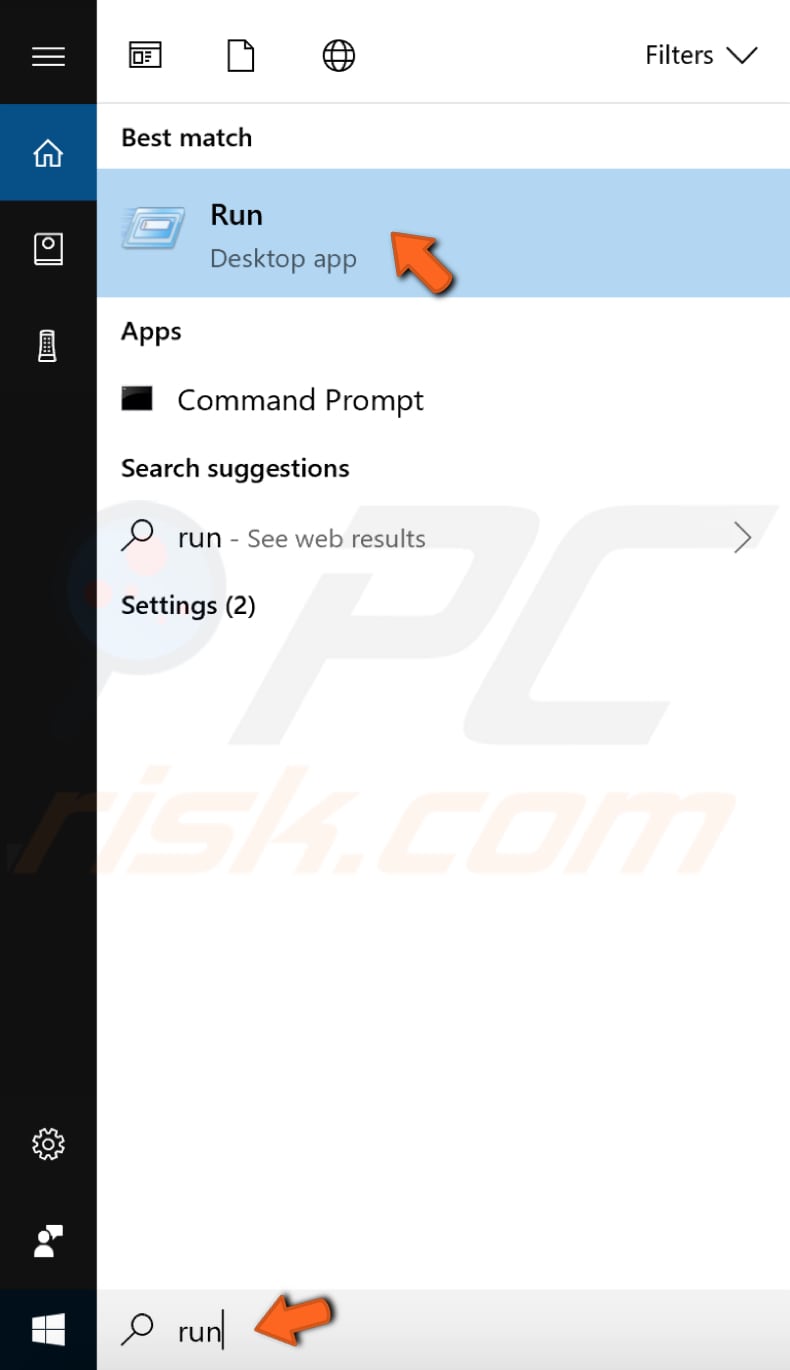
We demonstrate how to disable Thumbnails on Windows 10, which also applies to other versions of Windows. Open the Run dialog box by typing “run” in Search and click the “Run” result.
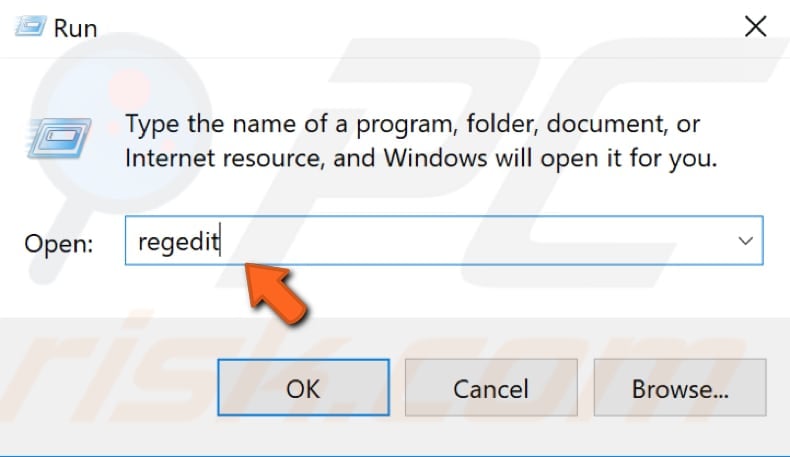
In the Run dialog box, type “regedit” and click “OK” to open Registry Editor.
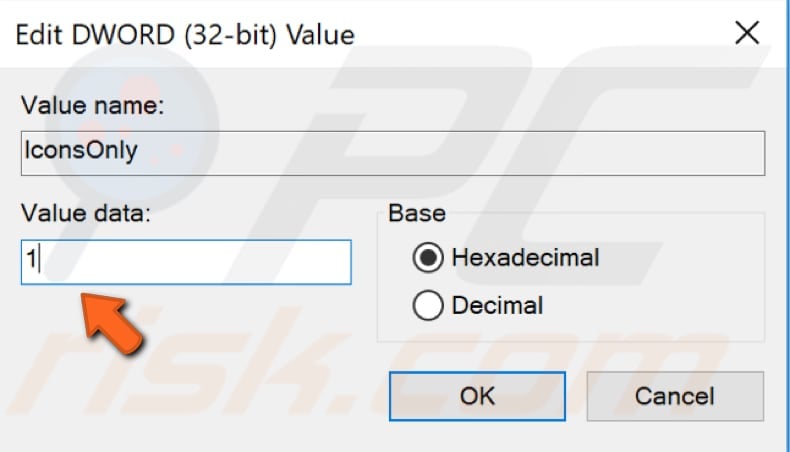
In Registry Editor, follow this path: “HKEY_CURRENT_USER/Software/Microsoft/Windows/CurrentVersion/Explorer/Advanced” on the left pane. When you reach the “Advanced” key, you will see the list “REG_DWORD” and other files. Find the one named “IconsOnly” and double-click on it.

In the Edit DWORD (32-bit) Value window, enter 1 under “Value data:” to show icons or 0 to show thumbnails. If you want to disable thumbnails, enter 1 and click “OK” to save the changes.
Disable Preview Pane
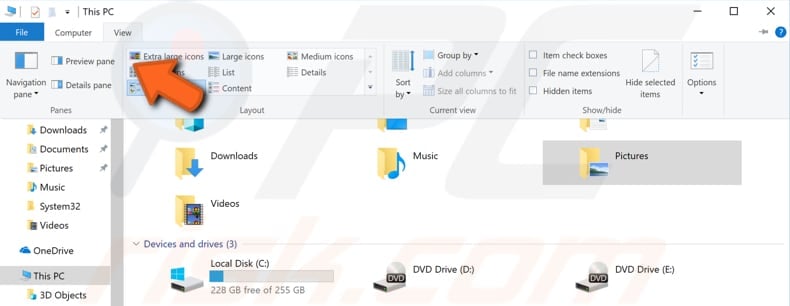
On Windows 10 File Explorer, you can enable or disable a Preview pane shown on the right side of the window. As the name implies, you can use it to preview the contents of certain types of files. If you select an image file in File Explorer, you can see a preview, and if you select a text file, you can also preview its contents, and so on. Disabling the Preview pane might help fix “The action cannot be completed because the file is open in another program,” since an enabled Preview pane is sometimes the reason for this error.
To disable the Preview pane, go to File Explorer by clicking the icon in the taskbar. Alternatively, press Windows Key + E on your keyboard. In File Explorer, go to the “View” tab and disable the “Preview pane” if it is enabled (it is enabled if selected and disabled if not). You can also use the Alt + P keyboard shortcut to enable or disable the Preview pane.
Launch Folder Windows In A Separate Process
By default, File Explorer opens windows in a single process. Enabling Explorer to open separate processes for the file browser can improve the stability of the Explorer shell, and this method might help fix the “The action cannot be completed because the file is open in another program” error.
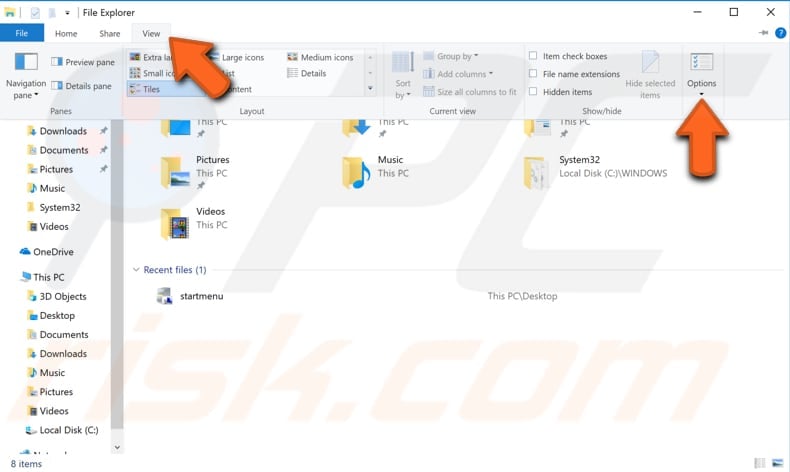
To make Windows File Explorer launch folder windows in a separate process, go to File Explorer by clicking the icon in the taskbar or using a Windows Key + E keyboard shortcut. Once File Explorer is open, click the “View” tab, and Chen click on “Options.” This will open the Folder Options window.
Go to the “View” tab in the Folder Options window and find “Launch folder windows in a separate process.” Check it and then click “Apply” and “OK” to save the changes.
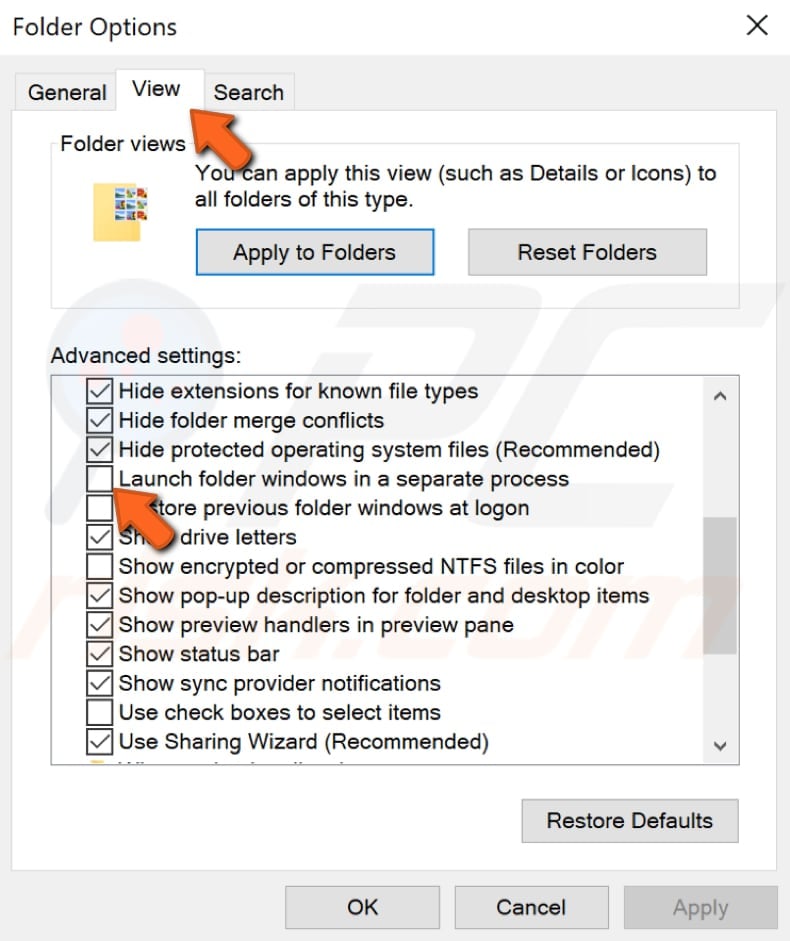
After making these changes, all folders will open as separate processes, resolving problems with the error message.
End Problematic Process
If the error message specifies that a particular application uses the file or folder, try terminating its process using Task Manager.
Open Task Manager by pressing Ctrl + Alt + Delete or Ctrl + Shift + Esc on your keyboard or right-click the Start menu and select “Task Manager.” Find the program, right-click on it and select “End task” from the drop-down menu. This will end the process, and the problem should be fixed.

End COM Surrogate Process
The Microsoft Component Object Model (COM) is a platform-independent, distributed, object-oriented system for creating binary software components that can interact. COM specifies an object model and programming requirements that enable COM objects to interact with other objects. These objects can be within a single process, in other processes, and can even be on remote computers. Sometimes ending the COM Surrogate process helps fix the “The action cannot be completed because the file is open in another program” error.
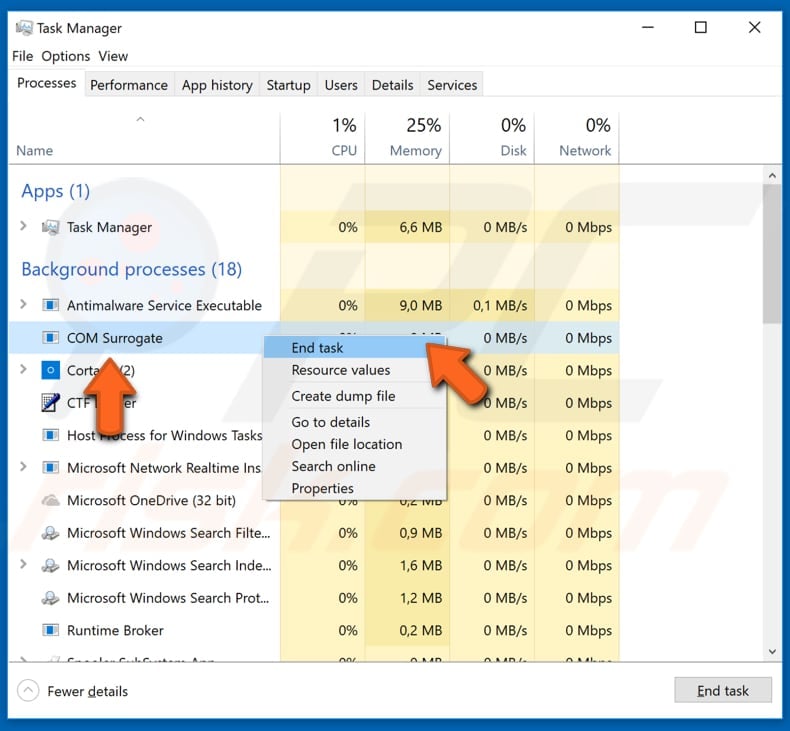
To end this process, go to Task Manager by pressing Ctrl + Alt + Delete or Ctrl + Shift + Esc on your keyboard or right-click the Start menu and select “Task Manager.” Under the “Processes” tab list, find “COM Surrogate” and right-click it, and then select “End Task.”
Update Your .NET Framework
The .NET Framework is a software development framework from Microsoft. It provides a controlled programming environment where software can be developed, installed, and executed on Windows-based operating systems. Many Windows applications .NET Framework and this problem can occur if you do not have the required .NET Framework installed on your computer. You can download it free from Microsoft’s webpage here. Check if installing the latest .NET Framework helps you to solve this problem.
Remove Thumbs.db File Using Command Prompt
As mentioned before, the thumbs.db (thumbnail database) or thumbnail cache stores thumbnail images for Windows Explorer’s thumbnail view. To fix the “The action cannot be completed because the file is open in another program” error, remove the thumbs.db file using Command Prompt. Command Prompt is the input field in a text-based user interface screen, a command-line interpreter application available in most Windows operating systems. It is used to execute entered commands. Most of the commands are used to automate tasks through scripts and batch files, perform advanced administrative functions, troubleshoot and solve certain Windows issues.
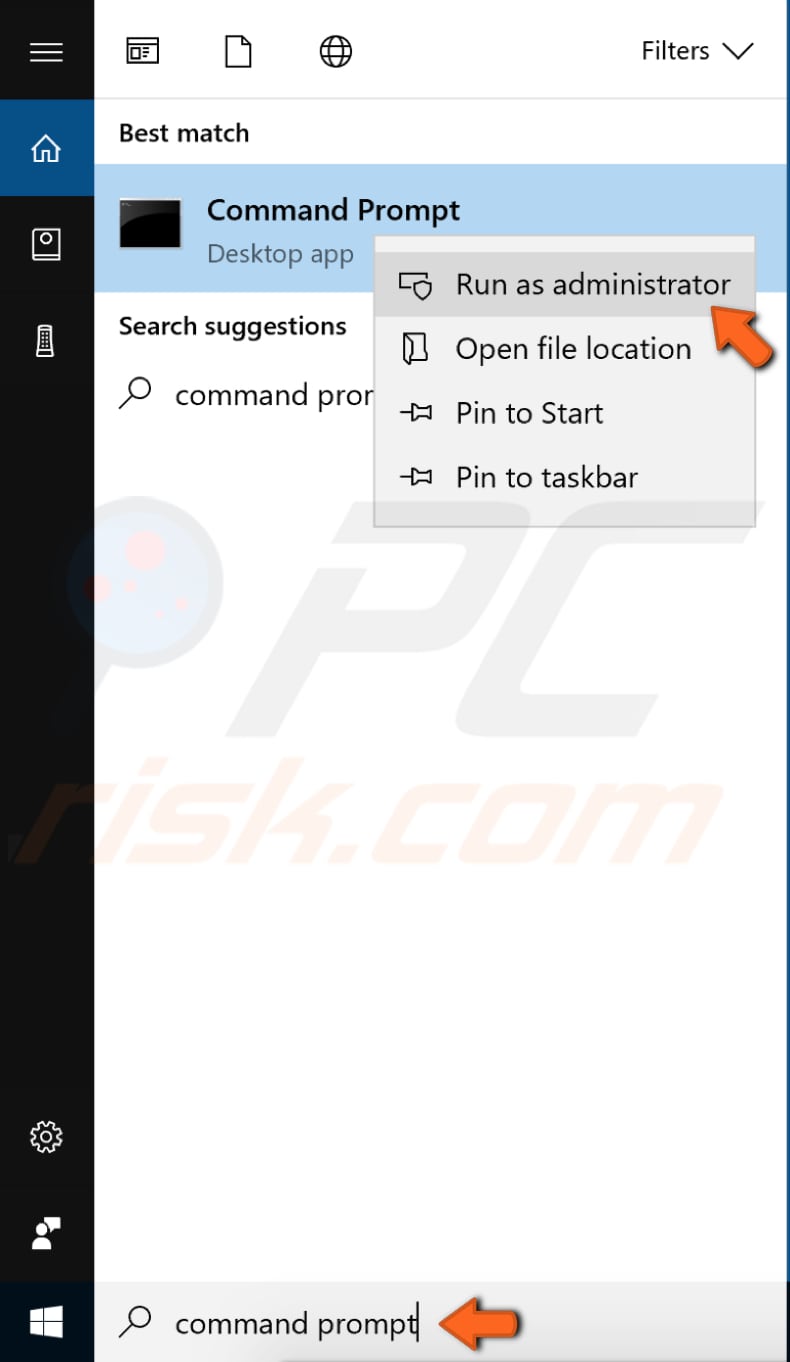
To open Command Prompt, type “command prompt” in Search and right-click the “Command Prompt” result. Select “Run as administrator” from the drop-down menu to run it with administrator privileges.
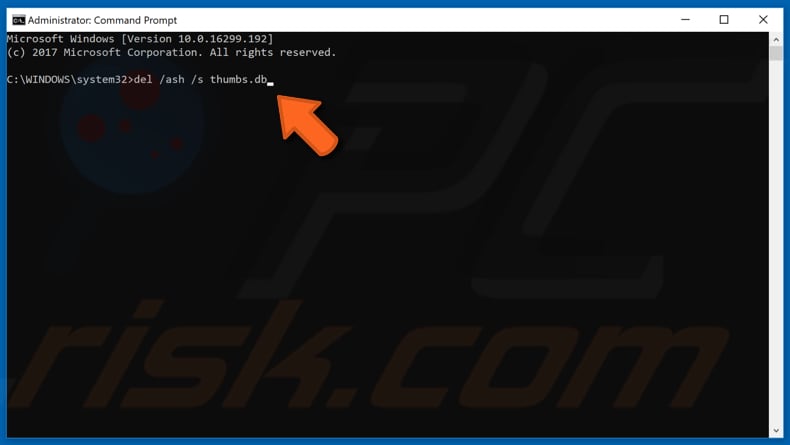
You need to switch to the desired drive to remove thumbs.db file. Type in your drive’s letter, for example, “C:” and press Enter. If you have only one partition on your computer, then it should be set automatically. Now type in the “del /ash /s thumbs.db” command and press Enter on your keyboard to execute this command.
It will delete all thumbs.db files from your drive. If you have more than one partition, switch to another one and repeat these steps until you delete thumbs.db files from all drives. If the problem with files and folders occurs only on a certain partition, there is no need to switch between partitions.
Optimize Folders
You can optimize any folder for given types of templates: general items, documents, pictures, videos, and music. The advantage of optimizing a folder based on a template is that when working with these folders, you have specific options based on the type of folder in the pane. If it is a Music folder, the “Play All” option is provided, and if it is a Pictures folder, then a “Slide Show” option is provided, and so on. If you experience this error while deleting a video folder, for example, using the “Optimize this folder for” option might help fix the error.
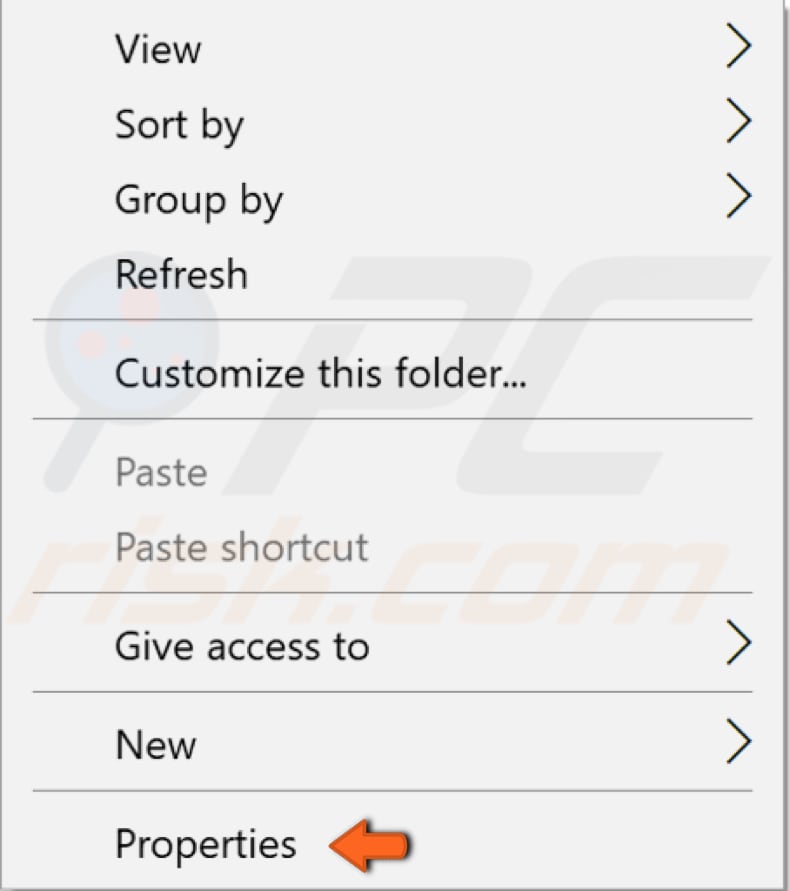
To optimize a folder, go to the specific folder where your problematic files are stored and right-click on the empty space. Then, select “Properties” from the drop-down menu.
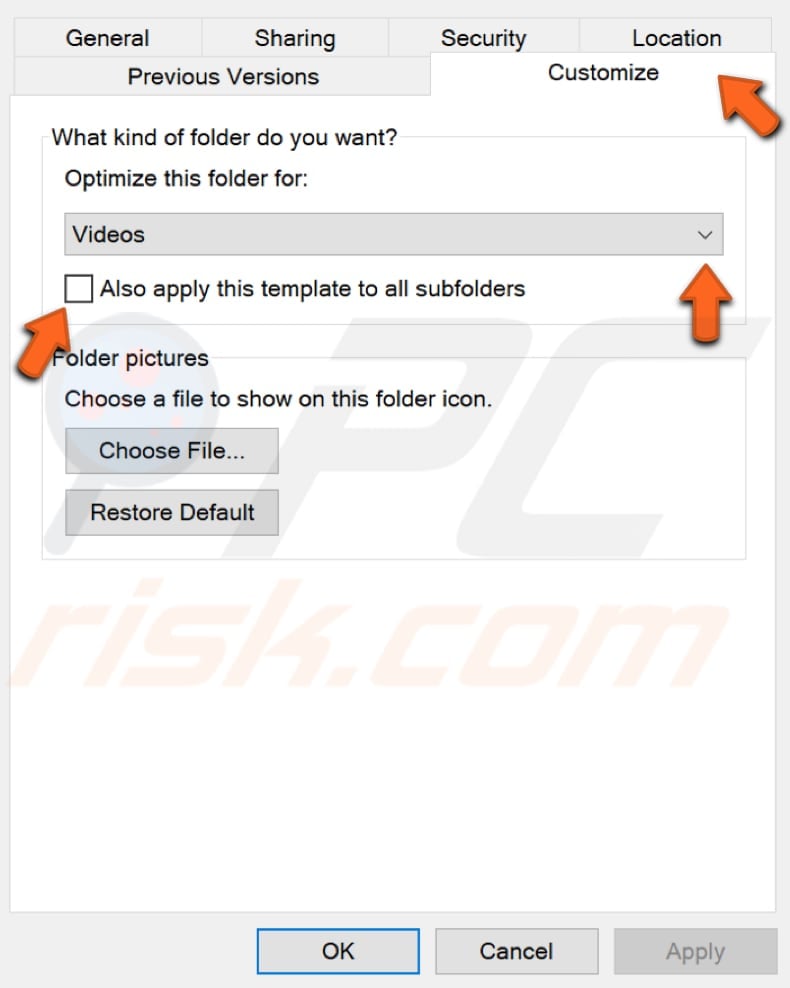
In the folder’s properties window, go to the “Customize” tab. Under “Optimize this folder for:,” select the option that suits best. Check the “Also apply this template to all subfolders” checkbox. Click “Apply” and “OK” to save changes. If there is more than one folder containing problematic files, repeat the steps and apply your preferred options to them.
Perform A Clean Boot
When you start Windows using a normal startup operation, several applications and services start automatically and then run in the background. These programs include basic system processes, antivirus software, system utility applications, and other previously installed software. These applications and services can cause software conflicts. A clean boot is performed to start Windows by using a minimal set of drivers and startup programs. This helps eliminate software conflicts that occur when you install a program or an update or when you run a program in Windows.
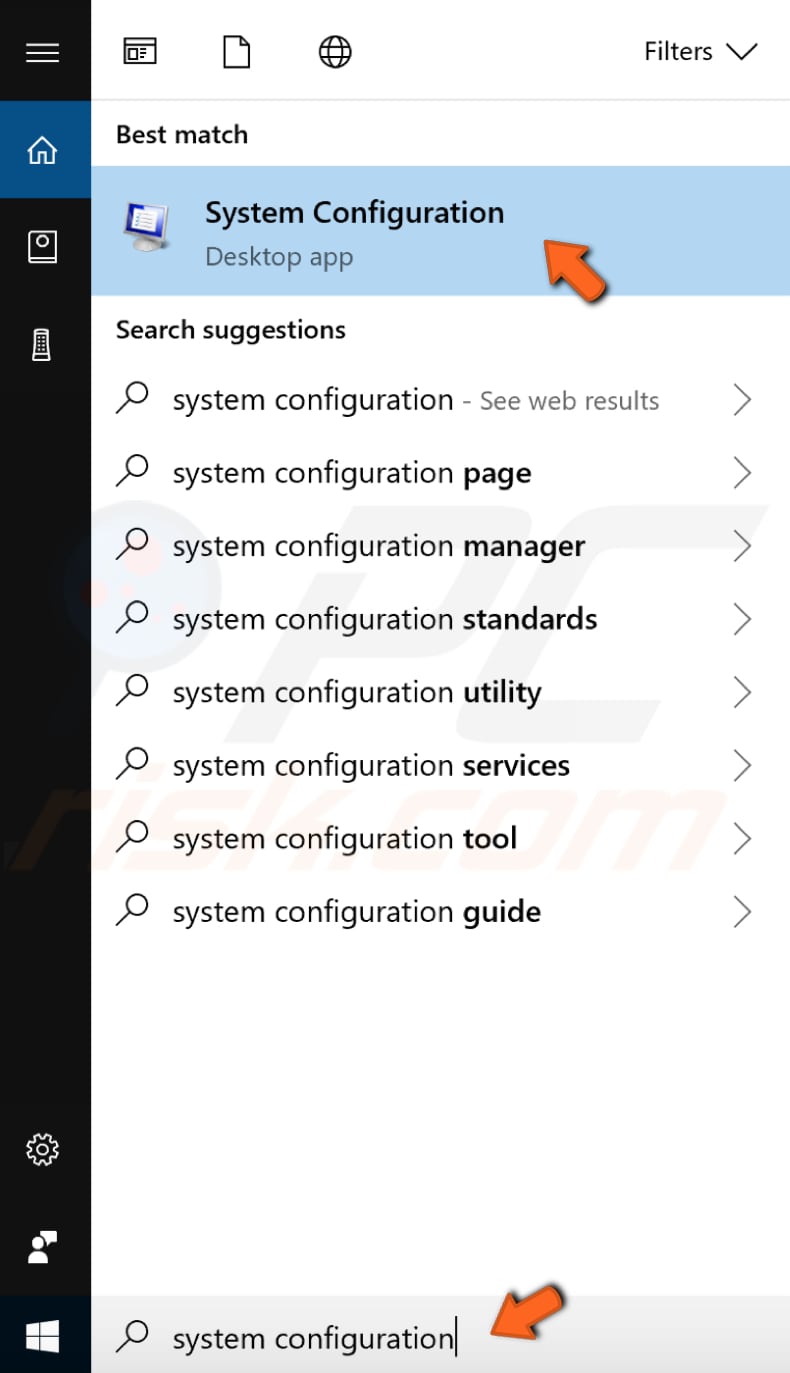
Type “system configuration” in Search and click on the “System Configuration” result to perform a clean boot.
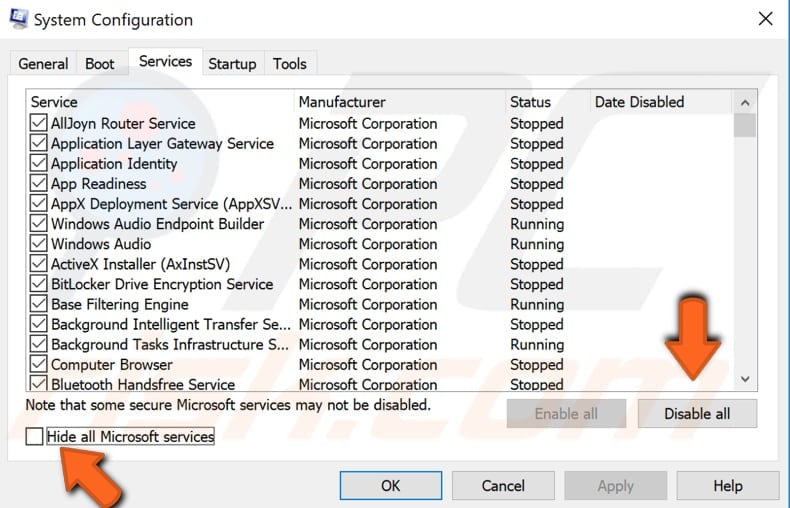
Click the “Services” tab in the System Configuration window and mark the “Hide all Microsoft services” checkbox. Then, click “Disable all.”
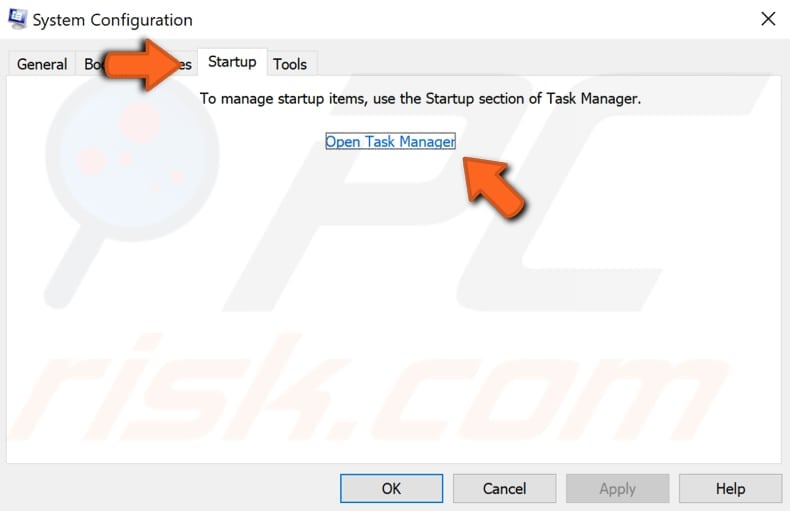
Then, click the “Startup” tab and click “Open Task Manager.”
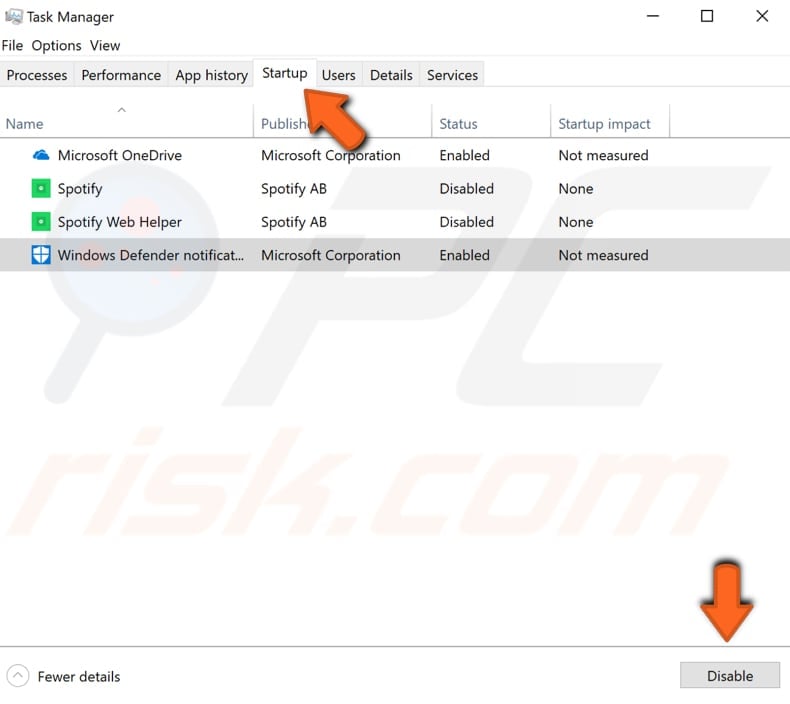
Under the Task Manager Startup tab, select the first application and click “Disable” - disable all applications one by one, repeating this step. Once you have disabled all programs, close Task Manager and click “OK” in the System Configuration Startup tab. Then, restart your computer to see if this helps to fix the issue.
Your computer will run only with default applications and services. If this helps, then one of the third-party applications is causing the error. To find that application, repeat the steps above, and enable startup services and applications one by one until you find it. You need to restart your computer after enabling the application or service to apply changes. Once you find the problematic application, you can keep it disabled, update it, reinstall it, or completely remove it from the Windows operating system.
Update Your Windows
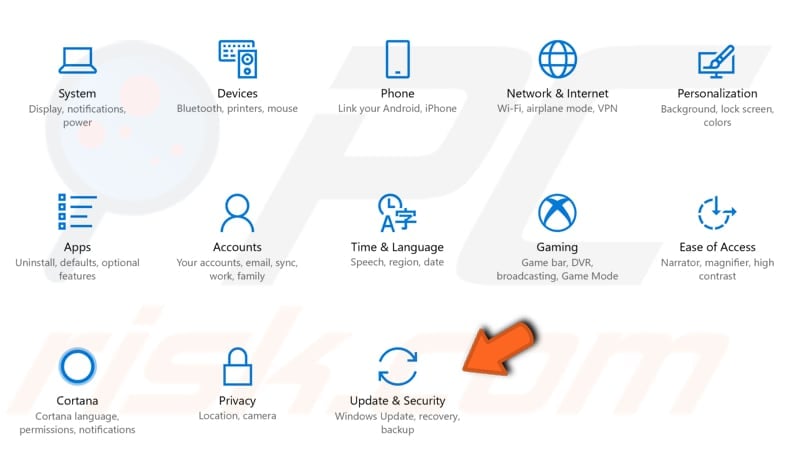
You may wish to try this option as well - checking all Windows operating system updates might help. Some Windows components might be corrupt, and Microsoft updates for Windows are often targeted to improve this area. To check for Windows Updates, go to Settings and select “Update & Security.”
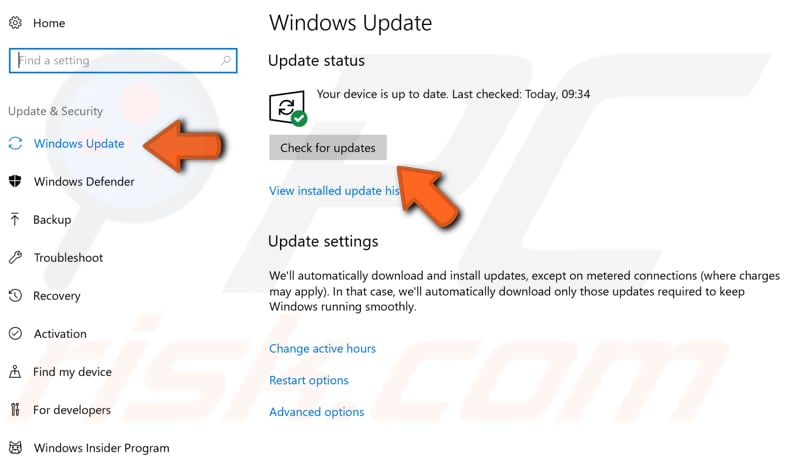
You should be automatically be directed to the Windows Update section. Click “Check for updates” - Windows will start checking for updates. If there are updates available, install them and check for updates again (just to ensure that you have the latest updates on your operating system). Check if this helps solve the “The action cannot be completed because the file is open in another program” error.
Empty Your Recycle Bin
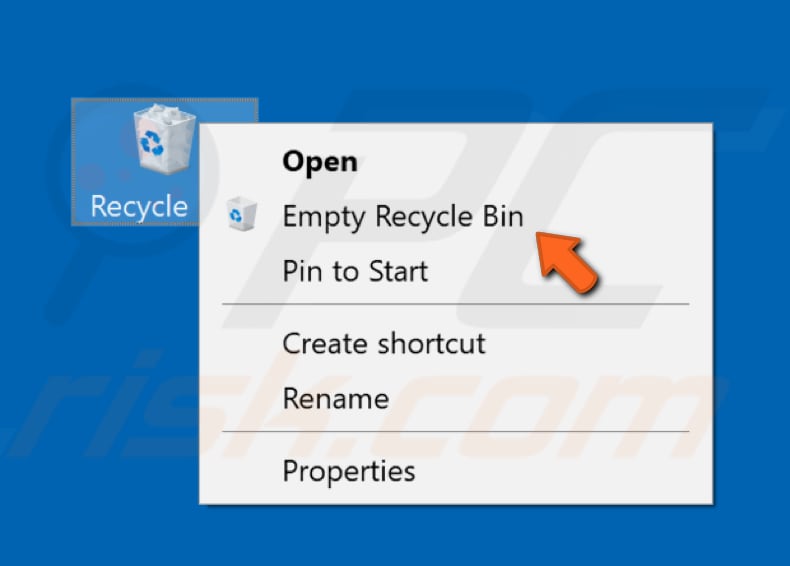
This might be a solution that you have not considered - it has actually helped some people to fix the “The action cannot be completed because the file is open in another program” problem. Find “Recycle Bin” on your Desktop and right-click it. Then, select “Empty Recycle Bin” from the drop-down menu.
Once the Recycle Bin is empty, the error message should not appear. This, however, is a one-time solution - the error might appear again once you add files to the Recycle Bin. If you want to delete your files permanently (and not add them to the Recycle Bin), use the Shift + Delete keyboard shortcut or press and hold the Shift key while clicking the Delete option. In our experience, deleting files permanently helped to fix this issue.
We hope that at least one of these solutions helps you fix the problem and that you can now work with files or folders without problems.
Share:

Rimvydas Iliavicius
Researcher, author
Rimvydas is a researcher with over four years of experience in the cybersecurity industry. He attended Kaunas University of Technology and graduated with a Master's degree in Translation and Localization of Technical texts. His interests in computers and technology led him to become a versatile author in the IT industry. At PCrisk, he's responsible for writing in-depth how-to articles for Microsoft Windows.
▼ Show Discussion