Here's how to quickly snap and tile windows on your Mac screen
Get Free Scanner and check your computer for errors
Fix It NowTo fix found issues, you have to purchase the full version of Combo Cleaner. Free trial available. Combo Cleaner is owned and operated by Rcs Lt, the parent company of PCRisk.com read more.
Discover the power of window management on macOS Sequoia
Managing multiple windows on your Mac can sometimes be tricky. Have you ever felt overwhelmed by all the open apps and windows on your screen? macOS Sequoia has some great features to help you stay organized.

This guide will show you how to snap and tile your app windows easily. With these tools, you can make the most of your screen space. It's like arranging books on a shelf so you can see everything at once.
By learning these simple tricks, you can improve your productivity. You'll be able to switch between tasks more smoothly. Whether you're working on a project, browsing the web, or chatting with friends, these tips will help.
By the end of this guide, you'll feel more in control of your Mac. So, let's get started and make your Mac experience even better!
Video on Here's how to quickly snap and tile windows on your Mac screen
Table of Contents:
- Introduction
- Manage windows with the green resize button
- Manage windows with drag and snap
- Manage windows with keyboard shortcuts
- Manage windows with the menu bar
- Customize window management
- Other tips to manage windows on your Mac
- Video on Here's how to quickly snap and tile windows on your Mac screen
Download Computer Malware Repair Tool
It is recommended to run a free scan with Combo Cleaner - a tool to detect viruses and malware on your device. You will need to purchase the full version to remove infections. Free trial available. Combo Cleaner is owned and operated by Rcs Lt, the parent company of PCRisk.com read more.
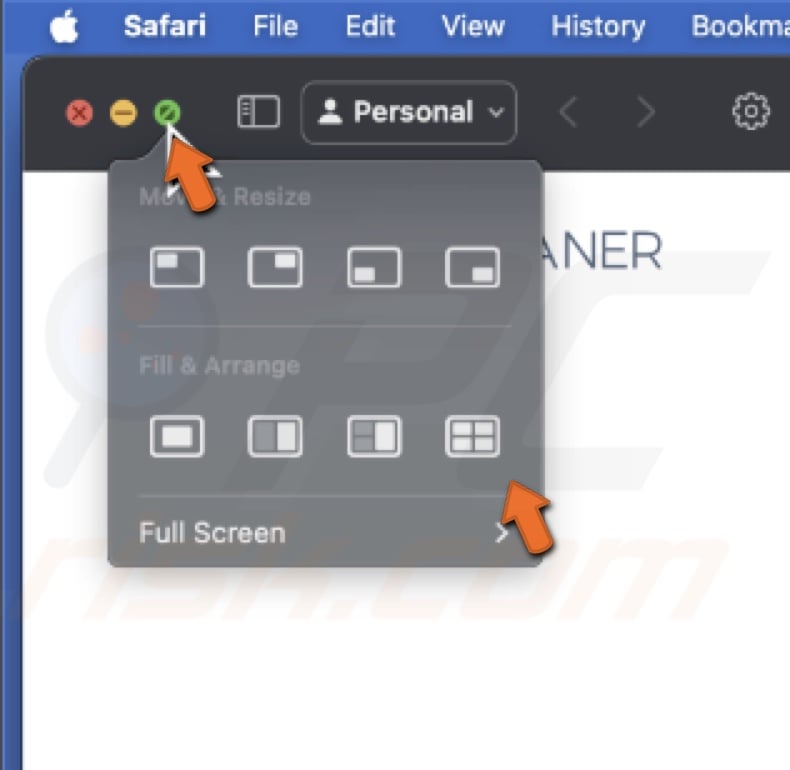
Follow these simple steps to manage your app windows using the green resize button.
1. Move your pointer to the green resize icon at the top left corner of any app window and wait until a menu appears.

2. The options under "Move & Resize" only affect the selected app window. The options under "Fill & Arrange" can also adjust other app windows on your screen.
3. Under the "Move & Resize" or "Fill & Arrange" headings, pick an option. The icons will show you how the app window will snap or position itself.
4. Hold the Option key to see additional choices under "Move & Resize" and "Fill & Arrange".
Manage windows with drag and snap
You can effortlessly arrange your windows using the drag and snap feature.
1. Pick an app window and drag it to one side or corner of your Mac screen.
2. When you see a white outline appear, let go of the window. It will snap into the outlined area.
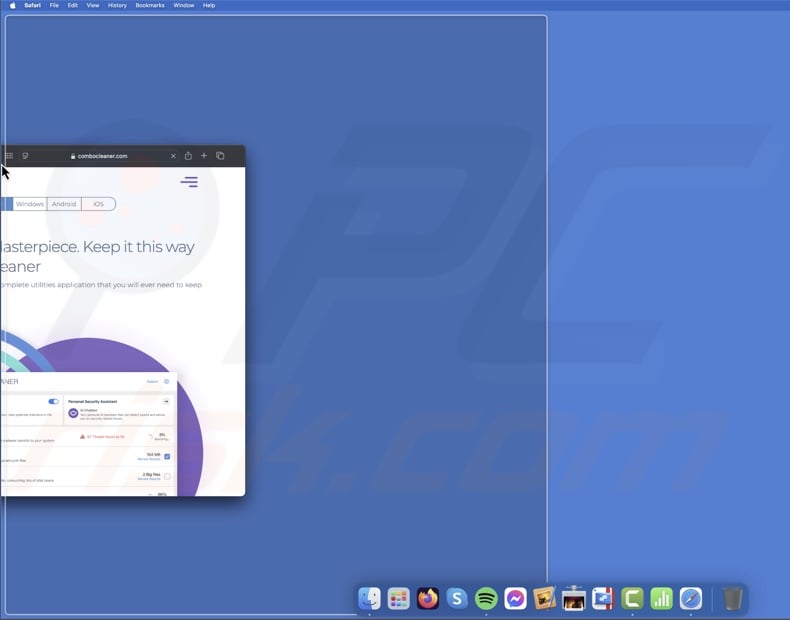
3. Hold the Option key while dragging the window if using the mouse or trackpad feels tricky. This makes snapping windows into place much easier.
This method helps you organize your screen effortlessly.
Manage windows with keyboard shortcuts
Managing windows on your Mac can be super easy with some handy keyboard shortcuts. Here's a simple guide to help you get started.
Use these shortcuts to move and resize your app windows quickly:
- To the left half of the screen: Press Globe/Fn + Control + Left arrow.

- To the right half of the screen: Press Globe/Fn + Control + Right arrow.

- To the top half of the screen: Press Globe/Fn + Control + Up arrow.

- To the bottom half of the screen: Press Globe/Fn + Control + Down arrow

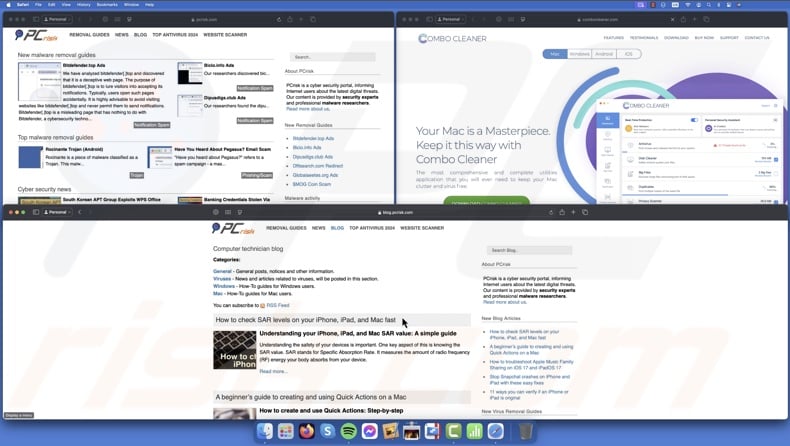
Arrange two app windows side by side or top and bottom using these shortcuts:
- To the left and right sides: Press Globe/Fn + Control + Shift + Left arrow.
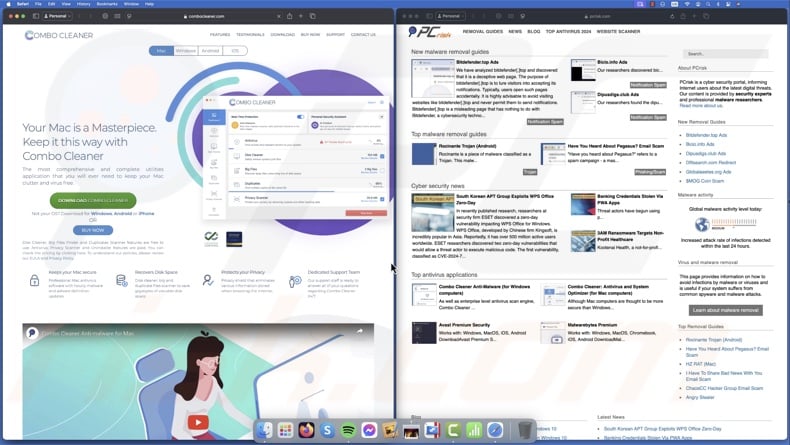
- To the right and left sides: Press Globe/Fn + Control + Shift + Right arrow.
- To the top and bottom: Press Globe/Fn + Control + Shift + Up arrow.
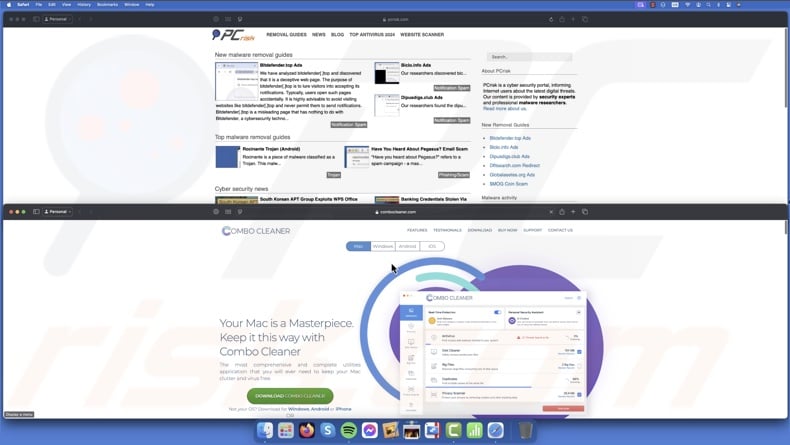
- To the bottom and top: Press `Globe/Fn + Control + Shift + Down arrow.
If you have three app windows open, these shortcuts will help you arrange them. They also work for two windows, leaving one area empty.
- To the left and quarters: Press Globe/Fn + Control + Shift + Option + Left arrow.
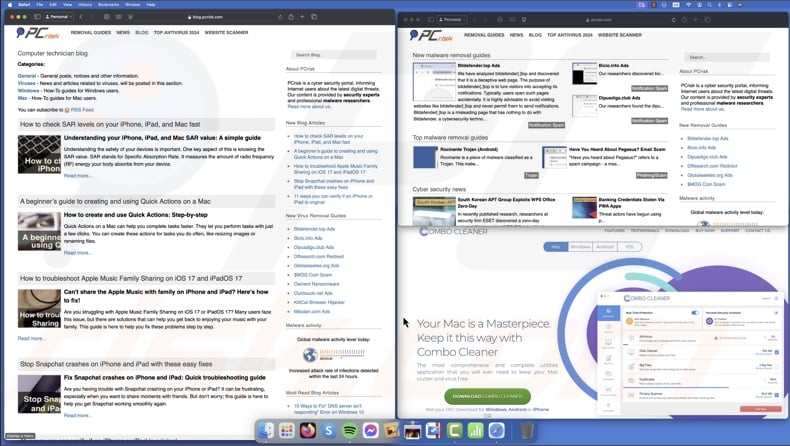
- To the right and quarters: Press `Globe/Fn + Control + Shift + Option + Right arrow.
- To the top and quarters: Press `Globe/Fn + Control + Shift + Option + Up arrow.
- To the bottom and quarters: Press `Globe/Fn + Control + Shift + Option + Down arrow.
Press Globe/Fn + Control + R to return any app window to its previous size.
Take a moment to practice these shortcuts, and you'll manage your windows like a pro in no time!
You can manage your windows efficiently by using the menu bar at the top of your screen.
1. Find the menu bar at the top of your screen.
2. Click on the word "Window" and click on "Move & Resize" in the dropdown menu.
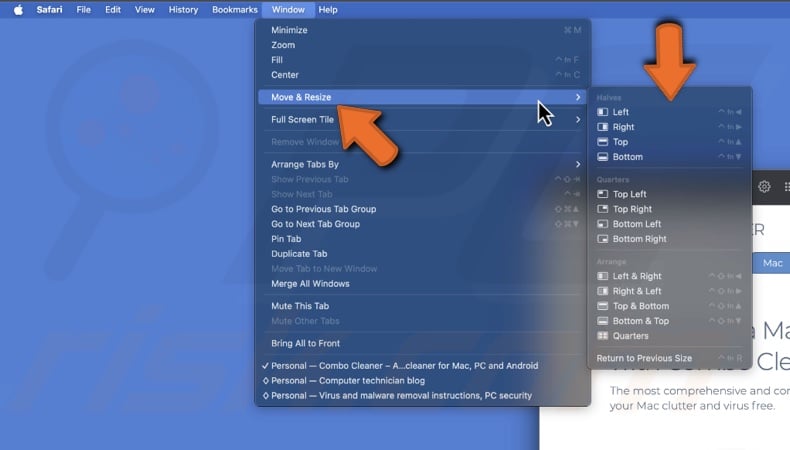
3. If you hold down the Option key while looking at the "Move & Resize" menu, you'll see more ways to arrange your windows.
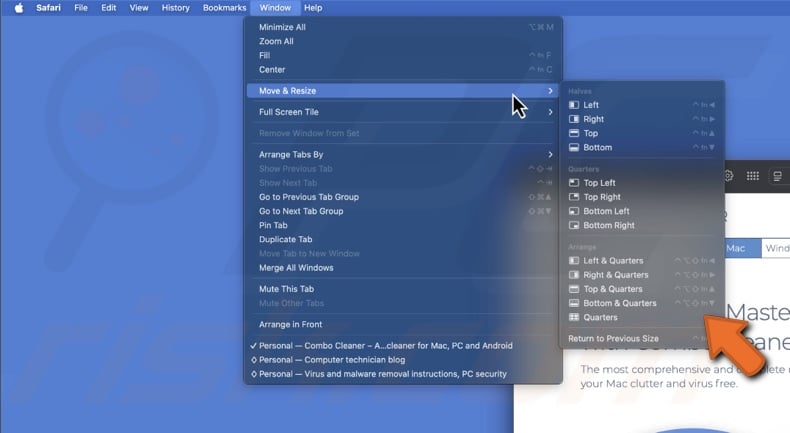
By following these steps, you can quickly organize your windows to better suit your needs.
Customize window management
In your Mac settings, you can adjust how your windows behave on the screen.
1. Open System Settings and go to "Desktop & Dock".
2. Scroll down to the "Windows" section. Here, you can choose to:
- Tile by dragging windows to screen edges. Turn this off if you find windows snapping to the edges when you don't want them to. This option is for you if you prefer using the green button, keyboard shortcuts, or the menu bar to manage windows.
- Hold the Option key while dragging windows to tile. Turn this off if you don't want windows to snap when you drag them while holding the Option key.
- Tiled windows have margins. There will be small gaps around the app windows when they are tiled. If you prefer using the extra screen space for your apps, you can turn this off.
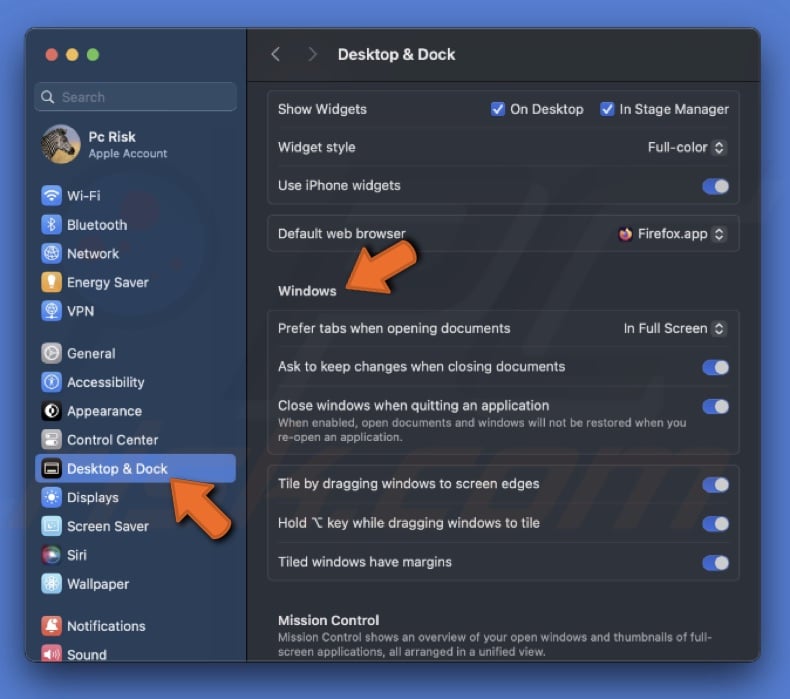
These simple adjustments can help you manage your windows more efficiently.
Other tips to manage windows on your Mac
In addition to the new features, you can still use the previous window management options:
- Split Screen: display two full-screen apps side by side.
- Left or Right of Screen:
1. Hover your mouse pointer over the green button at the top of the window.
2. Select "Full Screen", then choose either "Left of Screen" or "Right of Screen".
3. For older macOS versions, hover over the green button and hold down the Option key to access these options.
- Third-party apps: You can continue using third-party apps like Magnet and Rectangle to snap Windows, though some shortcuts might overlap with the built-in features.
- Use iPad as an extra screen: Extend your Mac's display by using your iPad as an additional screen. This feature is handy for increasing your workspace.
With these techniques at your fingertips, you should now feel more confident in managing your app windows on macOS Sequoia. Spend some time getting used to these features, and soon enough, arranging your windows will become second nature.
Share:

Karolis Liucveikis
Experienced software engineer, passionate about behavioral analysis of malicious apps
Author and general operator of PCrisk's News and Removal Guides section. Co-researcher working alongside Tomas to discover the latest threats and global trends in the cyber security world. Karolis has experience of over 8 years working in this branch. He attended Kaunas University of Technology and graduated with a degree in Software Development in 2017. Extremely passionate about technical aspects and behavior of various malicious applications.

▼ Show Discussion