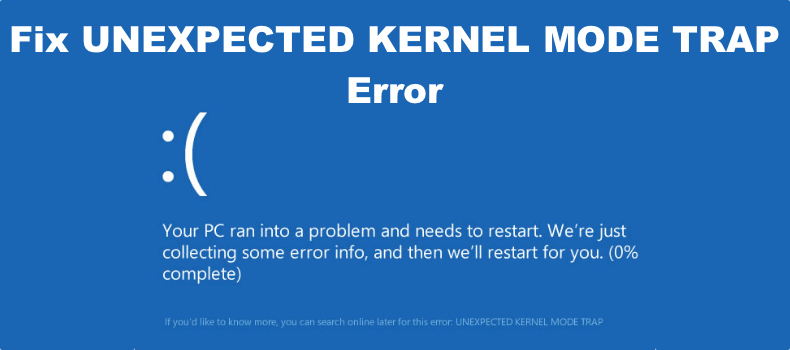
How to Fix UNEXPECTED KERNEL MODE TRAP

Get Free Scanner and check your computer for errors
Fix It NowTo fix found issues, you have to purchase the full version of Combo Cleaner. Free trial available. Combo Cleaner is owned and operated by Rcs Lt, the parent company of PCRisk.com read more.
How to Fix the UNEXPECTED KERNEL MODE TRAP Error on Windows 11/10
The UNEXPECTED KERNEL MODE TRAP error occurs when the CPU generates a condition the kernel cannot catch, or the condition is an unrecoverable error. If you’re getting this error, the methods provided here will help you fix it.
What Causes UNEXPECTED KERNEL MODE TRAP?
As mentioned in the introduction, this error occurs when the CPU generates a condition the kernel cannot catch or the condition is an unrecoverable error. Our research shows these conditions may occur for the reasons listed below.
- Faulty/incompatible hardware. The most common cause for this error is defective hardware, particularly PCI and VGA cards. You may also get this error if the installed hardware is incompatible, i.e., was not designed to work on your system.
- Faulty or mismatched memory (RAM). RAM sticks rarely fail, but it can happen due to insufficient cooling, among other factors. Furthermore, mismatched memory sticks with different specifications can also trigger this error.
- Corrupted or incompatible device drivers. Incompatible, outdated, corrupted, or otherwise bad device drivers are also known to trigger this error.
Before you try any of our fixes, here are some things you should do:
- Back up or recover your data to prevent its loss if something goes wrong. You should try to recover your data, especially if your PC cannot boot up due to this error.
- Disconnect all external devices, such as printers, scanners, USB drives, etc.
- Remove CPU/GPU overclocking.
- Disable memory caching.
- Temporarily disable your anti-virus software.
Video Tutorial on How to Fix UNEXPECTED KERNEL MODE TRAP
Table of Contents:
- Introduction
- Method 1. Perform a System Memory Check
- Method 2. Run the Hardware and Devices Troubleshooter
- Method 3. Update the Device Driver Using the Device Manager
- Method 4. Run the Deployment Image & Servicing Management (DISM) and System File Checker (SFC) Scans
- Video Tutorial on How to Fix UNEXPECTED KERNEL MODE TRAP
Download Computer Malware Repair Tool
It is recommended to run a free scan with Combo Cleaner - a tool to detect viruses and malware on your device. You will need to purchase the full version to remove infections. Free trial available. Combo Cleaner is owned and operated by Rcs Lt, the parent company of PCRisk.com read more.
Method 1. Perform a System Memory Check
You may get the UNEXPECTED KERNEL MODE TRAP error due to faulty or mismatched memory sticks. The instructions below show how to check if your system’s memory is defective.
If your PC cannot stay running for long or doesn’t boot, try booting it in Safe Mode or Safe Mode with Networking. Your PC will boot into WinRE after two consecutive failed attempts to start Windows. You may also boot into Safe Mode by following steps 1-7.

1. Open the Windows Start menu and click the Power button.
2. Hold down the Shift key and click Restart.
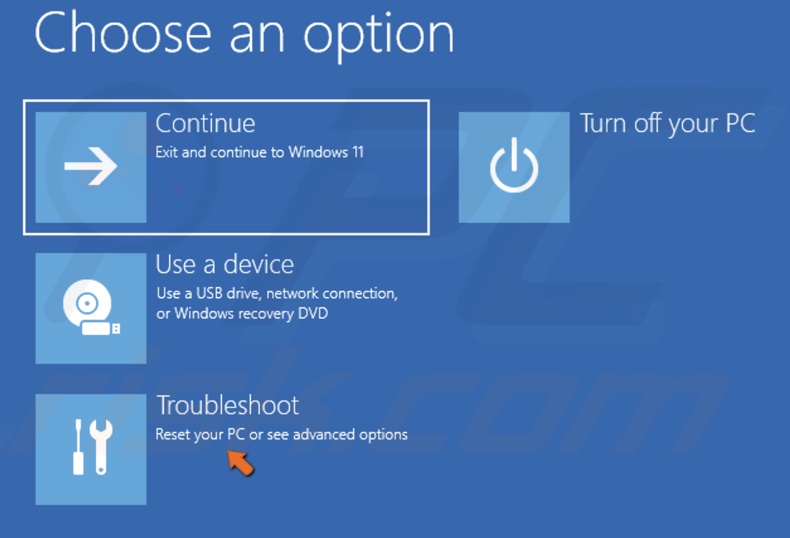
3. Select Troubleshoot.
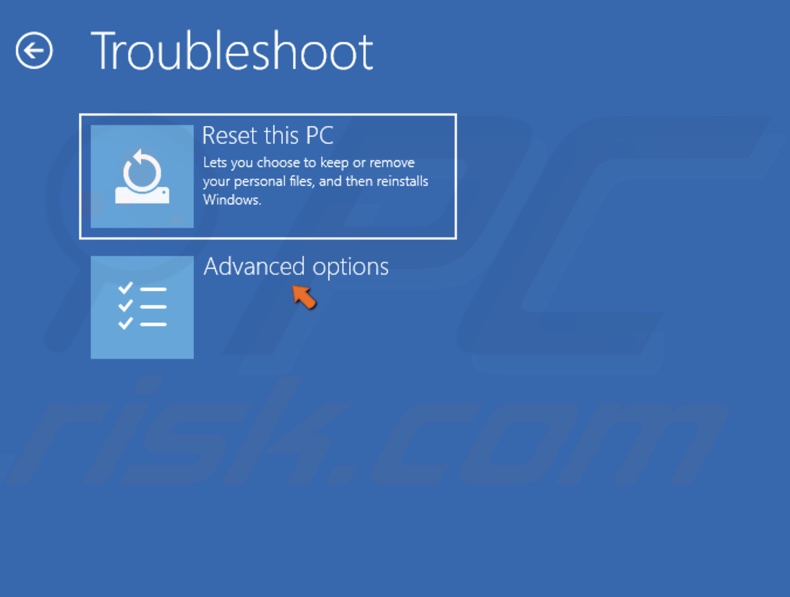
4. Select Advanced options.
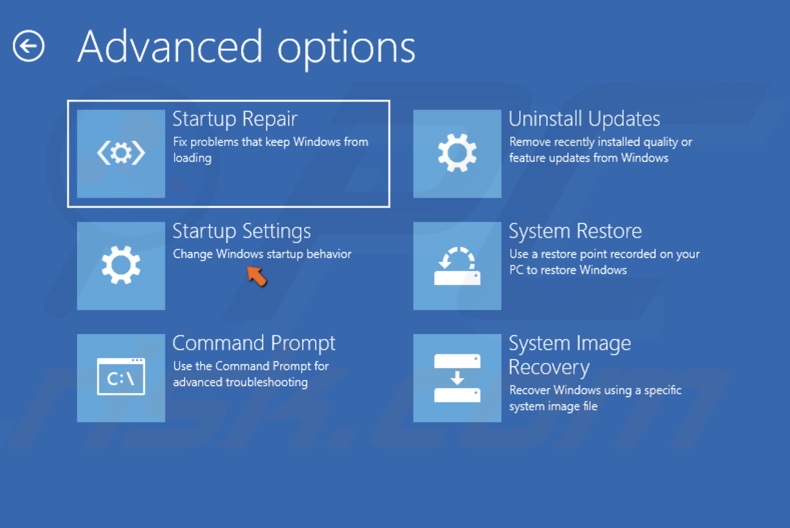
5. Select Startup Settings.
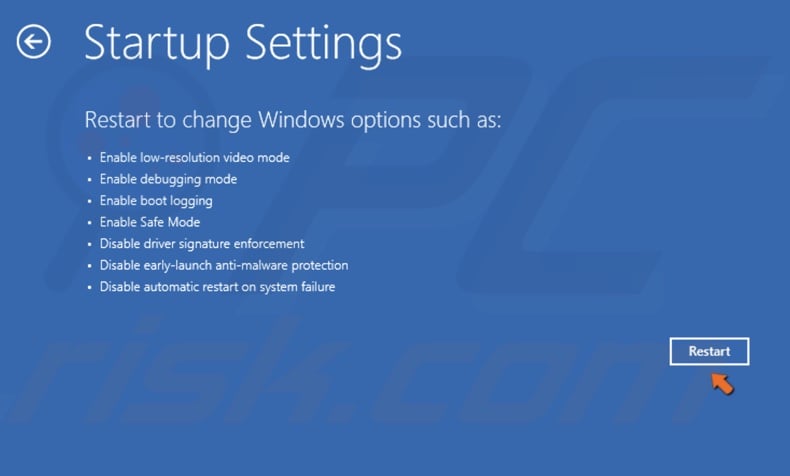
6. Click Restart.
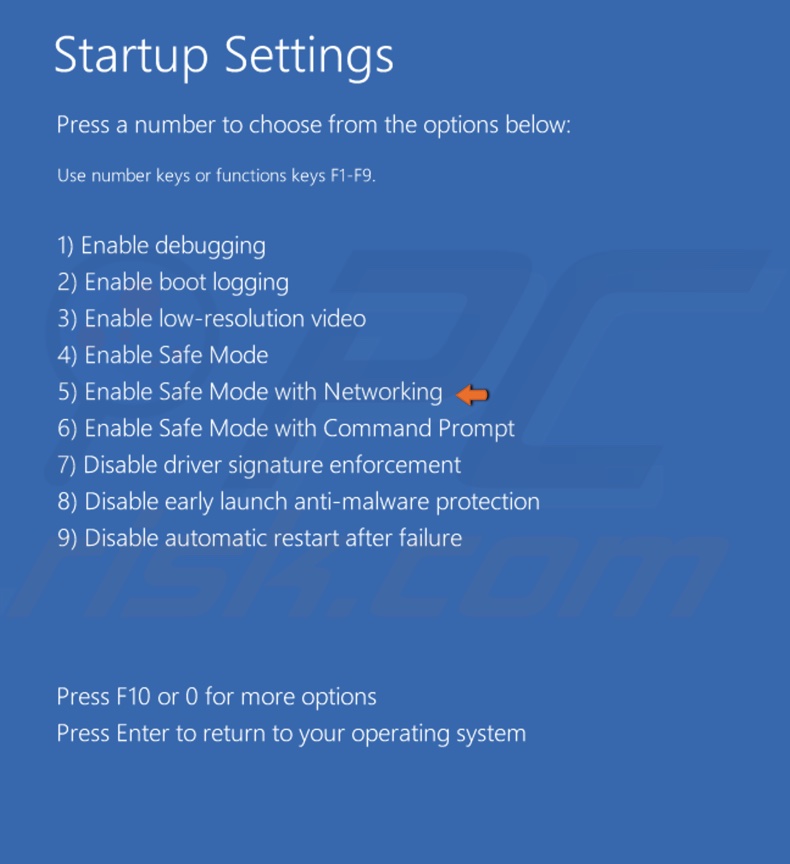
7. Press the 5 or F5 key to boot your PC into Safe Mode with Networking.
8. Hold down Windows+R keys to open Run.
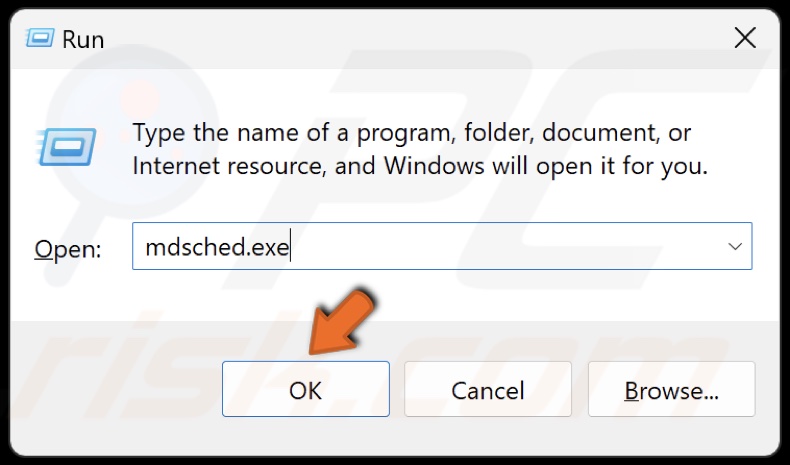
9. Type mdsched.exe in the Run dialog and click OK.
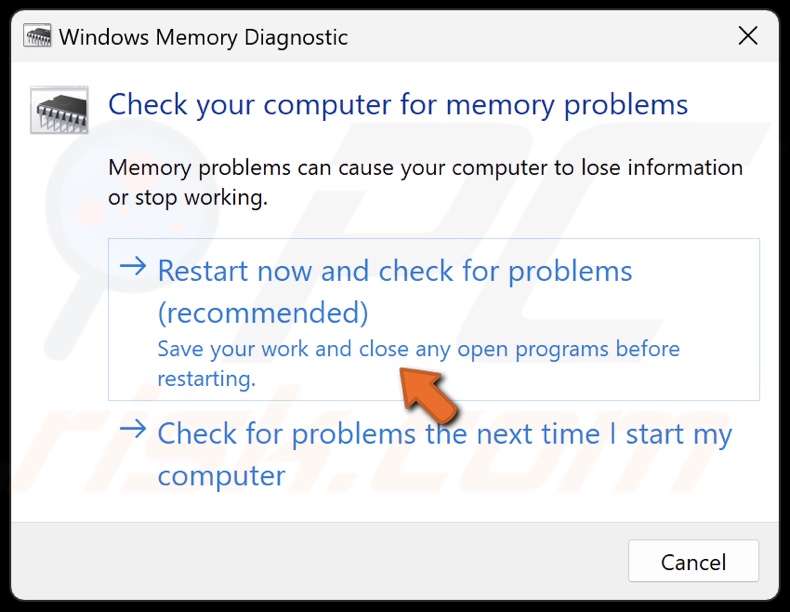
10. In the Windows Memory Diagnostic window, click Restart now and check for problems. Your PC will restart and diagnose the memory. Once the diagnostic process is complete, your PC will boot up normally.
11. Once your PC boots up, open the diagnosis report. The report will let you know if your memory is faulty.
12. Hold down Windows+R keys to open Run.
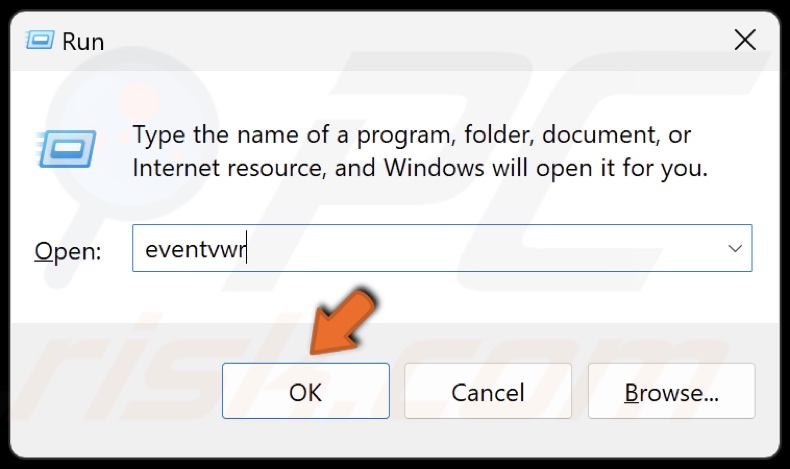
13. Type eventvwr in Run and click OK.
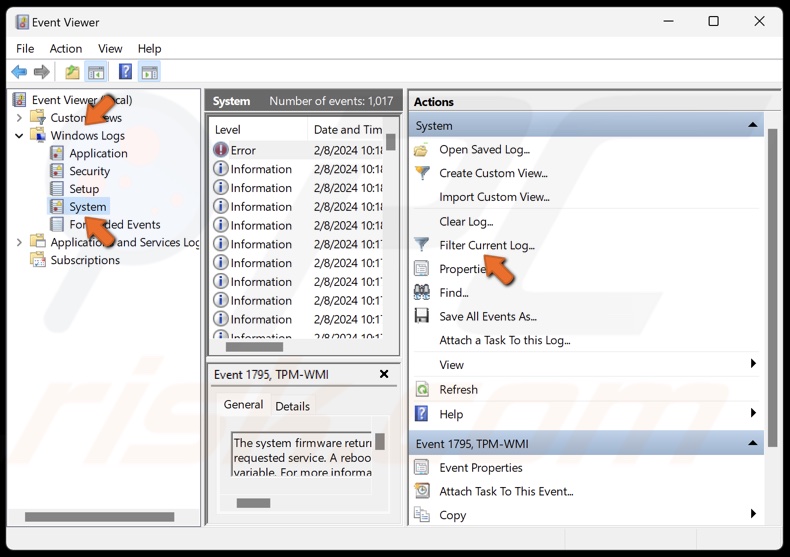
14. In Event Viewer, navigate to Windows Logs > System.
15. In the right pane, click Filter Current Log.
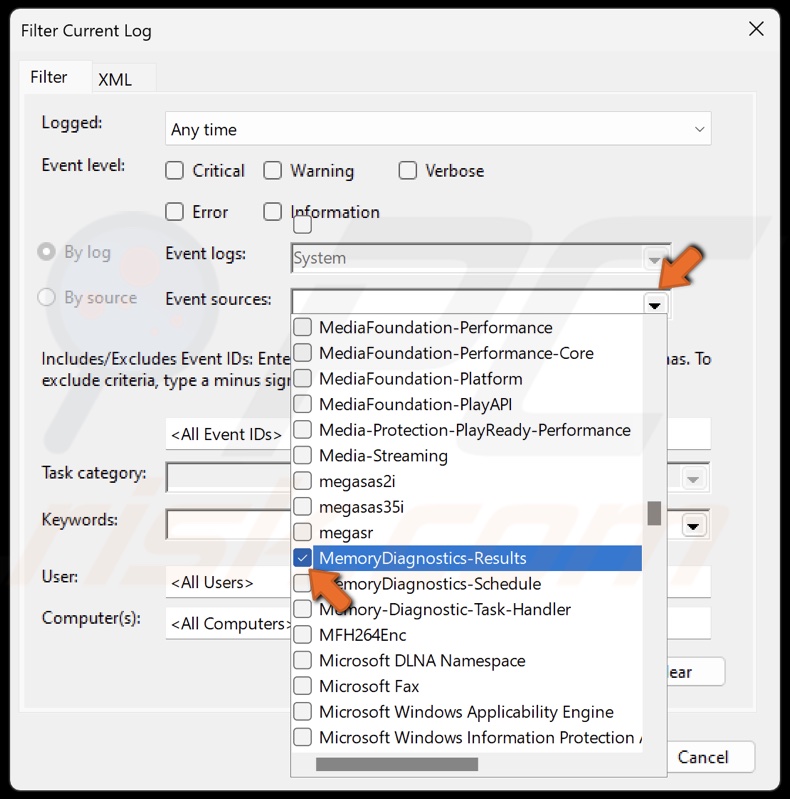
16. Open the Event sources drop-down menu and select MemoryDiagnostics-Results.
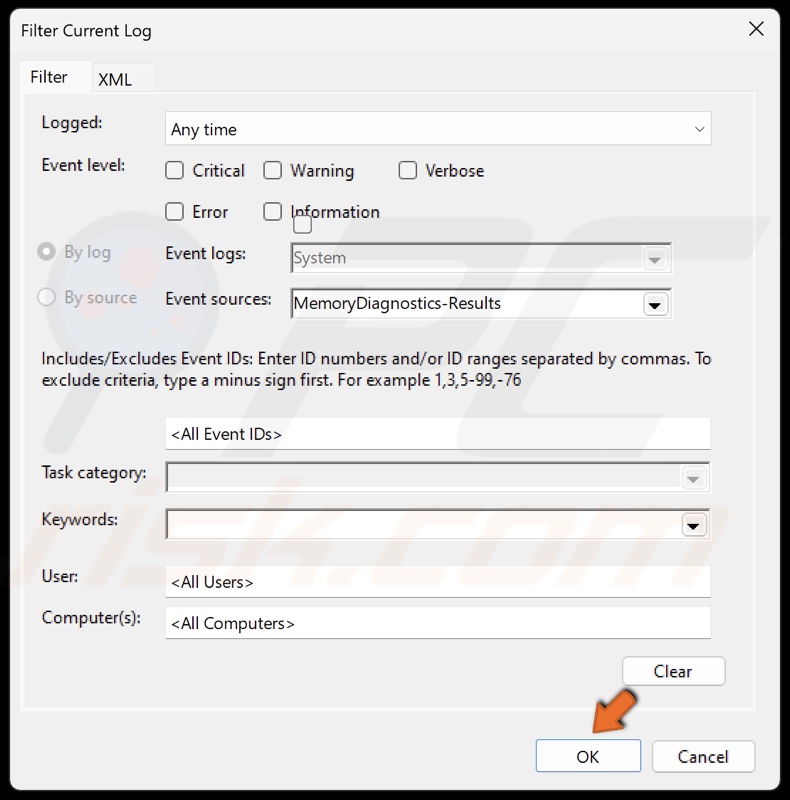
17. Click OK.
18. Double-click the results log. If there are memory errors, consider replacing your RAM. If there are no memory errors, proceed with the following fixes.
Method 2. Run the Hardware and Devices Troubleshooter
The UNEXPECTED KERNEL MODE TRAP error may occur due to incompatible or faulty hardware. If you recently upgraded or added new hardware, remove it and check if the error persists.
Note: If your system can’t run long enough to perform the following steps, boot Windows into Safe Mode, allowing your system to run without crashing.
1. Open the Windows Start menu and click the Power button.
2. Hold down the Shift key and click Restart.
3. Select Troubleshoot.
4. Select Advanced options.
5. Select Startup Settings.
6. Click Restart.
7. Press the 5 or F5 key to boot your PC into Safe Mode with Networking.
8. Hold down Windows+R keys to open Run.
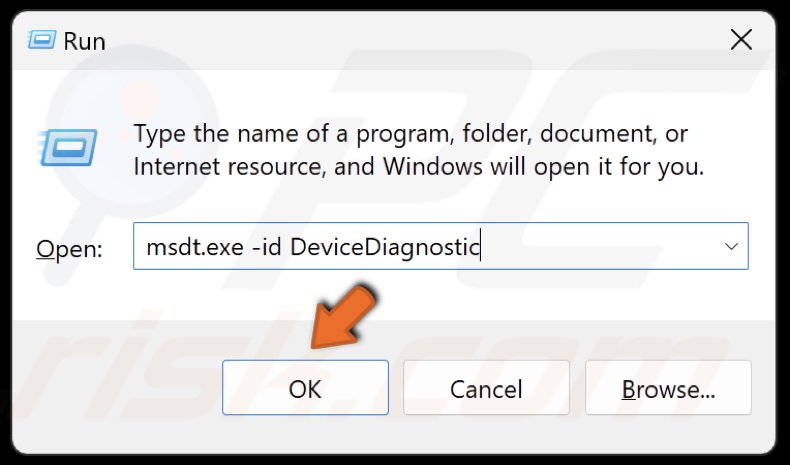
9. Type msdt.exe -id DeviceDiagnostic in Run and click OK.
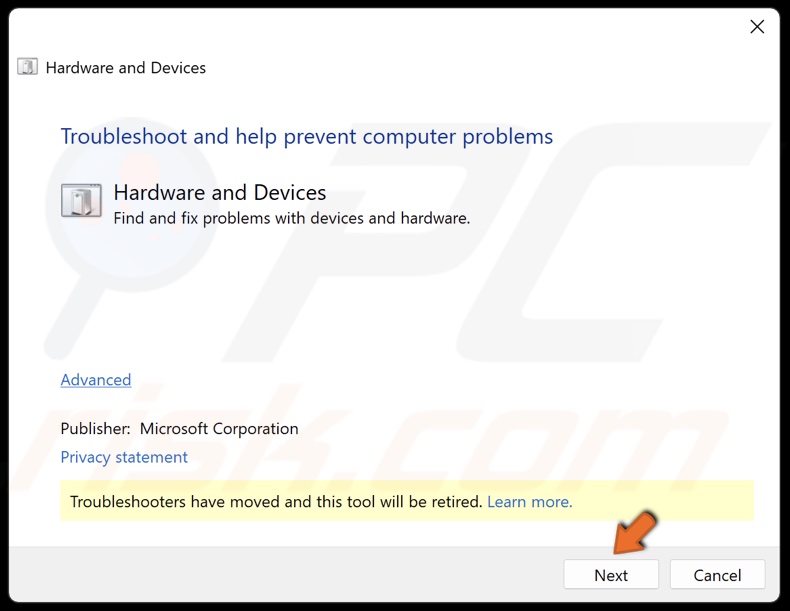
10. Click Next in the Hardware and Devices troubleshooter window.
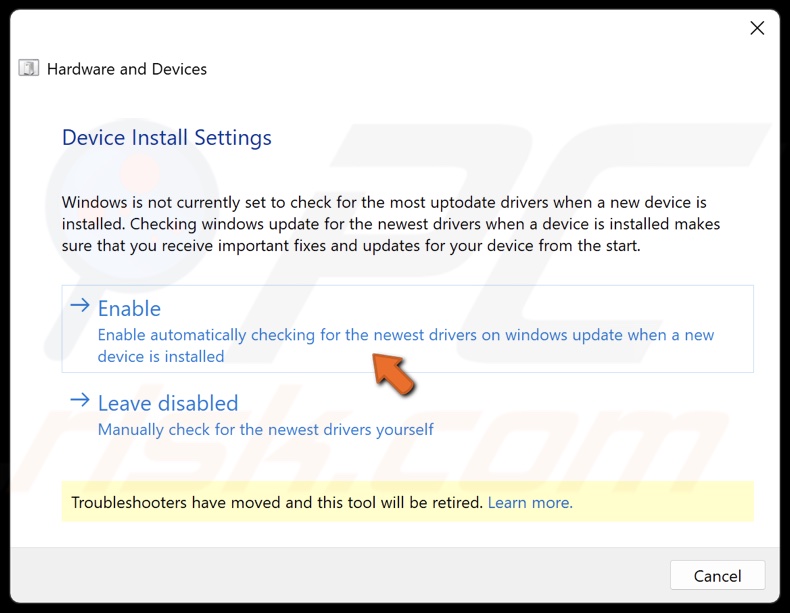
11. Apply the suggested fixes.
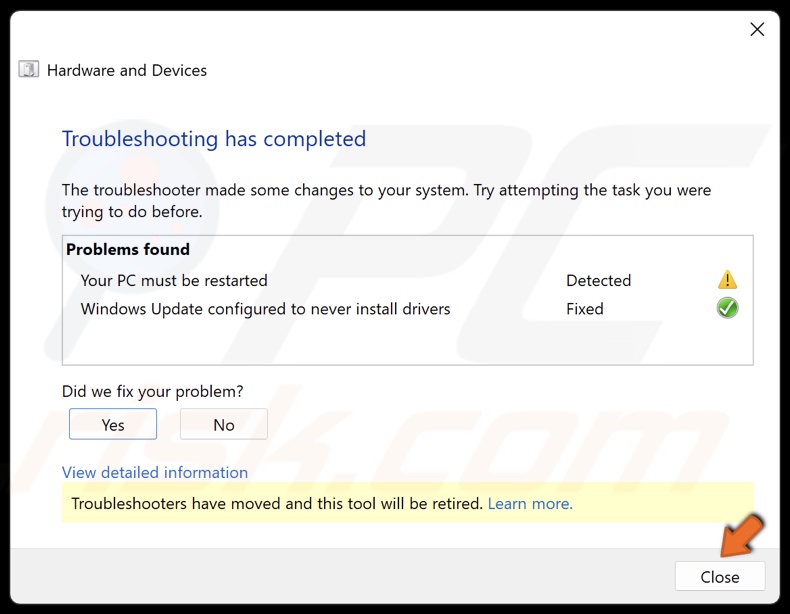
12. Click Close and restart your PC.
Method 3. Update the Device Driver Using the Device Manager
If you get the UNEXPECTED KERNEL MODE TRAP error after updating or installing an incompatible driver, try to roll back or install the correct driver.
Note: If your system can’t run long enough to perform the following steps, boot Windows into Safe Mode, allowing your system to run without crashing.
1. Open the Windows Start menu and click the Power button.
2. Hold down the Shift key and click Restart.
3. Select Troubleshoot.
4. Select Advanced options.
5. Select Startup Settings.
6. Click Restart.
7. Press the 5 or F5 key to boot your PC into Safe Mode with Networking.
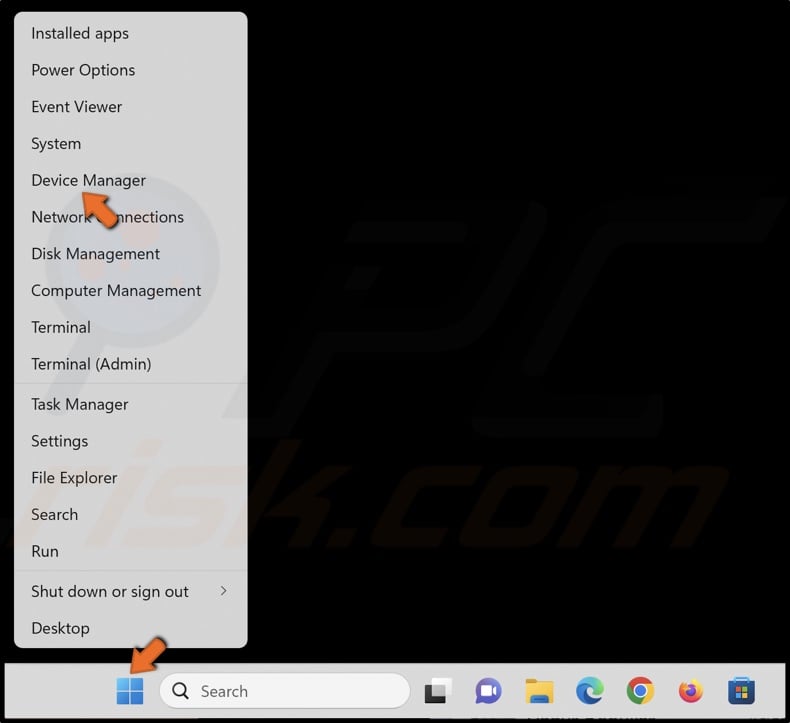
8. Right-click the Windows Start button and select Device Manager.
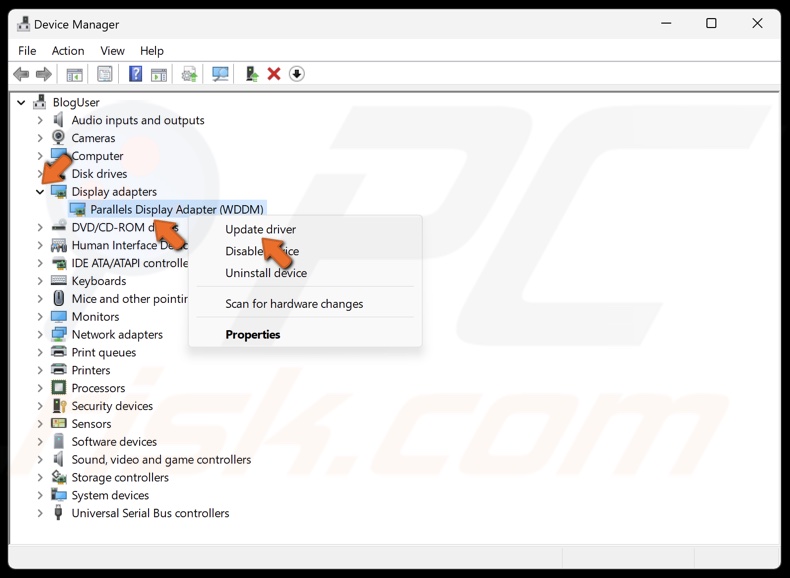
9. Go through the devices list and look for devices that have a yellow triangle with an exclamation mark. This symbol indicates an issue with the device.
10. Right-click the device and click Update driver.
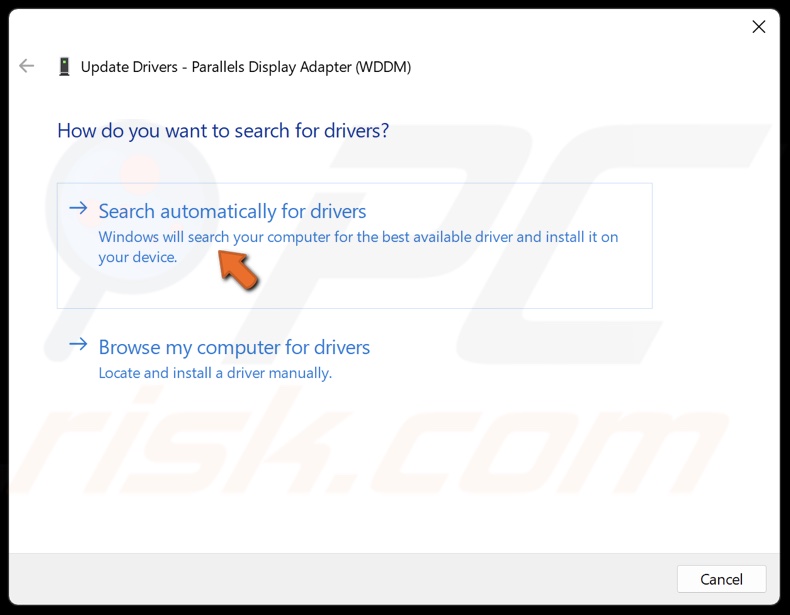
11. Select Search automatically for drivers. Windows will automatically install the best driver available on your computer.
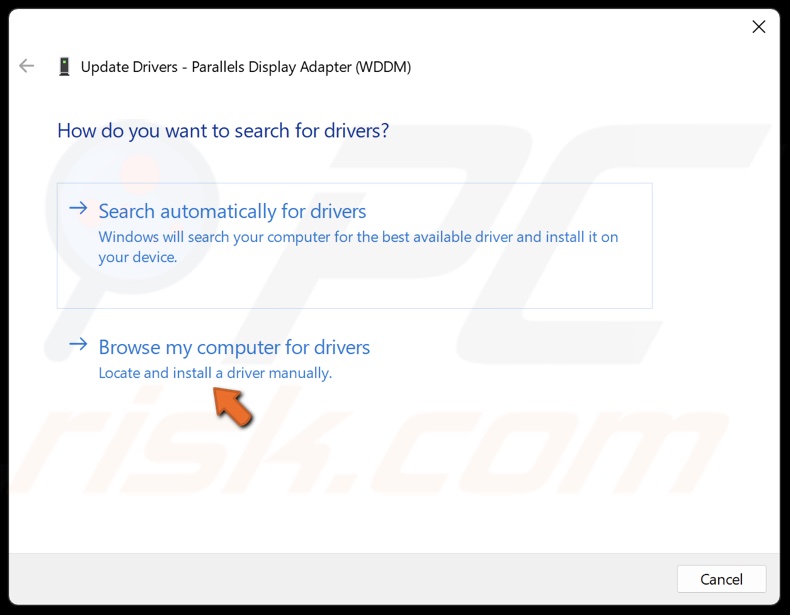
12. Alternatively, select Browse my computer for drivers.
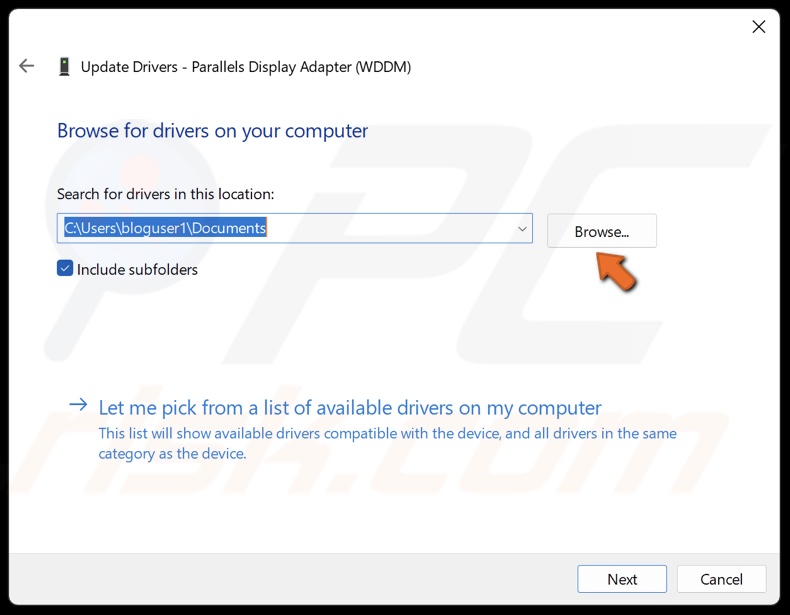
13. Click Browse and select a driver downloaded from the device vendor’s website.
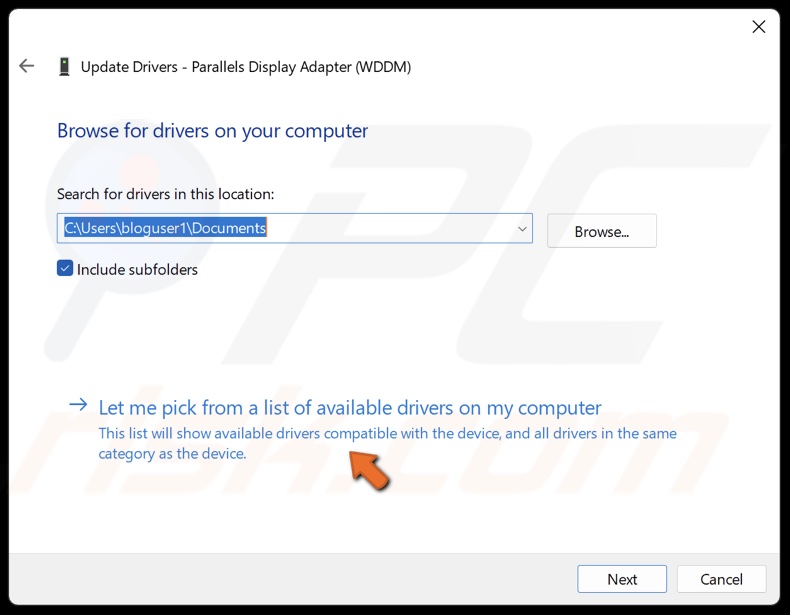
14. Alternatively, click Let me pick from a list of available drivers on my computer.
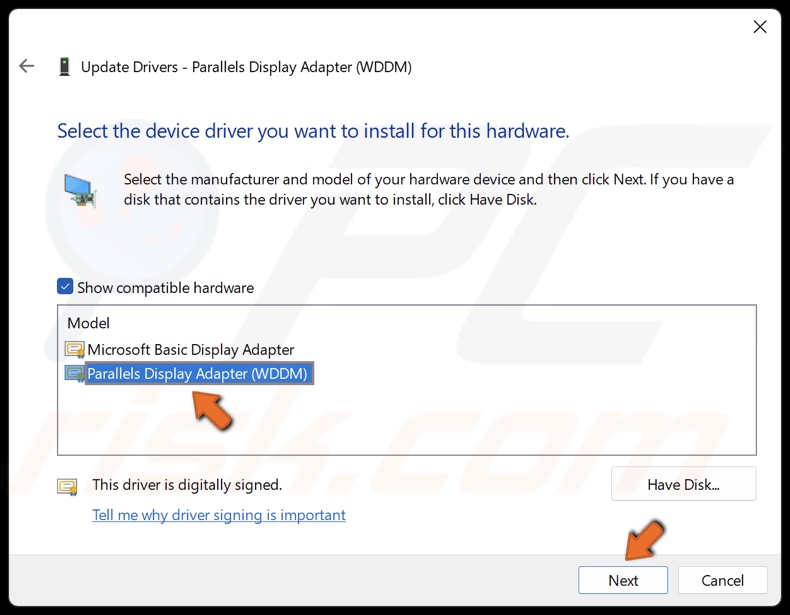
15. Select a compatible driver from the drivers list and click Next.
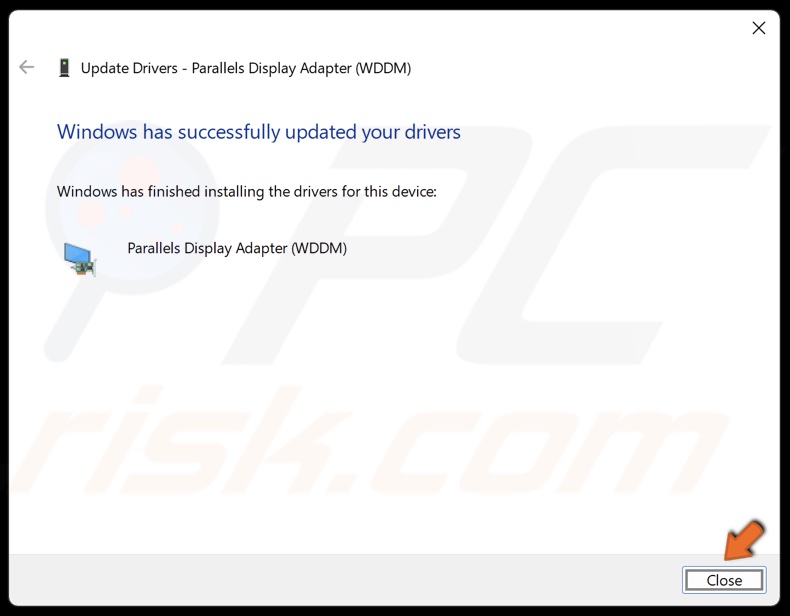
16. Click Close after installing the driver and restart your PC.
Method 4. Run the Deployment Image & Servicing Management (DISM) and System File Checker (SFC) Scans
Deployment Image & Servicing Management (DISM) tool that redeploys the system image to repair issues with system files and drivers. The System File Checker (SFC) is a tool that can replace problematic files from the DLL Cache.
Note: If your system can’t run long enough to perform the following steps, boot Windows into Safe Mode, allowing your system to run without crashing.
1. Open the Windows Start menu and click the Power button.
2. Hold down the Shift key and click Restart.
3. Select Troubleshoot.
4. Select Advanced options.
5. Select Startup Settings.
6. Click Restart.
7. Press the 5 or F5 key to boot your PC into Safe Mode with Networking.
8. Hold down Windows+R keys to open Run.
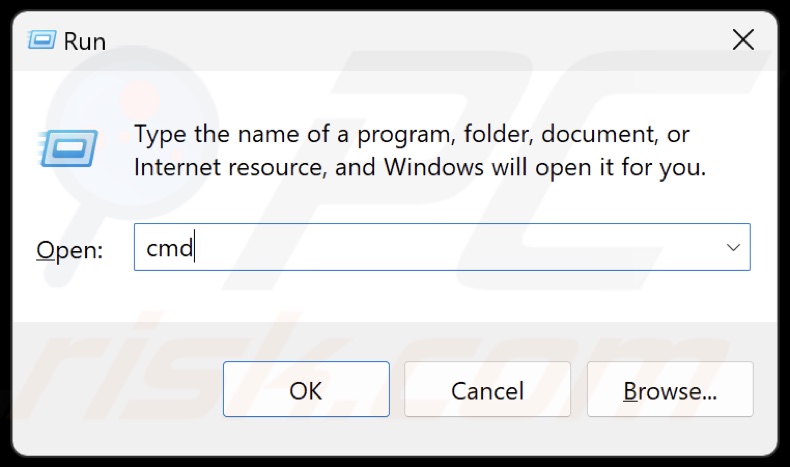
9. Type CMD in Run and hold down Ctrl+Shift+Enter keys to open the elevated Command Prompt.
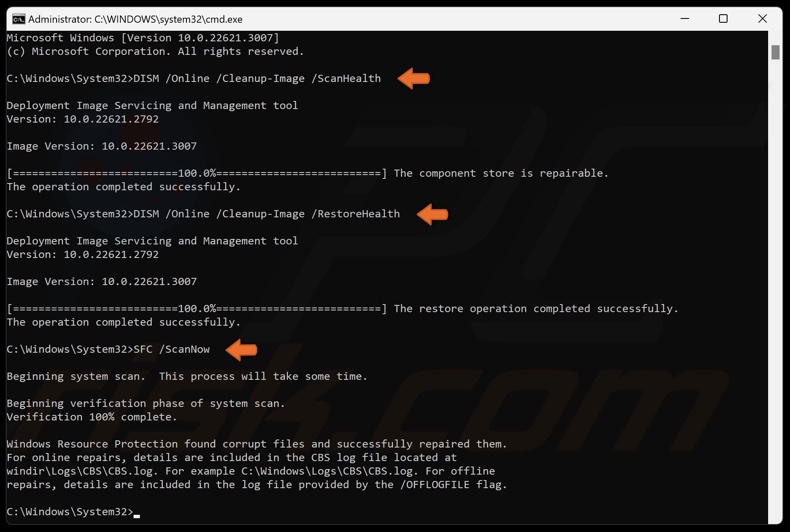
10. In the Command Prompt, type in DISM /Online /Cleanup-Image /ScanHealth and press Enter.
11. Type in DISM /Online /Cleanup-Image /RestoreHealth and press Enter.
12. Then, type in SFC /ScanNow and press Enter.
13. Close the Command Prompt and restart your PC.
If none of the tips and fixes in this article fix the error, try updating your system’s BIOS. However, note that updating your BIOS has some associated risks. Do this only as a last resort and perform in-depth research on how to do it since the process between hardware manufacturers is different.
Share:

Rimvydas Iliavicius
Researcher, author
Rimvydas is a researcher with over four years of experience in the cybersecurity industry. He attended Kaunas University of Technology and graduated with a Master's degree in Translation and Localization of Technical texts. His interests in computers and technology led him to become a versatile author in the IT industry. At PCrisk, he's responsible for writing in-depth how-to articles for Microsoft Windows.
▼ Show Discussion