How to Fix Lost Ark "Cannot connect to the server" Error

Get Free Scanner and check your computer for errors
Fix It NowTo fix found issues, you have to purchase the full version of Combo Cleaner. Free trial available. Combo Cleaner is owned and operated by Rcs Lt, the parent company of PCRisk.com read more.
How to Fix Lost Ark “Cannot connect to the server” Error on Windows 11
Many Lost Ark players report getting the “Cannot connect to the server” error when launching the game and even while playing it. Typically, this error occurs due to server overload caused by heavy traffic. Nevertheless, it can also occur due to an issue on the client side. If you’re getting this error, this article will help you fix it.

Cannot connect to the server. Exiting the game.
[W0x2-0PELPWN1N2NT]
Alternatively, you may get error codes:
[W0x2-SPELPWN1N2NT]
[GOx9-SPELPWP1P2NT]
What Causes the “Cannot connect to the server” Error?
- The server is overloaded. The most common reason users this error is Lost Ark’s servers get overloaded with users trying to connect and play. In this case, you have to wait a while and try again. It’s also possible that the servers are down for maintenance. Go to the Lost Ark Server Status website and check for server-related issues.
- Network-related issues. You may experience connection issues if your Internet connection is unstable or your bandwidth is being throttled because Lost Ark requires stable and fast Internet to establish a connection with a server.
- A corrupted DNS cache. If the DNS cache stored on your PC is corrupted, Lost Ark will have trouble establishing a connection with a server. Clearing your DNS server cache or switching to a third-party DNS server can fix this error.
- Corrupted game installation files. You might get this error if some of your Lost Ark installation files were corrupted, deleted, or misplaced. The files may also become corrupted while installing the game. We suggest you verify your Lost Ark installation files or reinstall the game.
- An outdated graphics card driver. Lost Ark requires the latest graphics card driver to work properly. If your graphics driver is outdated, that may prevent you from launching the game. Update your graphics driver and check if the game starts working.
- Misconfigured graphics settings. Some users reported getting the “Cannot connect to the server” error because they tampered with the game’s graphics settings. Resetting the graphics settings to their defaults should fix the error.
- Interference from third-party software. Some programs, particularly anti-virus and firewall applications, can block Lost Ark from connecting to its servers. Try to temporarily disable your anti-virus and firewall programs and check if that resolves the issue. Some users reported fixing error code W0x2-SPELPWN1N2NT using this method.
Before trying any of our fixes:
- Restart Steam and Lost Ark. If you’re getting the “Cannot connect to the server. Exiting the game.” error due to a glitch, you can work around this issue by restarting the game and Steam. Note that you may have to do this multiple times for it to work.
- Run Lost Ark as an administrator. If you use a local or guest account on your computer, you may run into problems because games often require administrative privileges to run. Configure Lost Ark to run as an administrator each time you launch it.
- Power-cycle your Internet router. If your Internet bandwidth is low or the connection is unstable, power cycling or resetting your router can fix any glitches your router may have. Unplug your router from the power outlet, wait a few minutes, and plug it back in.
- Connect to the Internet using an Ethernet cable. Many users that used Wi-Fi to connect to the Internet fixed the “Cannot connect to the server” error by connecting to the Internet using an Ethernet cable. If you have no option but to use a Wi-Fi connection, disconnect as many unnecessary devices from your WI-FI network.
- Update your graphics driver. If your graphics driver hasn’t been updated in a while, update it to ensure you get the best performance and fix any issues related to running the game.
- Disable your VPN or proxy server. If you connect to the Internet via a proxy server or VPN program, you may experience connection issues due to slower connection speeds. Turn off your VPN program or proxy server and check if the error disappears.
How to Fix Lost Ark "Cannot connect to the server" Error
Table of Contents:
- Introduction
- Method 1. Repair Easy Anti-Cheat
- Method 2. Verify the Integrity of Game Files
- Method 3. Clear the DNS Cache
- Method 4. Change Your DNS Server Address
- Method 5. Allow Lost Ark Through Windows Defender Firewall
- How to Fix Lost Ark "Cannot connect to the server" Error
Download Computer Malware Repair Tool
It is recommended to run a free scan with Combo Cleaner - a tool to detect viruses and malware on your device. You will need to purchase the full version to remove infections. Free trial available. Combo Cleaner is owned and operated by Rcs Lt, the parent company of PCRisk.com read more.
Method 1. Repair Easy Anti-Cheat
Some Lost Ark players fixed the “Cannot connect to the server” error after repairing the Easy Anti-Cheat service. Your Easy Anti-Cheat installation may have become corrupted, preventing Lost Ark from launching.
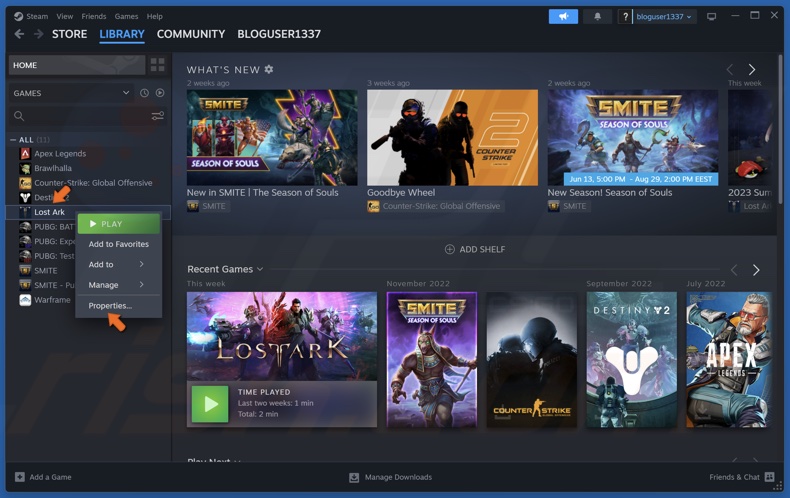
1. Open Steam. In the library window, right-click Lost Ark and select Properties.
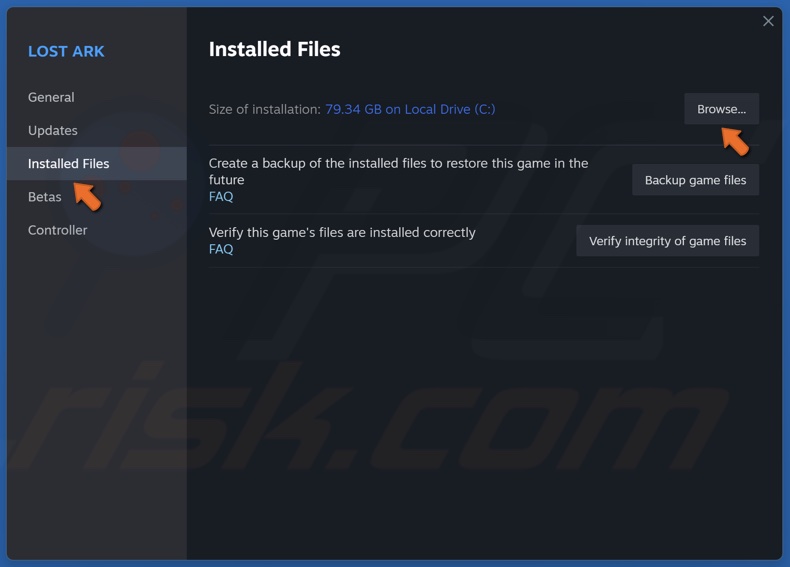
2. Select the Installed Files tab and click Browse.
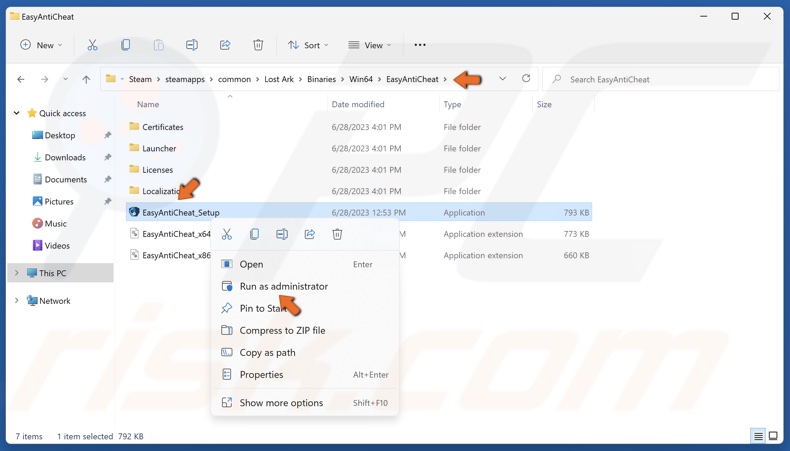
3. Then, navigate to:
Binaries\Win64\EasyAntiCheat
4. Right-click EasyAntiCheat_Setup.exe and click Run as administrator.
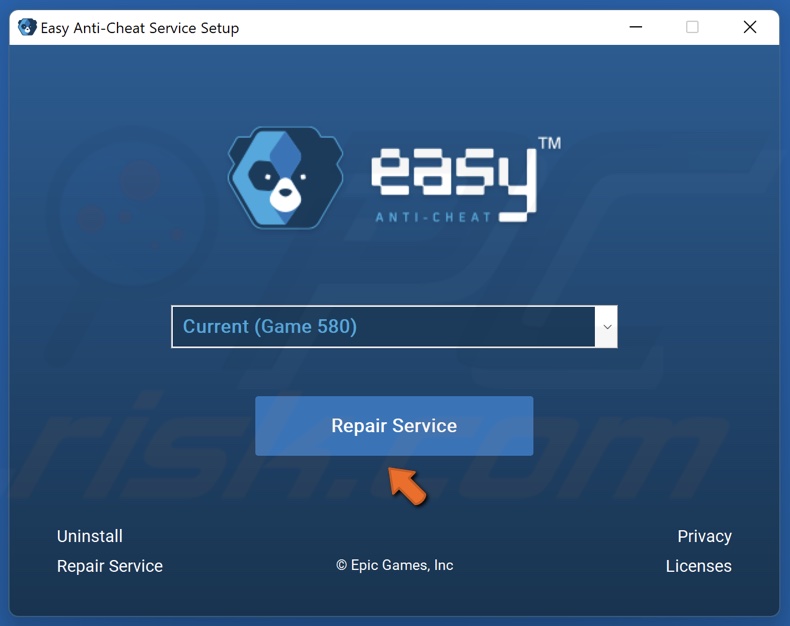
5. Click Repair Service in the Easy Anti-Cheat Setup window.
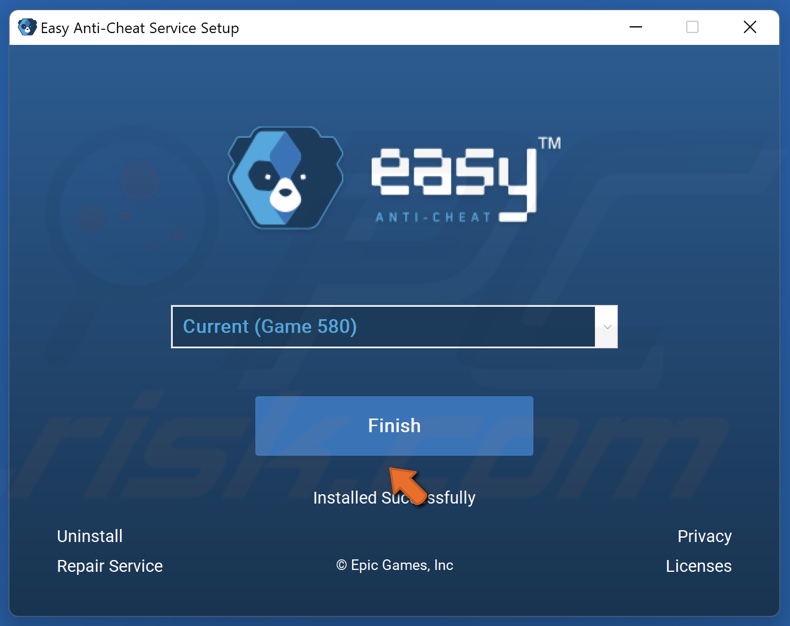
6. Click Finish.
Method 2. Verify the Integrity of Game Files
Lost Ark can fail to connect to its servers because some relevant files have been corrupted, deleted, or misplaced. Verifying game file integrity will replace all corrupted and missing files from Steam’s servers.
1. Open Steam. In the Library window, right-click Lost Ark and click Properties.
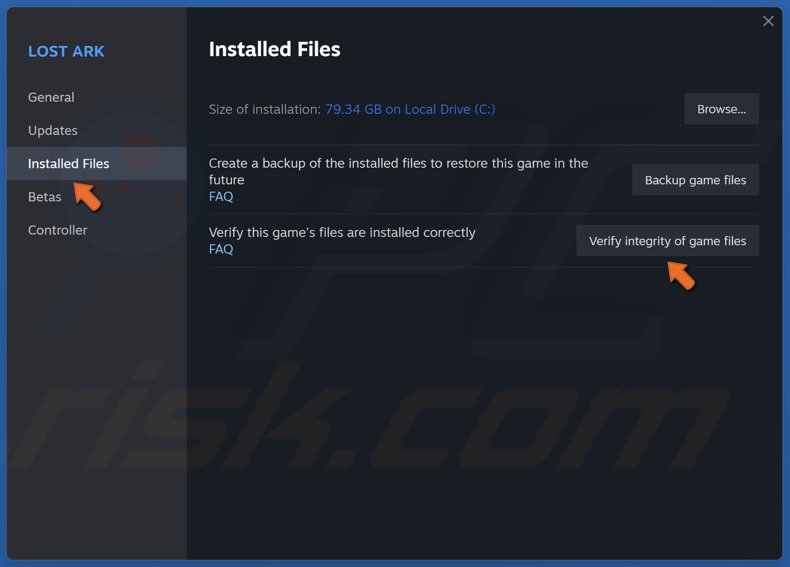
2. In the left pane, select the Installed Files tab.
3. Click Verify integrity of game files. Wait for the verification process to complete.
Method 3. Clear the DNS Cache
The DNS cache can become corrupt over time. Running the ipconfig /flushdns command will flush and reset the DNS resolver cache on your system, including data associated with Lost Ark.
Then, when you try to connect to Lost Ark’s servers, your DNS cache will save new data that may fix the “Cannot connect to the server” error.
1. Hold down Windows+R keys to open Run.
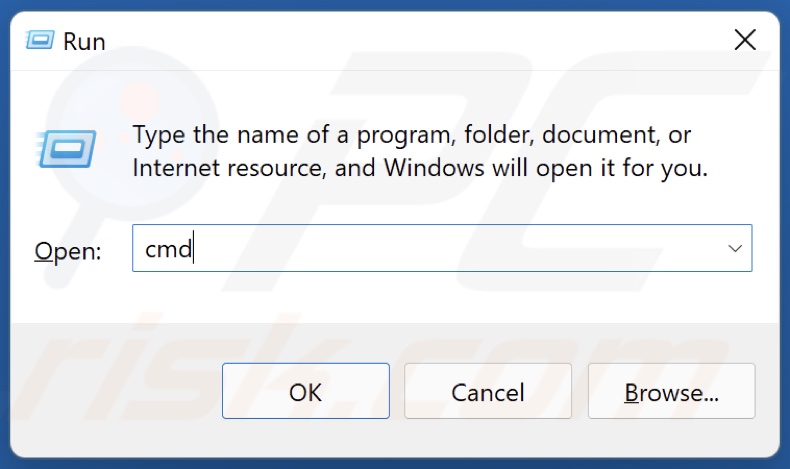
2. Type in CMD in the Run dialog and hold down Ctrl+Shift+Enter keys to open Command Prompt as an administrator.
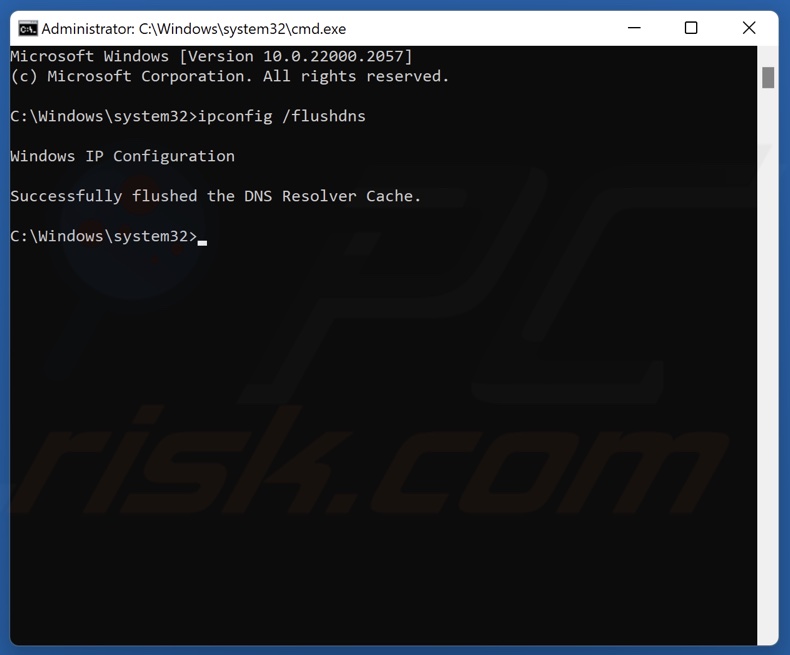
3. In the Command Prompt window, type in:
ipconfig /flushdns
4. Press the Enter key.
5. Close the Command Prompt and restart your PC.
Method 4. Change Your DNS Server Address
Changing your ISP-provided DNS server address to a third-party DNS server can fix connection issues with Lost Ark.
1. Hold down Windows+R keys to open Run.
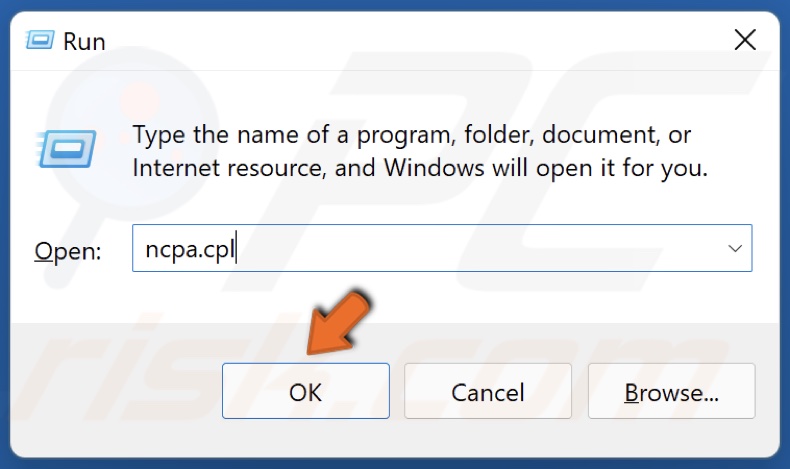
2. Type in ncpa.cpl in the Run dialog and click OK.
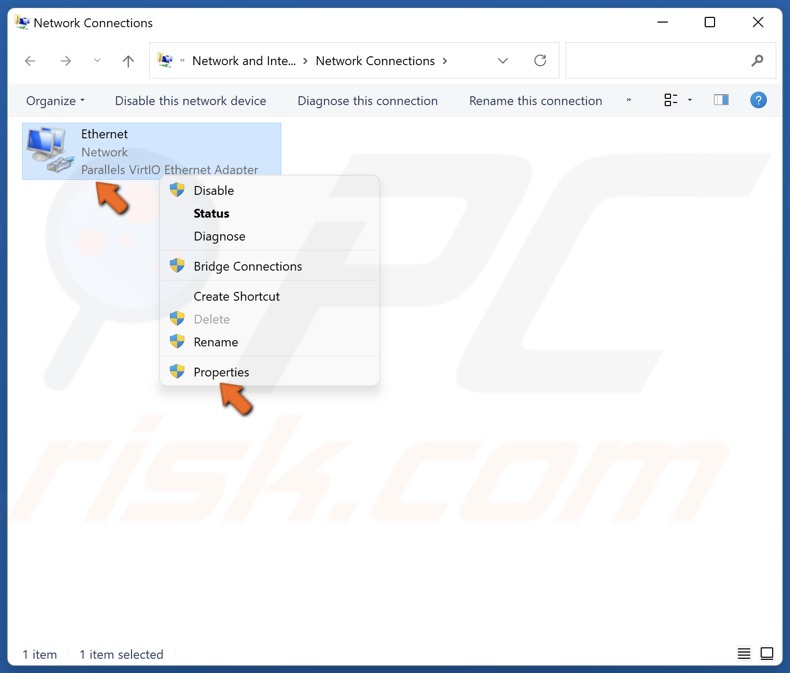
3. Right-click your network adapter and click Properties.
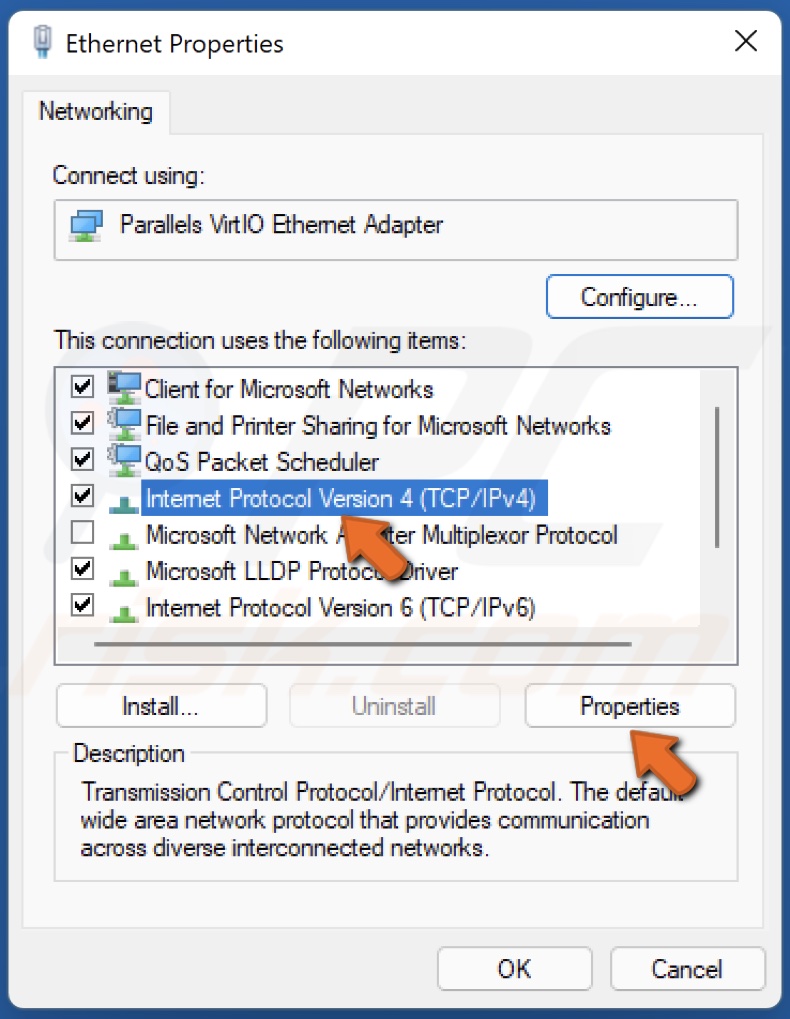
4. Select Internet Protocol Version 4 (TCP/IPv4) and click Properties.
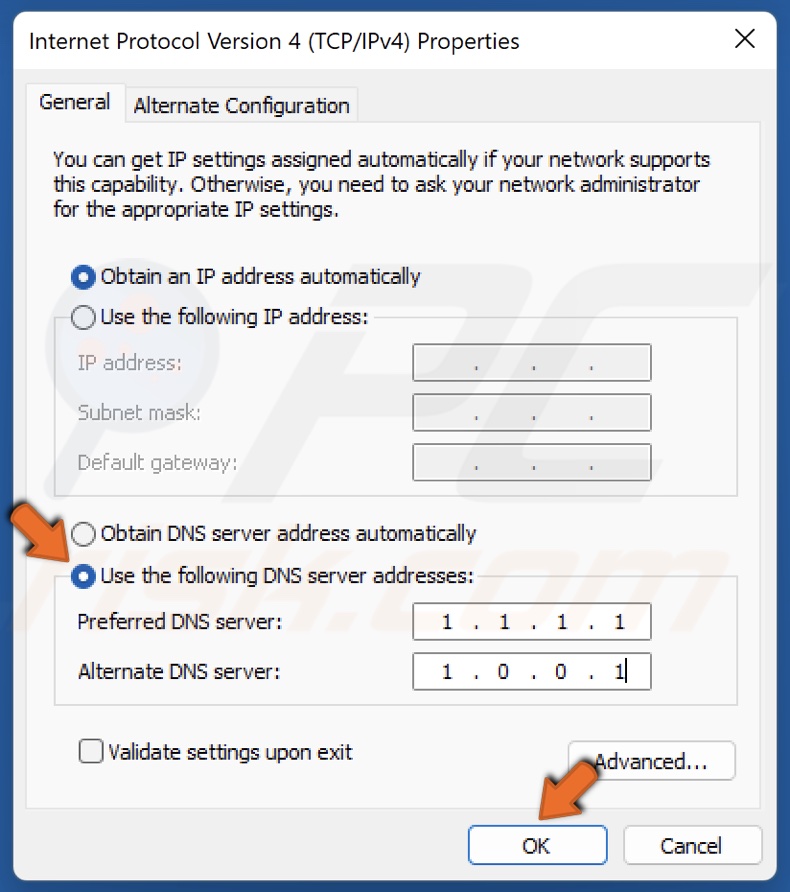
5. Tick Use the following DNS server addresses.
6. In the Preferred DNS server, type in 1.1.1.1
7. In the Alternate DNS server, type in 1.0.0.1
8. Click OK and restart your PC.
Method 5. Allow Lost Ark Through Windows Defender Firewall
In some cases, especially if you’re using a WI-FI connection, Windows Defender Firewall can prevent Lost Ark from connecting to its servers. Adding Lost Ark to your firewall’s exceptions list may fix the error.
1. Hold down Windows+R keys to open Run.
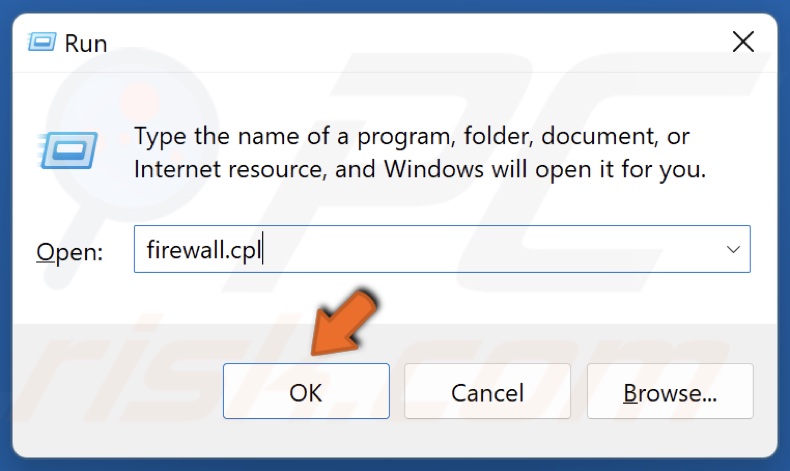
2. Type in firewall.cpl in the Run dialog and click OK.
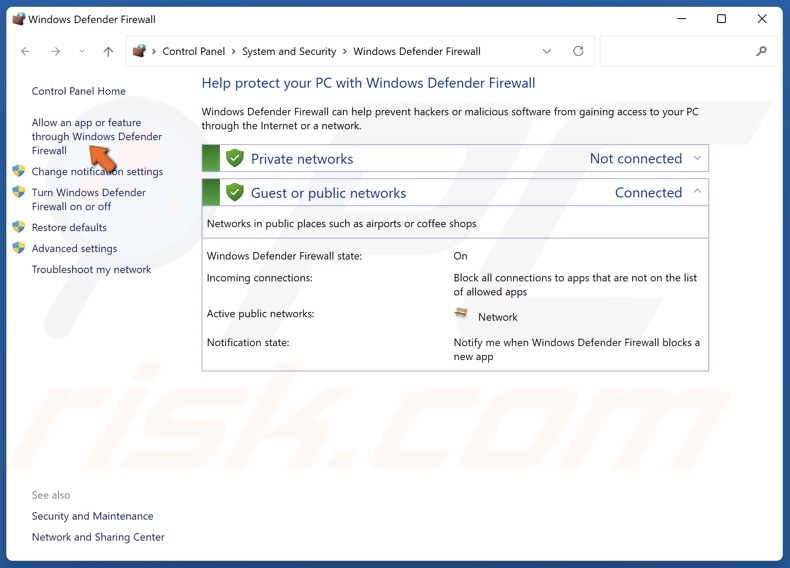
3. Click Allow an app or feature through Windows Defender Firewall.
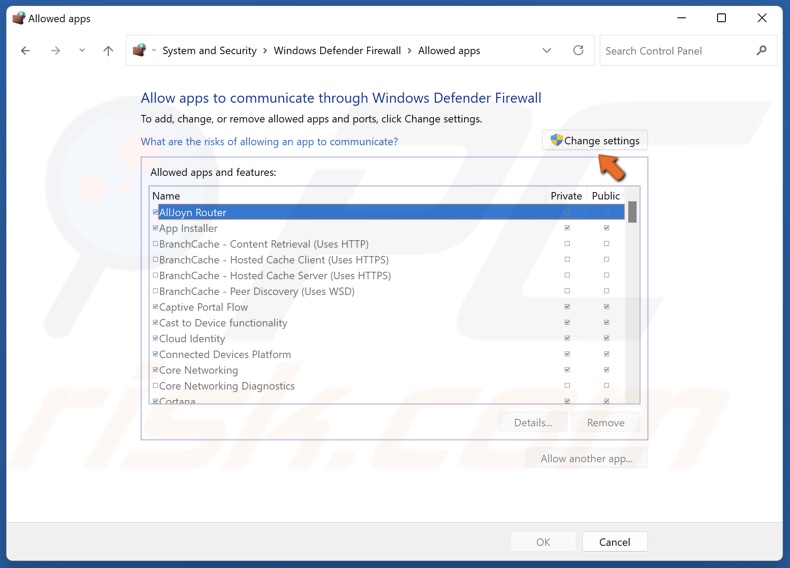
4. Click Change settings.
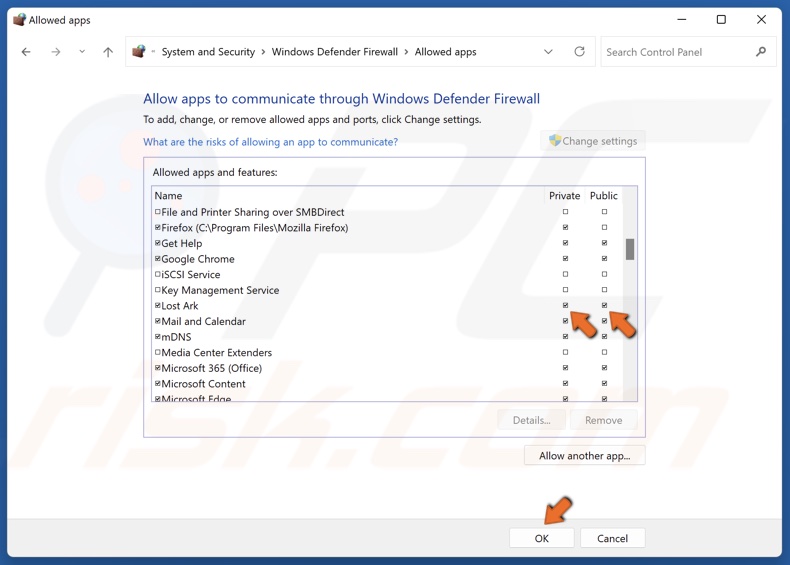
5. Scroll down and find Lost Ark.
6. Mark the Private and Public checkboxes next to Lost Ark and click OK.
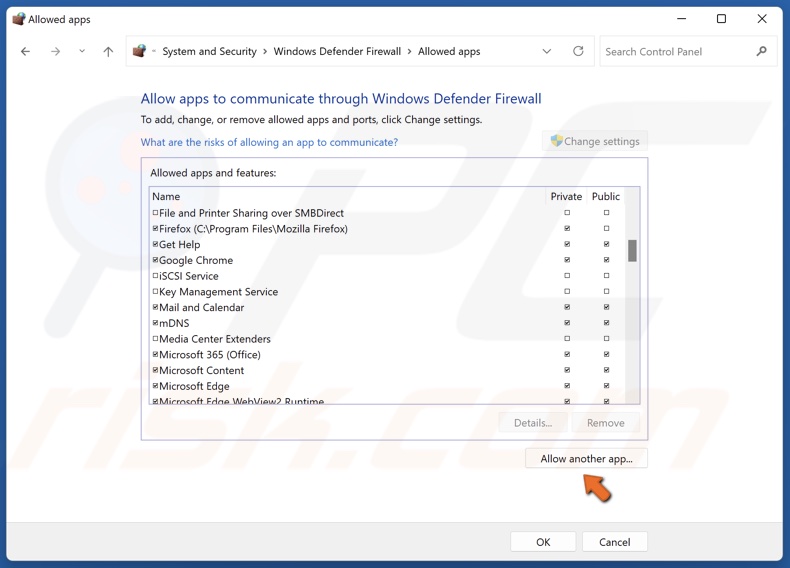
7. If Lost Ark is not on the allowed applications list, click Allow another app.
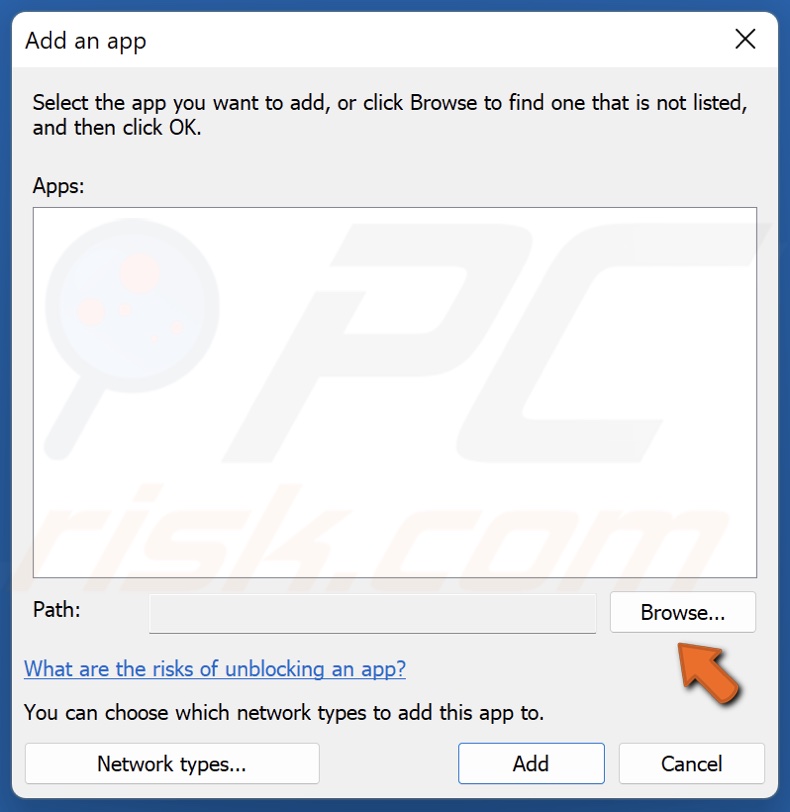
8. Click Browse.
9. In the address bar, type in:
C:\Program Files (x86)\Steam\steamapps\common\Lost Ark\Binaries\Win64
10. Press Enter.
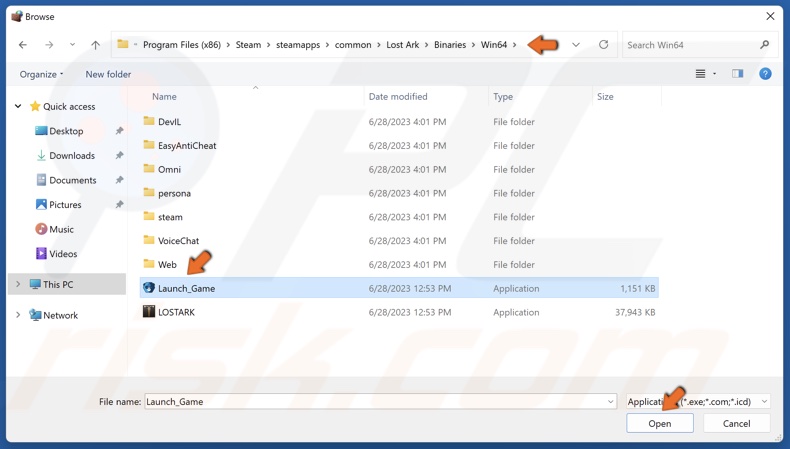
10. Select Launch_Game.exe and click Open.

11. Click Add to add EasyAntiCheat Launcher.
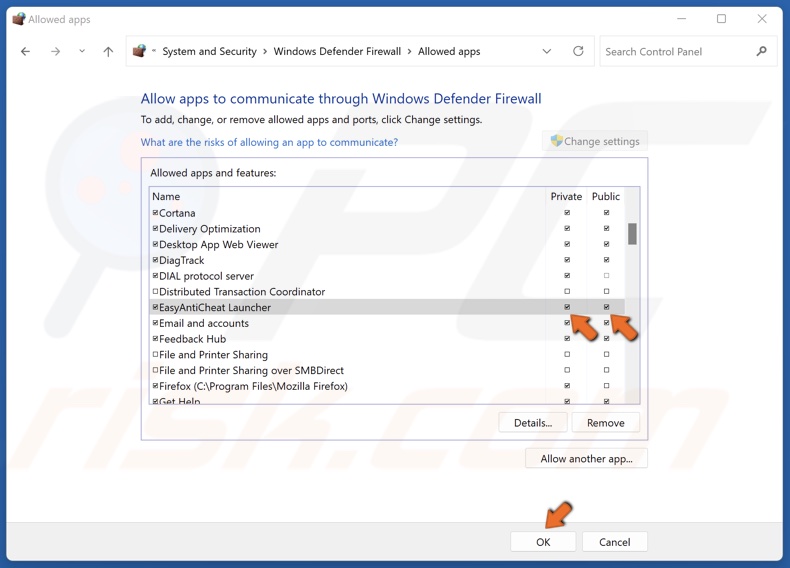
12. Mark the Public and Private checkboxes next to EasyAntiCheat Launcher.
13. Click OK.
Did this article help you fix the “Cannot connect to the server. Exiting the game.” error on your computer? Let us know in the comments below.
Share:

Rimvydas Iliavicius
Researcher, author
Rimvydas is a researcher with over four years of experience in the cybersecurity industry. He attended Kaunas University of Technology and graduated with a Master's degree in Translation and Localization of Technical texts. His interests in computers and technology led him to become a versatile author in the IT industry. At PCrisk, he's responsible for writing in-depth how-to articles for Microsoft Windows.
▼ Show Discussion