How to Fix Smite FPS Drops, Stuttering, and Lagging
Get Free Scanner and check your computer for errors
Fix It NowTo fix found issues, you have to purchase the full version of Combo Cleaner. Free trial available. Combo Cleaner is owned and operated by Rcs Lt, the parent company of PCRisk.com read more.
How to Fix Smite FPS Drops, Stuttering, and Lagging on Windows 11
Smite is a popular multiplayer battle arena that attracts millions of players. However, many users experience stuttering and lagging when playing the game. Above all, some experience frustrating FPS drops when playing smite. The reasons for these performance issues are various, but this article will show you how to fix them easily.
What Causes FPS Drops in Smite?
Obviously, you can experience frame rate drops in Smite because your computer does not meet the hardware requirements for the specific graphics settings you’re running or does not meet the minimum hardware requirements. Nevertheless, Smite’s frame rate can drop even if your PC meets the hardware requirements.
Smite runs on an outdated version of the Unreal engine, so it often runs poorly no matter how powerful your gaming rig is.
Running an outdated graphics card driver may contribute to FPS drops and stuttering. Therefore, make sure to update your graphics card driver to the latest version and see if the frame rate improves.
Smite requires a lot of system resources to run smoothly. Therefore, its performance can be hampered by unnecessary background applications that hog your system’s resources. Disabling as many background applications as possible can fix inconsistent frame rates, lagging, and stuttering. Try booting your PC in Clean Boot mode and see if that makes a difference.
The Xbox Game Bar is installed on Windows 11 by default and always runs in the background. The Xbox game bar is known to cause performance issues with Smite. By disabling the Xbox game bar, you have a good chance of solving the FPS drop issue.
Video on How to Fix Smite FPS Drops, Stuttering, and Lagging
Table of Contents:
- Introduction
- Method 1. Disable the Xbox Game Bar
- Method 2. Disable the Connected User Experiences and Telemetry (DiagTrack) Service
- Method 3. Disable Game DVR in Windows Registry
- Method 4. Optimize Smite Graphics Settings
- Video on How to Fix Smite FPS Drops, Stuttering, and Lagging
Download Computer Malware Repair Tool
It is recommended to run a free scan with Combo Cleaner - a tool to detect viruses and malware on your device. You will need to purchase the full version to remove infections. Free trial available. Combo Cleaner is owned and operated by Rcs Lt, the parent company of PCRisk.com read more.
Method 1. Disable the Xbox Game Bar
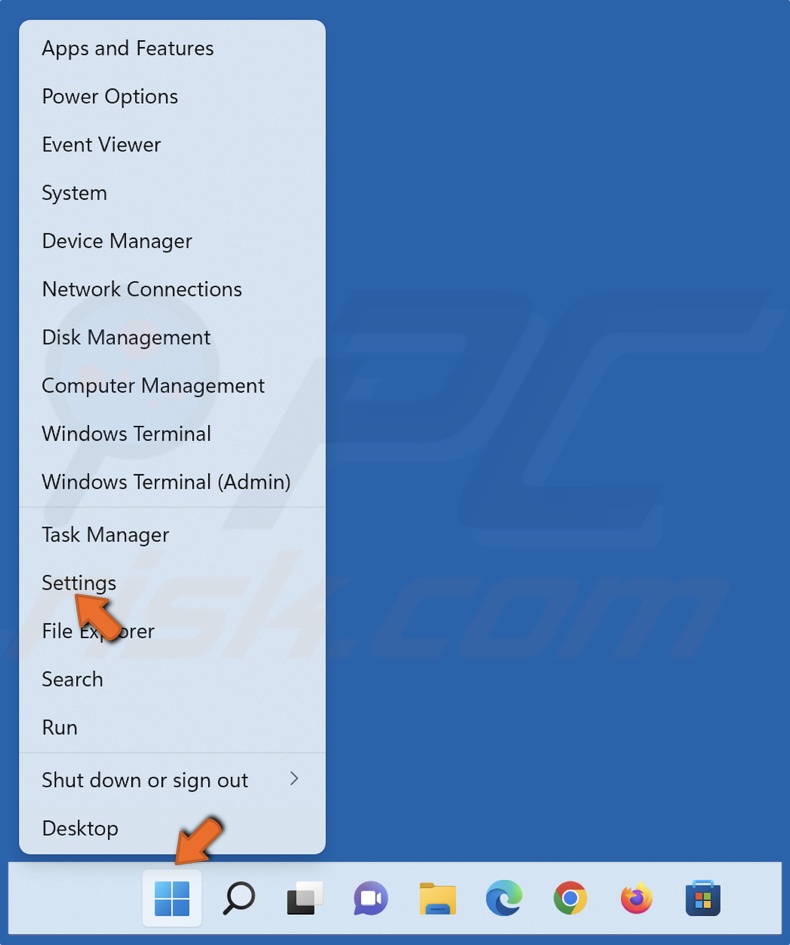
1. Right-click Start and select Settings.
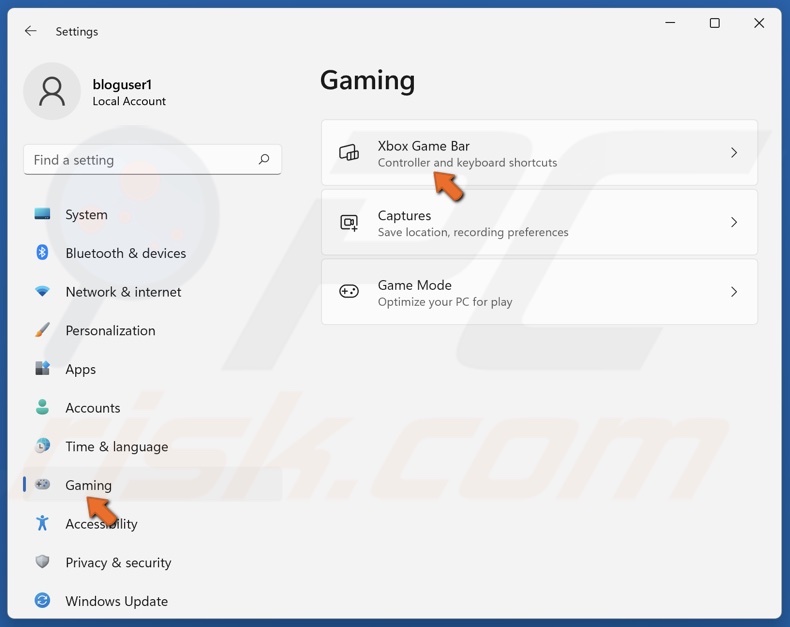
2. Select the Gaming tab and select Xbox Game Bar.
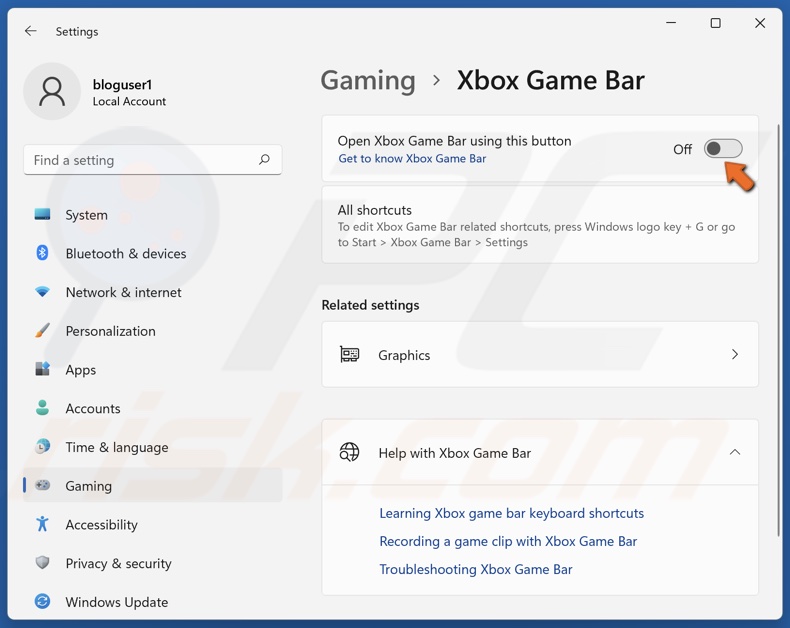
3. Toggle off the Open Xbox Game Bar using this button on a controller option.
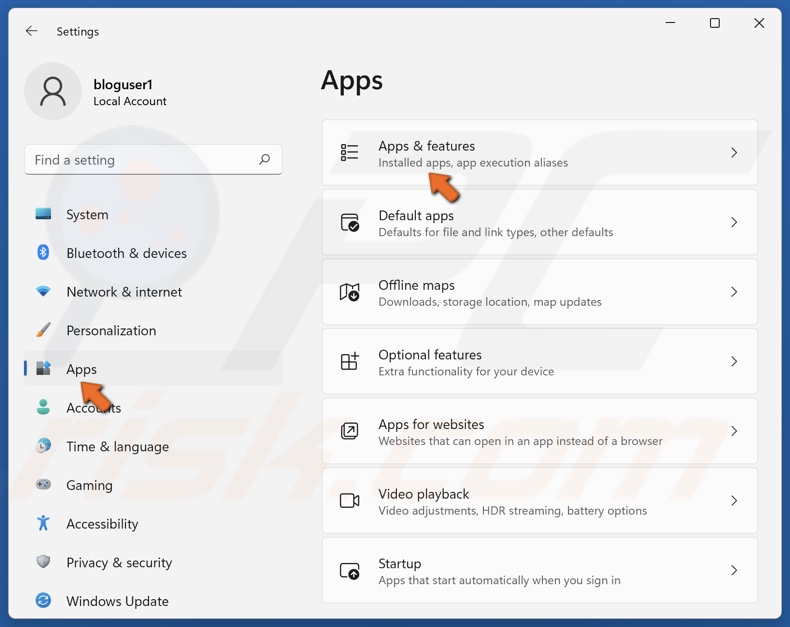
4. Then, Select the Apps tab and select Apps & features.
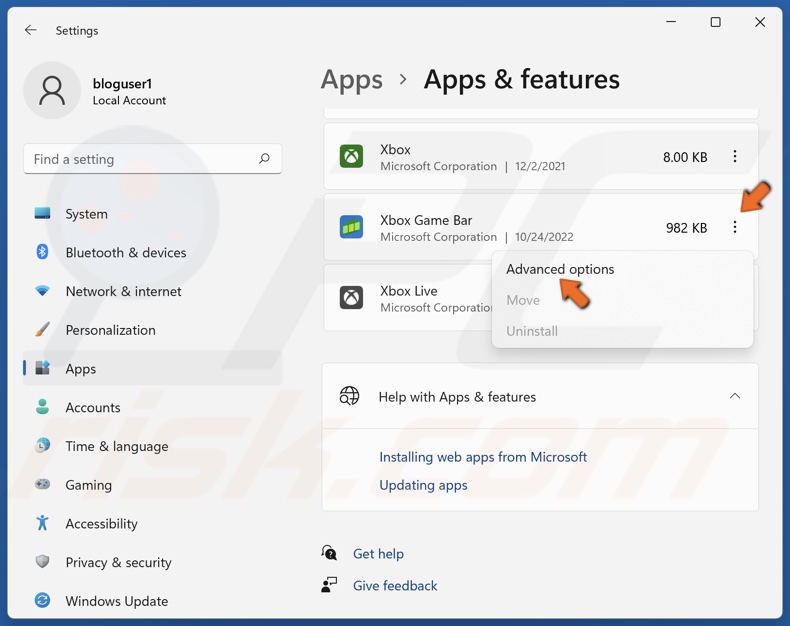
5. Click the three dots next to Xbox Game Bar and select Advanced options.
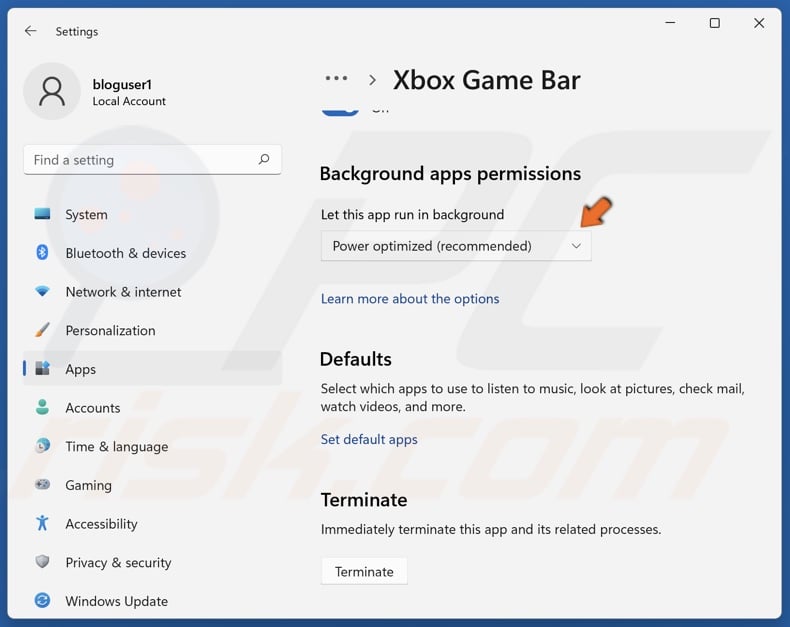
6. Open the Background apps permissions drop-down menu.
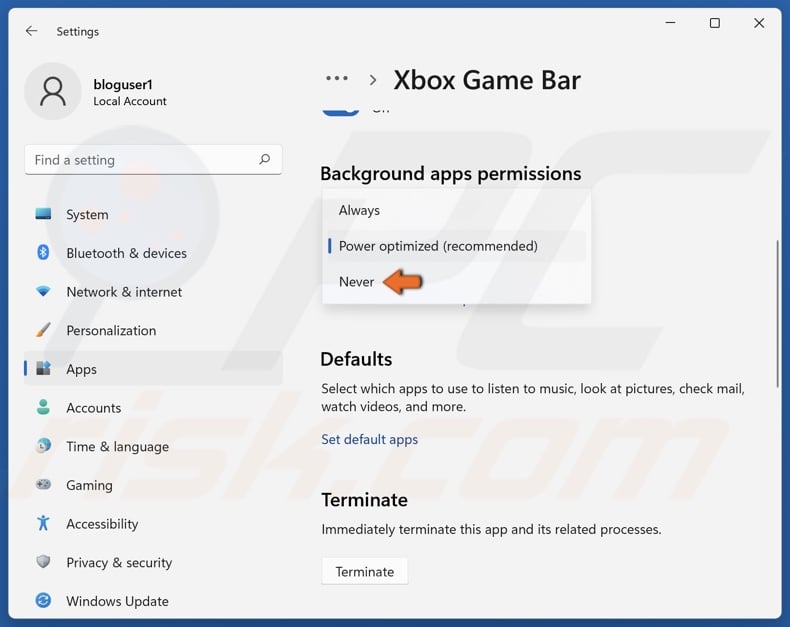
7. In the Background apps permissions menu, select Never.
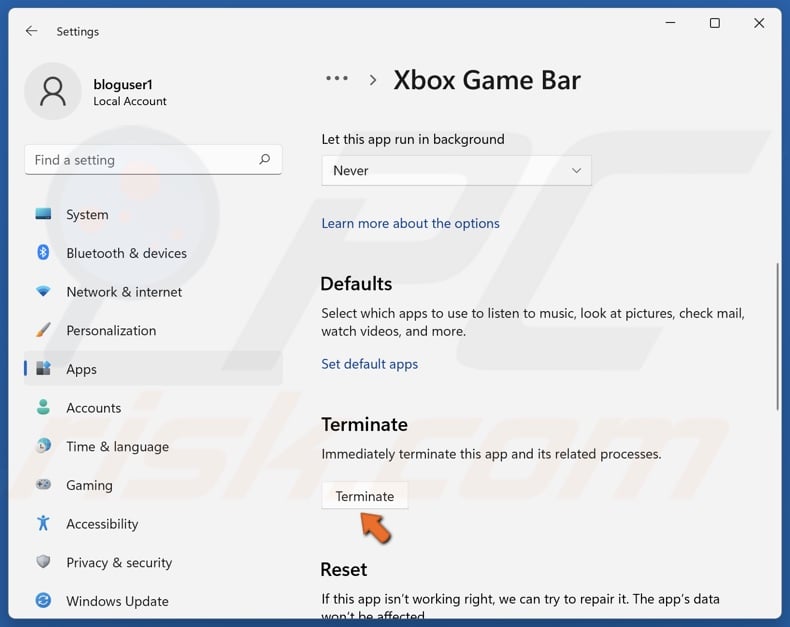
8. Then, click Terminate.
Method 2. Disable the Connected User Experiences and Telemetry (DiagTrack) Service
1. Hold down Windows+R keys to open Run.
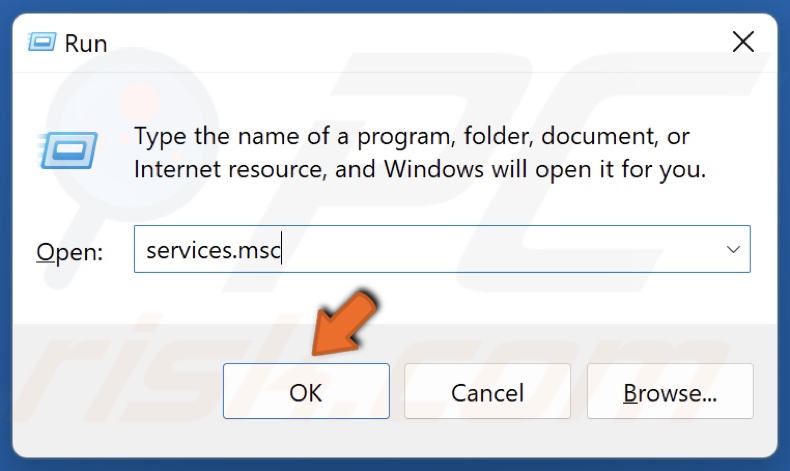
2. In the Run dialog box, type in services.msc and click OK.
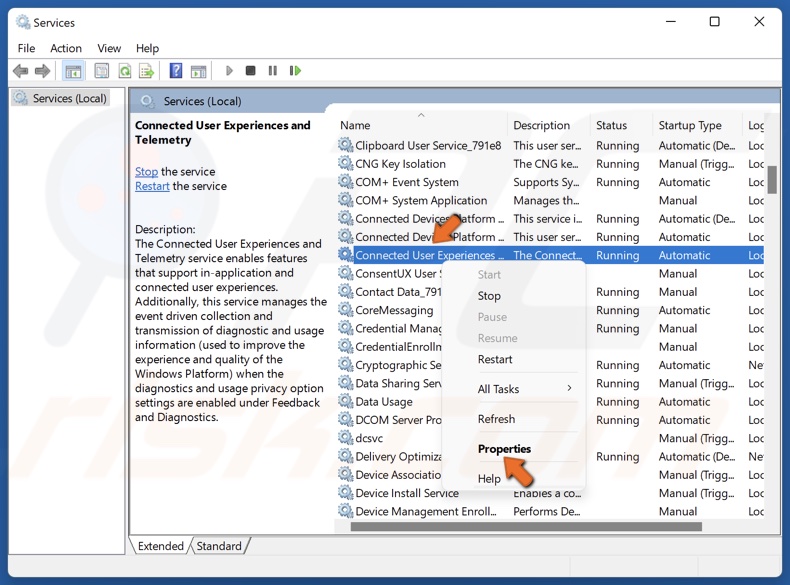
3. In the services window, locate Connected User Experiences and Telemetry.
4. Right-click Connected User Experiences and Telemetry and click Properties.
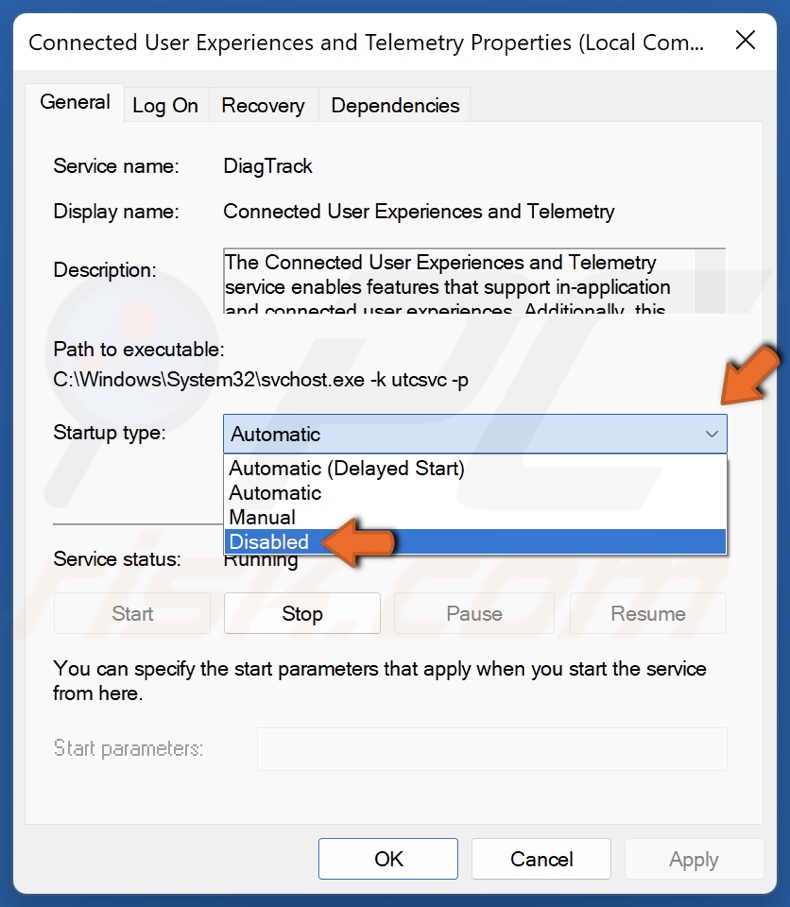
5. Open the Startup type drop-down menu and select Disabled.
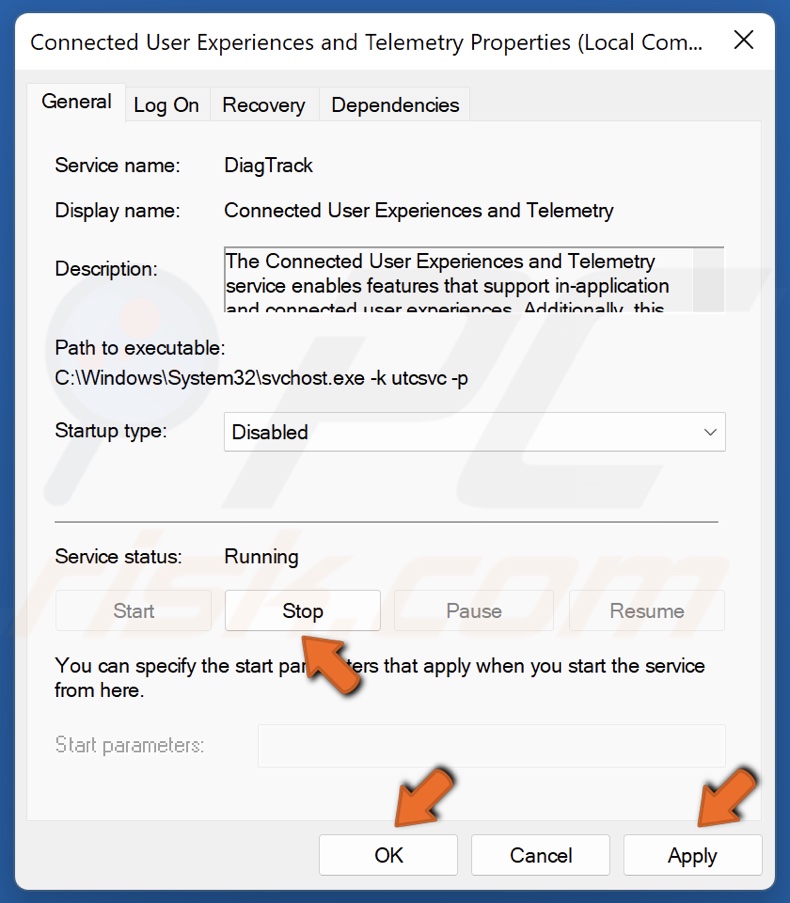
6. In the Service status section, click Stop.
7. Click Apply and click OK.
Method 3. Disable Game DVR in Windows Registry
1. Hold down Windows+R keys to open Run.
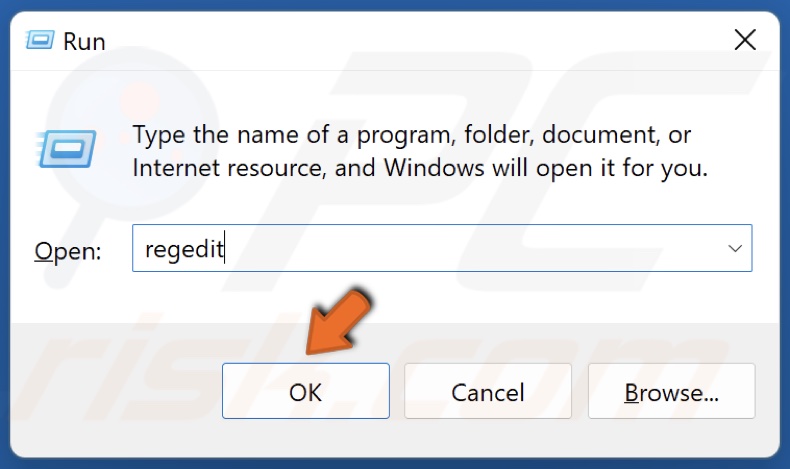
2. In the Run dialog box, type in regedit and click OK.
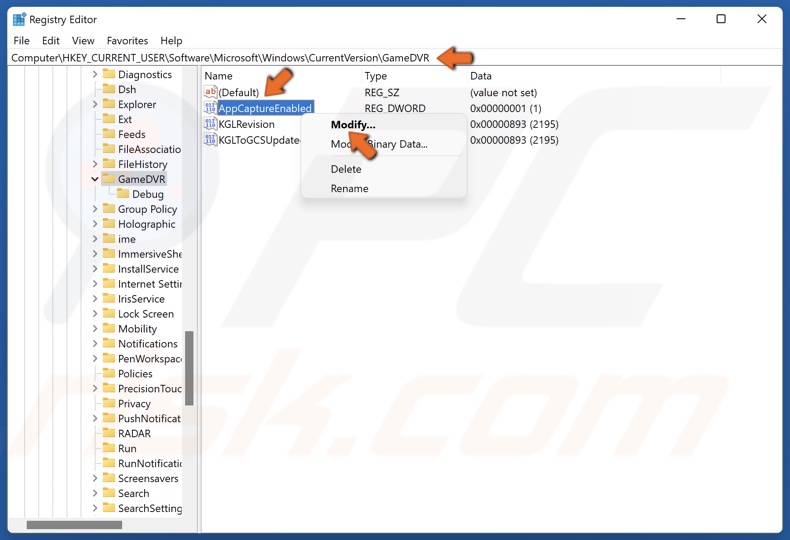
3. Navigate to HKEY_CURRENT_USER\Software\Microsoft\Windows\CurrentVersion\GameDVR
4. In the right pane, right-click AppCaptureEnabled and click Modify.
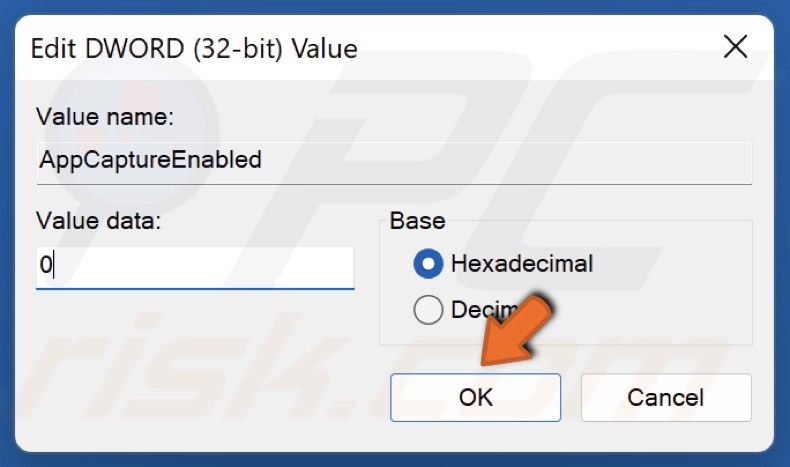
5. Set the Value data to 0 and click OK.
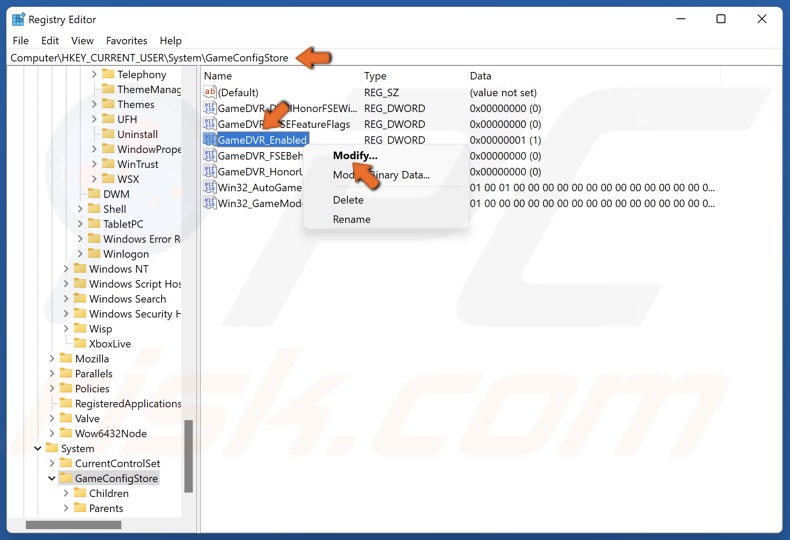
6. Then, navigate to HKEY_CURRENT_USER\System\GameConfigStore
7. In the right pane, right-click GameDVR_Enabled and click Modify.
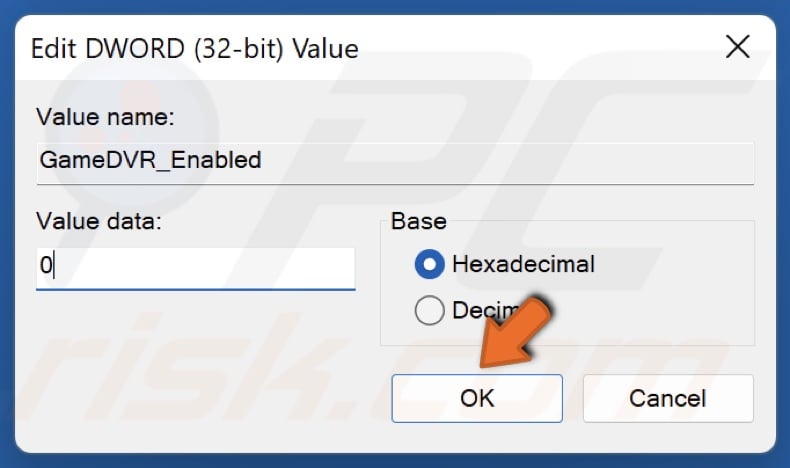
8. Set the Value data to 0 and click OK.
9. Restart your PC.
Method 4. Optimize Smite Graphics Settings
1. Launch Smite.
![]()
2. In the lower-left corner, click Settings (Gear icon).
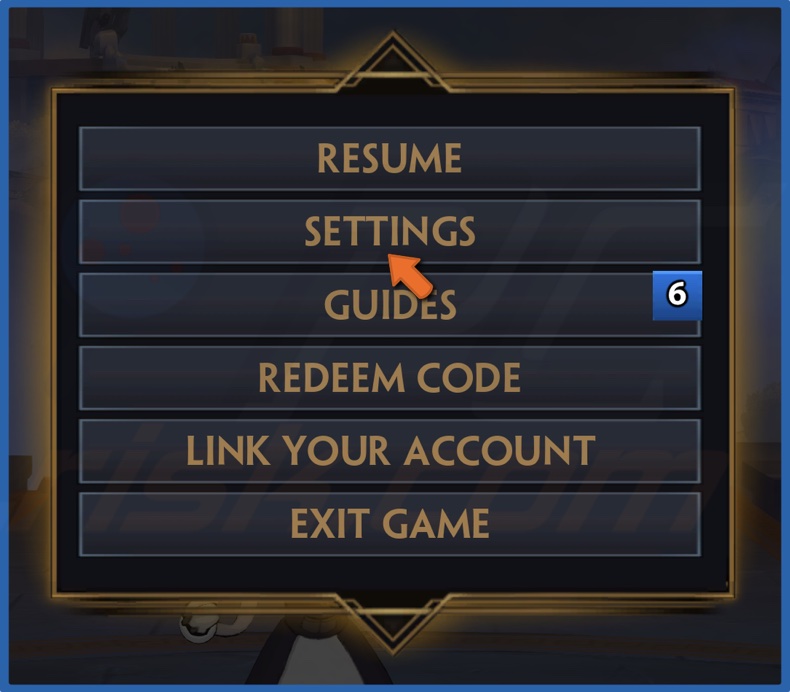
3. Select Settings.
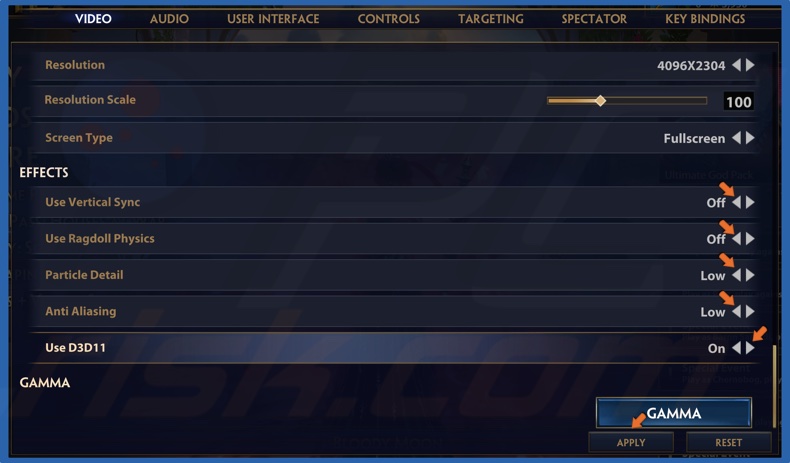
4. In the Effects section, turn off Vertical Sync and Ragdoll Physics, set Anti-Aliasing and Particle detail to low, and enable 3D11.
5. Click Apply.
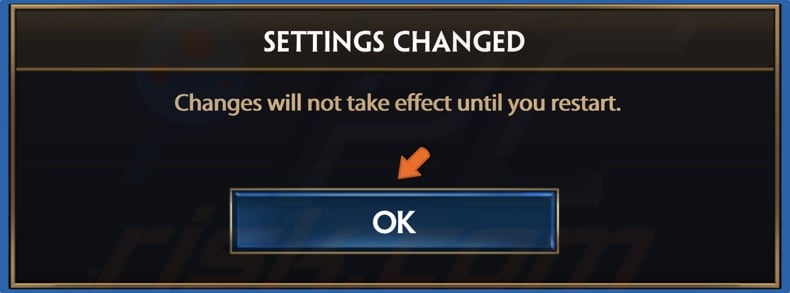
6. Click OK when prompted.
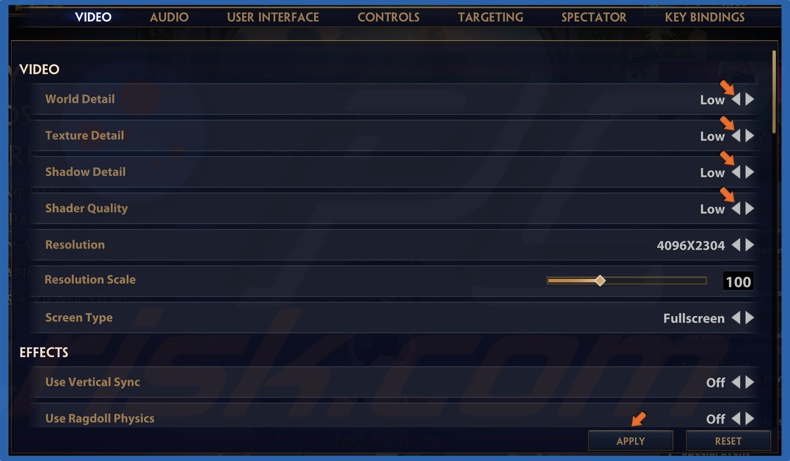
7. You can also set all graphics settings to low in the Video options section.

8. Click OK when prompted.
9. Restart Smite for the changes to take effect.
Did this article help you fix Smite FPS drops? Let us know in the comment section below.
Share:

Rimvydas Iliavicius
Researcher, author
Rimvydas is a researcher with over four years of experience in the cybersecurity industry. He attended Kaunas University of Technology and graduated with a Master's degree in Translation and Localization of Technical texts. His interests in computers and technology led him to become a versatile author in the IT industry. At PCrisk, he's responsible for writing in-depth how-to articles for Microsoft Windows.

▼ Show Discussion