How to Fix Battle.net Launcher Not Opening
Get Free Scanner and check your computer for errors
Fix It NowTo fix found issues, you have to purchase the full version of Combo Cleaner. Free trial available. Combo Cleaner is owned and operated by Rcs Lt, the parent company of PCRisk.com read more.
How to Fix Battle.net Launcher Not Opening
The Blizzard Battle.net client is mostly reliable, but occasionally, the Battle.net Launcher won’t open for various reasons. This article will discuss these reasons in more detail and provide several methods to fix this issue.

Why Won’t Battle.net Launcher Open?
Battle.net might not start or crash unexpectedly when initializing. The Battle.net Launcher might not open if its cache or installation has been corrupted. You may need to clear the Battle.net client cache folder or reinstall the client in such a case.
In some cases, this issue may occur due to another third-party application interfering with Battle.net. You can identify which application is interfering with the Battle.net Launcher by starting Windows in Clean Boot mode with selected programs enabled.
Also, some third-party antivirus and firewall programs may block Battle.net from connecting to the Internet, so try to temporarily disable your antivirus software or firewall to see if that fixes the problem.
However, Battle.net may fail to launch due to a problem on Blizzard’s end. Go to Down Detector, and check for issue reports.
Video Instructions on How to Fix Battle.net Launcher Not Opening
Table of Contents:
- Introduction
- Method 1. Run Battle.net Launcher as Administrator
- Method 2. Reset TCP/IP Settings and Flush DNS Cache
- Method 3. Disable Proxy Server
- Method 4. Delete the Battle.net Tools and Cache Folders
- Method 5. Enable the Secondary Logon Service
- Video Instructions on How to Fix Battle.net Launcher Not Opening
Download Computer Malware Repair Tool
It is recommended to run a free scan with Combo Cleaner - a tool to detect viruses and malware on your device. You will need to purchase the full version to remove infections. Free trial available. Combo Cleaner is owned and operated by Rcs Lt, the parent company of PCRisk.com read more.
Method 1. Run Battle.net Launcher as Administrator
1. Hold down Ctrl+Shift+Esc keys to open Task Manager.
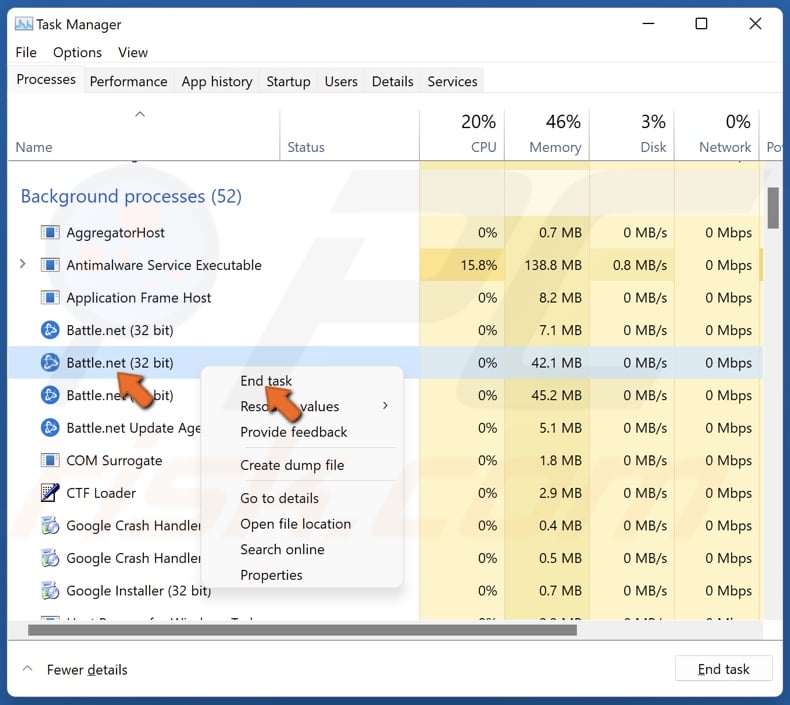
2. In the Processes tab, right-click each Battle.net and Battle.net Update Agent process and click End task.
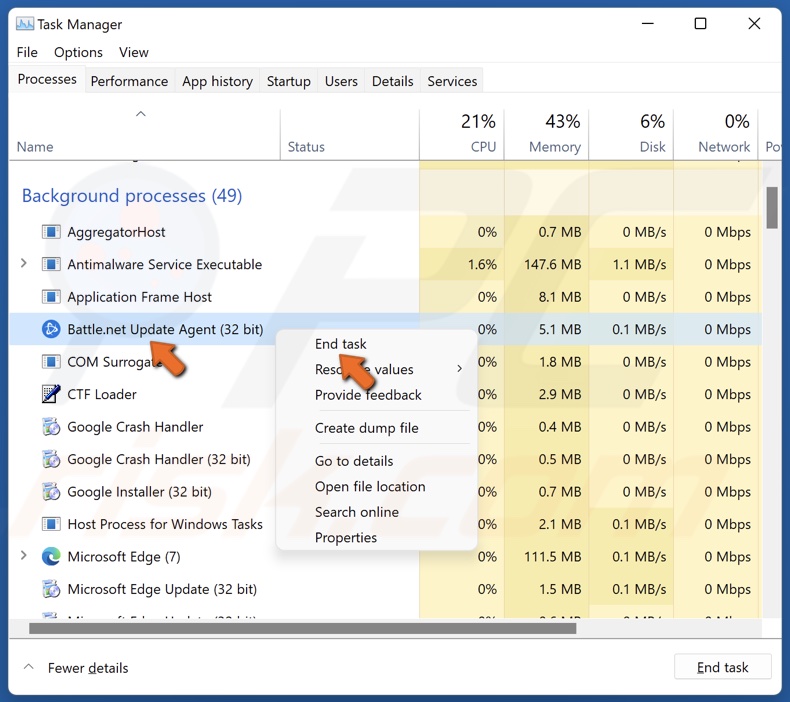
Make sure that no Battle.net processes are running.
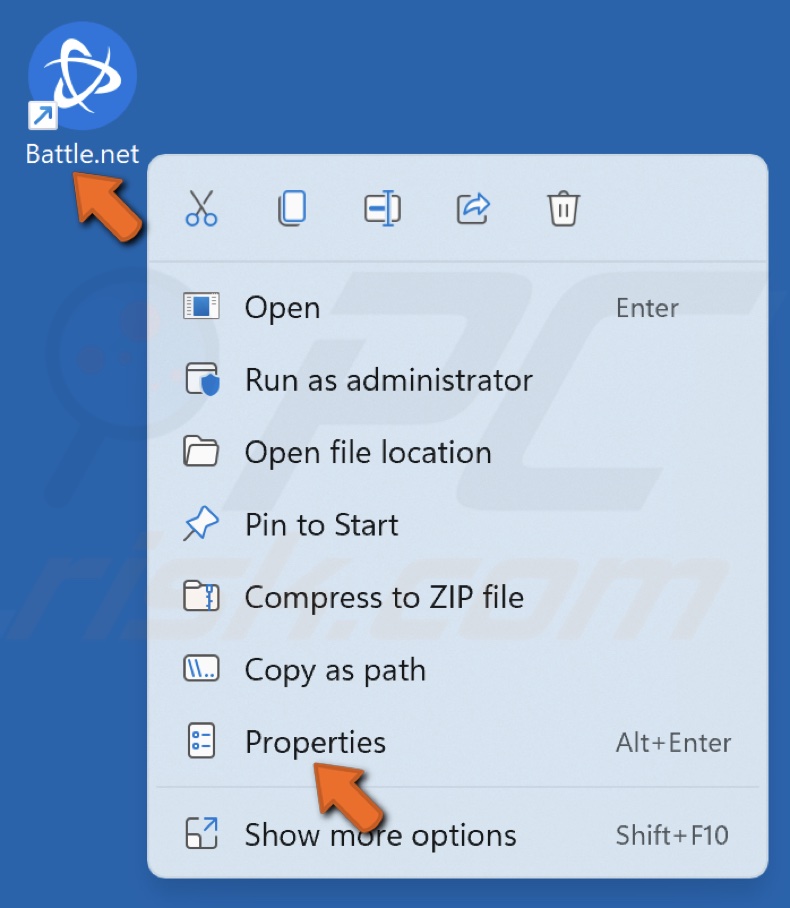
3. Right-click the Battle.net desktop shortcut and click Properties.
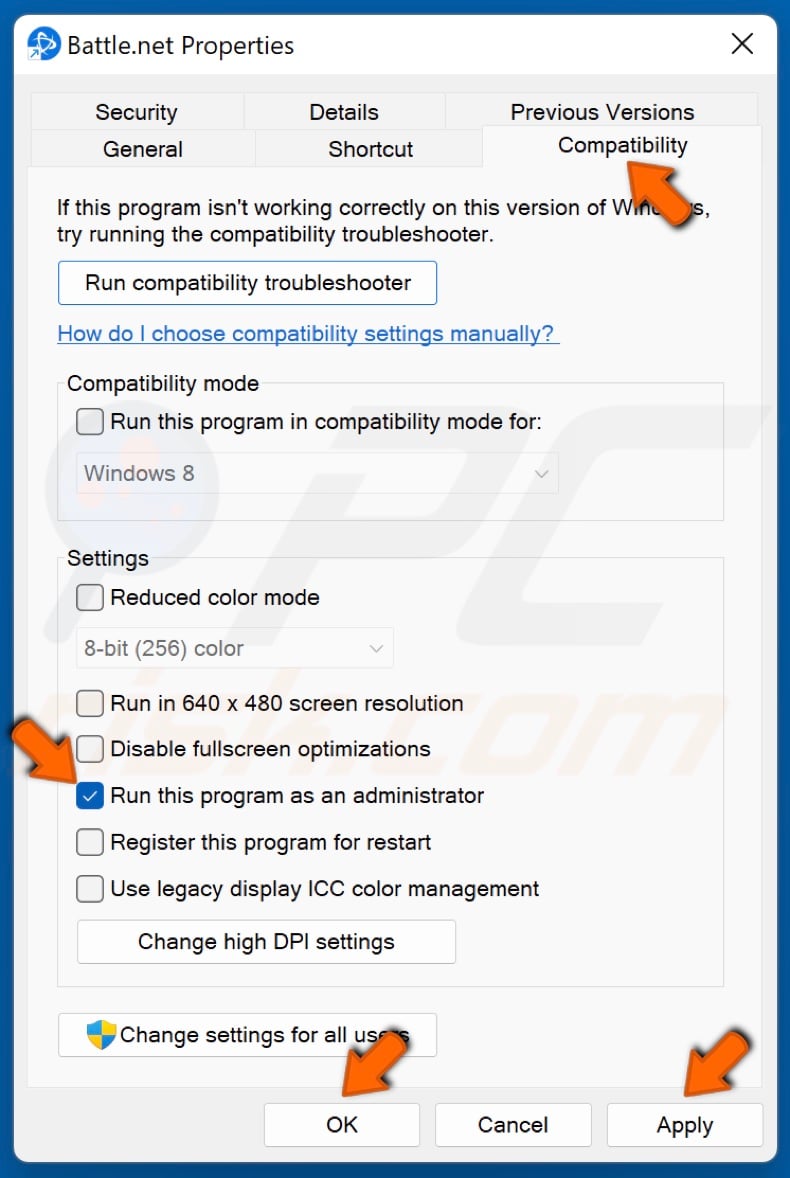
4. Navigate to the Compatibility tab.
5. Mark the Run this program as an administrator checkbox.
6. Click Apply and click OK.
7. Launch Battle.net.
Method 2. Reset TCP/IP Settings and Flush DNS Cache
1. Hold down Windows+R keys to open Run.
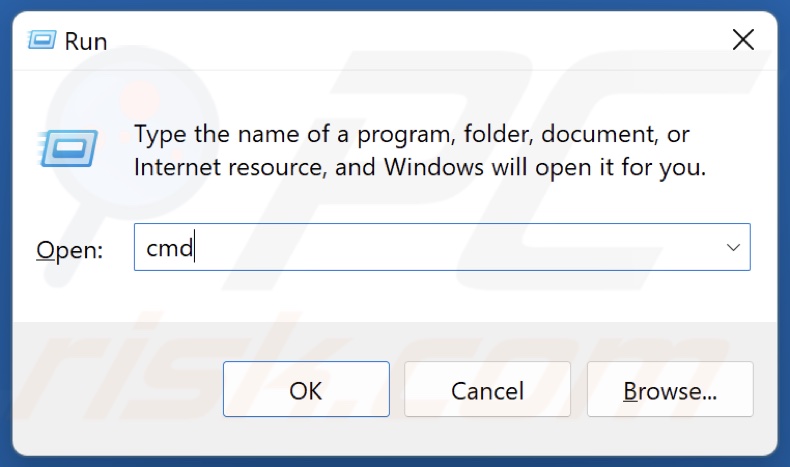
2. In the Run dialog box, type in CMD and hold down Ctrl+Shift+Enter keys to open the elevated Command Prompt.
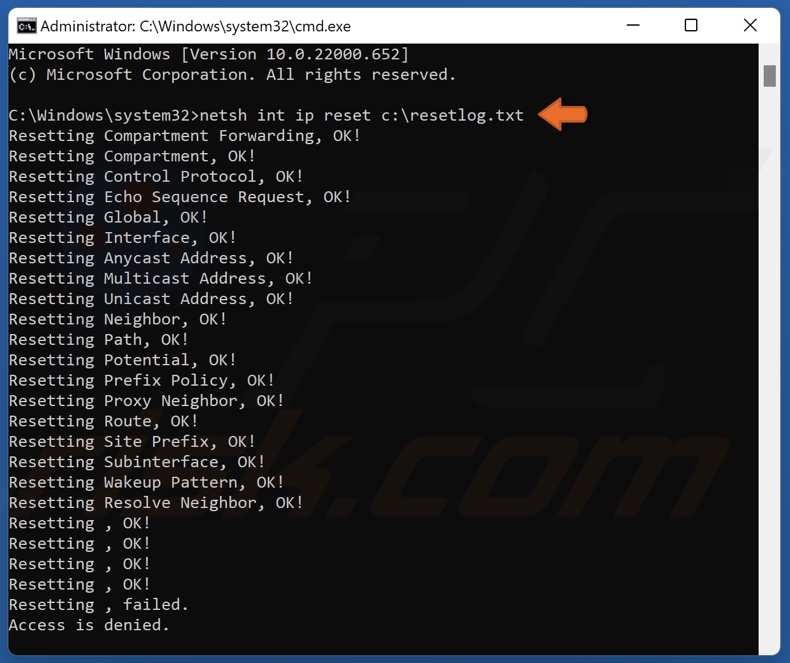
3. In the Command Prompt window, type in netsh int ip reset c:\resetlog.txt and press the Enter key.
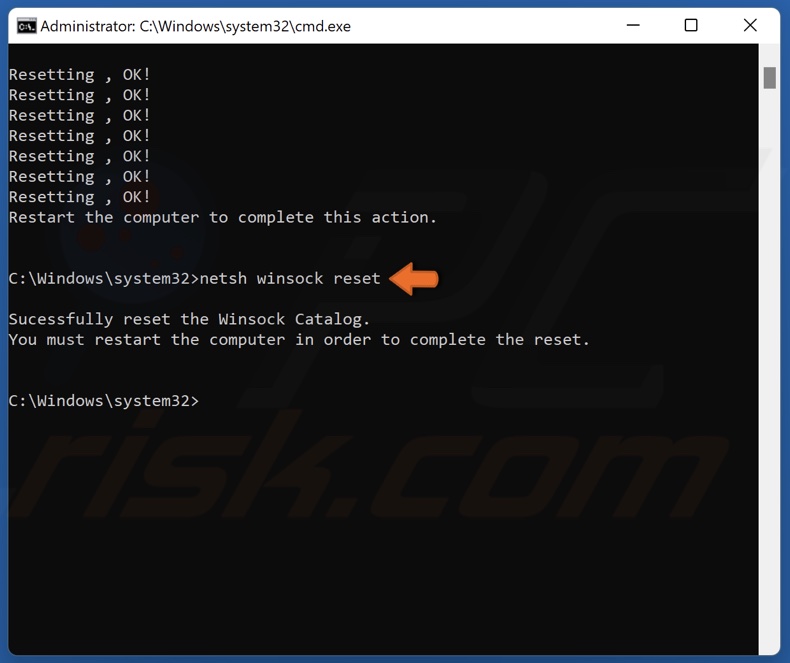
4. Then, type in netsh winsock reset and press Enter.
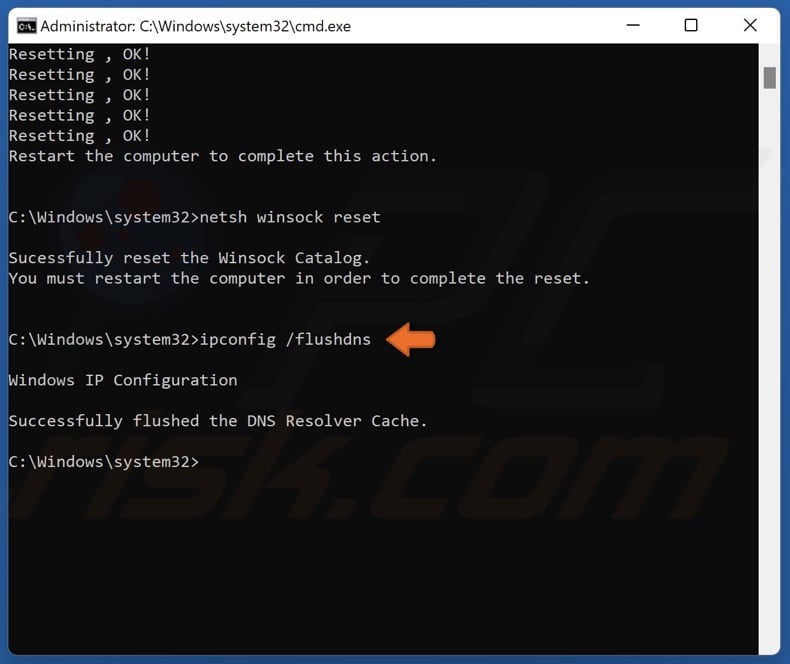
5. Finally, type in ipconfig /flushdns and press Enter.
6. Restart your PC.
Method 3. Disable Proxy Server
1. Hold down Windows+R keys to open Run.
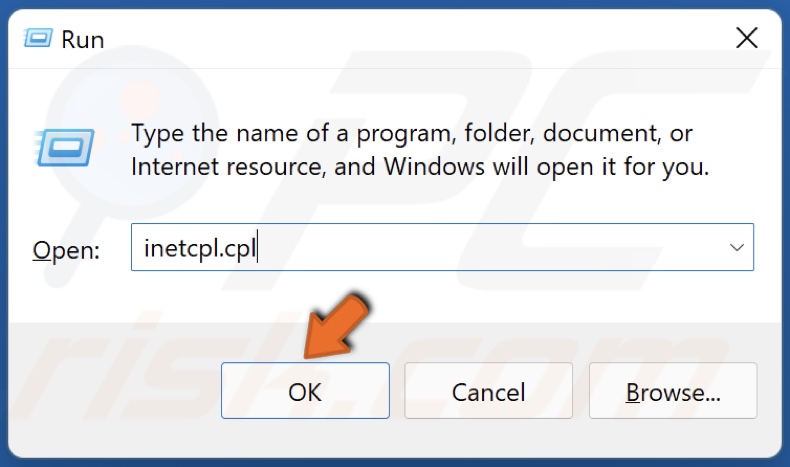
2. In the Run dialog box, type in inetcpl.cpl and click OK.
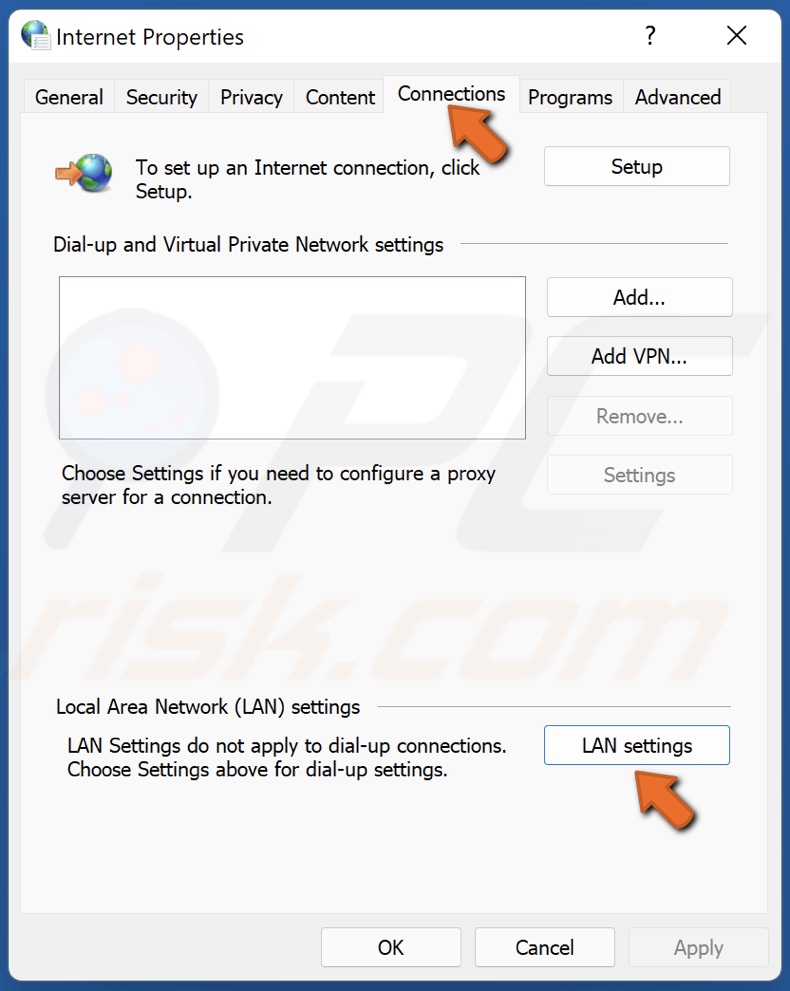
3. In the Internet Properties window, select the Connections tab.
4. Click LAN settings.
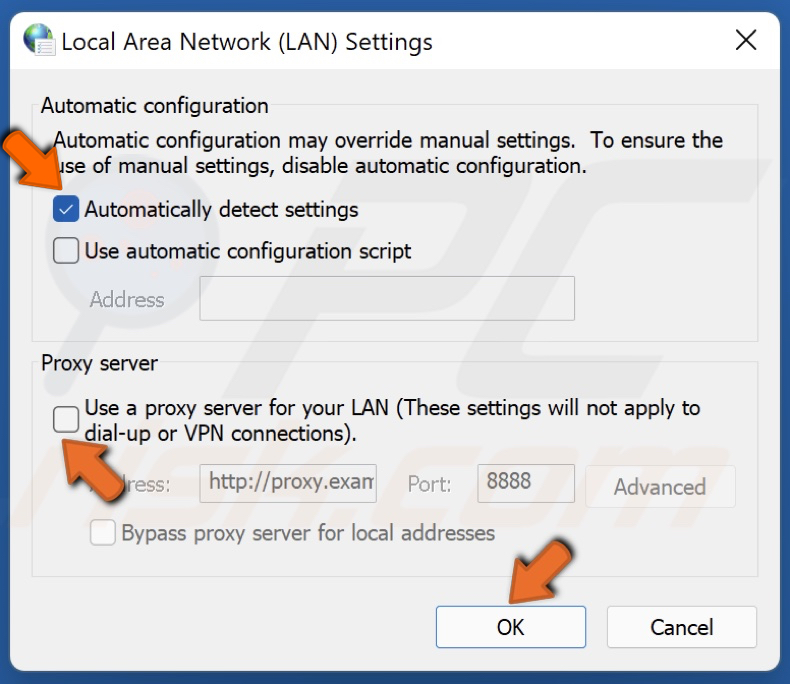
5. Unmark the checkbox next to Use a proxy server for your LAN option.
6. Mark the Automatically detect settings option.
7. Click OK.
Method 4. Delete the Battle.net Tools and Cache Folders
1. Hold down Ctrl+Shift+Esc keys to open Task Manager.

2. In the Processes tab, right-click each Battle.net and Battle.net Update Agent process and click End task.

Make sure that no Battle.net processes are running.
3. Hold down Windows+R keys to open Run.
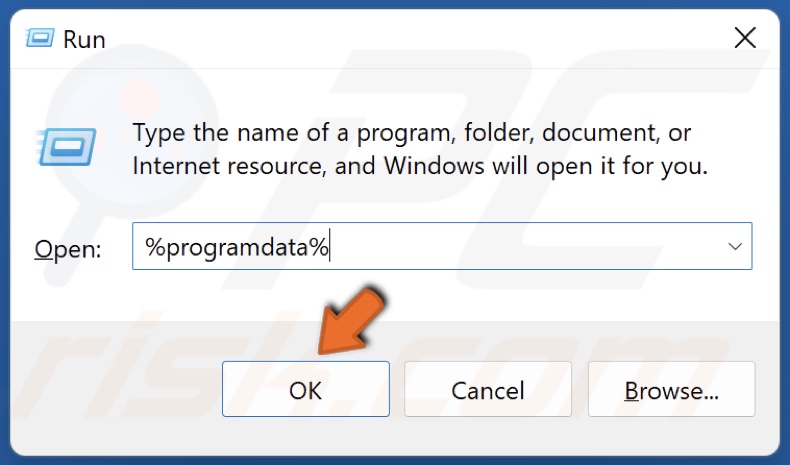
4. In the Run dialog box, type in %ProgramData% and click OK.
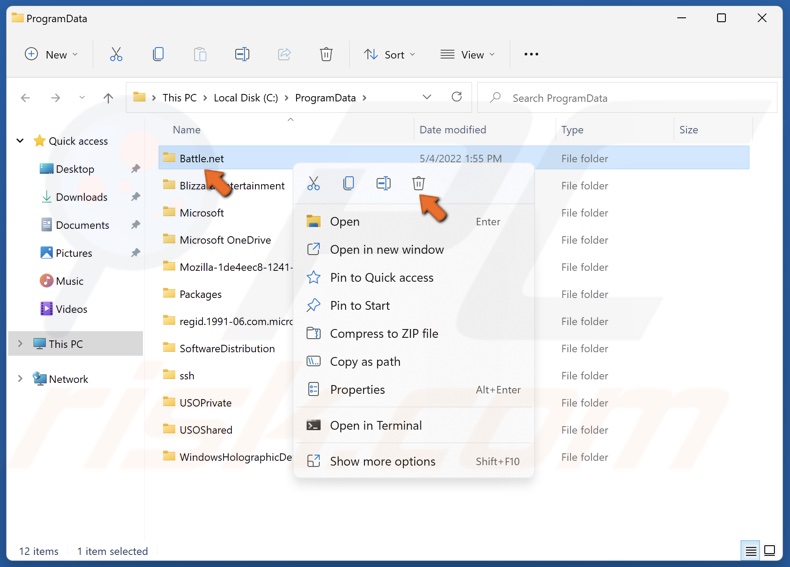
5. Find the Battle.net folder, right-click it and click Delete. Try running Battle.net. Note: Deleting the Battle.net folder may cause the application to forget game install locations.
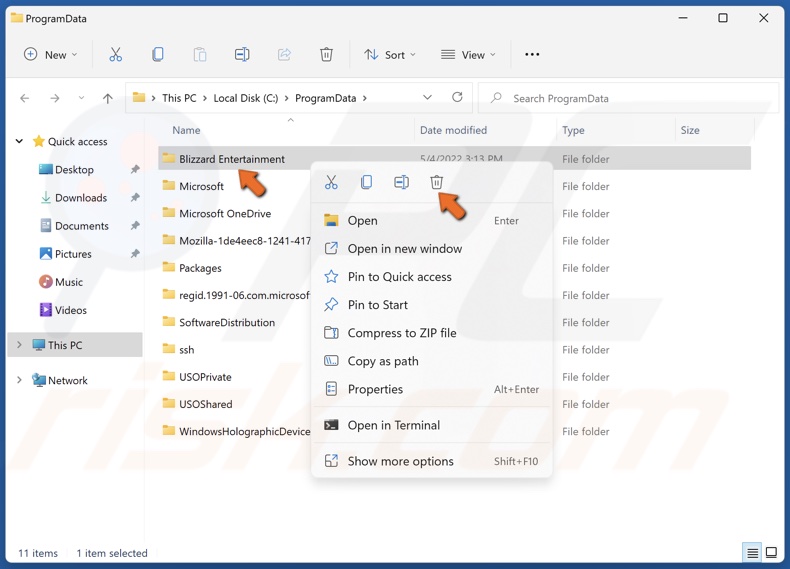
6. If the Battle.net Launcher still won’t start, right-click the Blizzard Entertainment folder (cache folder) and click Delete.
7. Run Battle.net.
Note: Deleting the Battle.net folder may cause the application to forget game install locations. If your games can’t be found, you will see Install on the game tab instead of Play. To find your installation, click Locate this game or run the game launcher.
Method 5. Enable the Secondary Logon Service
1. Hold down Windows+R keys to open Run.
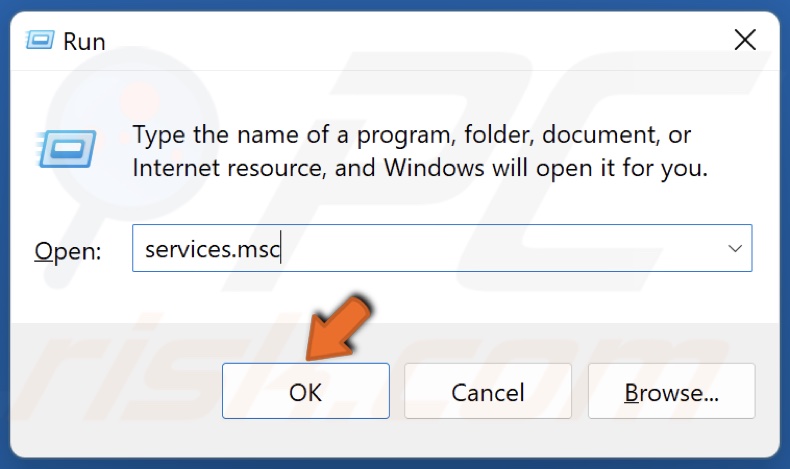
2. In the Run dialog box, type in services.msc and click OK.
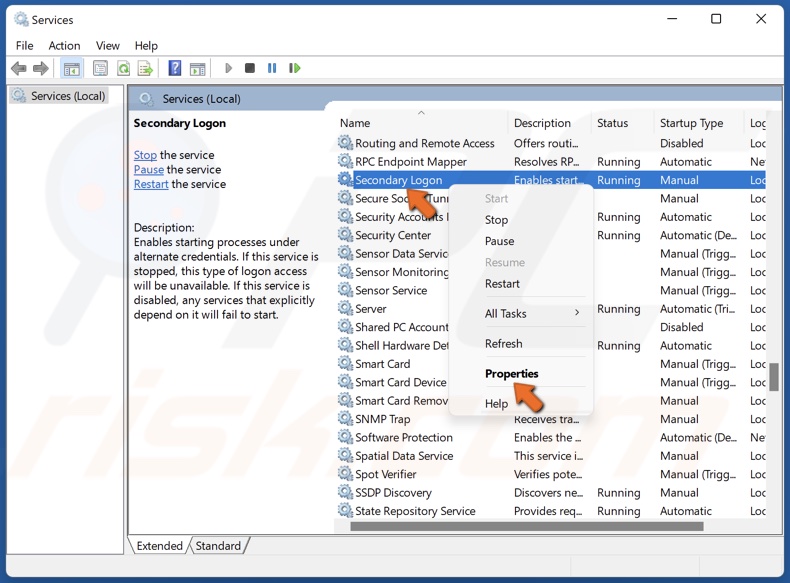
3. In the Services window, locate the Secondary Logon service.
4. Right-click Secondary Logon and click Properties.
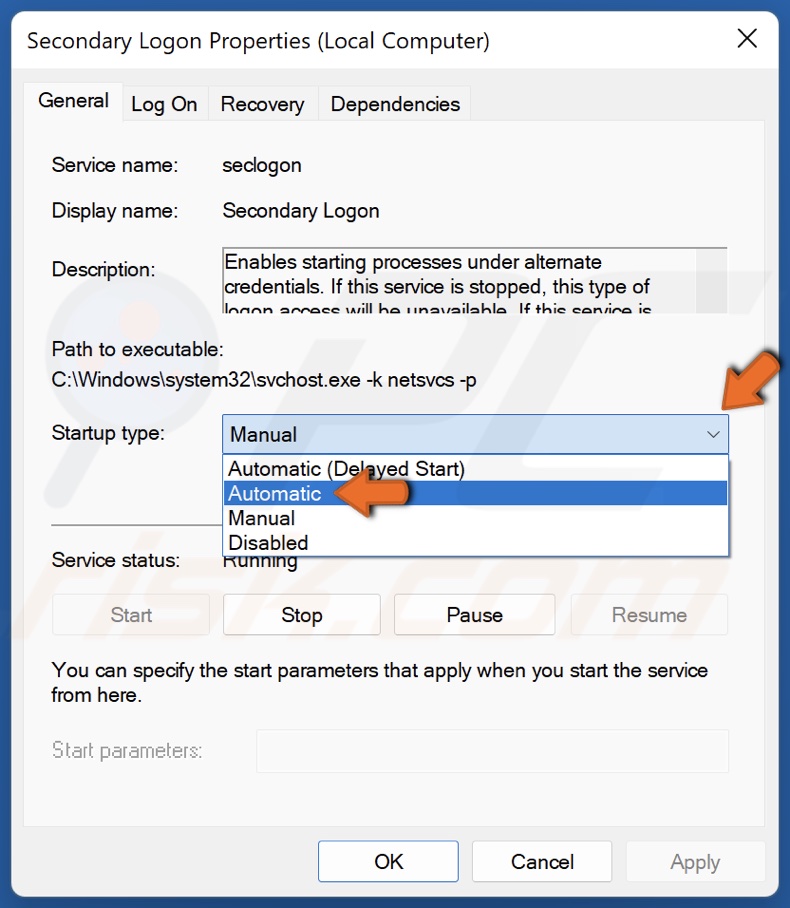
5. Open the Startup type drop-down menu and select Automatic.
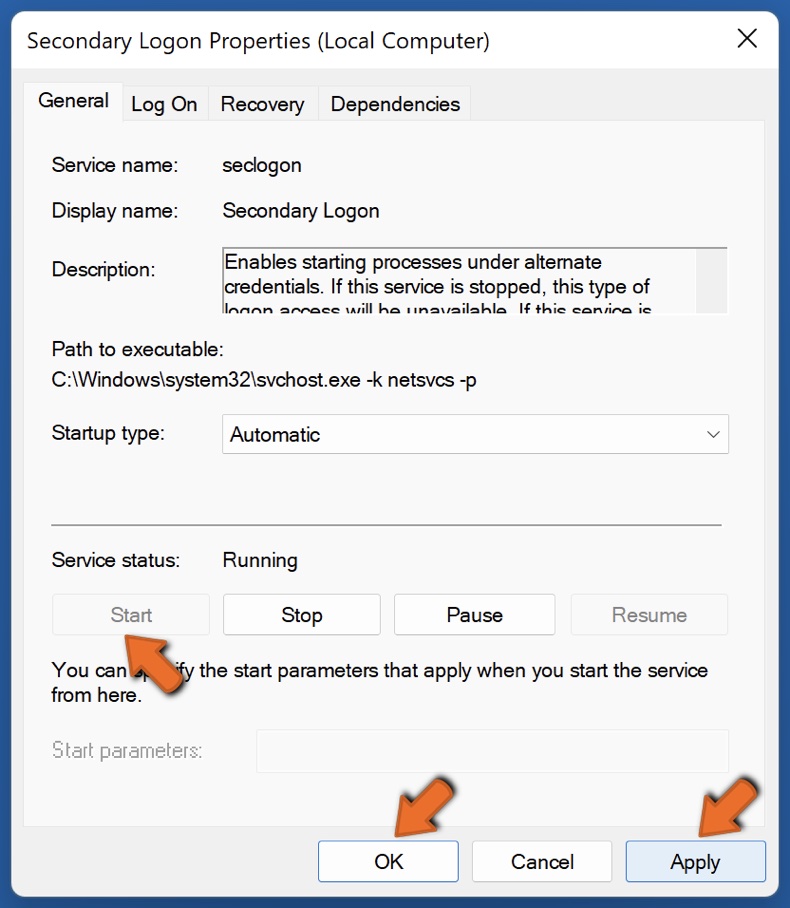
6. Click Apply.
7. If the service is not running, click Start and click OK.
8. Restart your PC.
Share:

Rimvydas Iliavicius
Researcher, author
Rimvydas is a researcher with over four years of experience in the cybersecurity industry. He attended Kaunas University of Technology and graduated with a Master's degree in Translation and Localization of Technical texts. His interests in computers and technology led him to become a versatile author in the IT industry. At PCrisk, he's responsible for writing in-depth how-to articles for Microsoft Windows.

▼ Show Discussion