Fix Laptop Won't Connect to WiFi but Other Devices Will

Get Free Scanner and check your computer for errors
Fix It NowTo fix found issues, you have to purchase the full version of Combo Cleaner. Free trial available. Combo Cleaner is owned and operated by Rcs Lt, the parent company of PCRisk.com read more.
How to Fix Laptop Not Connecting to WiFi When Other Devices Can
If your laptop won’t connect to WiFi but your phone or another device can, you’re dealing with a WiFi adapter settings or driver issue. This article will discuss this issue in more detail and show several ways to fix it.
Why Won’t My Laptop Connect to WiFi?
While a WiFi connection isn’t as stable as an Ethernet connection, it’s way more convenient, so it's a huge inconvenience when your laptop can’t detect your WiFi network when your other devices can. When you start experiencing this issue, it is usually the result of one of the reasons listed below.
- A faulty or obsolete WiFi adapter driver. A bad network driver is one of the most common reasons your laptop won’t detect your WiFi network while other devices will. Reinstalling or updating the driver will most likely resolve the issue.
- Misconfigured network settings. Misconfigured network settings, like incorrect bandwidth or DNS settings, are another common reason your laptop won’t connect to your WiFi network.
Before trying any of our fixes, here are some tips:
- Ensure that your laptop’s WiFi switch is turned on.
- Ensure that Airplane mode is turned off.
- Temporarily disable your antivirus software.
- Restart your Internet router. If your router doesn’t have a Restart button, unplug it from the power outlet, wait a few minutes, and plug it back in.
Video Tutorial on How to Fix Laptop Not Connecting to WiFi When Other Devices Can
Table of Contents:
- Introduction
- Method 1. Forget Your WiFi Network and Reconnect
- Method 2. Run the Network and Internet Troubleshooter
- Method 3. Modify Internet Protocol Version 4 (IPv4) Properties
- Method 4. Restart the Network Setup Service
- Method 5. Reset TCP/IP Settings and Flush DNS Cache
- Method 6. Change Network Adapter Bandwidth
- Method 7. Reinstall the Network Adapter Driver
- Video Tutorial on How to Fix Laptop Not Connecting to WiFi When Other Devices Can
Download Computer Malware Repair Tool
It is recommended to run a free scan with Combo Cleaner - a tool to detect viruses and malware on your device. You will need to purchase the full version to remove infections. Free trial available. Combo Cleaner is owned and operated by Rcs Lt, the parent company of PCRisk.com read more.
Method 1. Forget Your WiFi Network and Reconnect
If your WiFi network appears on the available WiFi networks list, but your computer can’t connect to it, try forgetting the network and reconnecting. Note that you will have to re-enter your WiFi password.
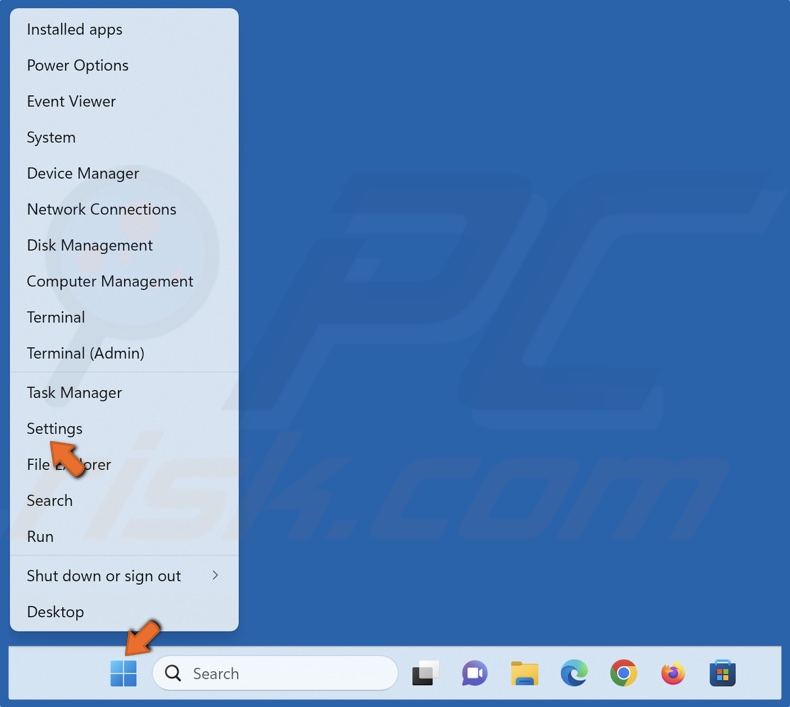
1. Right-click the Start menu button and select Settings.
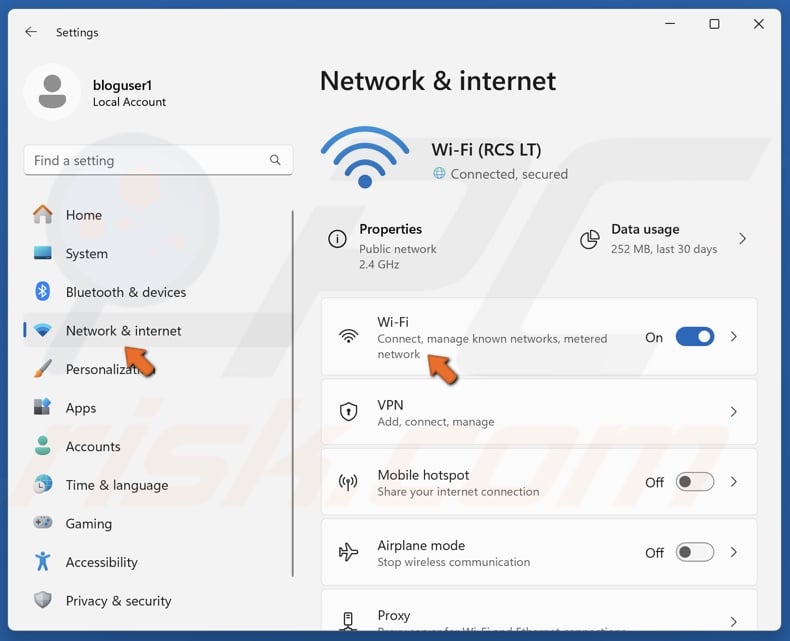
2. Select the Network & internet panel and click Wi-Fi.
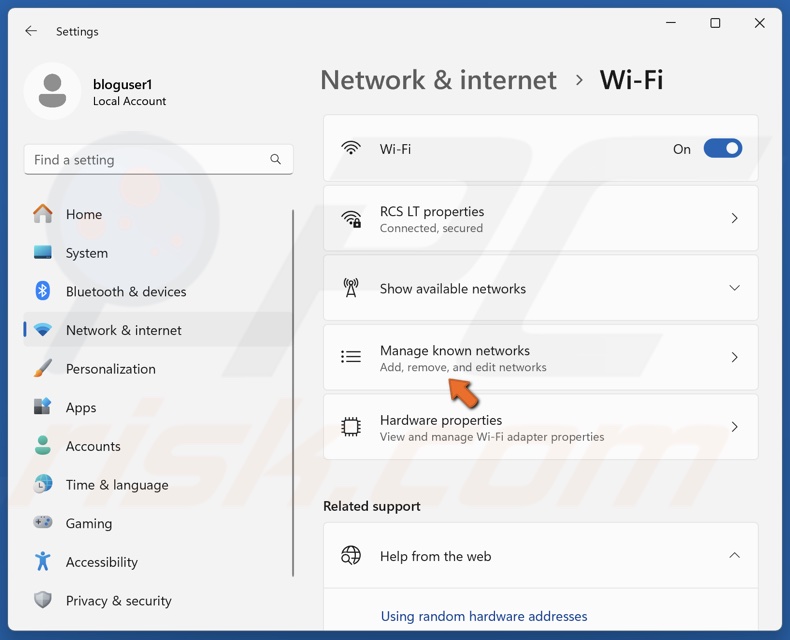
3. Click Manage known networks.
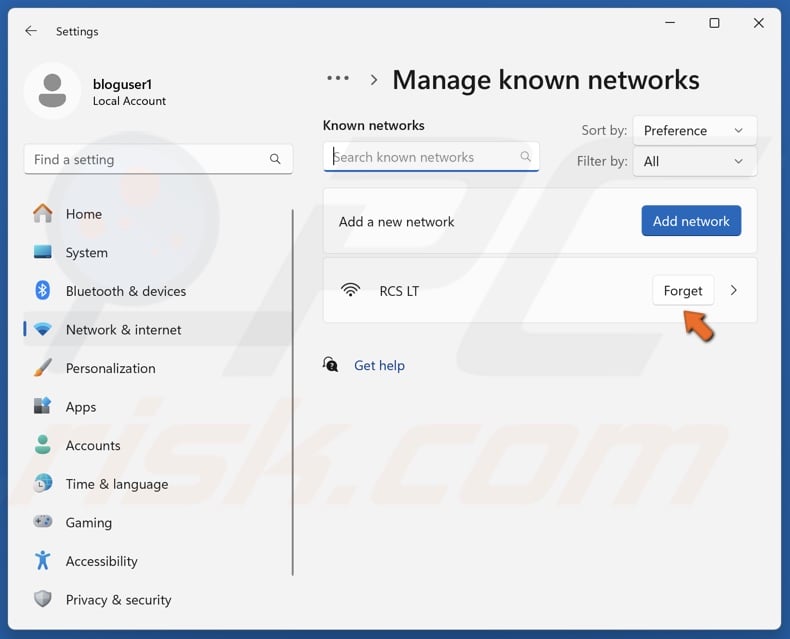
4. Click the Forget button next to your WiFi network.
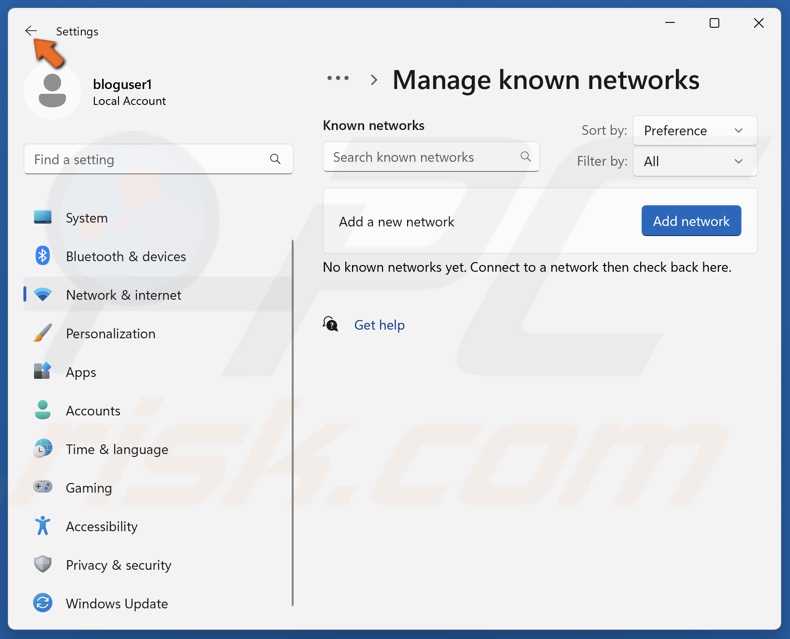
5. Return to the Wi-Fi settings panel.
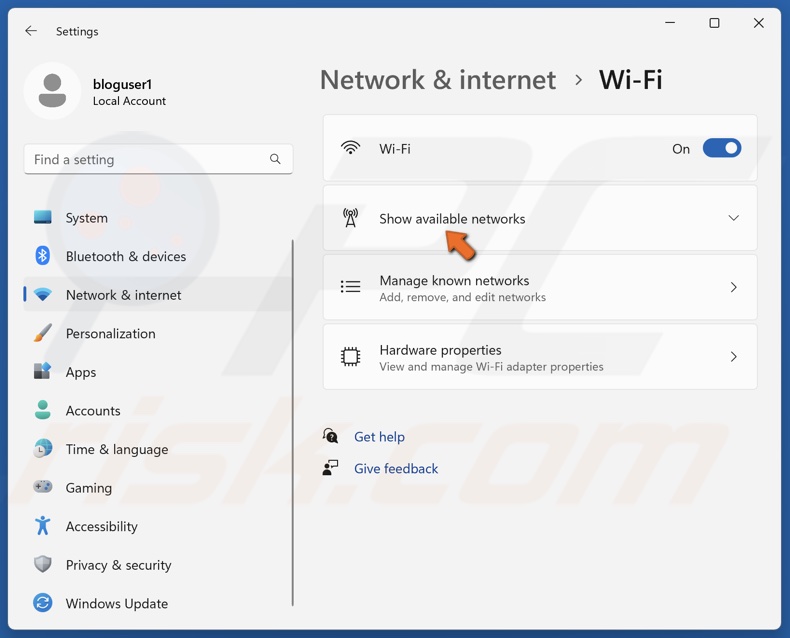
6. Click Show available networks.
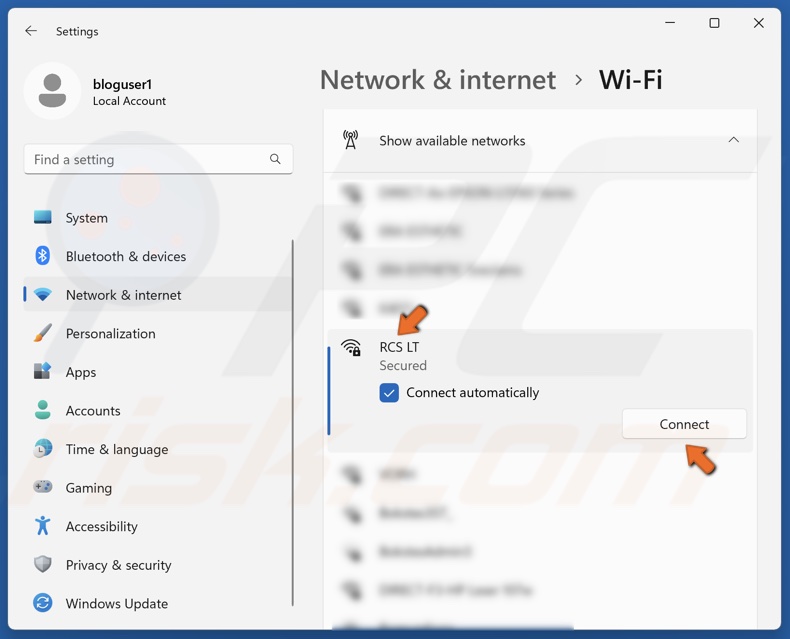
6. Click on your WiFi network and click Connect.

7. Enter the network security key and click Next.
Method 2. Run the Network and Internet Troubleshooter
While the Network and Internet troubleshooter is not known for being particularly useful, it can sometimes identify and fix network configuration-related issues.
1. Right-click the Start menu button and select Settings.

2. Select the System panel, scroll down and click Troubleshoot.
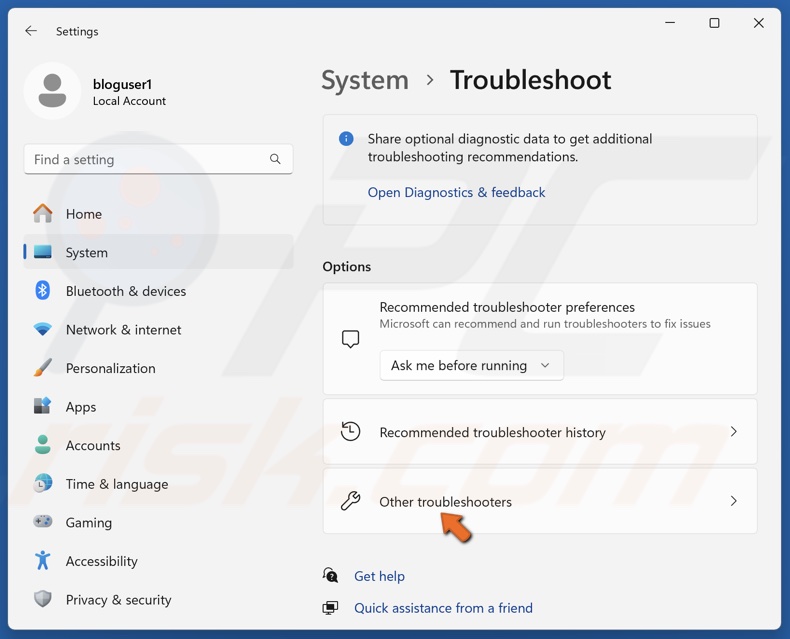
3. Then, select Other troubleshooters.
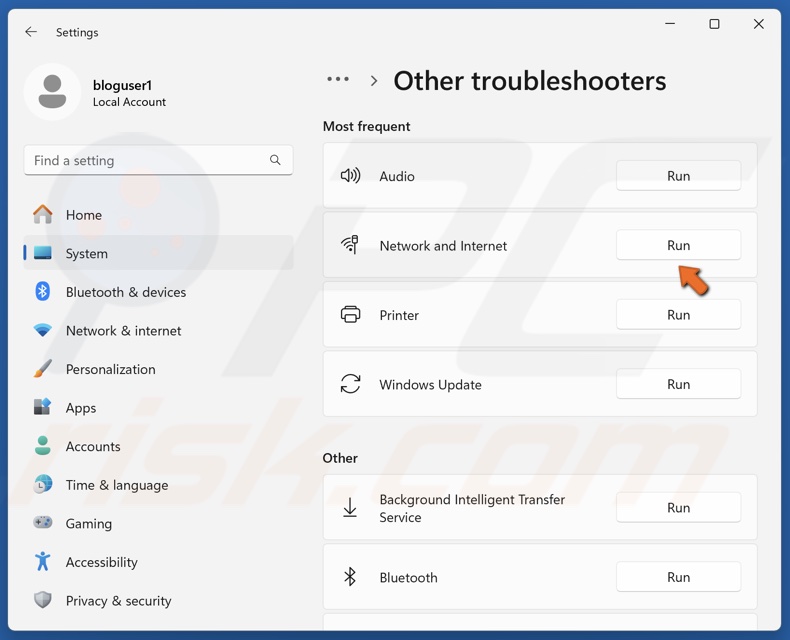
4. Run the Network and Internet troubleshooter.
Method 3. Modify Internet Protocol Version 4 (IPv4) Properties
If your laptop won’t connect to WiFi but other devices will, it might be because you modified your network settings to use a static IP address or a third-party DNS server. Resetting your IPv4 settings to default can resolve the issue.
1. Hold down Windows+R keys to open Run.
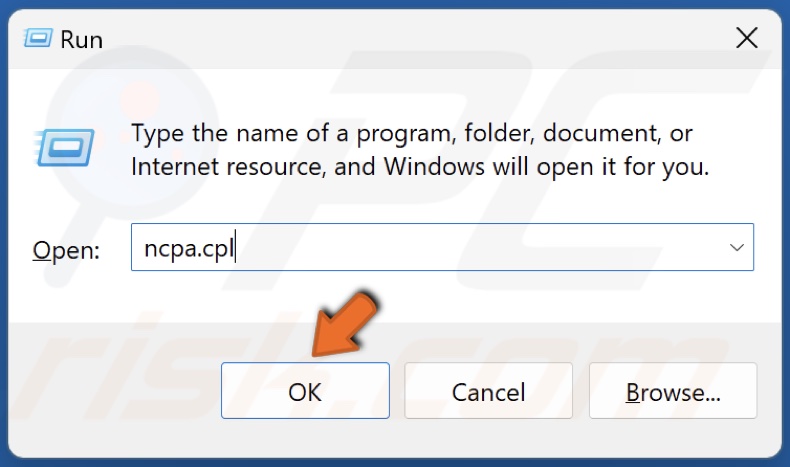
2. Type ncpa.cpl in the Run dialog and click OK.
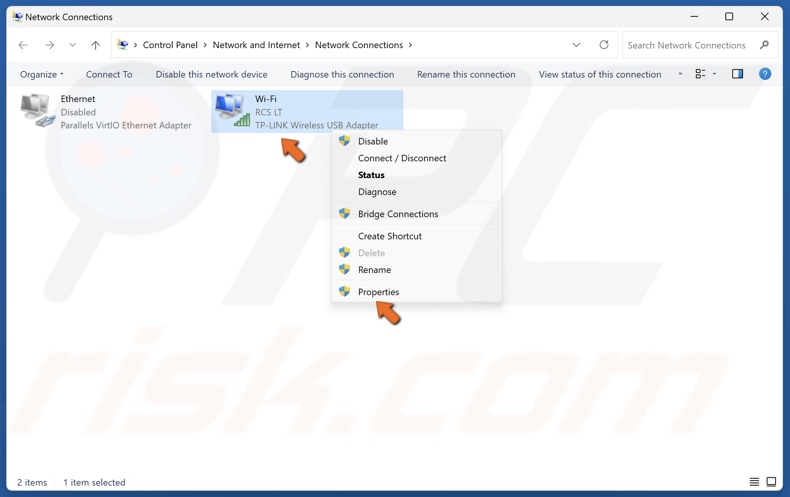
3. In the Network Connections window, right-click your WiFi network adapter and click Properties.
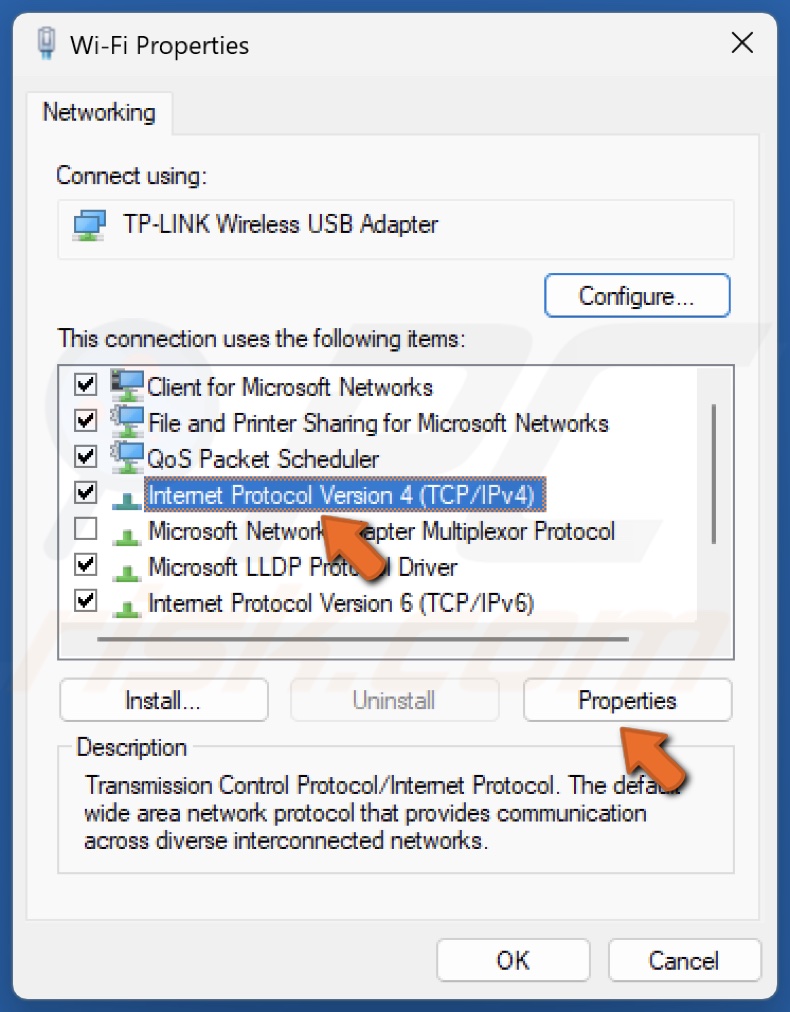
4. Select Internet Protocol version 4 (TCP/IPv4) and click Properties.
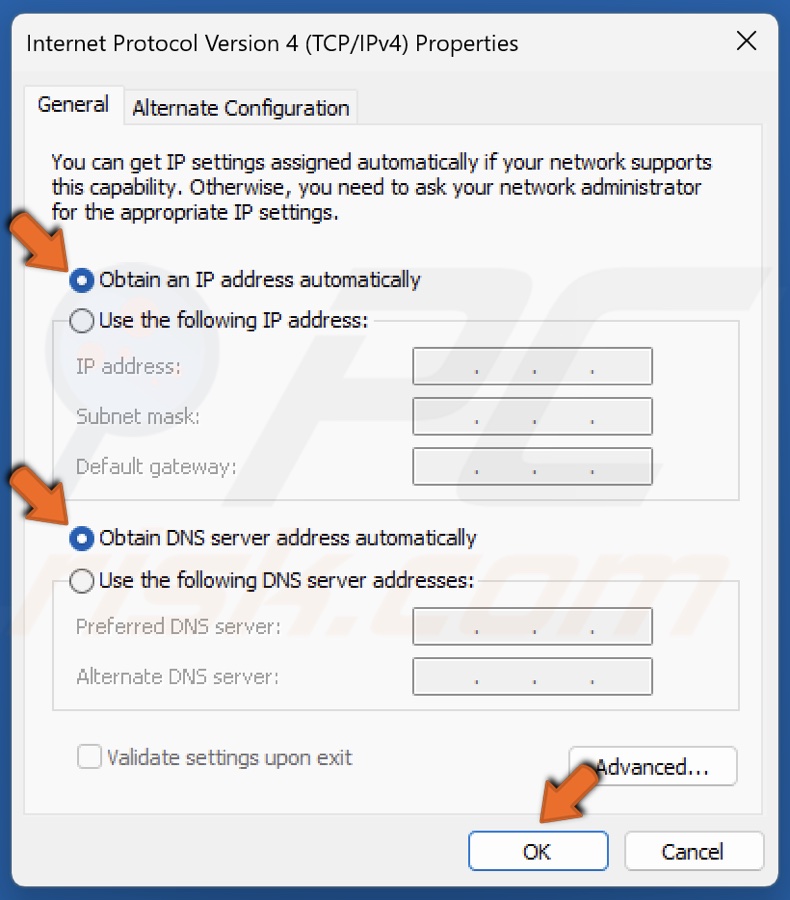
5. If the settings were previously modified, tick the Obtain an IP address automatically option.
6. Then, tick Obtain DNS server address automatically.
7. Click OK to save the settings and restart your PC.
Method 4. Restart the Network Setup Service
Your laptop may not detect your WiFi network if the Network Setup Service is disabled. The instructions below will show you how to enable this service and configure it to restart if it fails.
1. Hold down Windows+R keys to open Run.
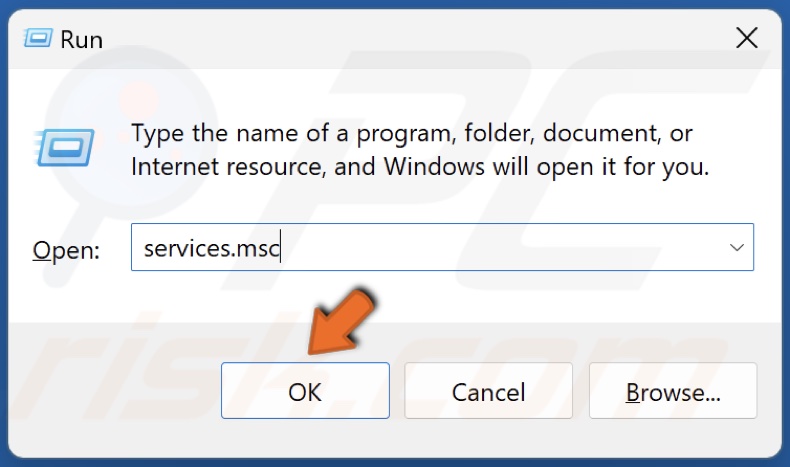
2. Type services.msc in the Run dialog and click OK.
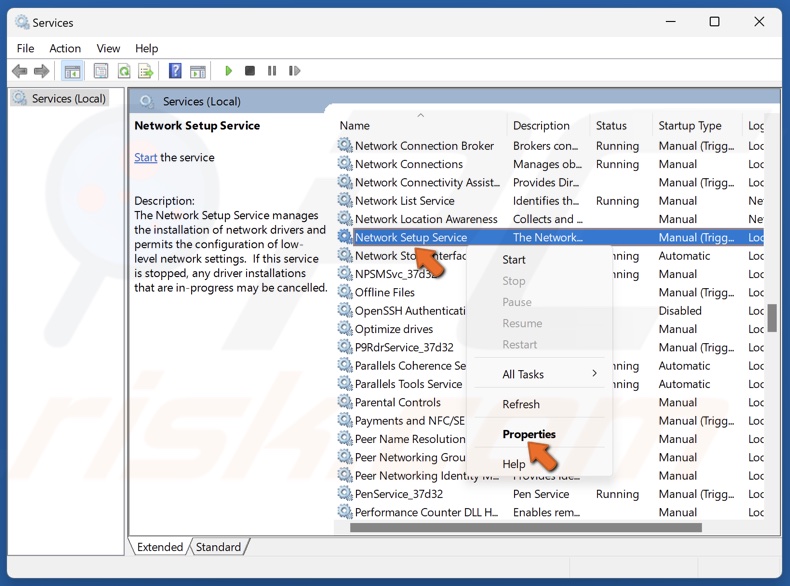
3. In the Services window, scroll down and find Network Setup Service.
4. Right-click Network Setup Service and click Properties.
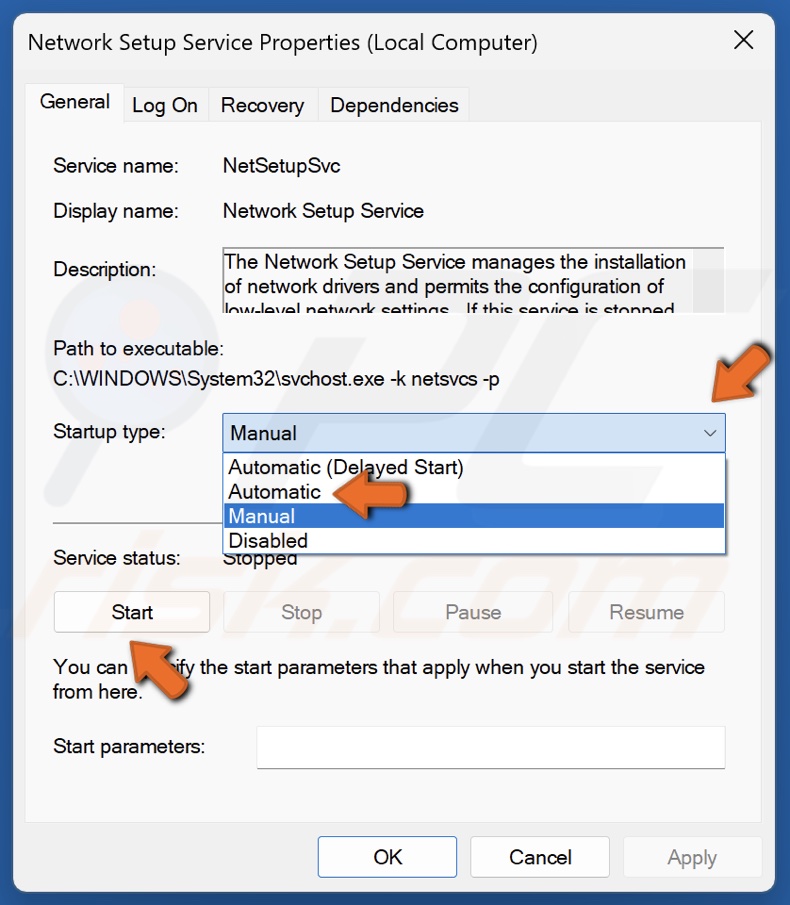
5. Open the Startup type drop-down menu and select Automatic.
6. Click Start under the Service status section.
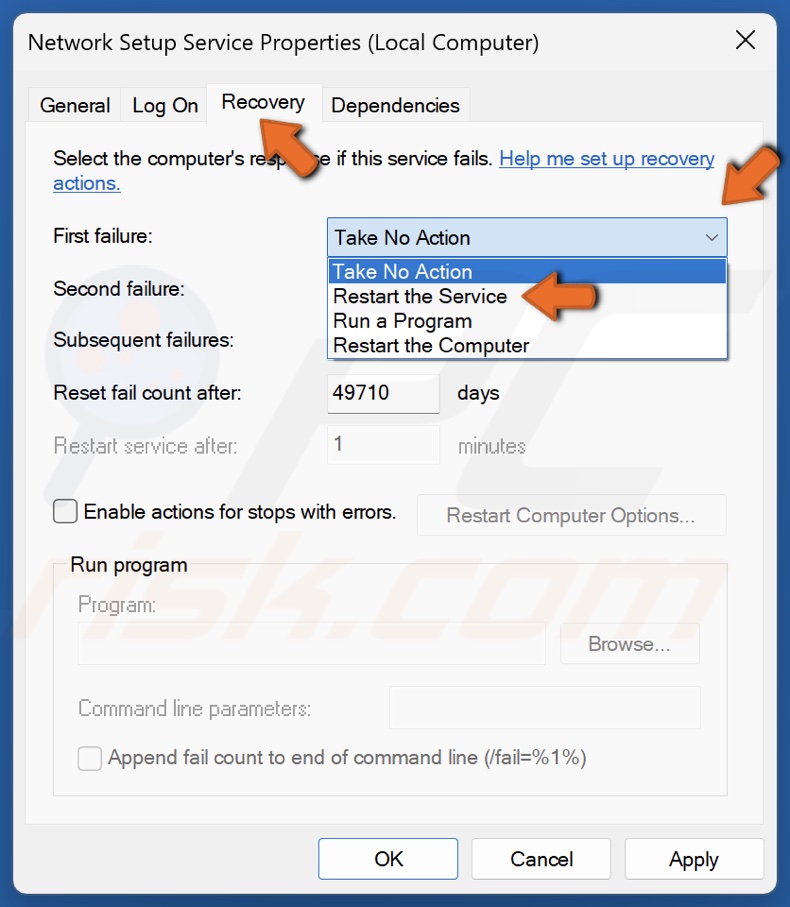
7. Then, select the Recovery tab.
8. Open the First failure drop-down menu and select Restart the Service.
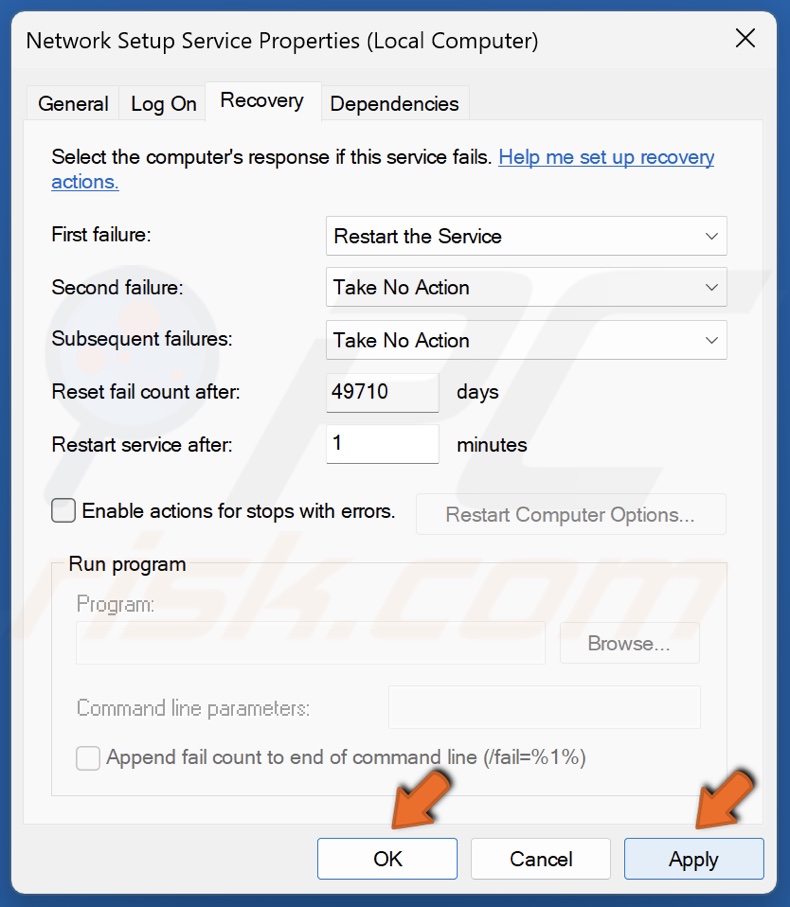
9. Click Apply and click OK.
Method 5. Reset TCP/IP Settings and Flush DNS Cache
If your laptop won’t connect to WiFi, your network settings may have been misconfigured. Running the commands below in the Command Prompt will reset your network settings and should fix your WiFi issue.
1. Hold down Windows+R keys to open Run.
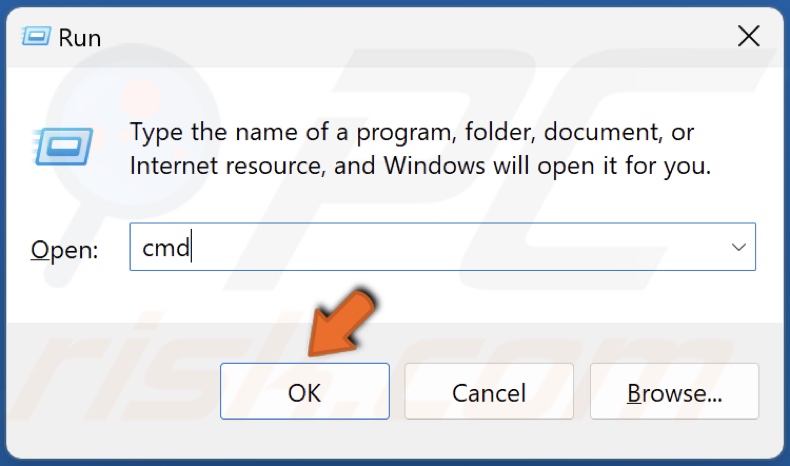
2. Type CMD in the Run dialog and hold down Ctrl+Shift+Enter keys to open Command Prompt as an administrator.
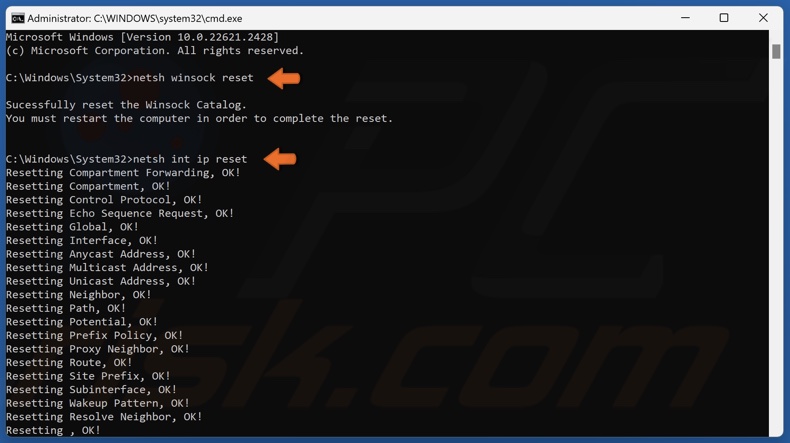
3. In the Command Prompt window, type in the commands listed below and press the Enter key after typing each one.
- netsh winsock reset
- netsh int ip reset

- ipconfig /release
- ipconfig /renew
- ipconfig /flushdns
4. Close the Command Prompt and restart your PC.
Method 6. Change Network Adapter Bandwidth
If your laptop won’t connect to your WiFi but other devices will, it may be because of your bandwidth setting. If your network adapter’s bandwidth value is set to “Auto,” it may be too low for your laptop to detect and connect. Setting the bandwidth to 20 MHz should fix the problem.
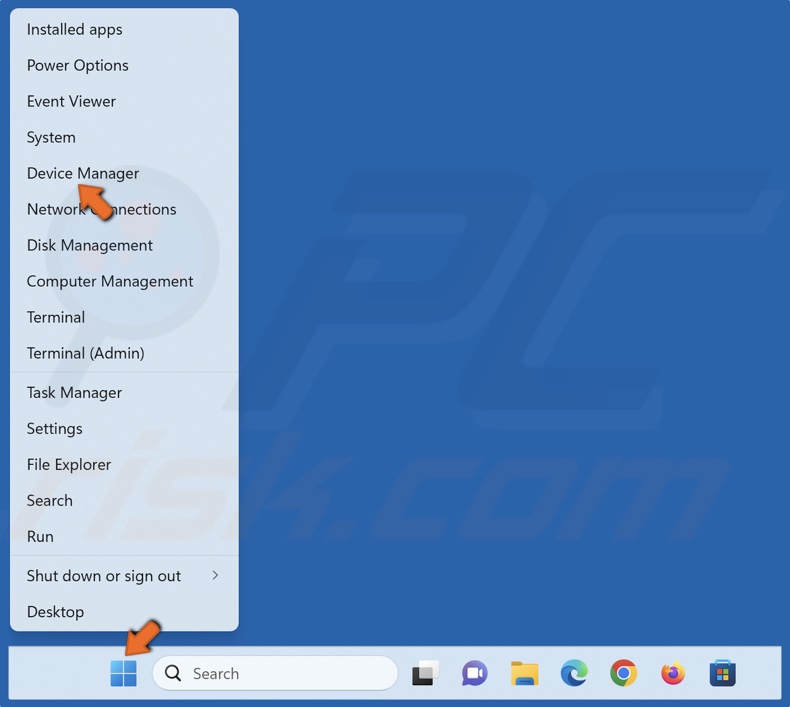
1. Right-click the Start menu button and select Device Manager.

2. In the Device Manager window, expand the network adapters list and find your WiFi adapter.
3. Right-click your WiFi network adapter and click Properties.
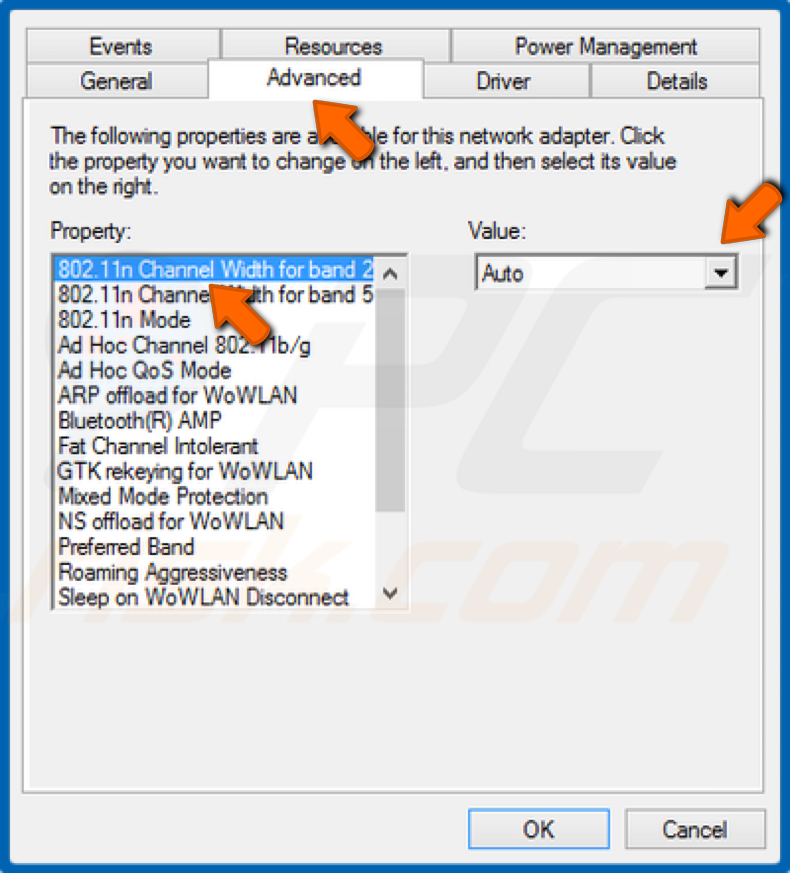
4. In the Properties window, select the Advanced tab.
5. In the Property section, select the 802.11n Channel Width for 2.4GHz option.
6. Open the Value context menu and select 20Mhz only.
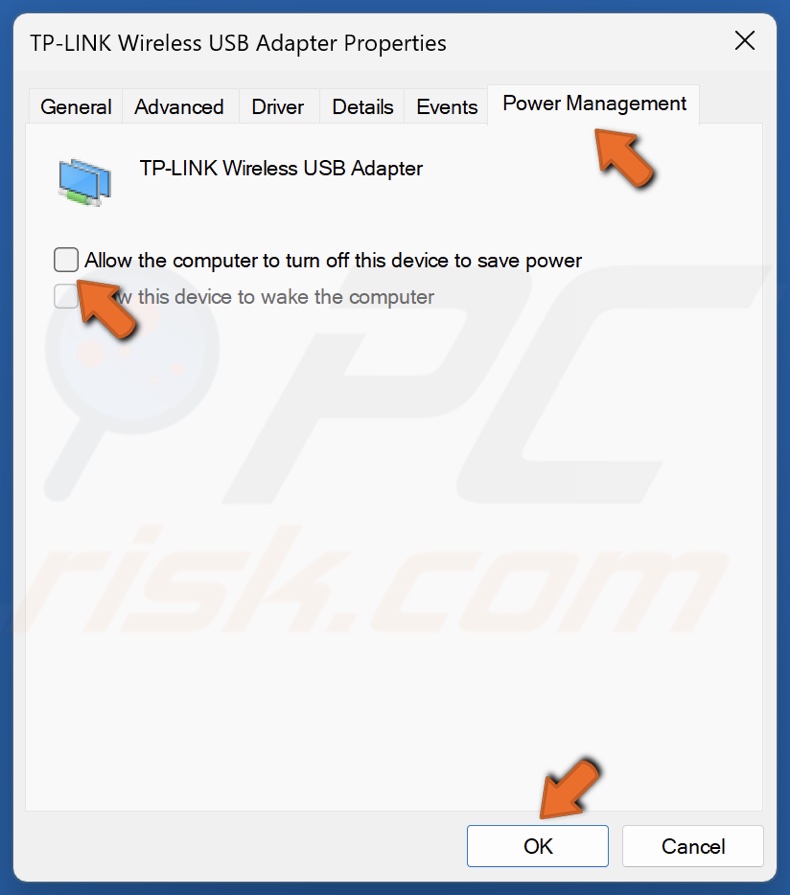
7. You may also want to modify your adapter’s power settings. Select the Power Management tab.
8. Uncheck the Allow computer to Turn off device to save power option.
9. Click OK to save the settings.
Method 7. Reinstall the Network Adapter Driver
If your laptop still cannot connect to WiFi but other devices can, you may need to reinstall your network adapter driver as it may be corrupt. Reinstalling the driver will fix any bugs or glitches in the software and reset the connection.
Note that your PC will install the default driver already present on your PC, so you don’t need an Internet connection to apply this method.
1. Right-click the Start menu button and select Device Manager.
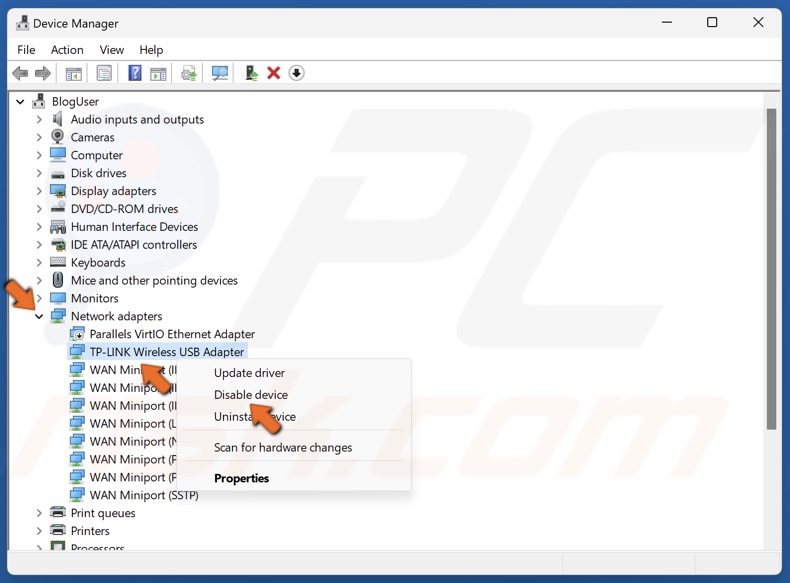
2. In the Device Manager window, expand the Network adapters list and find your WiFi adapter.
3. Try to disable and re-enable your WiFi adapter first. Right-click your WiFi adapter and click Disable device.
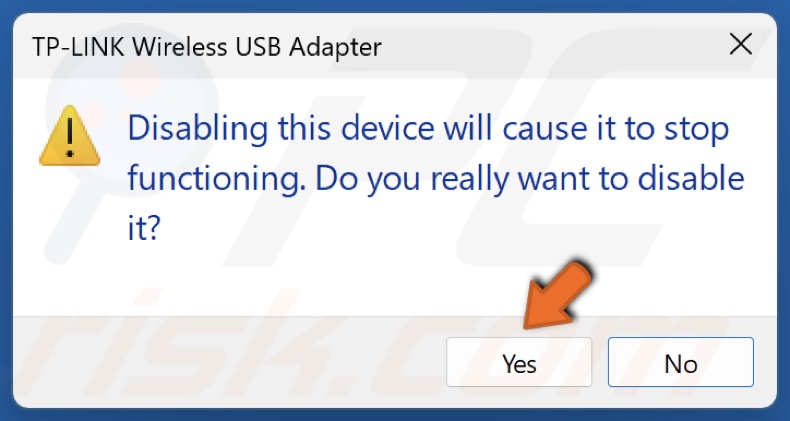
4. Click Yes when prompted.

5. Right-click the adapter again and click Enable device.
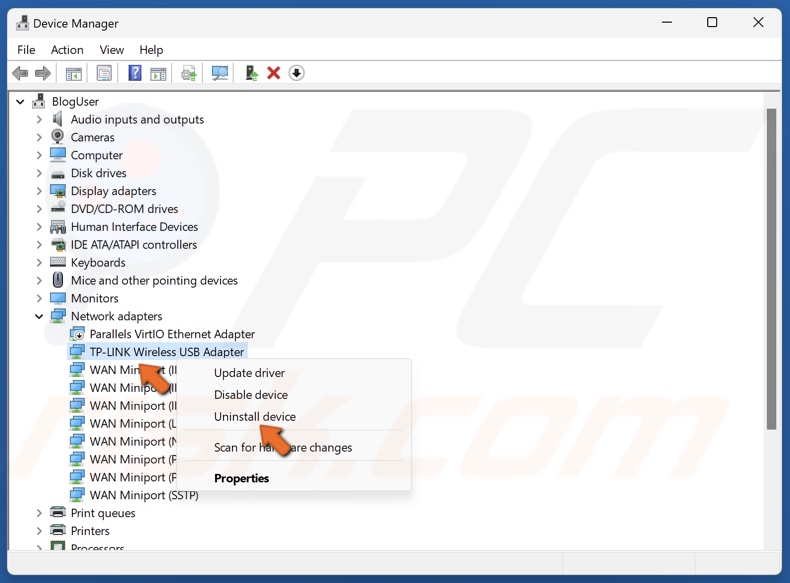
6. If disabling and re-enabling the adapter didn’t fix the issue, right-click your WiFi network adapter and click Uninstall device.
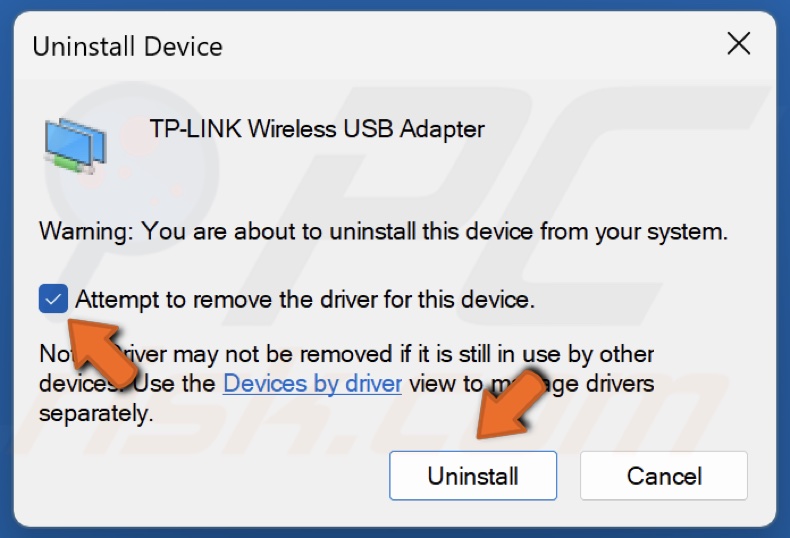
7. Mark the Attempt to remove the driver for this device checkbox and click Uninstall.
8. Close the Device Manager window and restart your PC. After the restart, your PC will automatically install the default driver for your network adapter automatically.
Did this article help you fix WiFi working on other devices but not your laptop? Let us know in the comments below. If you know a way to fix this issue not included in this article, please share it with others in the comments as well.
Share:

Rimvydas Iliavicius
Researcher, author
Rimvydas is a researcher with over four years of experience in the cybersecurity industry. He attended Kaunas University of Technology and graduated with a Master's degree in Translation and Localization of Technical texts. His interests in computers and technology led him to become a versatile author in the IT industry. At PCrisk, he's responsible for writing in-depth how-to articles for Microsoft Windows.
▼ Show Discussion