How to Fix Adobe Premiere Pro Playback Lag

Get Free Scanner and check your computer for errors
Fix It NowTo fix found issues, you have to purchase the full version of Combo Cleaner. Free trial available. Combo Cleaner is owned and operated by Rcs Lt, the parent company of PCRisk.com read more.
How to Fix Adobe Premiere Pro Lagging on Windows 11
Adobe Premiere Pro is the most popular multimedia editor currently on the market. Many people, particularly content creators, depend on it to produce their videos. However, Premiere Pro playback lag is a common, long-standing issue that hurts workflow. Fortunately, you can address this issue by modifying your Premiere Pro settings.

Why Is Premiere Pro Lagging?
Premiere Pro playback lag is a performance issue indicating that your computer may not be powerful enough to handle high-resolution video editing. Playback lag can also occur due to misconfigured video settings, an overloaded media cache, or corrupted media files.
Lag can also mean that Premiere Pro is dropping frames during playback. You can determine whether Premiere Pro is dropping frames during playback because the playback is not smooth or choppy and how the playhead moves along the timeline. If the playhead skips or jumps instead of moving smoothly along the timeline, it’s a sign that some frames have been dropped.
Premiere Pro has a Dropped Frame Indicator with a green icon that turns yellow when dropped frames are present. You can hover over the indicator to see how many frames were dropped.
Below are tried and tested methods to reduce playback lag in Adobe Premiere Pro 2023. Try several or all methods to get the best result.
Before trying our fixes, here are some tips:
- Don’t update Premiere Pro while you’re in the middle of editing a video.
- Close unnecessary background applications. Some of your background applications may be resource-intensive and hog resources that Premiere Pro may otherwise utilize.
Video Tutorial on How to Fix Adobe Premiere Pro Playback Lag
Table of Contents:
- Introduction
- Method 1. Enable GPU Acceleration
- Method 2. Delete Unused Media Cache Files
- Method 3. Lower the Playback Resolution
- Method 4. Disable High-Quality Playback
- Method 5. Use Proxy Videos in Your Workflow
- Method 6. Increase Memory Allowance
- Method 7. Close the Lumetri Scopes Panel
- Video Tutorial on How to Fix Adobe Premiere Pro Playback Lag
Download Computer Malware Repair Tool
It is recommended to run a free scan with Combo Cleaner - a tool to detect viruses and malware on your device. You will need to purchase the full version to remove infections. Free trial available. Combo Cleaner is owned and operated by Rcs Lt, the parent company of PCRisk.com read more.
Method 1. Enable GPU Acceleration
When you experience playback lag, you should first enable GPU acceleration in Premiere Pro.
1. Open Adobe Premiere Pro.
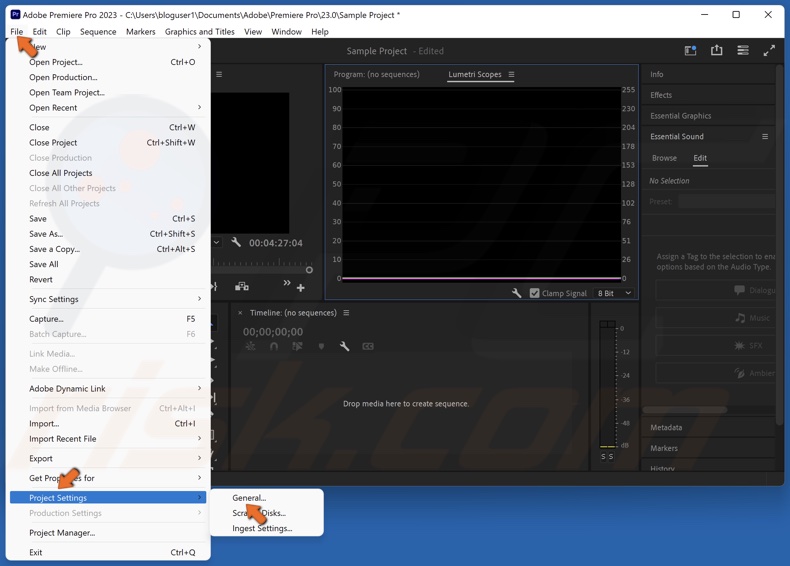
2. Click File in the toolbar, select Project Settings, and click General.
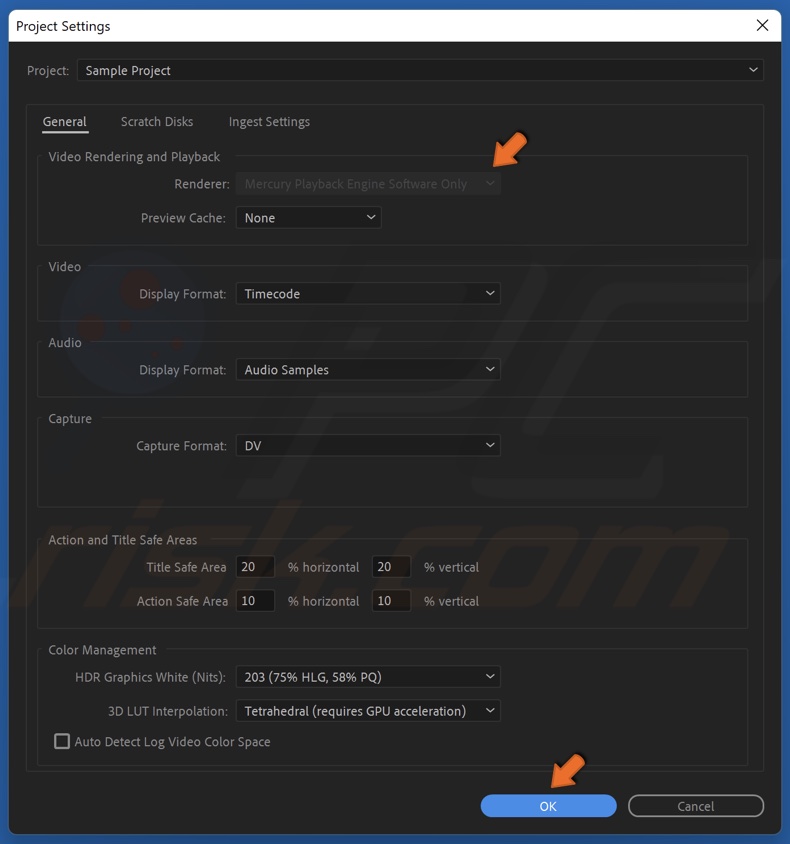
3. Open the Render drop-down menu and select Mercury Playback Engine GPU Acceleration. If GPU Acceleration is grayed out, you may need to update your graphics driver. If GPU Acceleration is still grayed out after the update, it may mean that Premiere Pro doesn’t support your graphics card.
4. Click OK.
Method 2. Delete Unused Media Cache Files
Sometimes, you may experience playback lag due to an overloaded Premiere Pro cache. Deleting the media cache will improve the performance of Premiere Pro.
1. Open Adobe Premiere Pro.
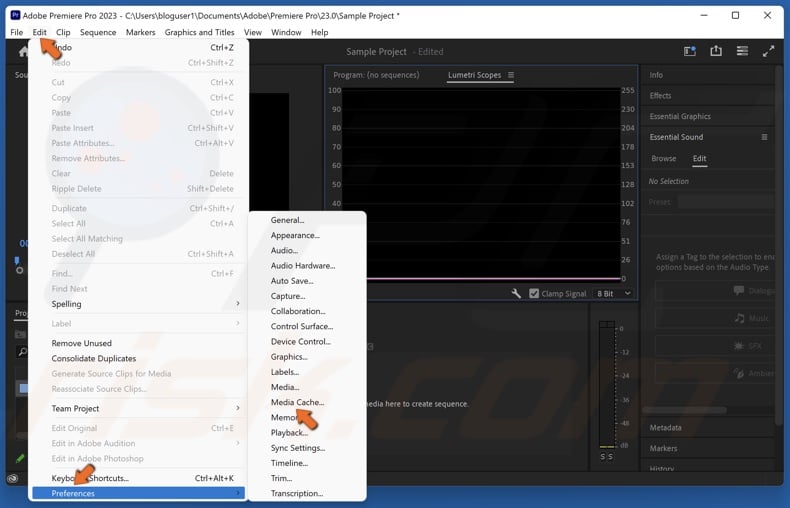
2. Click Edit in the toolbar, select Preferences, and click Media Cache.
3. Click Delete next to Remove Media Cache Files.
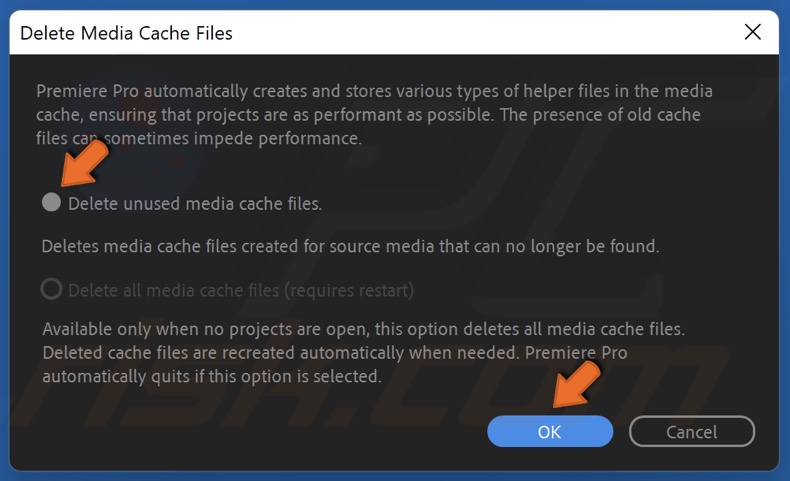
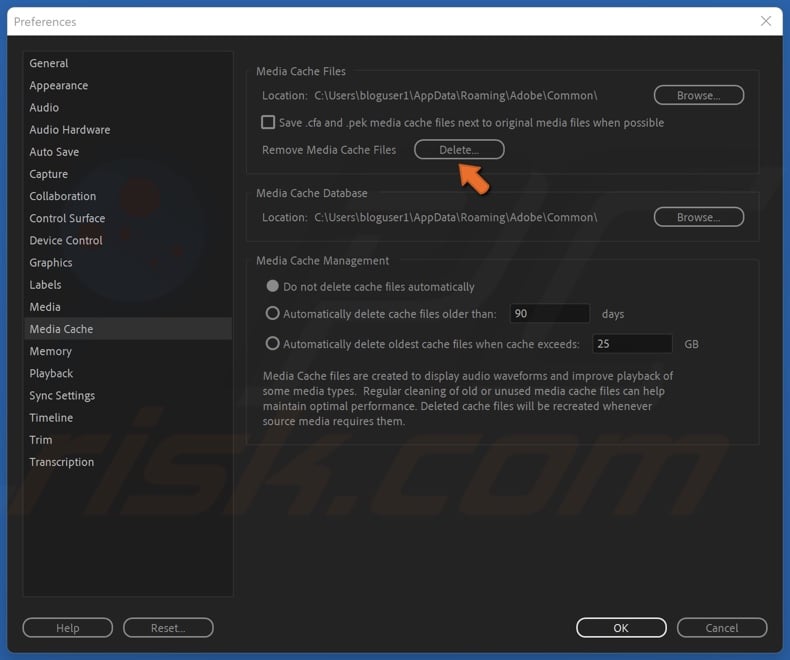
4. Tick Delete unused media cache files and click OK.
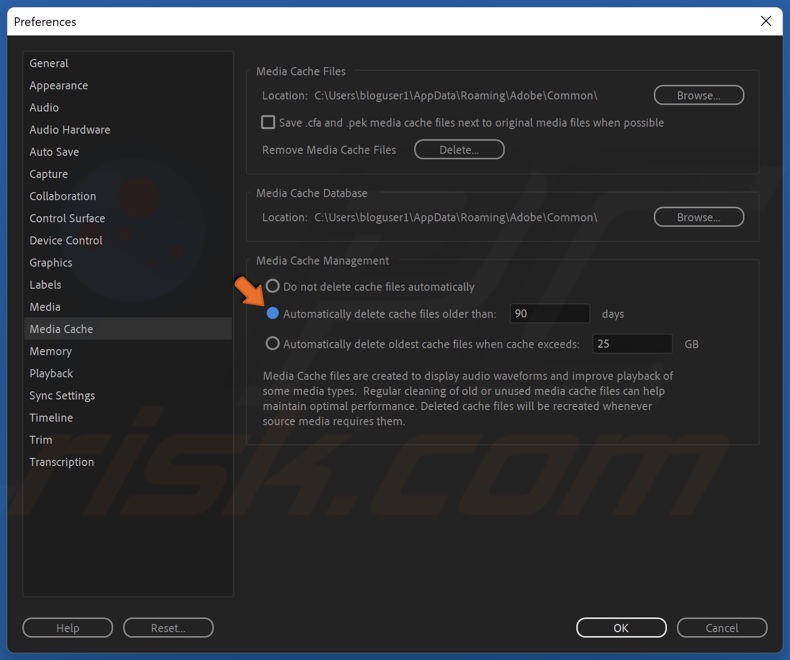
5. You can also change the settings to delete cached files after a set number of days automatically.
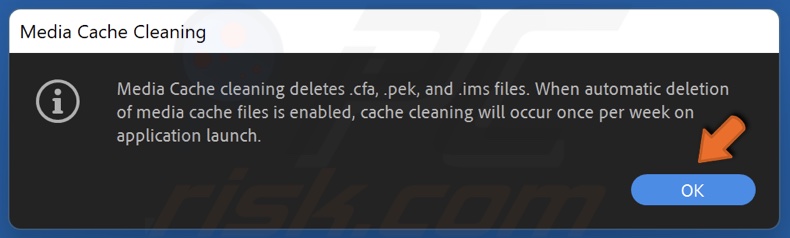
6. Click OK to confirm automatic media cache removal.
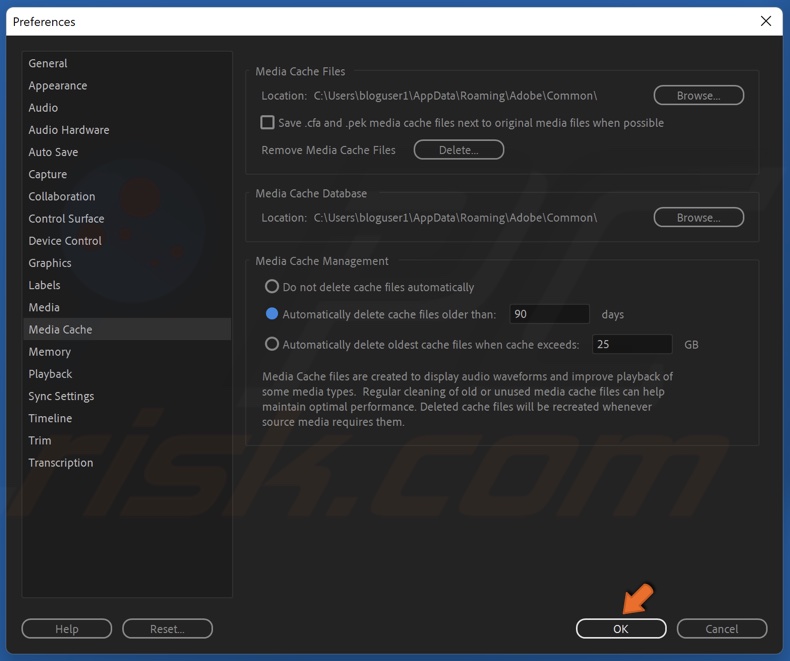
7. Click OK to close the Preferences window.
Method 3. Lower the Playback Resolution
The playback will appear choppy or laggy if your computer is not powerful enough to handle high-resolution video.
You can change the playback resolution without having to change its export resolution. Changing the playback resolution can reduce playback lag significantly.
1. Open Adobe Premiere Pro.
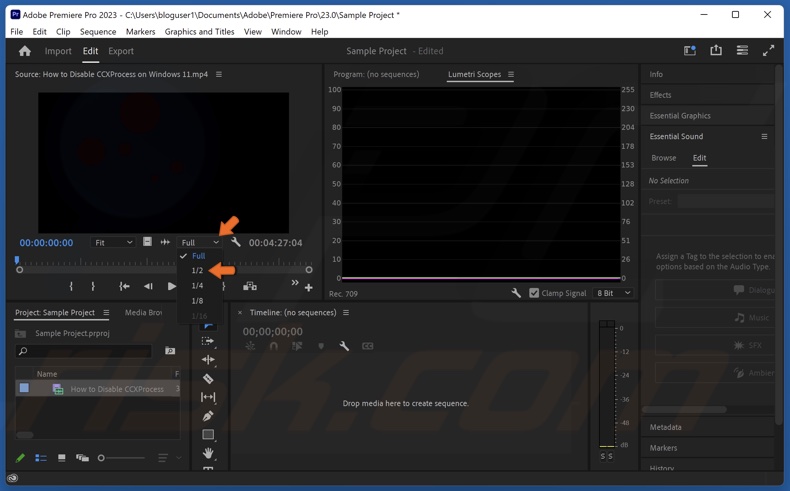
2. In the bottom right corner of the preview window, open the playback resolution drop-down menu and select any of the four lower resolution options (1/2, 1/4, 1/8, or 1/16) instead of Full.
Method 4. Disable High-Quality Playback
High-quality playback resolution is enabled by default and allows you to see the video in a resolution closest to how it will look when you export it. Disabling high-quality playback can reduce playback lag.
1. Open Adobe Premiere Pro.
![]()
2. Click the wrench icon to open the program monitor settings menu.
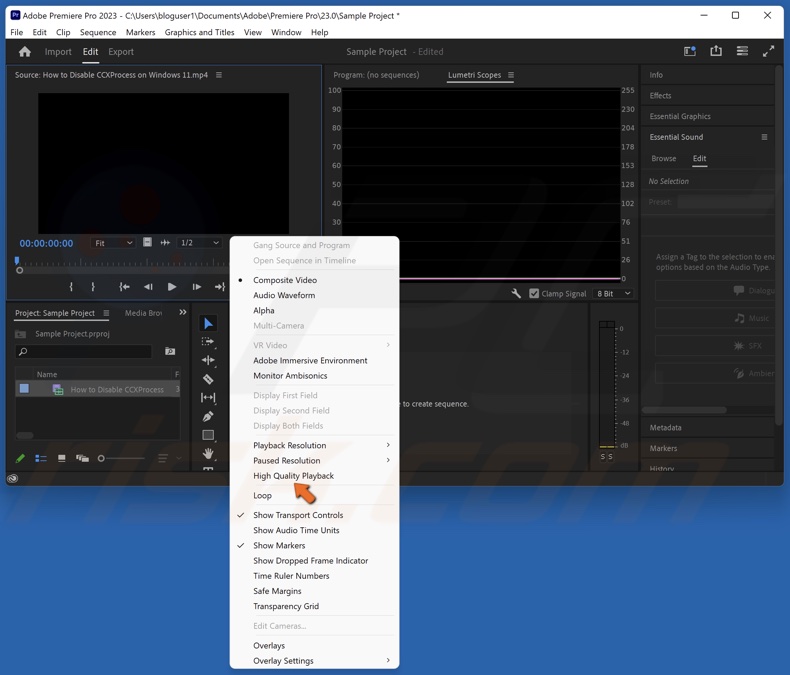
3. Deselect the High Quality Playback option.
Method 5. Use Proxy Videos in Your Workflow
Proxy videos refer to lower-resolution copies of an original video. Create a proxy video when you experience playback lag when previewing high-resolution videos. Working with a proxy video in Premiere Pro will eliminate playback lag.
1. Open Adobe Premiere Pro.
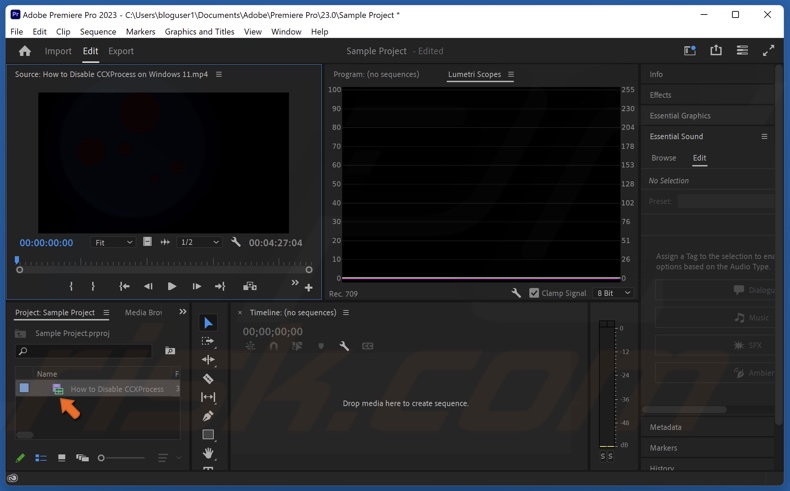
2. In the project panel, select the projects you want to create proxies for.
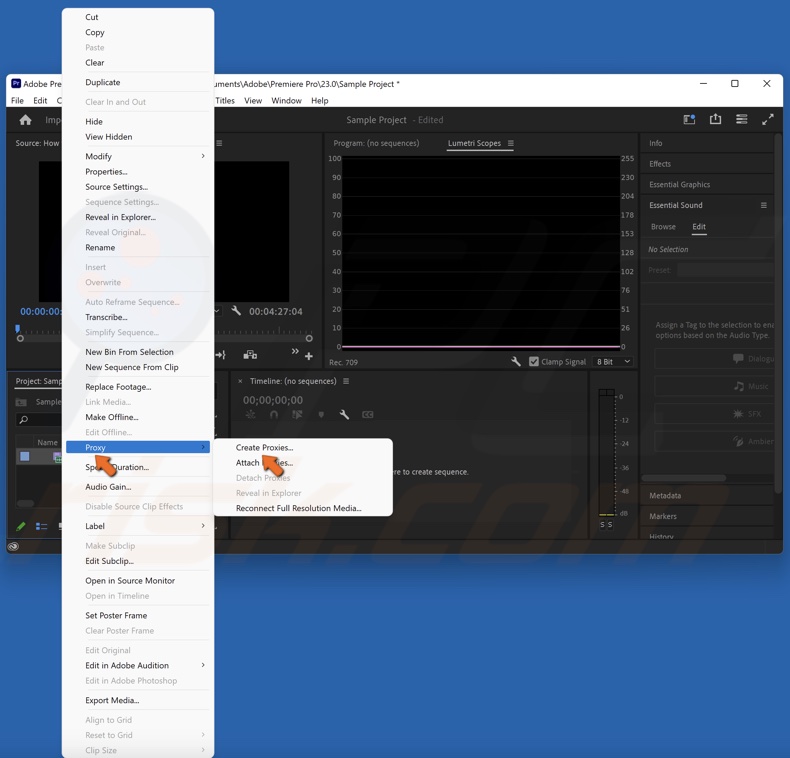
3. Right-click a project, select Proxy, and click Create Proxies.
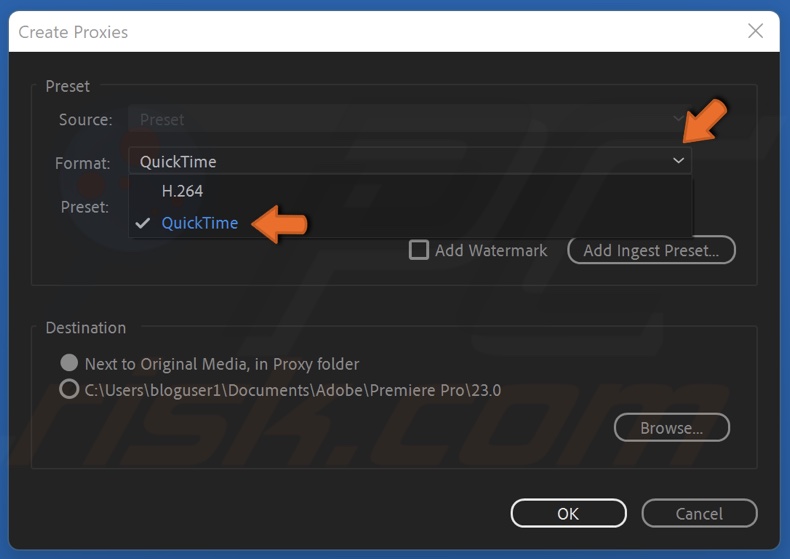
4. Open the format menu and select your preferred format.
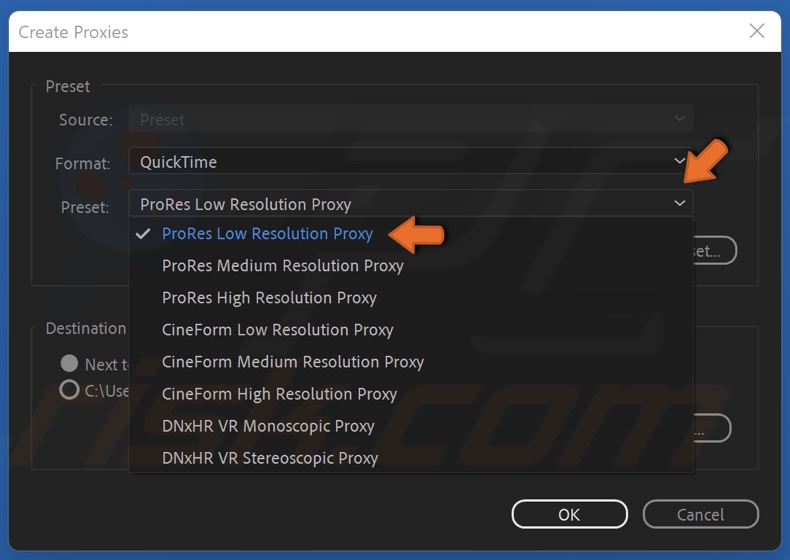
5. Then, open the Preset menu and select Low Resolution Proxy.
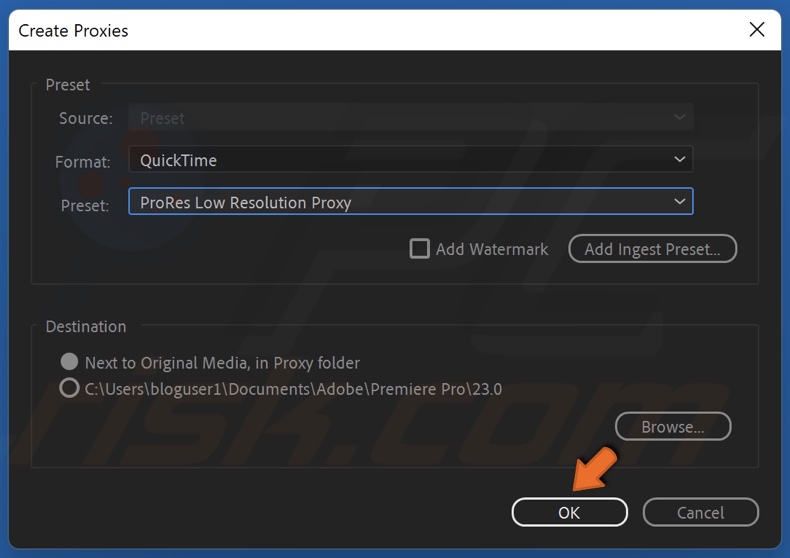
6. Click OK.
Method 6. Increase Memory Allowance
The Memory panel in the Preferences menu allows you to manage how much RAM is reserved for Premiere Pro and other Adobe apps. The higher the reserved RAM for other apps, the less is available for Premiere Pro. Therefore, increasing the RAM for Premiere Pro should reduce playback lag.
1. Open Adobe Premiere Pro.
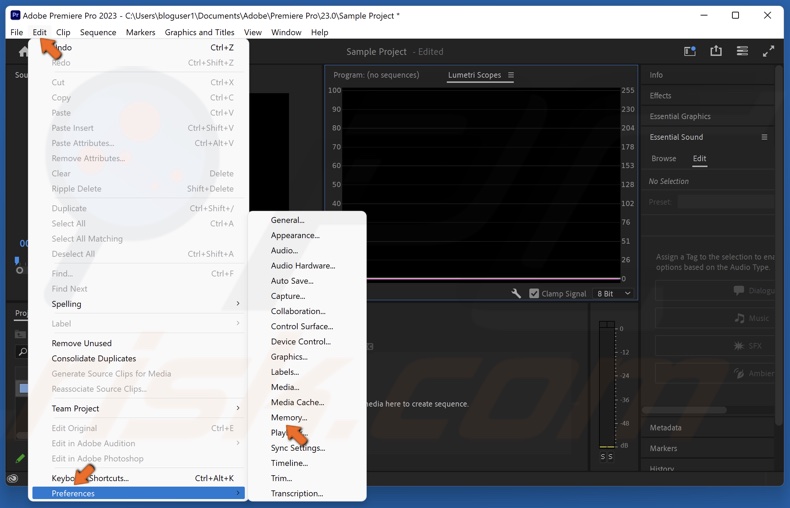
2. Click Edit in the toolbar, select Preferences, and click Memory.

3. In the Memory panel, reduce the RAM reserved for other Adobe applications to the lowest amount possible.
4. Click OK.
Method 7. Close the Lumetri Scopes Panel
Lumetri Scopes Panel analyses the color and lighting of the footage when it’s active. However, it’s not always needed, but it increases the amount of work Premiere Pro has to do during playback. Closing the Lumetri Scopes Panel will help to reduce playback lag.
1. Open Adobe Premiere Pro.
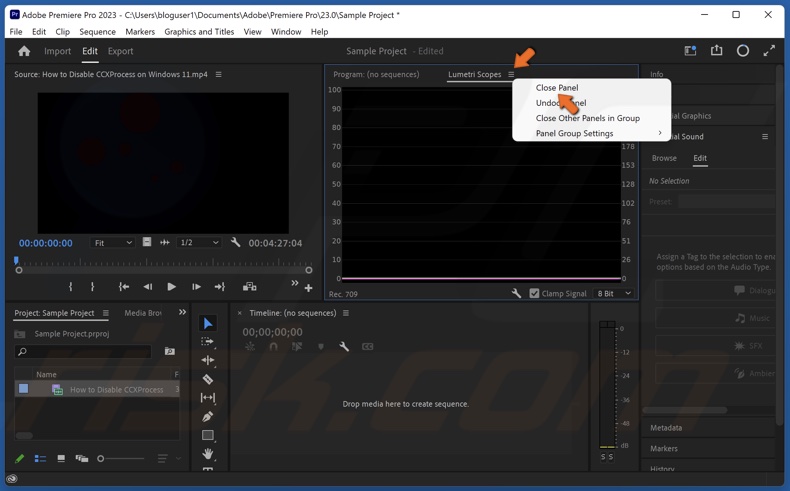
2. Open the menu next to the Lumetri Scopes panel and click Close Panel.
Share:

Rimvydas Iliavicius
Researcher, author
Rimvydas is a researcher with over four years of experience in the cybersecurity industry. He attended Kaunas University of Technology and graduated with a Master's degree in Translation and Localization of Technical texts. His interests in computers and technology led him to become a versatile author in the IT industry. At PCrisk, he's responsible for writing in-depth how-to articles for Microsoft Windows.
▼ Show Discussion