Fix Windows Update Error 0x80246019 on Windows 11
Get Free Scanner and check your computer for errors
Fix It NowTo fix found issues, you have to purchase the full version of Combo Cleaner. Free trial available. Combo Cleaner is owned and operated by Rcs Lt, the parent company of PCRisk.com read more.
How to Fix Windows Update Error 0x80246019 on Windows 11
Error 0x80246019 occurs when installing an update on Windows 11 or Windows 10. This error is known to occur due to corrupted system files or a bug in Windows. This article will provide information about this error and how to fix it.
Recently, Error Code 0x80246019 started to occur when trying to update Windows 11 to version 22H2, but it may also occur when installing other updates.
What Causes Error 0x80246019?
Corrupted system files. According to our research, Error 0x80246019 can occur due to corrupted system files. Running DISM and SFC scans will replace any corrupted system files.
Corrupted Windows Update-related files. Some users have discovered that the $WINDOWS.~BT directory can cause this error. This directory stores temporary Windows Update files, which can become corrupt and trigger the error. Running Disk Cleanup will clear the temporary files stored in this directory.
Interference from connected USB devices. User reports have also suggested that Error Code 0x80246019 can occur due to interference from a connected USB device. Try to disconnect all nonessential USB devices from your PC and install the update.
Interference from anti-virus software. Some users have reported that this error was caused by interference from anti-virus software. Try to temporarily disable Windows Real-Time Protection in Windows Security or your third-party anti-virus program and try to install the update.
Video Tutorial on How to Fix Windows Update Error 0x80246019
Table of Contents:
- Introduction
- Method 1. Run the Windows Update Troubleshooter
- Method 2. Run Disk Cleanup
- Method 3. Download and Install the Update Manually
- Method 4. Run the Deployment Image & Servicing Management (DISM) Scan
- Method 5. Run the System File Checker (SFC) Scan
- Video Tutorial on How to Fix Windows Update Error 0x80246019
Download Computer Malware Repair Tool
It is recommended to run a free scan with Combo Cleaner - a tool to detect viruses and malware on your device. You will need to purchase the full version to remove infections. Free trial available. Combo Cleaner is owned and operated by Rcs Lt, the parent company of PCRisk.com read more.
Method 1. Run the Windows Update Troubleshooter
Windows Update Troubleshooter is a tool dedicated to fixing Windows update-related problems. Try running it before moving to more advanced methods.
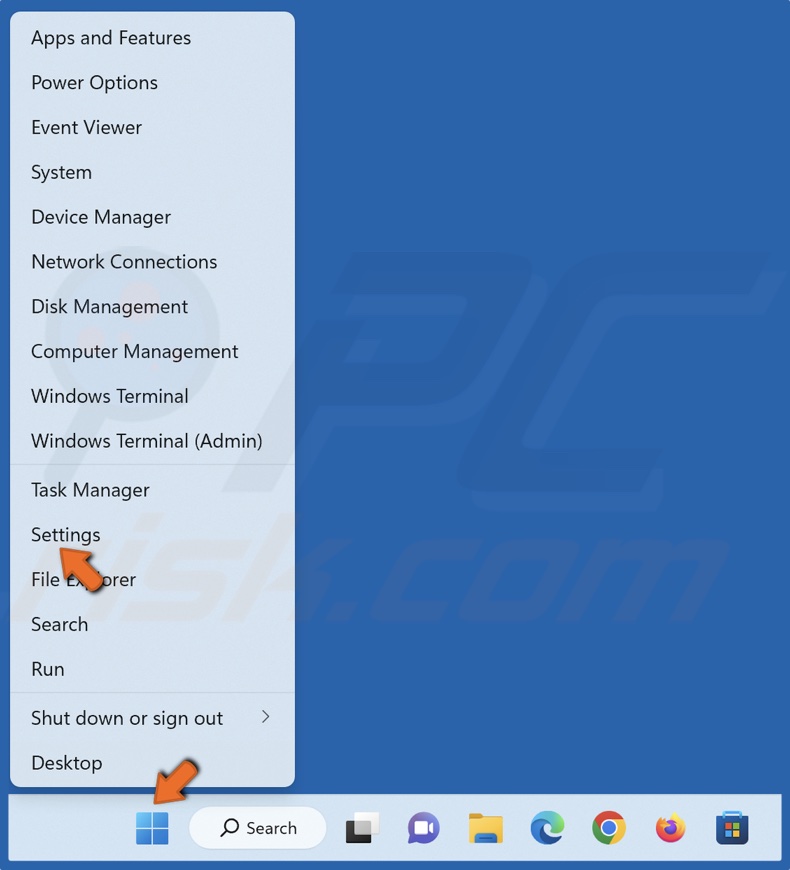
1. Right-click Start and select Settings.
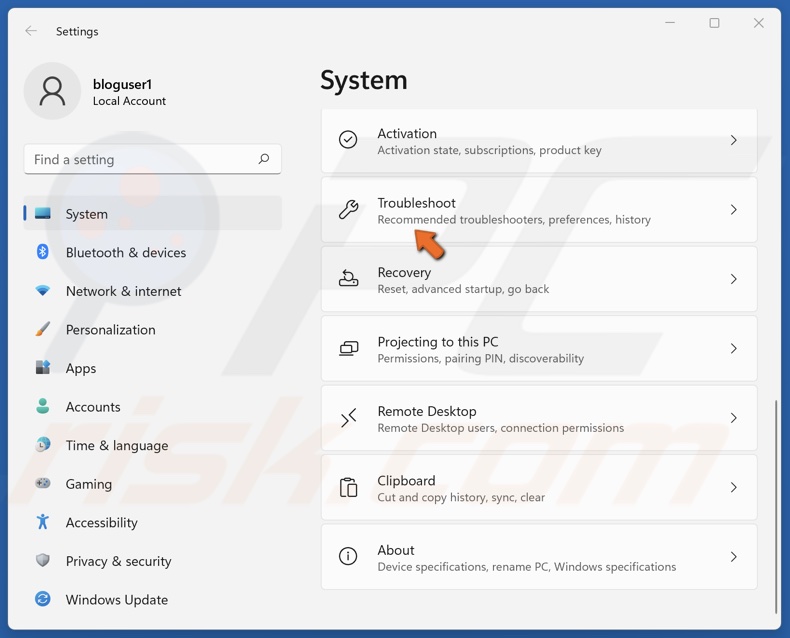
2. In the System panel, scroll down and click Troubleshoot.
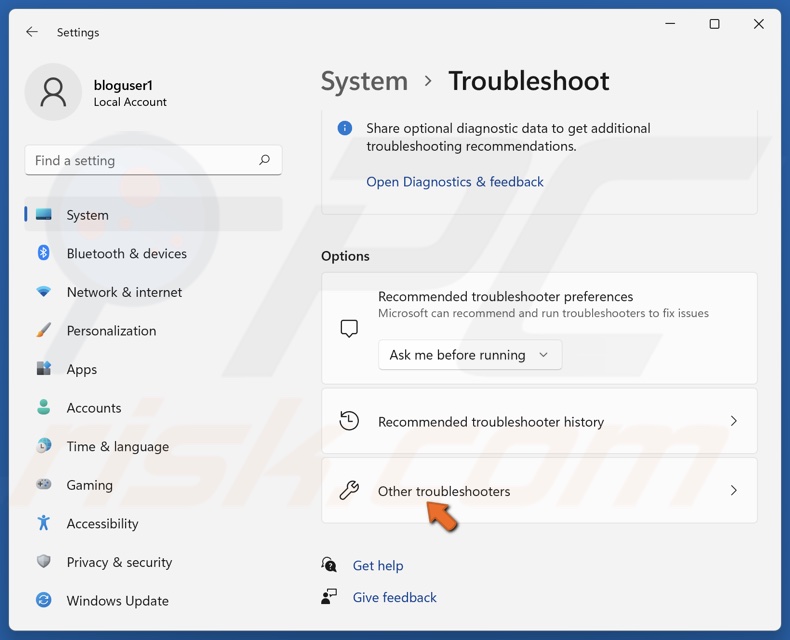
3. Select Other troubleshooters.
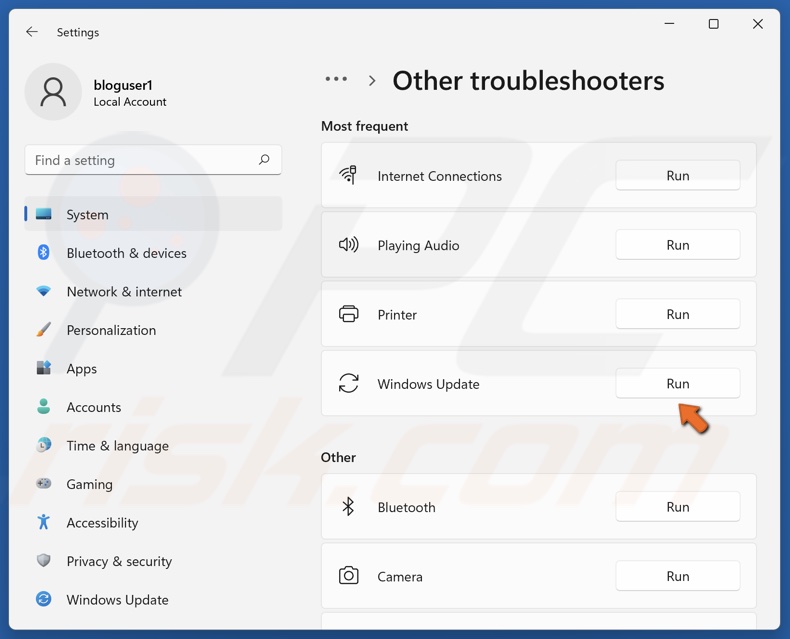
4. Click Run next to Windows Update.
5. Apply all the suggested fixes.
6. Restart your PC.
Method 2. Run Disk Cleanup
Users have found that clearing the $WINDOWS.~BT directory, which stores temporary Windows Update files, can cause error 0x80246019. Using Disk Cleanup to clear $WINDOWS.~BT often fixes the error.
1. Hold down Windows+R keys to open Run.
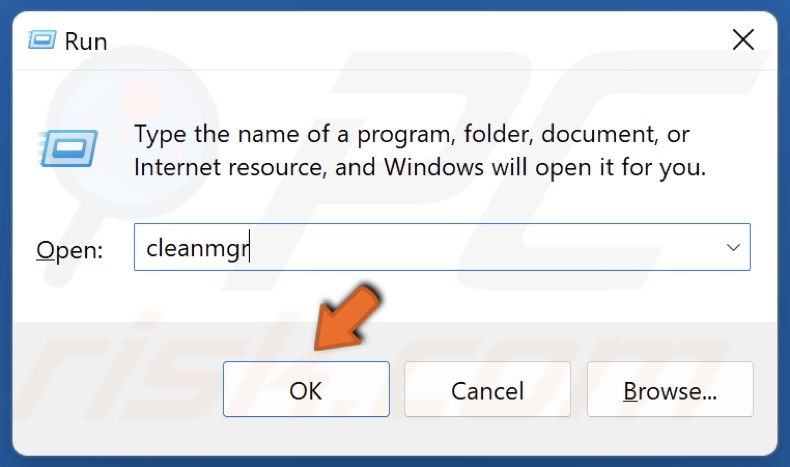
2. In the Run dialog box, type in cleanmgr and click OK.
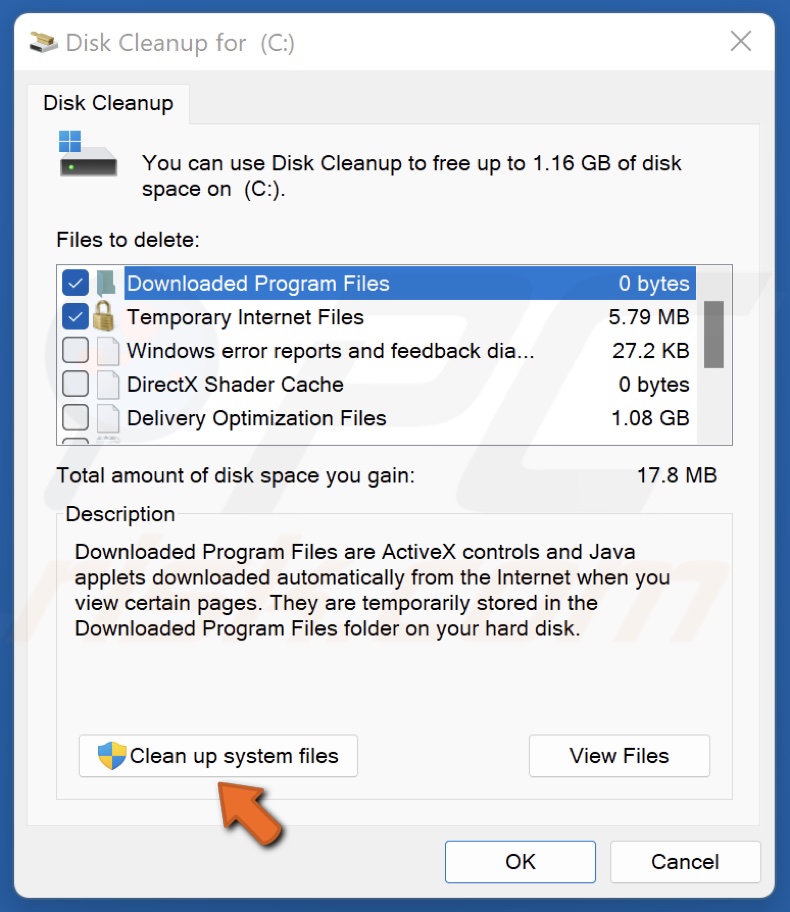
3. Click Clean up system files.
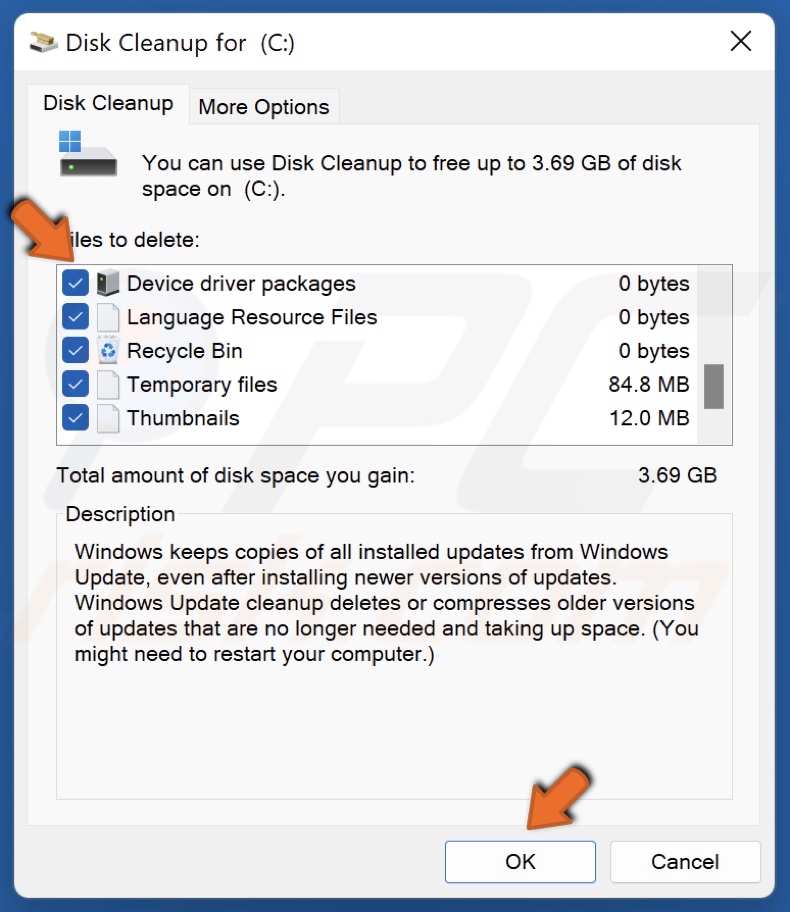
4. Tick the checkboxes of the locations you want to be cleaned.
5. Click OK.
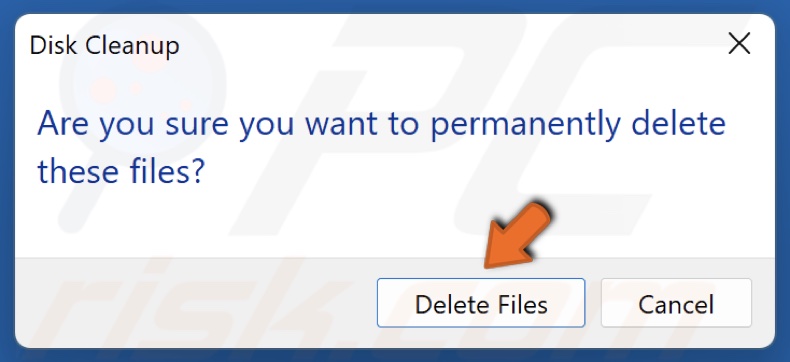
6. Click Delete Files.
7. Wait for the cleaning process to complete.
Method 3. Download and Install the Update Manually
When you can’t install an update via the Windows Update service, you might be able to download and install that particular update manually. Follow the instructions on how to do it below.
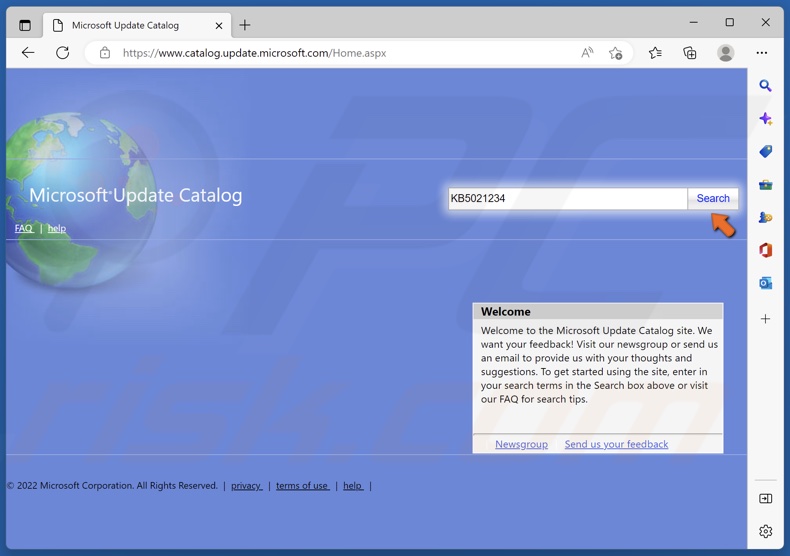
1. Open your browser and go to the Microsoft Update Catalog website.
2. In the search box, type in the KB (Knowledge Base) code (eg. KB5021234) and click Search.
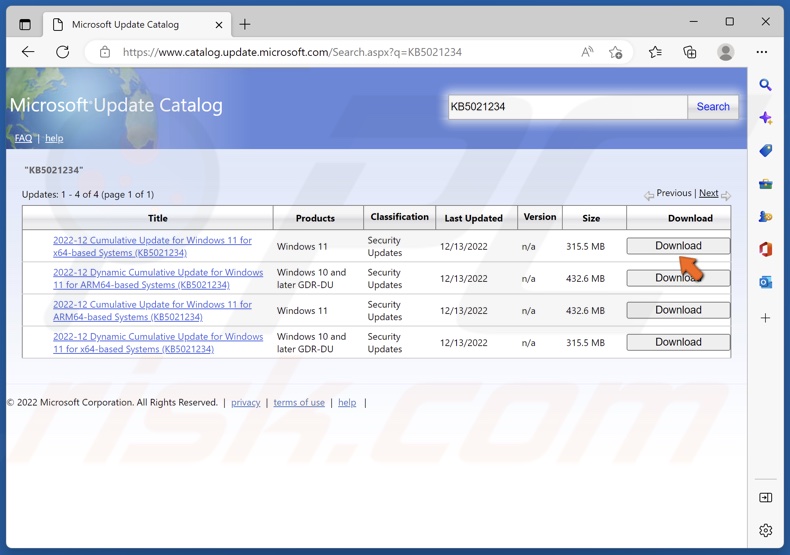
3. Select the version for your operating system and CPU architecture, and click Download.
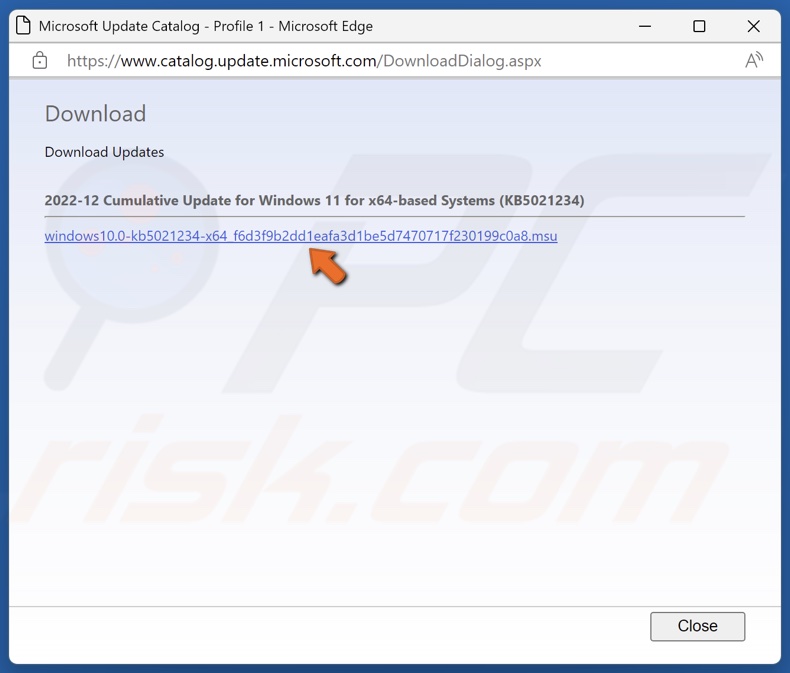
4. A new window will open. Click the update link, and the update will begin downloading.
5. Run the update installer once it's downloaded.
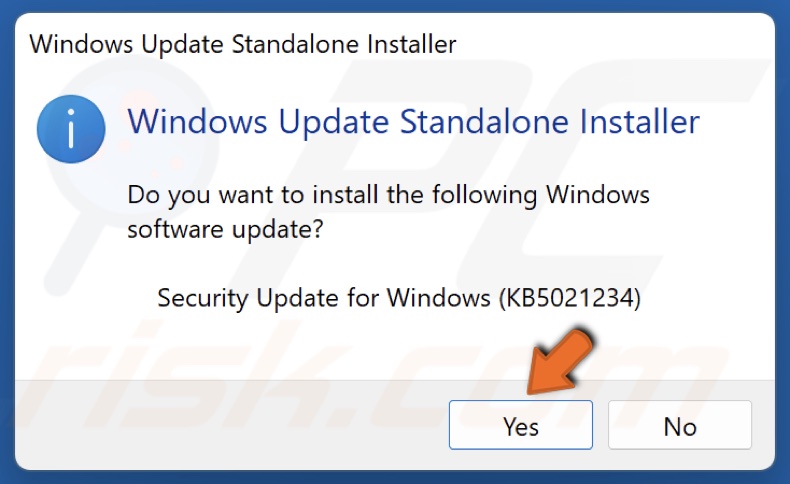
6. The installer will scan your PC for updates and ask whether you want to install the update. Click Yes.
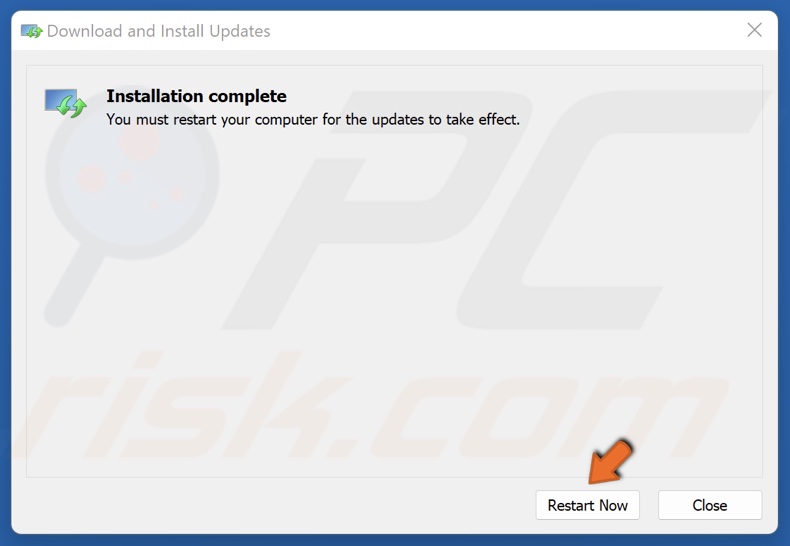
7. The Standalone installer will begin installing the update. Once the update is installed, click Restart Now.
Method 4. Run the Deployment Image & Servicing Management (DISM) Scan
The Deployment Image Servicing and Management (DISM) is a command-line tool designed to prepare, modify, and repair system images.
1. Hold down Windows+R keys to open Run.
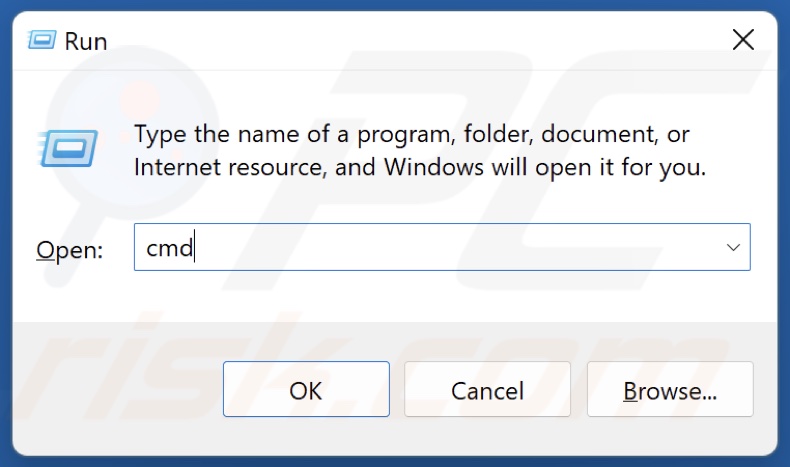
2. In the Run dialog box, type in CMD and hold down Ctrl+Shift+Enter keys to open the elevated Command Prompt.
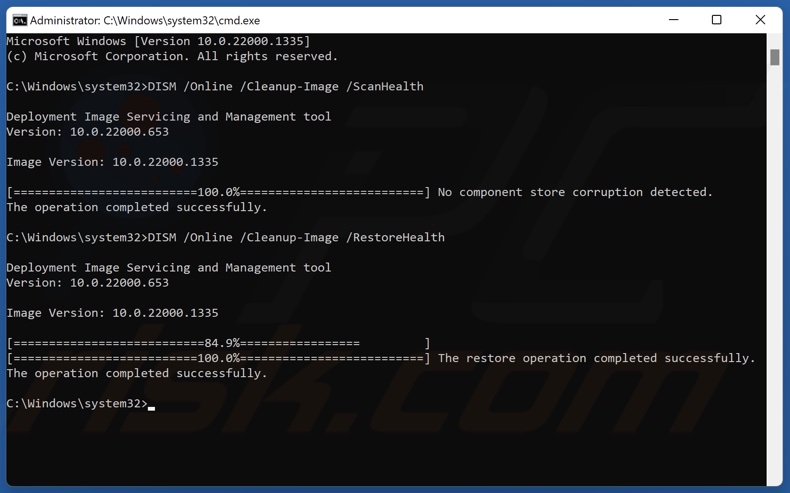
3. In the Comand Prompt window, type in DISM /Online /Cleanup-Image /ScanHealth and press the Enter key.
4. Type in DISM /Online /Cleanup-Image /RestoreHealth and press Enter.
5. Close the Command Prompt and restart your PC.
Method 5. Run the System File Checker (SFC) Scan
System File Checker (SFC) is a tool to identify corrupted or missing system files and download new files from Microsoft.
1. Hold down Windows+R keys to open Run.

2. In the Run dialog box, type in CMD and hold down Ctrl+Shift+Enter keys to open the elevated Command Prompt.
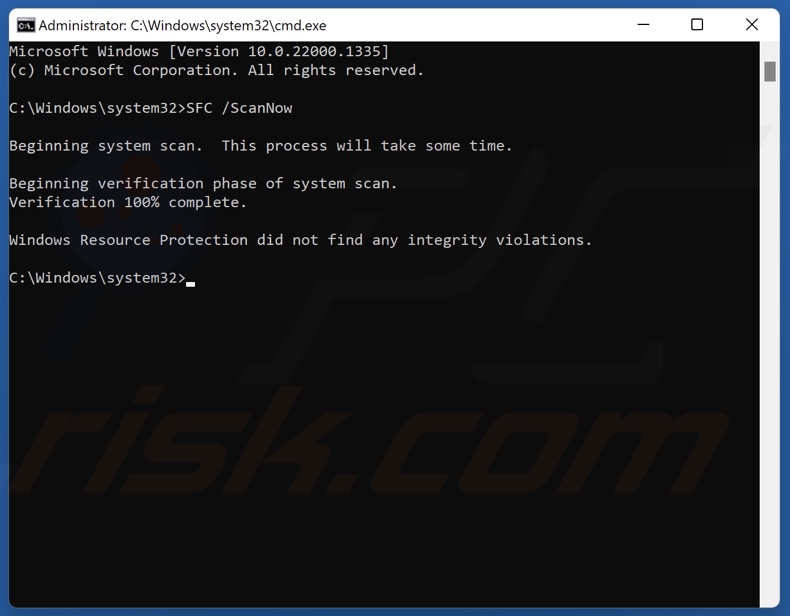
3. In the Command Prompt window, type in SFC /ScanNow and press Enter.
4. Close the Command Prompt and restart your PC.
Did this article help you fix Error Code 0x80246019 when updating Windows 11? Let us know in the comments below.
Share:

Rimvydas Iliavicius
Researcher, author
Rimvydas is a researcher with over four years of experience in the cybersecurity industry. He attended Kaunas University of Technology and graduated with a Master's degree in Translation and Localization of Technical texts. His interests in computers and technology led him to become a versatile author in the IT industry. At PCrisk, he's responsible for writing in-depth how-to articles for Microsoft Windows.

▼ Show Discussion