How to Fix Valorant Error Code VAN -81

Get Free Scanner and check your computer for errors
Fix It NowTo fix found issues, you have to purchase the full version of Combo Cleaner. Free trial available. Combo Cleaner is owned and operated by Rcs Lt, the parent company of PCRisk.com read more.
How to Fix Valorant Error Code VAN -81
Valorant Error Code VAN -81 is a connection error that often occurs because the VGC service isn’t running or can’t connect to Riot’s servers. This article is dedicated to helping you fix this error.
VALORANT has encountered a connection error. Please relaunch the client to reconnect. Error Code: VAN -81
What Causes Error Code VAN -81?
Error VAN -81 appears because Valorant fails to connect to its servers, but the reason it fails to connect relates to the Riot Vanguard (VGC) anti-cheat software. You will get this error if VGC is not running or is blocked from connecting to Riot’s servers.
- The VGC service fails to start. Riot’s VGC service may fail to start when you launch Valorant, resulting in Error VAN -81. You can fix this error by setting the VGC service to start automatically when you boot up Windows.
- The VGC service is blocked by a firewall. Your firewall may block the VGC service from connecting to Riot’s servers. Adding it to your firewall’s exceptions list may fix the error.
- The VGC service is blocked by an anti-virus program. Your anti-virus program may prevent the Riot Vanguard service from running. Adding it to the exclusions list should help you fix the error.
- The Riot Vanguard has been corrupted. If the Riot Vanguard installation has become corrupt, try reinstalling it.
Before trying any of our fixes, here are some tips:
- Restart the Riot client. Open the Task Manager, right-click each Riot and Valorant-related task and click End task. Relaunch Valorant and see if that fixed the issue.
- Run Valorant as an administrator.
- Restart your PC.
- Check your Internet connection. The error may occur if you have an unstable Internet connection. Try restarting/resetting your Internet router.
- Go to the Riot Games Service Status website and check the server status. If there are no recent issue reports, then it’s more than likely that there’s an issue on your side.
Video Guide on How to Fix Valorant Error Code VAN -81
Table of Contents:
- Introduction
- Method 1. Enable the VGC Service
- Method 2. Change the VGC Startup Type to Automatic
- Method 3. Allow VGC through Windows Defender Firewall
- Method 4. Add Riot Vanguard (VGC) to Windows Security Exclusions List
- Video Guide on How to Fix Valorant Error Code VAN -81
Download Computer Malware Repair Tool
It is recommended to run a free scan with Combo Cleaner - a tool to detect viruses and malware on your device. You will need to purchase the full version to remove infections. Free trial available. Combo Cleaner is owned and operated by Rcs Lt, the parent company of PCRisk.com read more.
Method 1. Enable the VGC Service
1. Hold down Windows+R keys to open Run.

2. In the Run dialog box, type in msconfig and click OK.
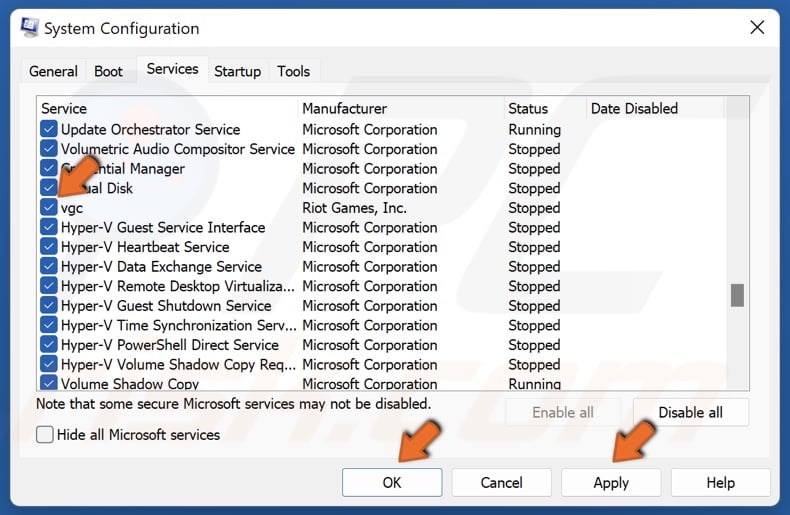
3. In the System Configuration window, select the Services tab.
4. Mark the checkbox next to VGC to enable it.
5. Click Apply and click OK.
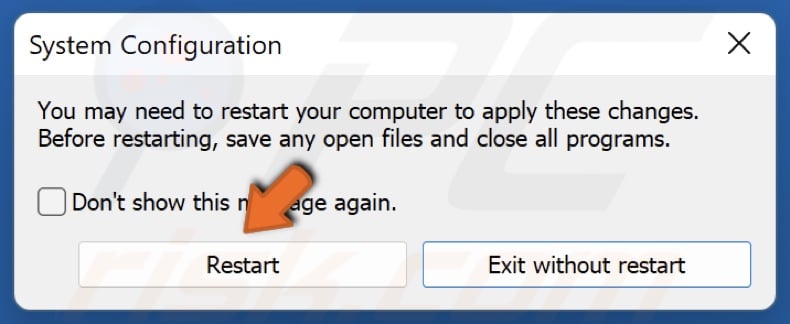
6. Click Restart when prompted.
Method 2. Change the VGC Startup Type to Automatic
The VGC Service is part of the anti-cheat system for Riot games, including Valorant. You may experience Error VAN 81 if the VGC service fails to start. The guide below will show you how to set the service to start automatically, thus preventing the error from occurring.
1. Hold down Windows+R keys to open Run.

2. In the Run dialog box, type in services.msc and click OK.
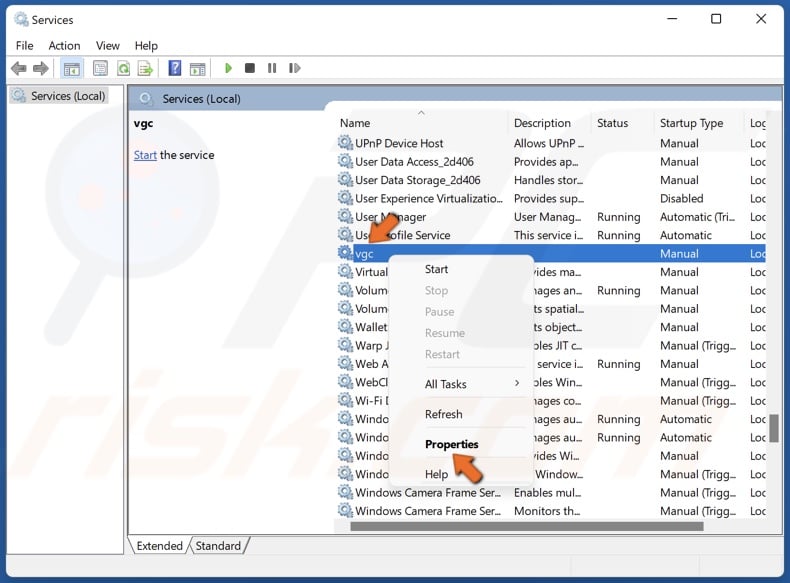
3. In the Services window, locate the VGC service, right-click it and select Properties.
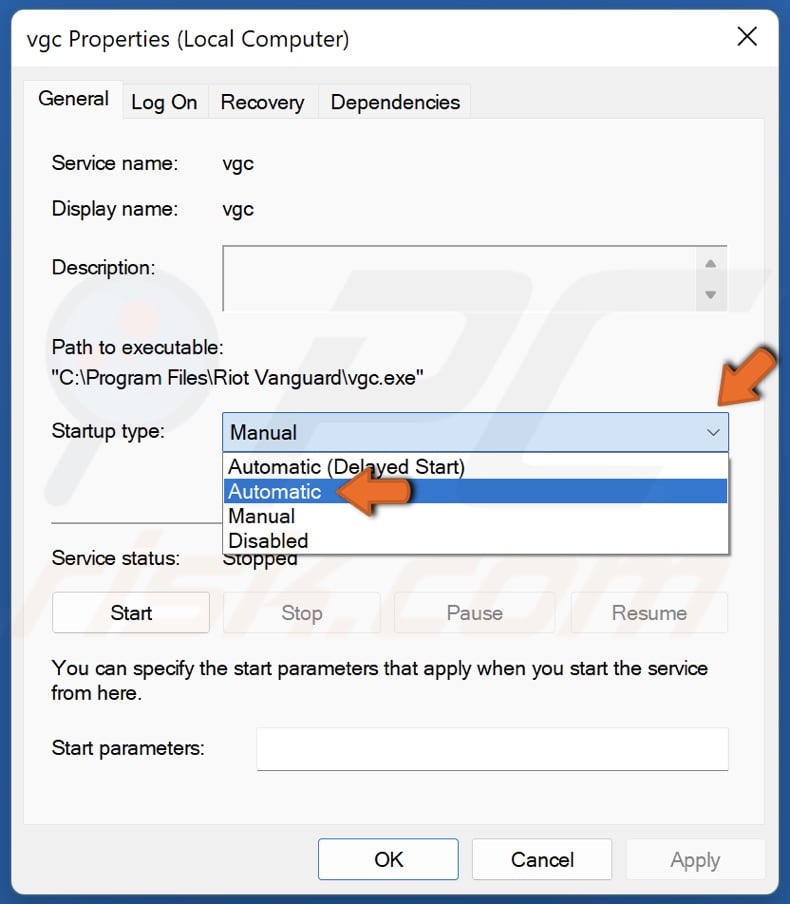
4. Open the Startup type drop-down menu and select Automatic.
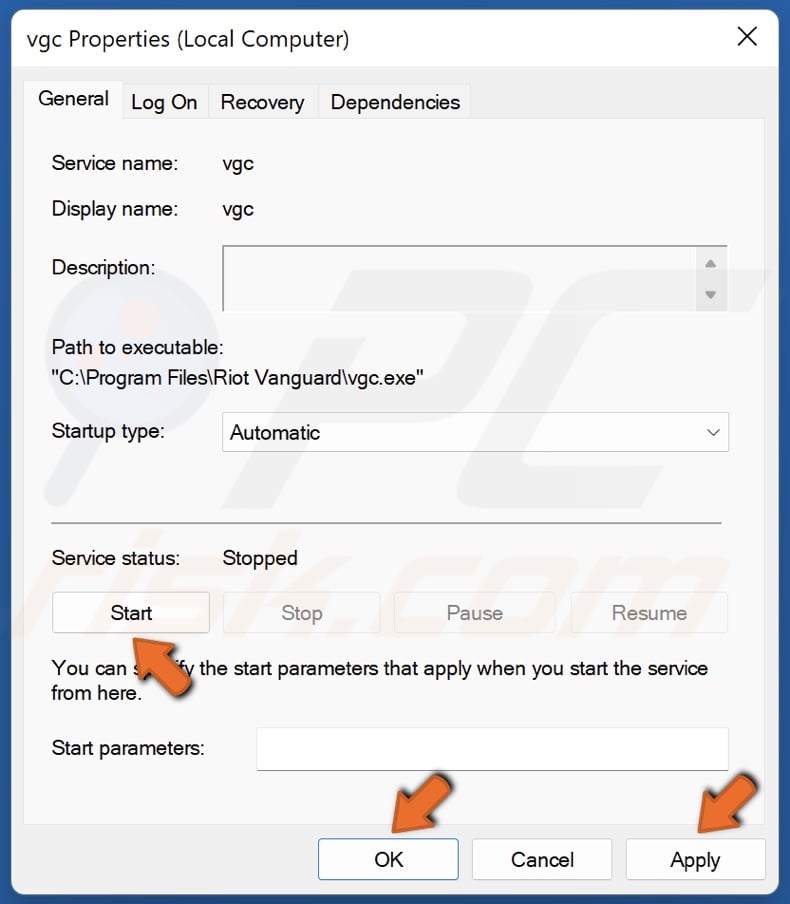
5. In the Services status section, click Start.
6. Click Apply and click OK.
7. Restart your PC and launch Valorant.
8. If you get a “Windows could not start the vgc service on Local Computer. Error 1: Incorrect function” message, perform the following steps.
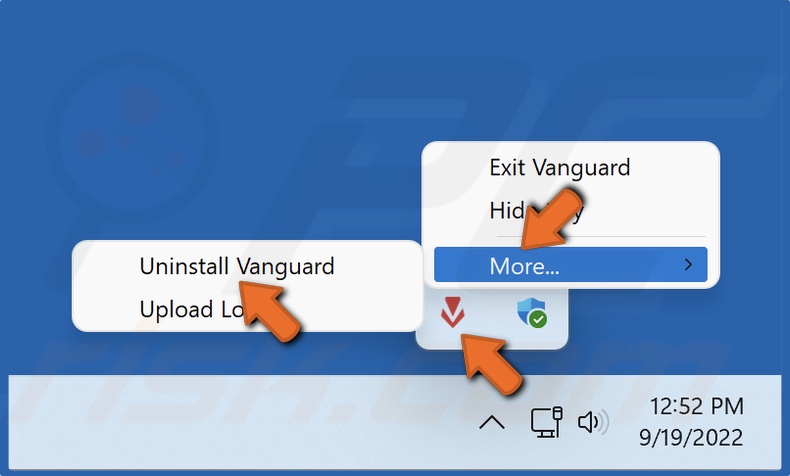
9. Navigate to the icons tray in the taskbar, right-click Riot Vanguard, select More, and click Uninstall Vanguard.
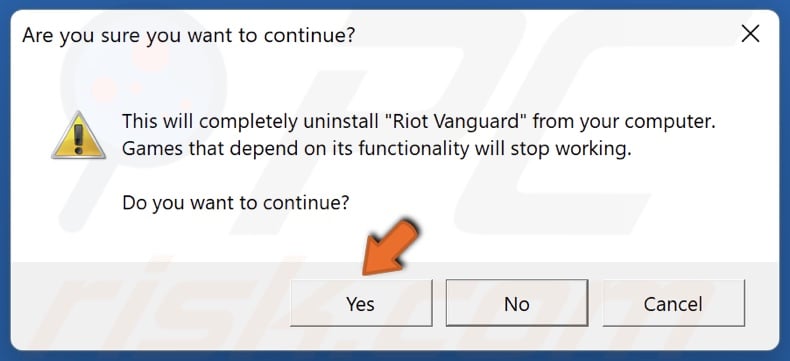
10. Click Yes when prompted to confirm the removal.
11. Hold down Windows+R keys to open Run.
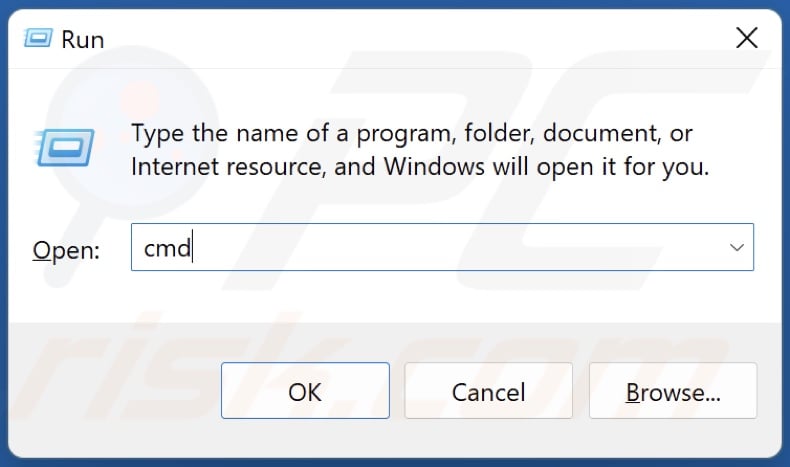
12. In the Run dialog box, type in CMD and hold down Ctrl+Shift+Enter keys to open the elevated Command Prompt.
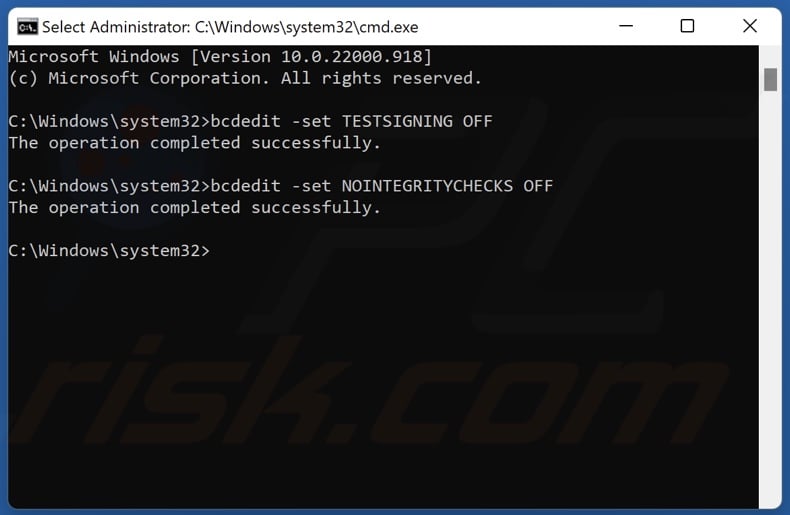
13. In the Command Prompt window, type in bcdedit -set TESTSIGNING OFF and press Enter.
14. Then, type in bcdedit -set NOINTEGRITYCHECKS OFF and press Enter. If you get “The value is protected by Secure Boot policy and cannot be modified or deleted” message, disable Secure Boot in your system’s BIOS.
15. Run the Valorant launcher to install Riot Vanguard.
16. Restart your PC.
17. Hold down Windows+R keys to open Run.
18. In the Run dialog box, type in services.msc and click OK.
19. In the Services window, right-click VGC and select Properties.
20. Open the Startup type drop-down menu and select Automatic.
21. In the Services status section, click Start.
22. Click Apply and click OK.
Method 3. Allow VGC through Windows Defender Firewall
Windows Defender Firewall (or your third-party firewall solution) may prevent the VGC service from connecting to Riot’s servers. The instructions below will show you how to add VGC to Windows Defender Firewall’s exceptions list.
1. Hold down Windows+R keys to open Run.
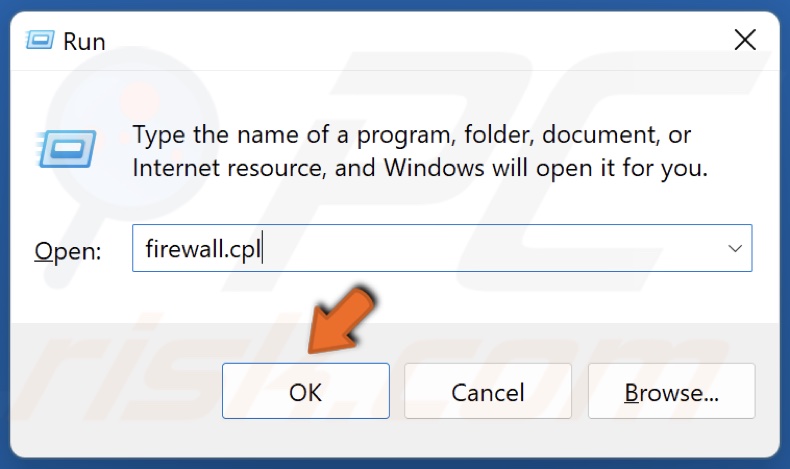
2. In the Run dialog box, type in firewall.cpl and click OK.
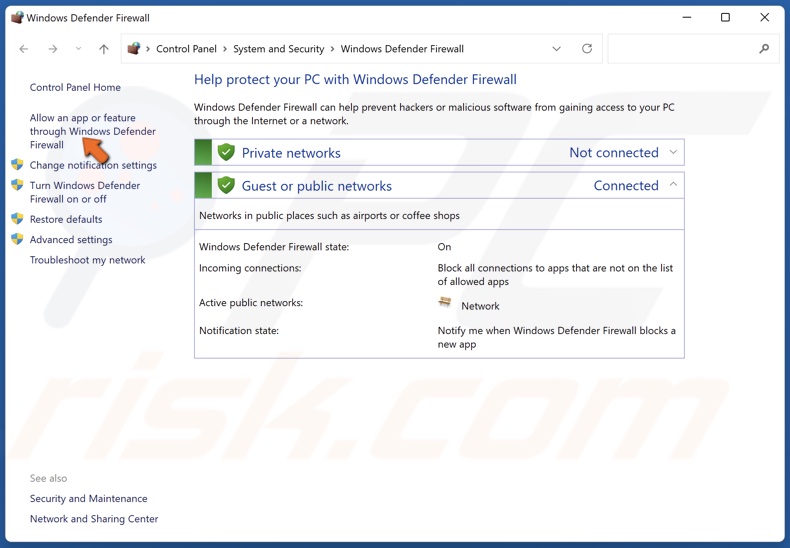
3. Click Allow an app or feature through Windows Defender Firewall.
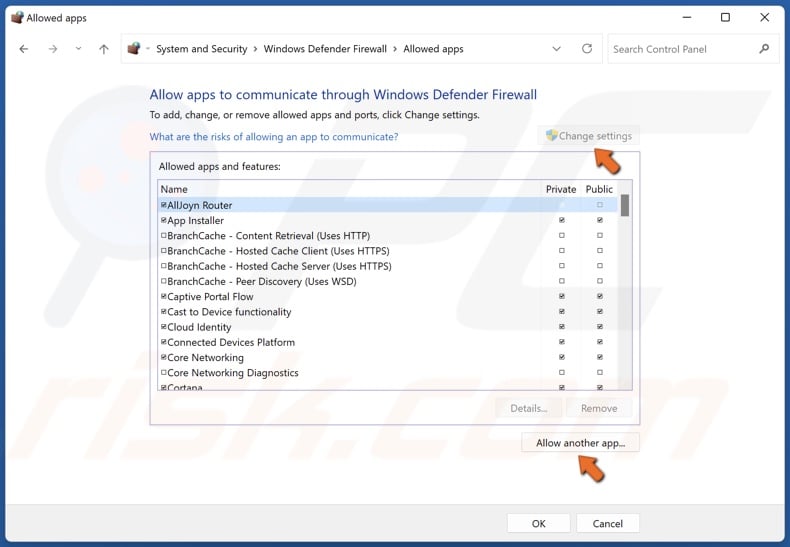
4. Click Change settings.
5. Click Allow another app.
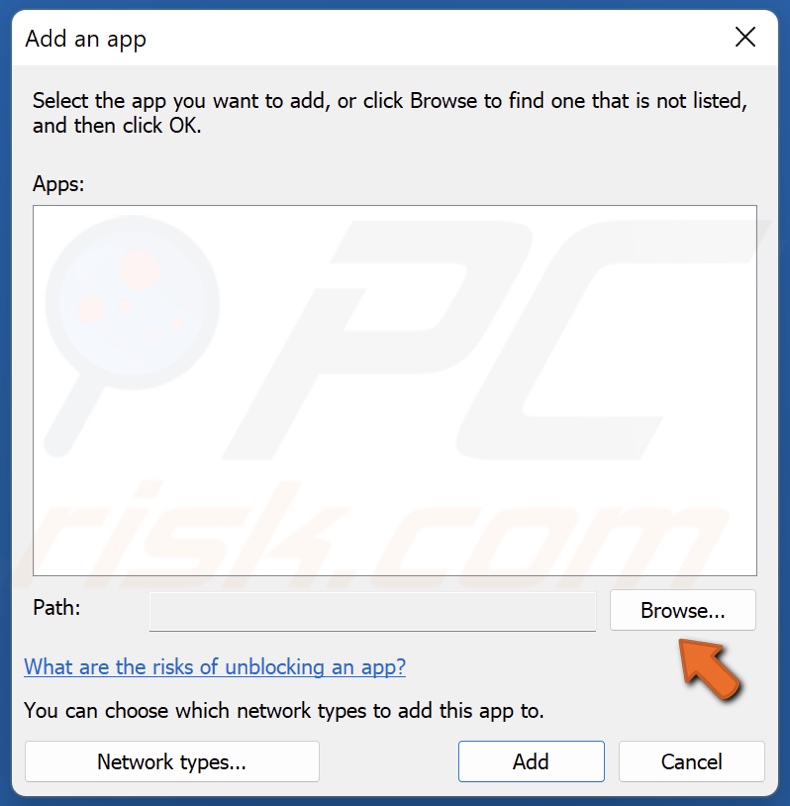
6. Click Browse.
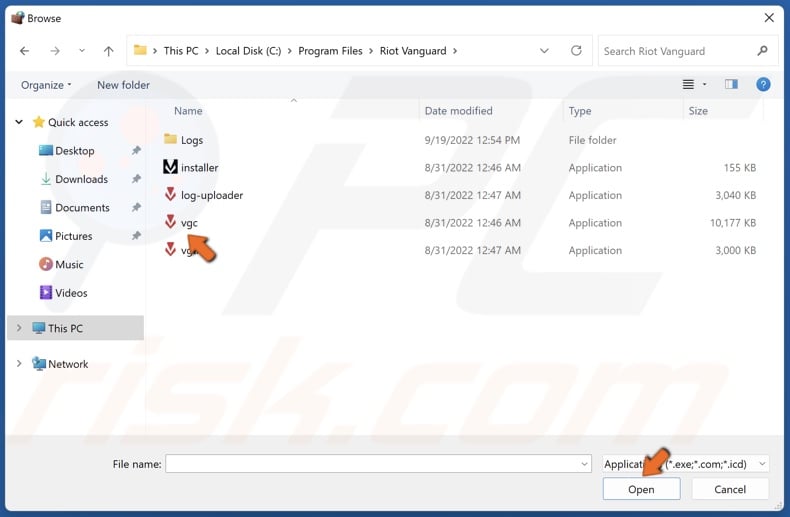
7. Navigate to C:\Program Files\Riot Vanguard
8. Select VGC.exe and click Open.
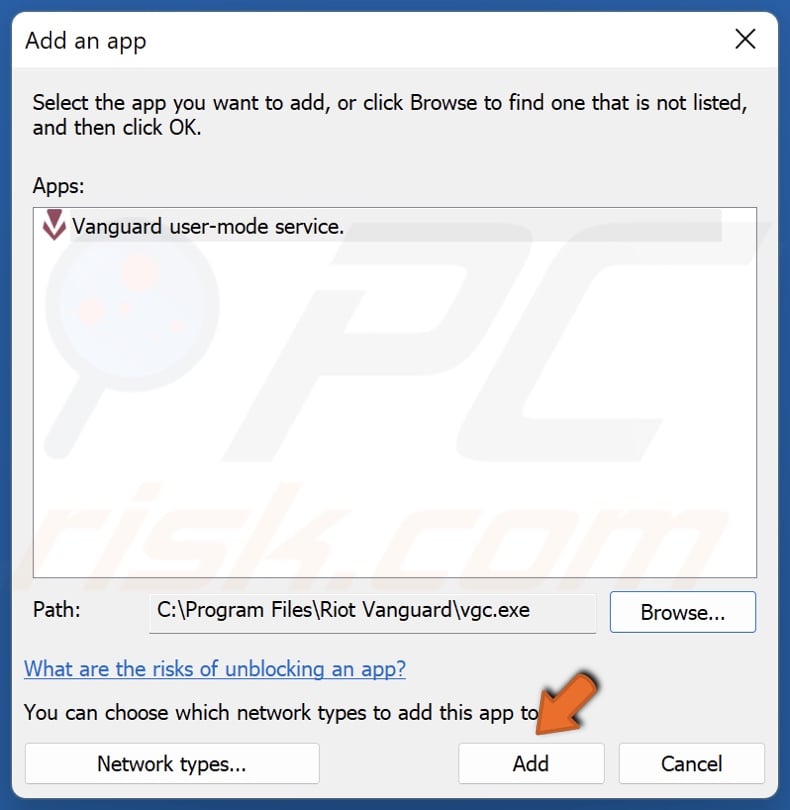
9. Click Add to add Vanguard user-mode service.
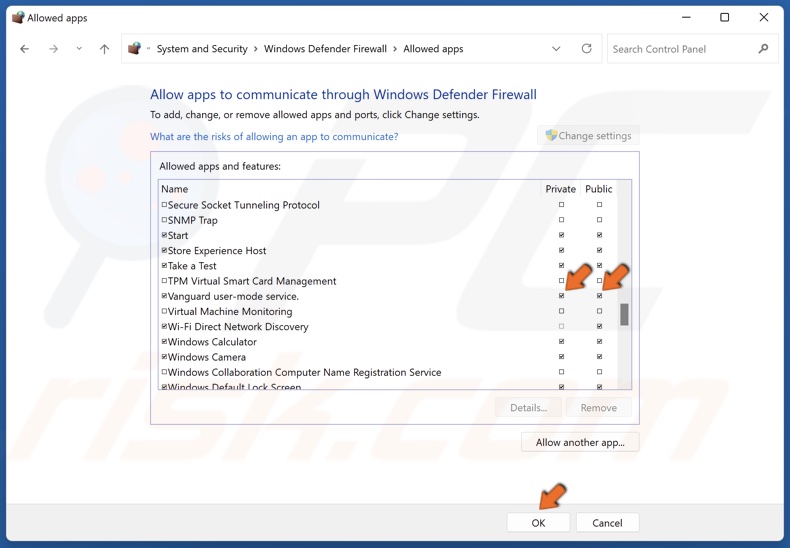
10. Mark the Private and Public checkboxes next to Vanguard user-mode service and click OK.
Method 4. Add Riot Vanguard (VGC) to Windows Security Exclusions List
![]()
1. Navigate to the icons tray in the taskbar and click the Windows Security icon.
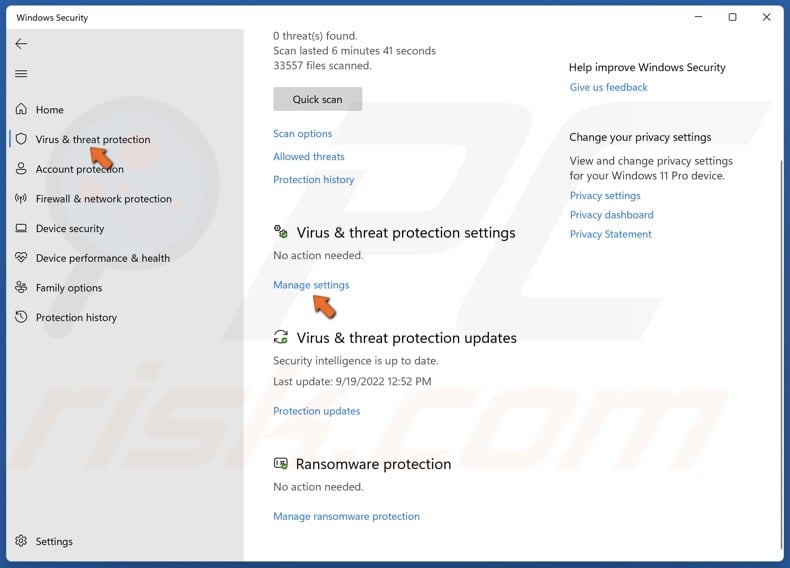
2. In the Windows Security window, select Virus & threat protection from the left pane.
3. In the Virus & threat protection section, click Manage settings.
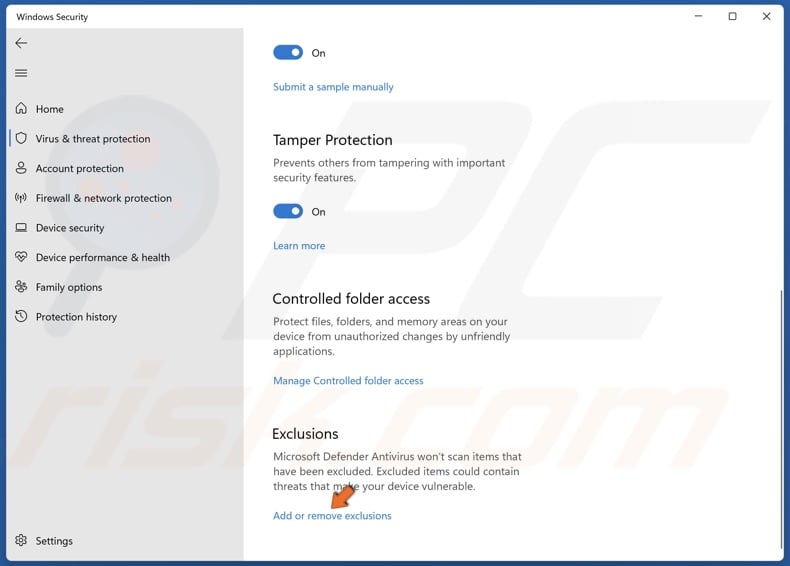
4. Scroll down, and in the Exclusions section, click Add or remove exclusions.

5. Click Add an exclusion and select Folder from the drop-down menu.
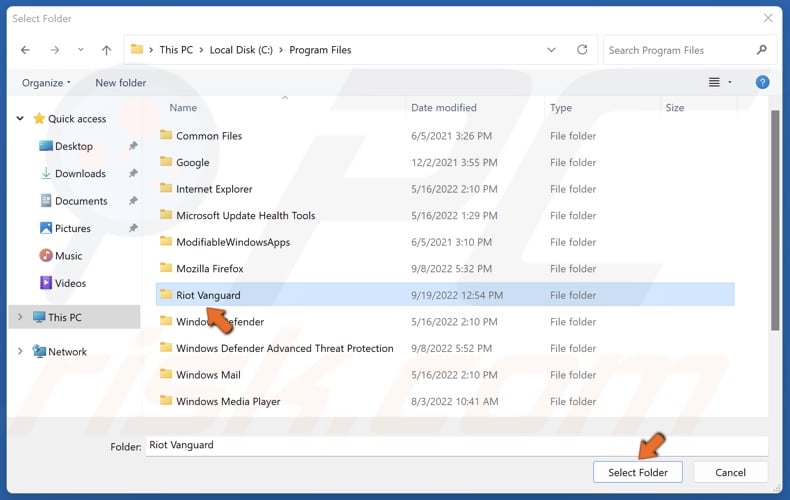
6. Navigate to C:\Program Files and select Riot Vanguard and click Select Folder.
If you have a third-party anti-virus program, you can temporarily disable your anti-virus, launch Valorant, and see if it connects to its servers.
Share:

Rimvydas Iliavicius
Researcher, author
Rimvydas is a researcher with over four years of experience in the cybersecurity industry. He attended Kaunas University of Technology and graduated with a Master's degree in Translation and Localization of Technical texts. His interests in computers and technology led him to become a versatile author in the IT industry. At PCrisk, he's responsible for writing in-depth how-to articles for Microsoft Windows.
▼ Show Discussion