4 Ways to Fix VLC Not Working on Windows 11

Get Free Scanner and check your computer for errors
Fix It NowTo fix found issues, you have to purchase the full version of Combo Cleaner. Free trial available. Combo Cleaner is owned and operated by Rcs Lt, the parent company of PCRisk.com read more.
How to Fix VLC Media Player Not Working on Windows 11
VLC Media Player is one of the most reliable players you can get, but even it can run into issues. Many users have reported that VLC is not working for them. This article will outline the causes for this issue and show you how to get VLC working again.

Why is VLC Media Player Not Working?
Our research has shown that VLC can stop working for several reasons, which we have listed below.
- Corrupted VLC cache. A corrupted VLC cache is the most common reason VLC Media Player stops working. The cache may become corrupt over time. One way to fix this issue is to increase the cache values.
- Misconfigured VLC settings. Incorrectly configured settings in VLC are some of the most common reasons VLC may stop playing video. The instructions found below will help you configure VLC properly.
- Obsolete GPU drivers. Outdated GPU drivers may cause VLC not to work properly in some cases. Therefore, you should update your GPU drivers to the latest version.
- Corrupted VLC installation files. VLC installation files may get corrupted due to interference with the installation. Interference can occur when installing it from scratch and updating the player. Reinstalling VLC should fix the issue.
- Outdated Windows 11 version. An outdated operating system may also cause VLC not to work correctly, so you should update your Windows 11 operating system to the latest version.
In addition to the VLC media player not working, users also experience the VLC player not opening, crashing, lagging, video stuttering or scrambling, and audio playing with no video. The troubleshooting instructions below should help you resolve the issues mentioned above.
Video Instructions on How to Fix VLC not Working
Table of Contents:
- Introduction
- Method 1. Clear the VLC Cache
- Method 2. Increase the Cache Value
- Method 3. Configure Video Output Mode
- Method 4. Disable Hardware Video Decoding
- Video Instructions on How to Fix VLC not Working
Download Computer Malware Repair Tool
It is recommended to run a free scan with Combo Cleaner - a tool to detect viruses and malware on your device. You will need to purchase the full version to remove infections. Free trial available. Combo Cleaner is owned and operated by Rcs Lt, the parent company of PCRisk.com read more.
Method 1. Clear the VLC Cache
1. Close VLC Media Player if it’s running.
2. Hold down Windows+R keys to open Run.
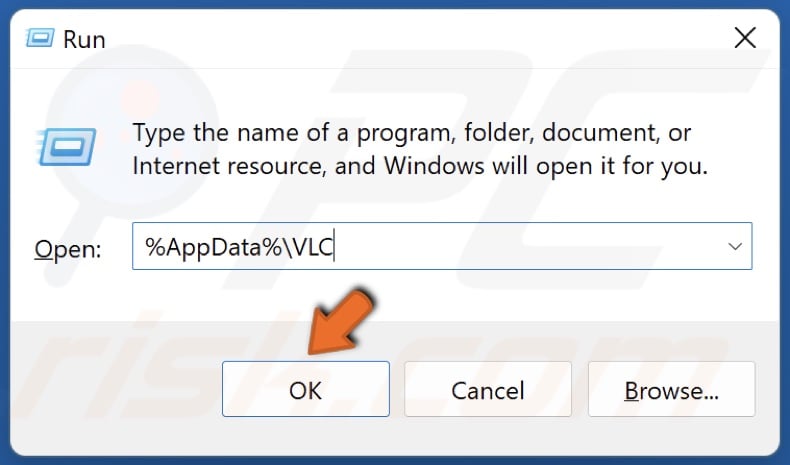
3. In the Run dialog box, type in %AppData%\VLC and click OK to open the VLC cache folder.
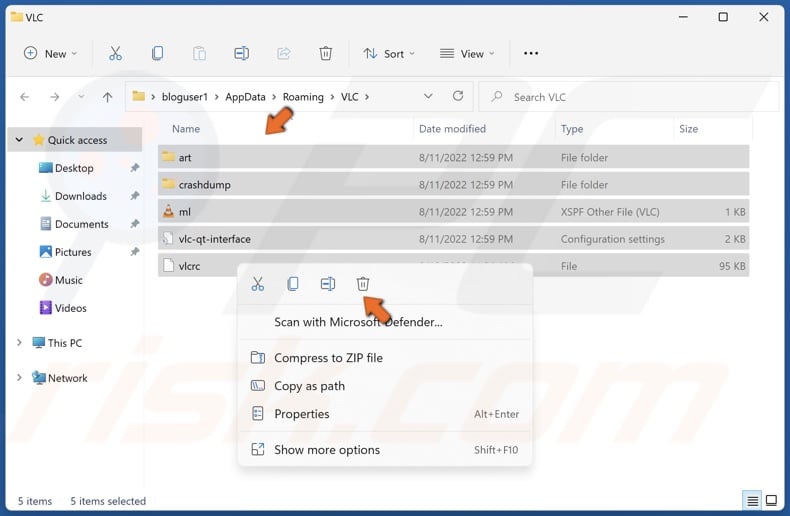
4. Hold down Ctrl+A to select all files and folders. Right-click the selection and click Delete.
5. Launch VLC and see if it’s working.
Method 2. Increase the Cache Value
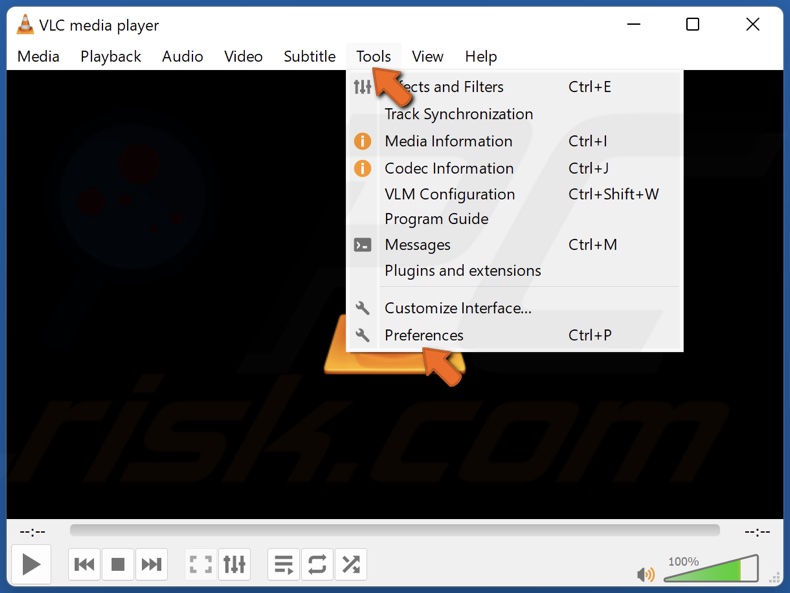
1. Open VLC. In the menu bar, click Tools and click Preferences.
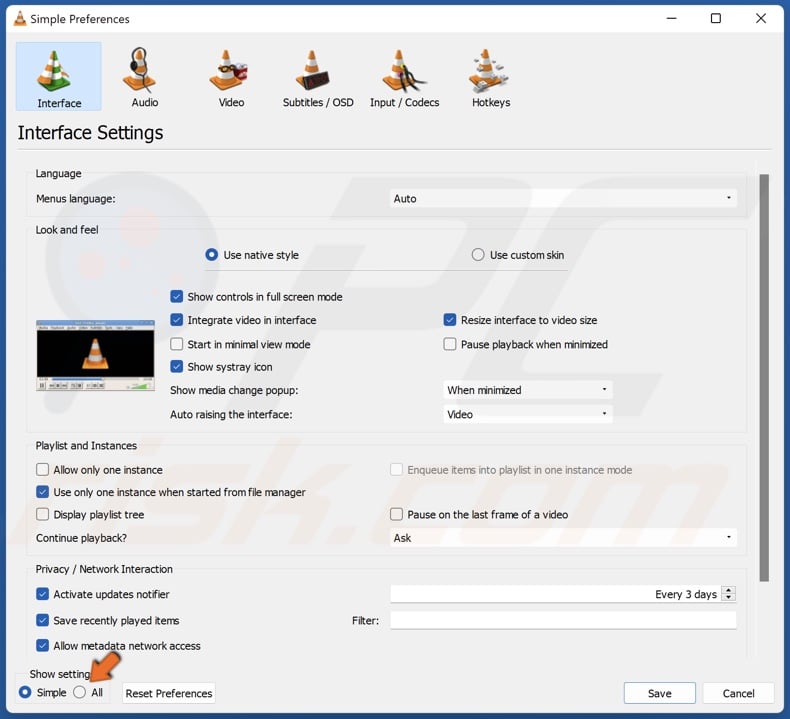
2. In the Show settings section at the bottom left of the window, tick All.
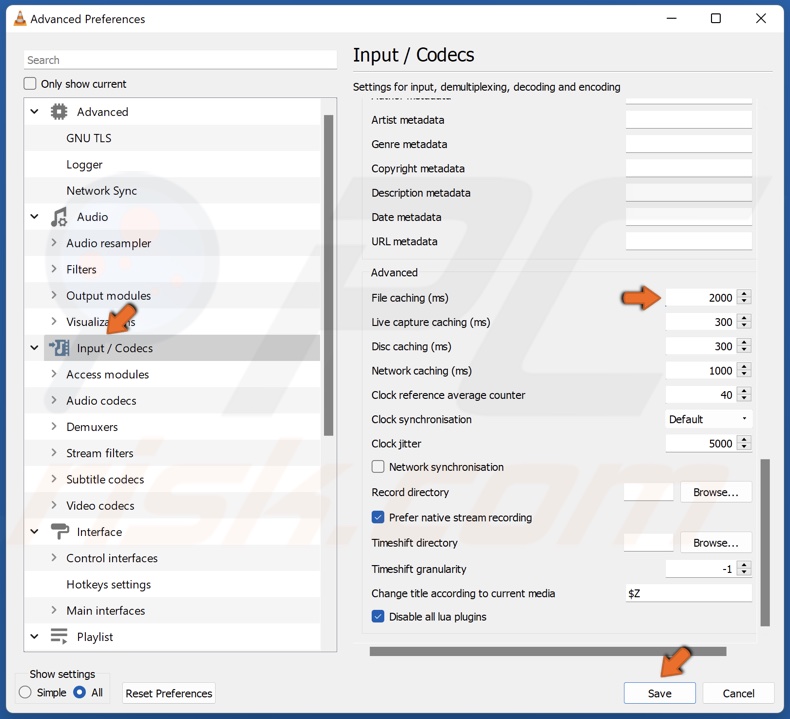
3. Select Input / Codecs.
4. Scroll down to the Advanced section, increase File caching (ms) to 2000 or more and click Save.
5. Close VLC and relaunch it.
Method 3. Configure Video Output Mode
1. Open VLC. In the menu bar, click Tools and click Preferences.
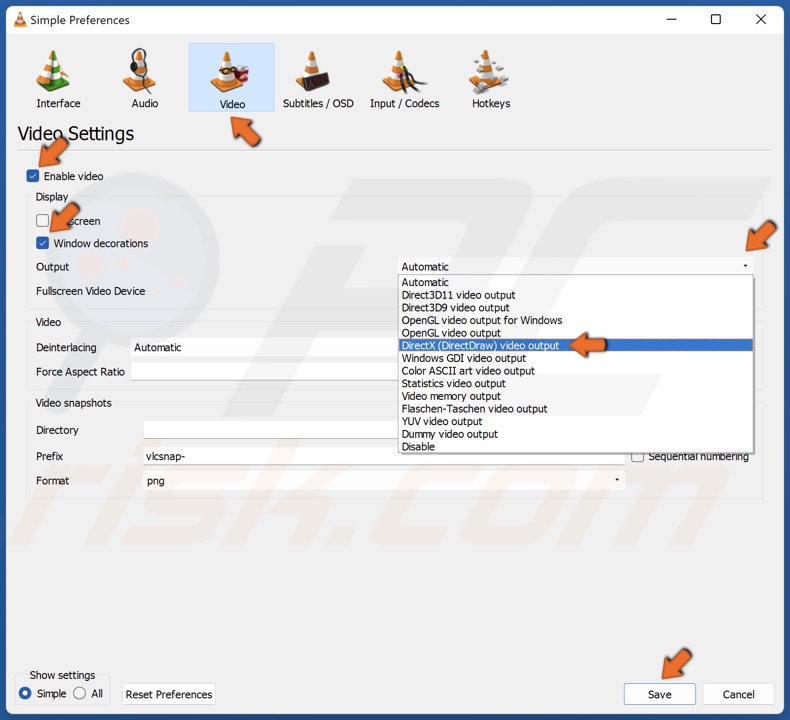
2. Select the Video section.
3. Mark the Enable video checkbox.
4. Mark the Window decorations checkbox.
5. Open the Output drop-down menu, select DirectX (DirectDraw) video output option, and click Save.
6. Close VLC and relaunch it.
Method 4. Disable Hardware Video Decoding
1. Open VLC. In the menu bar, click Tools and click Preferences.
2. In the Show settings section at the bottom left of the window, tick All.
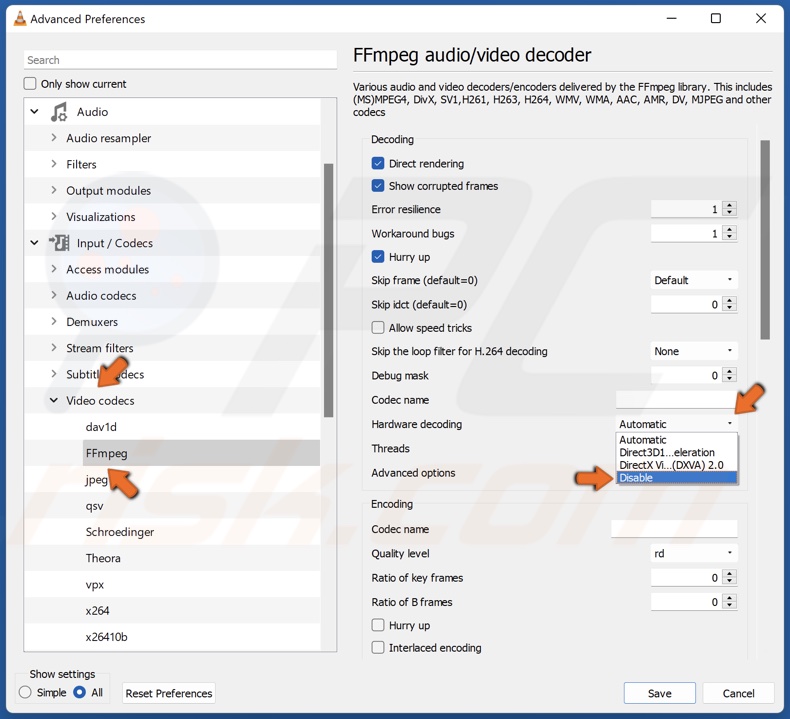
3. In the Input / Codecs list, expand the Video codecs list and select FFmpeg.
4. In the right pane, open the Hardware decoding drop-down menu and select Disable.
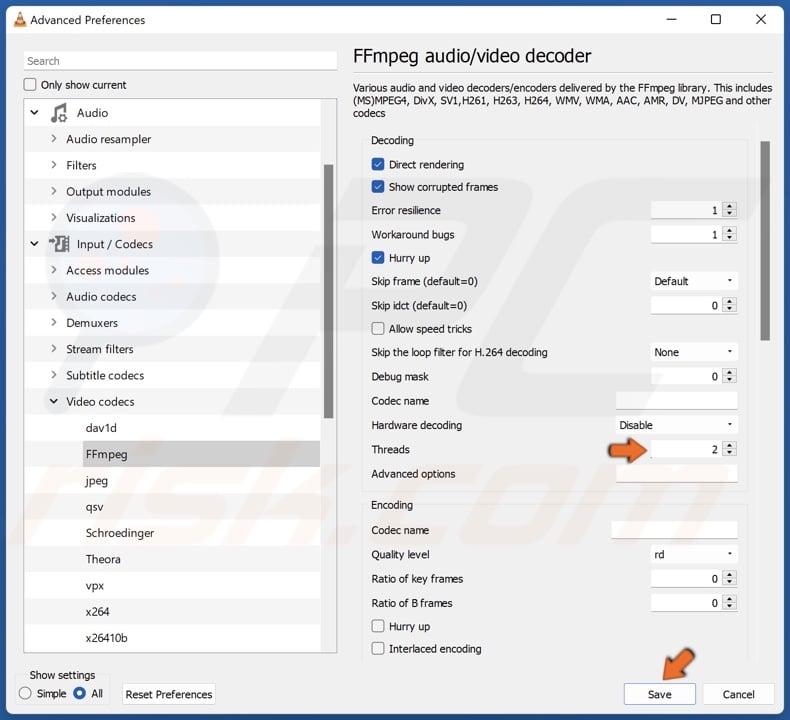
5. Then, set Threads to 2 and click Save.
6. Close VLC and relaunch it.
Did this article help you fix VLC not working? Let us know by commenting below.
Share:

Rimvydas Iliavicius
Researcher, author
Rimvydas is a researcher with over four years of experience in the cybersecurity industry. He attended Kaunas University of Technology and graduated with a Master's degree in Translation and Localization of Technical texts. His interests in computers and technology led him to become a versatile author in the IT industry. At PCrisk, he's responsible for writing in-depth how-to articles for Microsoft Windows.
▼ Show Discussion