Fix Windows Update Error 0x800f020b on Windows 11

Get Free Scanner and check your computer for errors
Fix It NowTo fix found issues, you have to purchase the full version of Combo Cleaner. Free trial available. Combo Cleaner is owned and operated by Rcs Lt, the parent company of PCRisk.com read more.
How to Fix Windows Update Error 0x800f020b on Windows 11
Many users have started getting a 0x800f020b error when updating Windows 11. This error may prevent one or more updates from getting installed, but you can fix this error by following the instructions in this article.
Most users experience error 0x800f020b when updating Windows, particularly when updating their HP and Xerox printer software.
You may experience this error if your printer isn’t properly connected or is disconnected during the update. You may also experience this error if your printer or another device is connected to the system over a WiFi connection. So make sure that the device is connected to your computer, preferably using a USB cable.
You can bypass the 0x800f020b error by booting up Windows in Clean Boot mode and then checking for updates manually.
If you no longer use an HP or Xerox printer, uninstall the driver, and the error message will go away as the update won’t be necessary. Alternatively, you can hide the problematic update using the Show or Hide Updates Troubleshooter.
Video on How to Fix Windows Update Error 0x800f020b in Windows 11
Table of Contents:
- Introduction
- Method 1. Run the Windows Update Troubleshooter
- Method 2. Download Windows 11 Update Manually
- Method 3. Clear Windows Update Cache
- Method 4. Run the System File Checker (SFC) Scan
- Method 5. Run the Deployment Image & Servicing Management (DISM) Scan
- Video on How to Fix Windows Update Error 0x800f020b in Windows 11
Download Computer Malware Repair Tool
It is recommended to run a free scan with Combo Cleaner - a tool to detect viruses and malware on your device. You will need to purchase the full version to remove infections. Free trial available. Combo Cleaner is owned and operated by Rcs Lt, the parent company of PCRisk.com read more.
Method 1. Run the Windows Update Troubleshooter
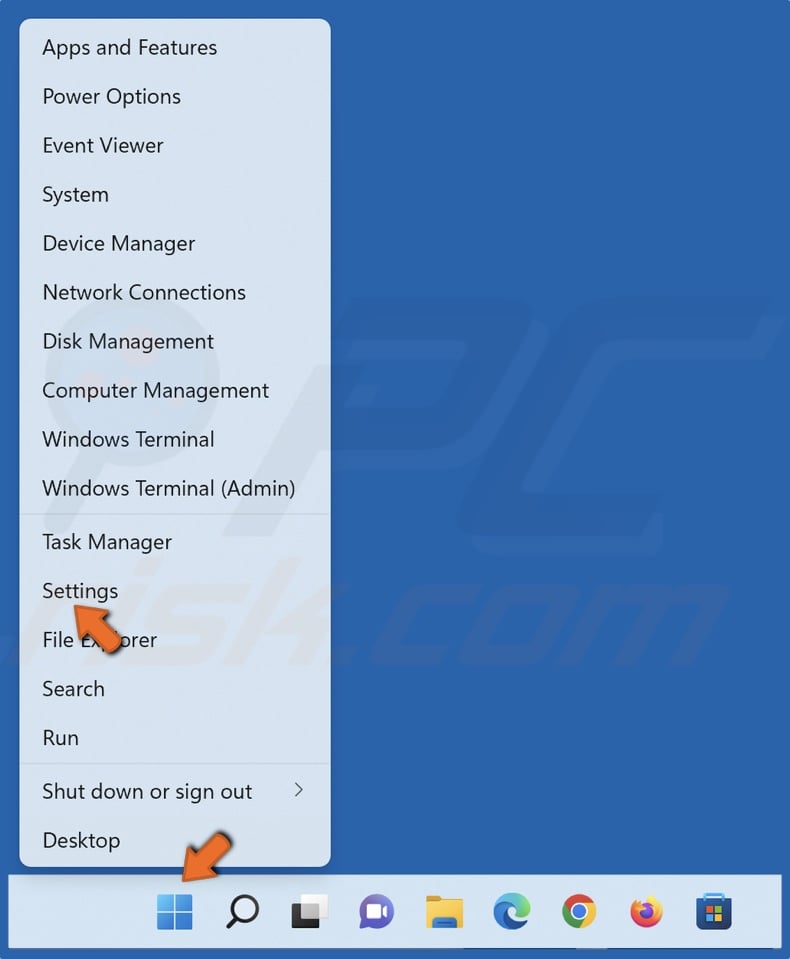
1. Right-click the Windows Start button and select Settings.
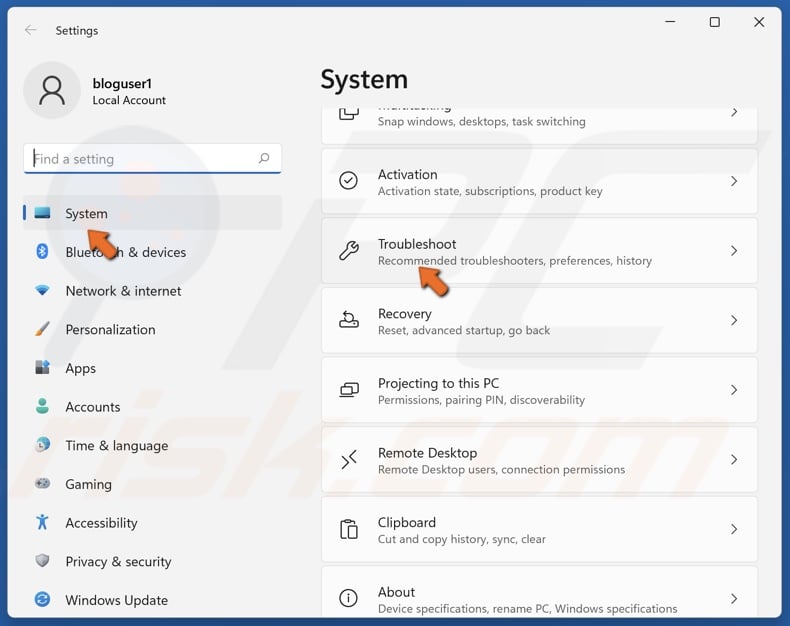
2. In the System panel, scroll down and click Troubleshoot.
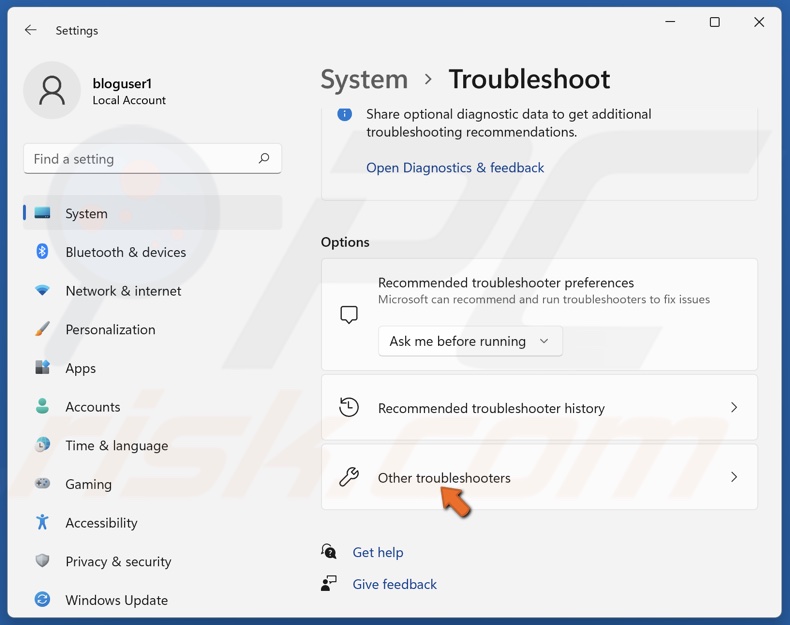
3. Select Other troubleshooters.
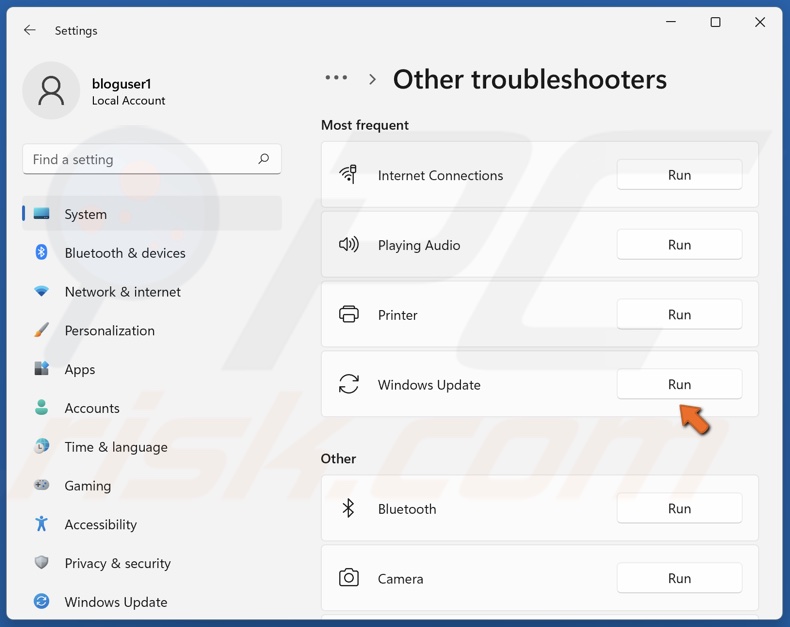
4. Run the Windows Update troubleshooter.
5. Apply the proposed fixes.
6. Restart your PC.
Method 2. Download Windows 11 Update Manually
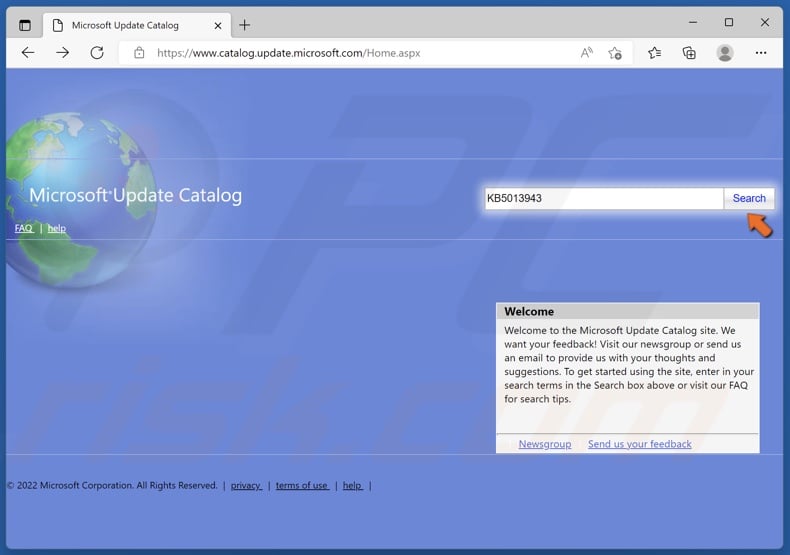
1. Open your browser and go to the Microsoft Update Catalog webpage.
2. In the search box at the top right of the window, type in the KB (Knowledge Base) code (eg. KB5013943) and click Search.
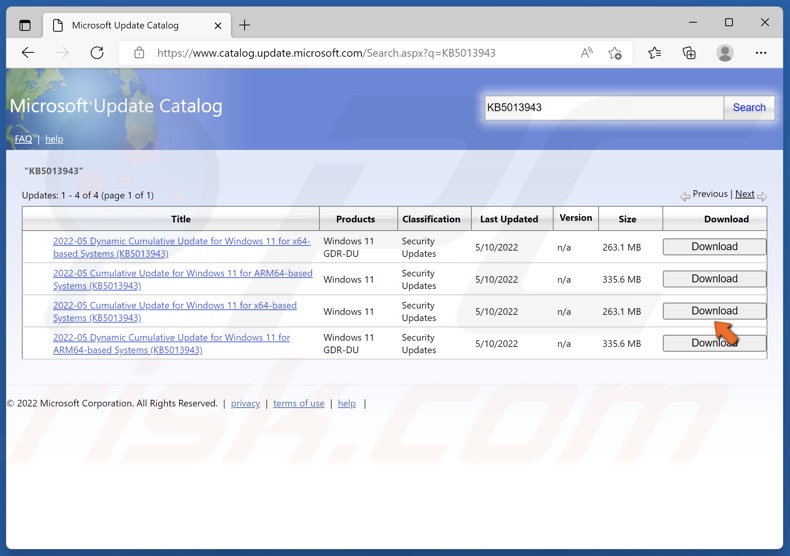
3. Then, select the version for your operating system and CPU architecture, and click Download.
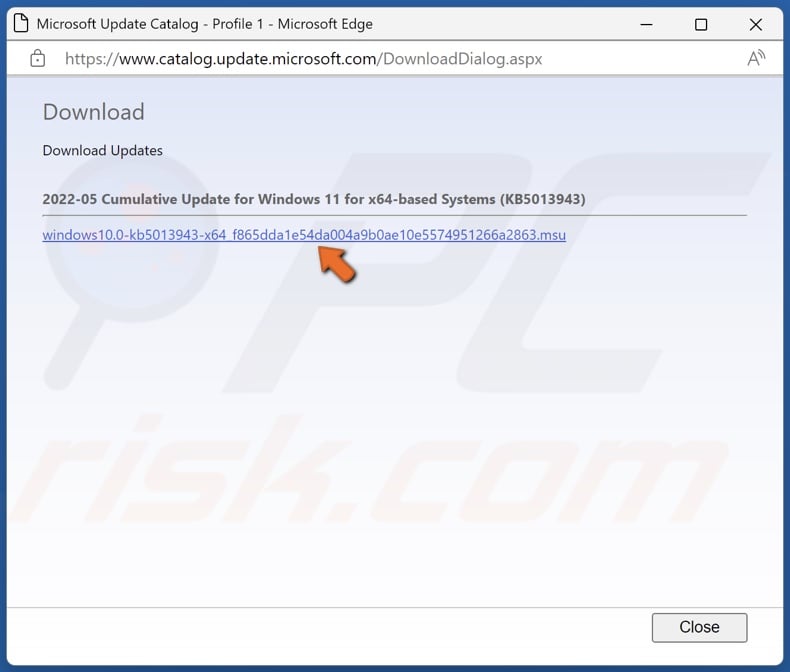
4. A new window will open. Click the update link, and the update will begin downloading.
5. Once the update has been downloaded, run its installer.
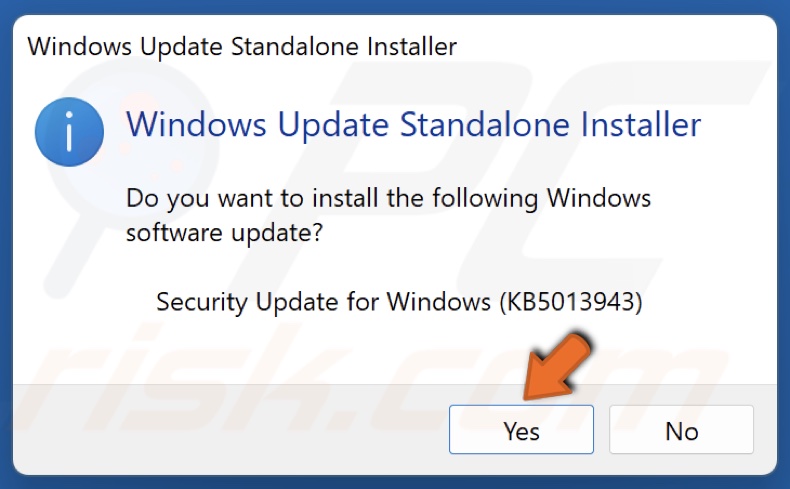
6. The installer will scan your PC for updates and ask whether you want to install the update. Click Yes.
7. The Standalone installer will begin installing the update.
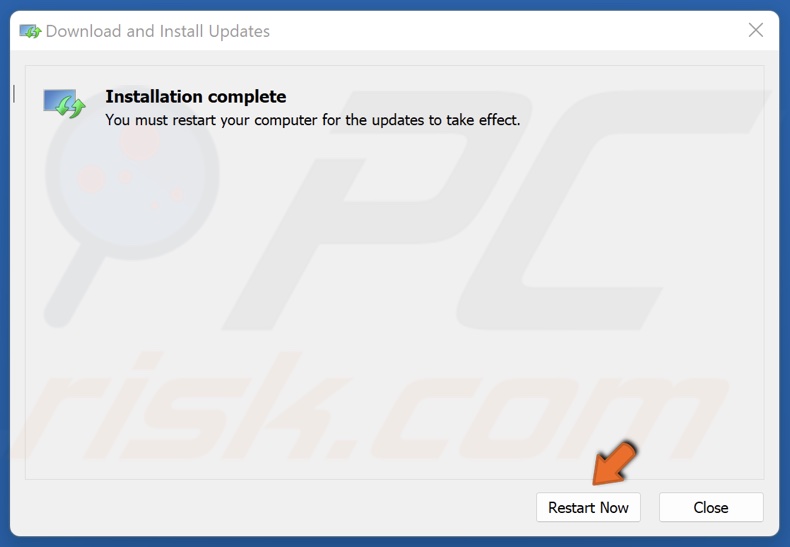
8. Once the update is installed, click Restart Now.
Method 3. Clear Windows Update Cache
1. Hold down Windows+R keys to open Run.
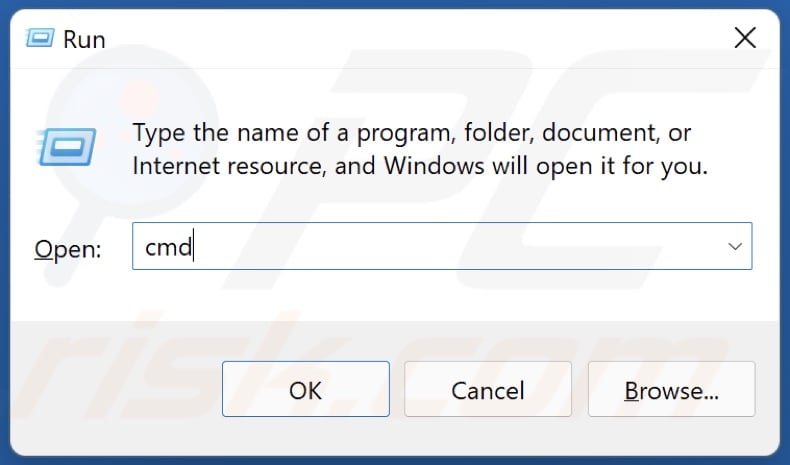
2. In the Run dialog box, type in CMD and hold down Ctrl+Shift+Enter keys to open the elevated Command Prompt.
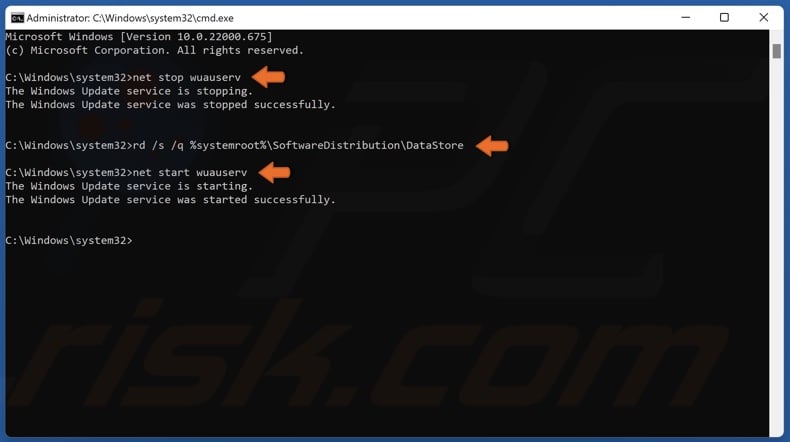
3. In the Command Prompt window, type in net stop wuauserv and press the Enter key.
4. Type in rd /s /q %systemroot%\SoftwareDistribution\DataStore and press Enter.
5. Type in net start wuauserv and press Enter.
Method 4. Run the System File Checker (SFC) Scan
1. Hold down Windows+R keys to open Run.
2. In the Run dialog box, type in CMD and hold down Ctrl+Shift+Enter keys to open the elevated Command Prompt.
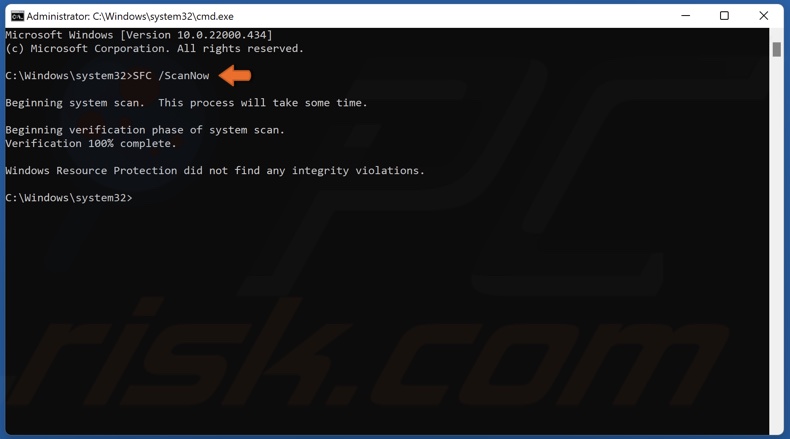
3. In the Command Prompt window, type in SFC /ScanNow and press Enter.
4. Once the scan has been completed, restart your PC.
Method 5. Run the Deployment Image & Servicing Management (DISM) Scan
1. Hold down Windows+R keys to open Run.
2. In the Run dialog box, type in CMD and hold down Ctrl+Shift+Enter keys to open the elevated Command Prompt.

3. In the Comand Prompt window, type in DISM /Online /Cleanup-Image /ScanHealth and press Enter.
4. Type in the DISM /Online /Cleanup-Image /RestoreHealth and press Enter.
5. Once the scan has been completed, restart your PC
Share:

Rimvydas Iliavicius
Researcher, author
Rimvydas is a researcher with over four years of experience in the cybersecurity industry. He attended Kaunas University of Technology and graduated with a Master's degree in Translation and Localization of Technical texts. His interests in computers and technology led him to become a versatile author in the IT industry. At PCrisk, he's responsible for writing in-depth how-to articles for Microsoft Windows.
▼ Show Discussion