Steam E502 L3 Error | 3 Ways to Fix It
Get Free Scanner and check your computer for errors
Fix It NowTo fix found issues, you have to purchase the full version of Combo Cleaner. Free trial available. Combo Cleaner is owned and operated by Rcs Lt, the parent company of PCRisk.com read more.
How to Fix Error Code E502 L3 in Steam
Steam error E502 L3 is a common server connection error that can appear at any moment when using Steam but is most often encountered when logging in or using the Steam store. This article will show you how to fix this error.
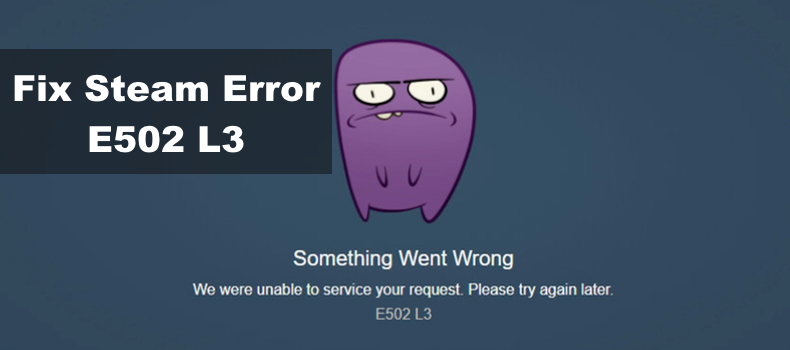
Something went wrong, We were unable to service your request, Please try again later, E502 L3.
Error Code E502 L3 means that Steam’s servers are under heavy load, usually involving the Steam store. This error starts occurring more frequently during Steam’s seasonal sales and popular game releases when many users attempt to checkout at the same time.
Since error E502 L3 is a server-related error, you might only need to wait for the buying frenzy to die down or for Valve to intervene and stabilize the servers. You can go to SteamDB to see how different areas of the platform are performing.
If all Steam services are up and running, you can apply the fixes listed below. However, before you do that, try disabling your third-party anti-virus software by following the instructions here.
Video Guide on How to Fix Steam E502 L3 Error
Table of Contents:
- Introduction
- Solution 1. Log Out and Exit Steam
- Solution 2. Add Steam to Windows Defender Firewall Exceptions List
- Solution 3. Reinstall Steam
- Video Guide on How to Fix Steam E502 L3 Error
Download Computer Malware Repair Tool
It is recommended to run a free scan with Combo Cleaner - a tool to detect viruses and malware on your device. You will need to purchase the full version to remove infections. Free trial available. Combo Cleaner is owned and operated by Rcs Lt, the parent company of PCRisk.com read more.
Solution 1. Log Out and Exit Steam
1. Open Steam.
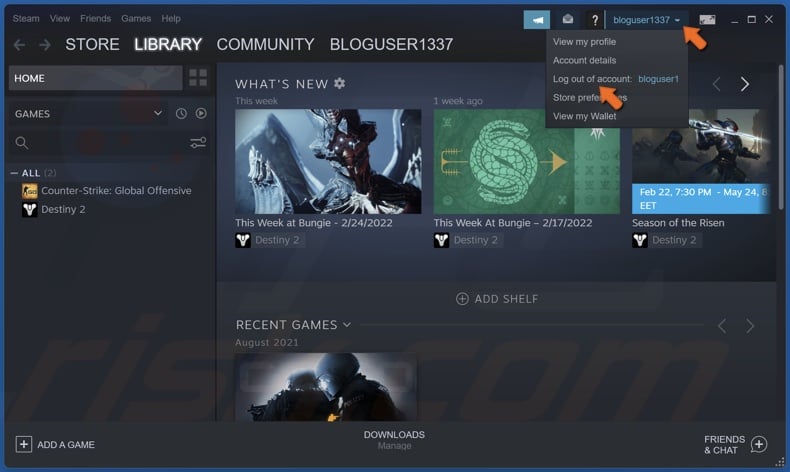
2. Click your Steam screen name at the top-right of the window and click Log out of account.
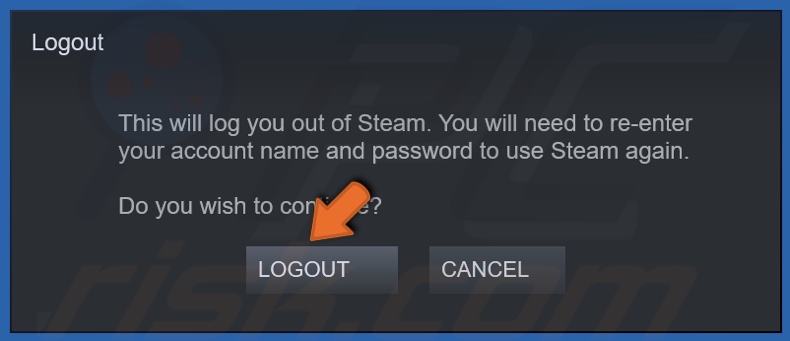
3. Click Logout when prompted.
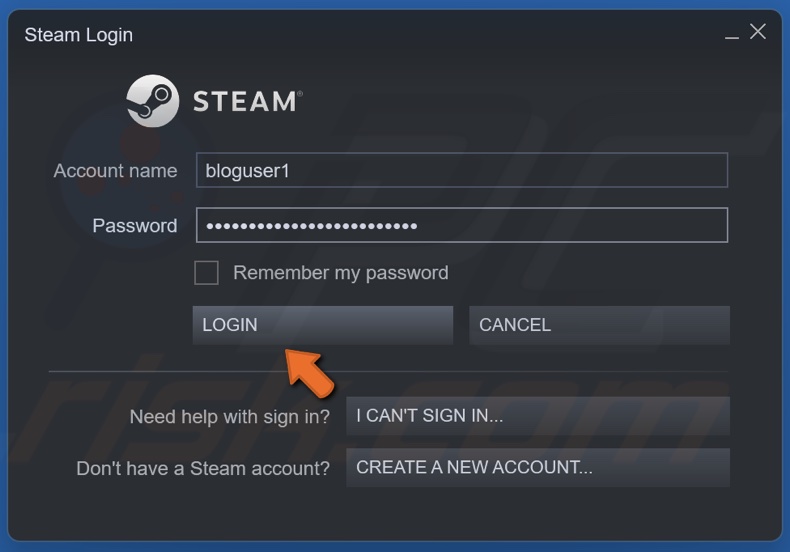
4. Then, enter your login credentials and click Login.
Solution 2. Add Steam to Windows Defender Firewall Exceptions List
1. Hold down Windows+R keys to open Run.
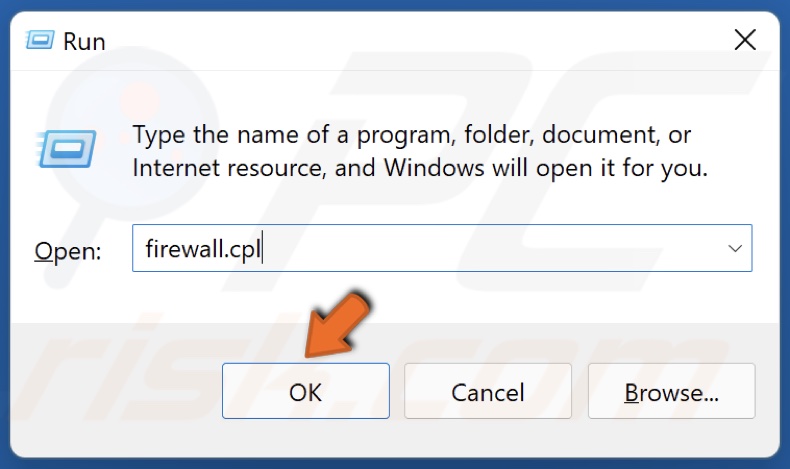
2. In the Run dialog box, type in firewall.cpl and click OK.
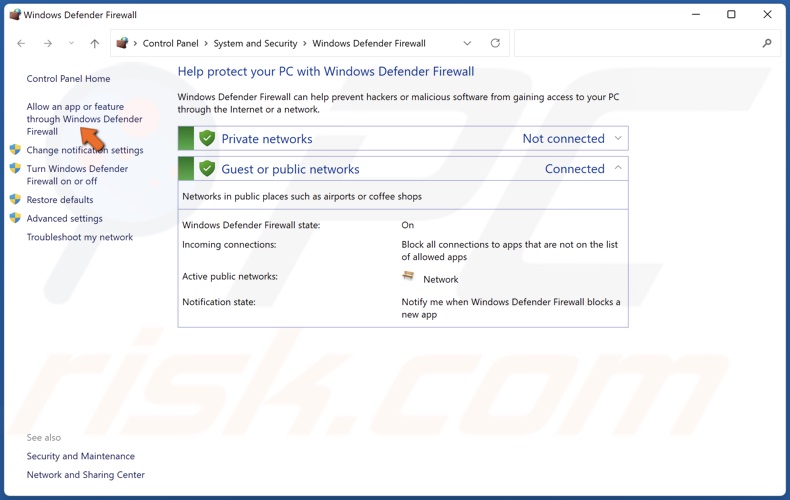
3. In the Firewall settings window, click Allow an app or feature through Windows Firewall.
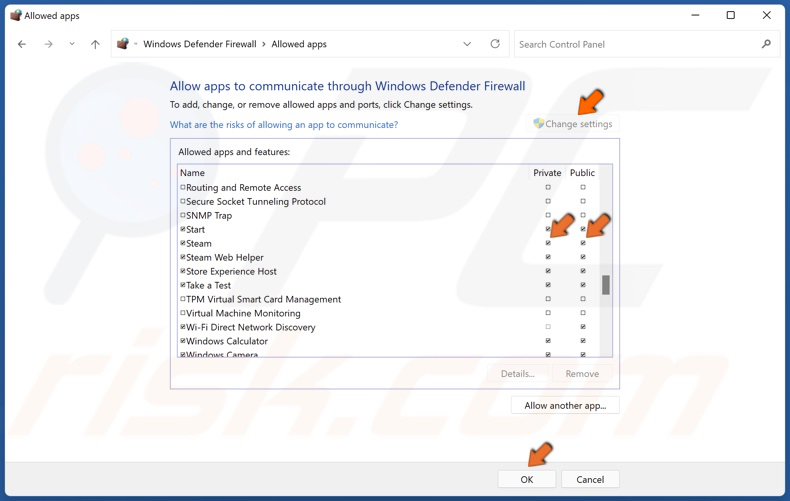
4. In the Allowed apps and features window, click Change settings, scroll down, and find Steam.
5. To allow Steam through private and public networks, mark the checkboxes in the Private and Public columns and click OK.
Solution 3. Reinstall Steam
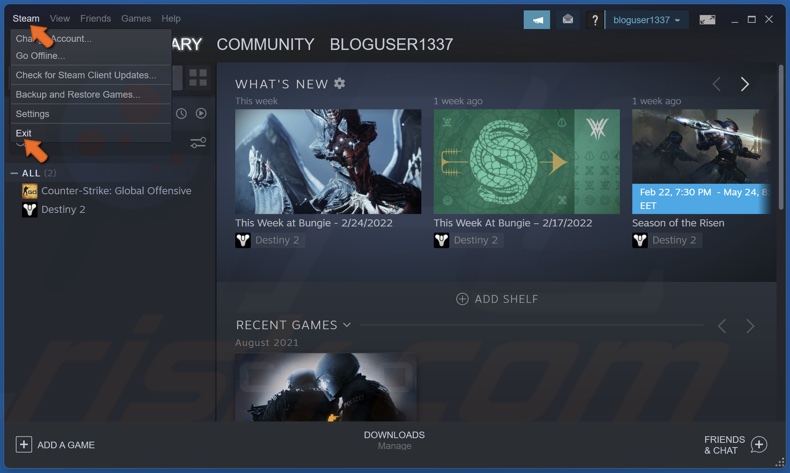
1. Open Steam, click Steam in the menu bar, and click Exit.
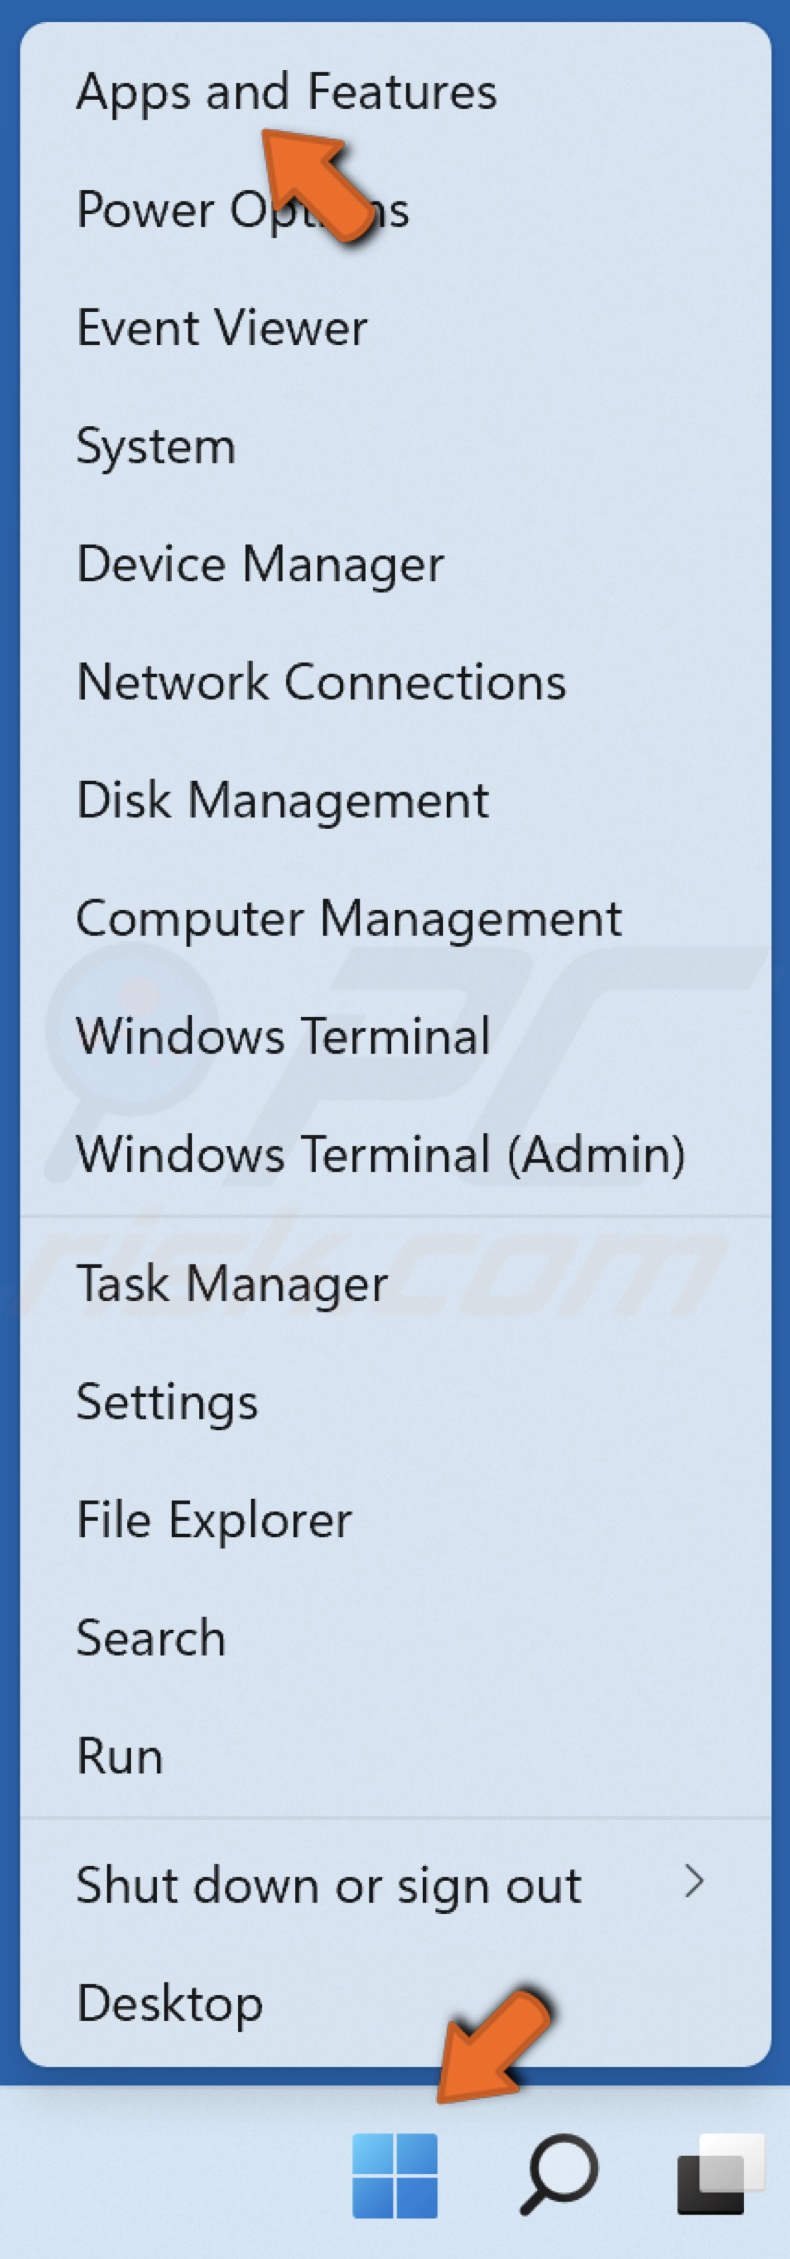
2. Right-click the Windows Start button and click Apps and Features.
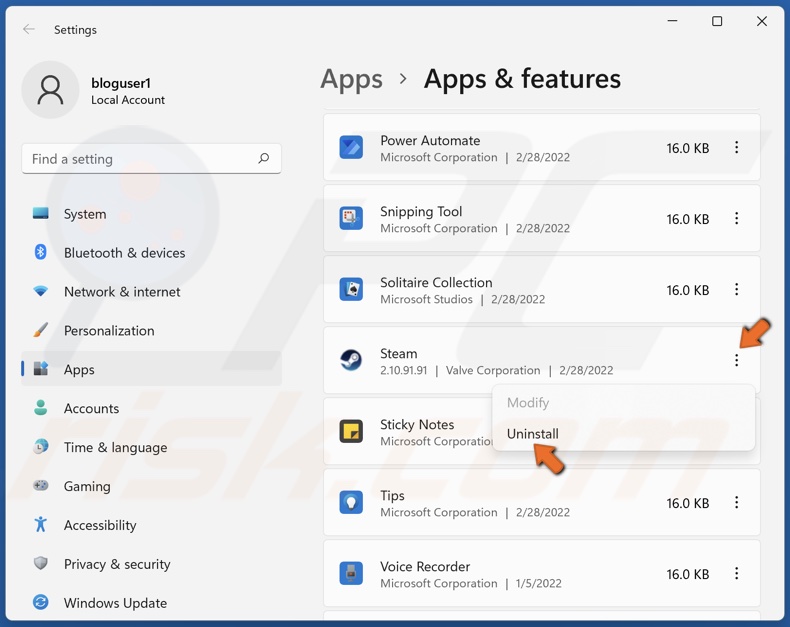
3. Select Steam from the list and click Uninstall.
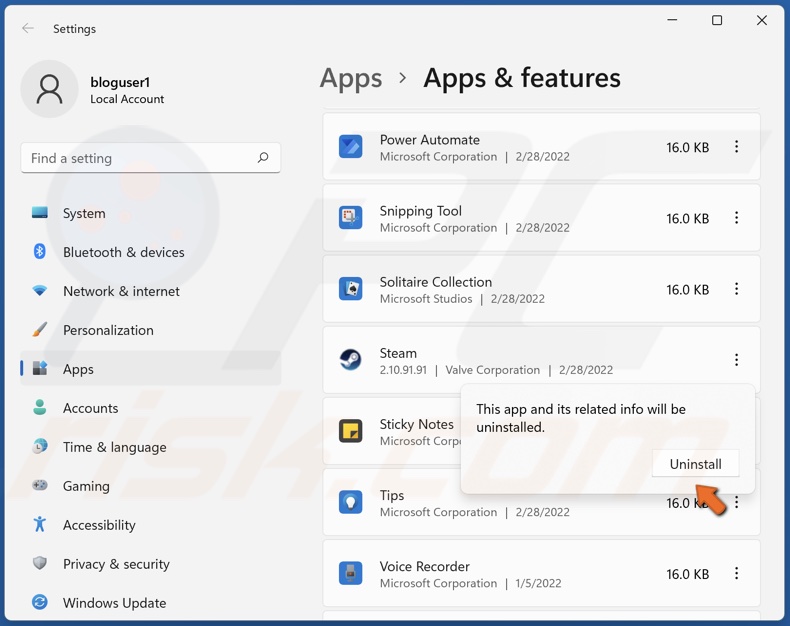
4. Click Uninstall again.
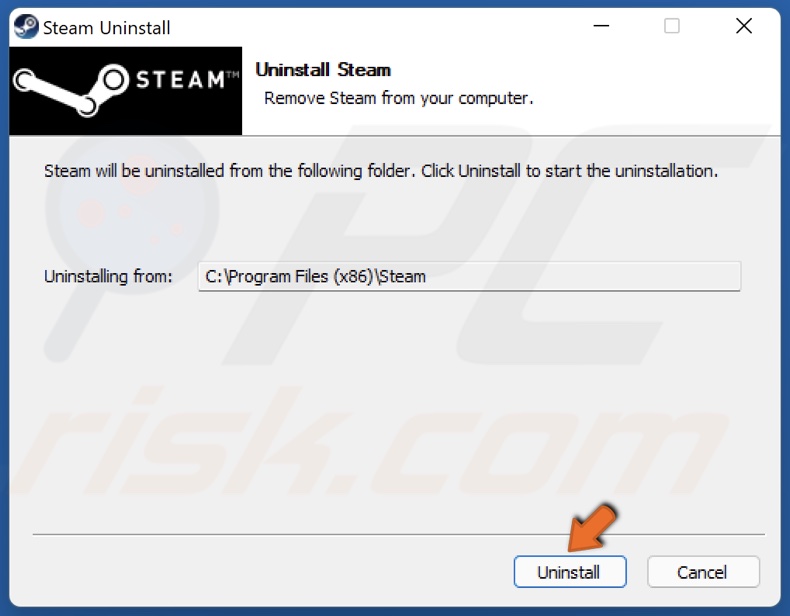
5. Click Uninstall yet again.
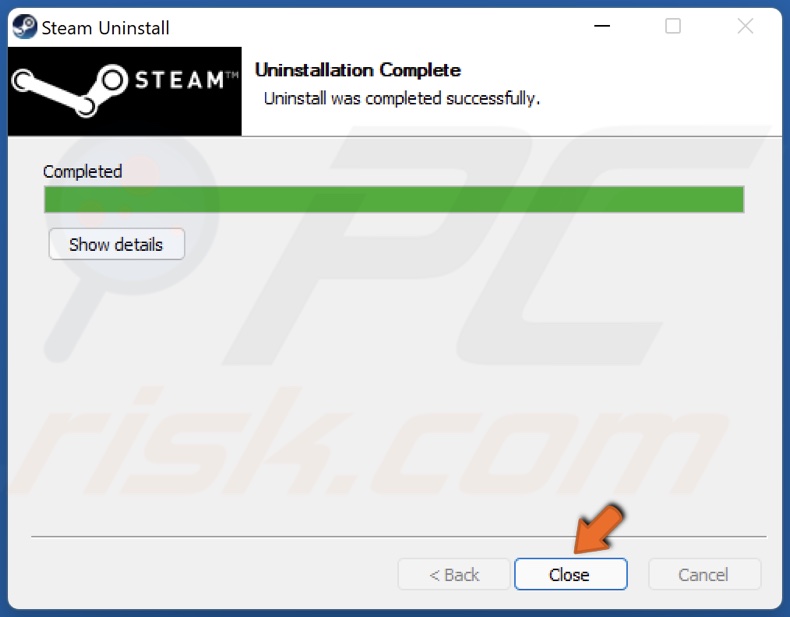
6. Click Close.

7. Then go to the Steam website.
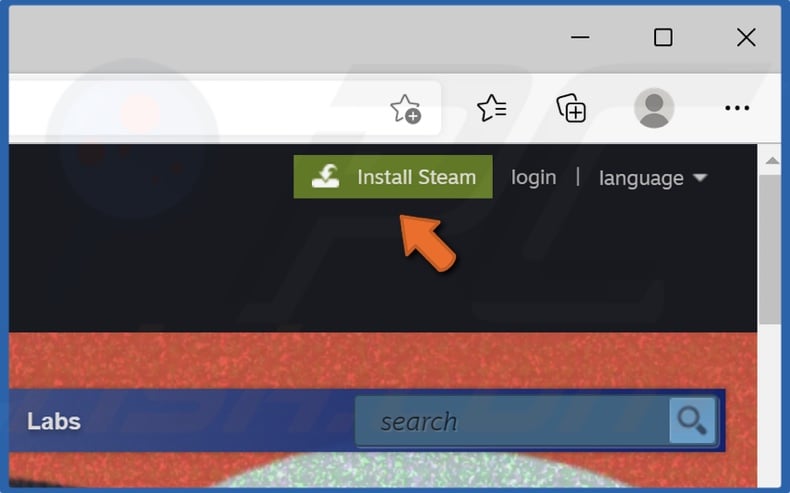
8. Click Install Steam.

9. Click Install Steam in the next window.
10. Run SteamSetup.exe and follow the installation guide.

11. Once installed, enter your login credentials.
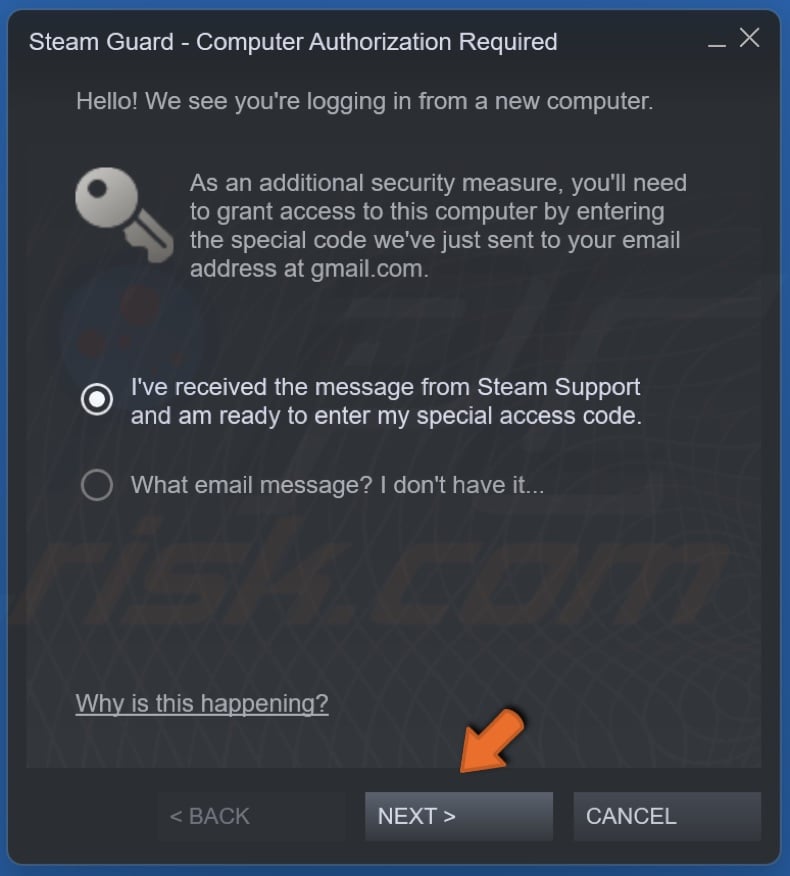
12. Click Next.
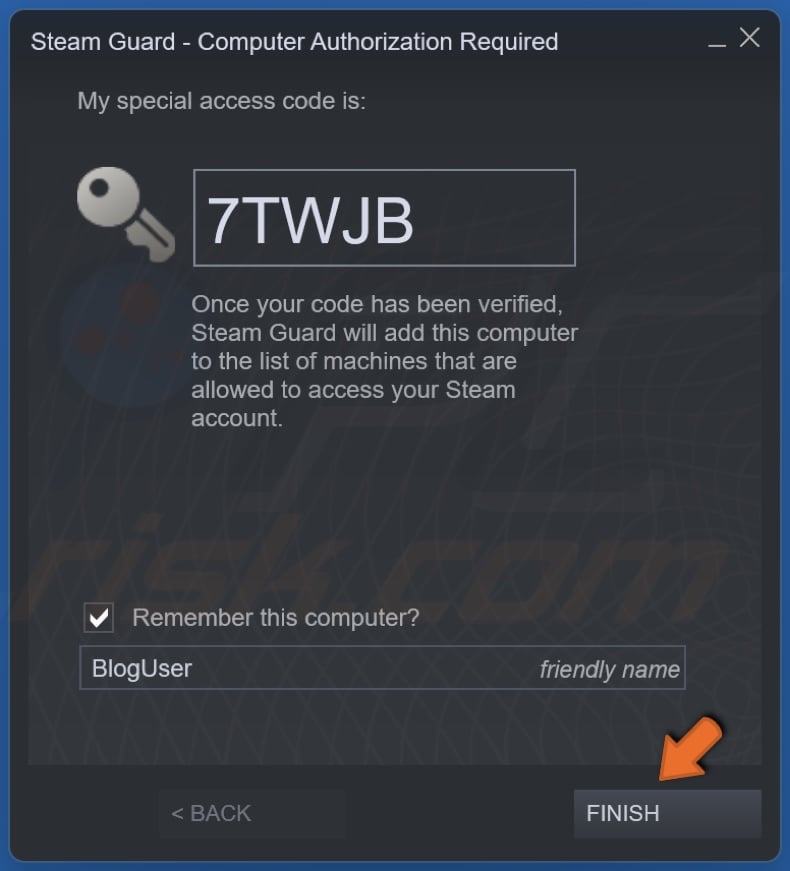
13. Enter the special code sent to you via email and click Finish.
Share:

Rimvydas Iliavicius
Researcher, author
Rimvydas is a researcher with over four years of experience in the cybersecurity industry. He attended Kaunas University of Technology and graduated with a Master's degree in Translation and Localization of Technical texts. His interests in computers and technology led him to become a versatile author in the IT industry. At PCrisk, he's responsible for writing in-depth how-to articles for Microsoft Windows.

▼ Show Discussion