How to Fix MsMpEng.exe High CPU Usage

Get Free Scanner and check your computer for errors
Fix It NowTo fix found issues, you have to purchase the full version of Combo Cleaner. Free trial available. Combo Cleaner is owned and operated by Rcs Lt, the parent company of PCRisk.com read more.
How to Fix High CPU Usage by the MsMpEng.exe Process on Windows 10
MsMpEng.exe is a core process of Microsoft Defender that may sometimes cause high CPU and Disk Usage. This article is dedicated to helping you fix this issue.

Most applications don't use more than 50% of the CPU's power for an extended period. However, some applications/programs and system processes may use an unjustifiable amount of your CPU, RAM, or Disk resources. One of these processes is MsMpEng.exe, and you may notice it using a lot of your CPU's processing power.
MsMpEng.exe is a core process of Microsoft Defender that scans downloaded files for spyware. If any suspicious items are found, it can quarantine or remove them. It also takes steps to prevent spyware infections by searching the system for known worms and trojan programs.
This guide demonstrates how to deal with high CPU usage when the MsMpEng.exe process is running and how to reduce it. Read the article below to find the solution that works for you.
NOTE: Before trying to resolve the MsMpEng.exe high CPU usage problem, ensure that you have no other antivirus program on your computer.
Video Showing How to Fix High CPU Usage by MsMpEng.exe on Windows:
Table of Contents:
- Introduction
- Limit CPU Usage
- Disable Sample Submission
- Prevent Windows Defender From Scanning Its Directory
- Start Windows in Safe Mode
- Disable Windows Defender Using Registry Editor
- Reschedule Windows Defender Using Task Scheduler
- Video Showing How to Fix High CPU Usage by MsMpEng.exe
Download Computer Malware Repair Tool
It is recommended to run a free scan with Combo Cleaner - a tool to detect viruses and malware on your device. You will need to purchase the full version to remove infections. Free trial available. Combo Cleaner is owned and operated by Rcs Lt, the parent company of PCRisk.com read more.
Limit CPU Usage
We will limit CPU usage for the "MsMpEng.exe" process using Task Manager. Task manager is a system monitor program used to provide information about processes and programs running on a computer and the general status of the system. Some implementations can also be used to terminate processes and programs and to change processes' priorities.
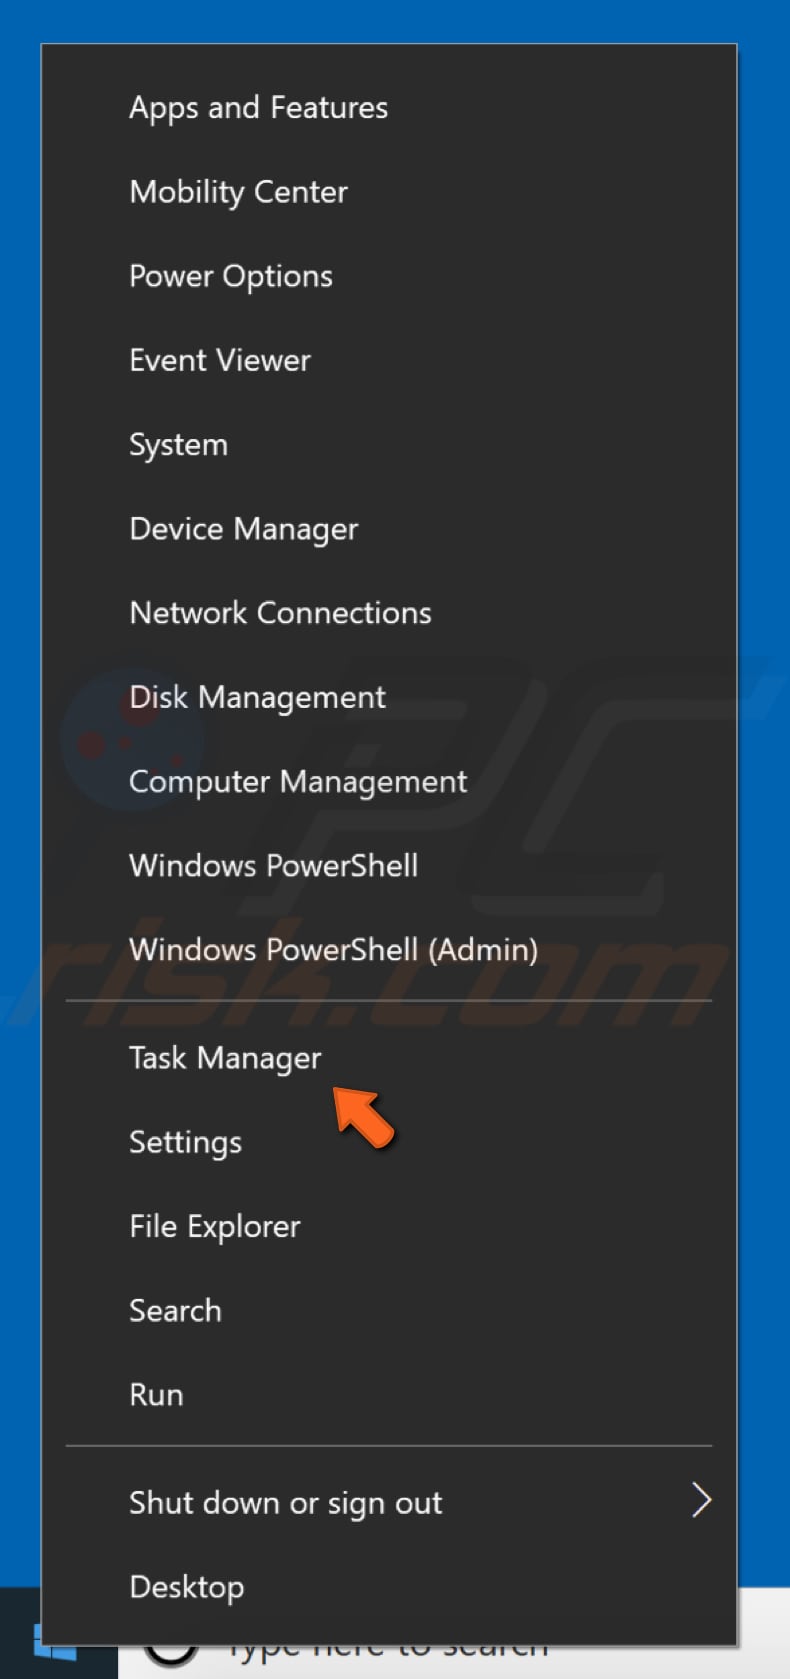
To open Task Manager, press Ctrl + Shift + Esc on your keyboard or right-click the Start menu and select "Task Manager".
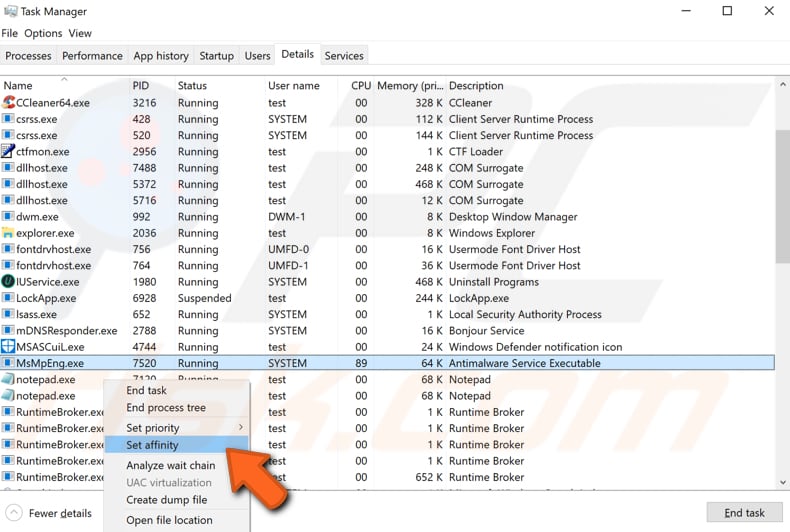
If Task Manager is minimized, click "More details" and find the "Details" tab and select it. In the Details tab, find the "MsMpEng.exe" process and right-click on it. Select "Set affinity" from the contextual menu. Then, select the CPU limit threshold for this process.
Disable Sample Submission
Microsoft automatically collects sample files from Windows Defender to improve antivirus and anti-malware protection and improve Windows Defender. Microsoft also collects information about suspicious items found by Windows Defender on your computer to provide cloud-based protection.
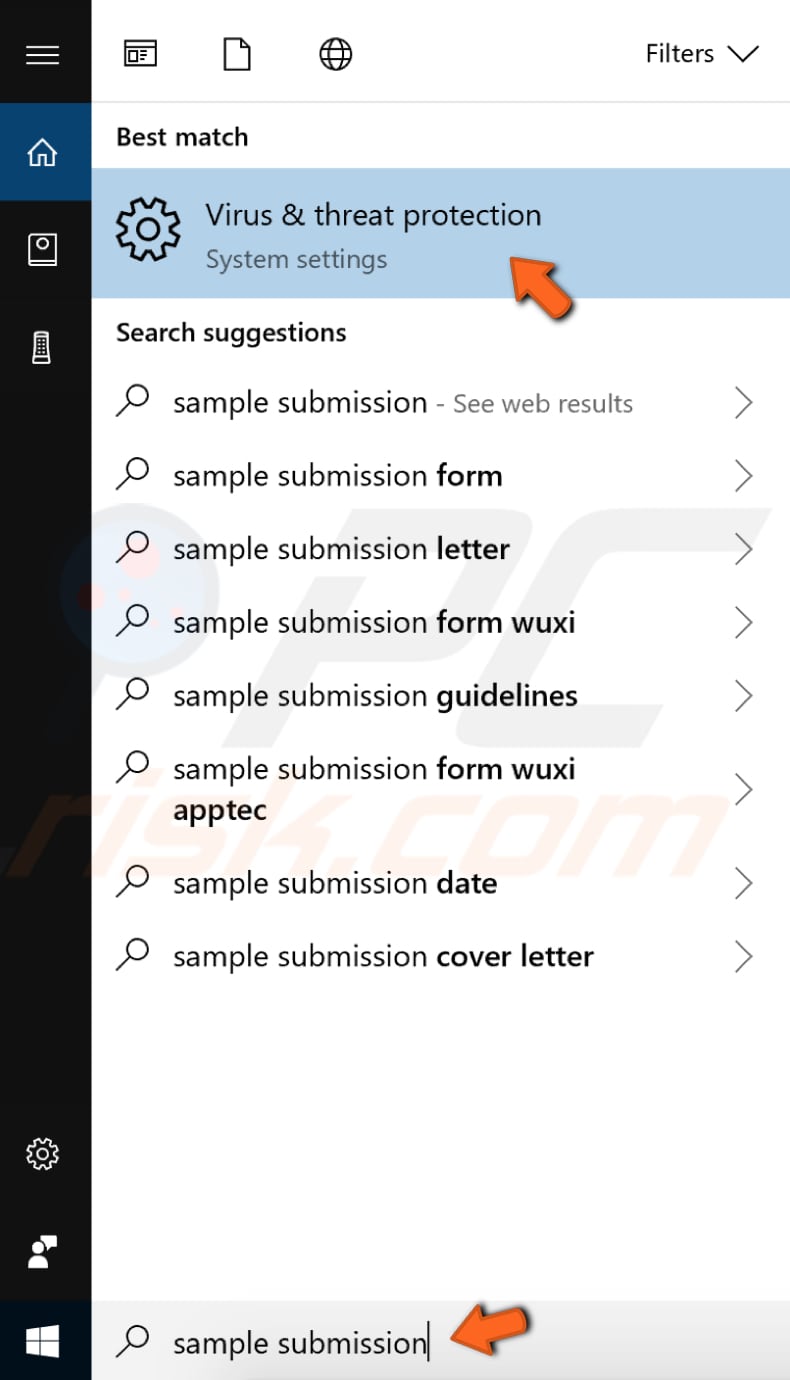
You can disable Automatic sample submission - simply type "sample submission" in Search and click the "Virus & threat protection" result.
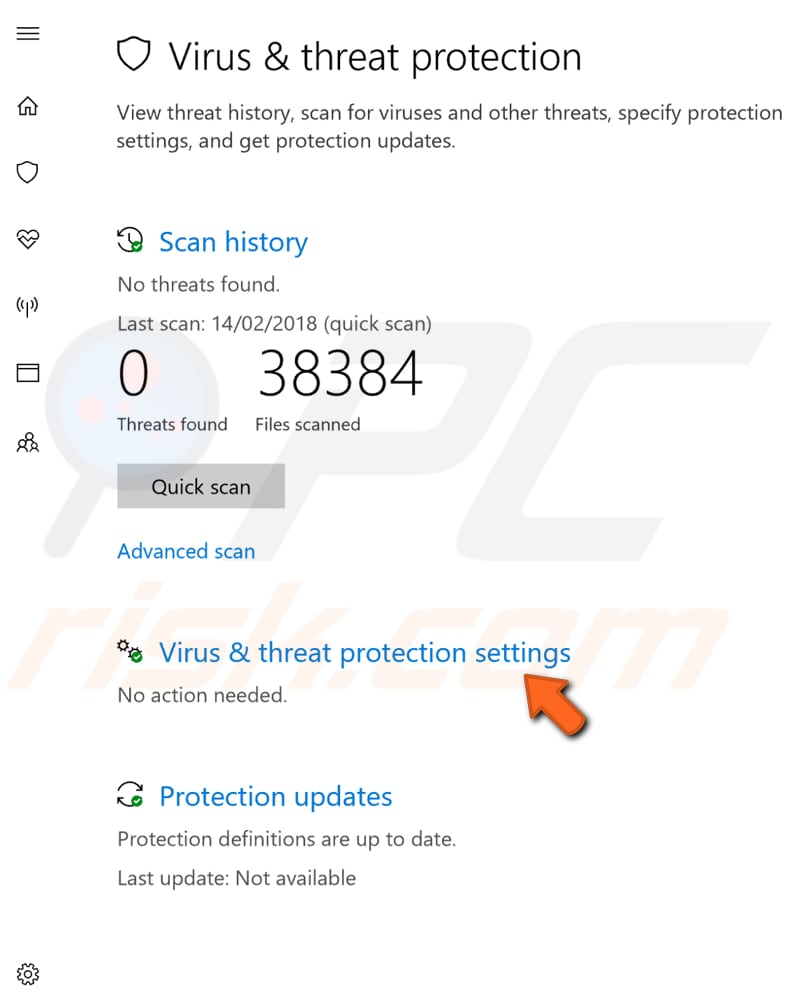
Now, click "Virus & threat protection settings".
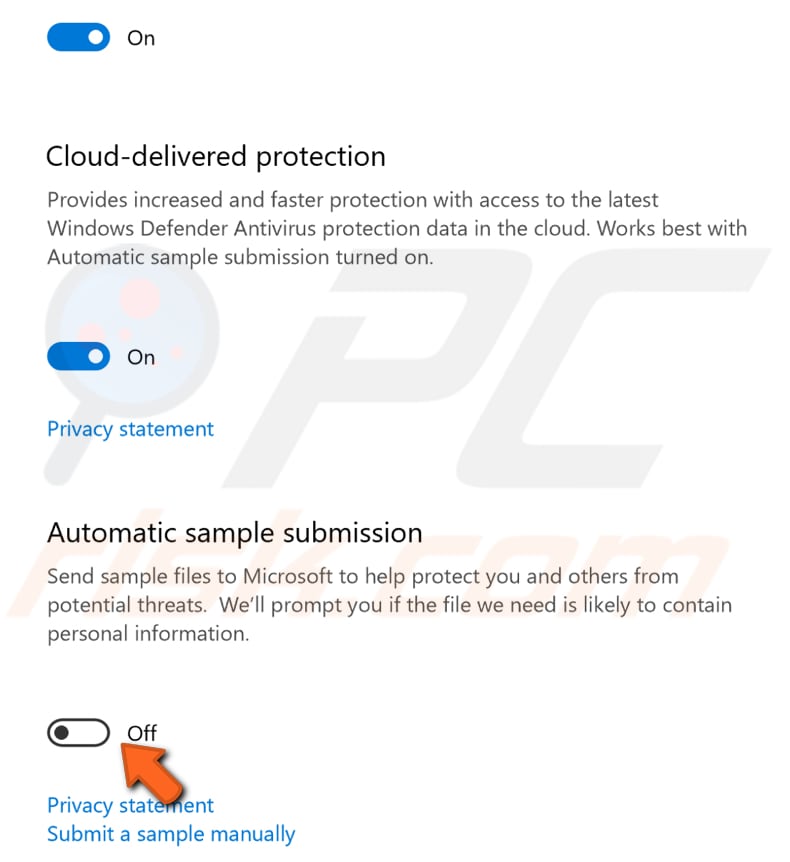
In Virus & threat protection settings, scroll down to find "Automatic sample submission" and toggle its switch to the "Off" position to disable it.
Prevent Windows Defender From Scanning Its Directory
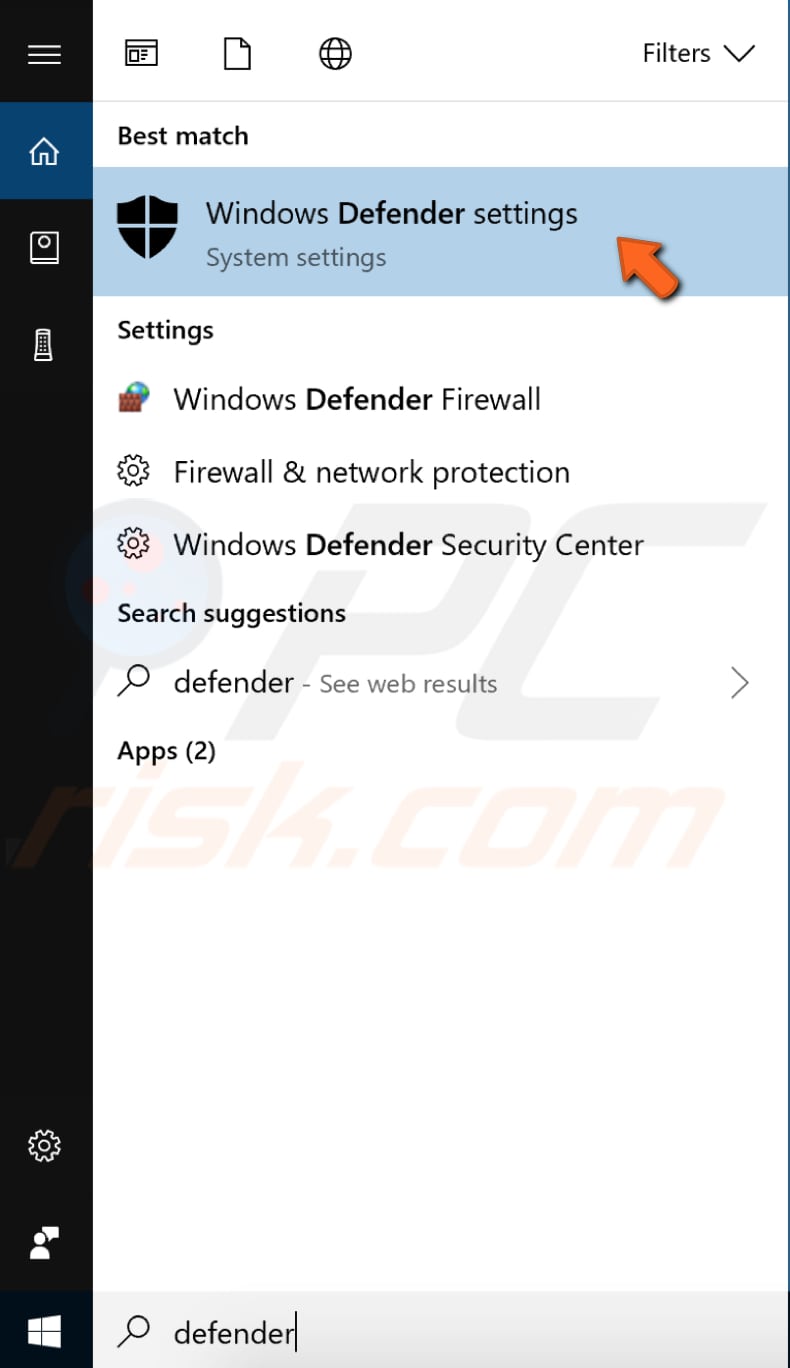
"MsMpEng.exe" might take too much CPU power because it scans the Windows Defender directory. To exclude this directory from scanning, type "defender" in Search and click the "Windows Defender Security Center" result.
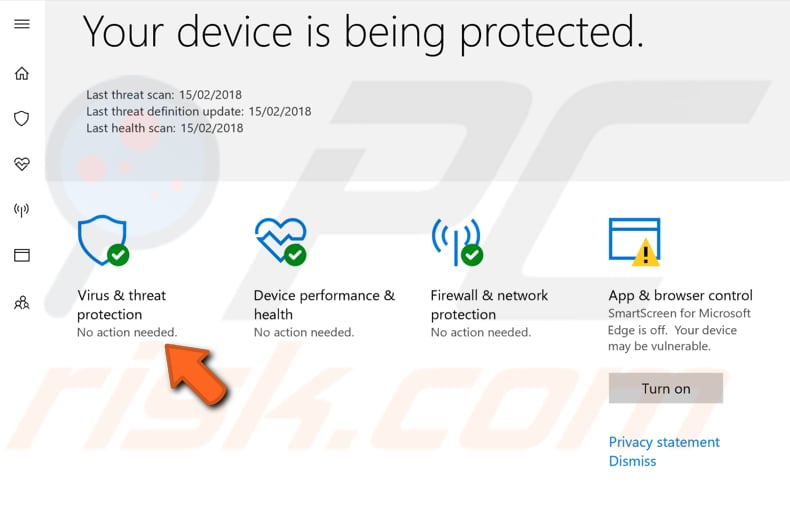
Now, click "Virus & threat protection".
In the Virus & threat protection window, click "Virus & threat protection settings".
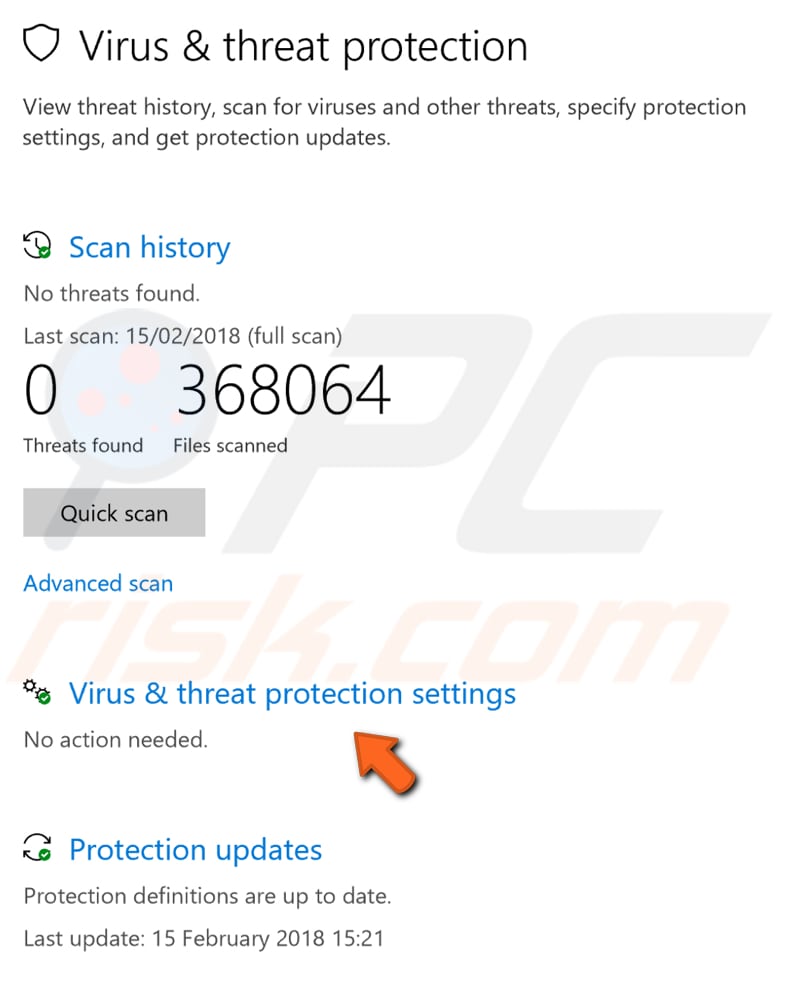
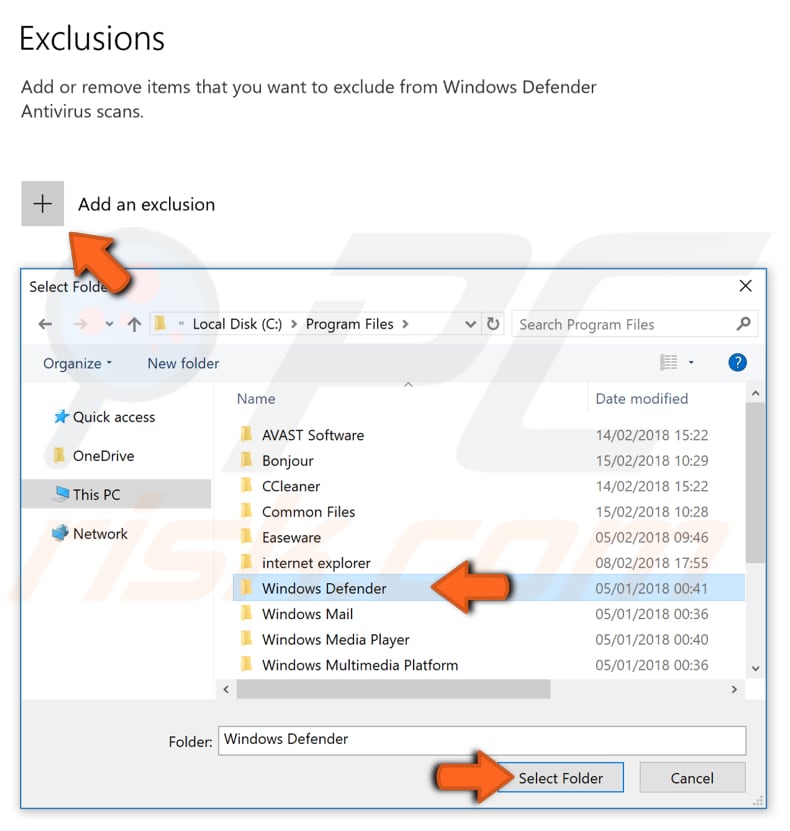
Scroll down to find "Add or remove exclusions" under "Exlusions".

Click "Add an exclusion" and select "Folder". Find the Windows Defender folder in Program Files and select it. This will exclude the Windows Defender folder from being scanned by its own software.
Start Windows in Safe Mode
Safe Mode is a diagnostic start-up mode in Windows operating systems used to obtain limited access to Windows when the operating system does not start or function normally.
Safe Mode starts Windows in a basic state, using a limited set of files and drivers. It can help to troubleshoot problems on your computer.
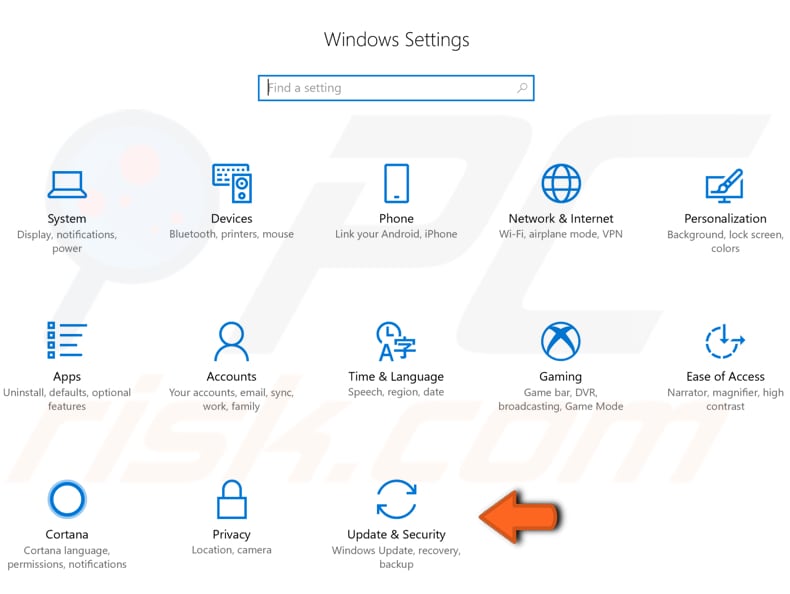
You might solve this problem by starting Windows in Safe Mode and using the Recovery option in Settings. Open Settings and click "Update & Security".
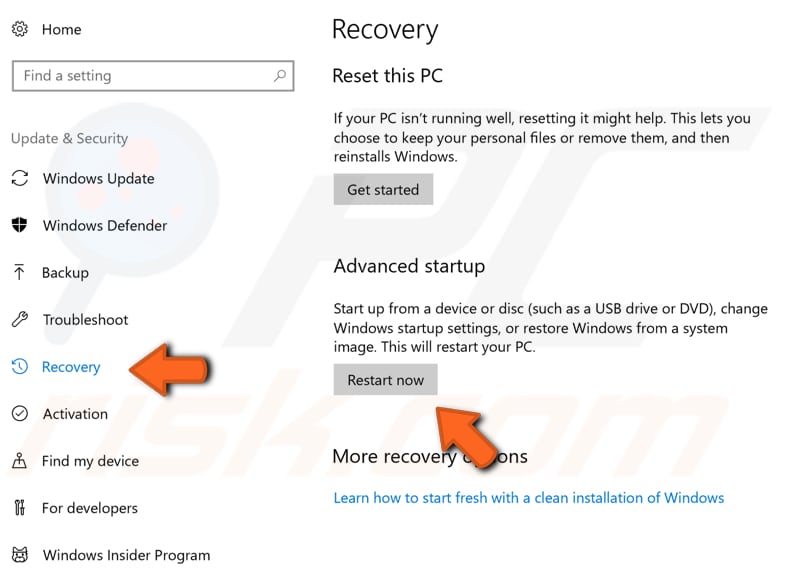
Then, click "Recovery" in the left pane. Click the "Restart now" button under Advanced startup.
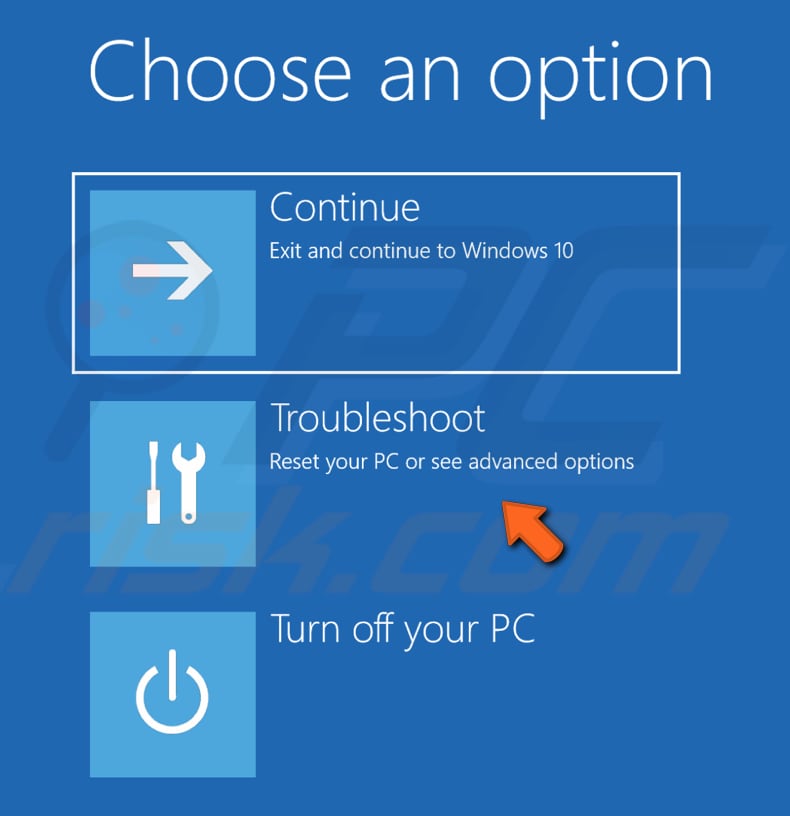
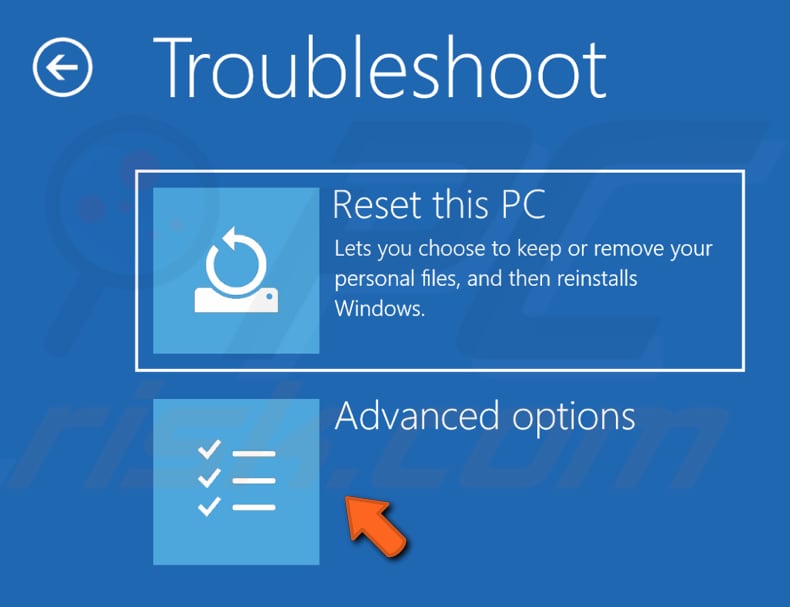
Your computer will restart, and you will see a menu on a blue screen. From the three options, select "Troubleshoot".
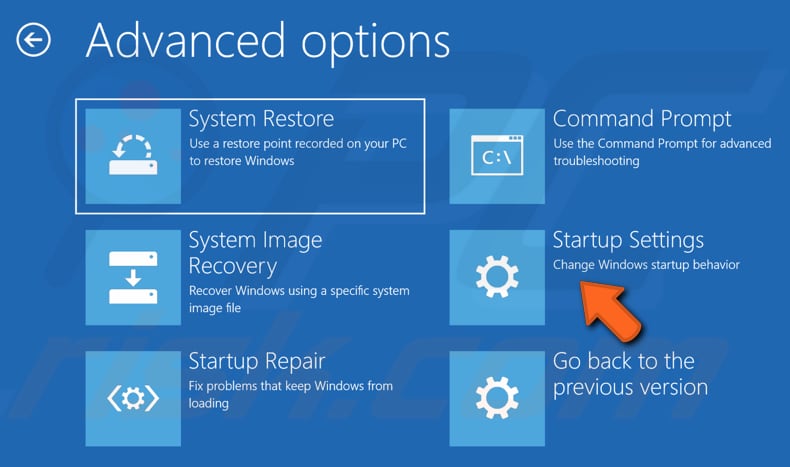
In Troubleshoot, click "Advanced options".
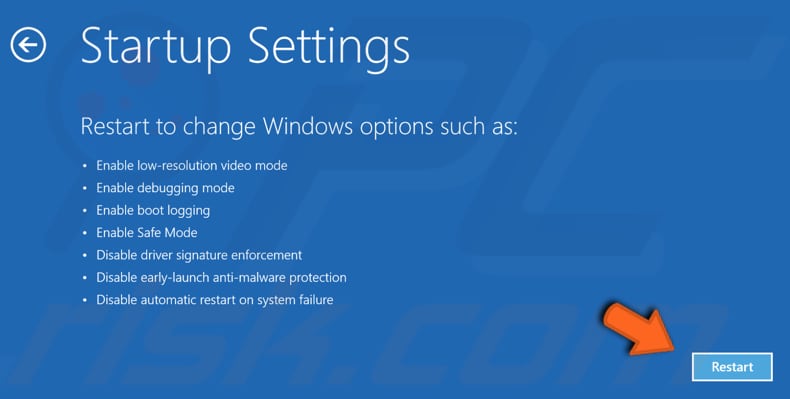
In Advanced options, click "Startup Settings".
In Startup Settings, click "Restart". After restart, you will be able to enable low-resolution video mode, debugging mode, boot logging, Safe Mode, disable early-launch anti-malware protection, and automatic restart on system failure.
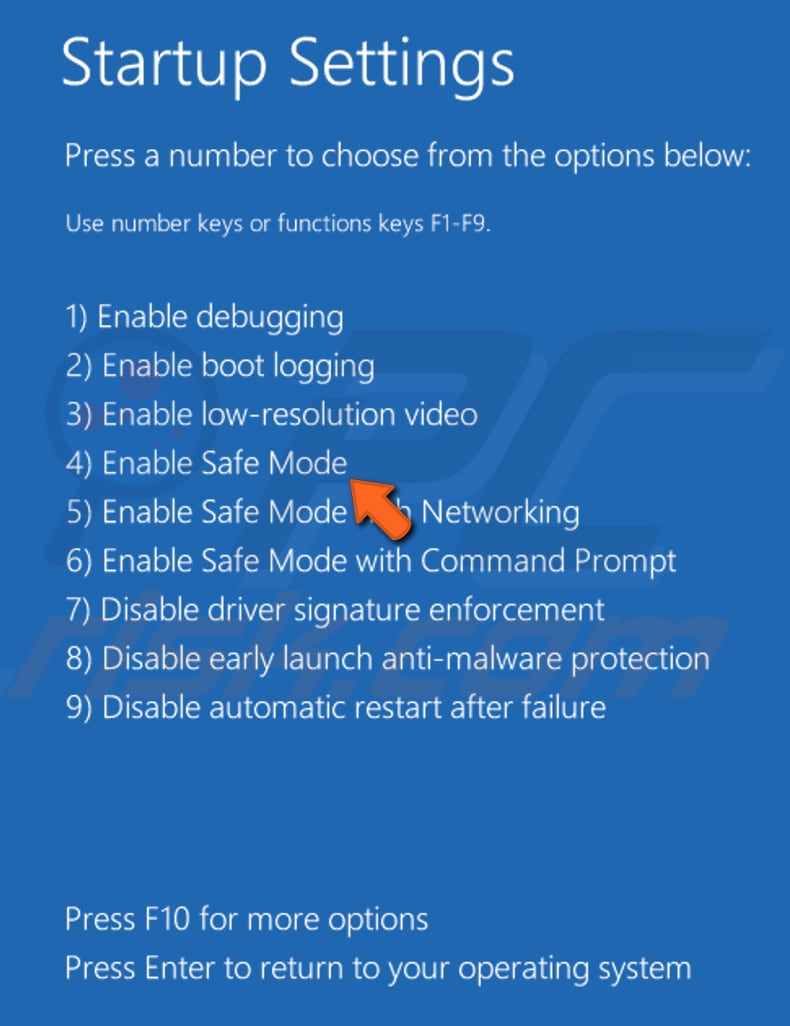
You will be presented with a list of options. To choose an option, press the number on your keyboard or use function keys from F1 to F9. Press 4 or F4 to enable Safe Mode.
To enable Safe Mode with Networking, press 5 and 6 to enable Safe Mode with Command Prompt.
If you change your mind and no longer need to start Windows in Safe Mode, press Enter to exit Startup Settings.
Read this article to find more ways to start your Windows in Safe Mode.
Disable Windows Defender Using Registry Editor
Windows Registry is a collection of databases of configuration settings in Microsoft Windows operating systems. It stores much of the information and settings for software programs, hardware devices, user preferences, operating system configurations, and much more.
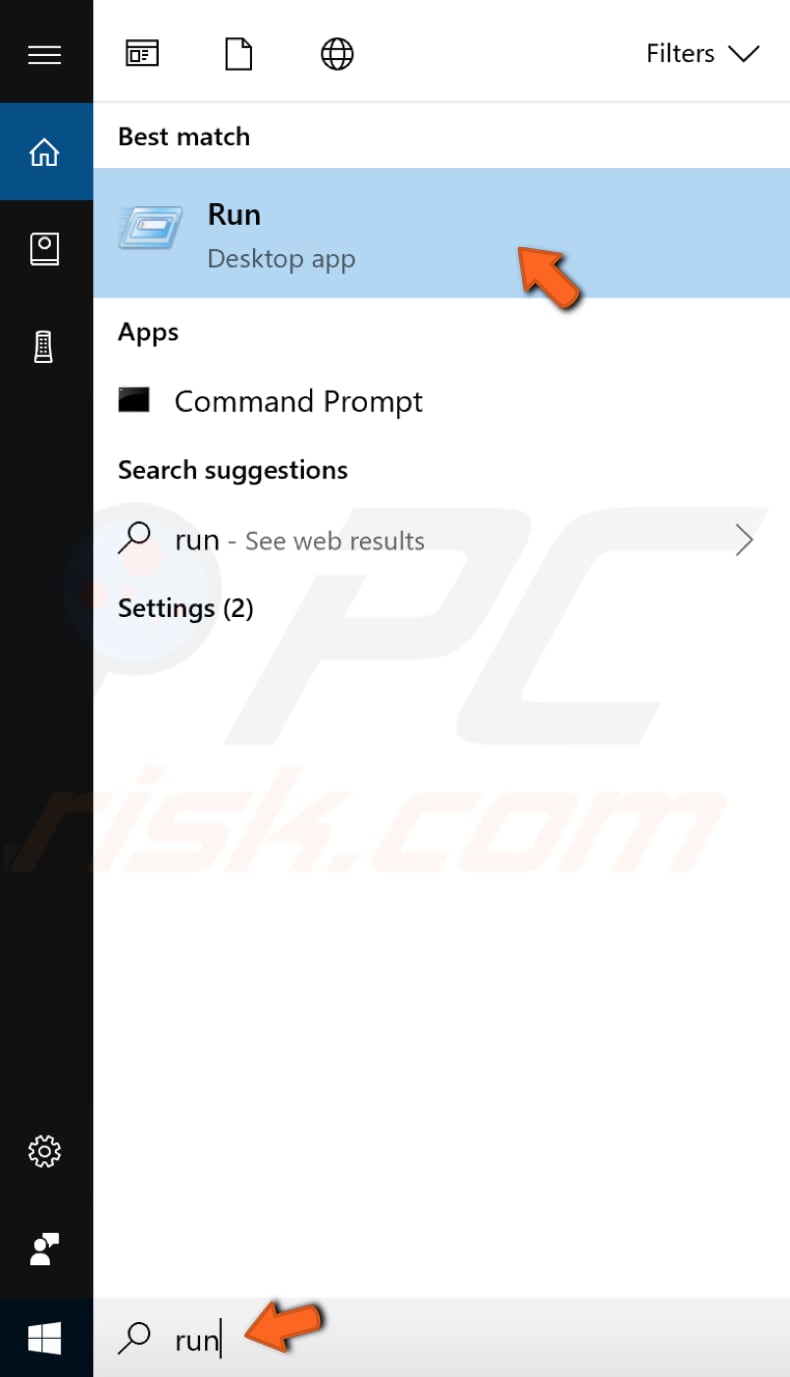
To open Registry Editor, you need to first open Run. Type "run" in Search and click the "Run" result.
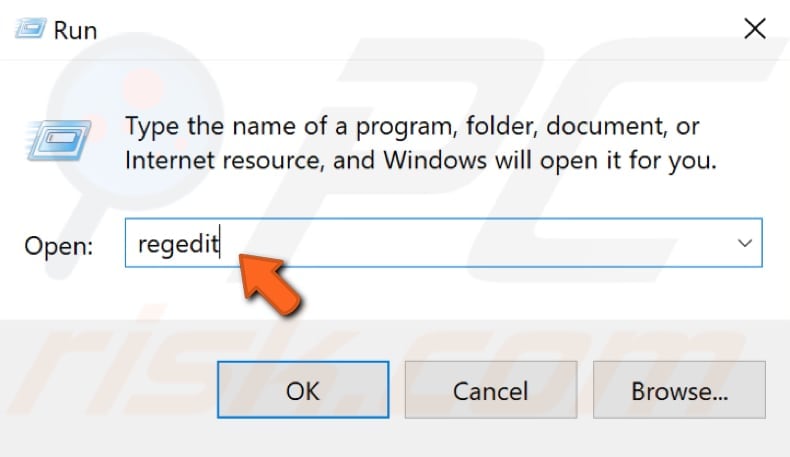
In the Run dialog box, type "regedit" and click "OK" or press Enter on your keyboard - this will open Registry Editor.
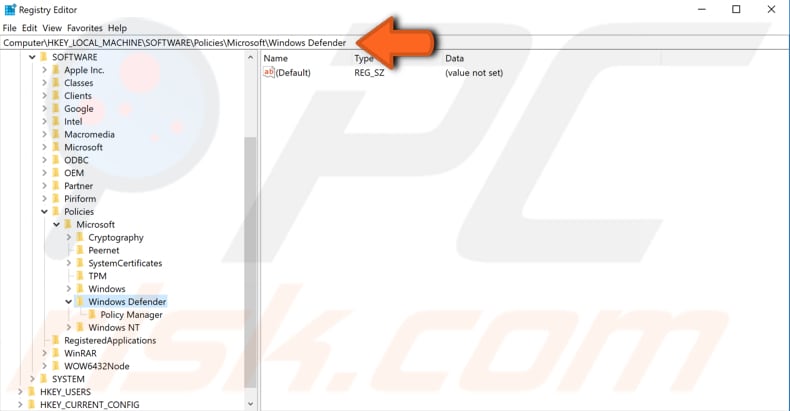
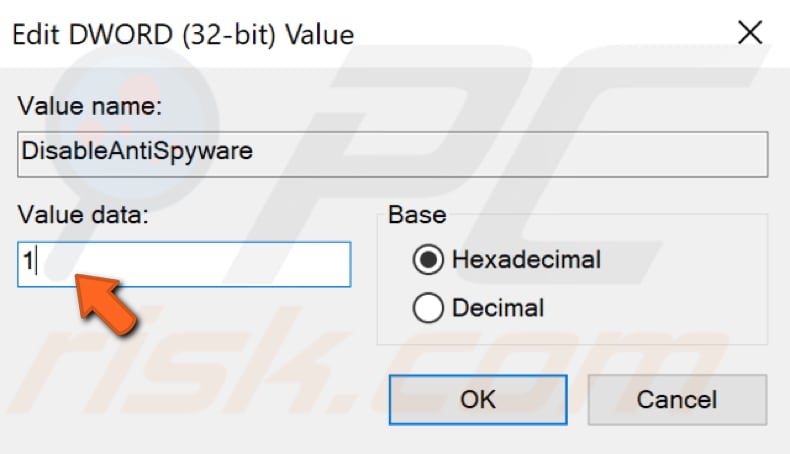
Now follow this path: "HKEY_LOCAL_MACHINE\SOFTWARE\Policies\Microsoft\Windows Defender". Look for the "DisableAntiSpyware" DWORD file.
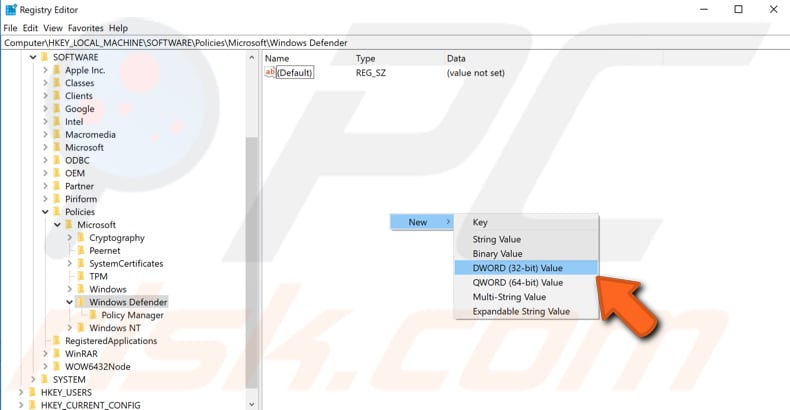
If there is no "DisableAntiSpyware" DWORD file, you need to create one. To create it, right-click the background of the Registry Editor right pane and select "New", "DWORD (32-bit) Value" from the drop-down menu.
Name it "DisableAntiSpyware". Now that you have the "DisableAntiSpyware" file, double-click it. In the "Value data:" box, type "1" and click "OK" to save the changes. You can now exit Registry Editor and Windows Defender will be turned off.
Reschedule Windows Defender Using Task Scheduler
Windows Task Scheduler is a component of Microsoft Windows that provides the ability to schedule the launch of programs or scripts at pre-defined times or after specified time intervals.
The Task Scheduler monitors the criteria you choose to initiate the tasks and then executing the tasks when the criteria are met. Using Windows Task Scheduler, tasks can be scheduled to execute at a specific time, when a specific system event occurs, when a user logs on, when the system is booted, a task is registered, etc.
To reschedule Windows Defender, type "task scheduler" in Search and click the "Task Scheduler" result.

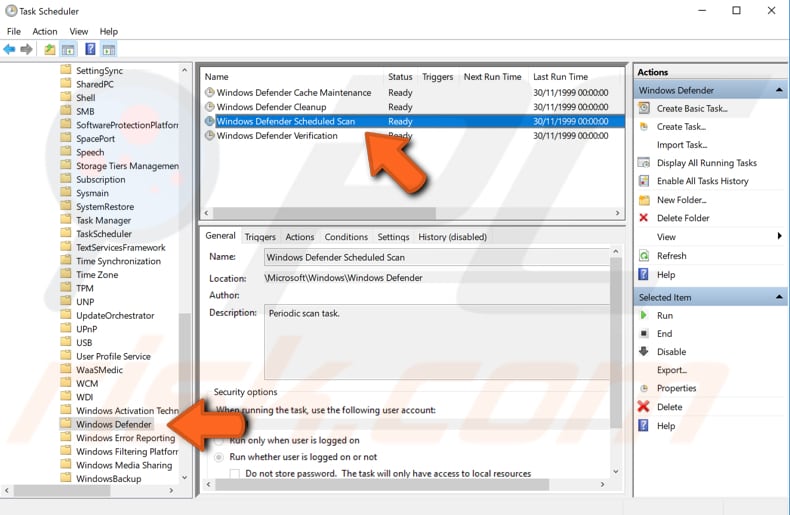
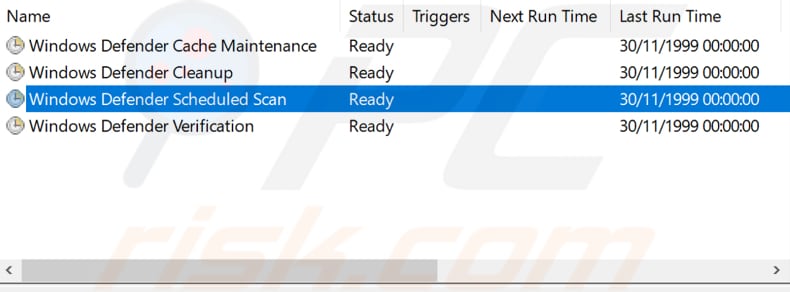
On the Task Scheduler left pane, you will see a "Task Sheduler Library", expand it and navigate to Windows Defender going through this path: "Task Scheduler Library/Microsoft/Windows/Windows Defender". Find "Windows Defender Scheduled Scan". Then, double-click it.
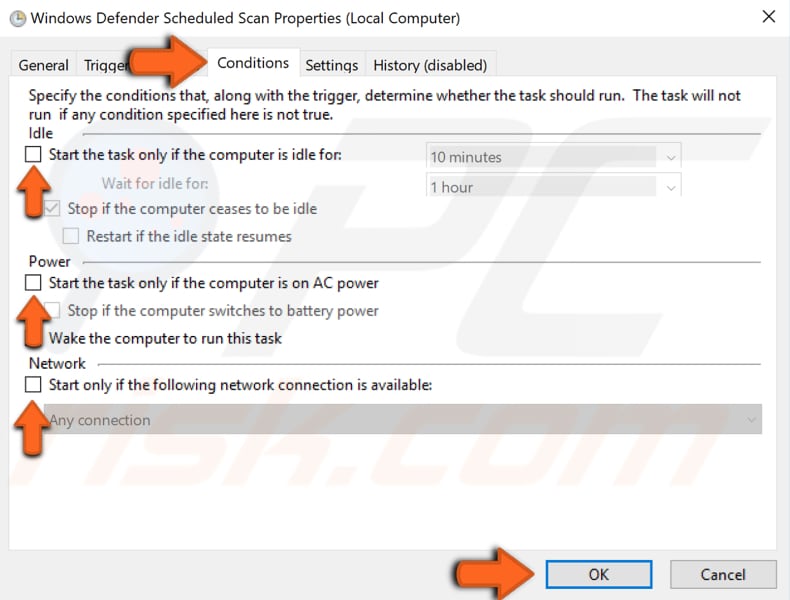
In the Windows Defender Scheduled Scan Properties window, select the "Conditions" tab, ensure that the "Start the task only if the computer is idle", "Start the task only if the computer is on AC power", and "Start only if the following network connection is available" options are disabled. Click "OK" to save the changes.
Now, double-click "Windows Defender Scheduled Scan" again, select the "Triggers" tab, and click "New...".
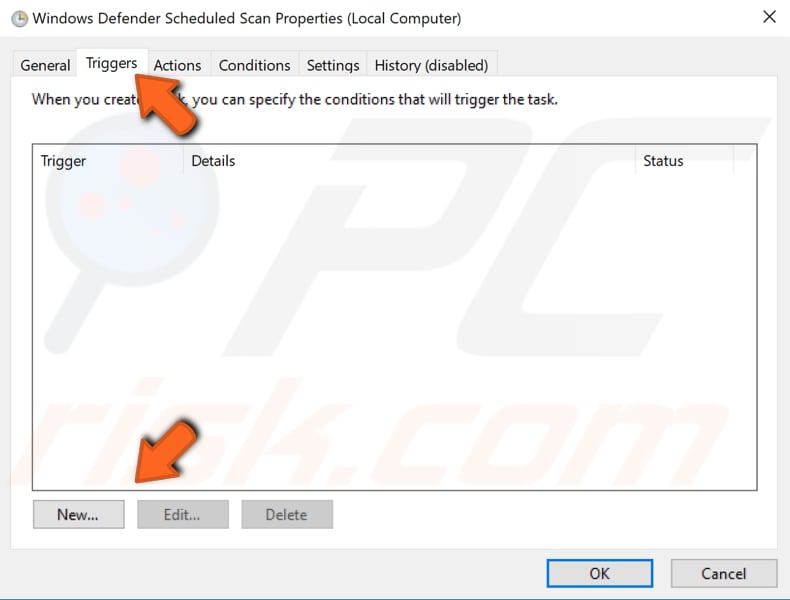
Choose the "Weekly" or "Monthly" option and set your preferred options. Click "OK" to save the changes.

Now go back to the Task Scheduler main window and apply the same steps to "Windows Defender Cache Maintenance", "Windows Defender Cleanup", and "Windows Defender Verification".
We hope that these methods were helpful and you could decrease CPU usage triggered by the "MsMpEng.exe" process. Bear in mind that your CPU usage will increase whenever a Windows Defender scan is running/active. If you are not satisfied with these workarounds, you might want to change your antivirus software.
Share:

Rimvydas Iliavicius
Researcher, author
Rimvydas is a researcher with over four years of experience in the cybersecurity industry. He attended Kaunas University of Technology and graduated with a Master's degree in Translation and Localization of Technical texts. His interests in computers and technology led him to become a versatile author in the IT industry. At PCrisk, he's responsible for writing in-depth how-to articles for Microsoft Windows.
▼ Show Discussion