How to Boot Into Safe Mode on Windows 10?

Get Free Scanner and check your computer for errors
Fix It NowTo fix found issues, you have to purchase the full version of Combo Cleaner. Free trial available. Combo Cleaner is owned and operated by Rcs Lt, the parent company of PCRisk.com read more.
How to Easily Boot Into Safe Mode on Windows 10
Safe Mode is a diagnostic start-up mode in Windows operating systems used to obtain limited access to Windows when it does not start or function normally. In this article, we show several ways to access Safe Mode on your computer.

One of the most common steps when troubleshooting a computer is to boot into Safe Mode. Safe Mode starts Windows in a basic state, using a limited set of files and drivers. It can help troubleshoot problems on your computer.
Safe Mode is distinctive since the Desktop background is replaced with black and the words "Safe Mode" in all corners. It also displays the current Windows version and service pack at the top of the screen.
For the most part, Safe Mode can be used as Windows in Normal Mode. The main difference is that certain areas of Windows may not function or work as quickly as in Normal Mode.
There are three main Safe Mode options available:
- Safe Mode starts Windows with the minimum set of drivers and services.
- Safe Mode with Networking includes additional drivers and services needed for networking services to function.
- Safe Mode with Command Prompt is the same as basic Safe Mode, except that Command Prompt is launched when starting Windows rather than Explorer.
Choose the Safe Mode option according to the problem you are having. If you have issues with your computer, or there are reasons you wish to load windows in Safe Mode, there are several ways to achieve this.
Video Showing How to Boot Into Safe Mode on Windows 10:
Table of Contents:
- Introduction
- Use System Configuration Tool
- Use Recovery Option in Settings
- Use Shift + Restart Combination
- Use Command Prompt
- Interrupt Windows Boot Process
- Video Showing How to Boot Into Safe Mode on Windows 10
Download Computer Malware Repair Tool
It is recommended to run a free scan with Combo Cleaner - a tool to detect viruses and malware on your device. You will need to purchase the full version to remove infections. Free trial available. Combo Cleaner is owned and operated by Rcs Lt, the parent company of PCRisk.com read more.
Use System Configuration Tool
The easiest way to start Windows in Safe Mode is to use the System Configuration tool also knows as "msconfig." It is used to configure how a computer starts and which programs and Windows services load.
To open the System Configuration tool, open the Run dialog box by typing "run" in Search.

In the Run dialog box, type "mschonfig" and click "OK." This will open the System Configuration tool.

Another way to open the System Configuration tool is to type "system configuration" in Search and click the "System Configuration" result.
When the System Configuration window is open, click the "Boot" tab. Under Boot options, mark the "Safe boot" checkbox and click "OK."
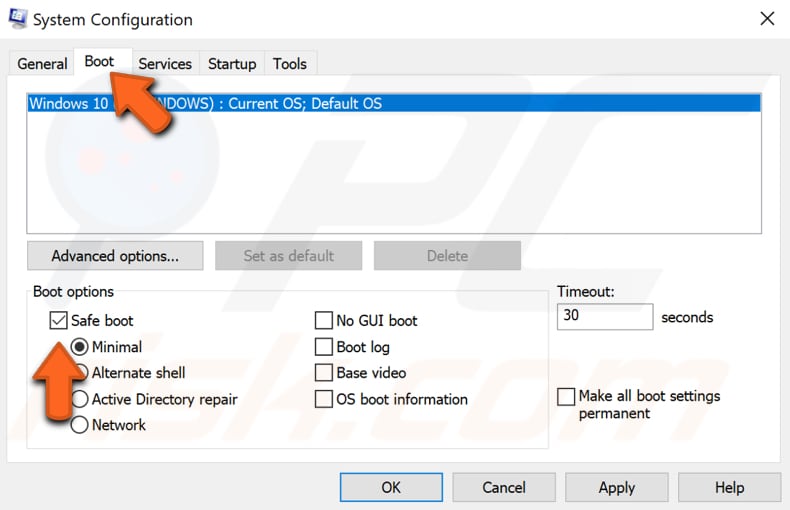
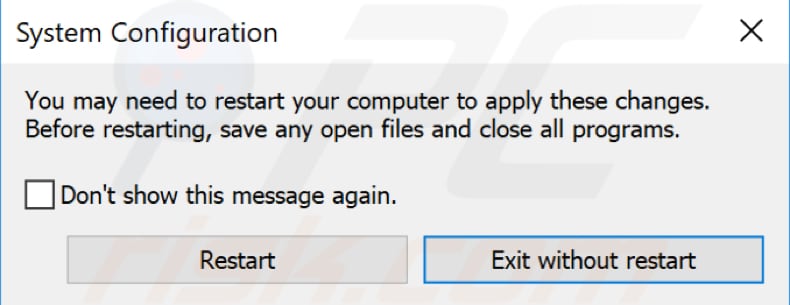
Windows will inform you that you may need to restart your computer to apply these changes. If you are working on another task, choose the "Exit without restart" option. Alternatively, click "Restart" - Windows will restart your computer and start the operating system in Safe Mode.
Remember to undo these changes in System Configuration if you do not wish to boot into Safe Mode each time you start Windows. To do this, just unmark the "Safe boot" checkbox in the System Configuration Boot tab.
Use Recovery Option in Settings
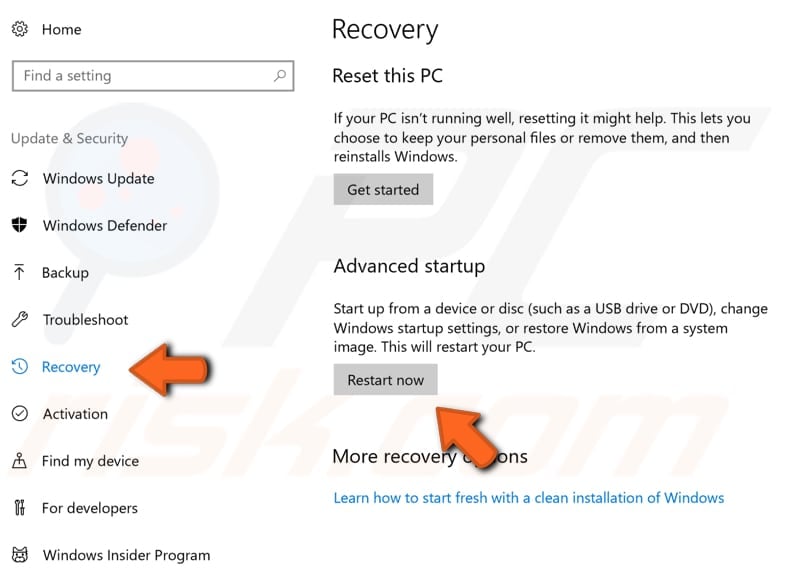
You can also start Windows in Safe Mode through Recovery's Advanced start-up option. This one is simple and only takes a few more steps. Open Settings and then click "Update & Security."

Then, click "Recovery" in the left pane. Click the "Restart now" button under Advanced startup.
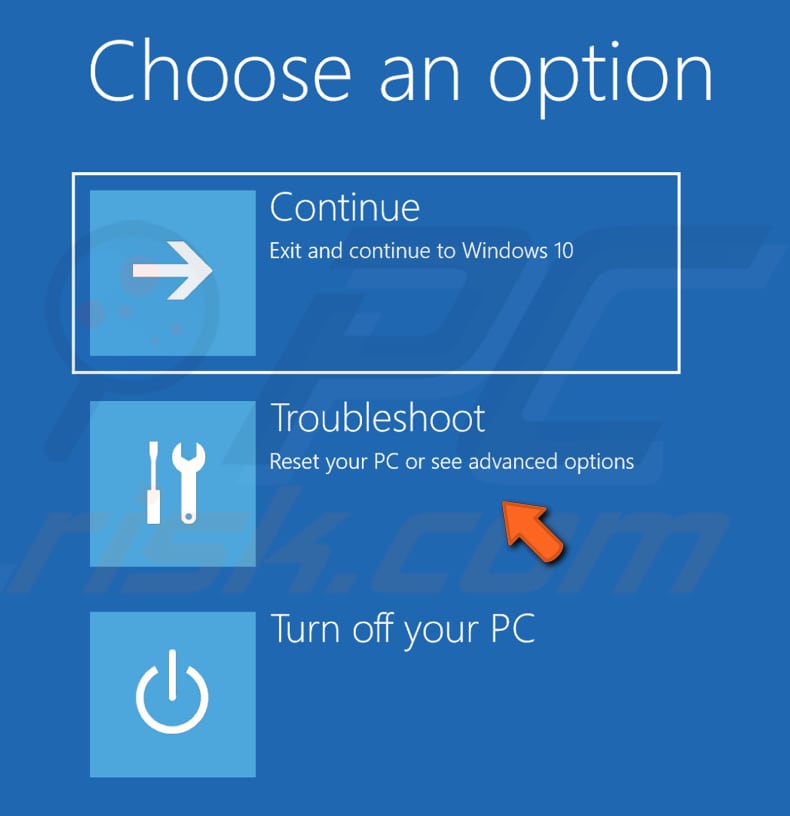
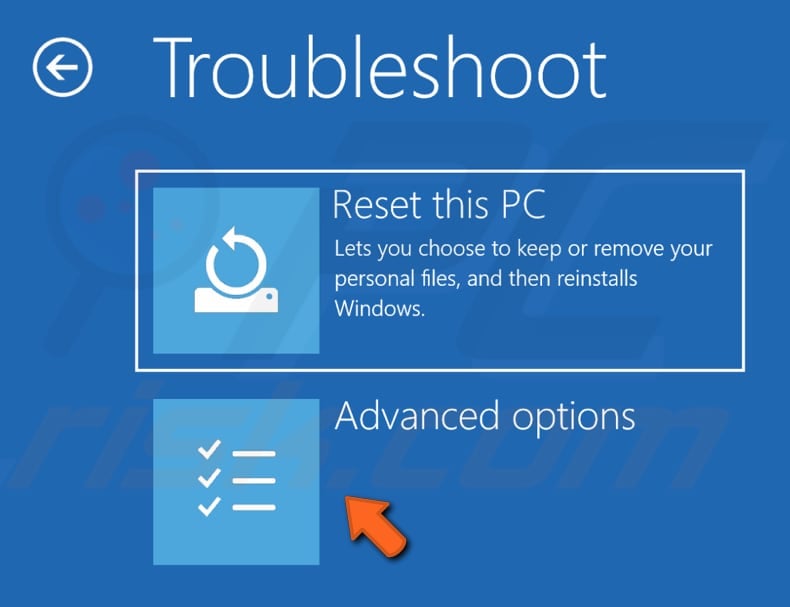
Your computer will restart, and you will see a menu on a blue screen. From the three options, select "Troubleshoot."
In Troubleshoot, click "Advanced options."
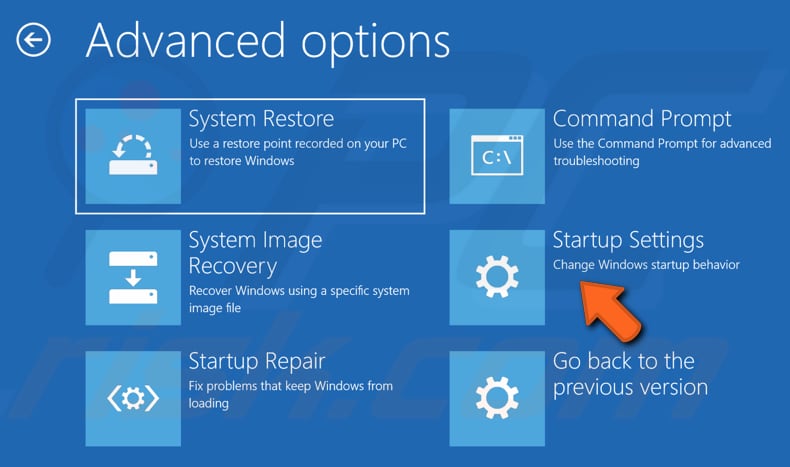
In Advanced options, click "Startup Settings."
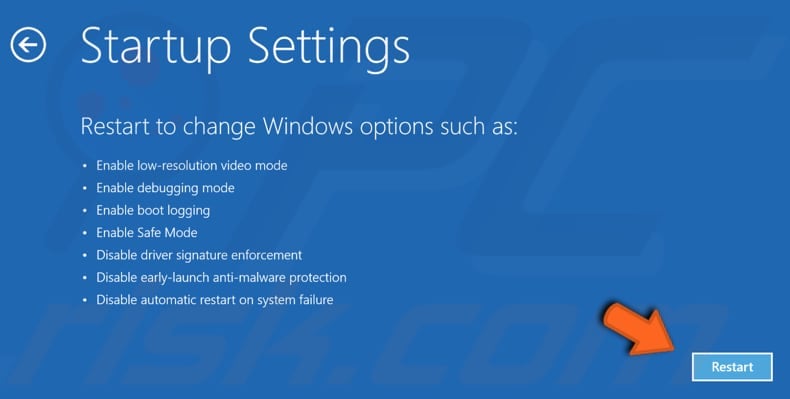
In Startup Settings, click "Restart." After restart, you will be able to enable low-resolution video mode, debugging mode, boot logging, Safe Mode, disable early-launch anti-malware protection, and automatic restart on system failure.
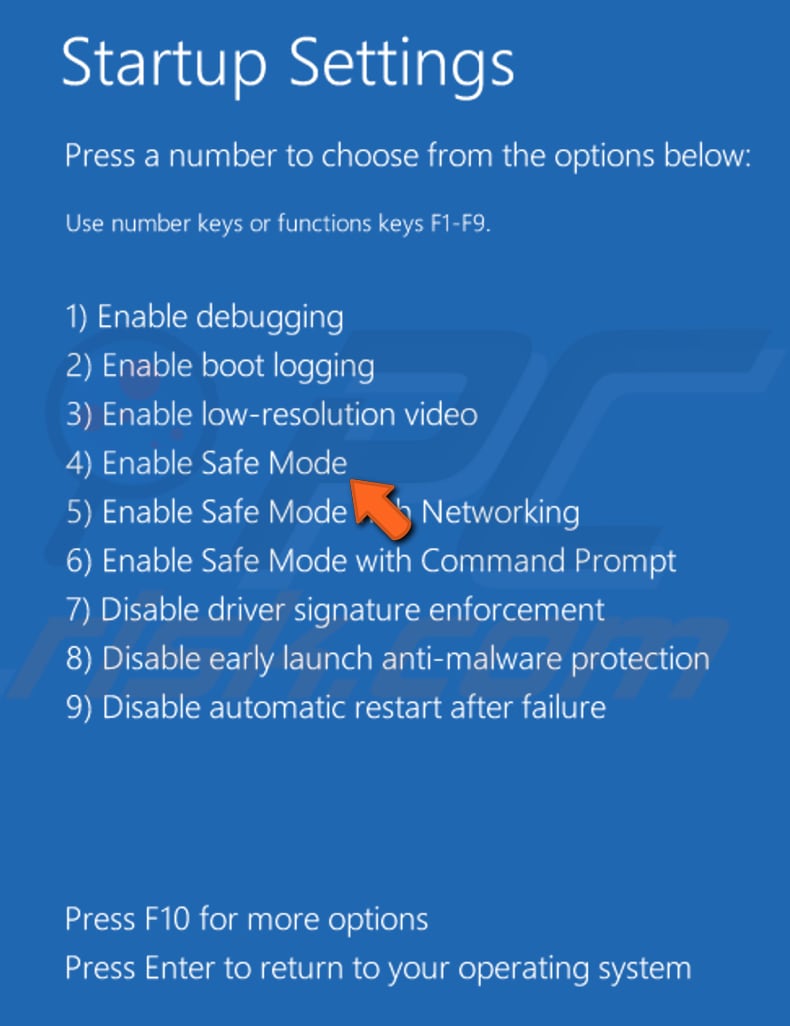
You will be presented with a list of options. To choose an option, press the number on your keyboard or use function keys from F1 to F9. Press 4 or F4 on your keyboard to enable Safe Mode.
If you need to enable Safe Mode with Networking, press 5 and 6 to enable Safe Mode with Command Prompt.
If you change your mind and you no longer need to start Windows in Safe Mode, press Enter to exit Startup Settings.
Use Shift + Restart Combination
Another way of starting Windows in Safe Mode in Windows 10 is to use the Shift + Restart combination. Click Start to open the Start menu, click the Power button, and click "Restart" while holding the Shift key on your keyboard. Windows will open the blue screen menu as before.

You can also access the blue screen menu when on the Sign In screen. Click the Power button, and then click "Restart" while holding the Shift key.

Use Command Prompt
You can also start Windows in Safe Mode using Command Prompt. Command Prompt is used to execute commands entered via the keyboard. Most of these commands are used to automate tasks via scripts and batch files, perform advanced administrative functions, troubleshoot, and solve certain Windows issues.
To open Command Prompt, type "command prompt" in Search and right-click on the "Command Prompt" result. Select "Run as administrator" from the drop-down menu to run Command Prompt with administrator privileges.

In Command Prompt, type the "bcdedit /set {default} safeboot minimal" command and press Enter to execute it. When the operation has been completed successfully, exit Command Prompt and restart your computer, which will start in Safe Mode.
If you want to enable Safe Mode with Networking, type "bcdedit /set {default} safeboot network."
Note: to stop booting Windows in Safe Mode, turn this option off in System Configuration (see the previous guide), or type "bcdedit /deletevalue {default} safeboot" in Command Prompt.

Interrupt Windows Boot Process
If Windows fails to start normally three times over, it will enter Automatic Repair mode on the fourth attempt, and then you can boot into Safe Mode. To make your system start in Automatic Repair mode, you must interrupt the normal boot process three times in a row: use the reset or power button on your Windows 10 PC to stop it during boot and before it finishes loading Windows 10.
If you use the power button, you might have to keep it pressed for at least 4 seconds to force the power off. You will see a screen informing you that the operating system is “Preparing Automatic Repair" and then "Diagnosing your PC." After this, you will be directed to the Automatic Repair window. Click "Advanced options" and then choose "Troubleshoot." Then, it is the same process described earlier on how to start Windows: Safe Mode using the Recovery option in Settings and using the Shift + Restart combination.
We hope this helps you to find the best way to start Windows in Safe mode.
Share:

Rimvydas Iliavicius
Researcher, author
Rimvydas is a researcher with over four years of experience in the cybersecurity industry. He attended Kaunas University of Technology and graduated with a Master's degree in Translation and Localization of Technical texts. His interests in computers and technology led him to become a versatile author in the IT industry. At PCrisk, he's responsible for writing in-depth how-to articles for Microsoft Windows.
▼ Show Discussion