How to Fix Mouse Lag on Windows 10

Get Free Scanner and check your computer for errors
Fix It NowTo fix found issues, you have to purchase the full version of Combo Cleaner. Free trial available. Combo Cleaner is owned and operated by Rcs Lt, the parent company of PCRisk.com read more.
How to Fix Mouse Lag on Windows 10
Computers may suffer slow response or 'lag,' a term commonly used in online gaming. Often, Windows 10 users experience mouse lag during mouse cursor scrolling. If you're experiencing mouse lag, try the fixes provided in this article below.
Generally, lag is the time difference between initiating a task and the action or result. For example, it might refer to a delay between the time a key is pressed on the keyboard and the corresponding character appears on the screen.
Why Is My Mouse Lagging?
The most likely reasons could be interference from particular hardware or software, Windows settings, or types of peripherals used. Windows 10 mouse lags can appear during mouse cursor scrolling with a wireless Bluetooth mouse or trackpad on Windows 10 laptops or desktop computers.
If you experience Windows 10 lag problems with your mouse (the cursor stutters, freezes, or does not move at all), read the guide below to find a possible solution.
Video Showing How to Fix Mouse Lag on Windows 10:
Table of Contents:
- Introduction
- Reinstall/Update Your Mouse Driver
- Update Your Graphics Driver
- Disable/Enable Scroll Inactive Windows Feature
- End Realtek Audio Process
- Disable Fast Startup
- Disable Cortana
- Disconnect Other USB Devices
- Adjust Power Management Settings For USB
- Video Showing How to fix Mouse Lag on Windows 10
Download Computer Malware Repair Tool
It is recommended to run a free scan with Combo Cleaner - a tool to detect viruses and malware on your device. You will need to purchase the full version to remove infections. Free trial available. Combo Cleaner is owned and operated by Rcs Lt, the parent company of PCRisk.com read more.
Reinstall/Update Your Mouse Driver
A device driver is software that informs the operating system and other software how to interact with particular hardware. The driver facilitates smooth communication between hardware and software. In most cases, computers are unable to send and receive data correctly without drivers.
If the appropriate driver is not installed, the device might not function properly, if at all. A fault with your mouse driver might cause problems with lag. Try your mouse on another computer to see if you can repeat the problem. If not, then you probably have a faulty driver, and that requires re-installation.
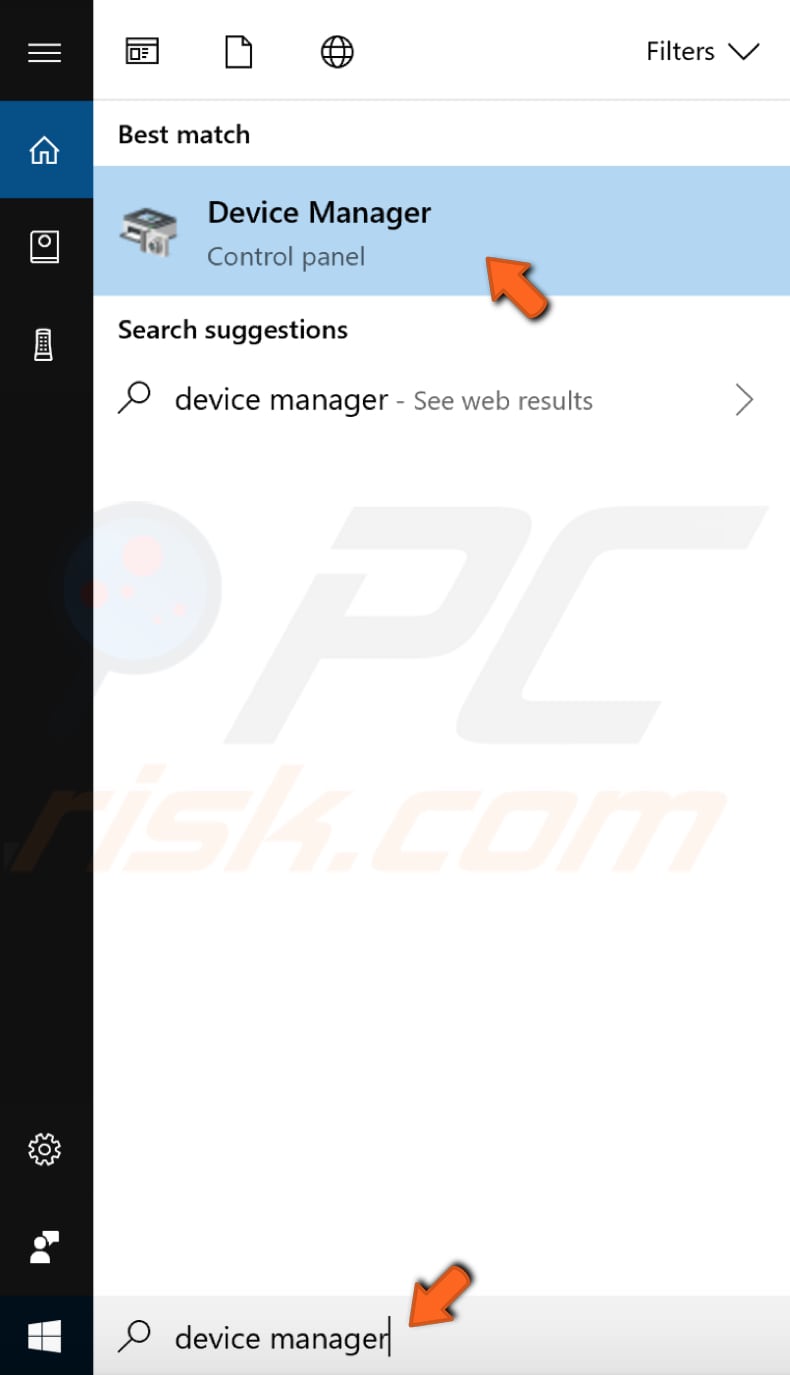
To do so, type "device manager" in Search and click the "Device Manager" result to open it.
In Device Manager, find "Mice and other pointing devices," expand it, and right-click on your mouse, select "Uninstall" from the drop-down menu to uninstall it. Restart the computer, and Windows will automatically install the missing driver.
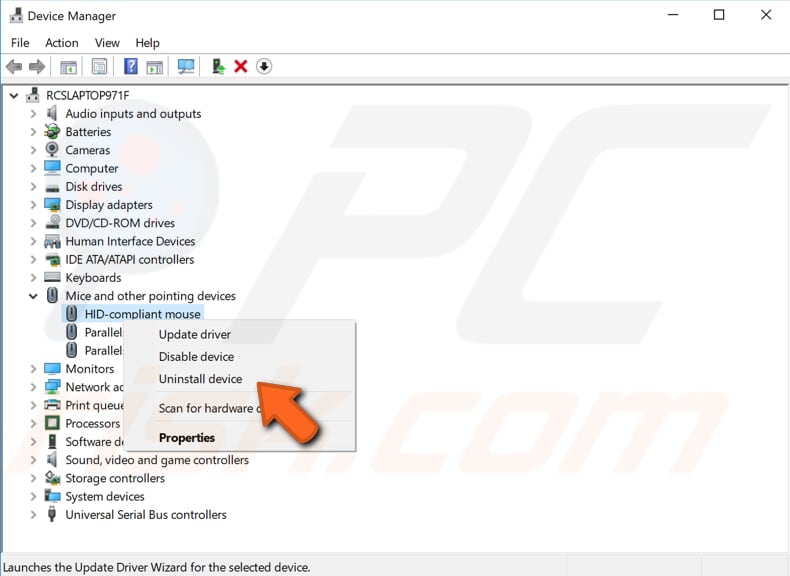
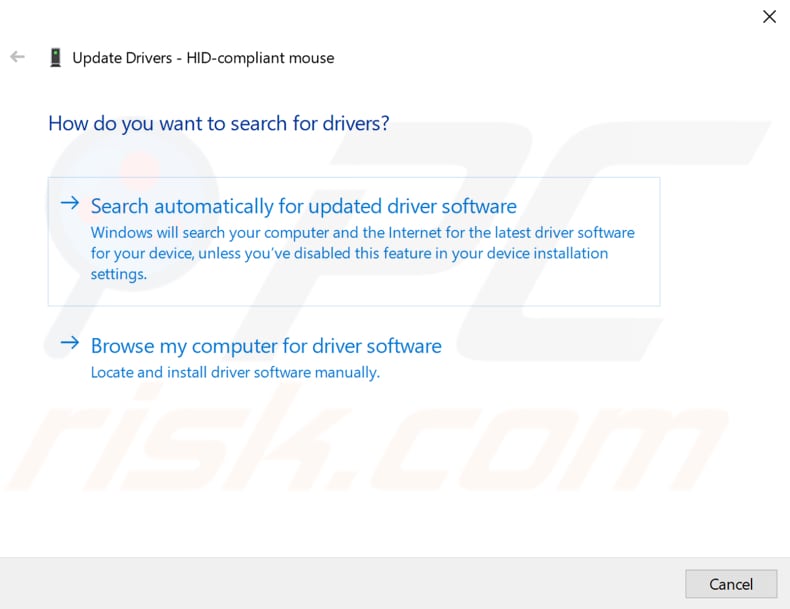
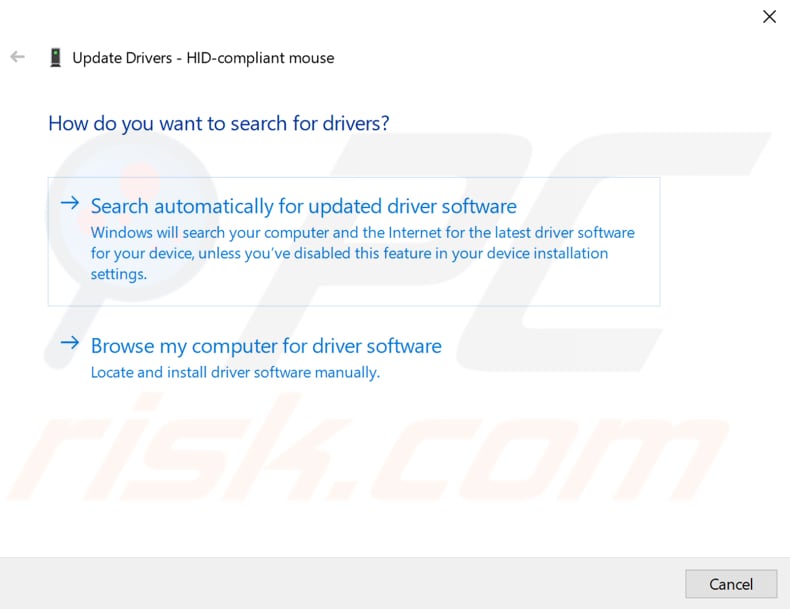
You can also try updating your mouse driver. When right-clicked on your mouse in the Device Manager window, repeat the steps and select "Update driver" from the drop-down menu. You will be asked if you want to search for updated driver software automatically or to browse your computer for driver software. If you select the first option, Windows will search your computer and the Internet for the latest driver software for your device.
If you select to browse your computer for driver software, you need to have the correct driver on your computer or USB drive. You can find the driver on your mouse manufacturer's website.
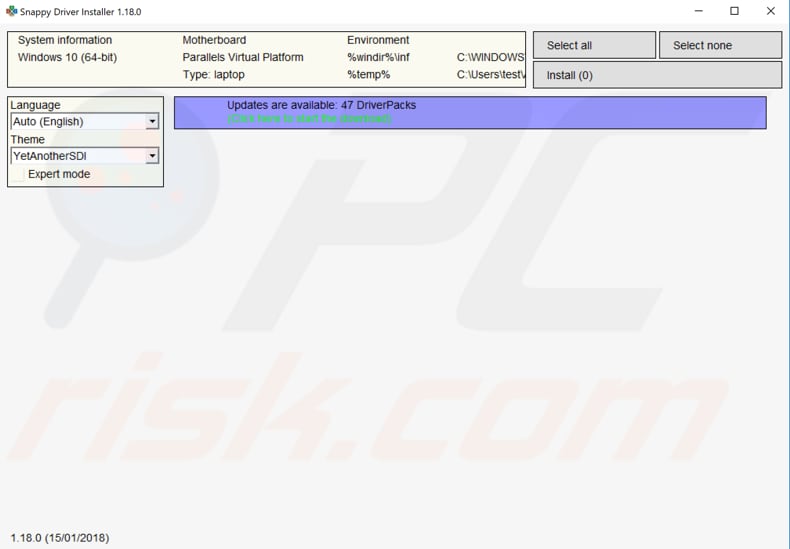
Another way to update or install a new driver for your mouse is by using third-party software such as Snappy Driver Installer. You will need a computer with a working internet connection to download it.
Snappy Driver Installer (SDI) is a powerful free driver updater tool for Windows that can store its entire collection of drivers offline. Having offline drivers gives Snappy Driver Installer the ability to have access to fast driver updates, even if there is no active internet connection. Snappy Driver works with 32-bit and 64-bit versions of Windows 10, Windows 8, Windows 7, Windows Vista, and XP.
Drivers are downloaded through Snappy Driver Installer in driverpacks, which are collections (packs) of drivers for various hardware like sound devices, video cards, network adapters, etc. It can also show duplicate and invalid drivers, and it separates the updates that require you to restart your computer so it would be easier to distinguish them from the rest. You can download Snappy Driver Installer from here.
 After you have finished updating and installing drivers, restart Windows 10 for the changes to take effect and see if this helps fix the mouse lag problem.
Update Your Graphics Driver
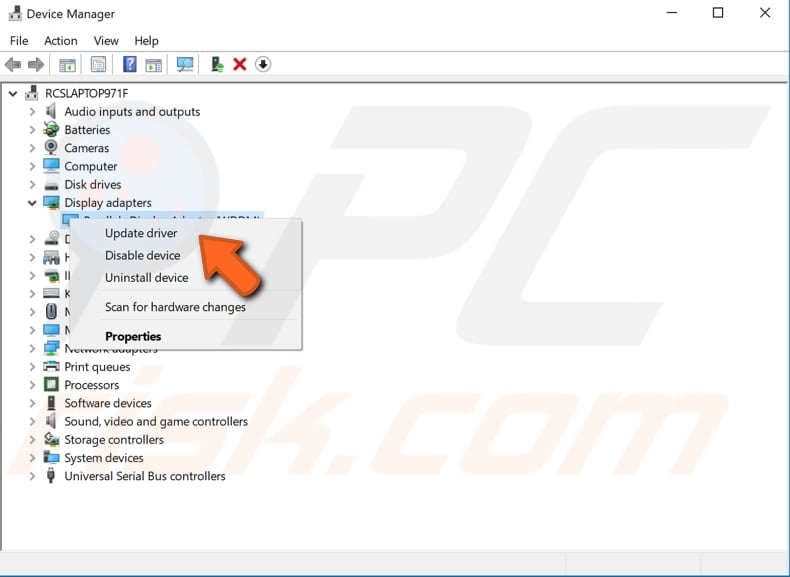
To update the graphic driver through Windows, go to Device Manager (as described in the method above). In the Device Manager window, expand "Display adapters" (or click the arrow showing right). Right-click the graphics driver and select "Update driver."
Windows will ask you how you want to search for drivers. Click "Search automatically for updated driver software." Windows will find and install drivers for you.
Alternatively, you can browse your computer for driver software - you will need to have the correct driver on your computer or USB drive. You can find it on your graphics card manufacturer's website.
To update your graphics driver, use you can also use Snappy Driver Installer. You can find the link for the described method above. Or, you can read the full article about how to update your video drivers on Windows 10 here.
Disable/Enable Scroll Inactive Windows Feature
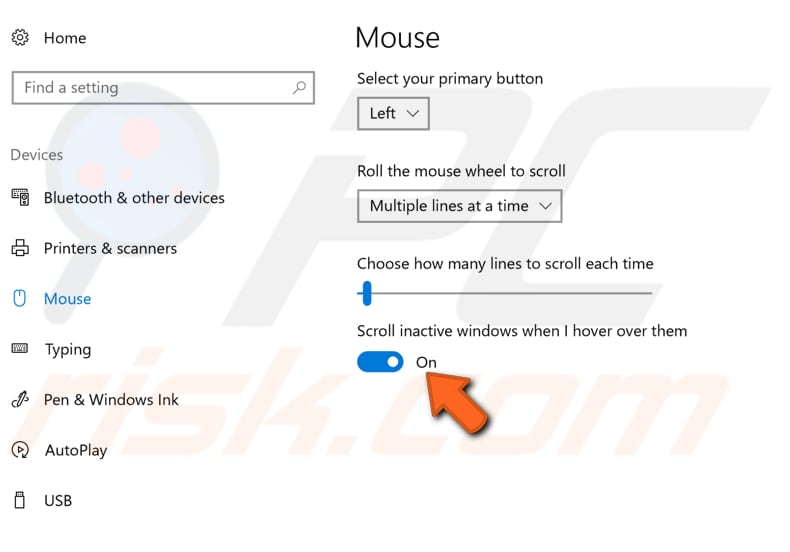
One of the native features of Windows 10 is the ability to scroll inactive windows by simply hovering over such a window with the mouse pointer and then using the mouse wheel. The contents of the inactive window will be scrolled.
For example, if you have an inactive Notepad window containing text, that text will be scrolled. The focus will not change and remain in the currently active window. Disabling this feature (and re-enabling, if needed) might help to fix the mouse lag issue.
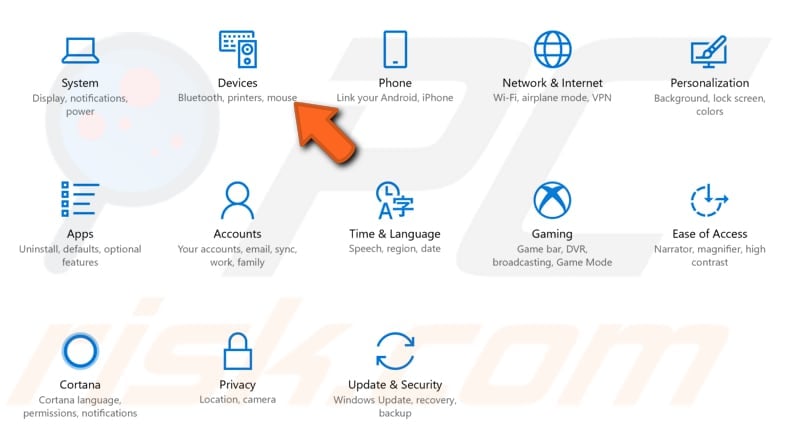
To disable/enable this feature go to Settings and click "Devices."
In Devices settings, click "Mouse" (or "Mouse & touchpad") on the left pane and then try disabling and enabling the "Scroll inactive windows when I hover them" feature a few times and check if the issue is resolved.
If you are using a laptop, try setting your touchpad to "No delay (always on)" - you will find this option under the "Touchpad" section.
End Realtek Audio Process
It is possible that your Realtek audio card (or another audio card) might interfere with your mouse and cause the lag issue. To fix this problem, you need to terminate the Realtek audio process in Task Manager. Right-click on Start and click "Task Manager" to open it.

In Task Manager, find "Realtek audio.exe" under the "Processes" tab and right-click it. Select "End task" from the drop-down menu to end the process.

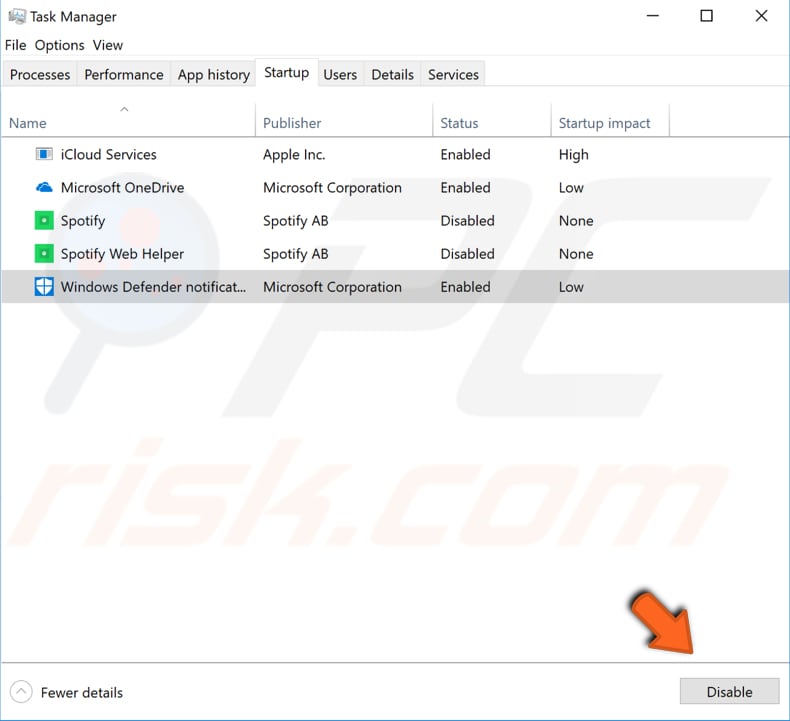
This issue can also be caused by Realtek Audio Manager. In some cases, this application starts automatically with Windows and causes the problem to occur.
To fix the issue, open Task Manager again and disable Realtek Audio Manager in the Startup tab. In the Task Manager window, click the "Startup" tab and locate Realtek Audio Manager. If it appears, select it by clicking it, and then click "Disable" to disable it from launching on Windows startup.
Disable Fast Startup
Fast startup is a feature on Windows 10 (and also Windows 8) that provides a faster boot time when starting up your computer. It is a useful feature and one that most people use without knowing.
However, some people disable it immediately when they receive a new computer with the Windows operating system. With the fast startup feature enabled, shutting down your computer might seem like you are completely shutting it down, but this is not entirely true since it moves into a state between hibernation and shutdown. Leaving fast startup enabled should not harm your PC since it is a Windows feature, but this could be why the mouse is lagging.
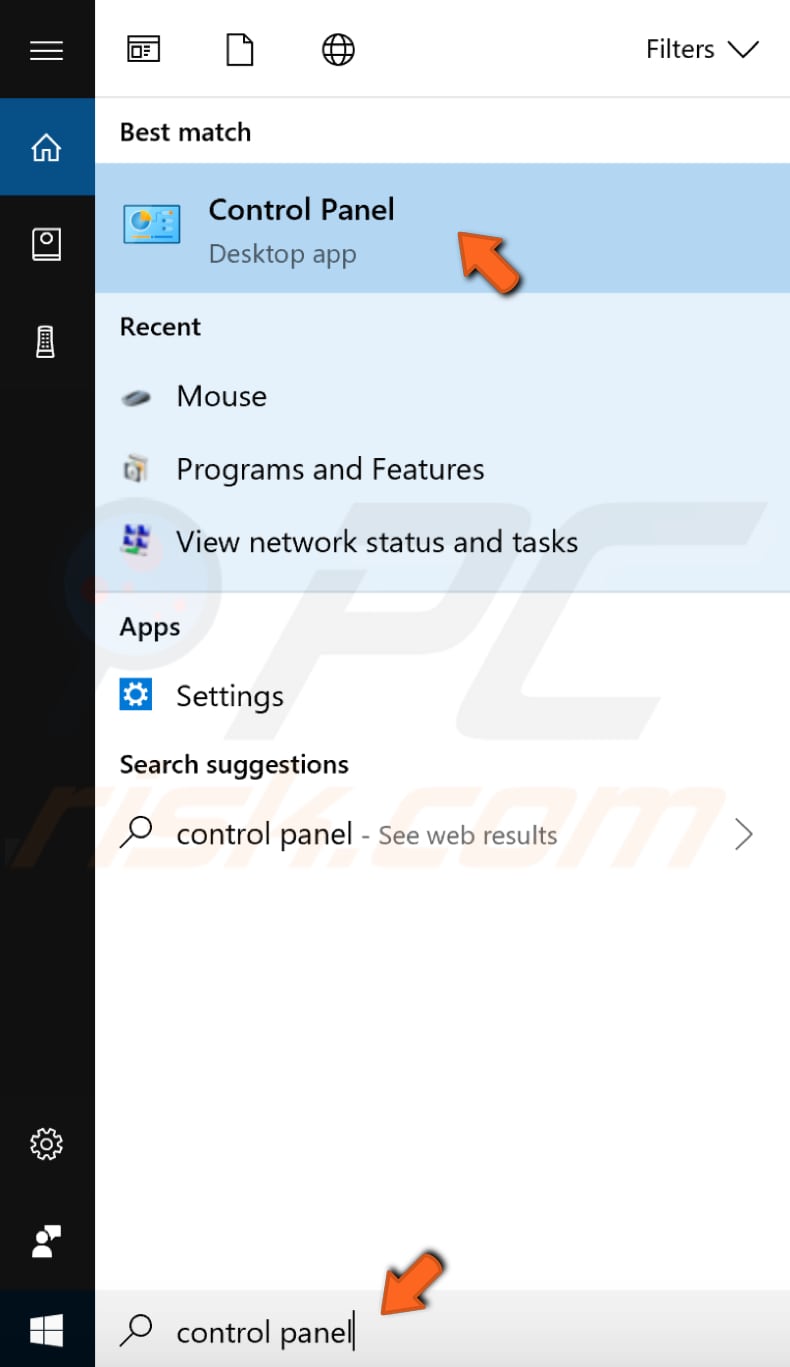
To fix the problem, you could disable this feature to see if it helps. To disable this feature, go to Search and type "control panel." Click on the "Control Panel" result to open it.
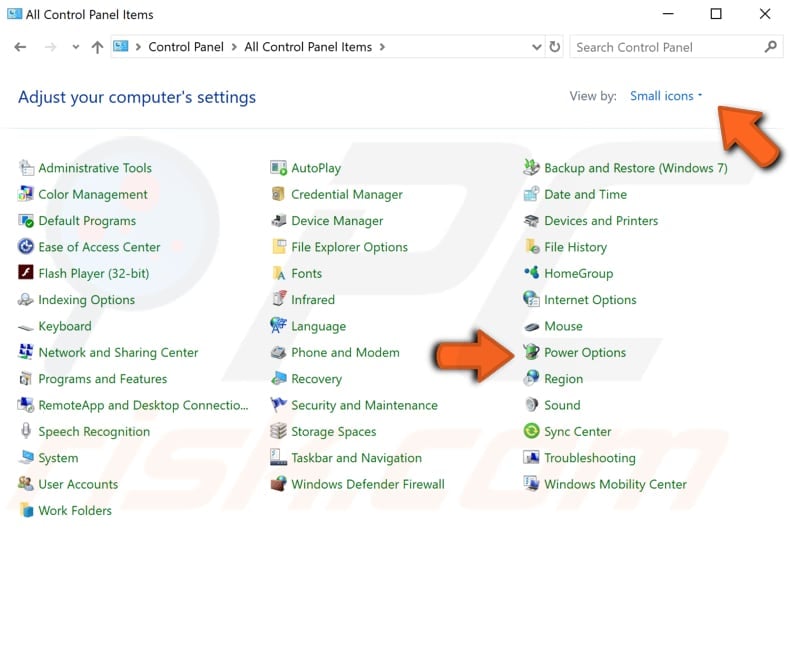
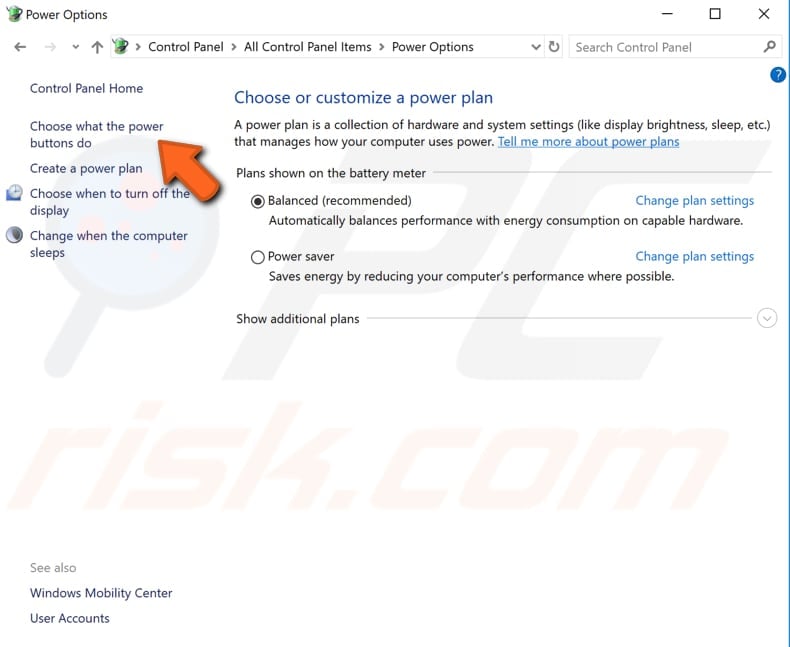
In Control Panel, set "View by:" to "Small icons," find "Power options," and click it.
In the Power Options window, click "Choose what the power button does."
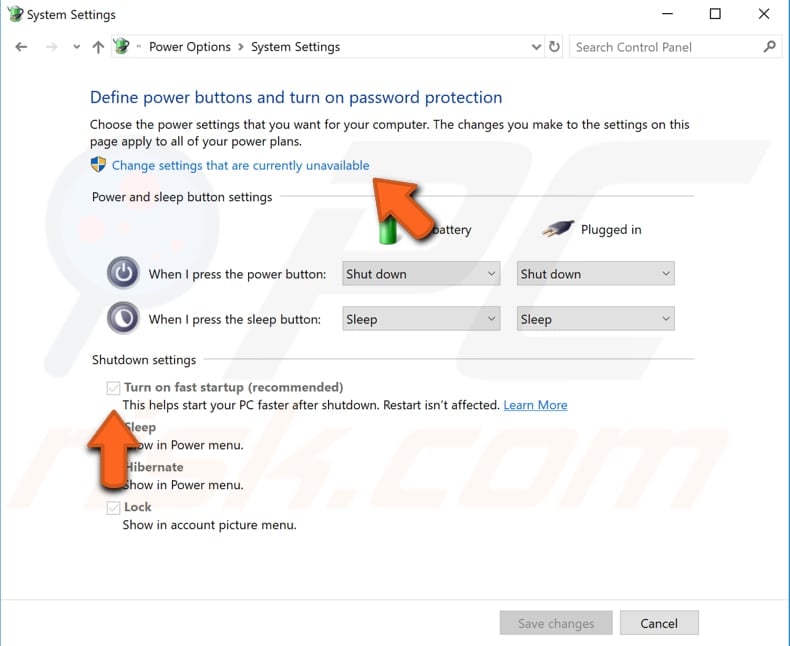
Click on "Change settings that are currently unavailable" and then uncheck the "Turn on fast startup (recommended)" option if it is enabled. Click "Save changes" to save the changes made. Your mouse should start working normally again.
Disable Cortana
Cortana is a virtual assistant created by Microsoft. Disabling it might resolve the problem with mouse lag.
To disable Cortana, open it and go to Settings in the top left corner. In Settings, find the "Cortana can give you suggestions, ideas, reminders, alerts and more" option and set it to "Off." Check if this helps to resolve the issue.
Disconnect Other USB Devices
Another solution that might help is to disconnect any other devices from USB ports. Often, other USB devices can interfere with the mouse and cause a lag issue. Try disconnecting your portable hard drive from the USB port if one is connected (you do not need to disconnect your keyboard).
There are different USB port types. For example, USB 2.0 and USB 1.0 differ in the data transfer rate they are capable of. The maximum speed that USB 1.0 devices can achieve is 12Mbps, while 2.0 devices can theoretically achieve up to 40 times more. If you are using a wireless mouse, try connecting its receiver to the USB 2.0 port.
Adjust Power Management Settings For USB
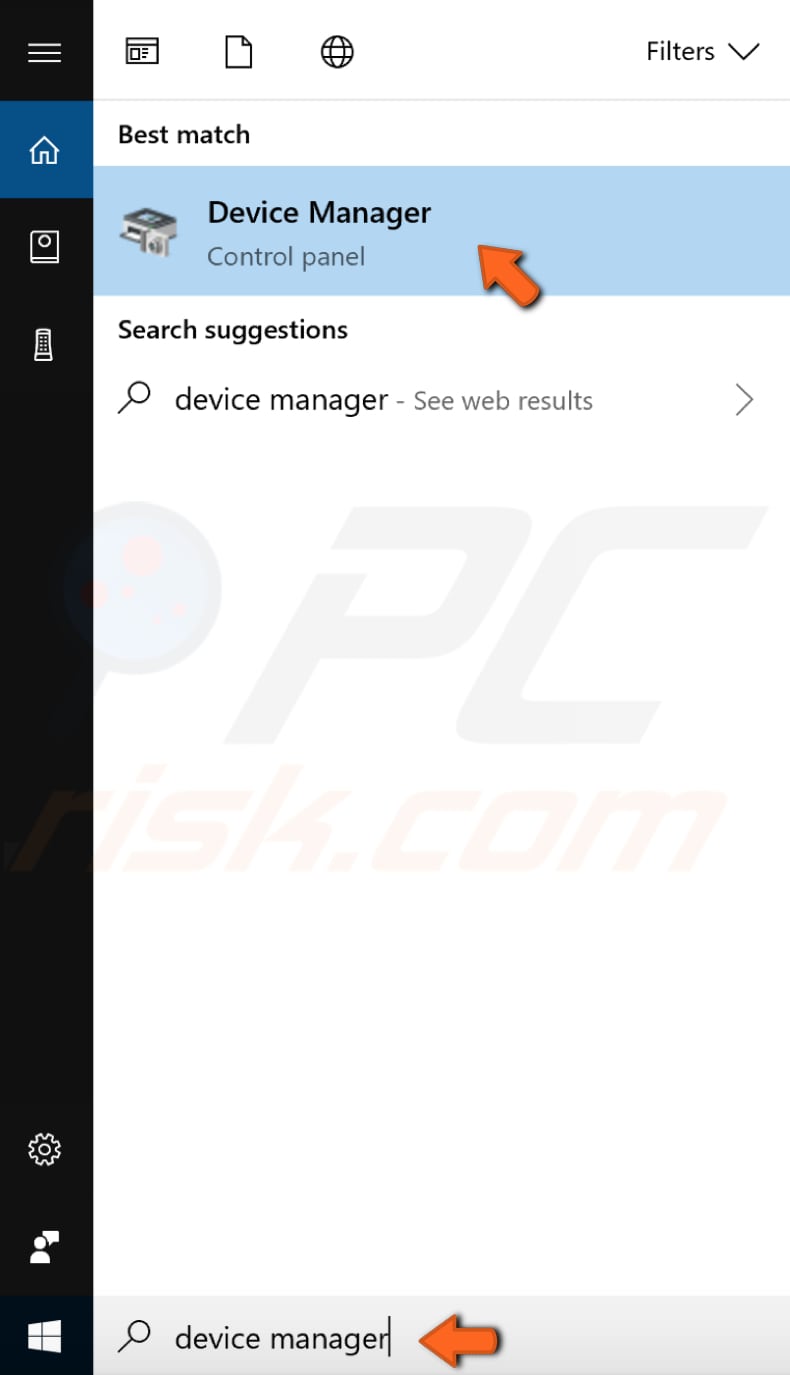
Type "device manager" in Search and click the "Device Manager" result to open it.
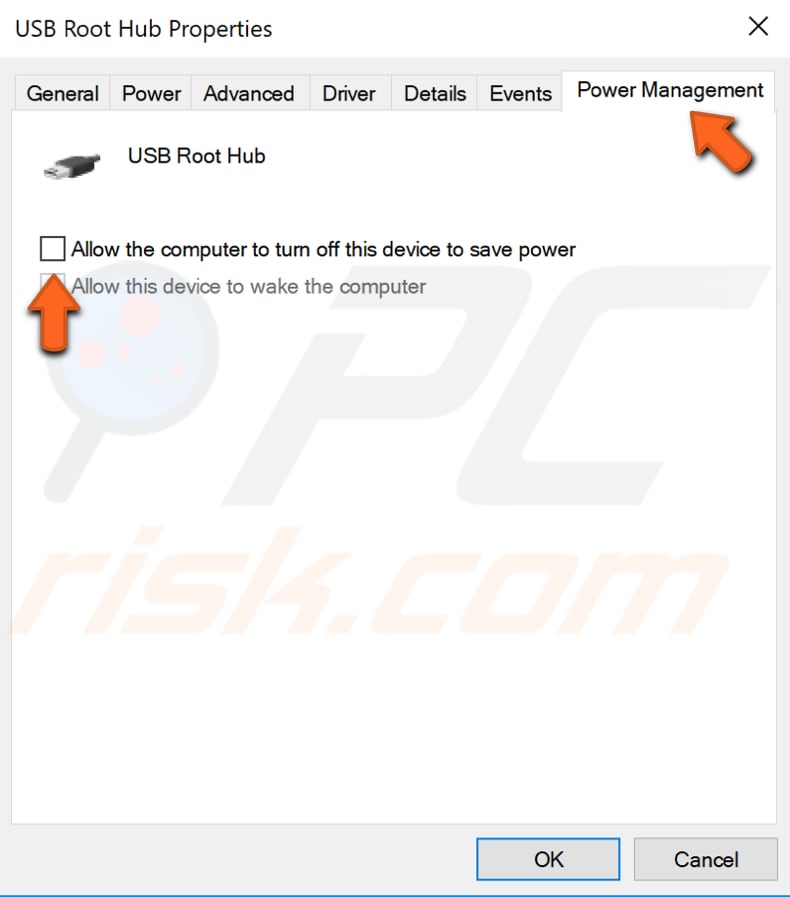
In Device Manager, find "Universal Serial Bus controllers" and expand it. Double-click the USB Hub device to open its properties.
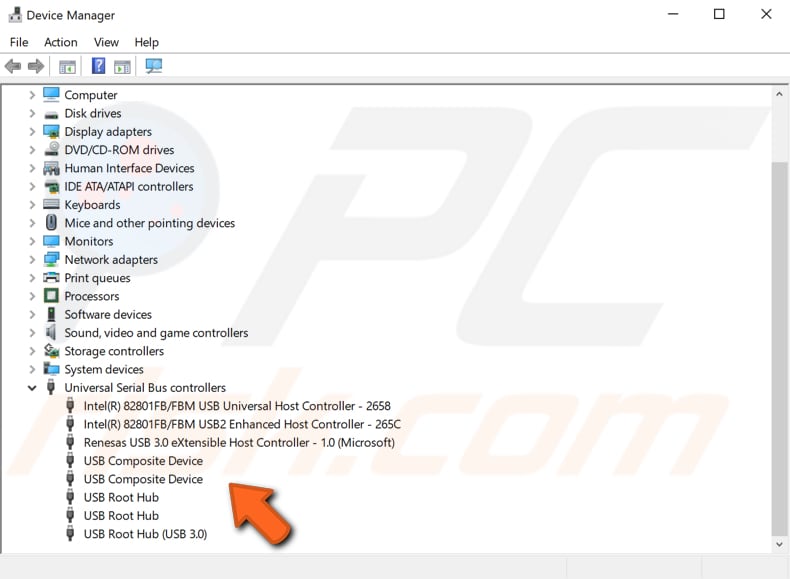
In the USB Hub device properties window, click the "Power Management" tab and uncheck the "Allow the computer to turn off this device to save power" checkbox. Repeat these steps for all USB Hub devices on your computer. After completing these steps, your mouse should work properly and without any lag.
We hope that one of these solutions helped you fix the mouse lag issue on your Windows PC and that your mouse is now working properly.
Share:

Rimvydas Iliavicius
Researcher, author
Rimvydas is a researcher with over four years of experience in the cybersecurity industry. He attended Kaunas University of Technology and graduated with a Master's degree in Translation and Localization of Technical texts. His interests in computers and technology led him to become a versatile author in the IT industry. At PCrisk, he's responsible for writing in-depth how-to articles for Microsoft Windows.
▼ Show Discussion