How to Turn off Background Apps on Windows 11

Get Free Scanner and check your computer for errors
Fix It NowTo fix found issues, you have to purchase the full version of Combo Cleaner. Free trial available. Combo Cleaner is owned and operated by Rcs Lt, the parent company of PCRisk.com read more.
How to Turn off Background Apps on Windows 11
Background apps are programs that can perform actions even when not actively used. Sometimes, these apps are unnecessary, and users want to know how to stop apps from running in the background to divert system resources to more important tasks. This article will explain more about background apps and show you how to disable them.

What is a Background App?
Windows background apps are apps from the Microsoft Store that can continue performing actions, such as app updates and data fetching, when not in active use. While Windows can manage and optimize the power usage of said apps, they can still use Internet bandwidth, CPU, and memory, and drain your laptop’s battery.
Turning off background apps helps save system resources, network data, and battery life when the apps are inactive. Turning background apps off means they won’t sync data and send or receive information. In addition, the apps won’t update until they’re opened. However, the disabled apps will still work when opened manually.
Windows 11 allows you to change background app permissions for apps from the Microsoft Store. The guides below show several ways to stop apps from running in the background on Windows 11.
Table of Contents:
- Introduction
- Method 1. Disable Background Apps via Settings
- Method 2. Disable Background Apps via Group Policy Settings
- Method 3. Disable Background Apps via Windows Registry Editor
- Video Tutorial on How to Turn off Background Apps
Download Computer Malware Repair Tool
It is recommended to run a free scan with Combo Cleaner - a tool to detect viruses and malware on your device. You will need to purchase the full version to remove infections. Free trial available. Combo Cleaner is owned and operated by Rcs Lt, the parent company of PCRisk.com read more.
Video Tutorial on How to Turn off Background Apps
Method 1. Disable Background Apps via Settings
The Apps panel in Windows Settings allows you to manage which Microsoft Store apps can run in the background. This method is useful when you want to disable an individual app from running in the background.
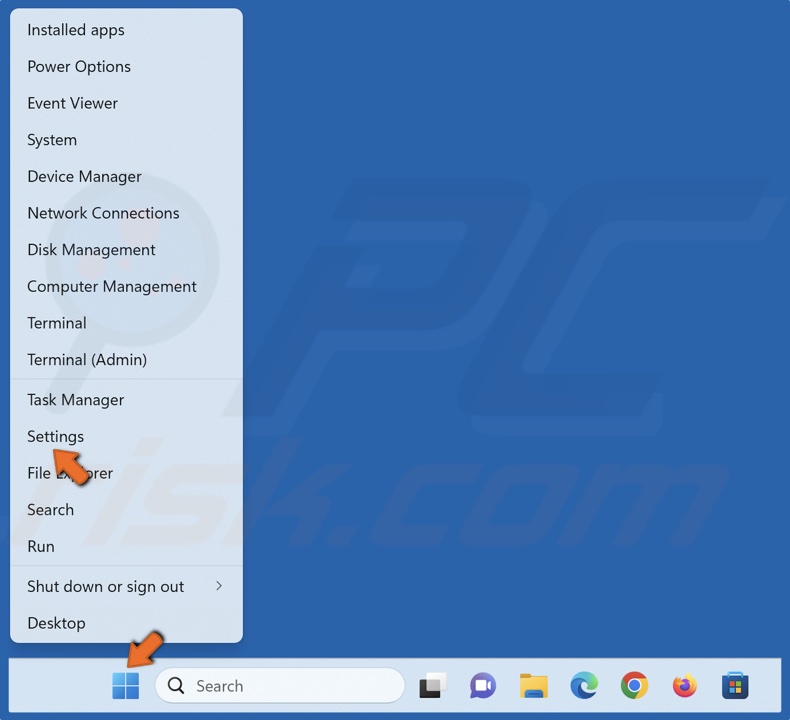
1. Right-click Start and click Settings.
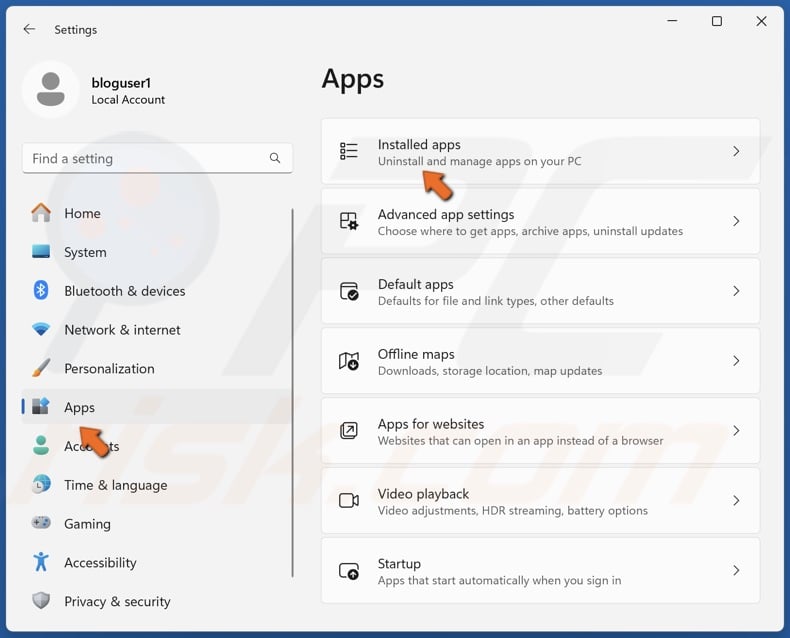
2. Select the Apps panel on the left.
3. Select Installed apps on the right.
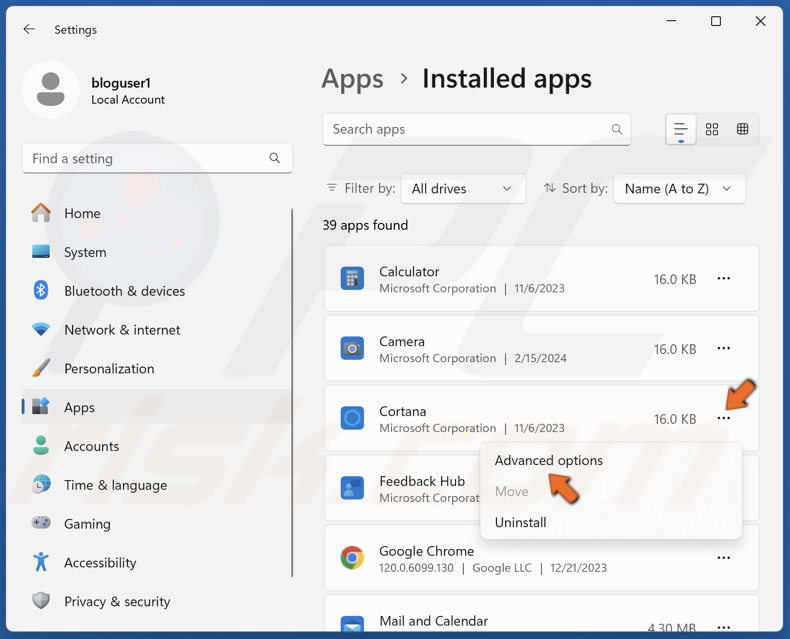
4. Scroll through the list or type the app’s name in the search box to find it.
5. Click the three-dot button next to the app and click Advanced options. If Advanced options are missing, the app doesn’t run in the background.
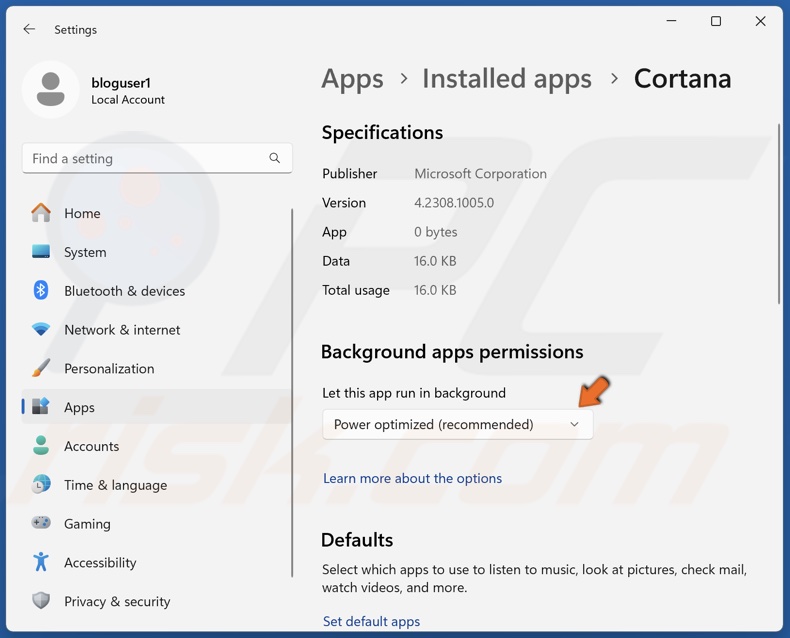
6. Open the Background apps permissions drop-down menu.
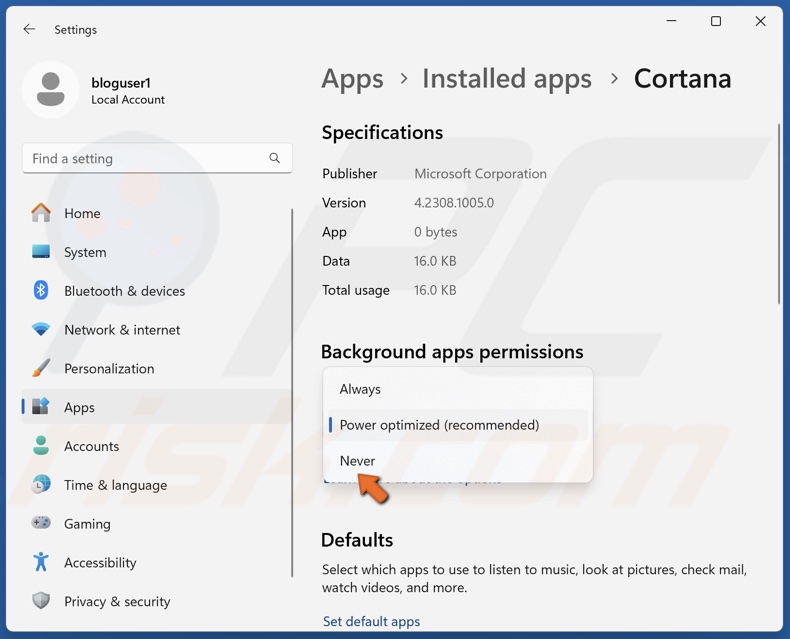
7. Select Never.
8. Scroll down and click Terminate.
Method 2. Disable Background Apps via Group Policy Settings
Windows 11 allows you to turn off background apps all at once through the Local Group Policy Editor. Turning off apps via Group Policy Editor will also turn off the Background apps permissions option covered in Method 1.
Note that the Group Policy Editor is only available on Pro, Education, and Enterprise versions of Windows 11. If you use the Windows 11 Home edition, you will have to use Method 1 or 3.
1. Hold down Windows+R keys to open Run.
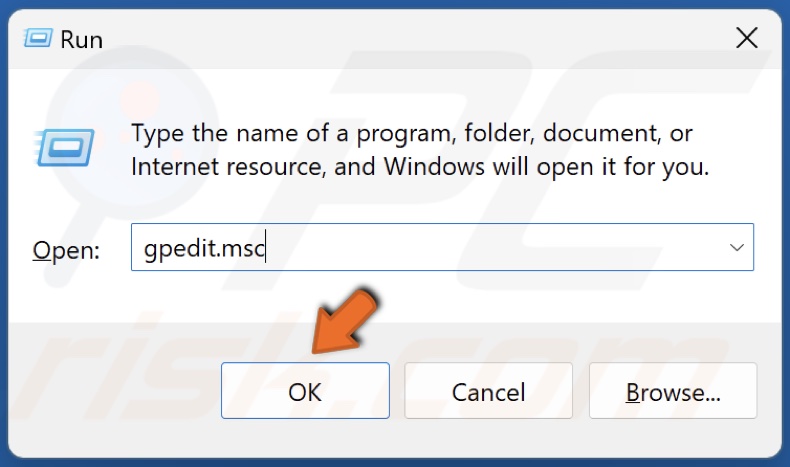
2. Type gpedit.msc in Run and click OK.
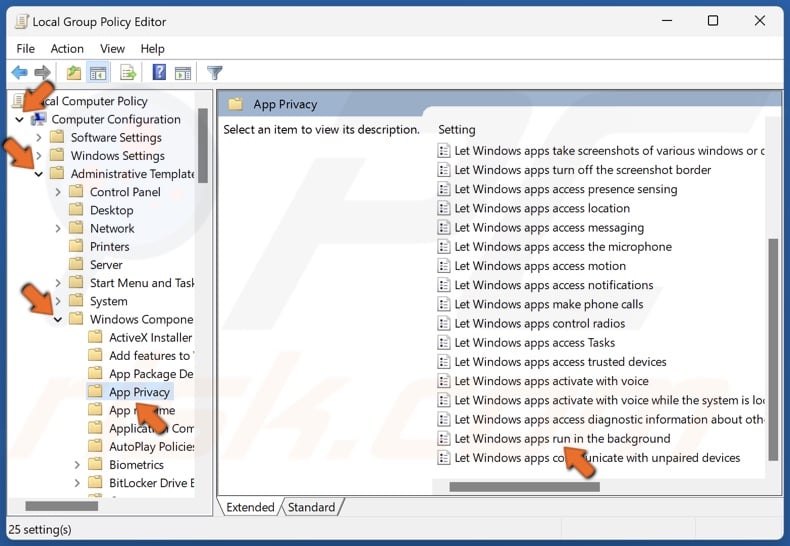
3. In the Group Policy window, navigate to:
Computer Configuration > Administrative Templates > Windows Components > App Privacy
4. Double-click Let Windows apps run in the background on the right pane.
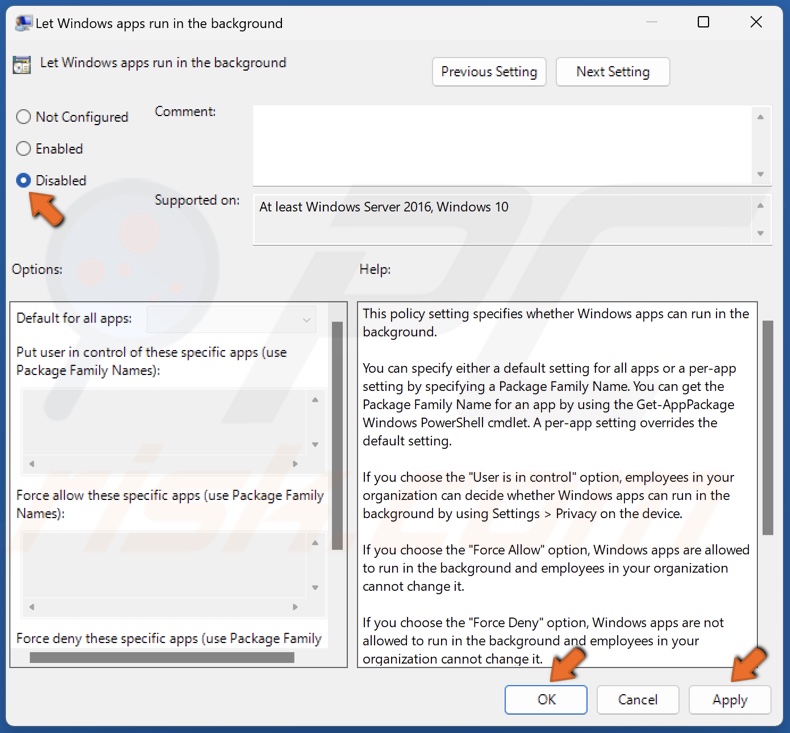
5. Tick Disabled on the left.
6. Click Apply and click OK.
Method 3. Disable Background Apps via Windows Registry Editor
An alternative way to disable apps running in the background on Windows 11 is to add a new value in the Windows Registry. This method is an alternative way to edit the Group Policy setting covered in Method 2.
1. Hold down Windows+R keys to open Run.
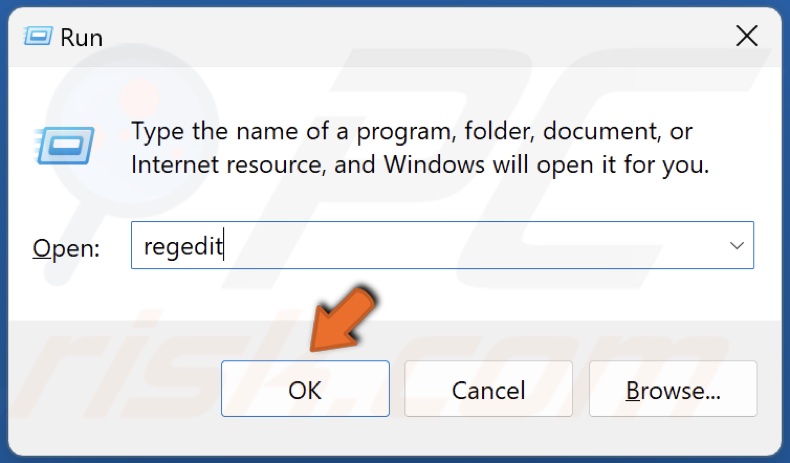
2. Type regedit in Run and click OK.
3. Once in the Registry Editor, navigate to:
HKEY_LOCAL_MACHINE\SOFTWARE\Policies\Microsoft\Windows\
4. Select the AppPrivacy key in the left pane.
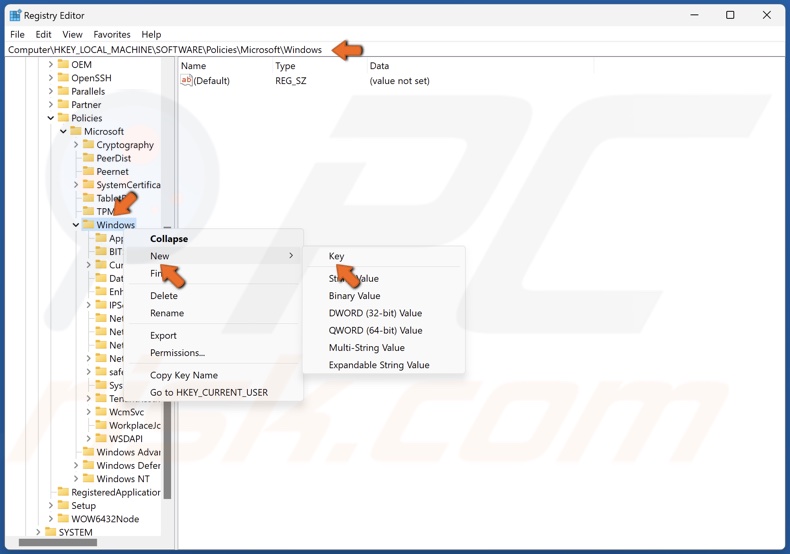
5. If the AppPrivacy key is missing, right-click the Windows key, select New, and click Key.
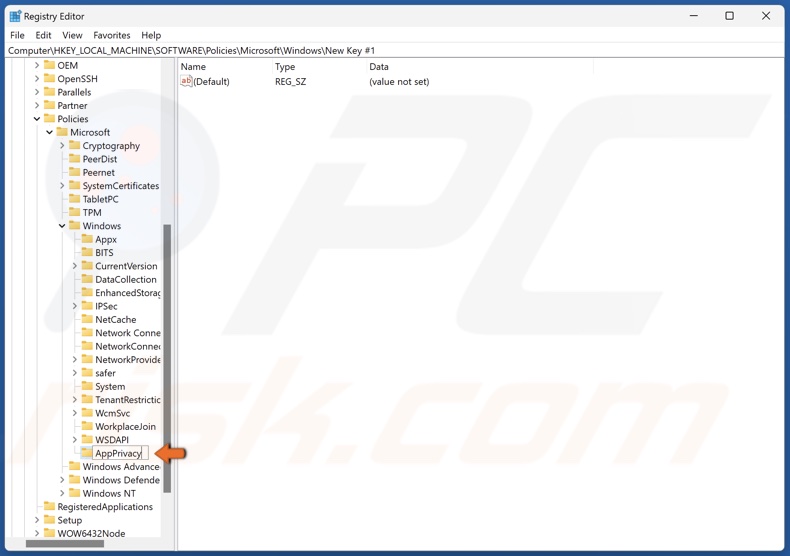
6. Name the key AppPrivacy and save it.
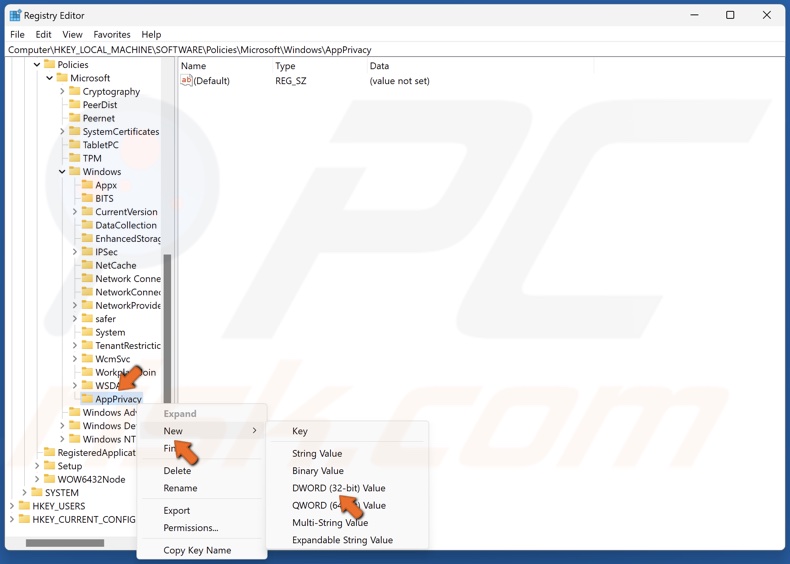
8. If the LetAppsRunInBackground value is missing, right-click the AppPrivacy key, select New, and click DWORD (32-bit) Value.
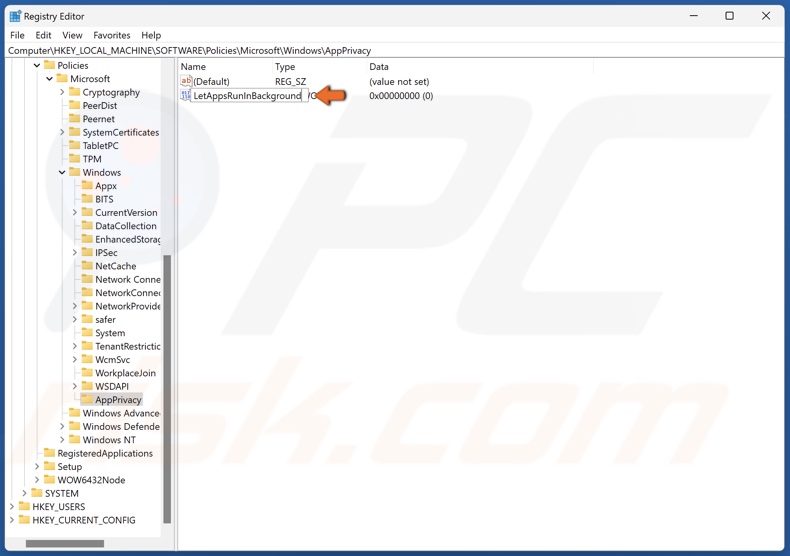
9. Name the value LetAppsRunInBackground and save it.
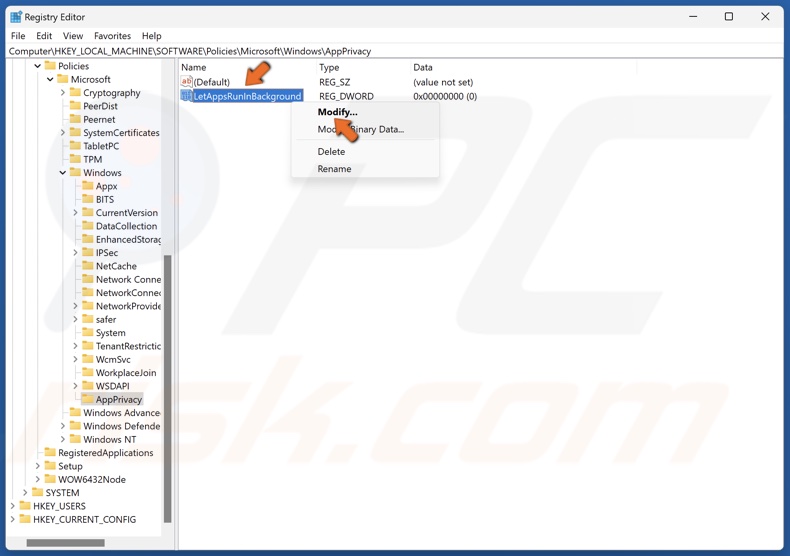
10. Right-click the LetAppsRunInBackground value and click Modify.
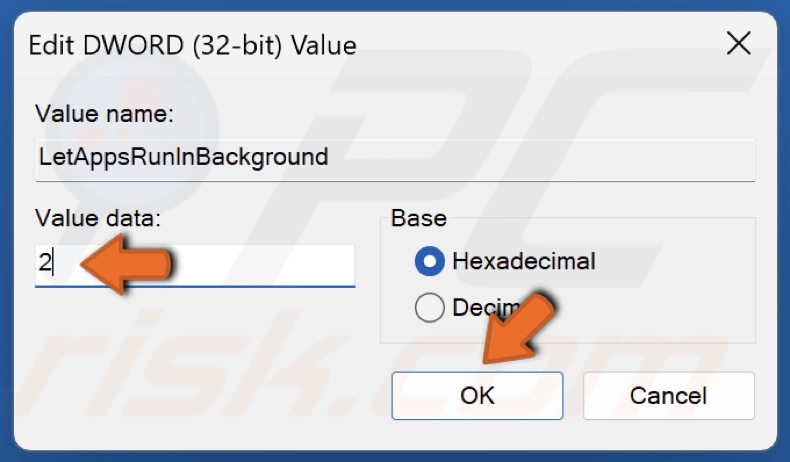
11. Set the Value data to 2 and click OK.
12. Close the Registry Editor and restart your PC.
Did you find this article helpful? We would appreciate your feedback. Please leave a comment below.
Share:

Rimvydas Iliavicius
Researcher, author
Rimvydas is a researcher with over four years of experience in the cybersecurity industry. He attended Kaunas University of Technology and graduated with a Master's degree in Translation and Localization of Technical texts. His interests in computers and technology led him to become a versatile author in the IT industry. At PCrisk, he's responsible for writing in-depth how-to articles for Microsoft Windows.
▼ Show Discussion