What Is CCXProcess.exe, Why and How to Disable It

Get Free Scanner and check your computer for errors
Fix It NowTo fix found issues, you have to purchase the full version of Combo Cleaner. Free trial available. Combo Cleaner is owned and operated by Rcs Lt, the parent company of PCRisk.com read more.
What Is CCXProcess, Why and How to Disable It on Windows 11
Many Windows users notice a process called CCXProcess running in the background and are puzzled by its purpose. Sometimes, users think it’s malware. This article will discuss this process in more detail and show you how to disable/remove it from your background processes list.

What Is CCXProcess?
CCXProcess stands for Creative Cloud Experience Process, a process that belongs to the Adobe Creative Cloud Desktop software. CCXProcess.exe launches automatically on system startup and can create multiple instances of cscript.exe or conhost.exe processes.
Adobe Creative Cloud includes applications such as Premiere Pro, Lightroom Classic, and After Effects. Therefore, CCXProcess.exe can be part of any of the applications mentioned earlier.
The purpose of CCXProcess is to provide a range of features in Adobe Creative Cloud, including templates, filters, and tutorials. It also facilitates moving between Adobe apps.
Is CCXProcess Malicious?
If you have Adobe applications on your system, then there’s nothing to worry about unless CCXProcess.exe consumes a lot of system resources (such as high CPU and memory usage) without Adobe software running. You should be concerned if you don’t have any Adobe software but one or two CCXProcess.exe running in the background.
You may notice two CCXProcess running simultaneously - this is normal. However, malware such as Trojans and crypto-miners can be disguised as CCXProcess.exe to avoid getting noticed by the user. If you want to check whether the CCXProcess.exe file on your system is legitimate, scan it with Combo Cleaner.
The legitimate, digitally signed version of CCXProcess.exe is located at C:\Program Files (x86)\Adobe\Adobe Creative Cloud Experience and any other Adobe folder under C:\Program Files (x86). If the executable is in another location, it’s probably malware disguised as CCXProcess.
To check the location of CCXProcess.exe, hold down Ctrl+Shift+Esc keys to open Task Manager. In the Processes tab, right-click CCXProcess.exe and click Open file location. If the file is not in one of the locations mentioned above, then it’s most definitely malware.
However, if you want to disable CCXProcess.exe to optimize your system performance, you can do it by following one of the guides below. There are no downsides to disabling the CCXProcess as keeping it enabled is unnecessary since it will automatically start when you launch Adobe Creative Cloud.
Video Tutorial on How to Disable CCXProcess on Windows 11
Table of Contents:
- Introduction
- Method 1. Disable CCXProcess via Adobe Create Cloud
- Method 2. Disable CCXProcess via Task Manager
- Method 3. Disable CCXProcess via Registry Editor
- Video Tutorial on How to Disable CCXProcess on Windows 11
Download Computer Malware Repair Tool
It is recommended to run a free scan with Combo Cleaner - a tool to detect viruses and malware on your device. You will need to purchase the full version to remove infections. Free trial available. Combo Cleaner is owned and operated by Rcs Lt, the parent company of PCRisk.com read more.
Method 1. Disable CCXProcess via Adobe Create Cloud
This first method shows how to disable CCXProcess directly using Adobe Creative Cloud.
1. Open Adobe Creative Cloud.
![]()
2. In the top-right corner of the window, click the Account icon and click Preferences.
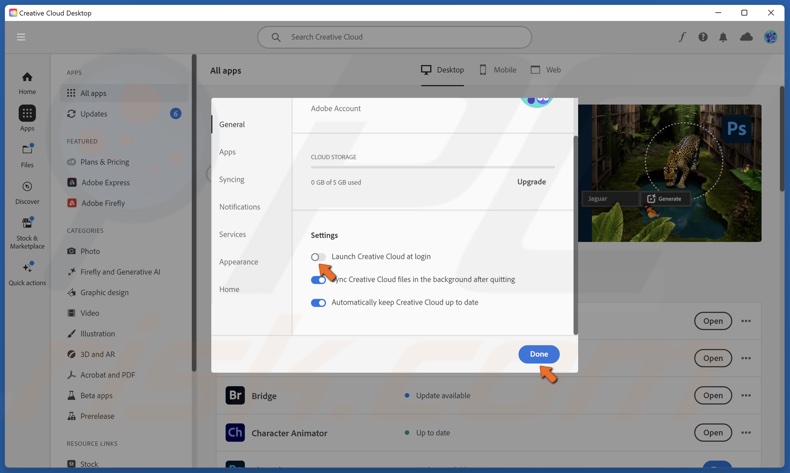
3. In the Settings section, toggle off the Launch Creative Cloud at login slider, and click Done.
4. Restart your PC and check if CCXProcess has been disabled.
Method 2. Disable CCXProcess via Task Manager
If disabling CCXProcess using Adobe Creative Cloud doesn’t work, you can disable it via Task Manager.
1. Hold down Ctrl+Shift+Esc keys to open Task Manager.
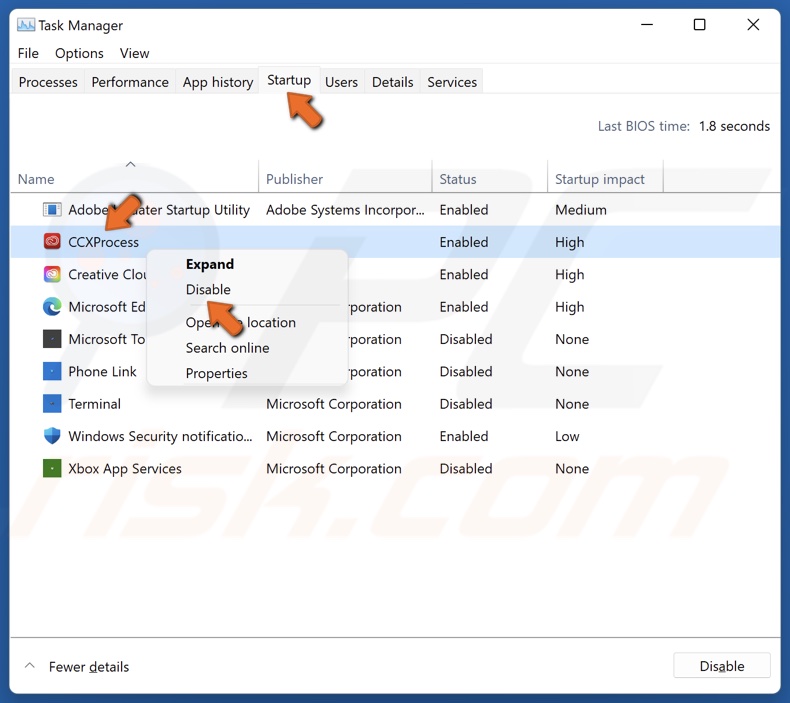
2. Select the Startup tab.
3. Right-click CCXProcess and click Disable.
4. Restart your PC and check if CCXProcess has been disabled.
Method 3. Disable CCXProcess via Registry Editor
This last method should work if none of the methods above worked. This method shows how to disable CCXProcess permanently using the Windows Registry Editor.
1. Hold down Windows+R keys to open Run.
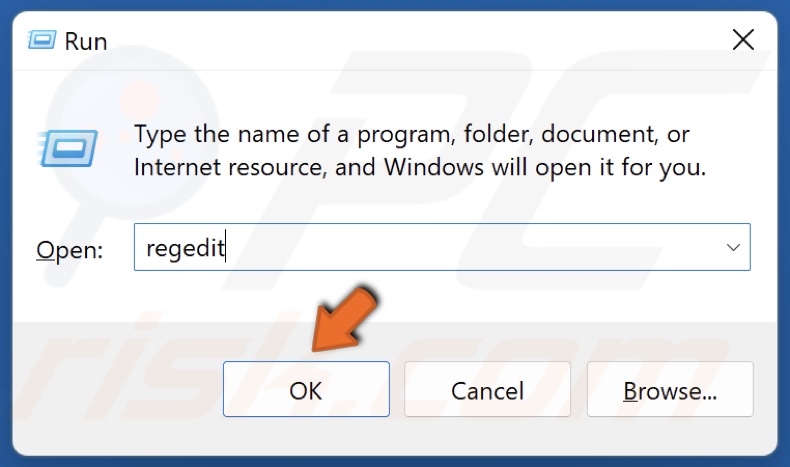
2. Type in regedit in the Run dialog and click OK to open the Windows Registry Editor.
3. In the Registry Editor, navigate to:
HKEY_LOCAL_MACHINE\SOFTWARE\Policies\Adobe
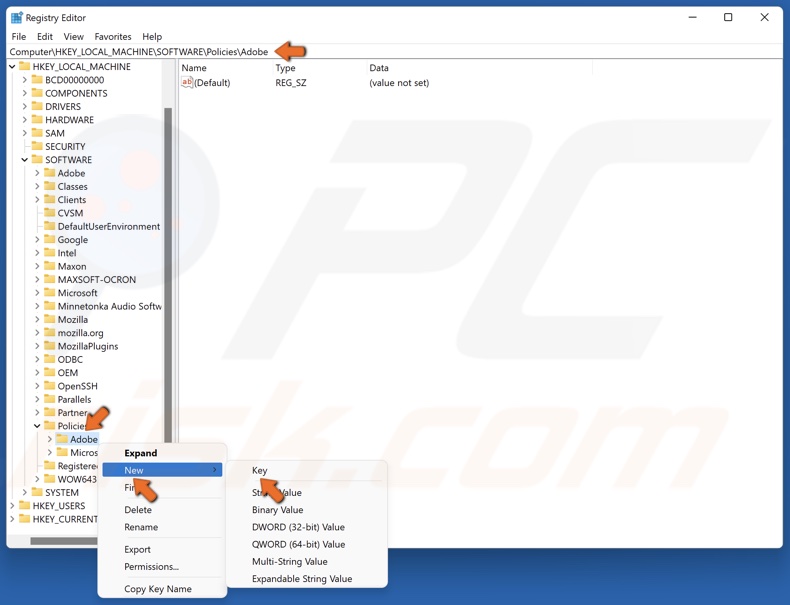
4. Right-click the Adobe key, select New, and click Key.
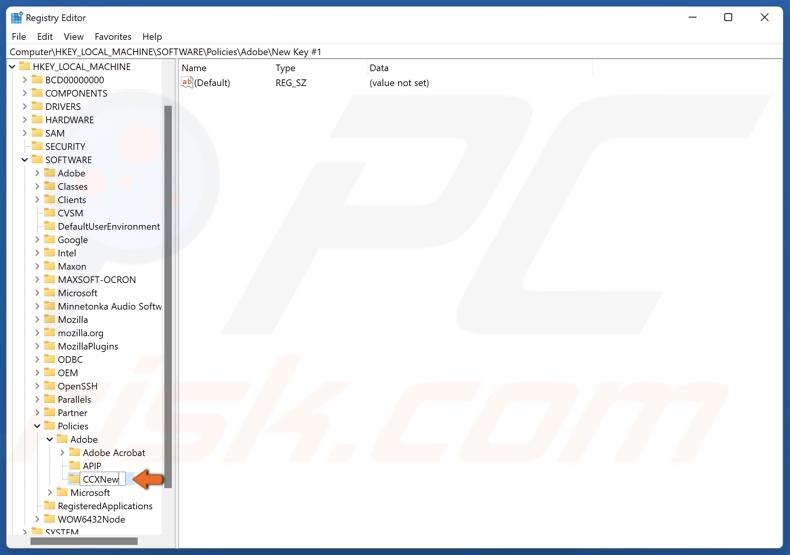
5. Name the new key CCXNew and save it.
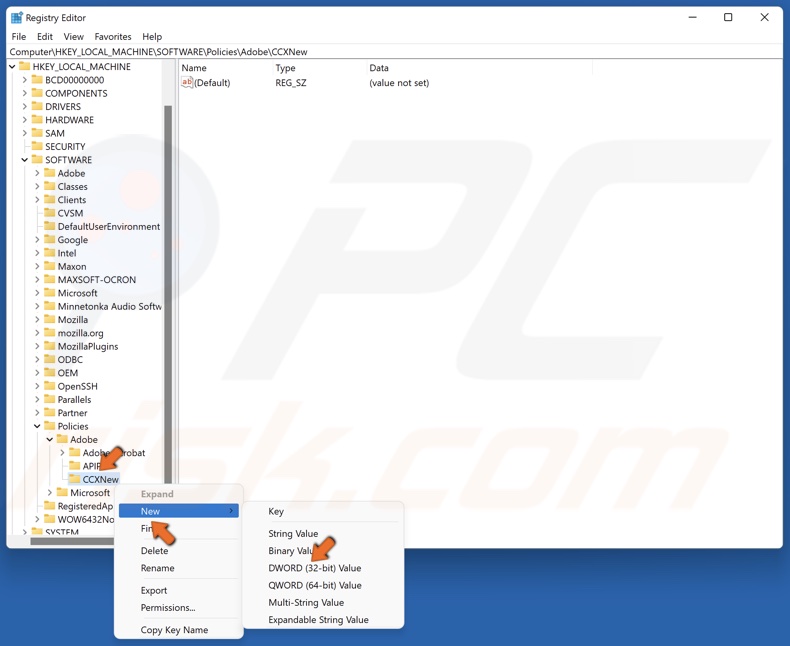
6. Right-click the CCXNew key, select New, and click DWORD (32-bit) Value.
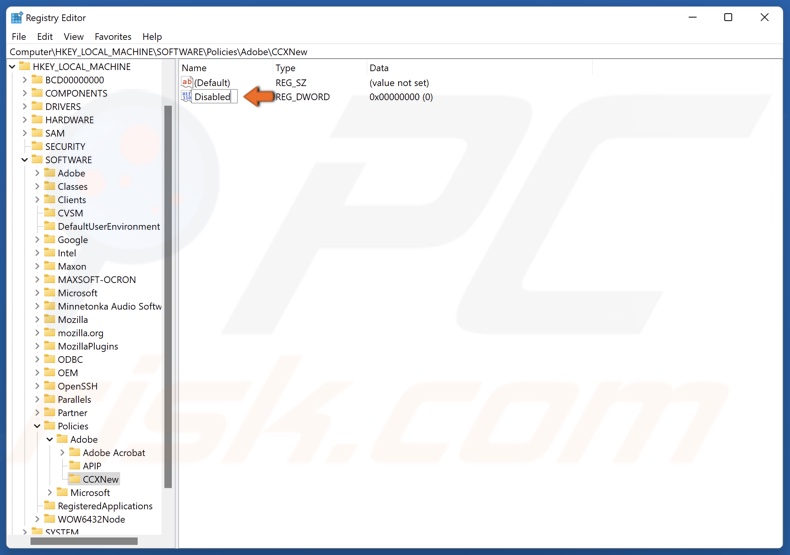
7. Name the new value Disabled and save it.
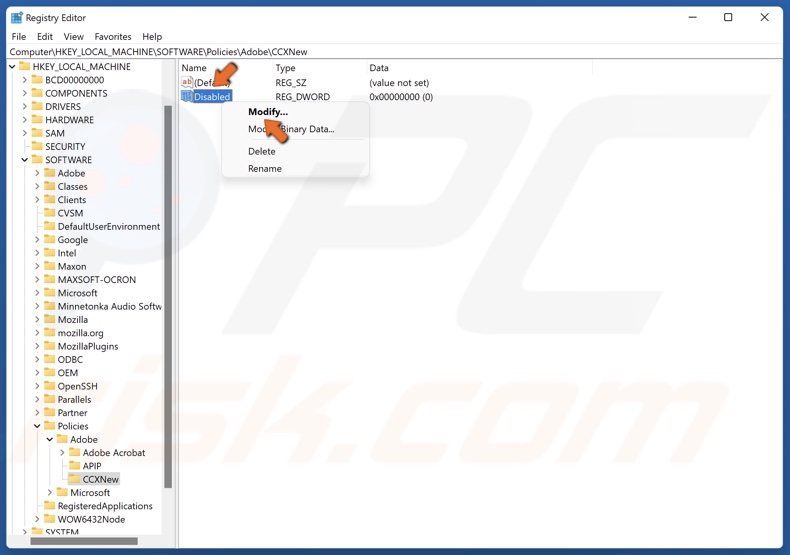
8. Right-click the Disabled value and click Modify.
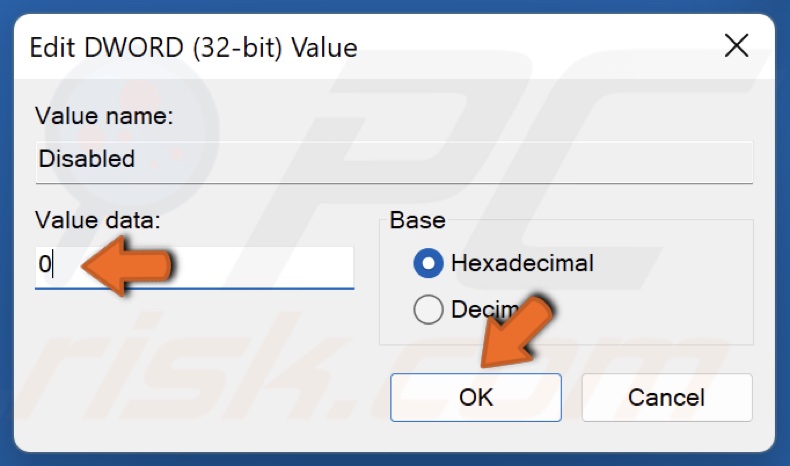
9. Set the Value data to 0 and click OK.
10. Restart your PC and check if CCXProcess has been disabled.
Did you find this article helpful? Leave your thoughts and suggestions in the comments section below.
Share:

Rimvydas Iliavicius
Researcher, author
Rimvydas is a researcher with over four years of experience in the cybersecurity industry. He attended Kaunas University of Technology and graduated with a Master's degree in Translation and Localization of Technical texts. His interests in computers and technology led him to become a versatile author in the IT industry. At PCrisk, he's responsible for writing in-depth how-to articles for Microsoft Windows.
▼ Show Discussion