How to Fix Windows Update Error 0x80070103 on Windows 11
Get Free Scanner and check your computer for errors
Fix It NowTo fix found issues, you have to purchase the full version of Combo Cleaner. Free trial available. Combo Cleaner is owned and operated by Rcs Lt, the parent company of PCRisk.com read more.
How to Fix Windows Update Error 0x80070103 on Windows 11
Many Windows 11 users report getting update install error 0x80070103 when updating Windows. Typically, this error occurs when Windows Update tries installing an already existing driver update. If you’re getting this error and are looking for a way to fix it, check out the instructions below.
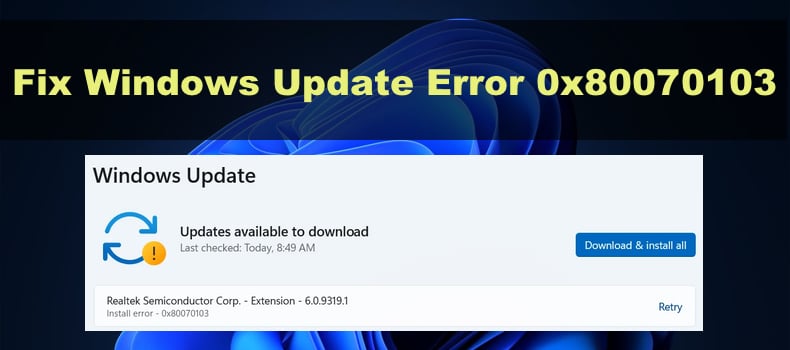
Update install error 0x80070103 is common on Windows 11 laptops as they require specific sound, video, network, touchpad, and other drivers. Nevertheless, it can also occur when installing external device drivers, notably HP printer drivers.
What Causes This Error?
Windows Update attempts to install an existing driver update. As previously mentioned, update install error 0x80070103 occurs when Windows Update tries to install a driver update that was already installed. In this case, to fix this error, you can try installing the problematic driver update manually.
The driver update is incompatible. You may get error 0x80070103 if the driver updates Windows Update is trying to install is incompatible with your Windows version.
The driver is in use during the update. You can get this error If the driver being updated is in use by another program. Closing the program that’s using the driver will allow it to update.
Corrupted system files. Update error 0x80070103 can occur if essential Windows system files are corrupted or deleted. Running DISM and SFC scans will fix corrupted and missing files.
Video Tutorial on How to Fix Windows Update Error 0x80070103
Table of Contents:
- Introduction
- Method 1. Run the Windows Update Troubleshooter
- Method 2. Pause and Resume Windows Updates
- Method 3. Restart the Windows Update Service
- Method 4. Clear Windows Update Cache
- Method 5. Run the Deployment Image & Servicing Management (DISM) and System File Checker (SFC) Scans
- Video Tutorial on How to Fix Windows Update Error 0x80070103
Download Computer Malware Repair Tool
It is recommended to run a free scan with Combo Cleaner - a tool to detect viruses and malware on your device. You will need to purchase the full version to remove infections. Free trial available. Combo Cleaner is owned and operated by Rcs Lt, the parent company of PCRisk.com read more.
Method 1. Run the Windows Update Troubleshooter
Windows Update Troubleshooter is a tool dedicated to fixing Windows update-related problems. Try running it first before moving on to more advanced methods.
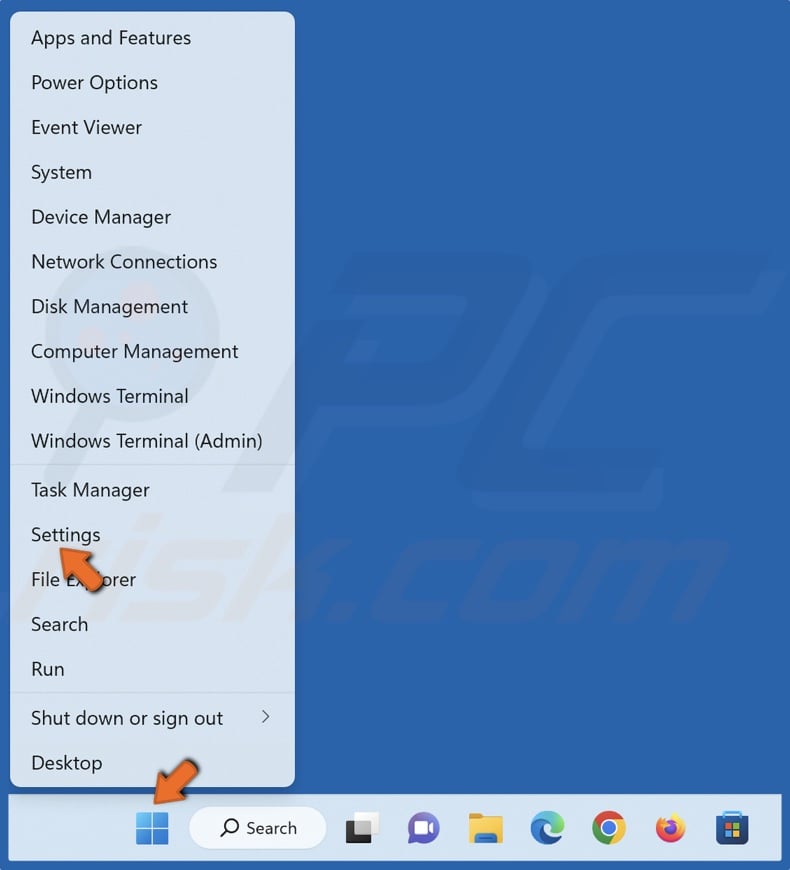
1. Right-click Start and select Settings.
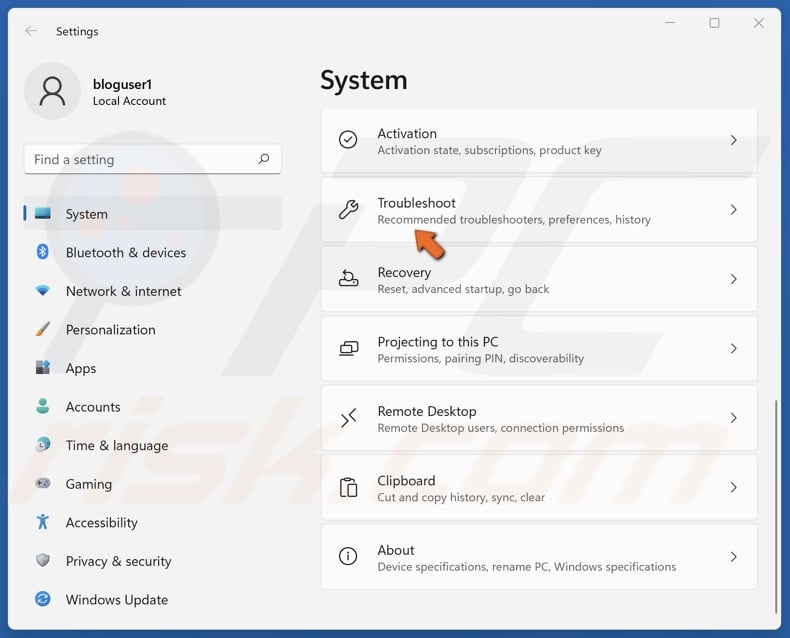
2. In the System panel, scroll down and click Troubleshoot.
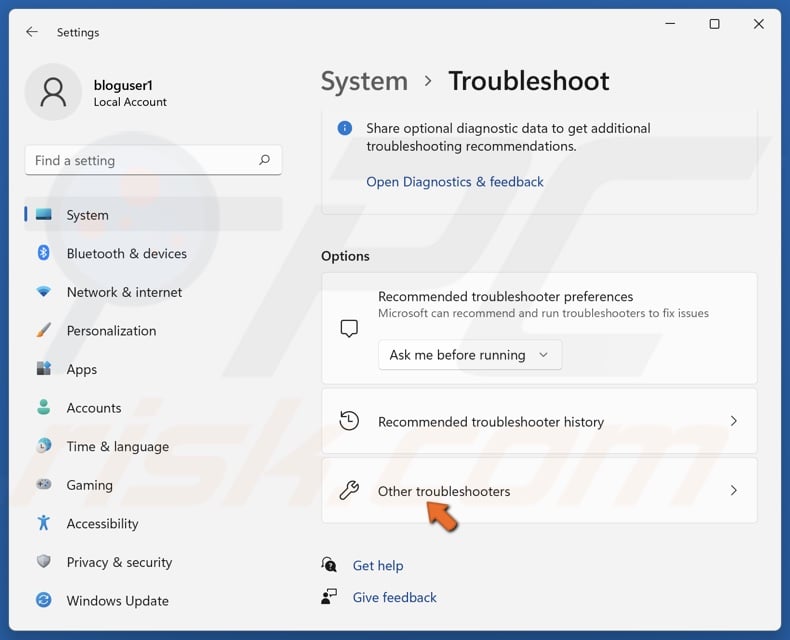
3. Select Other troubleshooters.
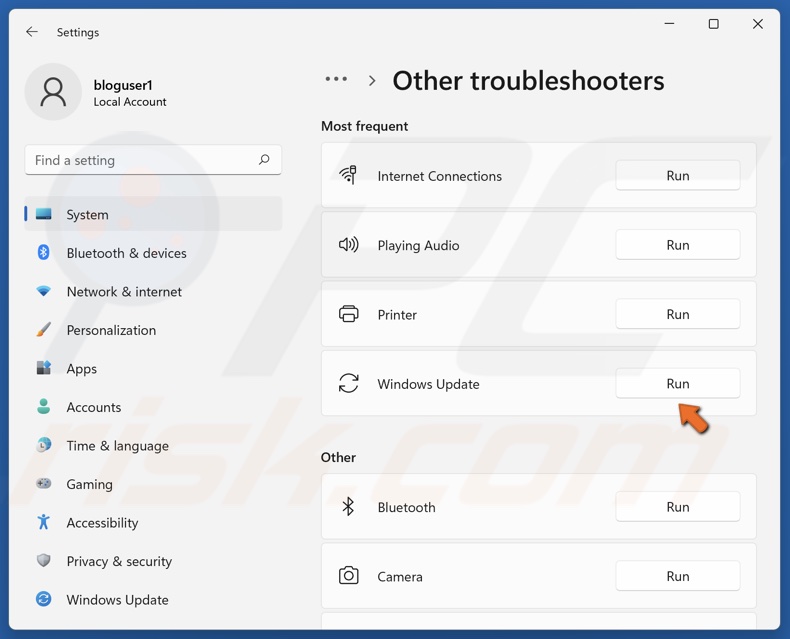
4. Click Run next to Windows Update.
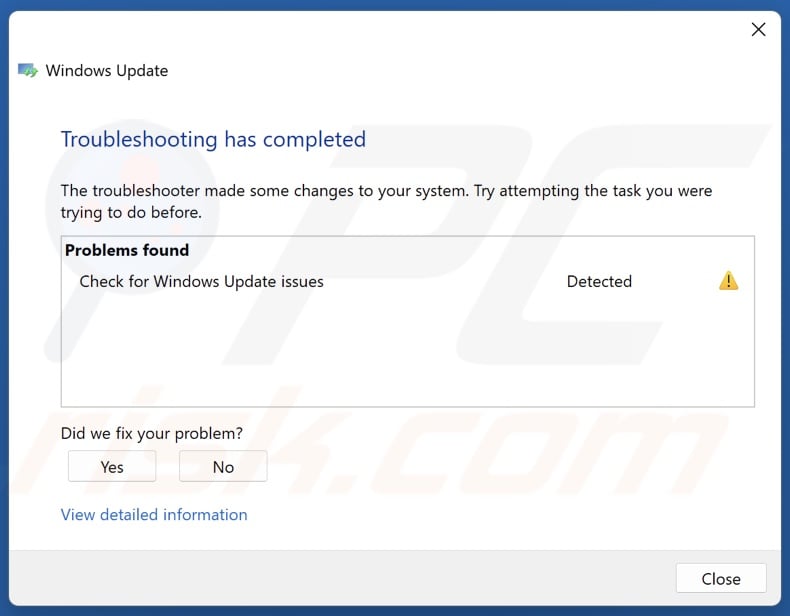
5. Apply all of the suggested fixes.
6. Restart your PC.
Method 2. Pause and Resume Windows Updates
Many users have reported that pausing and resuming Windows updates fixes update install error 0x80070103. You don’t have to leave the updates paused for any amount of time - you can resume the updates immediately. Note that you may have to pause and resume updates a few times for this to work.

1. Right-click Start and select Settings.
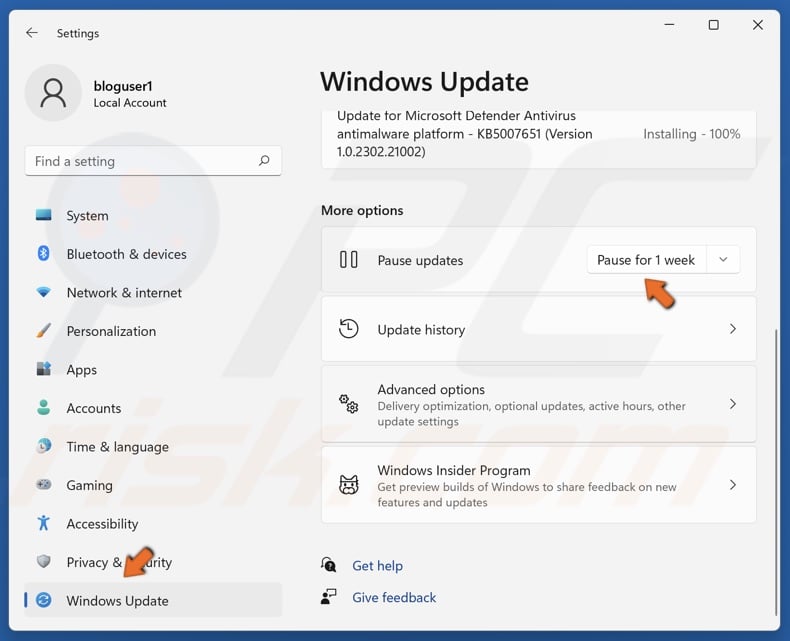
2. Select the Windows Update panel.
3. In the Pause updates section, click Pause for 1 week.
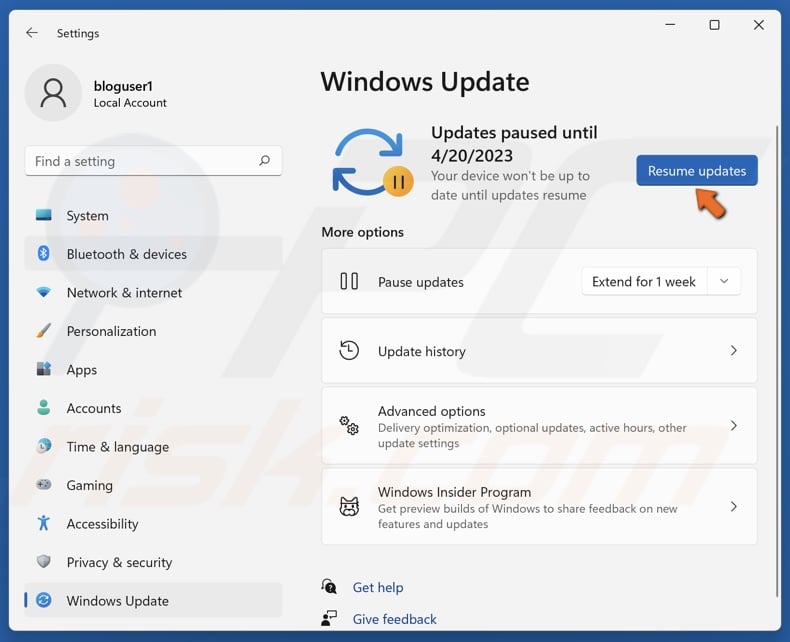
4. Then, click Resume updates.
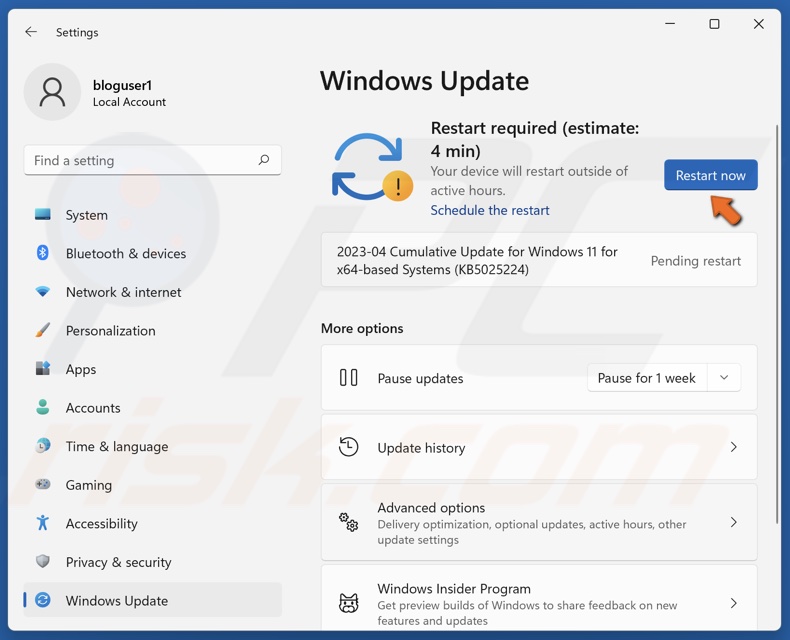
5. Once Windows is updated, click Restart now if prompted.
Method 3. Restart the Windows Update Service
The Windows Update service may not work properly, and try to install already installed device driver updates due to a glitch. Restarting the Windows Update service is a simple fix that has helped many users.
1. Hold down Windows+R keys to open Run.
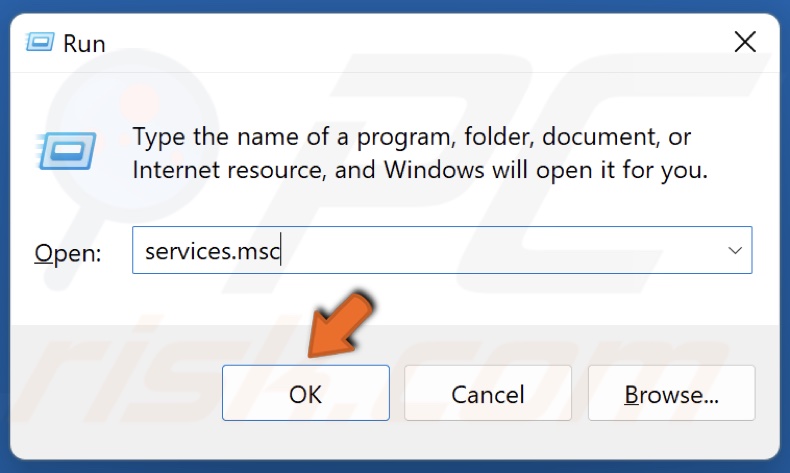
2. In the Run dialog, type in services.msc and click OK.
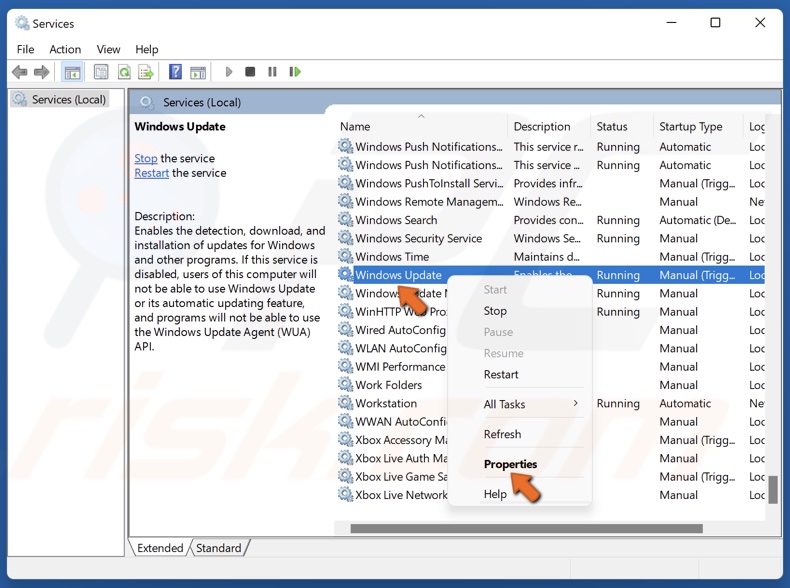
3. In the Services window, locate the Windows Update service.
4. Right-click Windows Update and click Properties.
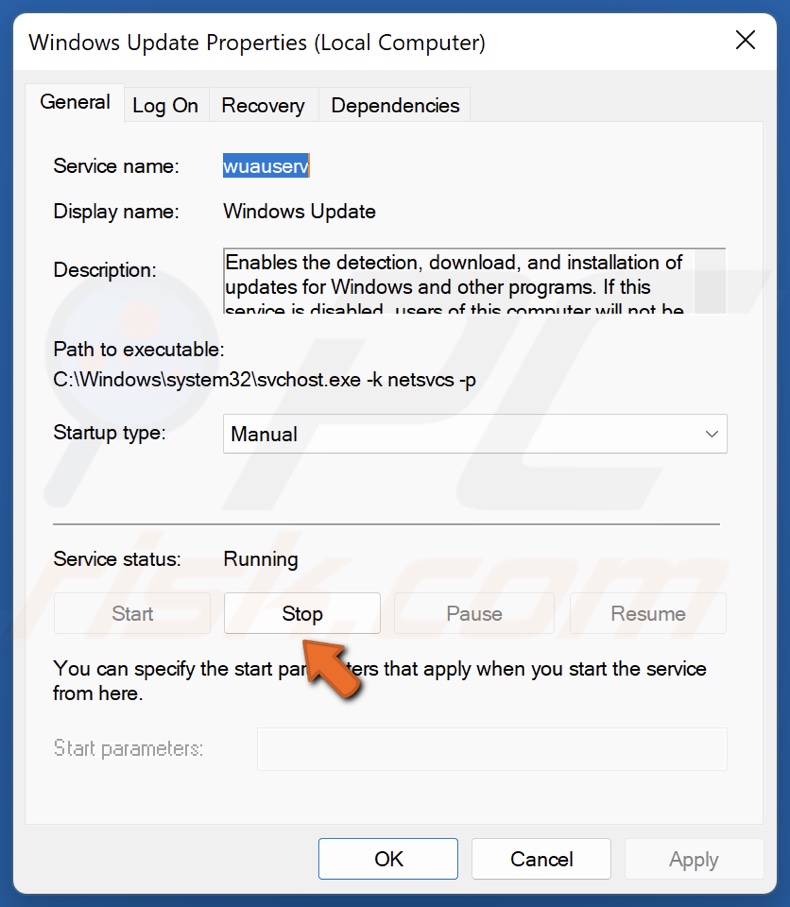
5. In the Service status section, click Stop.
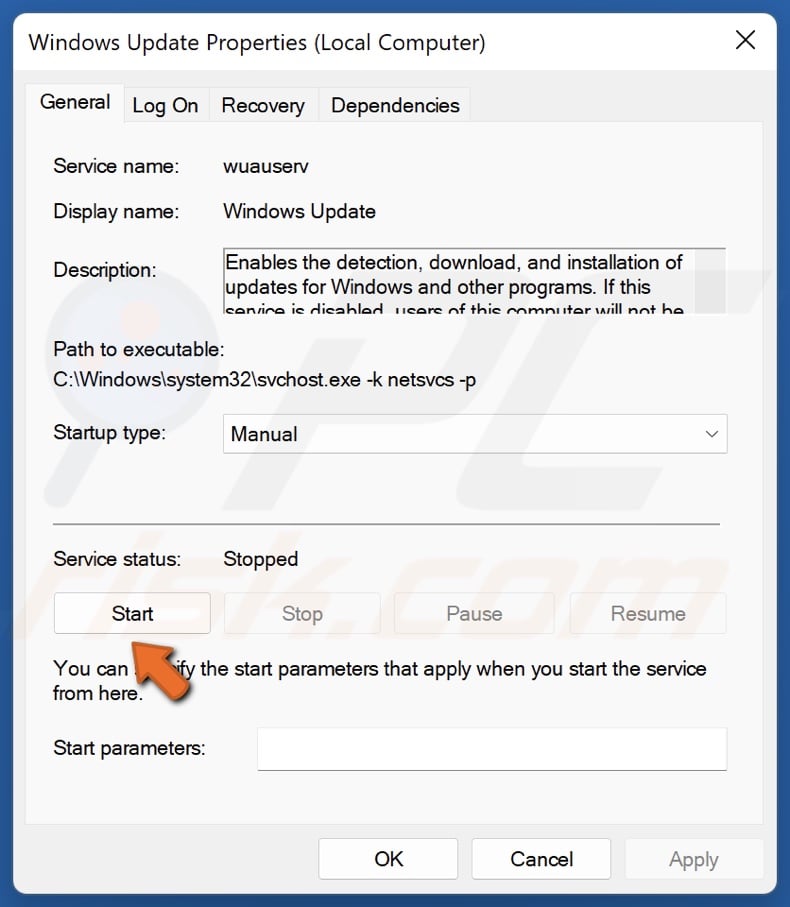
6. Then, click Start.
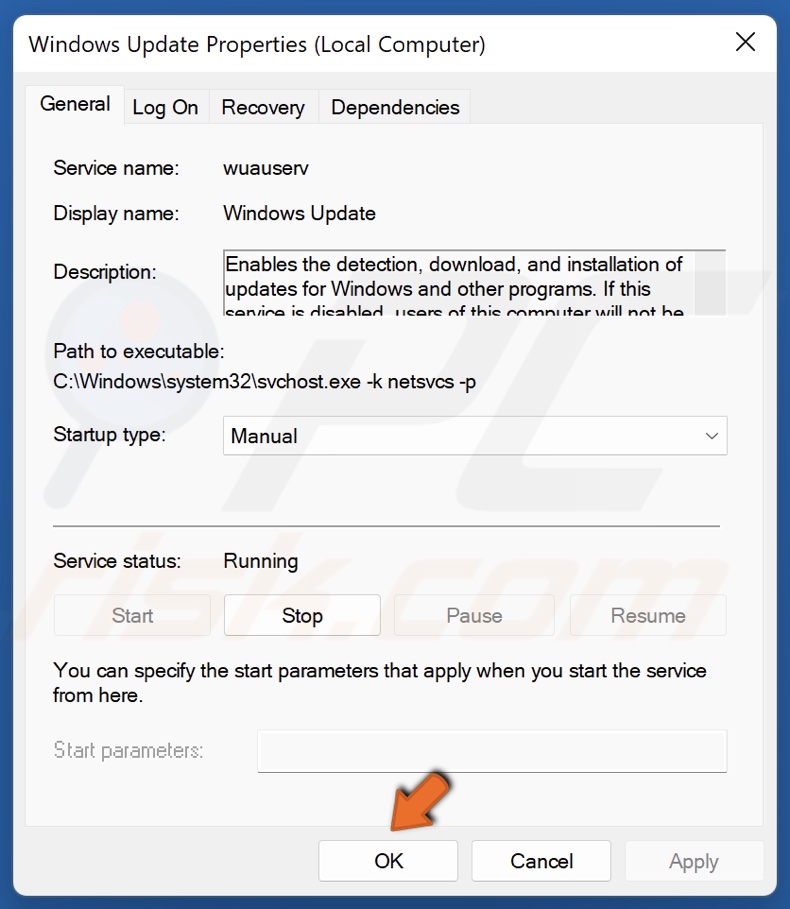
7. Click OK to close the Properties window.
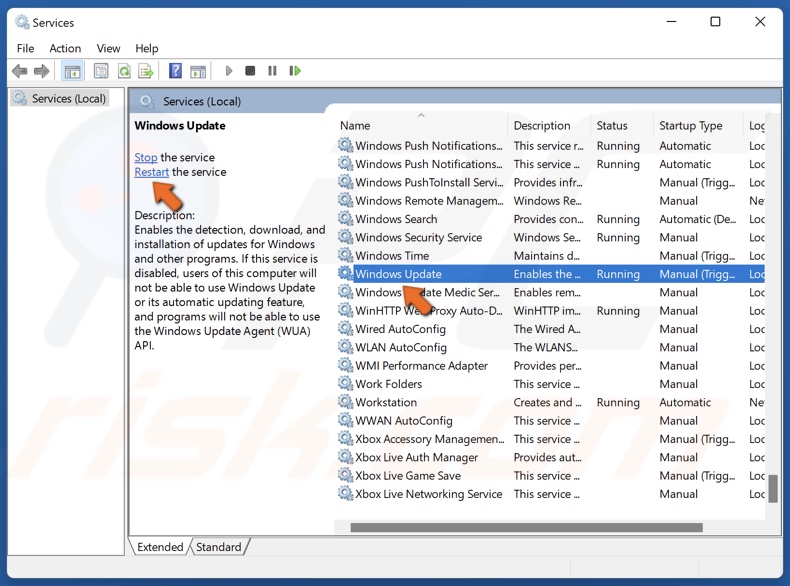
8. Alternatively, select Windows Update and click the Restart the service button.
9. Close the Services window.
Method 4. Clear Windows Update Cache
Many users were able to fix update error 0x80070103 by clearing the Windows Update cache, which stores update installation files.
1. Hold down Windows+R keys to open Run.
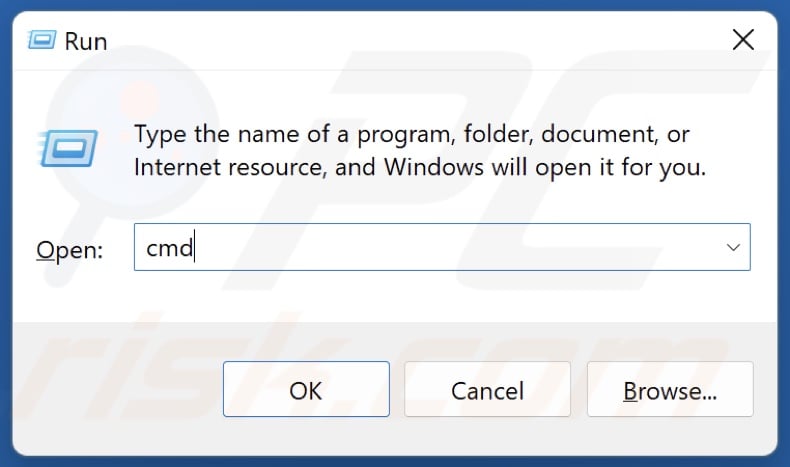
2. In the Run dialog, type in CMD and hold down Ctrl+Shift+Enter keys to open Command Prompt as an administrator.
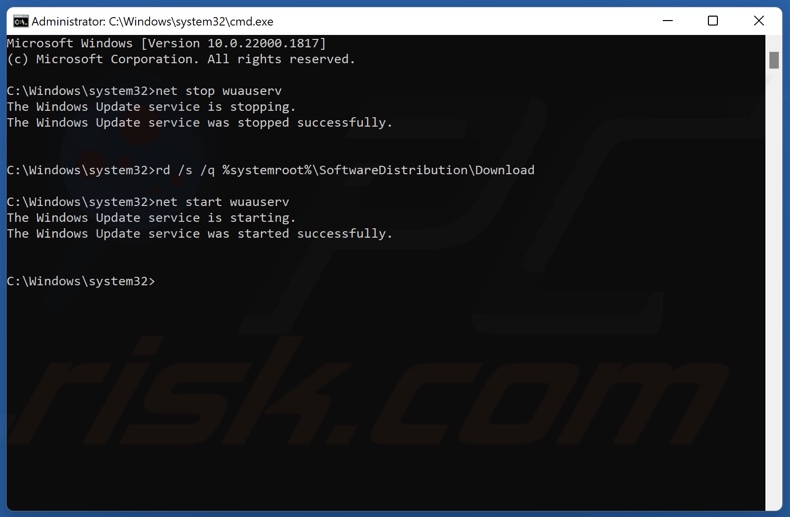
3. In the Command Prompt window, type in:
net stop wuauserv
4. Pess the Enter key.
5. Type in:
rd /s /q %systemroot%\SoftwareDistribution\Download
6. Press Enter.
7. Type in:
net start wuauserv
8. Press Enter.
Method 5. Run the Deployment Image & Servicing Management (DISM) and System File Checker (SFC) Scans
You may get error 0x80070103 due to corrupted system files. To repair and replace corrupted and missing system files, run DISM and SFC commands.
The Deployment Image Servicing and Management (DISM) is a command-line tool that can repair a damaged/corrupted Windows image. The System File Checker (SFC) is a utility that can repair and replace corrupted Windows system files.
1. Hold down Windows+R keys to open Run.

2. In the Run dialog, type in CMD and hold down Ctrl+Shift+Enter keys to open Command Prompt as an administrator.
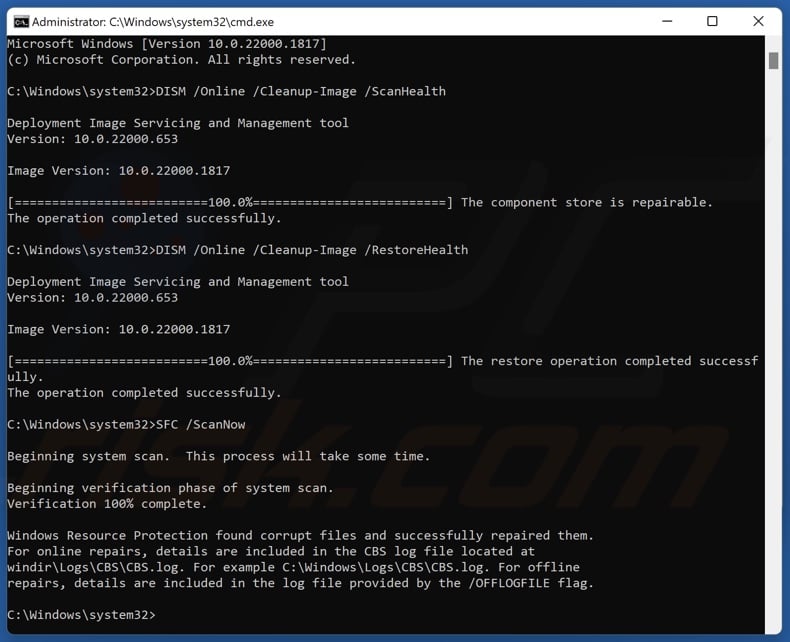
3. In the Command Prompt window, type in:
DISM /Online /Cleanup-Image /ScanHealth
4. Press Enter.
5. Type in:
DISM /Online /Cleanup-Image /RestoreHealth
6. Press Enter.
7. Then, type in:
SFC /ScanNow
8. Press Enter.
9. Close the Command Prompt and restart your PC.
Did this article help you fix Windows Update install error 0x80070103 on your Windows 11 machine? Leave a comment below.
Share:

Rimvydas Iliavicius
Researcher, author
Rimvydas is a researcher with over four years of experience in the cybersecurity industry. He attended Kaunas University of Technology and graduated with a Master's degree in Translation and Localization of Technical texts. His interests in computers and technology led him to become a versatile author in the IT industry. At PCrisk, he's responsible for writing in-depth how-to articles for Microsoft Windows.

▼ Show Discussion