How to Fix "ffmpeg.dll was not found" Error
Get Free Scanner and check your computer for errors
Fix It NowTo fix found issues, you have to purchase the full version of Combo Cleaner. Free trial available. Combo Cleaner is owned and operated by Rcs Lt, the parent company of PCRisk.com read more.
How to Fix “ffmpeg.dll was not found” Error on Windows 11
You may get “ffmpeg.dll was not found” or “ffmpeg.dll is missing” error when launching an application. Usually, this error occurs when ffmpeg.dll is missing or corrupt. This article will discuss this error in more detail and provide several ways to fix it.
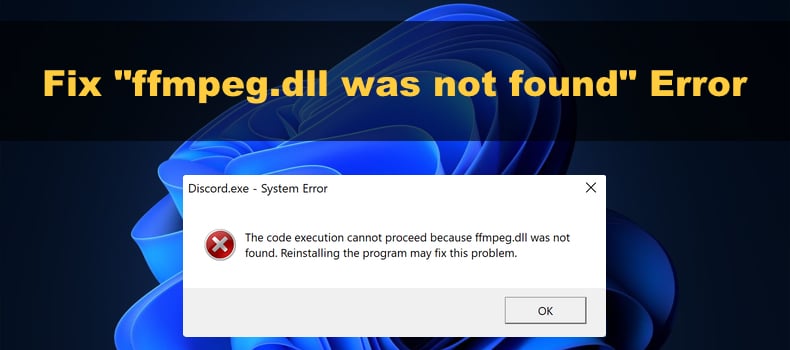
The program can’t start because ffmpeg.dll is missing from your computer. Try reinstalling the program to fix this problem.
The code execution cannot proceed because ffmpeg.dll was not found. Reinstalling the program may fix this problem.
We have found that this error occurs when attempting to install or launch applications such as Skype, Discord, and Slack.
What Is ffmpeg.dll?
ffmpeg.dll is a Dynamic Link Library. It contains code and data that can be accessed by multiple programs at the same time and ensures that Windows programs operate correctly. The ffmpeg.dll contains libraries that are essential for some applications to function.
What Causes This Error?
Our research has shown that the “ffmpeg.dll was not found” error occurs when ffmpeg.dll is not present on the system or is corrupt. Furthermore, this error can occur if other essential system files have been corrupted. Running the System File Checker (SFC) should fix this issue.
“ffmpeg.dll was not found” can also occur if the installation of the application that requires ffmpeg.dll to run doesn’t contain it. Typically, when you install an application, the installation will contain ffmpeg.dll. However, when the application is later updated, the new version may not have ffmpeg.dll. Moving ffmpeg.dll from the older version folder to the latest version should fix the issue.
Before trying our fixes, reinstall the program that gives you the “ffmpeg.dll was not found” error. Make sure to remove all residual files in the installation directory and %AppData% and %LocalAppData% folders.
Video Tutorial on How to Fix “ffmpeg.dll was not found” Error
Table of Contents:
- Introduction
- Method 1. Run the Deployment Image & Servicing Management (DISM) Scan
- Method 2. Run the System File Checker (SFC) Scan
- Method 3. Clear the Cache of the Program
- Method 4. Copy ffmpeg.dll to the Latest Application Version Folder
- Video Tutorial on How to Fix “ffmpeg.dll was not found” Error
Download Computer Malware Repair Tool
It is recommended to run a free scan with Combo Cleaner - a tool to detect viruses and malware on your device. You will need to purchase the full version to remove infections. Free trial available. Combo Cleaner is owned and operated by Rcs Lt, the parent company of PCRisk.com read more.
Method 1. Run the Deployment Image & Servicing Management (DISM) Scan
Deployment Image Servicing and Management (DISM) is a command-line tool that can repair your Windows image if it has been corrupted. DISM uses Windows Update to get the files required to fix corruptions.
1. Hold down Windows+R keys to open Run.
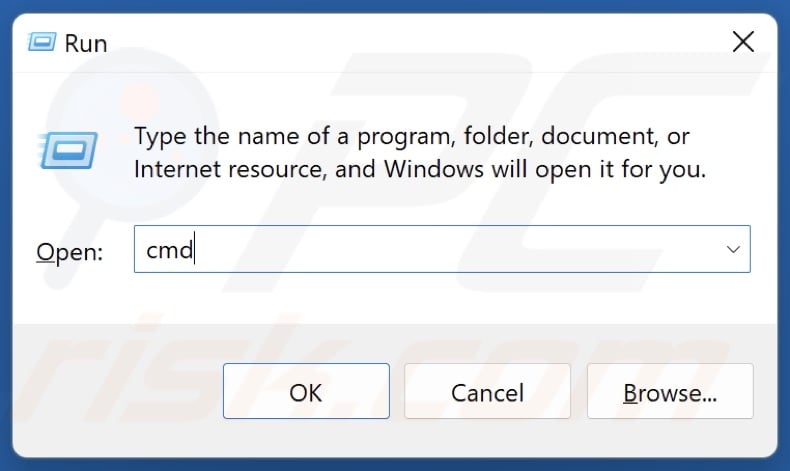
2. In the Run dialog, type in CMD and hold down Ctrl+Shift+Enter keys to open Command Prompt as an administrator.
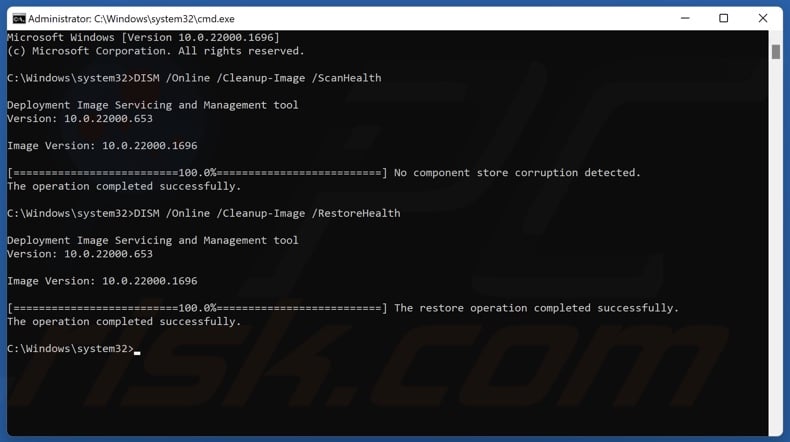
3. In the Command Prompt window, type in:
DISM /Online /Cleanup-Image /ScanHealth
4. Press Enter to execute the command.
5. Then, type in:
DISM /Online /Cleanup-Image /RestoreHealth
6. Press Enter to execute the command.
7. Close the Command Prompt and restart your PC.
Method 2. Run the System File Checker (SFC) Scan
System File Checker (SFC) is a tool that scans all protected system files and replaces corrupted files with a cached copy located in a compressed folder at %WinDir%\System32\dllcache.
1. Hold down Windows+R keys to open Run.

2. In the Run dialog, type in CMD and hold down Ctrl+Shift+Enter keys to open Command Prompt as an administrator.
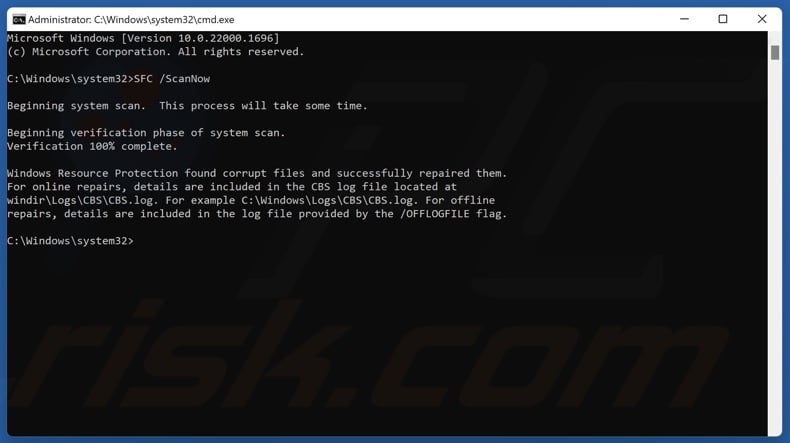
3. In the Command Prompt window, type in:
SFC /ScanNow
4. Press Enter to execute the command.
5. Close the Command Prompt and restart your PC.
Method 3. Clear the Cache of the Program
Many applications use cache to improve performance. However, the cache may become overloaded or corrupted, triggering errors such as “ffmpeg.dll was not found”. Therefore, clearing the cache of the particular application giving you this error may fix it.
For demonstration purposes, we will use Discord but the same steps apply to applications such as Slack.
1. Close the application if it’s running.
2. Hold down Windows+R keys to open Run.
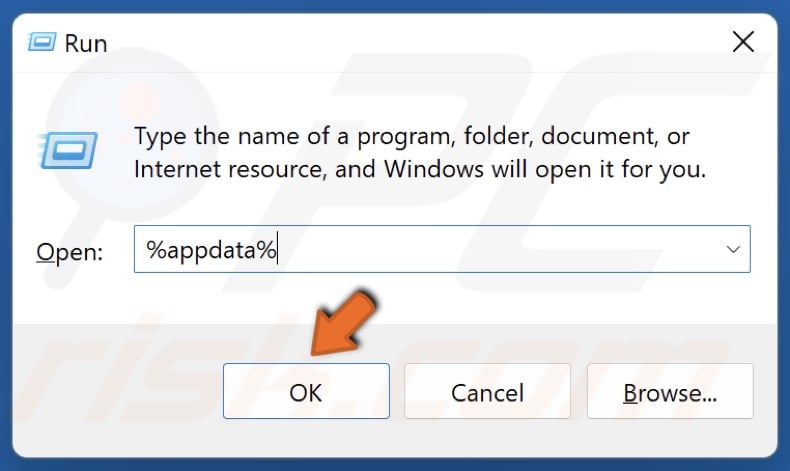
3. In the Run dialog, type in %AppData% and click OK.
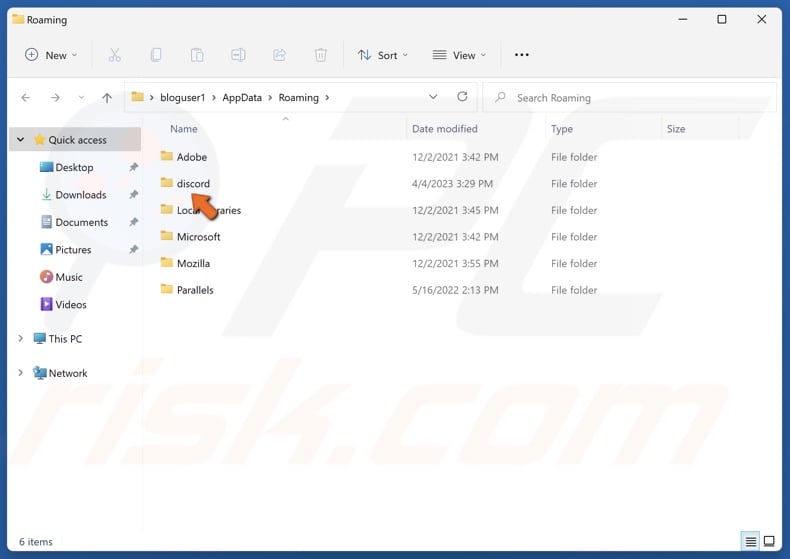
4. Navigate to the program folder (in this case, Discord).
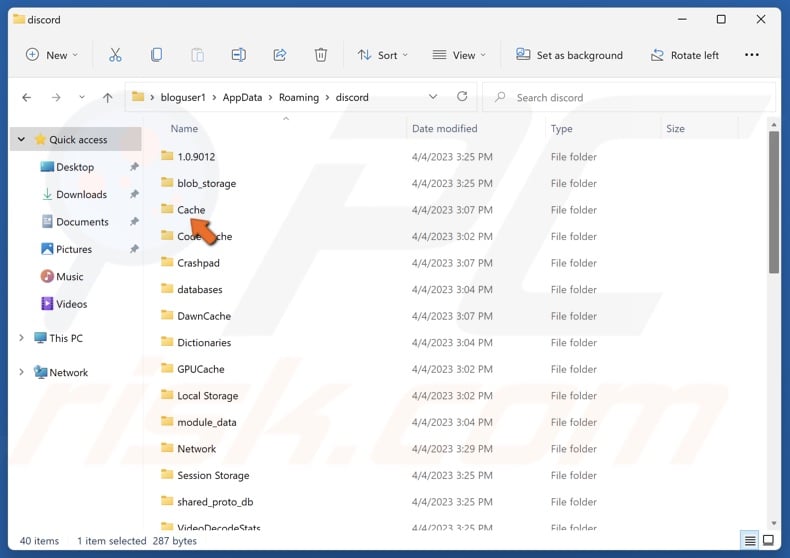
5. Access the cache folder. The cache folder name varies depending on the program, so do your research to identify where cached files are stored.
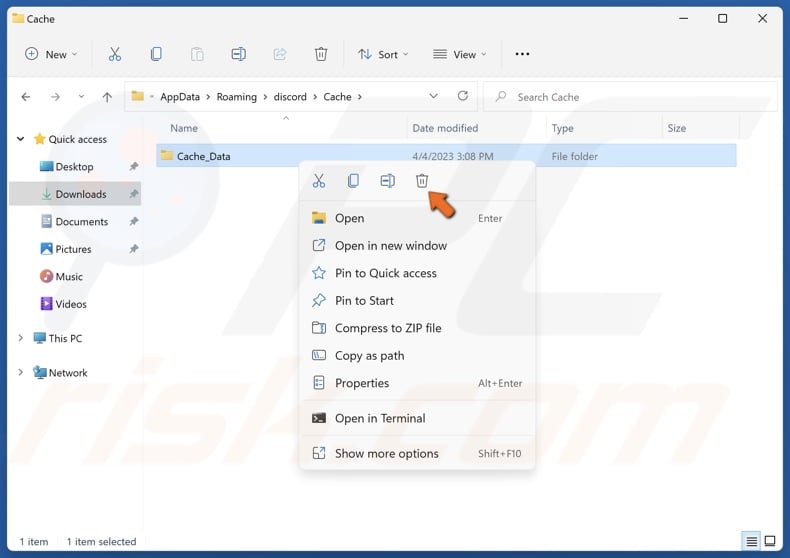
6. In the cache, hold down Ctrl+A to select all files in the folder.
7. Right-click the selected files and click Delete.
8. Then, launch the program.
Method 4. Copy ffmpeg.dll to the Latest Application Version Folder
Some users have found that the ffmpeg.dll goes missing after updating the program. The solution they found is to copy ffmpeg.dll from the older version folder to the latest version folder.
1. Hold down Windows+R keys to open Run.
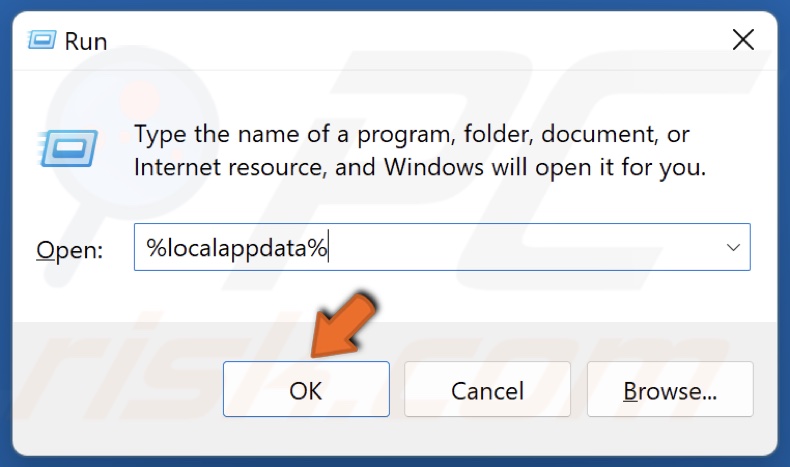
2. In the Run dialog, type in %LocalAppData% and click OK.
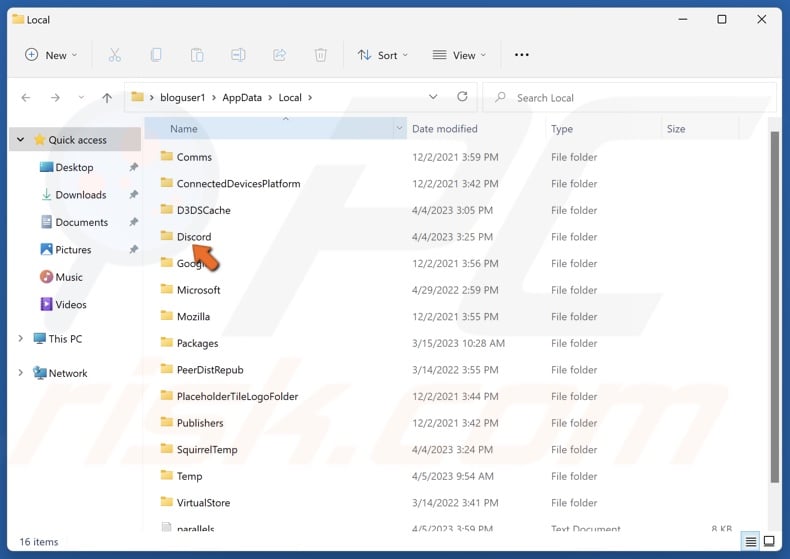
3. Navigate to the program folder (in this case, Discord).
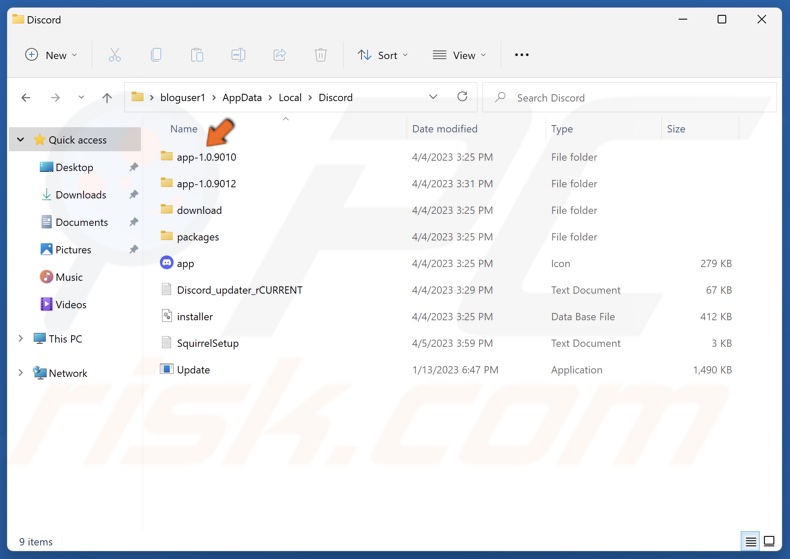
4. Access an older application version folder.
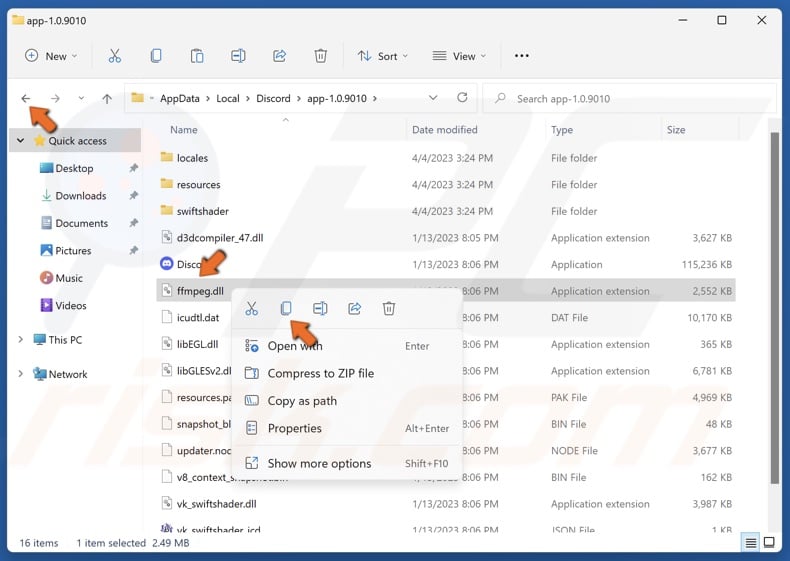
5. Find ffmpeg.dll. Right-click ffmpeg.dll and click Copy.
6. Then, go back to the main program folder (Discord).
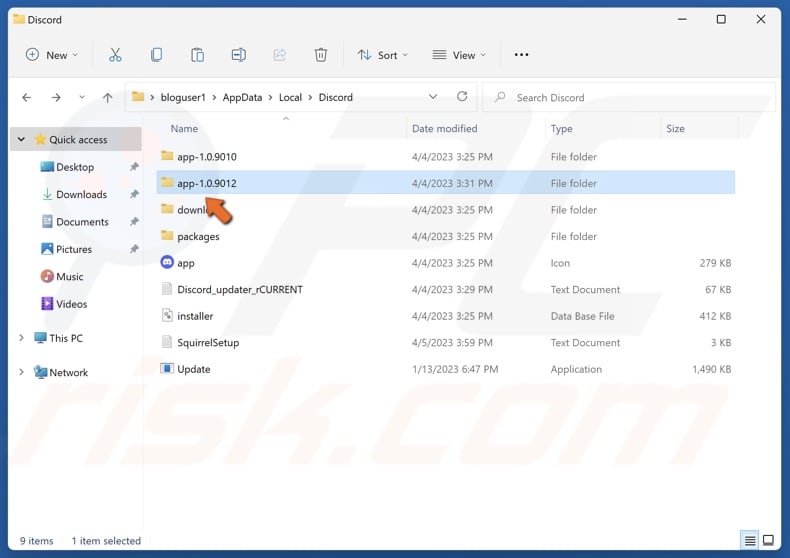
7. Access the latest version folder.
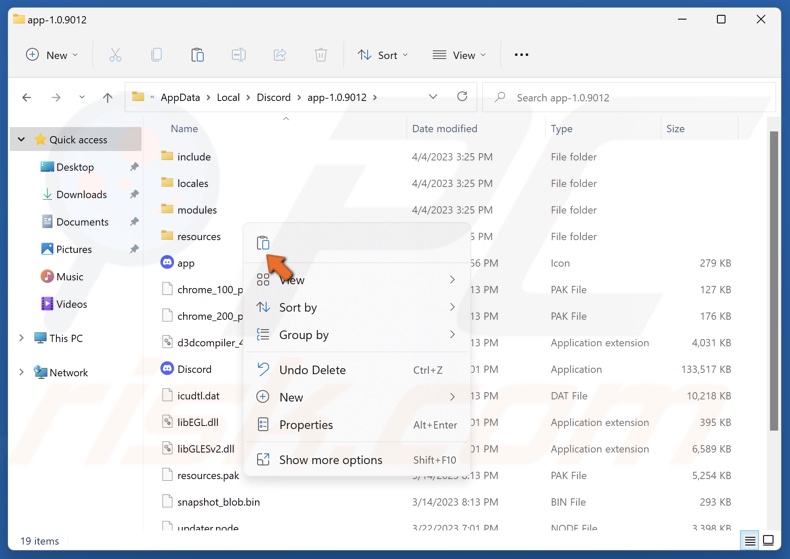
8. Right-click inside the folder and click Paste.
Did this article help you fix the “ffmpeg.dll was not found” error on your PC? Let us know in the comments section below.
Share:

Rimvydas Iliavicius
Researcher, author
Rimvydas is a researcher with over four years of experience in the cybersecurity industry. He attended Kaunas University of Technology and graduated with a Master's degree in Translation and Localization of Technical texts. His interests in computers and technology led him to become a versatile author in the IT industry. At PCrisk, he's responsible for writing in-depth how-to articles for Microsoft Windows.

▼ Show Discussion