How to Fix "Failed to locate Framework.dll" Error
Get Free Scanner and check your computer for errors
Fix It NowTo fix found issues, you have to purchase the full version of Combo Cleaner. Free trial available. Combo Cleaner is owned and operated by Rcs Lt, the parent company of PCRisk.com read more.
How to Fix “Failed to locate Framework.dll” Error on Windows 11
If you get the “Failed to locate Framework.dll” error when you launch or install a program, it means that the program requiring framework.dll could not access it. In this article, we will discuss the causes of this error and provide several ways to fix it.

Here’s a list of the most common errors associated with Framework.dll.
The program can’t start because Framework.dll is missing from your computer.
Error loading Framework.dll. The specified module could not be found.
Framework.dll could not be located.
What Causes This Error?
Our research has revealed that the “Failed to locate Framework.dll” error occurs when applications that depend on it can’t access it. Users typically get this error when running programs like BitDefender, Comodo Cleaning Essentials, and Xojo. We have outlined several possible causes for this error below.
- The program that requires Framework.dll is corrupt. If you get this error when the program that requires Framework.dll to run is corrupted. Re-download the installer and re-install the program.
- Corrupted system files. A corrupted Framework.dll or other system files will cause the “Failed to locate Framework.dll” error to occur. You will also see this error message if Framework.dll is missing from your computer. You can fix corrupted and missing system files by running DISM and SFC scans or re-registering the Framework.dll file.
- Malware on your PC. If your PC has been infected with malware, it may block specific system processes and prevent programs from accessing necessary DLL and other files. Scan your PC using Combo Cleaner or another anti-malware program to remove the malware.
Before trying our fixes, here are some tips:
- Re-install the program that triggers the Runtime error “Failed to locate Framework.dll”.
- Update your Windows operating system. Make sure to install all pending Windows 11 updates.
Video Tutorial on How to Fix "Failed to locate Framework.dll" Error
Table of Contents:
- Introduction
- Method 1. Run the Deployment Image & Servicing Management (DISM) Scan
- Method 2. Run the System File Checker (SFC) Scan
- Method 3. Install the Latest Version of .NET Framework
- Method 4. Disable and Re-Enable .NET Framework
- Method 5. Re-Register All DLL Files
- Video Tutorial on How to Fix "Failed to locate Framework.dll" Error
Download Computer Malware Repair Tool
It is recommended to run a free scan with Combo Cleaner - a tool to detect viruses and malware on your device. You will need to purchase the full version to remove infections. Free trial available. Combo Cleaner is owned and operated by Rcs Lt, the parent company of PCRisk.com read more.
Method 1. Run the Deployment Image & Servicing Management (DISM) Scan
Deployment Image Servicing and Management (DISM) is a command-line tool that identifies and repairs corrupted Windows system image files.
1. Hold down Windows+R keys to open Run.
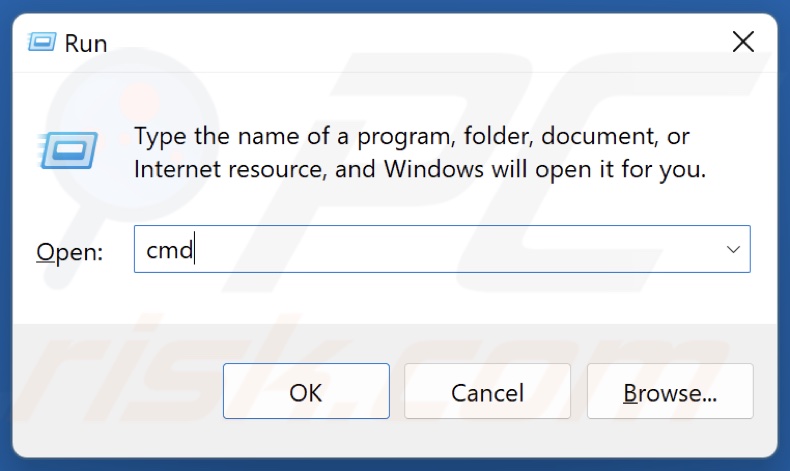
2. In the Run dialog, type in CMD and hold down Ctrl+Shift+Enter keys to open Command Prompt as an administrator.
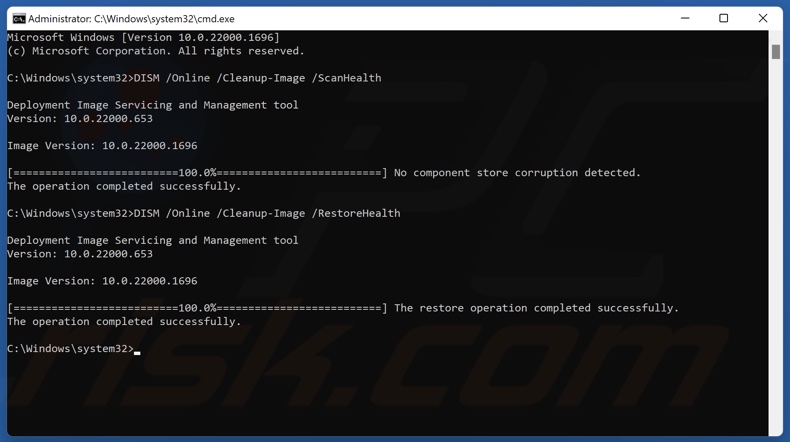
3. In the Command Prompt window, type in DISM /Online /Cleanup-Image /ScanHealth and press the Enter key.
4. Then, type in DISM /Online /Cleanup-Image /RestoreHealth and press Enter.
5. Close the Command Prompt and restart your PC.
Method 2. Run the System File Checker (SFC) Scan
The System File Checker (SFC) is a utility that scans the integrity of all protected operating system files and replaces corrupted, changed, or damaged files.
1. Hold down Windows+R keys to open Run.

2. In the Run dialog, type in CMD and hold down Ctrl+Shift+Enter keys to open Command Prompt as an administrator.
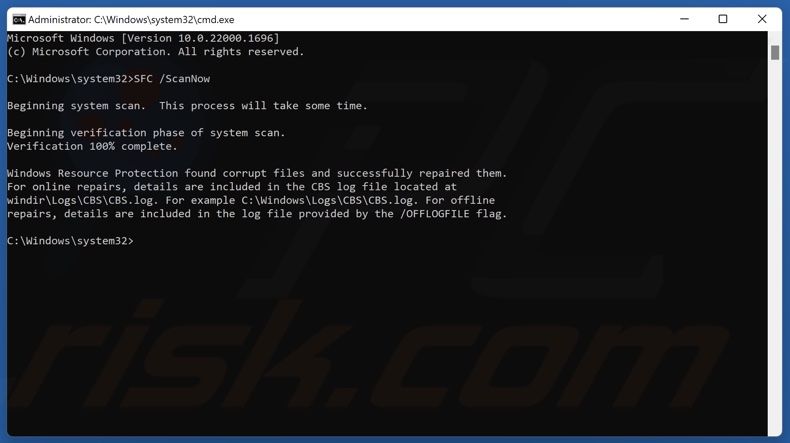
3. In the Command Prompt window, type in SFC /ScanNow and press Enter.
4. Close the Command Prompt and restart your PC.
Method 3. Install the Latest Version of .NET Framework
Many of today’s applications depend on .Net Framework to work correctly. If you get the “Failed to locate Framework.dll” error, you may be missing the Microsoft.Build.Framework.dll file. In this case, you can fix the error by installing the latest .NET Framework.
1. Open your web browser and go to the .Net Framework download page.
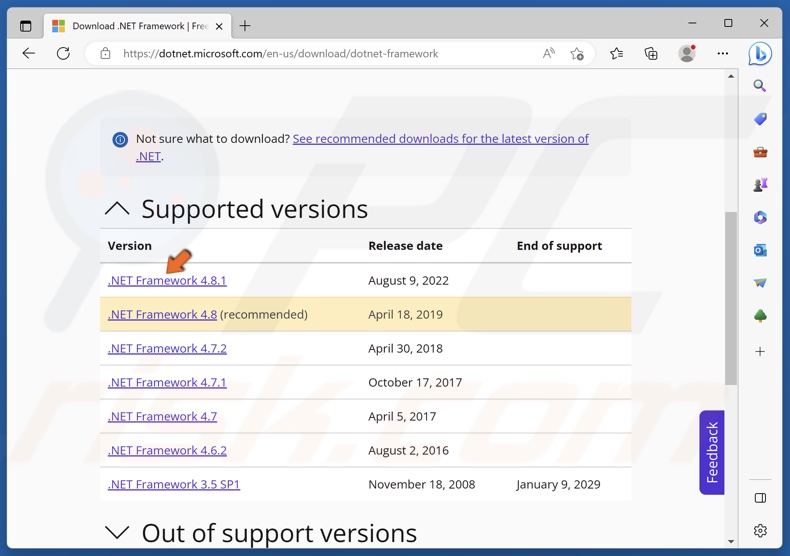
2. Select the latest .Net Framework version (Currently .NET Framework 4.8.1).
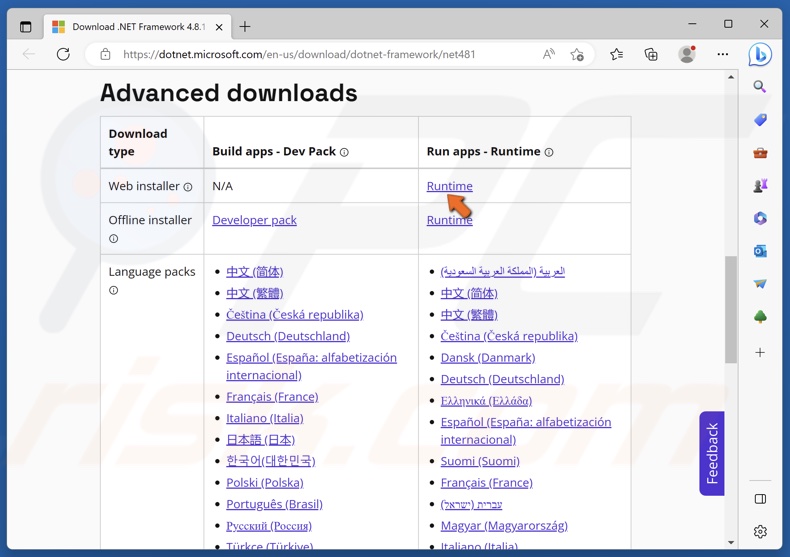
3. Then, click Runtime next to Web installer.
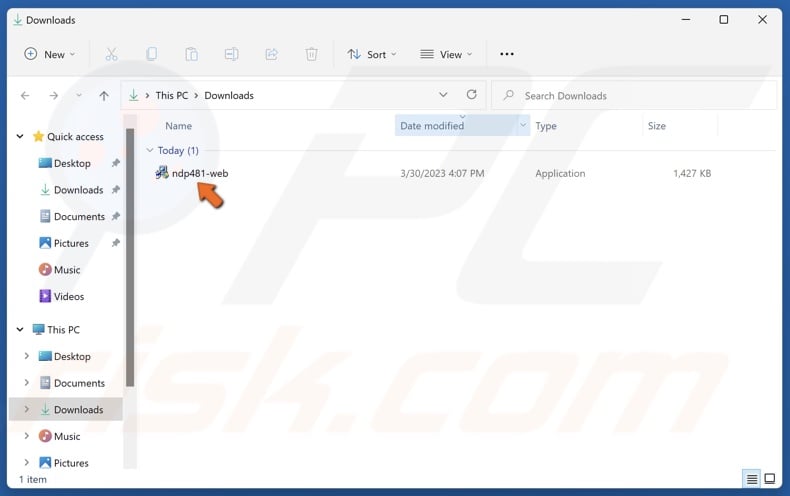
4. Once the .Net Framework installer is downloaded, go to your Downloads folder and run the installer.
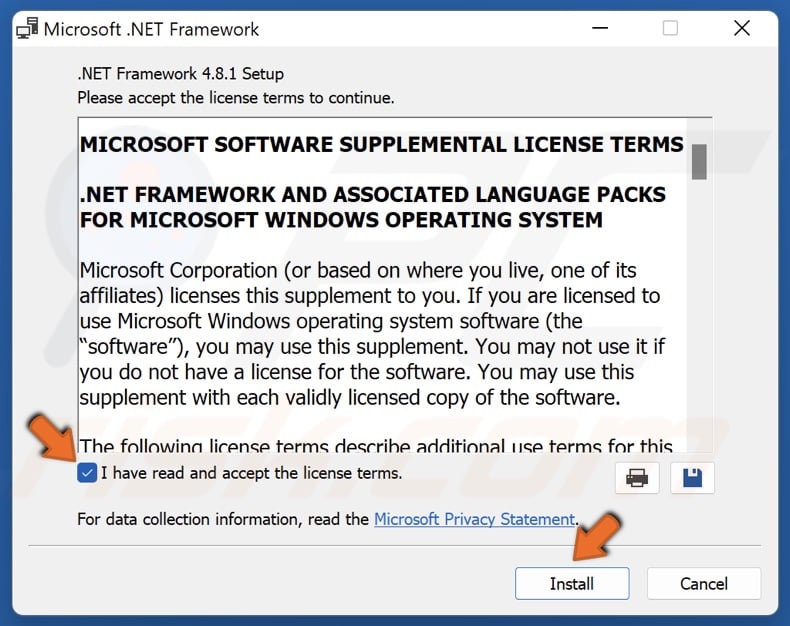
5. Accept the license terms and click Install.
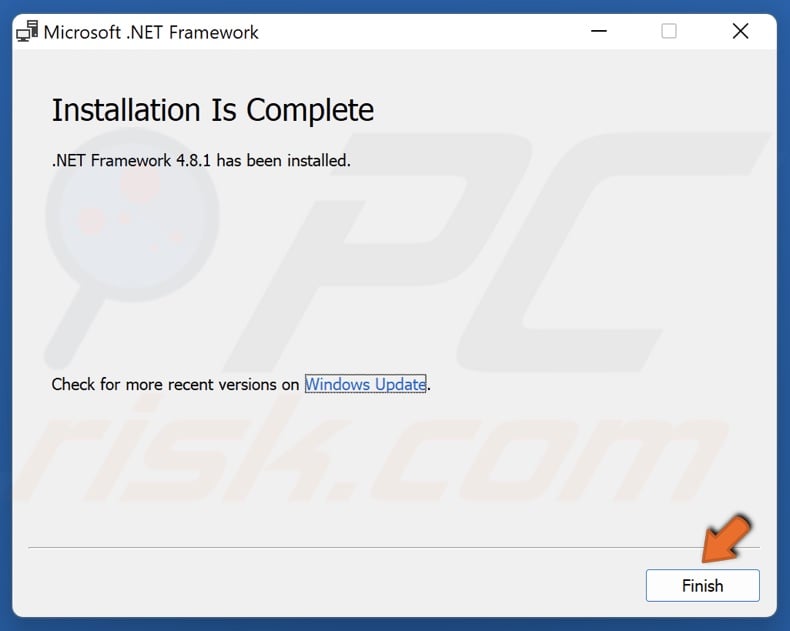
6. Click Finish.
7. Restart your PC once the installation is complete.
Method 4. Disable and Re-Enable .NET Framework
This error can sometimes be fixed by disabling and re-enabling .NET Framework.
1. Hold down Windows+R keys to open Run.
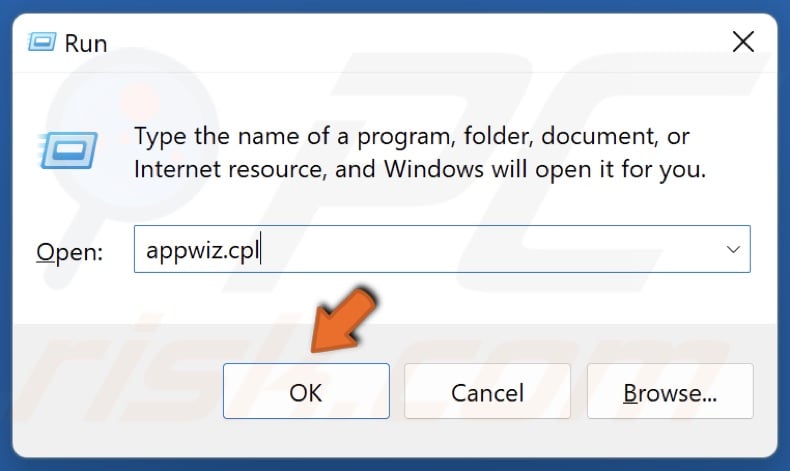
2. In the Run dialog, type in Appwiz.cpl and click OK.
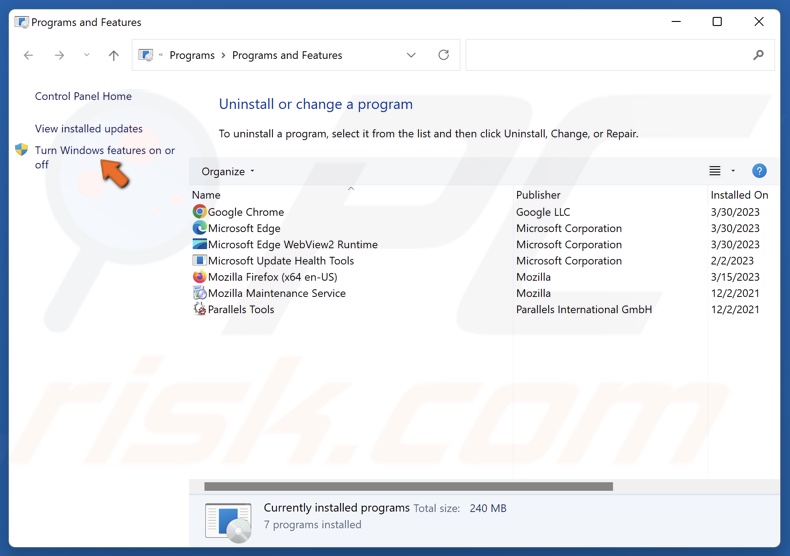
3. Click Turn Windows features on or off in the left pane.
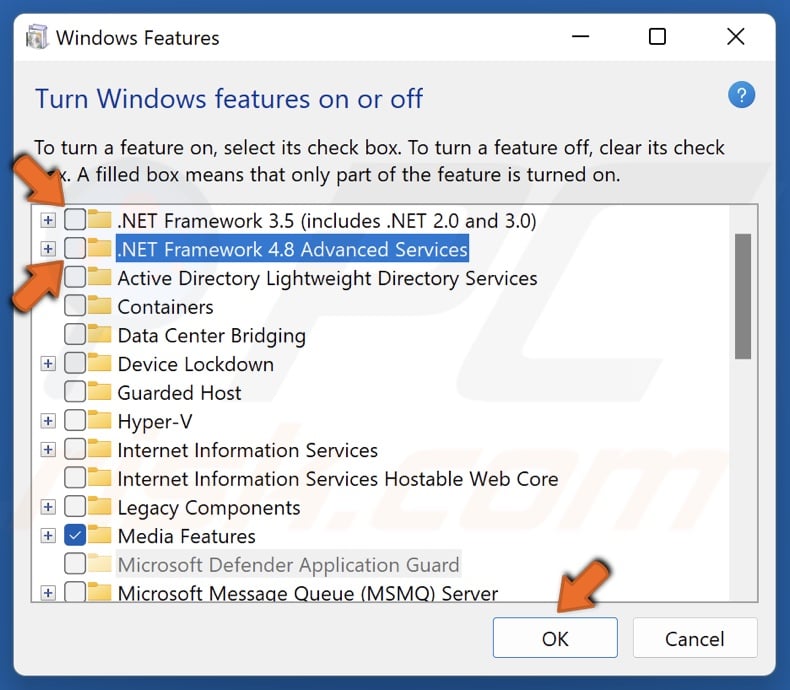
4. Unmark .NET Framework 3.5 and 4.8 checkboxes and click OK.
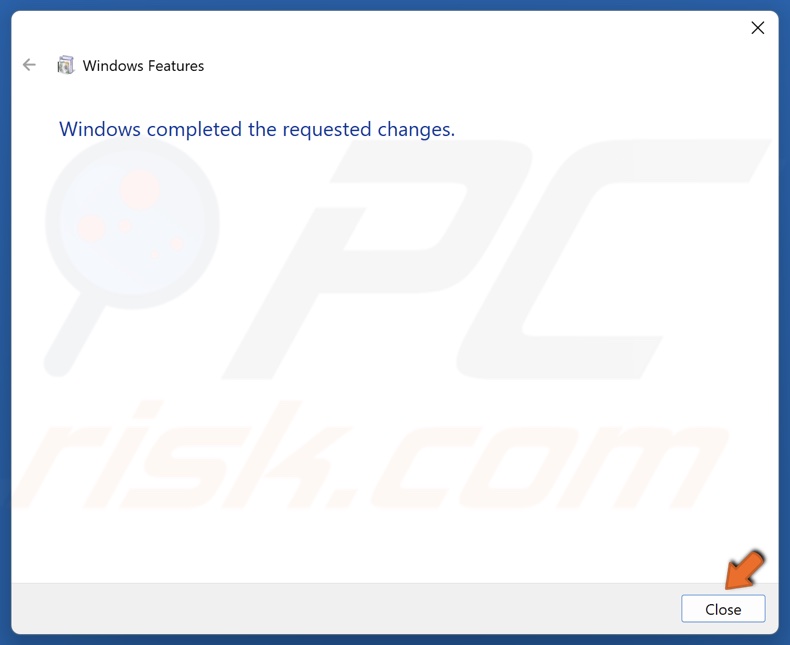
5. Click Close.
6. Restart your PC.
7. After the restart, Hold down Windows+R keys to open Run.

8. In the Run dialog, type in Appwiz.cpl and click OK.

9. Click Turn Windows features on or off in the left pane.
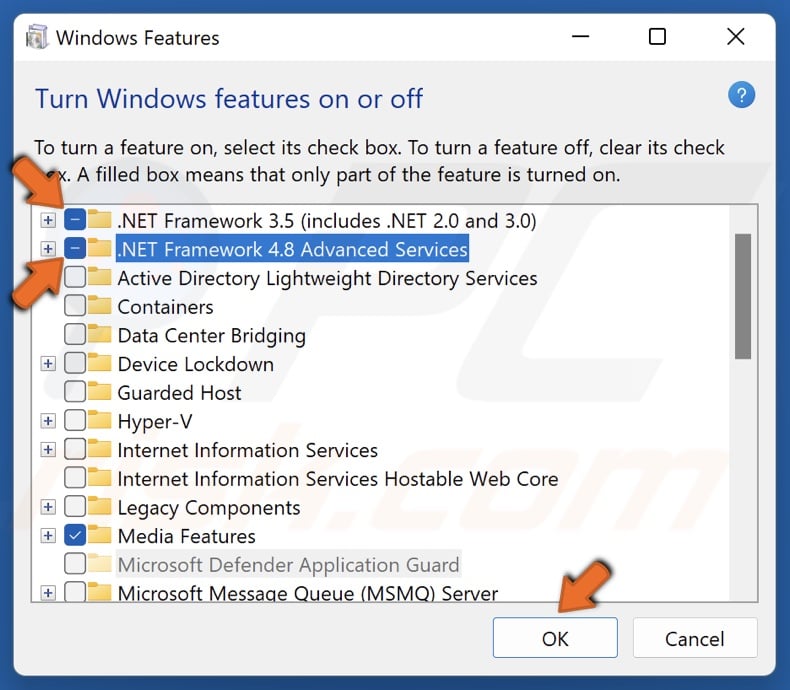
10. Mark .NET Framework 3.5 and 4.8 checkboxes and click OK.
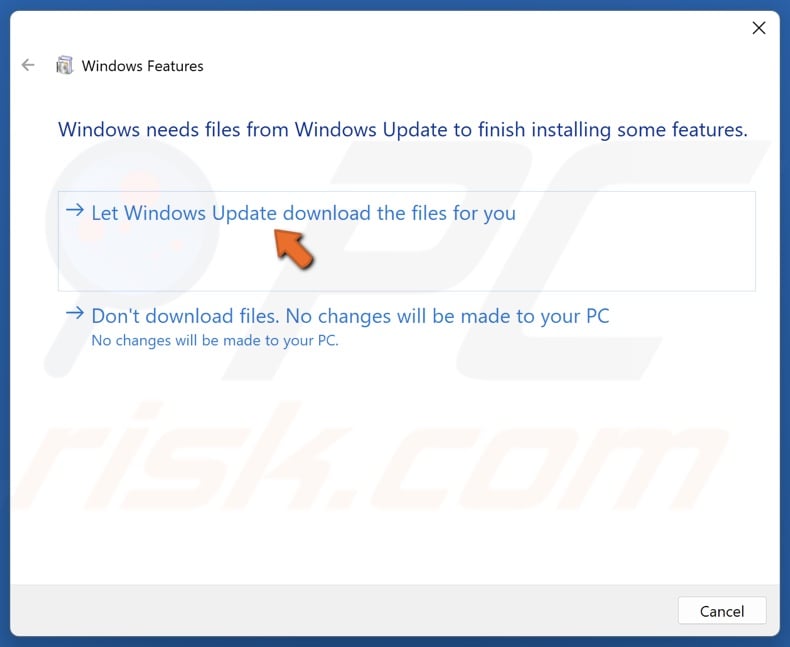
11. Click Let Windows Update download the files for you.

12. Click Close.
13. Restart your PC.
Method 5. Re-Register All DLL Files
Usually, third-party DLL files are registered while installing a particular application, but DLL files may not register in some cases. As a result, an application will be prevented from accessing the Framework.dlll file. Re-registering DLL files may fix the “Failed to locate Framework.dll” error.
1. Hold down Windows+R keys to open Run.

2. In the Run dialog, type in CMD and hold down Ctrl+Shift+Enter keys to open Command Prompt as an administrator.
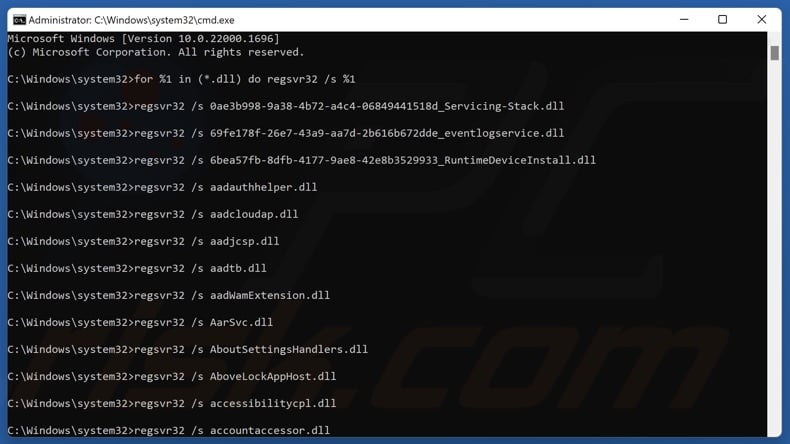
3. In the Command Prompt window, type in:
for %1 in (*.dll) do regsvr32 /s %1
4. Press the Enter key. Re-registering all DLL files will take some time.
5. Close the Command Prompt and restart your PC.
Did this article help you fix “Failed to locate Framework.dll” error on your PC? Comment below to let us know.
Share:

Rimvydas Iliavicius
Researcher, author
Rimvydas is a researcher with over four years of experience in the cybersecurity industry. He attended Kaunas University of Technology and graduated with a Master's degree in Translation and Localization of Technical texts. His interests in computers and technology led him to become a versatile author in the IT industry. At PCrisk, he's responsible for writing in-depth how-to articles for Microsoft Windows.

▼ Show Discussion