How to Fix "The local device name is already in use" Error on Windows 11

Get Free Scanner and check your computer for errors
Fix It NowTo fix found issues, you have to purchase the full version of Combo Cleaner. Free trial available. Combo Cleaner is owned and operated by Rcs Lt, the parent company of PCRisk.com read more.
How to Fix “The local device name is already in use” Error on Windows 11
“The local device name is already in use” error commonly occurs when working with network-based systems. It often occurs when trying to access a network drive. This article will tell you more about this error and show several ways to fix it.
What is “The local device name is already in use” Error?
A mapped drive is a shortcut that grants you access to the drive and the files and folders on it that are on another system. This error is triggered when you try to access a mapped drive.
This error occurs when 1) trying to access files in a shared folder and 2) when trying to restore a network mapping connection to a shared network folder.
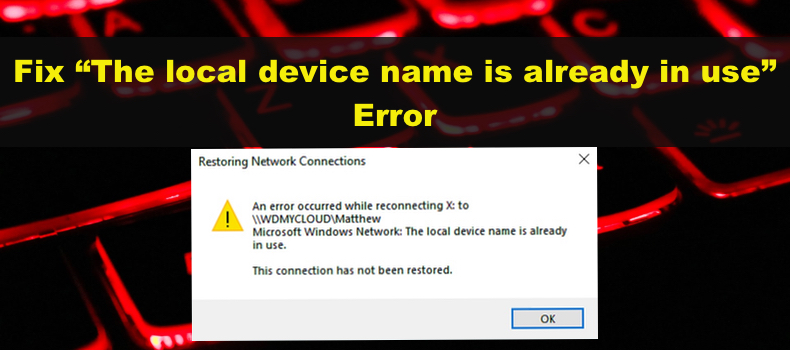
The full error message reads as follows:
An error occurred while reconnecting to Microsoft Windows Network: The local device name is already in use. This connection has not been restored.
What Causes This Error?
- Unassigned or incorrect drive letters. Some drives may have missing or incorrect drive letters.
- Drive mapping errors. A problem occurred during the network drive mapping process.
- Insufficient disk space on the network server. This error can be resolved by freeing up a few gigabytes of disk space on the root drive of the network server.
- Disabled File and Printer Sharing. If File and Printer Sharing is disabled in your firewall, you may experience issues with shared drives and get the “local device name is already in use” error.
Video Instructions on How to Fix “The local device name is already in use” Error
Table of Contents:
- Introduction
- Method 1. Remap the Network Drive
- Method 2. Assign a Letter to the Drive
- Method 3. Enable File and Printer Sharing in Windows Defender Firewall
- Method 4. Delete the MountPoints2 Key in Windows Registry
- Method 5. Change Protection Mode Value in Windows Registry
- Video Instructions on How to Fix “The local device name is already in use” Error
Download Computer Malware Repair Tool
It is recommended to run a free scan with Combo Cleaner - a tool to detect viruses and malware on your device. You will need to purchase the full version to remove infections. Free trial available. Combo Cleaner is owned and operated by Rcs Lt, the parent company of PCRisk.com read more.
Method 1. Remap the Network Drive
Remapping the network drive is officially recommended by Microsoft. Furthermore, this method is likely to work for most users.
1. Hold down Windows+R keys to open Run.
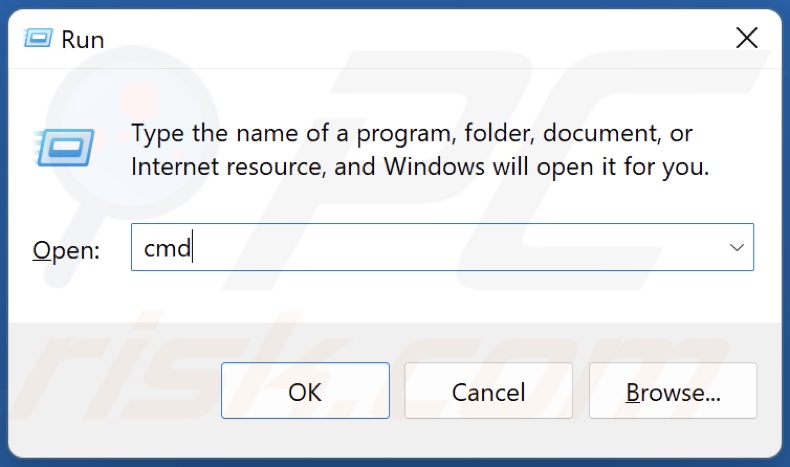
2. In the Run dialog box, type in CMD and hold down Ctrl+Shift+Enter keys to open the elevated Command Prompt.
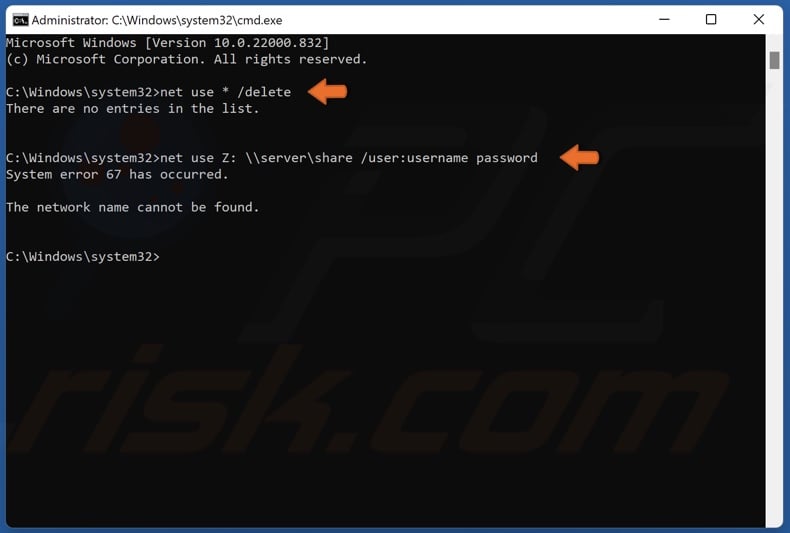
3. Type in net use * /delete and press Enter.
4. Then, type in net use Z: \\server\share /user:username password and press Enter. You must replace “username” and “password” with your actual user name and password.
5. Restart your PC and try to access the network drive.
Method 2. Assign a Letter to the Drive
The problematic drive might not have a drive letter assigned to it, or the drive in Disk Management may have a different assigned letter than the letter in network mapping.
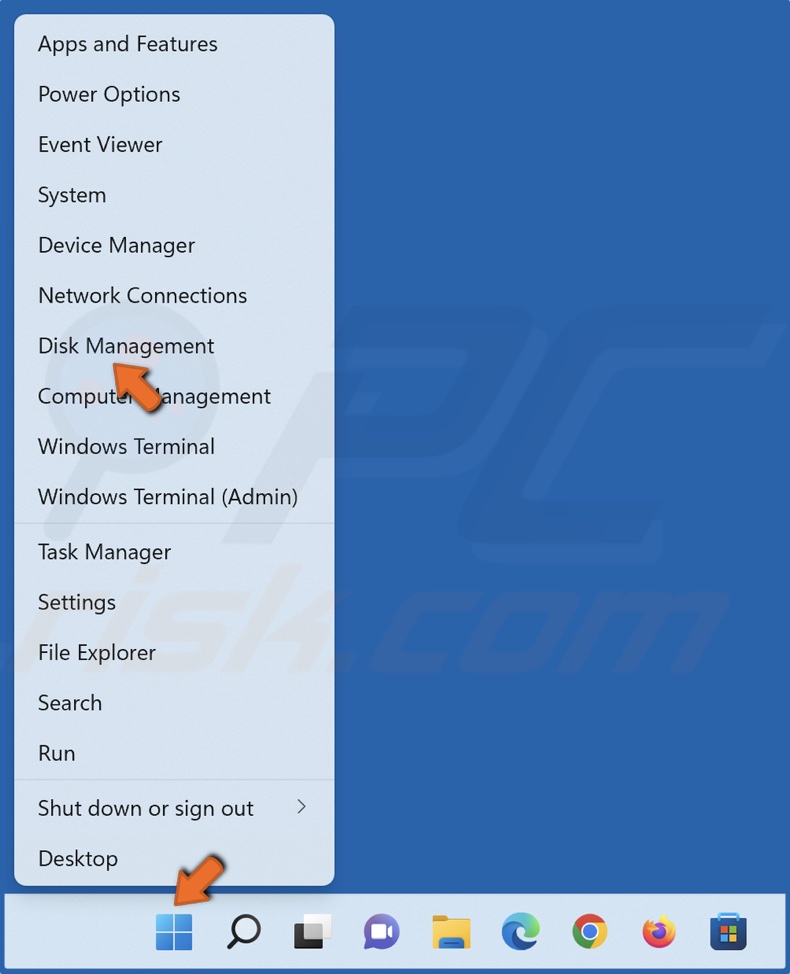
1. Right-click Start and click Disk Management.
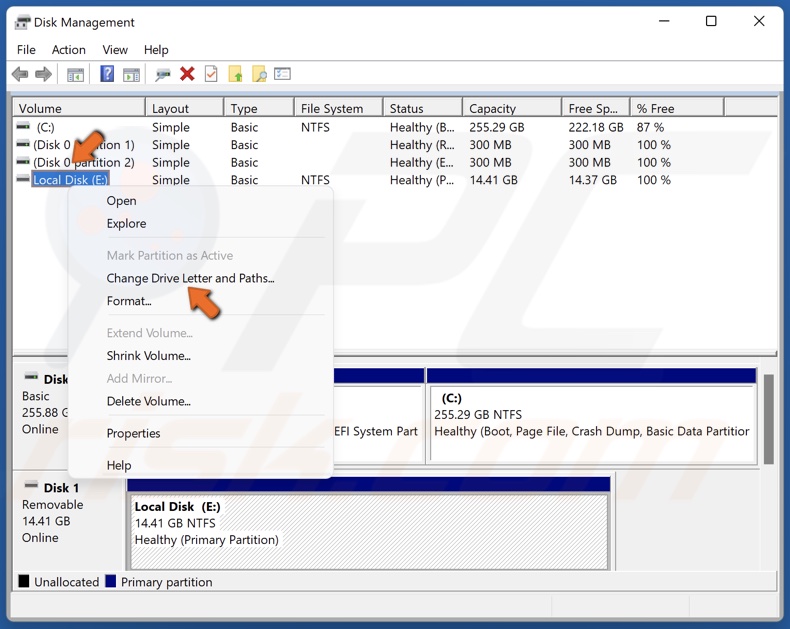
2. Right-click the volume without a drive letter and click Change Drive Letter and Paths.
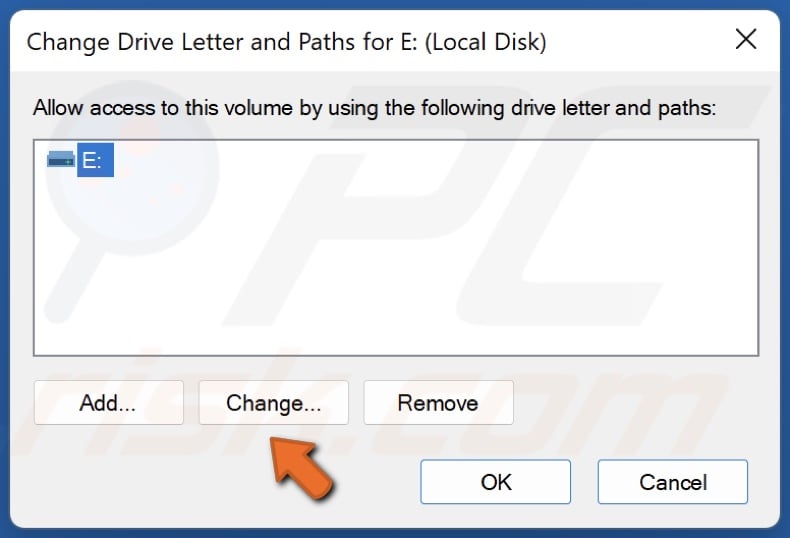
3. Click Add or Change depending on whether the drive had an assigned letter.
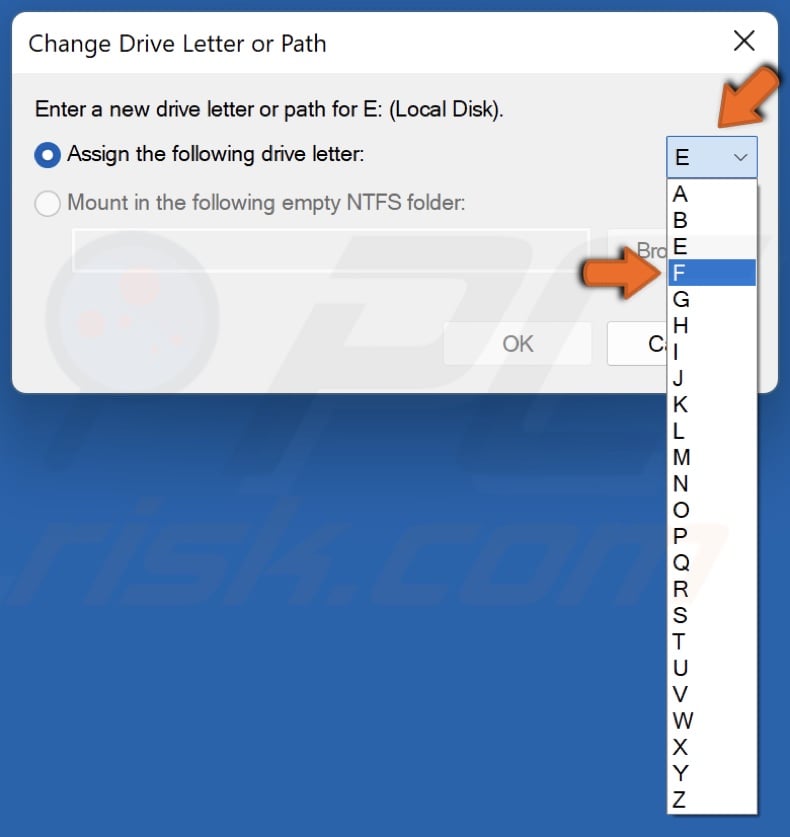
4. Open the drive letter drop-down menu, select an available drive letter. Don’t select A or B as they are reserved for floppy drives on older systems.
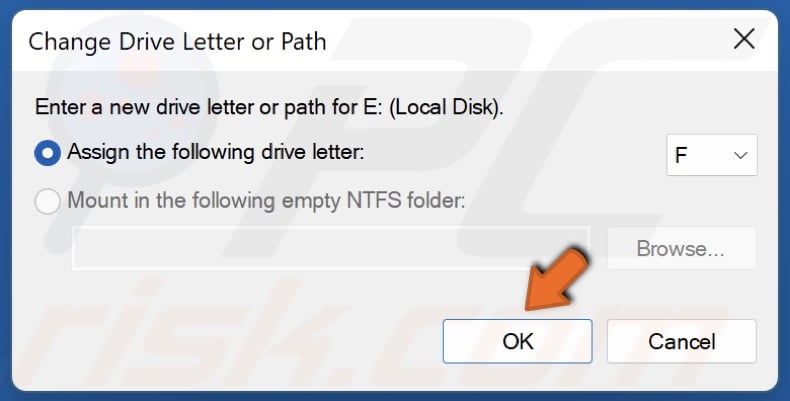
5. Click OK.
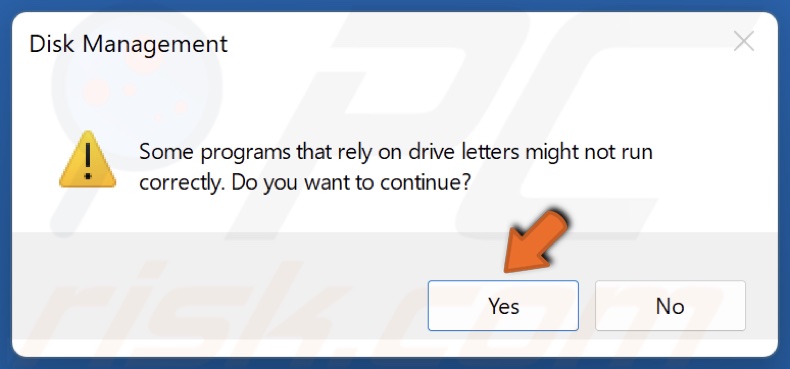
6. Click Yes when prompted.
7. Restart your PC and try to access the network drive.
Method 3. Enable File and Printer Sharing in Windows Defender Firewall
If File and Printer Sharing is disabled in Windows Defender Firewall (or a third-party firewall), you may experience problems with shared network drives. You fix this error by enabling File and Printer Sharing. If you use a third-party firewall program, make sure to allow this feature through it as well.
1. Hold down Windows+R keys to open Run.
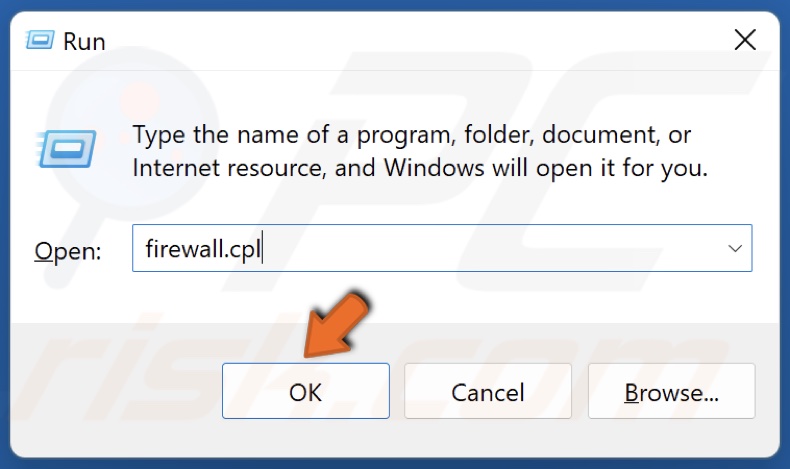
2. In the Run dialog box, type in firewall.cpl and click OK.
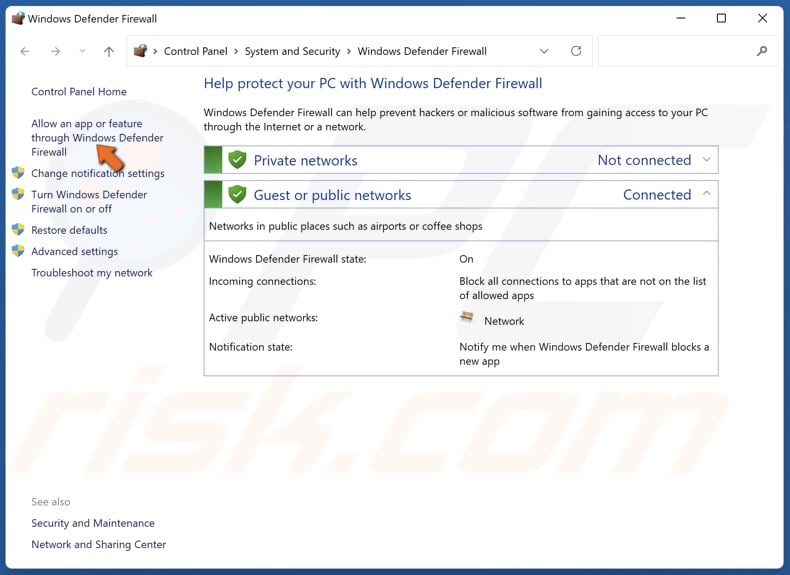
3. Click Allow an app or feature through Windows Defender Firewall in the Firewall settings window.
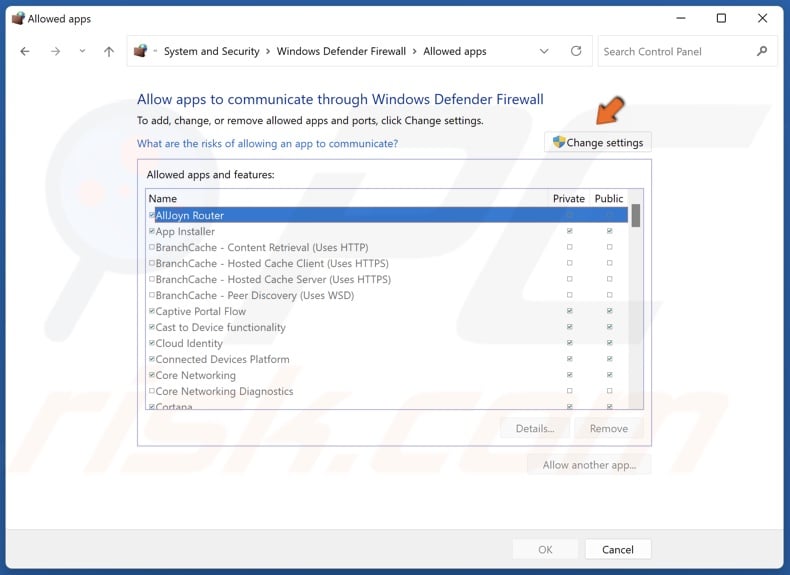
4. In the Allowed apps and features window, click Change settings.
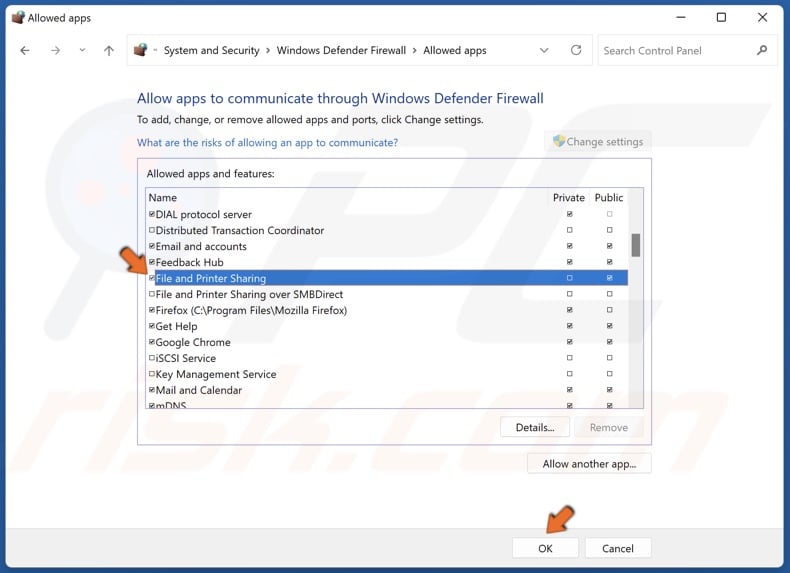
5. Find File and Printer Sharing, mark the checkbox next to it, and click OK.
6. Restart your PC and try to access the network drive.
Method 4. Delete the MountPoints2 Key in Windows Registry
Some users were able to resolve “The local device name is already in use” error by deleting the MountPoints2 registry key. However, we recommend you create a backup of your computer’s registry just in case. After opening the Windows Registry Editor, select Computer in the left pane. Then, click File in the menu bar and click Export. Type in a name for the backup file and click Save.
1. Hold down Windows+R keys to open Run.
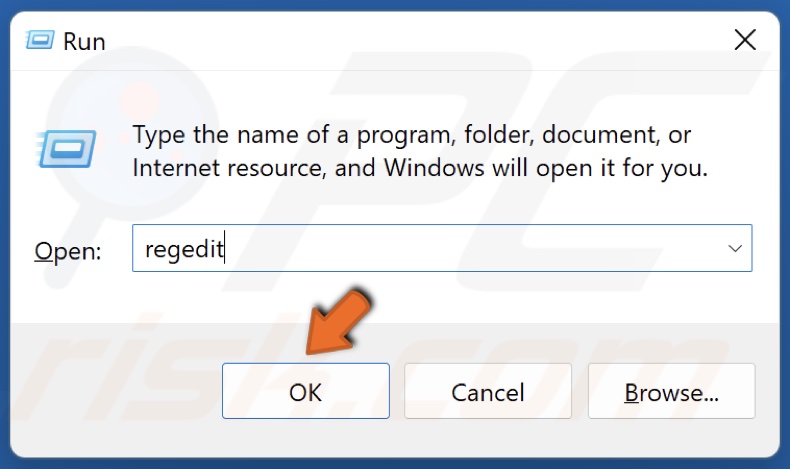
2. In the Run dialog box, type in regedit and click OK to open the Windows Registry Editor.
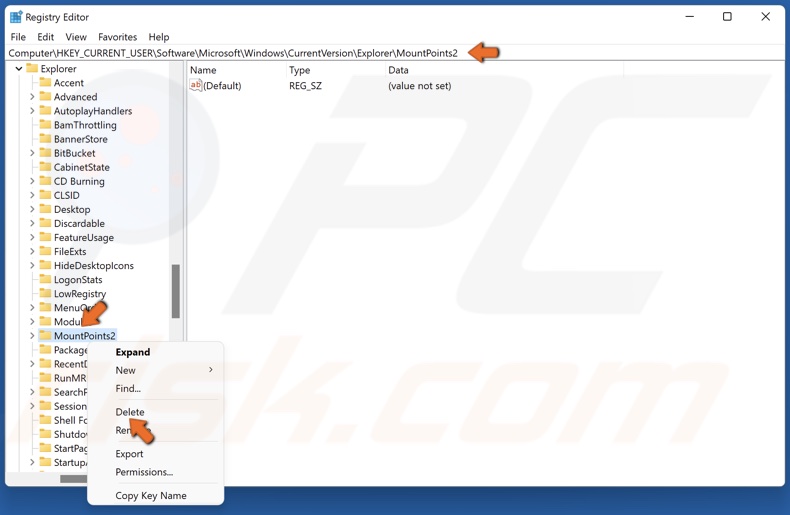
3. Navigate to HKEY_CURRENT_USER\Software\Microsoft\Windows\CurrentVersion\Explorer
4. Inside the Explorer registry key, find the key named MountPoints2, right-click it and click Delete.
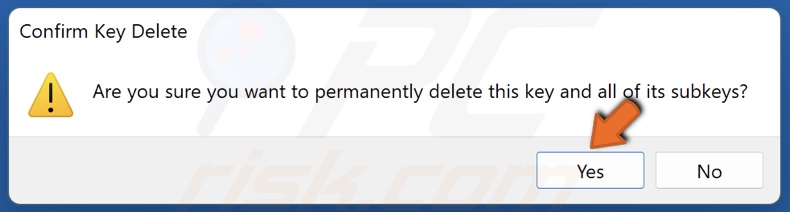
5. Click Yes when prompted.
6. Restart your PC and try to access the network drive.
Method 5. Change Protection Mode Value in Windows Registry
Microsoft also officially recognizes this method as a legitimate fix for “The local device name is already in use” error. We recommend backing up your computer’s registry as described in Method 4.
1. Hold down Windows+R keys to open Run.
2. In the Run dialog box, type in regedit and click OK to open the Windows Registry Editor.
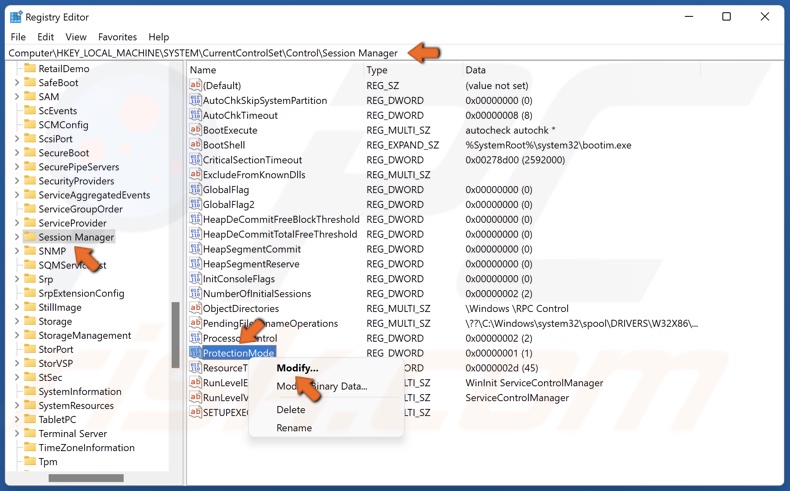
3. Navigate to HKEY_LOCAL_MACHINE\System\CurrentControlSet\Control\SessionManager
4. Select the SessionManager key.
5. In the right pane, find the ProtectionMode registry entry, right-click it and click Modify.
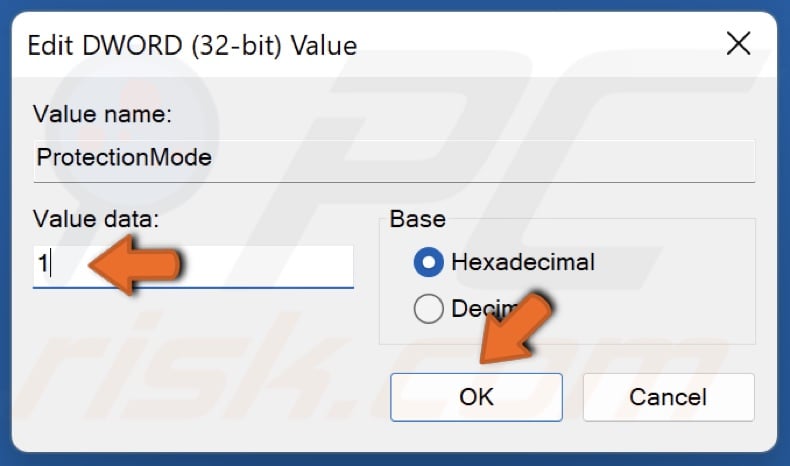
6. Change the Value data from 0 to 1 and click OK.
7. Restart your PC and try to access the network drive.
Did this article help fix “The local device is already in use” error? Let us know by leaving a comment below.
Share:

Rimvydas Iliavicius
Researcher, author
Rimvydas is a researcher with over four years of experience in the cybersecurity industry. He attended Kaunas University of Technology and graduated with a Master's degree in Translation and Localization of Technical texts. His interests in computers and technology led him to become a versatile author in the IT industry. At PCrisk, he's responsible for writing in-depth how-to articles for Microsoft Windows.
▼ Show Discussion