FIX: Zoom Keeps Crashing on Windows 11

Get Free Scanner and check your computer for errors
Fix It NowTo fix found issues, you have to purchase the full version of Combo Cleaner. Free trial available. Combo Cleaner is owned and operated by Rcs Lt, the parent company of PCRisk.com read more.
How to Fix Zoom Crashing on Windows 11
Many users have reported Zoom crashing while screen sharing in online meetings. This issue is particularly prominent in Windows 11. This article will tell you more about this problem and provide several methods to fix it.

Why Does Zoom Keep Crashing?
Generally, Zoom crashes due to misconfigured Zoom app settings or issues with Windows 11. We’ve compiled a list of specific causes for this problem below.
- Misconfigured In-app settings. Incorrectly configured Zoom app settings may cause the app not to run properly. In this case, you may fix the problem by configuring the video rendering settings.
- Corrupted or obsolete webcam drivers. Corrupted or outdated webcam drivers may cause Zoom to crash. Make sure that your webcam drivers are up-to-date.
- Outdated Zoom client. An outdated Zoom client may come into conflict with Windows 11 and crash.
- Corrupted system files. Corrupted or missing Windows system files may lead to various issues, including programs such as Zoom crashing. Repairing the corrupted files may resolve the issue.
Video Guide on How to Fix Zoom Crashing on Windows 11
Table of Contents:
- Introduction
- Method 1. Set Zoom Video Rendering Method to Direct3D11
- Method 2. Set Zoom Graphics Performance Preference to High
- Method 3. Update the Webcam Driver
- Method 4. Force-Quit and Relaunch Zoom
- Method 5. Repair Corrupted Windows System Files
- Video Guide on How to Fix Zoom Crashing on Windows 11
Download Computer Malware Repair Tool
It is recommended to run a free scan with Combo Cleaner - a tool to detect viruses and malware on your device. You will need to purchase the full version to remove infections. Free trial available. Combo Cleaner is owned and operated by Rcs Lt, the parent company of PCRisk.com read more.
Method 1. Set Zoom Video Rendering Method to Direct3D11
![]()
1. Open Zoom. Click the Settings icon at the top-right corner of the window.
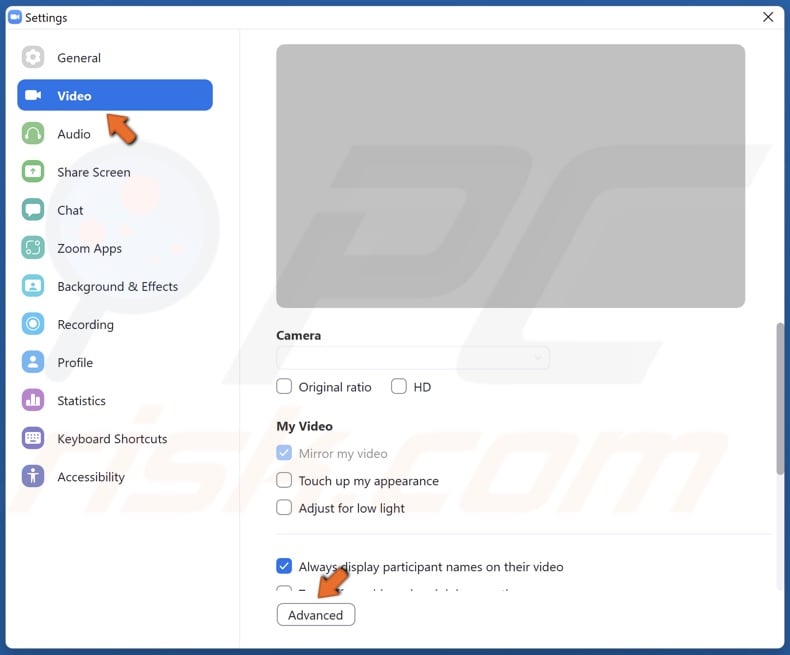
2. In the Settings window, select Video.
3. Select Advanced at the bottom of the window.
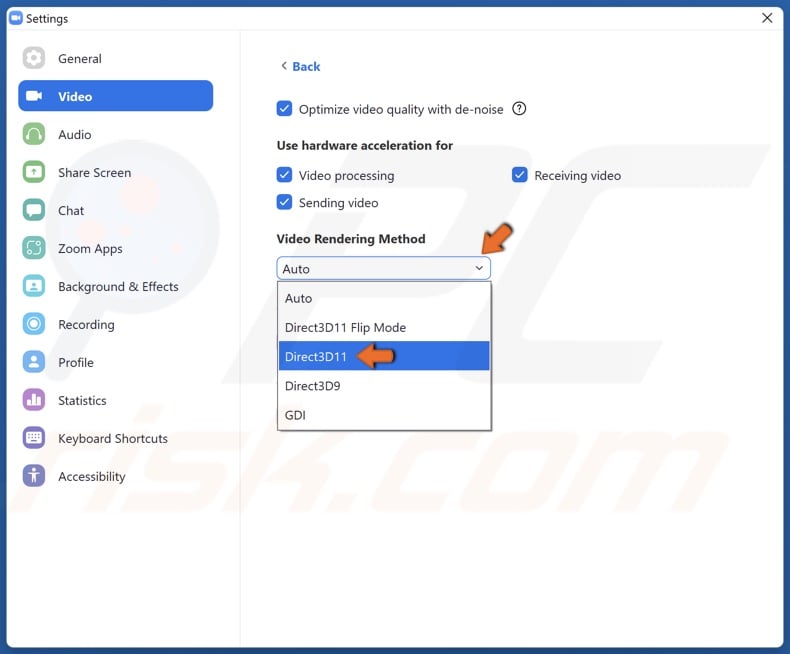
4. Open the Video Rendering Method drop-down menu and select Direct3D11.
![]()
5. Navigate to the icons tray in the Taskbar, right-click Zoom, and click Exit.
6. Then, relaunch Zoom.
Method 2. Set Zoom Graphics Performance Preference to High
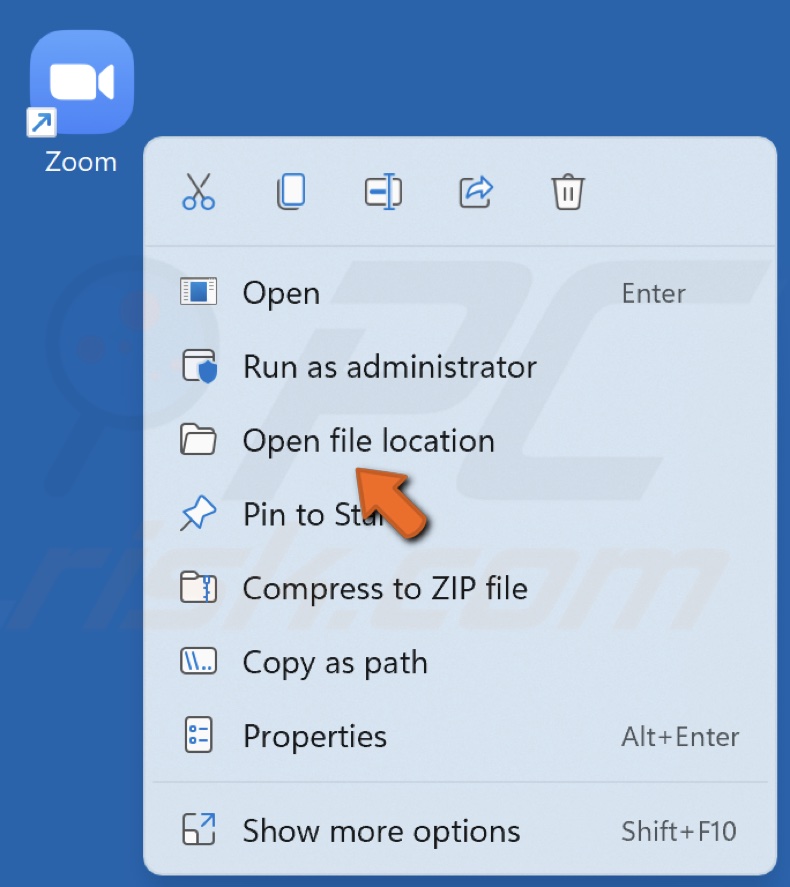
1. Right-click Zoom’s desktop shortcut and click Open file location.
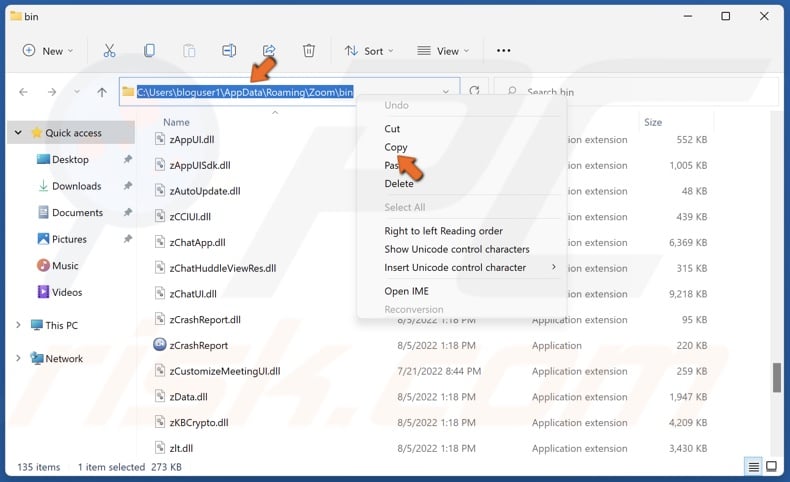
2. In the address bar, select the file path, right-click it and click Copy.
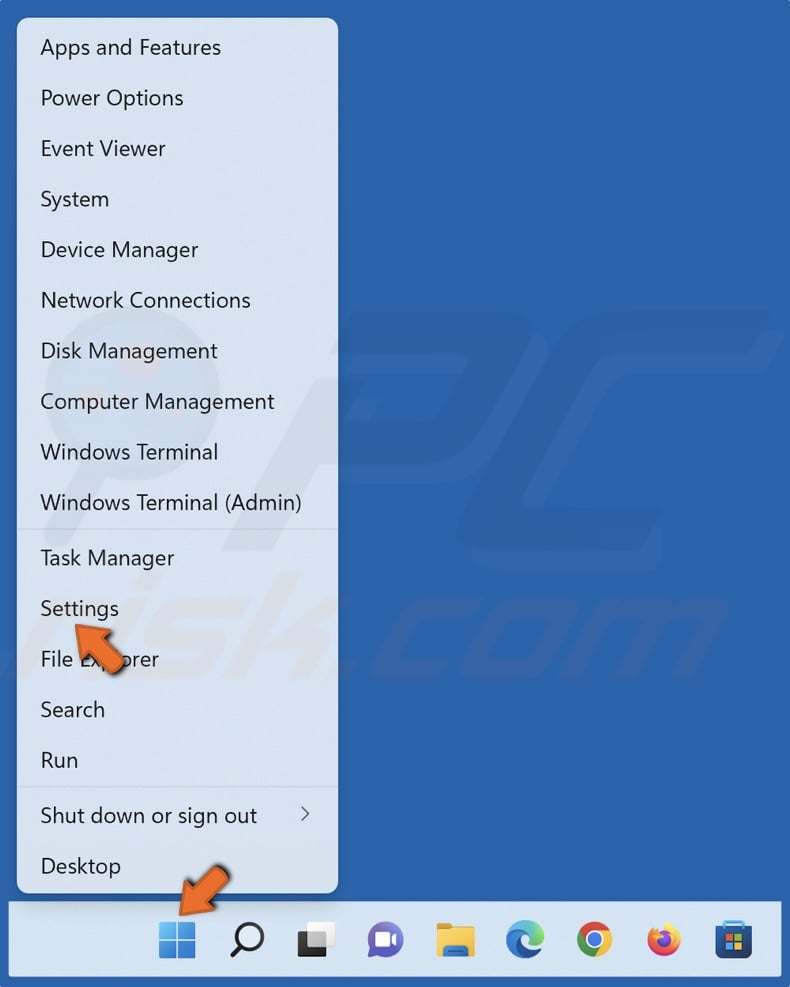
3. Right-click Start and select Settings.
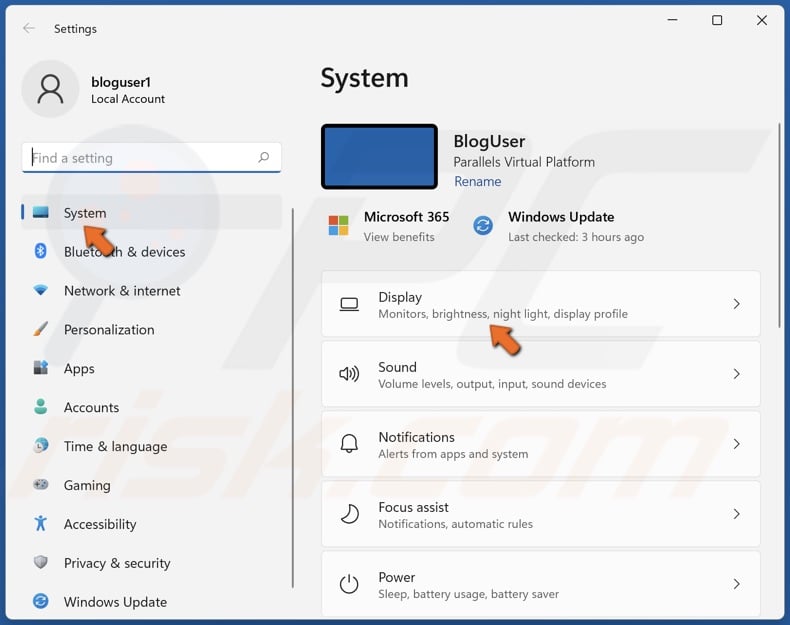
4. In the Settings window, select Display.
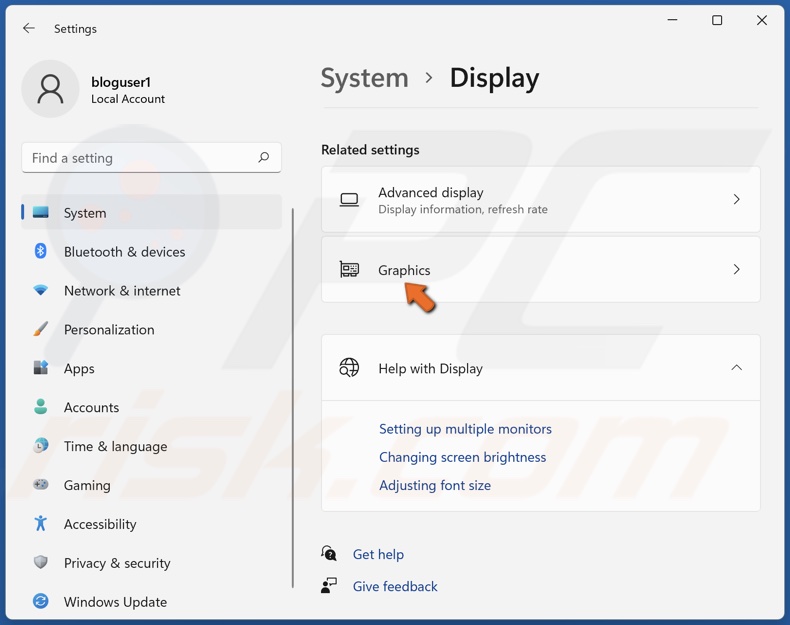
5. In the Display panel, select Graphics.
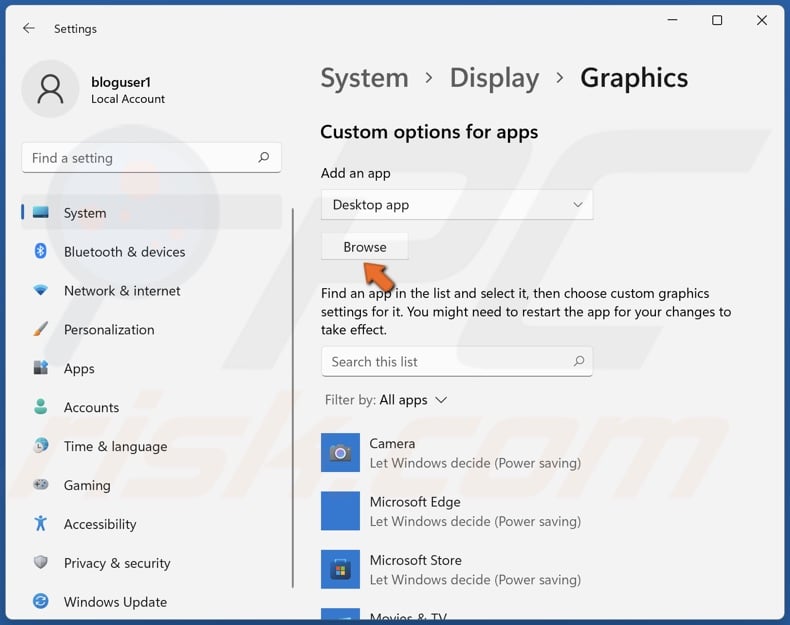
6. Click Browse.
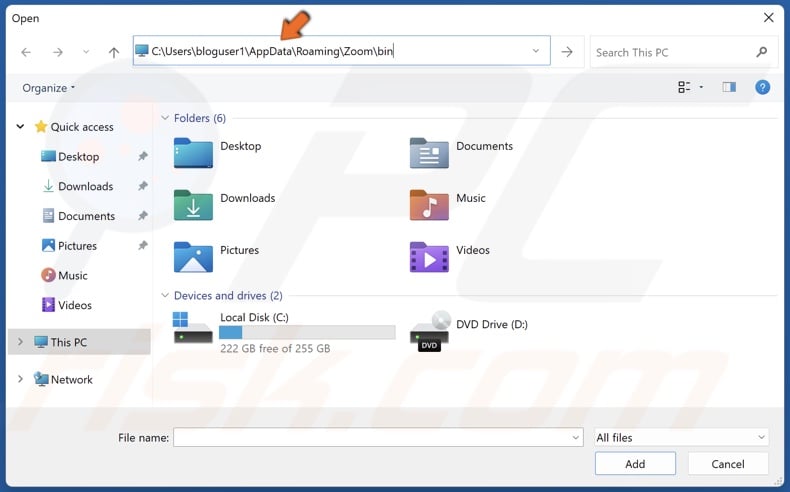
7. Right-click the address bar, click Paste, and press Enter.
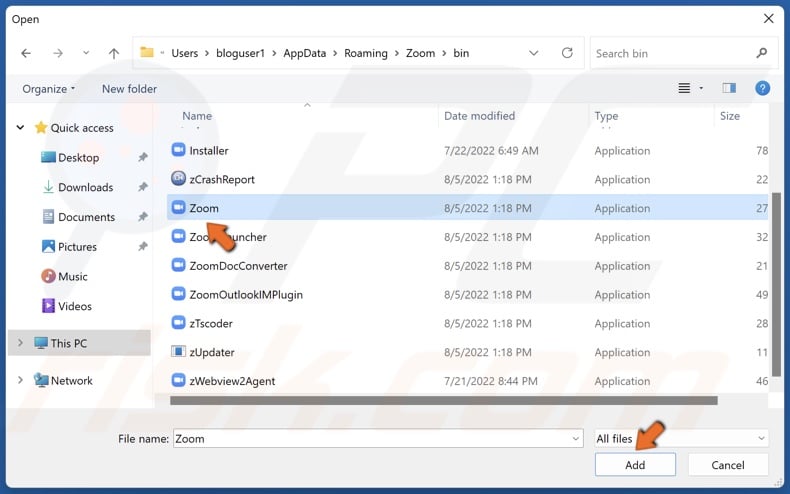
8. Select Zoom.exe and click Add.
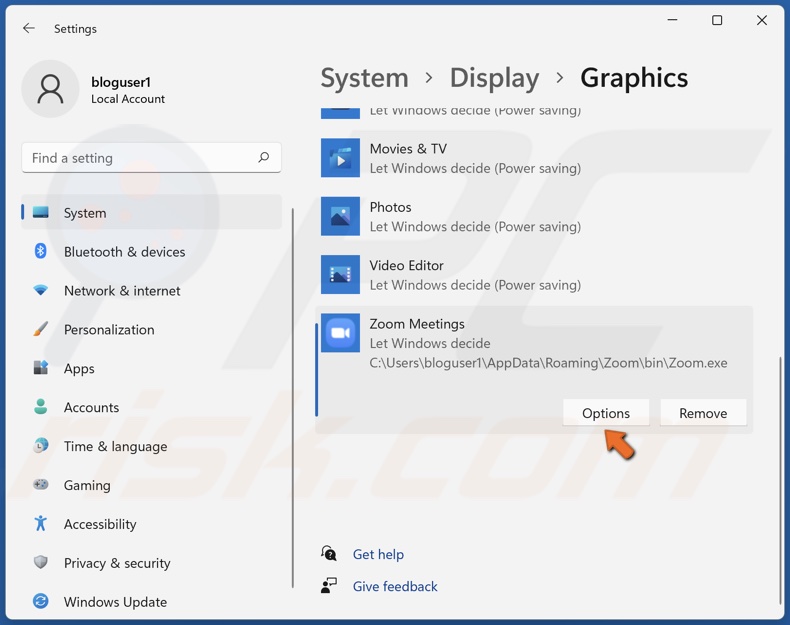
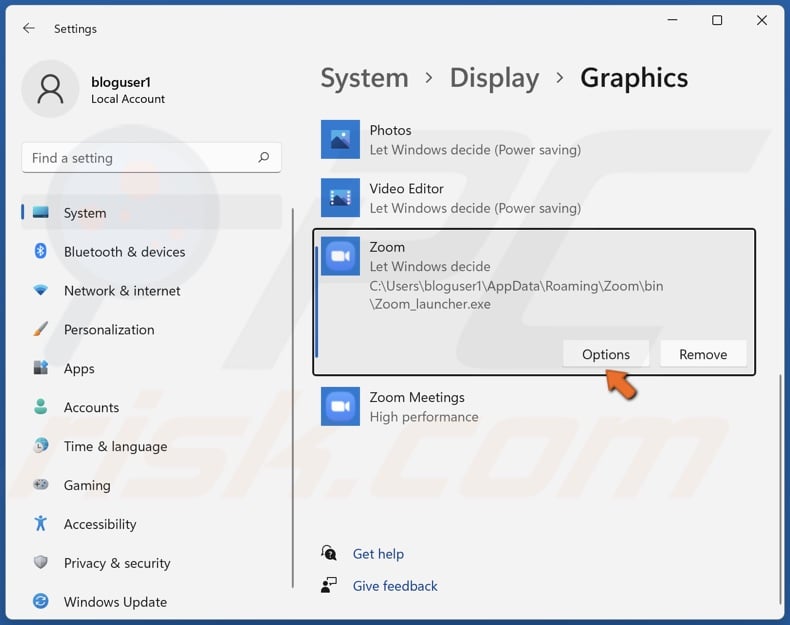
9. Click Options.
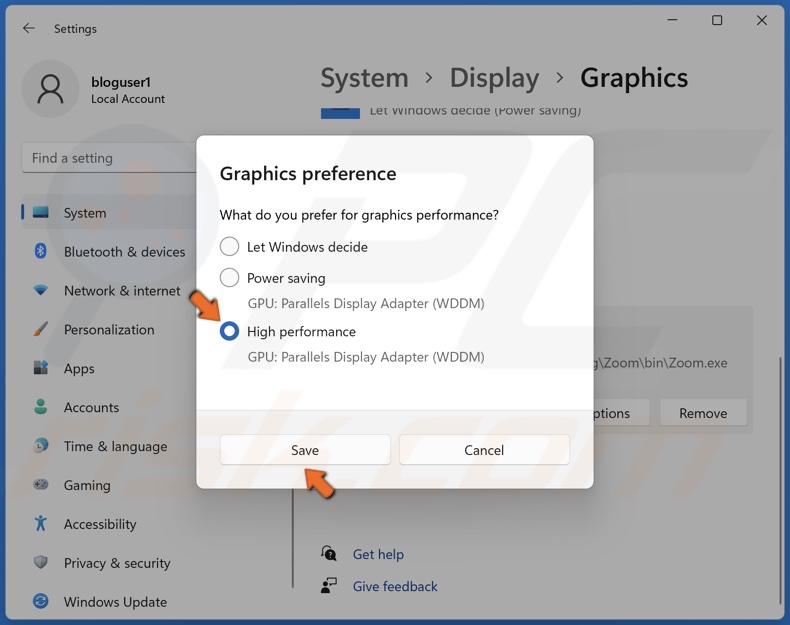
10. Select High performance for Zoom.exe and click Save.

11. Click Browse again.
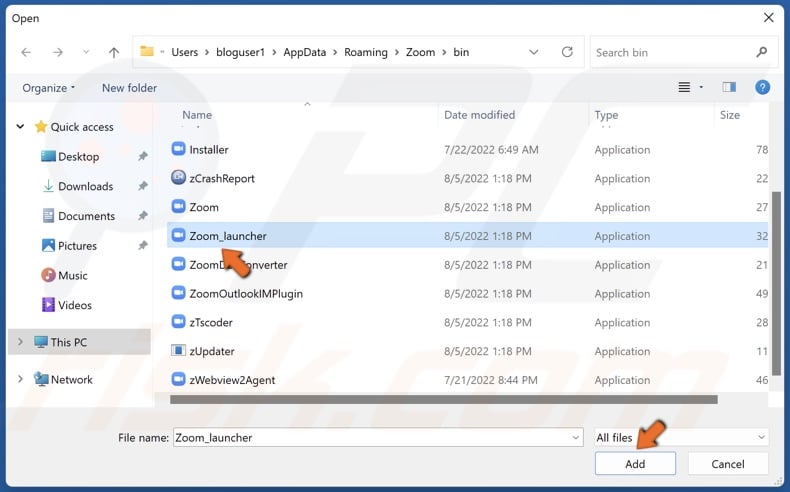
12. Select Zoom_launcher.exe and click Add.
13. Click Options.
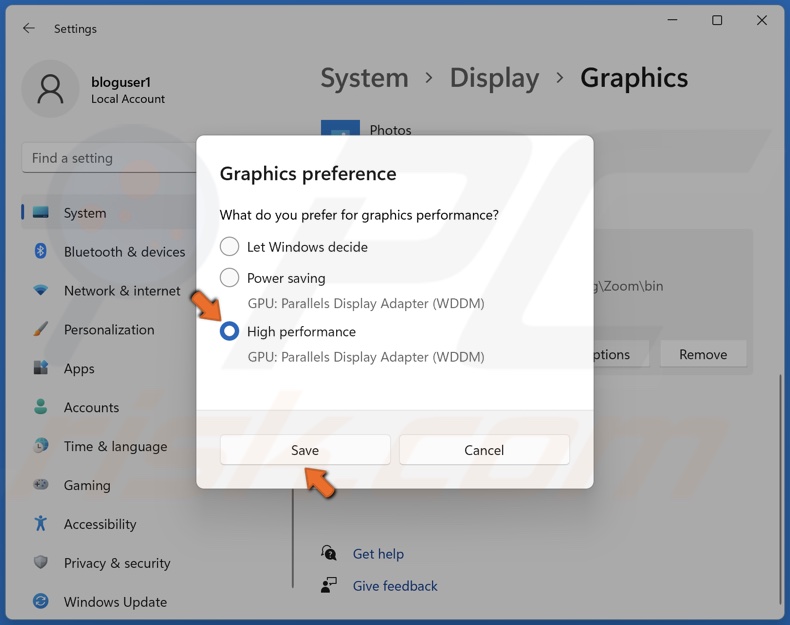
14. Select High performance for Zoom_launcher.exe and click Save.
Method 3. Update the Webcam Driver
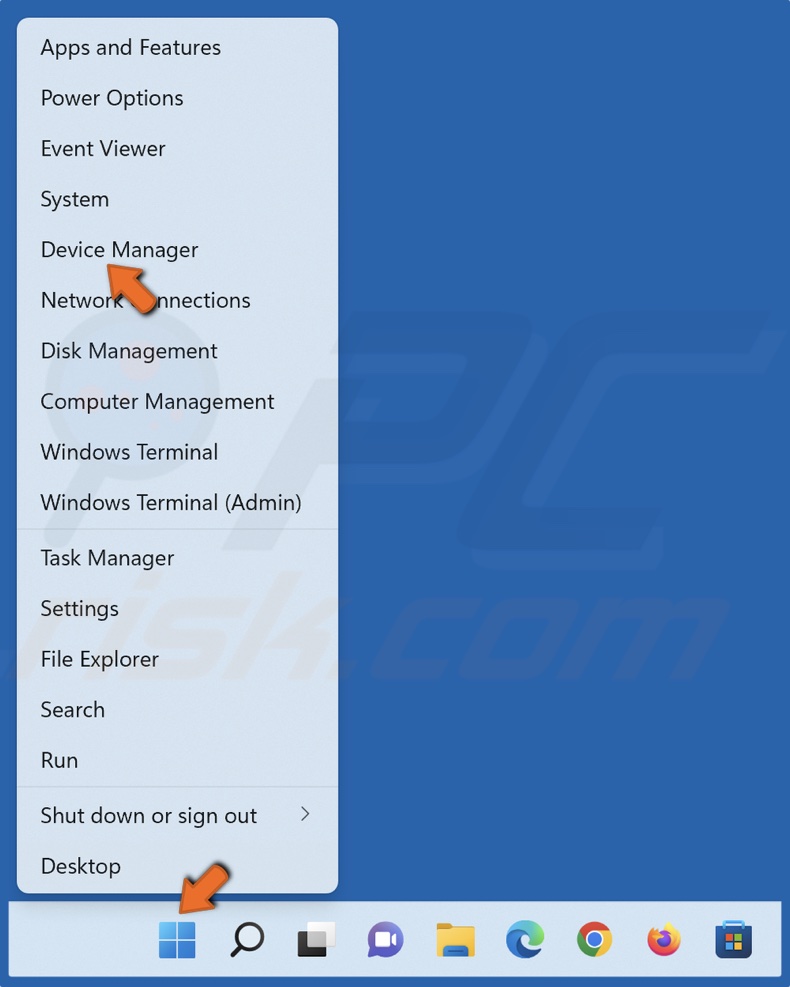
1. Right-click Start and select Device Manager.
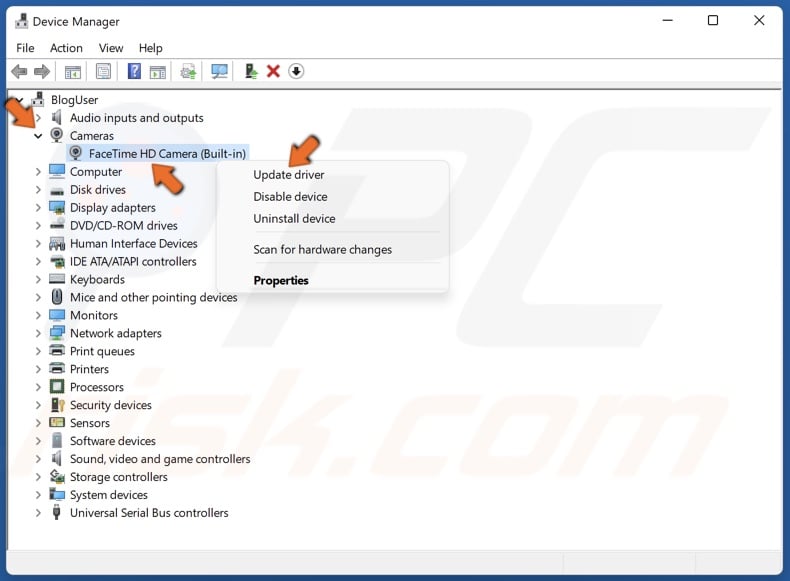
2. Expand the Cameras list.
3. Select your webcam, right-click it, and click Update driver.
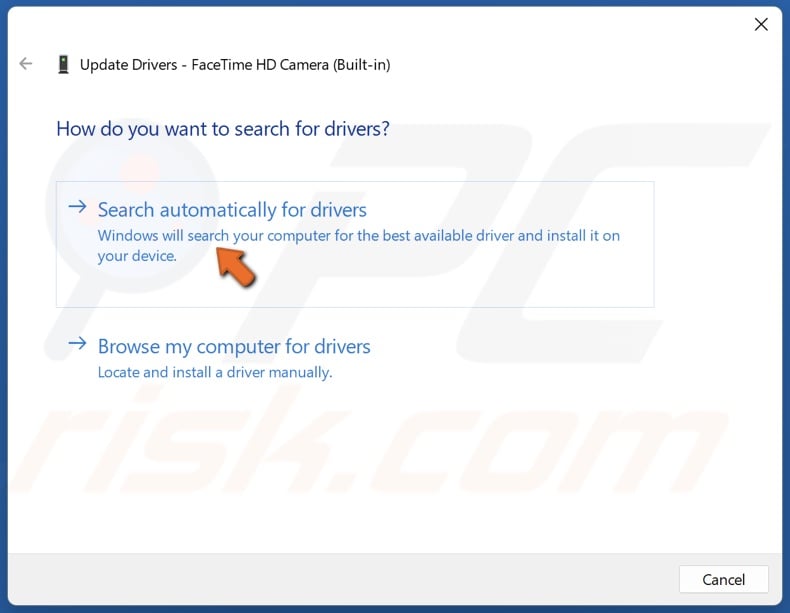
4. Select Search automatically for drivers. Windows will download and install the drivers automatically.
5. Alternatively, you can download the driver from the webcam’s manufacturer’s website, select Browse my computer for drivers, select and then install the downloaded drivers.
Method 4. Force-Quit and Relaunch Zoom
1. Hold down Ctrl+Shift+Esc keys to open Task Manager.
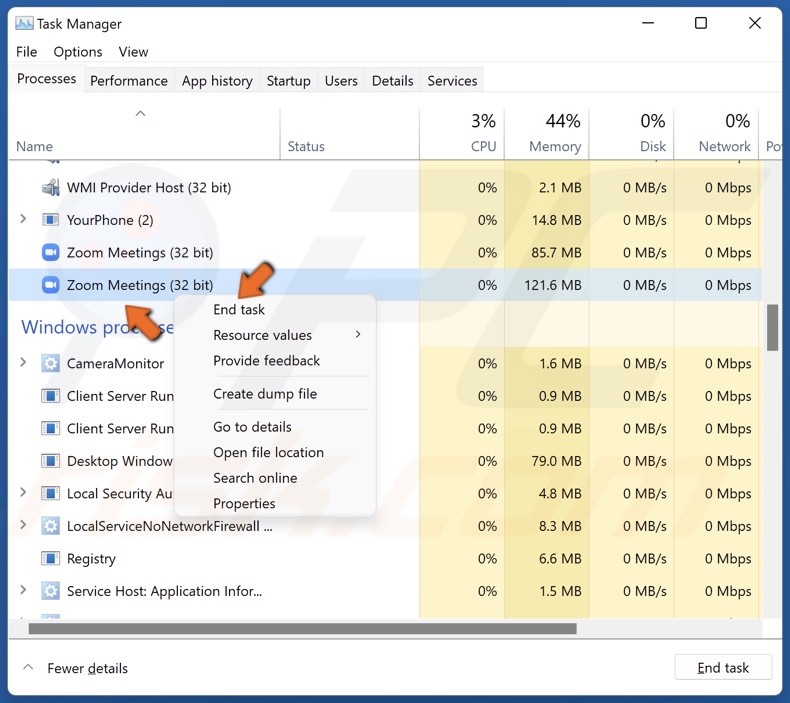
2. In the processes tab, find Zoom, right-click it, and click End task.
3. Close the Task Manager and relaunch Zoom.
Method 5. Repair Corrupted Windows System Files
1. Hold down Windows+R keys to open Run.
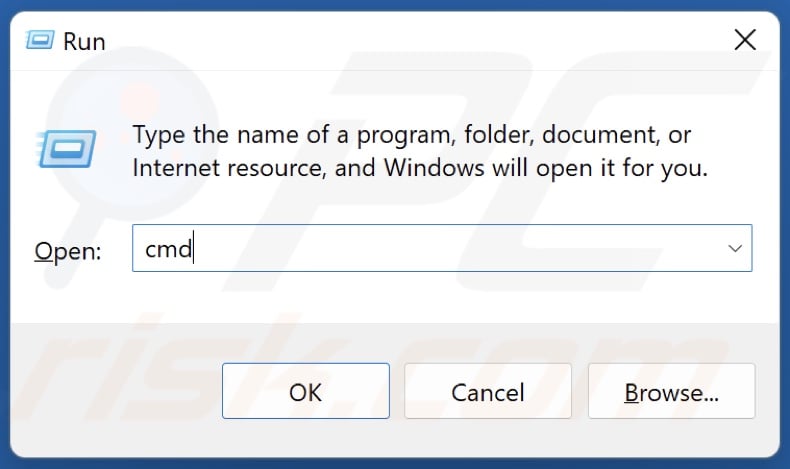
2. In the Run dialog box, type in CMD and hold down Ctrl+Shift+Enter keys to open the Command Prompt as an administrator.
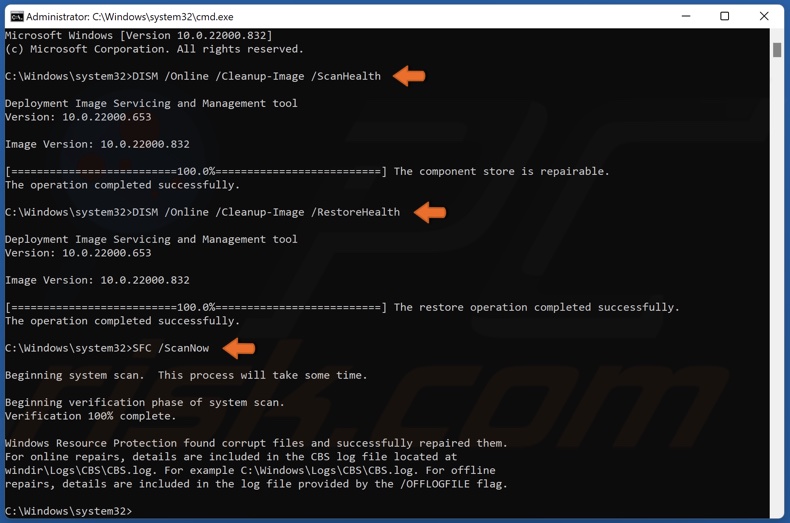
3. In the Command Prompt window, type in DISM /Online /Cleanup-Image /ScanHealth and press Enter.
4. Type in DISM /Online /Cleanup-Image /RestoreHealth and press Enter.
5. Type in SFC /ScanNow and press Enter.
6. Close the Command Prompt and restart your PC.
Share:

Rimvydas Iliavicius
Researcher, author
Rimvydas is a researcher with over four years of experience in the cybersecurity industry. He attended Kaunas University of Technology and graduated with a Master's degree in Translation and Localization of Technical texts. His interests in computers and technology led him to become a versatile author in the IT industry. At PCrisk, he's responsible for writing in-depth how-to articles for Microsoft Windows.
▼ Show Discussion