How to Fix ERR_HTTP2_PROTOCOL_ERROR in Chrome

Get Free Scanner and check your computer for errors
Fix It NowTo fix found issues, you have to purchase the full version of Combo Cleaner. Free trial available. Combo Cleaner is owned and operated by Rcs Lt, the parent company of PCRisk.com read more.
How to Fix ERR_HTTP2_PROTOCOL_ERROR in Google Chrome
The ERR_HTTP2_PROTOCOL_ERROR in Google Chrome can occur due to the browser and network issues and interference from third-party software. This article will provide information about the error and several methods to fix it.
This error can occur on the client and server sides. This article will focus on how to fix this error on the client side. You may find yourself experiencing ERR_HTTP2_PROTOCOL_ERROR when accessing a specific website. However, in some cases, you may get it when accessing most websites.
What Causes ERR_HTTP2_PROTOCOL_ERROR?
- Corrupted web browser cache. If your Google Chrome cache is corrupted, the website may fail to authenticate the legitimacy of your device and refuse the connection and trigger the error code.
- Outdated web browser and operating system. If your browser or operating system is outdated, a website may fail to parse the data packets from your device.
- Conflicting browser extensions. A browser extension may interfere with the client’s communication with the website and prevent it from loading.
- Third-party antivirus or firewall. This error may occur if your antivirus or firewall program limits access to the website. As a result, the website’s server may refuse the connection.
Before trying any of our solutions, here’s what you should do:
- If you have many open tabs, close the other tabs you don’t need and reload the problematic website.
- Update Google Chrome and your Windows operating system.
- Temporarily disable your third-party antivirus or firewall program.
- If possible, connect to another network or use a VPN.
Video Instructions on How to Fix ERR_HTTP2_PROTOCOL_ERROR in Chrome
Table of Contents:
- Introduction
- Method 1. Clear Google Chrome Browsing Data
- Method 2. Disable the QUIC Protocol in Chrome
- Method 3. Perform a DNS Flush
- Method 4. Disable Conflicting Browser Extensions
- Method 5. Reset Google Chrome Flags
- Method 6. Reset Google Chrome Settings to Default
- Video Instructions on How to Fix ERR_HTTP2_PROTOCOL_ERROR in Chrome
Download Computer Malware Repair Tool
It is recommended to run a free scan with Combo Cleaner - a tool to detect viruses and malware on your device. You will need to purchase the full version to remove infections. Free trial available. Combo Cleaner is owned and operated by Rcs Lt, the parent company of PCRisk.com read more.
Method 1. Clear Google Chrome Browsing Data
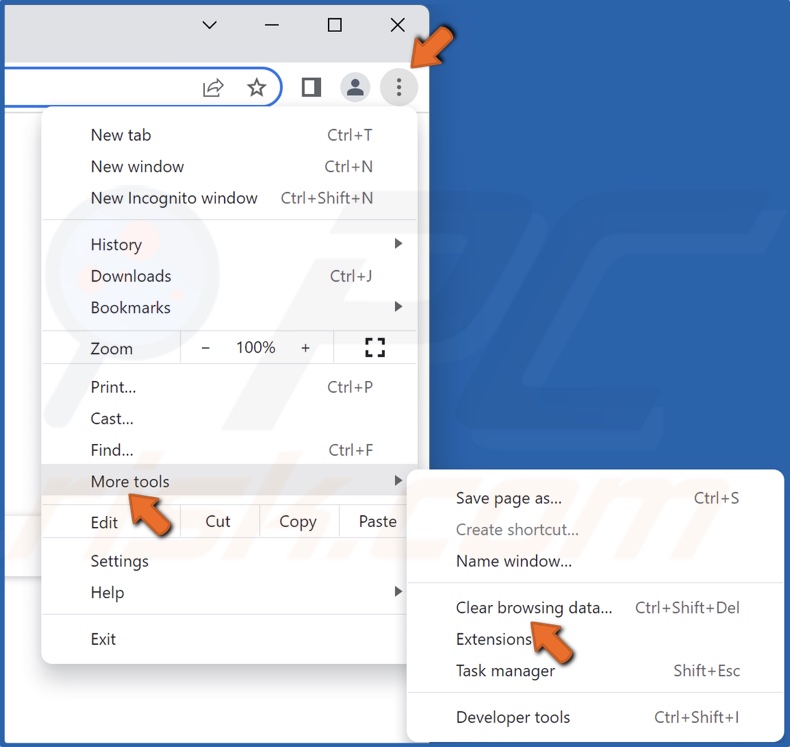
1. Open Google Chrome. At the top-right corner, click the ellipsis, select More tools and click Clear browsing data.
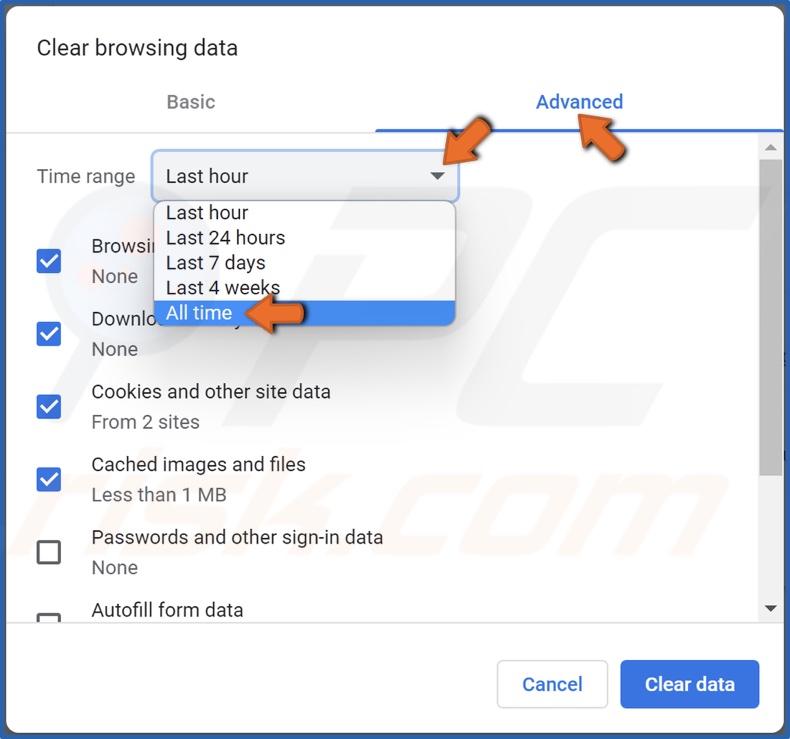
2. Select Advanced.
3. Open the Time range drop-down menu and select All time.
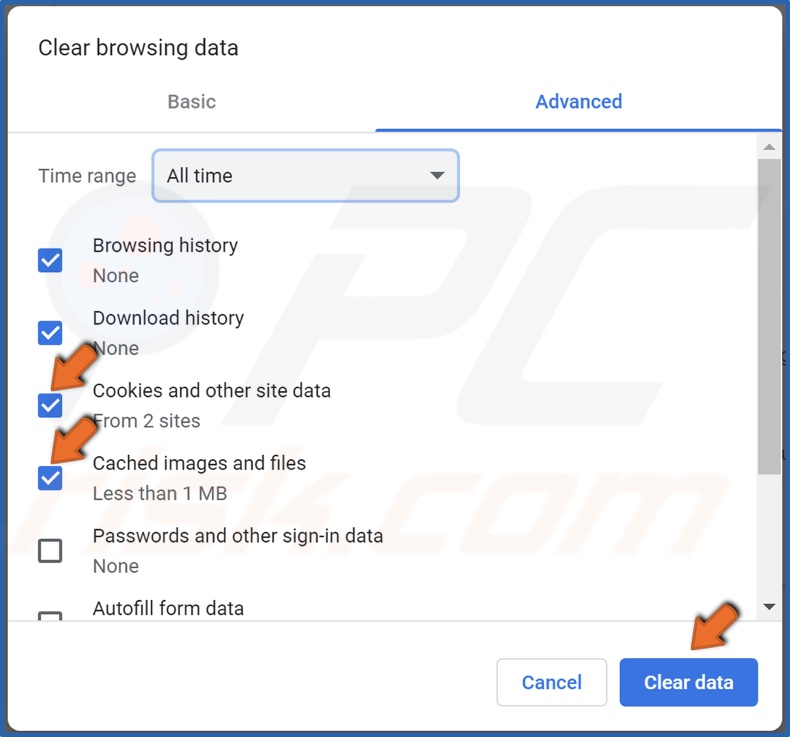
4. Then, tick Cookies and other site data, and Cached images and files.
5. Click Clear data.
Method 2. Disable the QUIC Protocol in Chrome
1. Open Google Chrome.
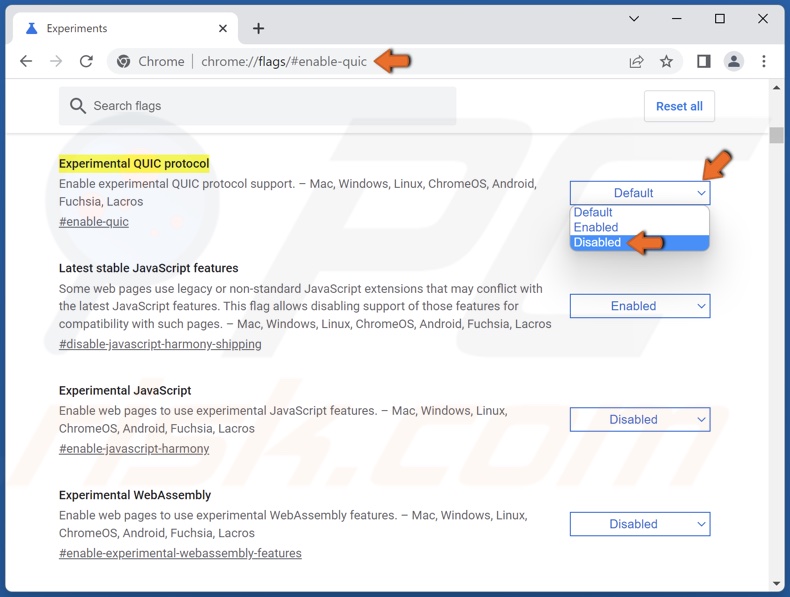
2. Type in chrome://flags/#enable-quic in the Omnibox and press Enter.
3. Open the Experimental QUIC Protocol drop-down menu and click Disabled.
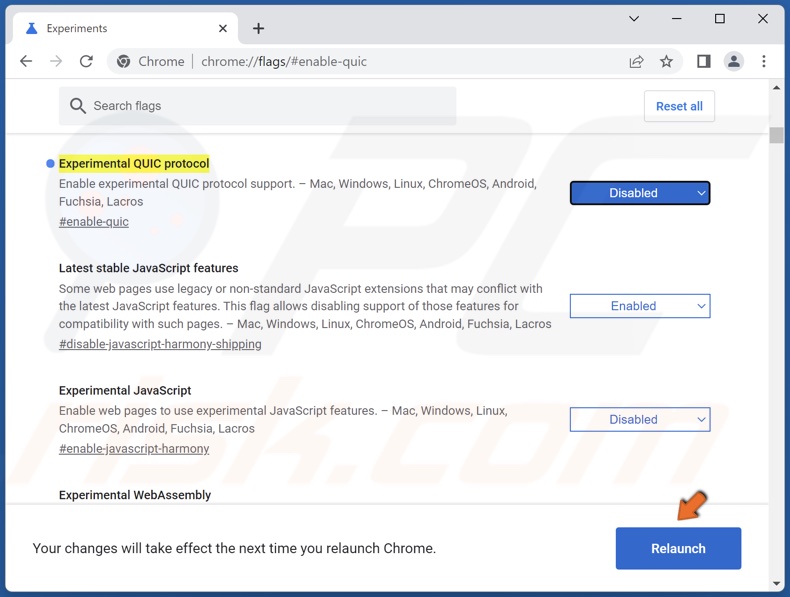
4. Then, click Relaunch.
Method 3. Perform a DNS Flush
1. Hold down Windows+R keys to open Run.

2. In the Run dialog box, type in CMD and hold down Ctrl+Shift+Enter keys to open the elevated Command Prompt.
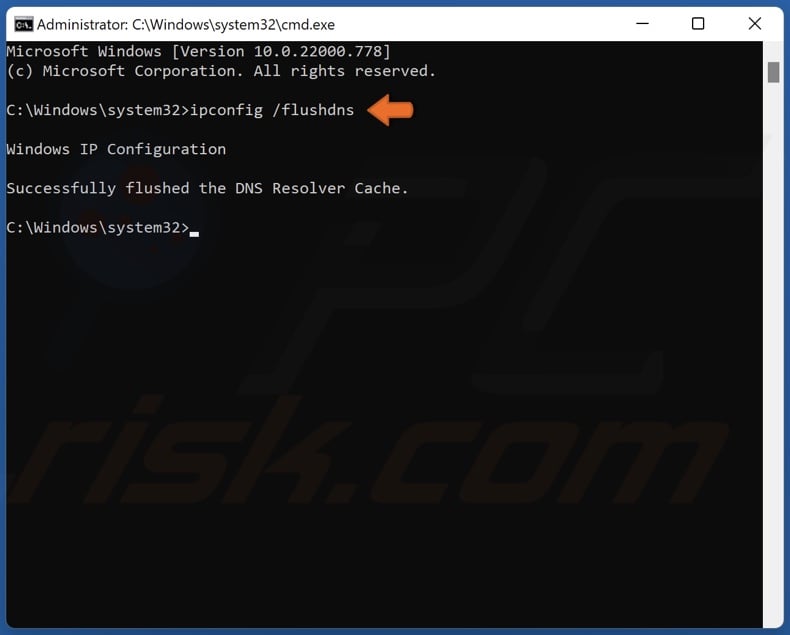
3. In the Command Prompt window, type in ipconfig /flushdns and press the Enter key. This command will clear the DNS cache files and reset the DNS resolver cache.
4. Close the Command Prompt.
Method 4. Disable Conflicting Browser Extensions
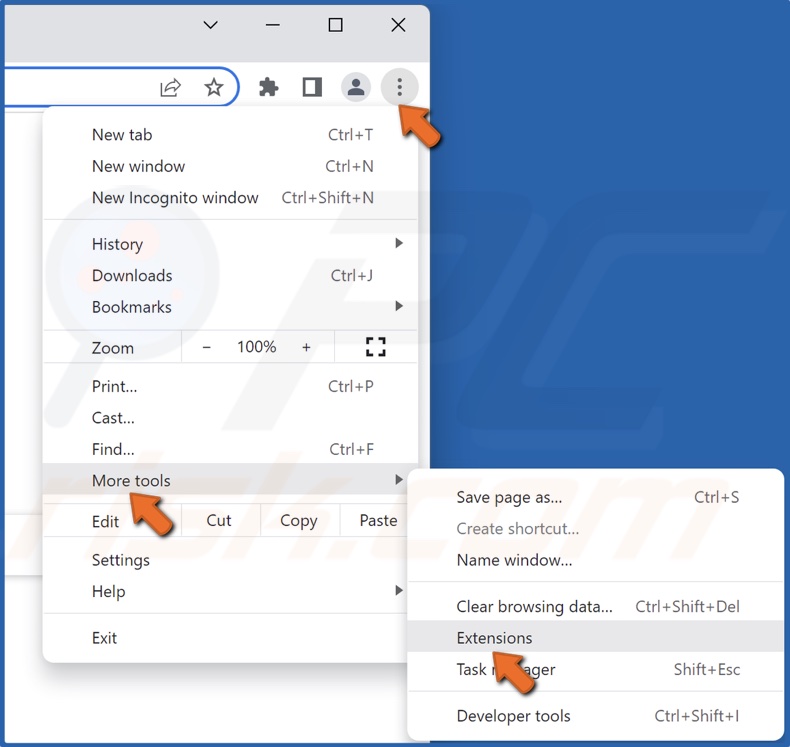
1. Open Google Chrome. Click the ellipsis at the top-right corner, select More tools and click Extensions.
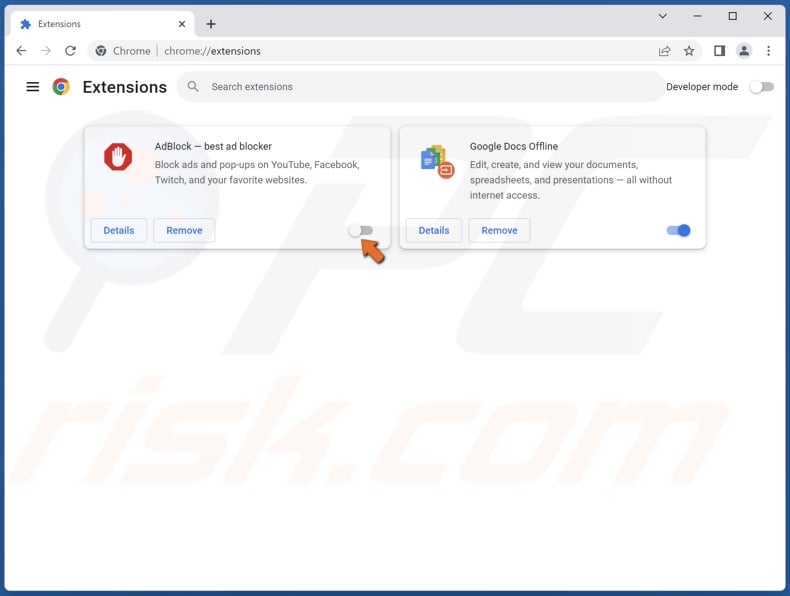
2. Toggle the slider to disable the extension Try disabling all of the extensions installed on your browser and check if that fixes the HTTP2 protocol error.
Method 5. Reset Google Chrome Flags
1. Open Google Chrome.
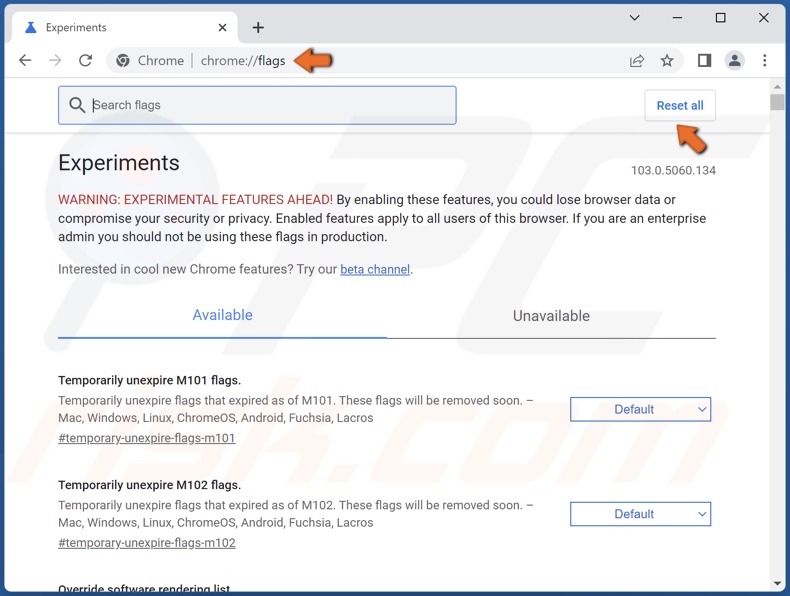
2. Type in chrome://flags/ in the Omnibox and press the Enter key.
3. Click Reset all.
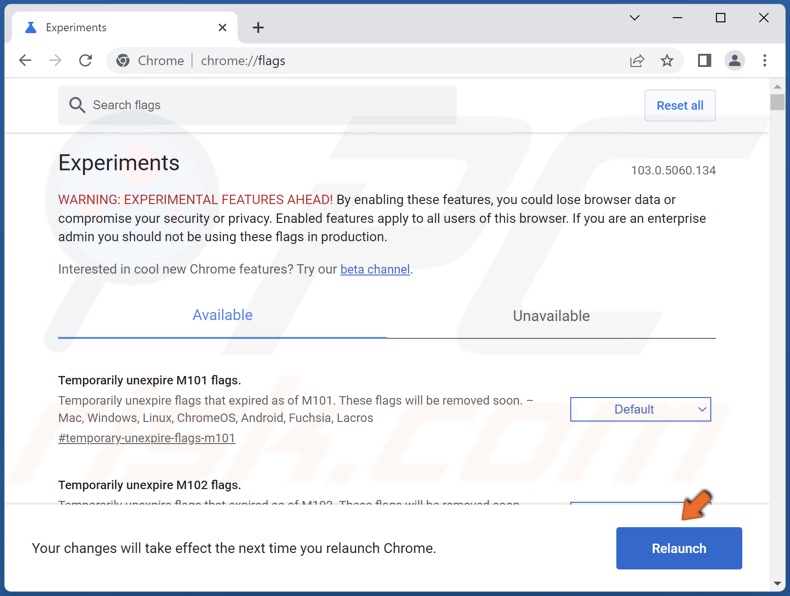
4. Then, click Relaunch.
Method 6. Reset Google Chrome Settings to Default
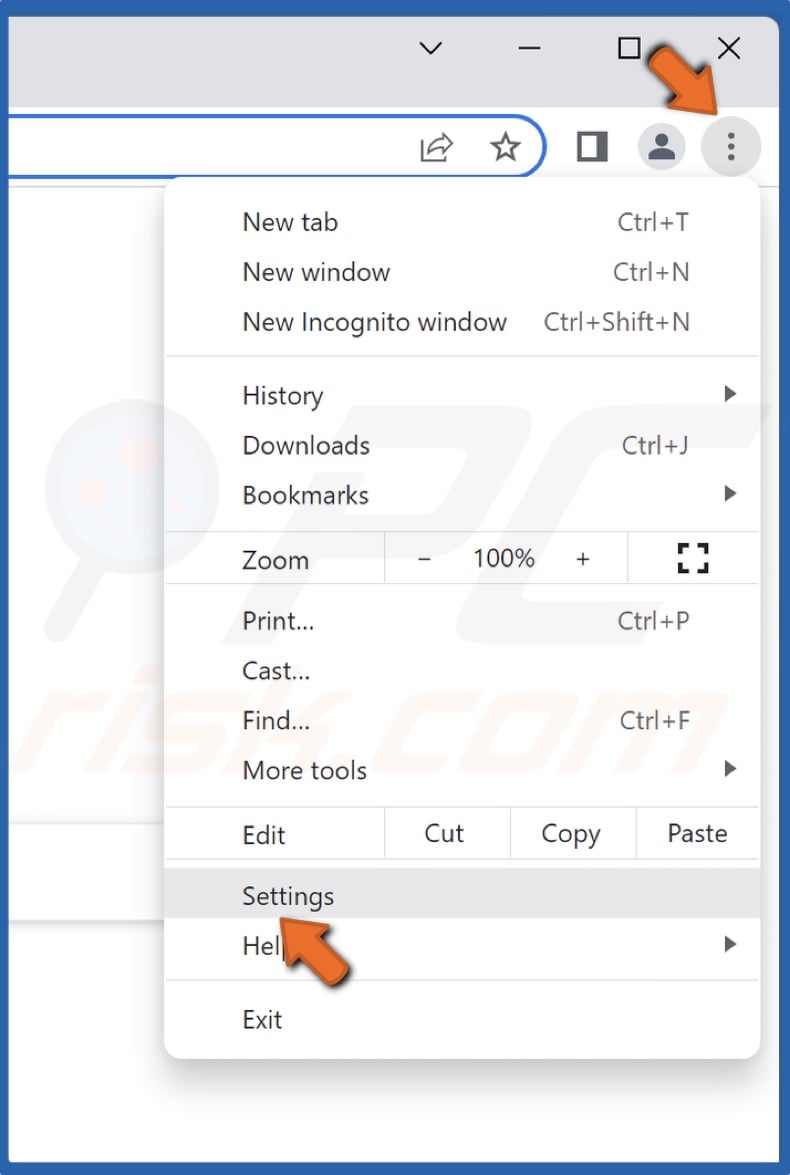
1. Open Google Chrome. Click the ellipsis at the top-right corner and click Settings.
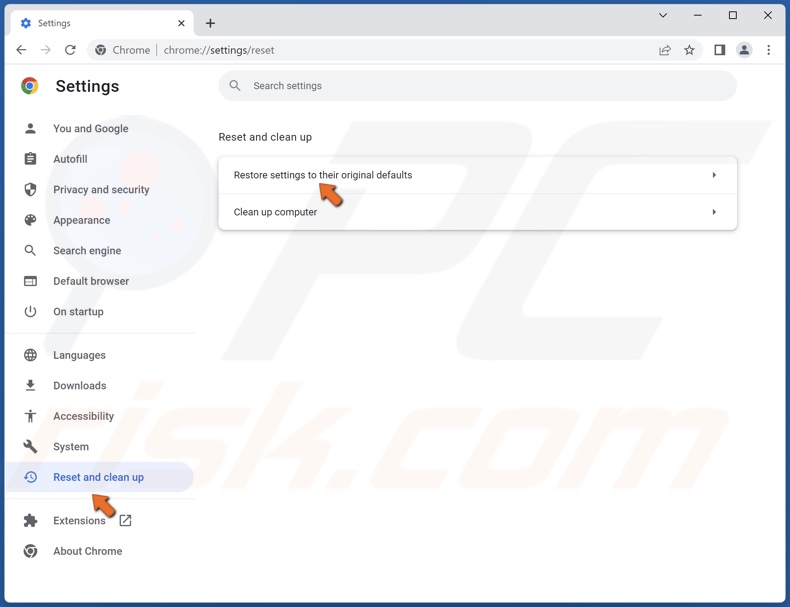
2. In the left pane, click Reset and clean up.
3. Click Restore settings to their original defaults.
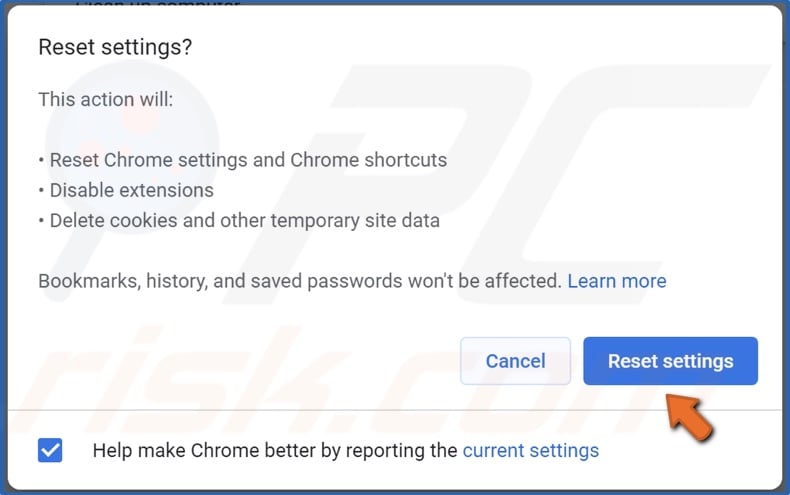
4. Click Reset settings.
Did this article help? Let us know by commenting below.
Share:

Rimvydas Iliavicius
Researcher, author
Rimvydas is a researcher with over four years of experience in the cybersecurity industry. He attended Kaunas University of Technology and graduated with a Master's degree in Translation and Localization of Technical texts. His interests in computers and technology led him to become a versatile author in the IT industry. At PCrisk, he's responsible for writing in-depth how-to articles for Microsoft Windows.
▼ Show Discussion