How to Fix Valorant Error Code VAL 43

Get Free Scanner and check your computer for errors
Fix It NowTo fix found issues, you have to purchase the full version of Combo Cleaner. Free trial available. Combo Cleaner is owned and operated by Rcs Lt, the parent company of PCRisk.com read more.
How to Fix Valorant Error Code VAL 43 on Windows 11
Valorant players often experience error code VAL 43 when they try to open the game client. In most cases, this error occurs due to connectivity issues. Follow the instructions in this article to fix this error.
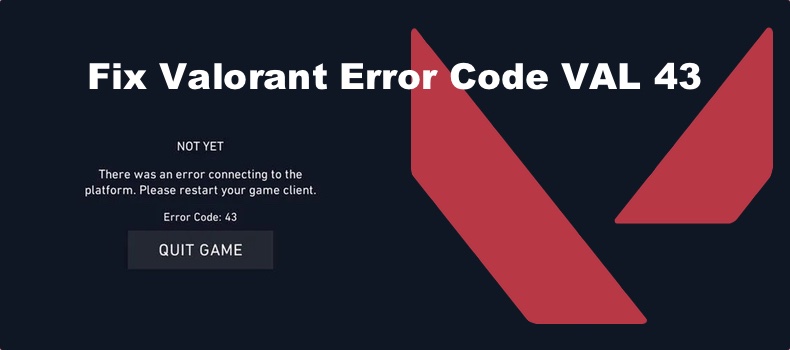
There was an error connecting to the platform. Please restart your game client.
Error Code: 43
Error code 43 translates to “A system has timed out.” Riot Games recommends restarting the Riot client, but that doesn’t always work.
What Causes VAL 43?
Error code VAL 43 can occur because Riot servers are down or under maintenance. Go to Riot Games Service Status website to find out if the service is experiencing issues.
If there are no issues with Riot’s servers, the problem could be on the client-side. Error code 43 is known to occur more frequently after the release of a new update.
Riot client settings. Error code VAL 43 may occur due to your Riot client game settings found in the AppData directory.
Riot Vanguard Service. The Vanguard service (vgc) ensures that the anti-cheat protection is running before launching the game. If the service isn’t running, you won’t be able to launch Valorant.
If you’re getting Error code 43, try restarting the game, forcing the game to reconnect to Riot’s servers. Restarting your PC could also help as this will also force Riot Vanguard to restart. Reinstalling Valorant will remove all corrupted files from the system and replace them with good ones.
If the tips mentioned above didn’t help you fix the error, apply the fixes we have included below.
Video Guide on How to Fix Valorant Error Code VAL 43
Table of Contents:
- Introduction
- Method 1. Run Valorant as an Administrator
- Method 2. Delete Riot Client Settings File in AppData
- Method 3. Start the VGC Service
- Method 4. Reset TCP/IP Settings and Flush DNS Cache
- Video Guide on How to Fix Valorant Error Code VAL 43
Download Computer Malware Repair Tool
It is recommended to run a free scan with Combo Cleaner - a tool to detect viruses and malware on your device. You will need to purchase the full version to remove infections. Free trial available. Combo Cleaner is owned and operated by Rcs Lt, the parent company of PCRisk.com read more.
Method 1. Run Valorant as an Administrator
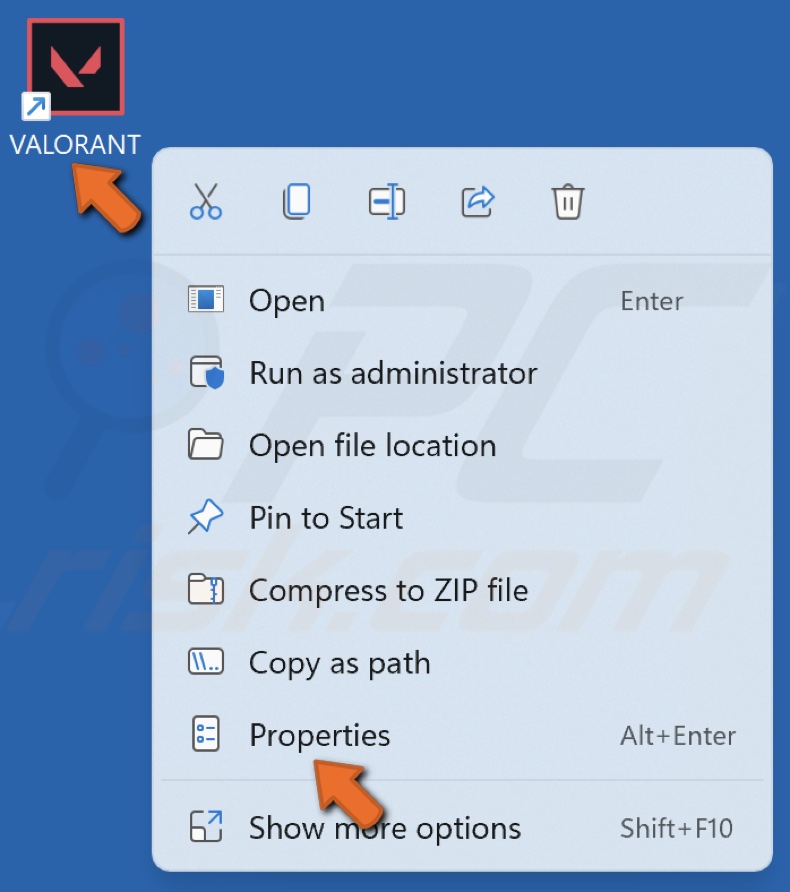
1. Right-click the Valorant desktop shortcut and select Properties.
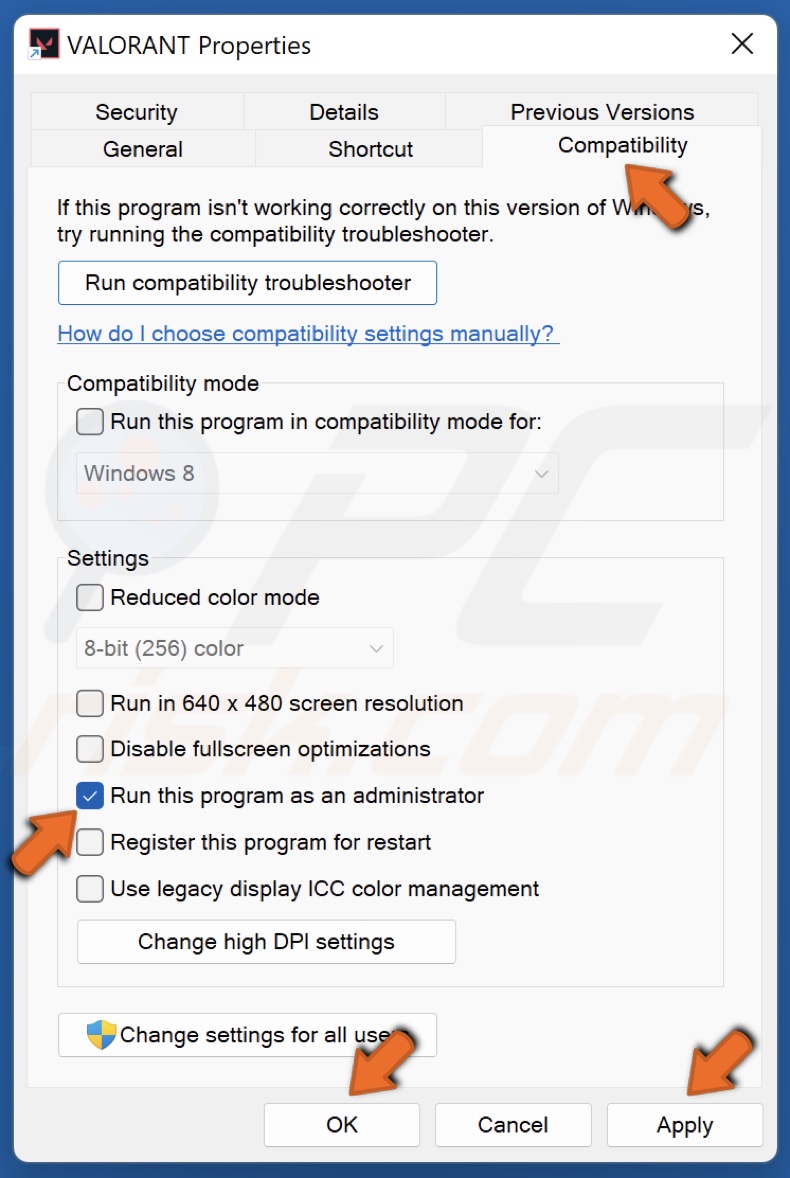
2. Select the Compatibility tab.
3. Mark the Run this program as an administrator checkbox.
4. Click Apply and click OK.
Method 2. Delete Riot Client Settings File in AppData
1. Hold down Windows+R keys to open Run.

2. In the Run dialog box, type in AppData and click OK.
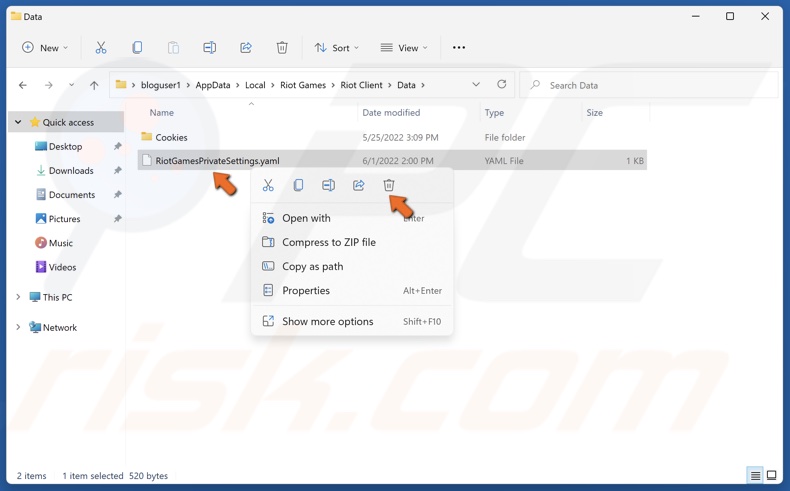
3. Navigate to C:\Users\USERNAME\AppData\Local\Riot Games\Riot Client\Data
4. Right-click the RiotGamesPrivateSettings.yaml file and click Delete.
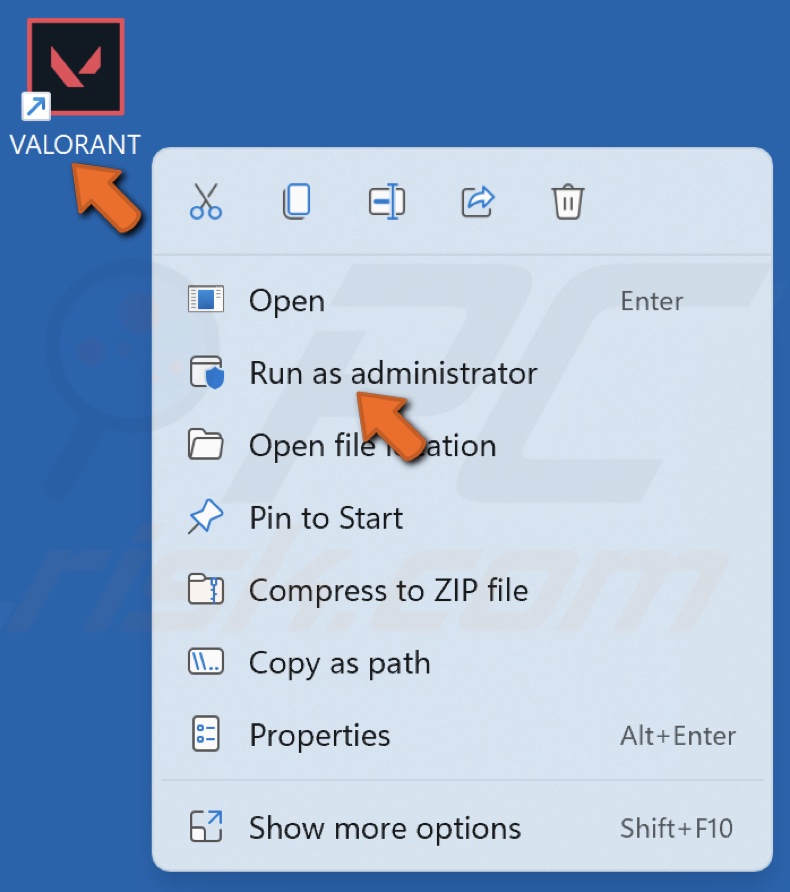
5. Right-click the Valorant desktop shortcut and click Run as an administrator.
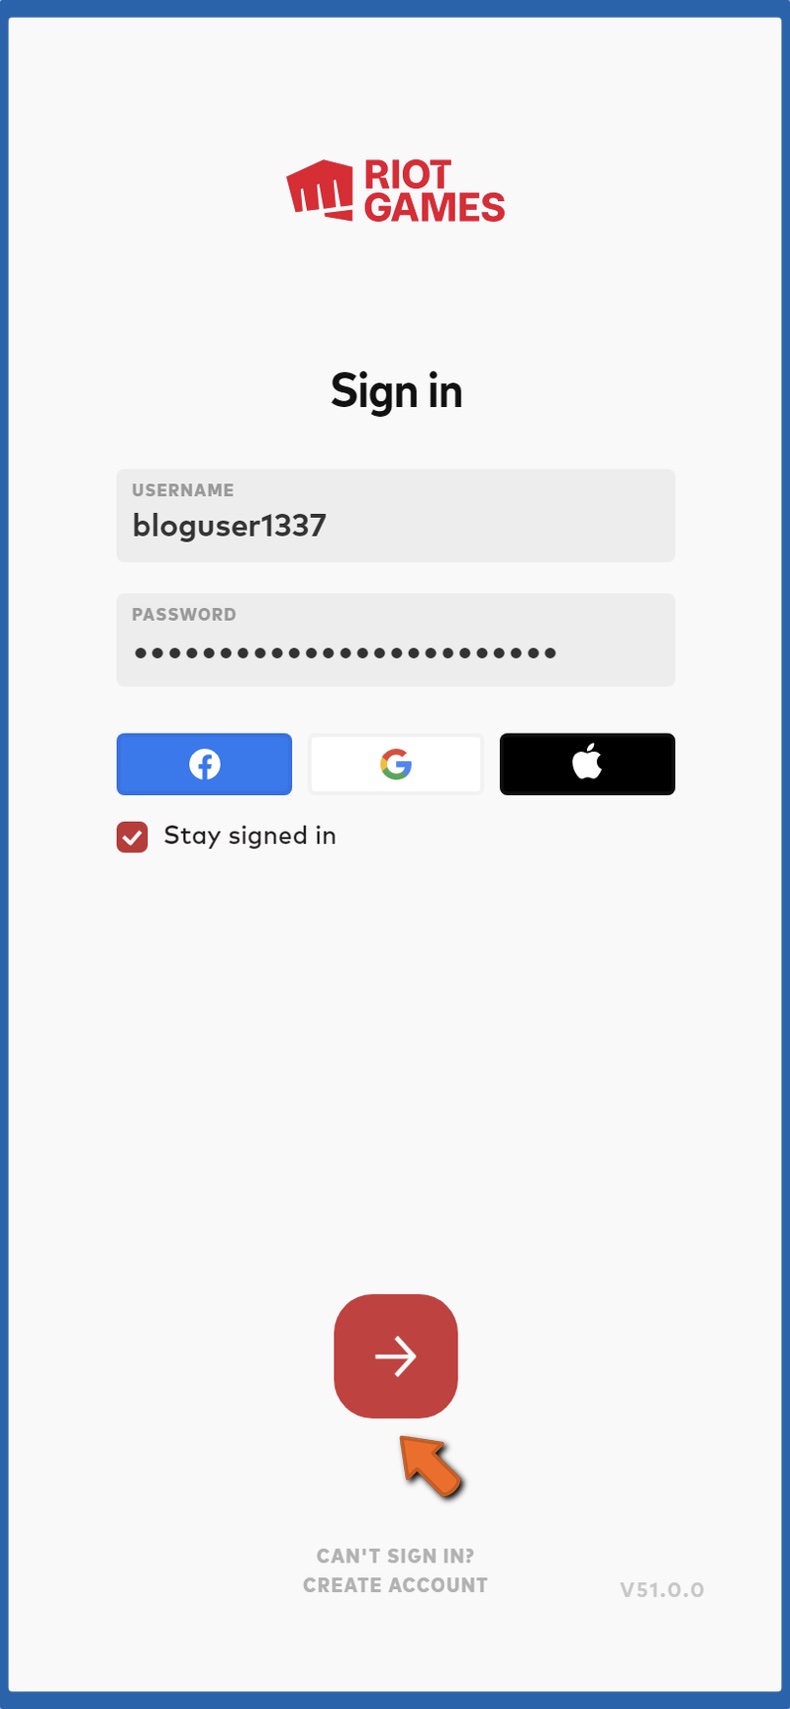
6. Enter your login credentials and click the login button.
Method 3. Start the VGC Service
1. Hold down Windows+R keys to open Run.
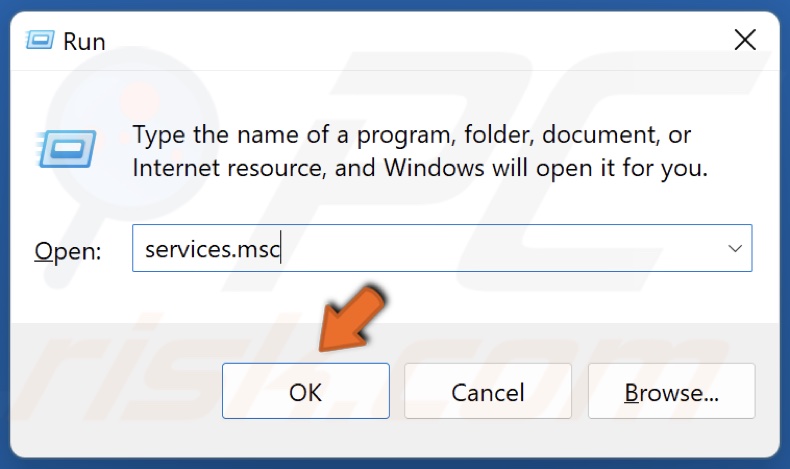
2. In the Run dialog box, type in services.msc and click OK.
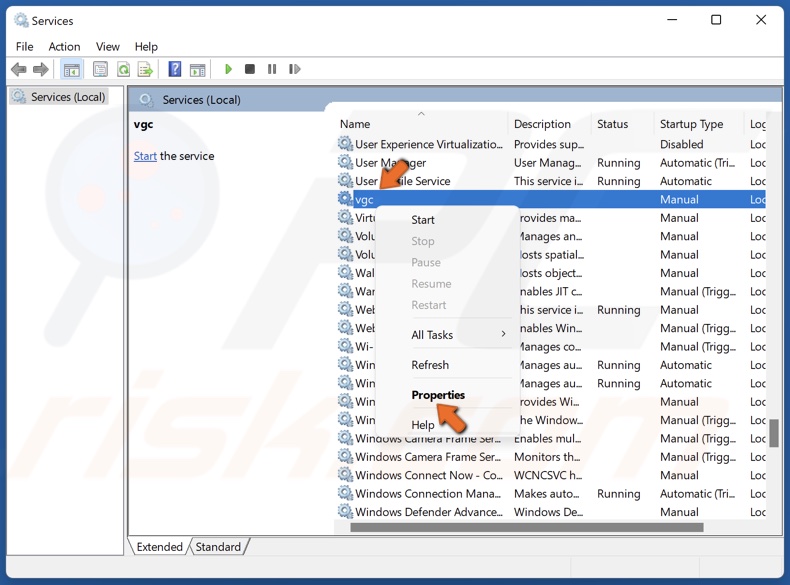
3. In the services window, scroll through the list and find vgc.
4. Right-click it and click Properties.
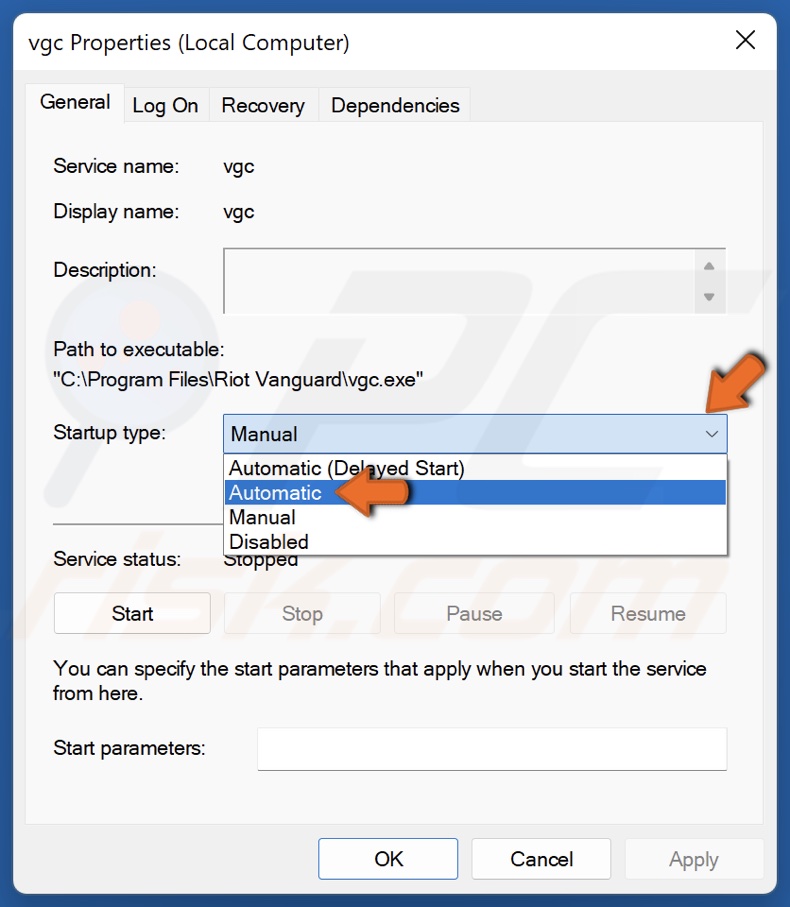
5. Open the Startup type drop-down menu and select Automatic.
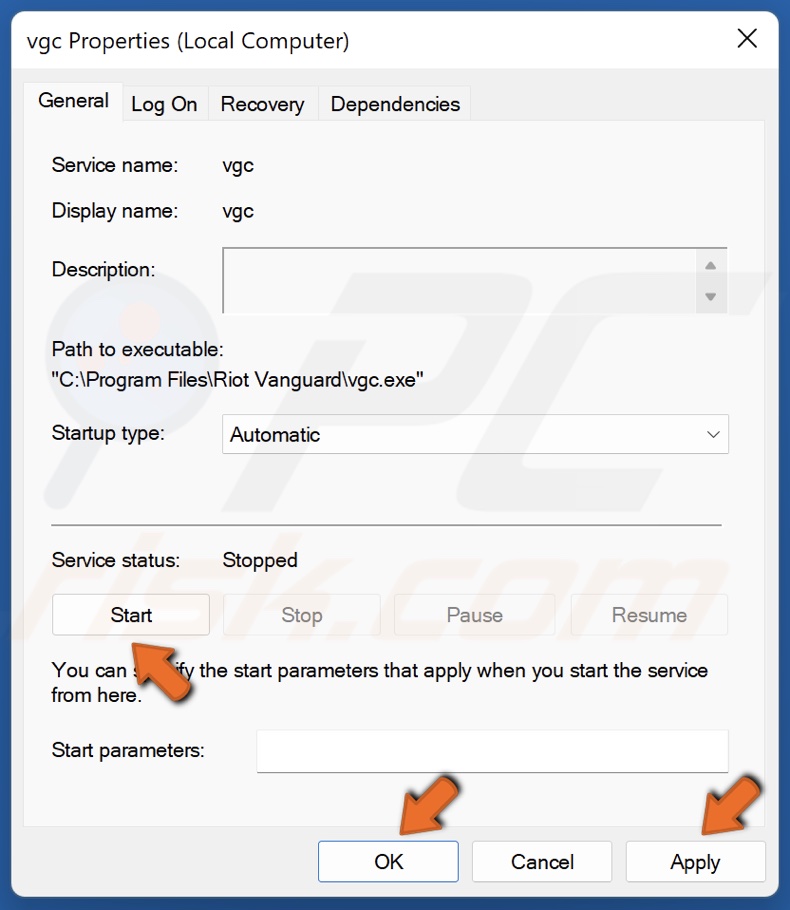
6. In the Service status section, click Start.
7. Click Apply and click OK.
8. Close the services window, right-click the Valorant desktop shortcut and click Run as an administrator.
Method 4. Reset TCP/IP Settings and Flush DNS Cache
1. Hold down Windows+R keys to open Run.

2. In the Run dialog box, type in CMD and hold down Ctrl+Shift+Enter keys to open Command Prompt as an administrator.
3. In the Command Prompt window, type in the commands below and press the Enter key after typing in each one.
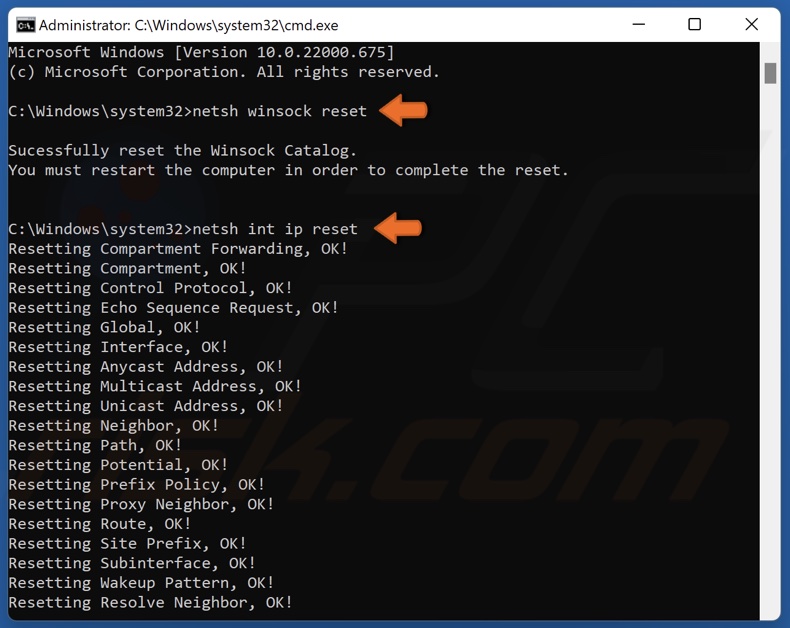
netsh winsock reset
netsh int ip reset
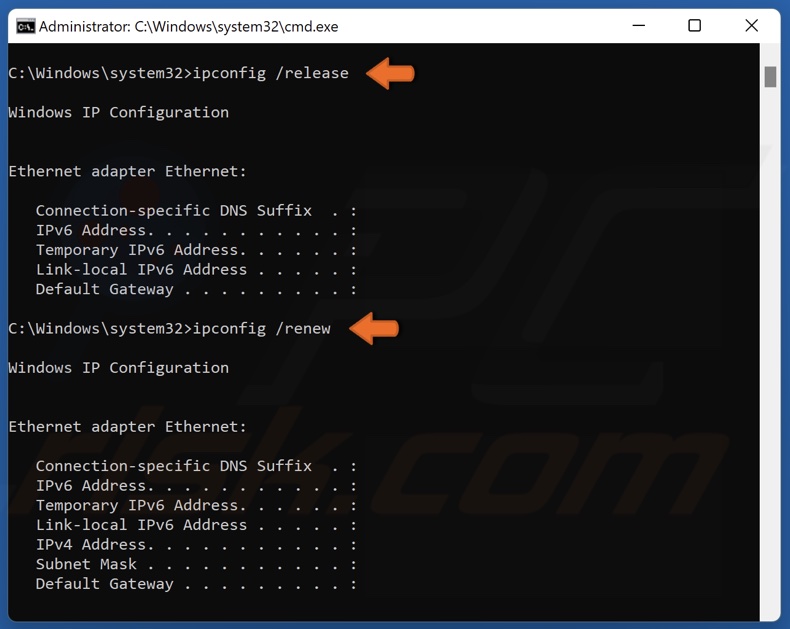
ipconfig /release
ipconfig /renew
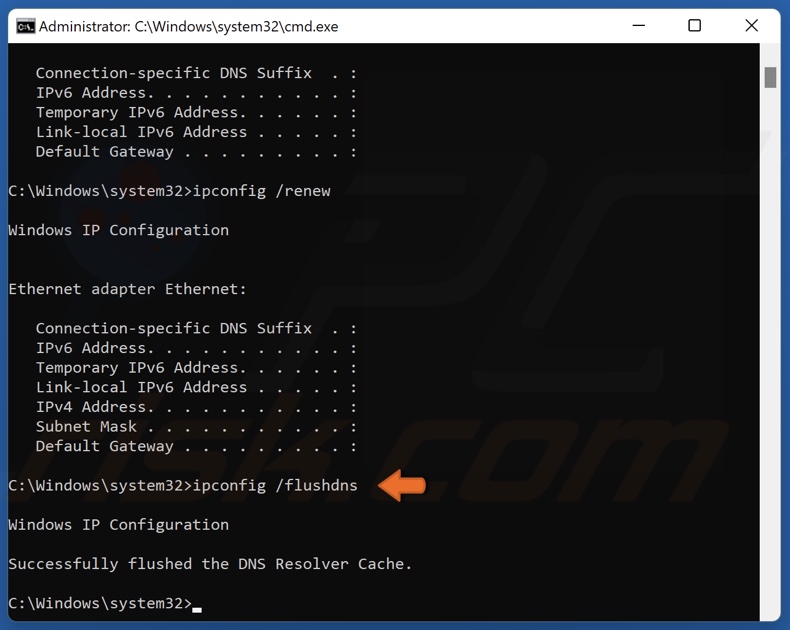
ipconfig /flushdns
4. Close the Command Prompt and restart your PC.
Share:

Rimvydas Iliavicius
Researcher, author
Rimvydas is a researcher with over four years of experience in the cybersecurity industry. He attended Kaunas University of Technology and graduated with a Master's degree in Translation and Localization of Technical texts. His interests in computers and technology led him to become a versatile author in the IT industry. At PCrisk, he's responsible for writing in-depth how-to articles for Microsoft Windows.
▼ Show Discussion