How to Fix File System Error (-805305975) in Windows 11

Get Free Scanner and check your computer for errors
Fix It NowTo fix found issues, you have to purchase the full version of Combo Cleaner. Free trial available. Combo Cleaner is owned and operated by Rcs Lt, the parent company of PCRisk.com read more.
How to Fix File System Error (-805305975) in Windows 11
File System Error (-805305975) usually occurs when trying to open an image file using the Microsoft Photos app. If you experience this error, read this article to find out how to fix it.
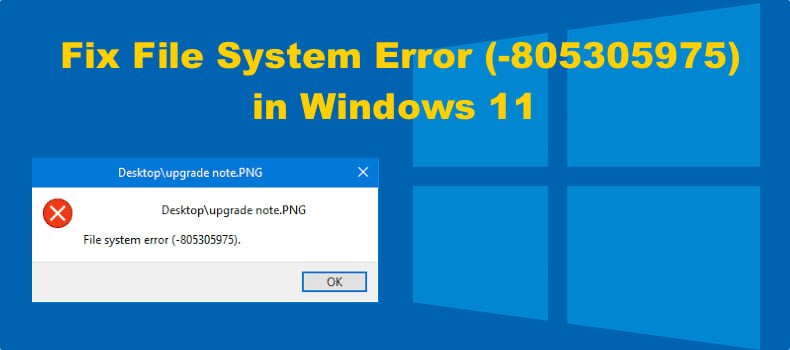
Error (-805305975) can occur when opening any image, regardless of the file format. However, you may also get this same error code when opening video and audio files.
What Causes This Error
Our research has revealed that you may experience File System Error (-805305975) due to the causes listed below.
- Incorrect image format. You can resolve this issue by resetting the Microsoft Photos app.
- Malfunctioning Microsoft Photos app. Reinstalling the app should fix the problem.
- Hard drive errors. You may repair your hard drive by running the CHKDSK scan.
- Corrupted system files. You can repair corrupted system files by running SFC and DISM scans.
Before trying any of our methods, make sure that Windows 11 is updated.
Video Guide on How to Fix File System Error (-805305975)
Table of Contents:
- Introduction
- Method 1. Repair and Reset Microsoft Photos
- Method 2. Run the Deployment Image & Servicing Management (DISM) Scan
- Method 3. Run the System File Checker (SFC) Scan
- Method 4. Run a CHKDSK Scan
- Method 5. Reinstall Microsoft Photos
- Video Guide on How to Fix File System Error (-805305975)
Download Computer Malware Repair Tool
It is recommended to run a free scan with Combo Cleaner - a tool to detect viruses and malware on your device. You will need to purchase the full version to remove infections. Free trial available. Combo Cleaner is owned and operated by Rcs Lt, the parent company of PCRisk.com read more.
Method 1. Repair and Reset Microsoft Photos
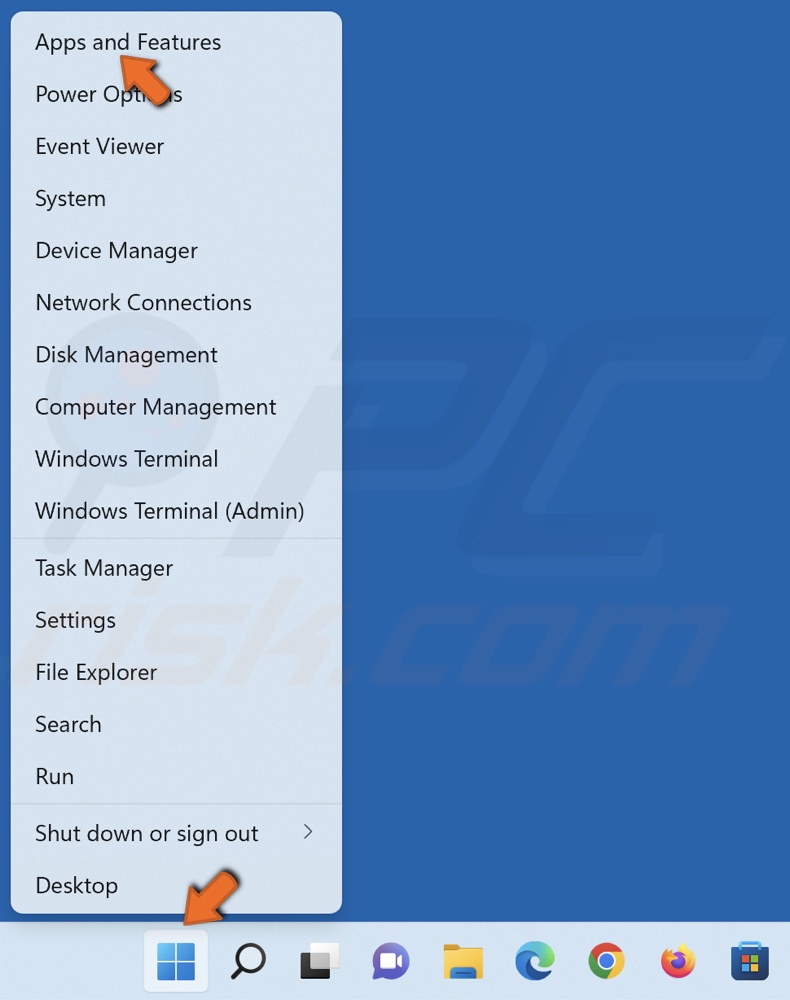
1. Right-click Start and select Apps and Features.
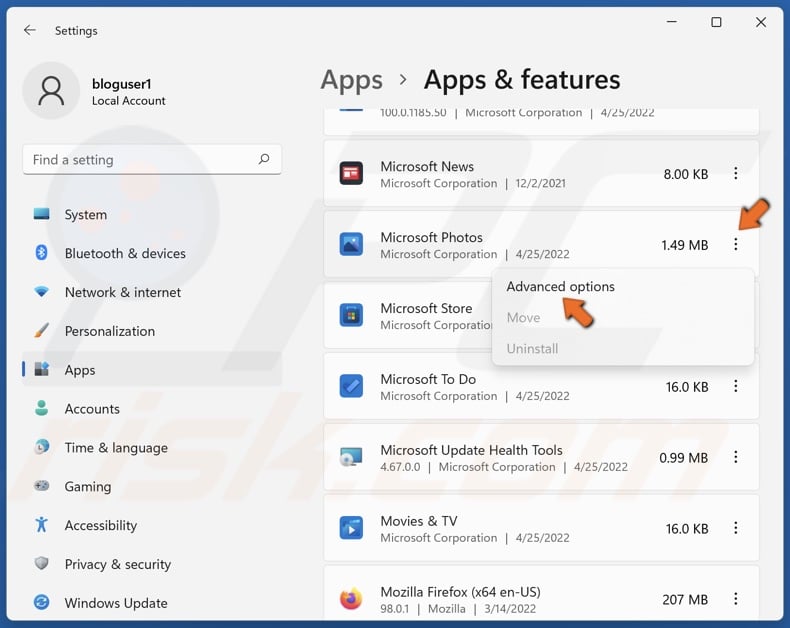
2. Scroll through the apps list and find Microsoft Photos.
3. Click the ellipsis next to Microsoft Photos and click Advanced options.
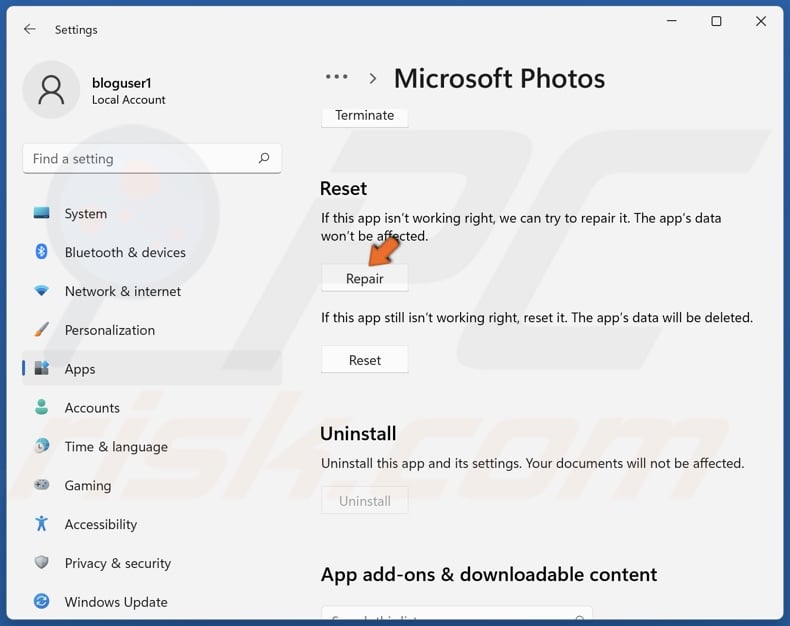
4. In the Reset section, click Repair.
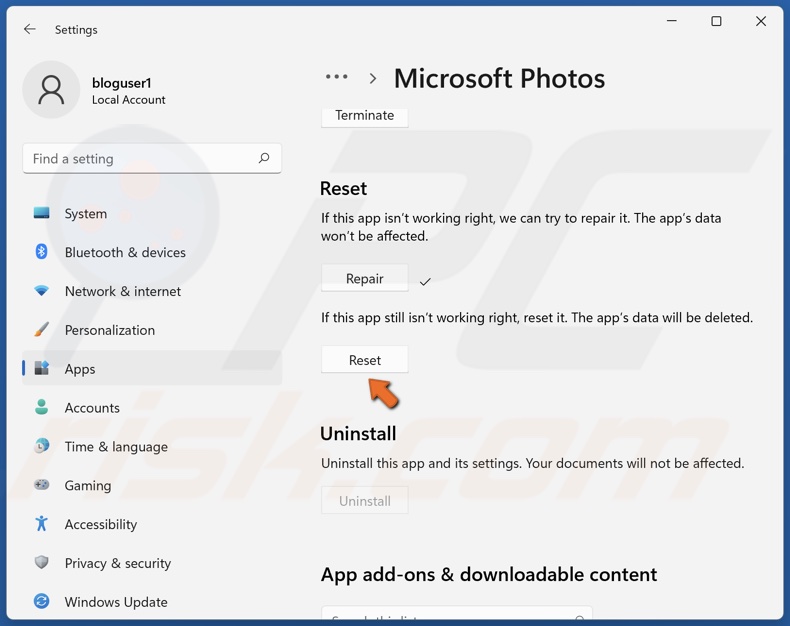
5. If Microsoft Photos still doesn’t open files, click Reset.

6. Click Reset again to confirm the action.
Method 2. Run the Deployment Image & Servicing Management (DISM) Scan
1. Hold down Windows+R keys to open Run.
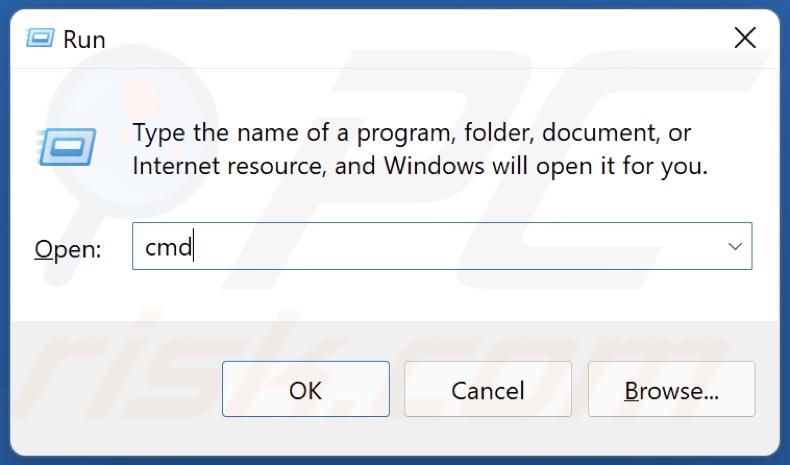
2. In the Run dialog box, type in CMD and hold down Ctrl+Shift+Enter keys to open the elevated Command Prompt.
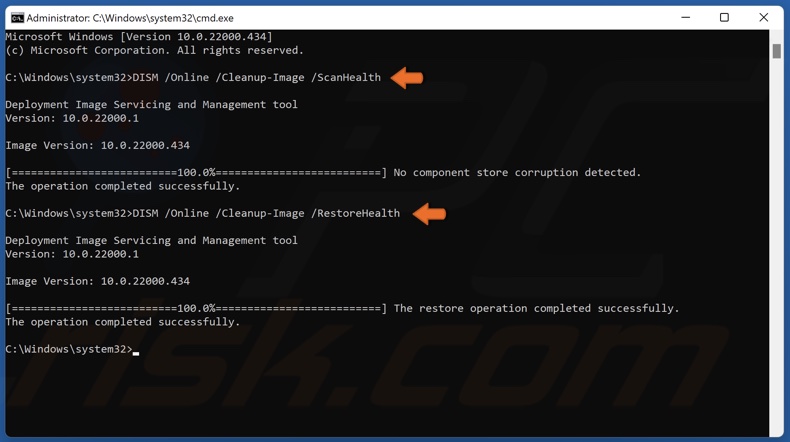
3. In the Command Prompt window, type in DISM /Online /Cleanup-Image /ScanHealth and press the Enter key. Wait for the scan to complete.
4. Then, type in DISM /Online /Cleanup-Image /RestoreHealth and press Enter.
5. Restart your PC.
Method 3. Run the System File Checker (SFC) Scan
1. Hold down Windows+R keys to open Run.
2. In the Run dialog box, type in CMD and hold down Ctrl+Shift+Enter keys to open the elevated Command Prompt.
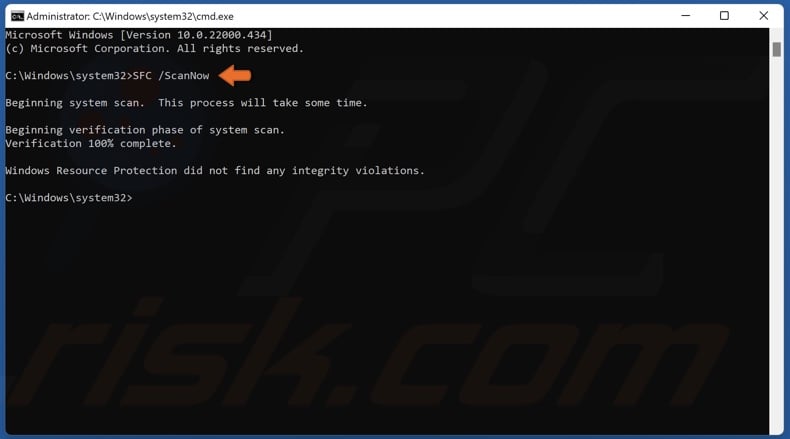
3. In the Command Prompt window, type in SFC /ScanNow and press Enter.
4. Restart your PC.
Method 4. Run a CHKDSK Scan
1. Hold down Windows+R keys to open Run.
2. In the Run dialog box, type in CMD and hold down Ctrl+Shift+Enter keys to open the elevated Command Prompt.
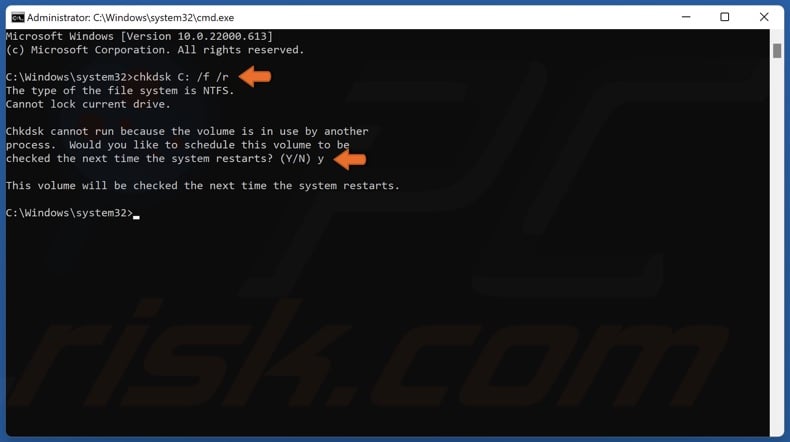
3. In the Command Prompt window, type in chkdsk C: /f /r and press Enter. Replace C: with the letter of the drive where Windows is installed on your PC.
4. Type in Y if that volume is being used by another process and press Enter.
5. Close the Command Prompt and restart your PC. The scan will begin during the restart.
6. Wait for the scan to complete.
Method 5. Reinstall Microsoft Photos
1. Hold down Windows+R keys to open Run.
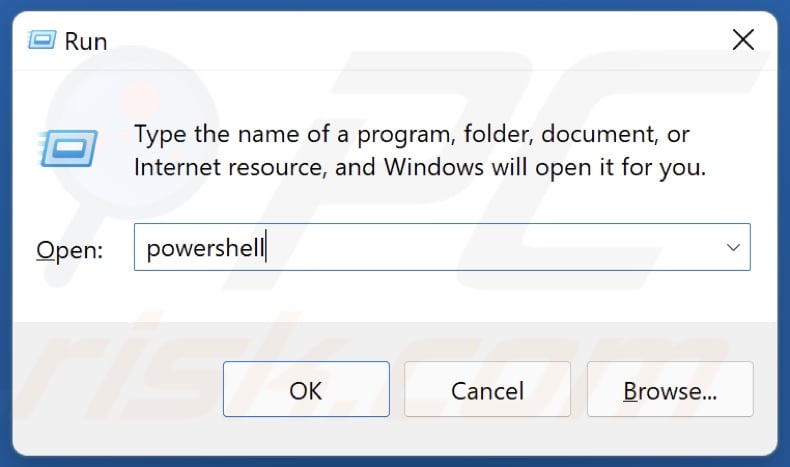
2. In the Run dialog box, type in powershell and hold down Ctrl+Shift+Enter keys to open PowerShell as an administrator.
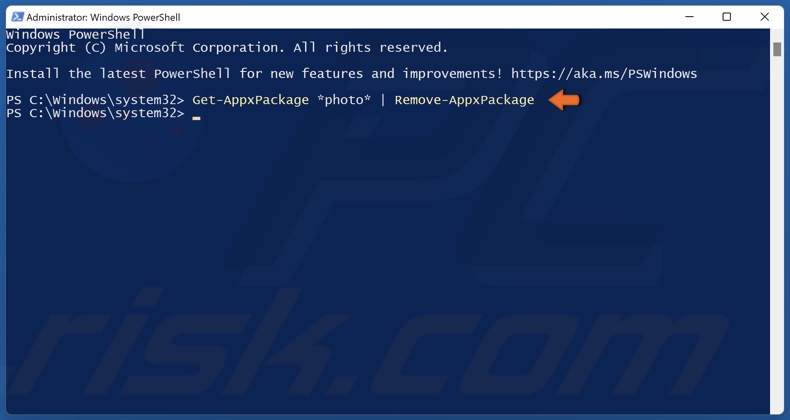
3. In the PowerShell window, type in Get-AppxPackage *photo* | Remove-AppxPackage and press Enter. You can copy this command from our article linked in the video description.
4. Microsoft Photos will be uninstalled.

5. Then, open the Microsoft Store.

6. Type Microsoft Photos in the search bar and select Microsoft Photos.

7. Click the Get button.
Share:

Rimvydas Iliavicius
Researcher, author
Rimvydas is a researcher with over four years of experience in the cybersecurity industry. He attended Kaunas University of Technology and graduated with a Master's degree in Translation and Localization of Technical texts. His interests in computers and technology led him to become a versatile author in the IT industry. At PCrisk, he's responsible for writing in-depth how-to articles for Microsoft Windows.
▼ Show Discussion