Fix Desktop Window Manager (dwm.exe) High GPU and Memory Usage
Get Free Scanner and check your computer for errors
Fix It NowTo fix found issues, you have to purchase the full version of Combo Cleaner. Free trial available. Combo Cleaner is owned and operated by Rcs Lt, the parent company of PCRisk.com read more.
How to Fix Desktop Window Manager High GPU and Memory Usage in Windows 11
Sometimes Desktop Window Manager (dwm.exe) starts hogging Graphics Processing Unit (GPU) or memory (RAM) resources when it shouldn’t. This article will show you how to fix this problem.
Desktop Window Manager is responsible for rendering the Windows desktop environment, which is a significant part of the GUI. Usually, wdm.exe doesn’t use much of the GPU’s processing power, but it ends up causing high GPU usage due to some arbitrary reasons.
Many users reported that GPU usage by Desktop Window Manager spikes to 70% or even 100% when running an app and its main window is visible or a video game. This problem is known to occur in Windows 11 and Windows 10.
Why Is Desktop Window Manager Using So Much GPU?
The issue can be caused by outdated GPU drivers or overloading the Desktop Window Manager process with many desktop processes and activities that require more resources than normal.
Some have noticed that Desktop Window Manager started causing high GPU or memory (RAM) usage after a Windows update. It has been said that an update might contain bugs that cause dwm.exe to overuse GPU resources.
In some cases, the Xbox Game Bar causes Desktop Window Manager to use more GPU/Memory than normal. We suggest uninstalling the Xbox Game Bar and checking if that fixes the issue.
Video Guide on How to Fix Desktop Window Manager High GPU/Memory Usage
Table of Contents:
- Introduction
- Method 1. Update the Graphics Card Driver
- Method 2. Run the Hardware and Devices Troubleshooter
- Method 3. Set Desktop Window Manager Priority to Normal
- Method 4. Turn Off Visual Effects
- Video Guide on How to Fix Desktop Window Manager High GPU/Memory Usage
Download Computer Malware Repair Tool
It is recommended to run a free scan with Combo Cleaner - a tool to detect viruses and malware on your device. You will need to purchase the full version to remove infections. Free trial available. Combo Cleaner is owned and operated by Rcs Lt, the parent company of PCRisk.com read more.
Method 1. Update the Graphics Card Driver
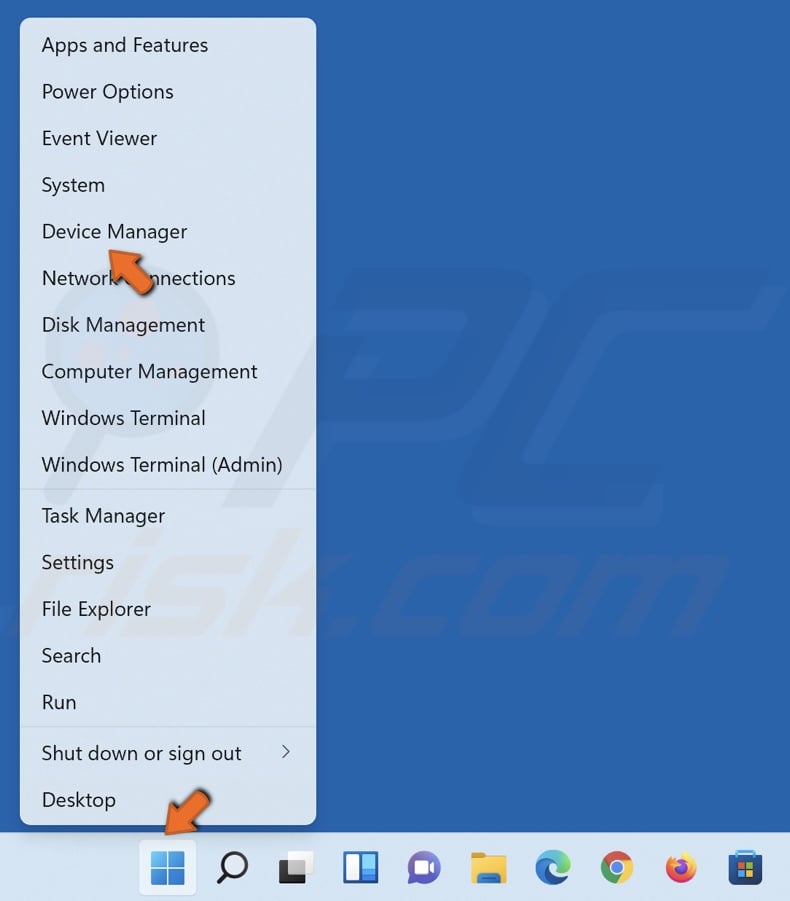
1. Right-click the Start menu button and select Device Manager.
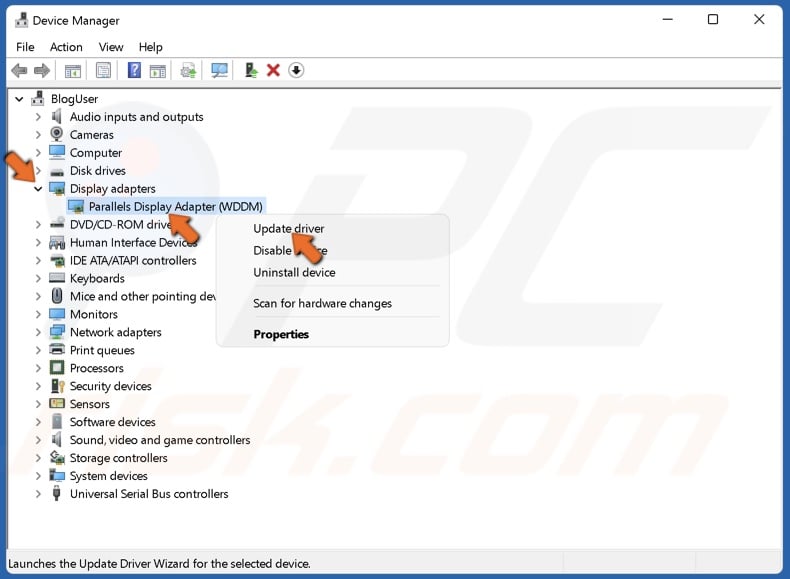
2. Expand the Display adapters list.
3. Select your display adapter (graphics card), right-click it, and click Update driver.
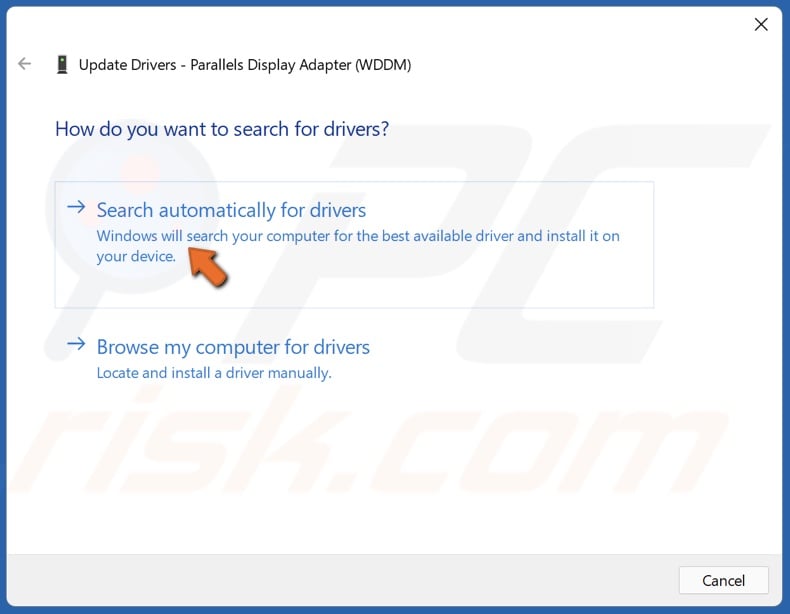
4. Select Search automatically for drivers.
5. Windows will download and install the drivers.
You can also manually download the graphics card drivers for Intel, Nvidia, and AMD from their respective websites.
Method 2. Run the Hardware and Devices Troubleshooter
1. Hold down Windows+R keys to open Run.
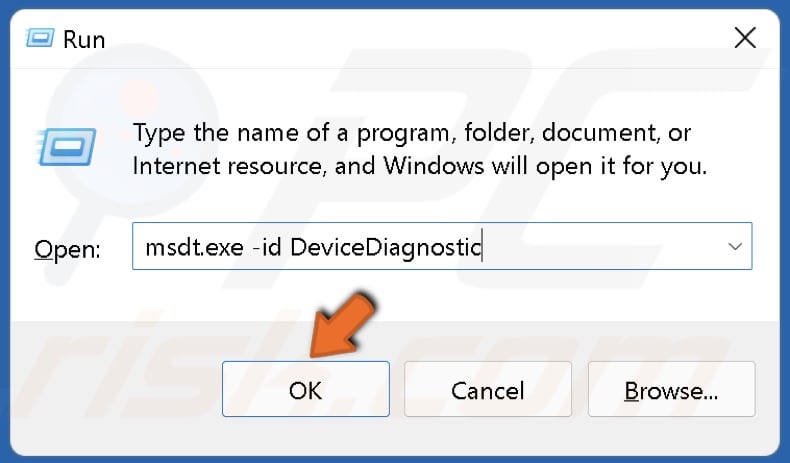
2. In the Run dialog box, type in msdt.exe -id DeviceDiagnostic and click OK.
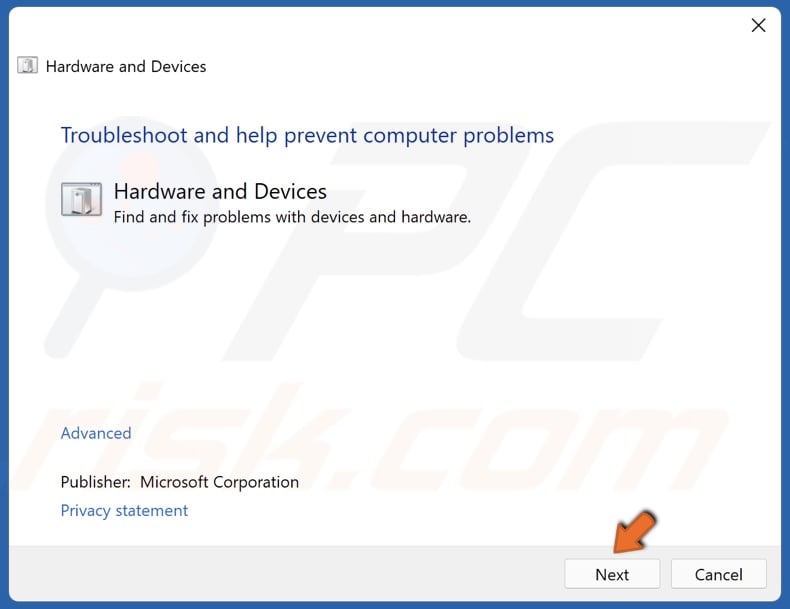
3. Click Next in the Hardware and Devices troubleshooter window.
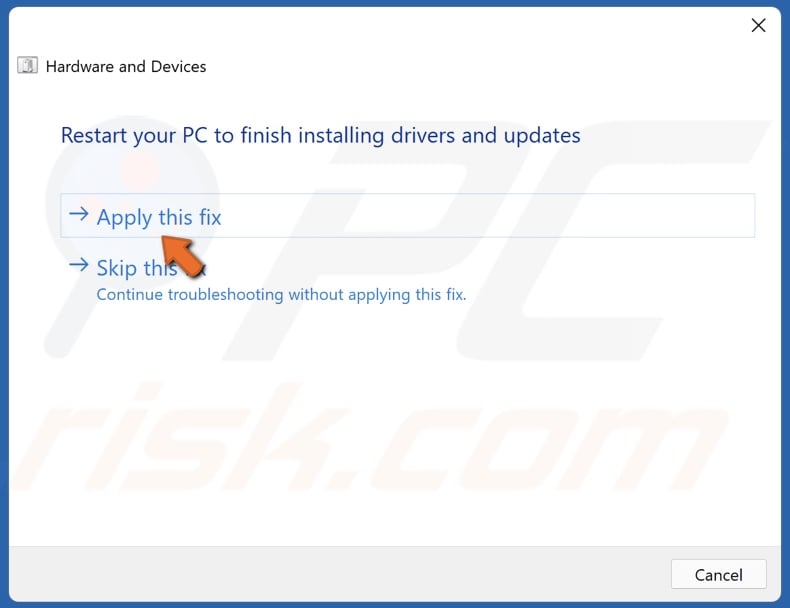
4. Apply the suggested fixes and close the troubleshooter.
Method 3. Set Desktop Window Manager Priority to Normal
1. Hold down Ctrl+Shift+Esc keys to open Task Manager.
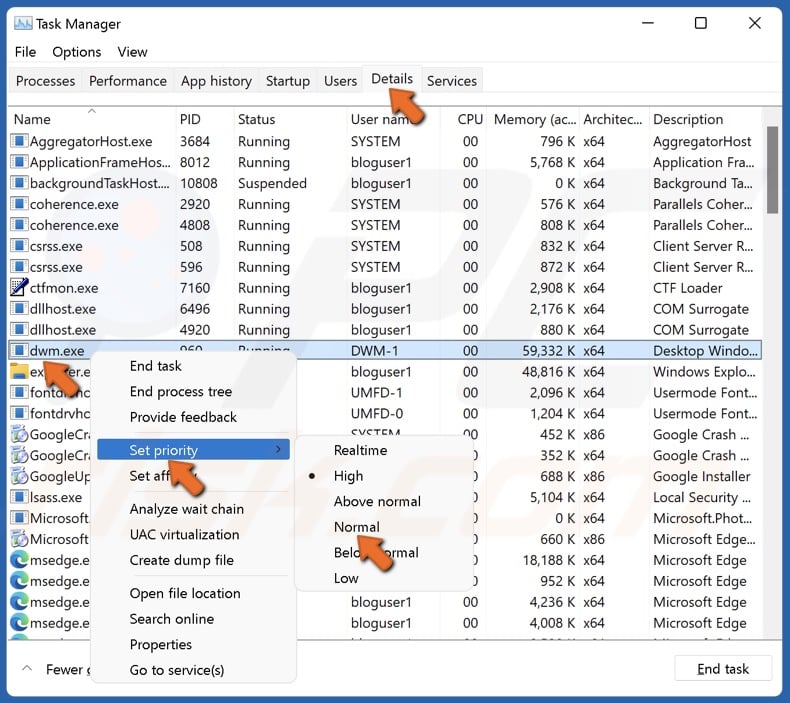
2. Select the Details tab.
3. Find dwm.exe, right-click it, select Set priority, and click Normal.
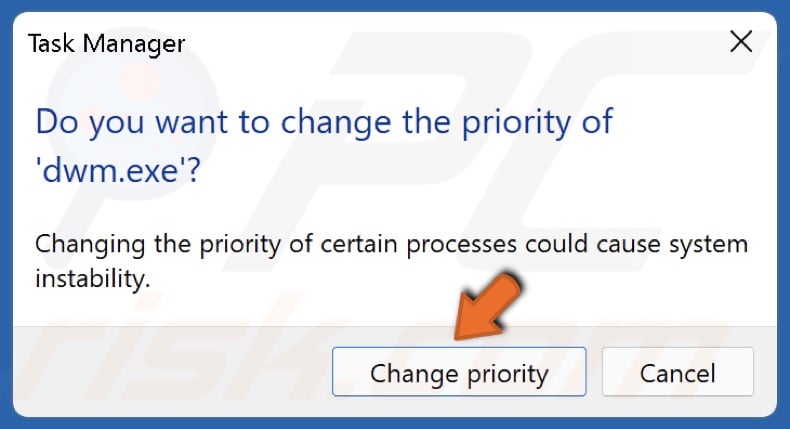
4. Click Change priority to confirm.
Method 4. Turn Off Visual Effects
1. Hold down Windows+R keys to open Run.
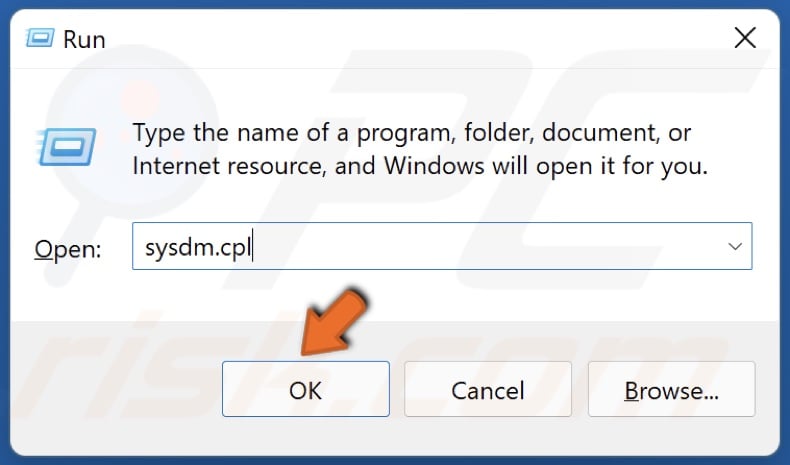
2. In the Run dialog box, type in sysdm.cpl and click OK.
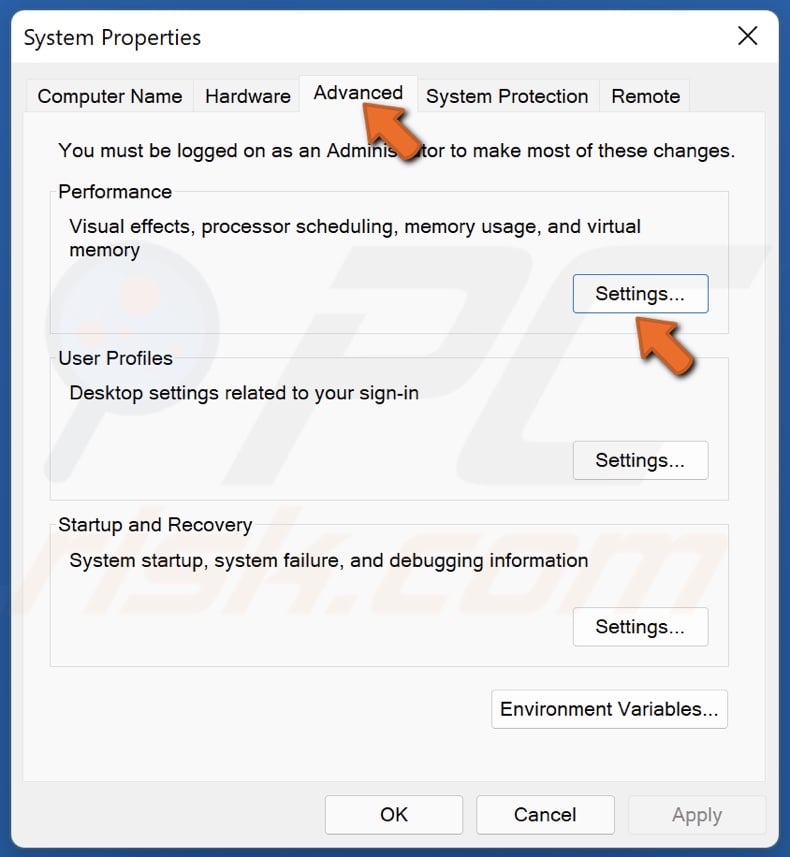
3. In the resulting System Properties window, select the Advanced tab.
4. Under the Performance section, click Settings.
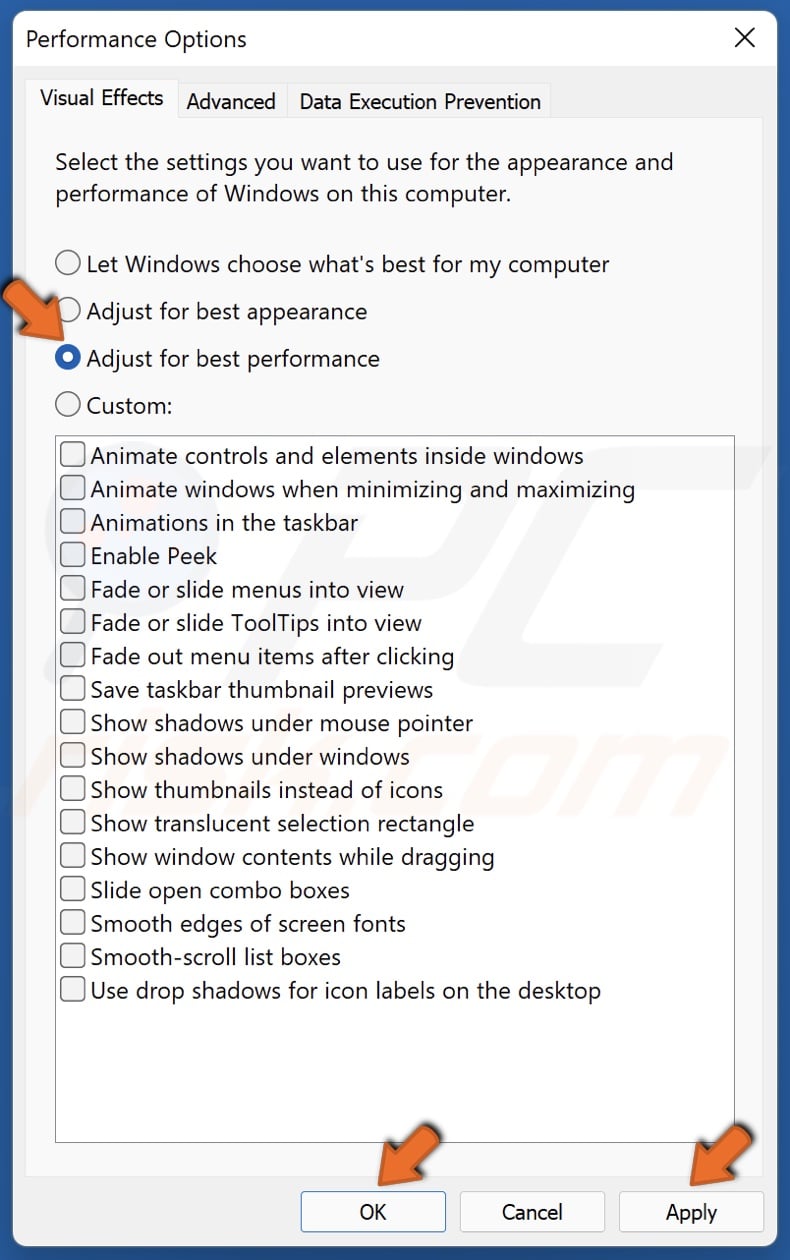
5. Tick the Adjust for best performance option.
6. Click Apply and click OK.
7. Alternatively, you can select Custom and only disable the options you want.
If none of the proposed methods work, try turning off Fast startup in Windows 11 Power Options and uninstalling the Xbox Game Bar. If you haven’t tried that already, try changing the background image to a solid color and disabling Transparency effects in Personalization settings.
Share:

Rimvydas Iliavicius
Researcher, author
Rimvydas is a researcher with over four years of experience in the cybersecurity industry. He attended Kaunas University of Technology and graduated with a Master's degree in Translation and Localization of Technical texts. His interests in computers and technology led him to become a versatile author in the IT industry. At PCrisk, he's responsible for writing in-depth how-to articles for Microsoft Windows.

▼ Show Discussion