FIX: File BCD Error 0xc0000098 in Windows 11

Get Free Scanner and check your computer for errors
Fix It NowTo fix found issues, you have to purchase the full version of Combo Cleaner. Free trial available. Combo Cleaner is owned and operated by Rcs Lt, the parent company of PCRisk.com read more.
How to Fix the BCD Error Code 0xc0000098 in Windows 11
Error code 0xc0000098 occurs due to a corrupted Boot Configuration Data (BCD) file. Consequently, Windows 11 won’t boot up. This article contains several methods to help you fix this error.
A corrupted (BCD) file means that Windows 11 is unable to load the operating system because the BCD file doesn’t contain any entry of it.
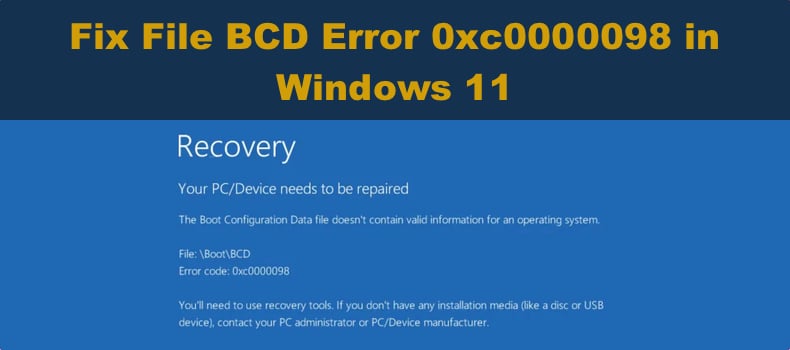
When the BCD is corrupted, Windows 11 won’t boot up and will show you the following error message:
Your PC/Device needs to be repaired.
The Boot Configuration Data file doesn’t contain valid information for an operating system.
File: \BCD
Error code: 0xc0000098
What Causes BCD Error Code 0xc0000098
- A change in the hardware
- A damaged hard drive
- Bad RAM
Fortunately, you can fix the corrupted BCD file. To do this, you will need to use a Windows recovery drive in the form of a Windows 11 Bootable USB Drive or Windows 11 installation DVD disc.
Video Guide on How to Fix the BCD Error Code 0xc0000098
Table of Contents:
- Introduction
- Method 1. Repair the Master Boot Record (MBR), Boot Sector, and Boot Configuration Data (BCD)
- Method 2. Run Startup Repair
- Method 3. Run the System File Checker (SFC) Utility
- Method 4. Run a CHKDSK Scan
- Video Guide on How to Fix the BCD Error Code 0xc0000098
Download Computer Malware Repair Tool
It is recommended to run a free scan with Combo Cleaner - a tool to detect viruses and malware on your device. You will need to purchase the full version to remove infections. Free trial available. Combo Cleaner is owned and operated by Rcs Lt, the parent company of PCRisk.com read more.
Method 1. Repair the Master Boot Record (MBR), Boot Sector, and Boot Configuration Data (BCD)
Insert a Windows 11 Bootable USB Drive or Windows 11 installation DVD into your PC.
Turn off your computer by holding down the power button for about 5 seconds. Then, press the power button again to turn it on. While in the post screen, press Del, Delete, F2 to F8, F10, or F12 (depending on the motherboard manufacturer) to enter the BIOS.
Once in the BIOS, navigate to Boot and set the bootable USB drive or CD-DVD ROM as the first boot device. Save the changes and exit the BIOS (typically by pressing F10).
Your PC will restart and boot into the Windows Installation Setup window.
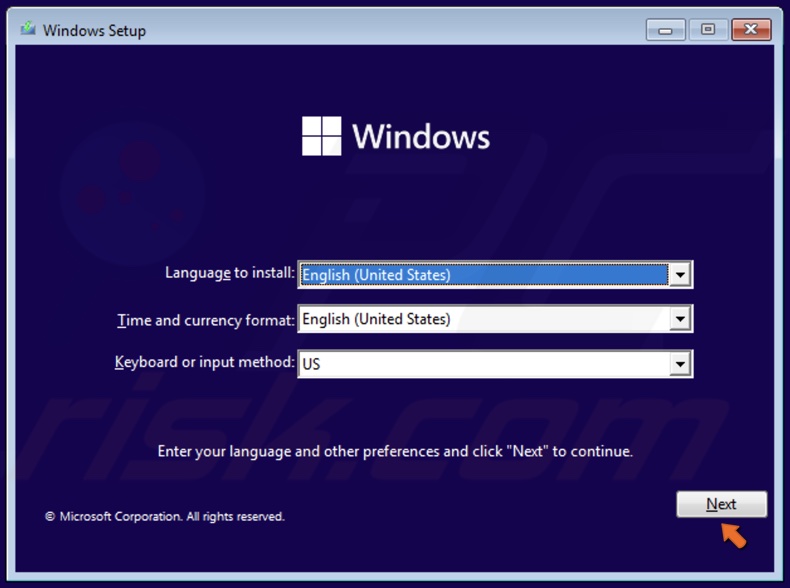
1. In the Windows Setup window, click Next.
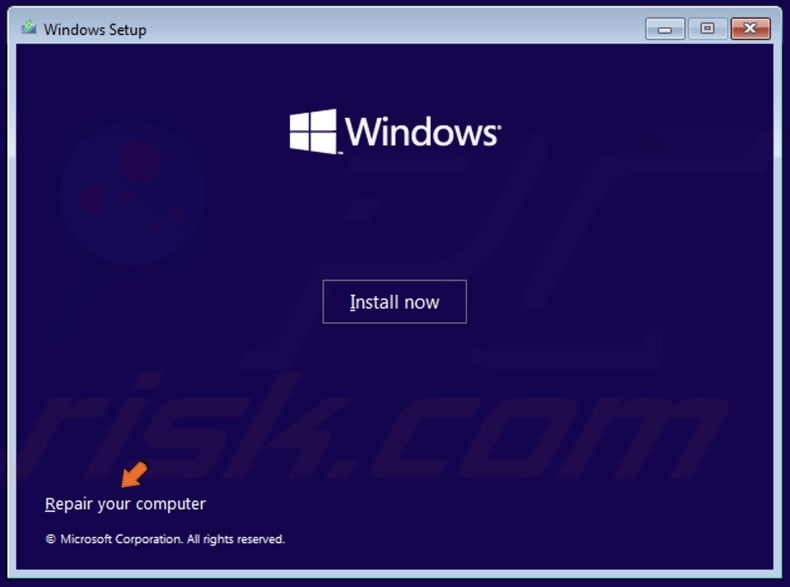
2. In the lower-left corner, click Repair your computer.
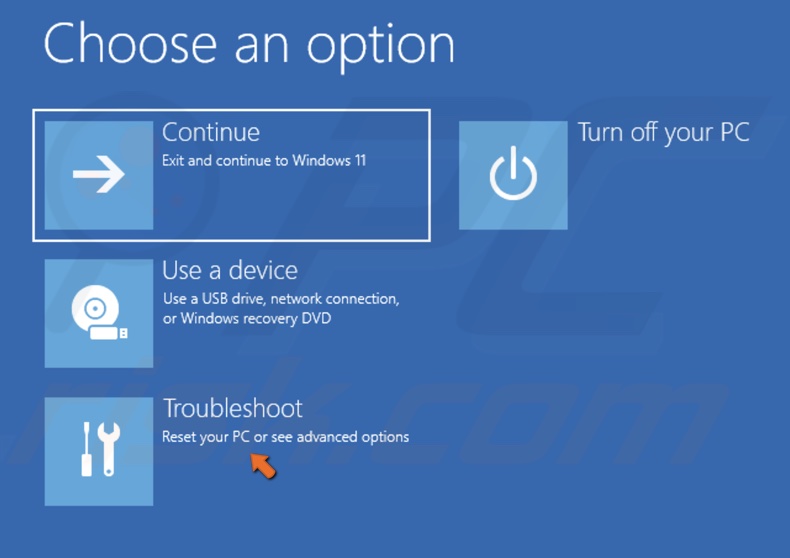
3. In the Choose an Option screen, select Troubleshoot.
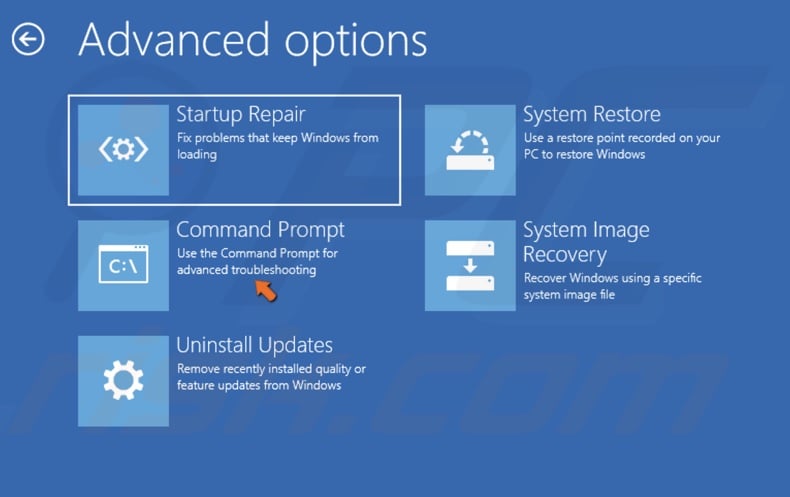
4. In the Advanced options screen, select Command Prompt.
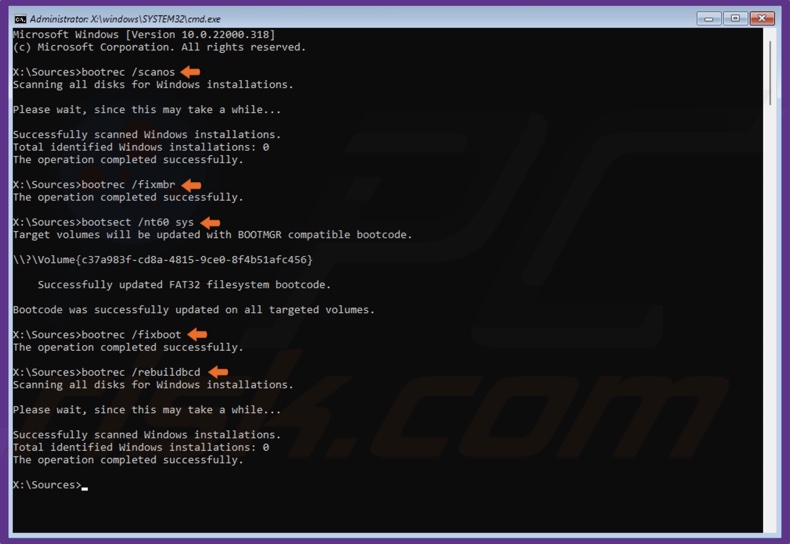
5. In the Command Prompt window, type in C: and press the Enter key.
6. Then, type in dir and press Enter.
7. Then, type in the following commands and press Enter after typing in each one.
- bootrec /scanos
- bootrec /fixmbr
- bootsect /nt60 sys
- bootrec /fixboot
- bootrec /rebuildbcd
8. Close the Command Prompt and click Continue.
Method 2. Run Startup Repair
1. In the Windows Setup window, click Next.
2. In the lower-left corner, click Repair your computer.
3. In the Choose an Option screen, select Troubleshoot.
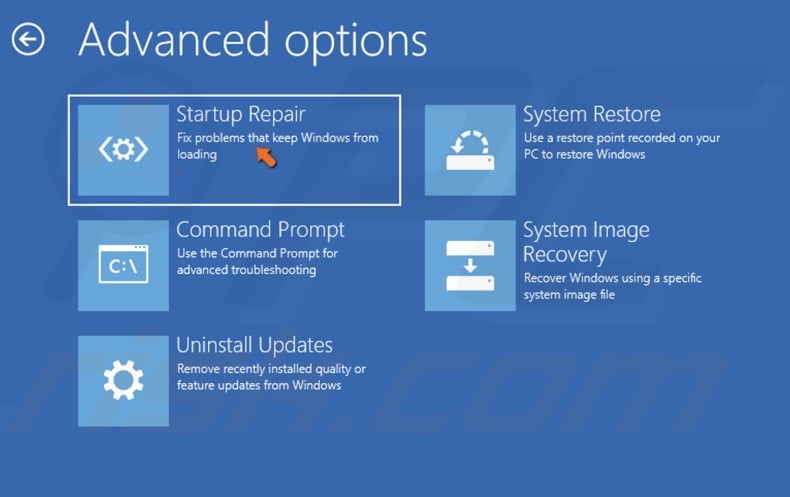
4. In the Advanced options screen, select Startup Repair.
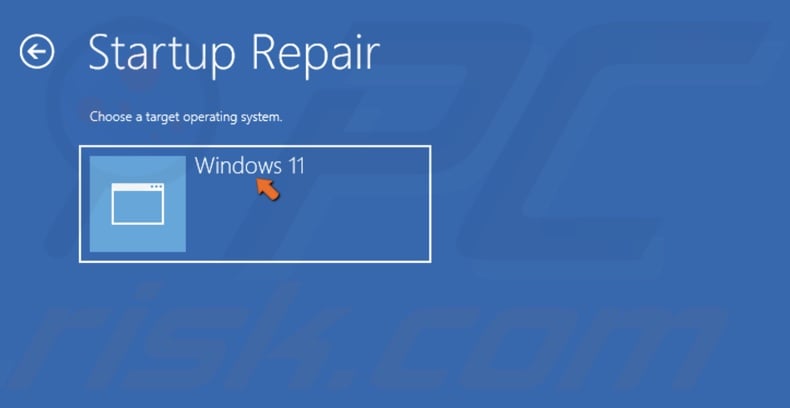
5. Select your operating system (Windows 11). The repair tool will begin diagnosing and repairing your PC.
Method 3. Run the System File Checker (SFC) Utility
1. In the Windows Setup window, click Next.
2. In the lower-left corner, click Repair your computer.
3. In the Choose an Option screen, select Troubleshoot.
4. In the Advanced options screen, select Command Prompt.
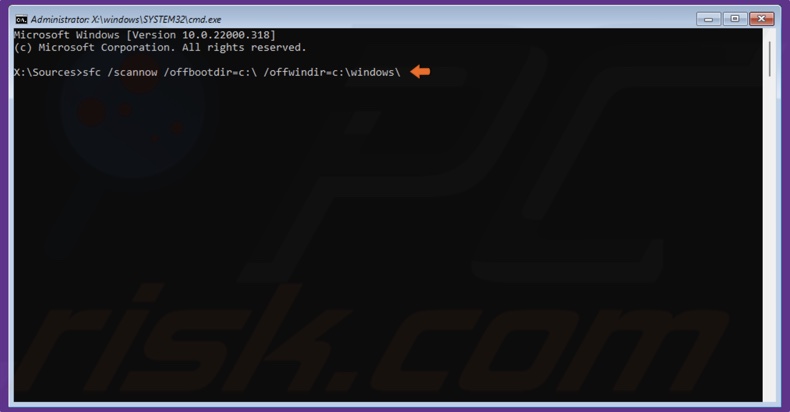
5. In the Command Prompt window, type in sfc /scannow /offbootdir=C:\ /offwindir=C:\Windows\ and press the Enter key.
Note: Replace C:\ with the letter of the drive where Windows is installed on your PC.
6. Wait for the SFC utility to scan and repair corrupted system files.
Method 4. Run a CHKDSK Scan
1. In the Windows Setup window, click Next.
2. In the lower-left corner, click Repair your computer.
3. In the Choose an Option screen, select Troubleshoot.
4. In the Advanced options screen, select Command Prompt.
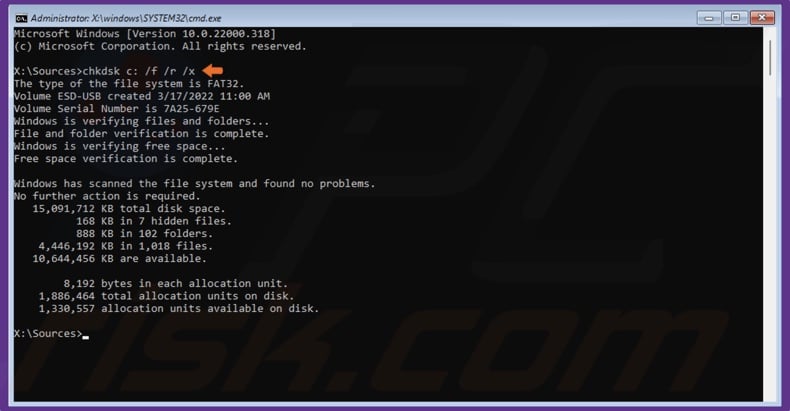
5. In the Command Prompt window, type in chkdsk C: /f /r /x and press the Enter key.
Note: Replace C: with the letter of the drive where Windows is installed on your PC.
6. Close the Command Prompt and click Continue.
Share:

Rimvydas Iliavicius
Researcher, author
Rimvydas is a researcher with over four years of experience in the cybersecurity industry. He attended Kaunas University of Technology and graduated with a Master's degree in Translation and Localization of Technical texts. His interests in computers and technology led him to become a versatile author in the IT industry. At PCrisk, he's responsible for writing in-depth how-to articles for Microsoft Windows.
▼ Show Discussion