FIX: The Local Security Authority cannot be contacted
Get Free Scanner and check your computer for errors
Fix It NowTo fix found issues, you have to purchase the full version of Combo Cleaner. Free trial available. Combo Cleaner is owned and operated by Rcs Lt, the parent company of PCRisk.com read more.
How to Fix “The Local Security Authority cannot be contacted” Error in Windows 11/10
“The Local Security Authority cannot be contacted” error occurs when logging in to another computer via a remote desktop connection. This article is dedicated to helping you resolve this problem.
When attempting to connect to a remote computer (such as Windows Server 2008, Windows Server 2012) using the Remote Desktop client (mstsc.exe), you may receive the following error message:
An authentication error has occurred.
The Local Security Authority cannot be contacted
Remote computer: XXX.XXX.XXX.XXX
This could be due to an expired password.
Please update your password if it has expired.
For assistance, contact your administrator or technical support.
What Causes “The Local Security Authority cannot be contacted” Error
- Remote desktop connections may be disabled on the host or client PC. The solution is to turn the remote desktop feature on.
- DNS address misconfiguration. The solution is to set up another DNS server address.
- IP and DNS address conflicts.
- An update to fix Windows 10 and Windows Server remote desktop vulnerability prevents connecting to older Windows versions.
Table of Contents:
- Introduction
- Method 1. Allow the Connection in System Properties
- Method 2. Allow the Connection in Group Policy Editor
- Method 3. Change Your DNS Server Address
- Method 4. Perform a DNS Flush
- Video Guide on How to Fix "The Local Security Authority cannot be contacted" Error
Download Computer Malware Repair Tool
It is recommended to run a free scan with Combo Cleaner - a tool to detect viruses and malware on your device. You will need to purchase the full version to remove infections. Free trial available. Combo Cleaner is owned and operated by Rcs Lt, the parent company of PCRisk.com read more.
Method 1. Allow the Connection in System Properties
1. Hold down Windows+R keys to open Run.
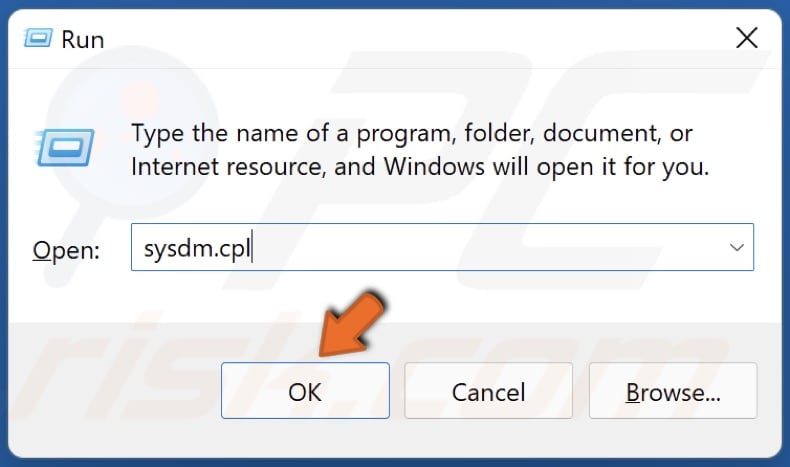
2. In the Run dialog box, type in sysdm.cpl and click OK.
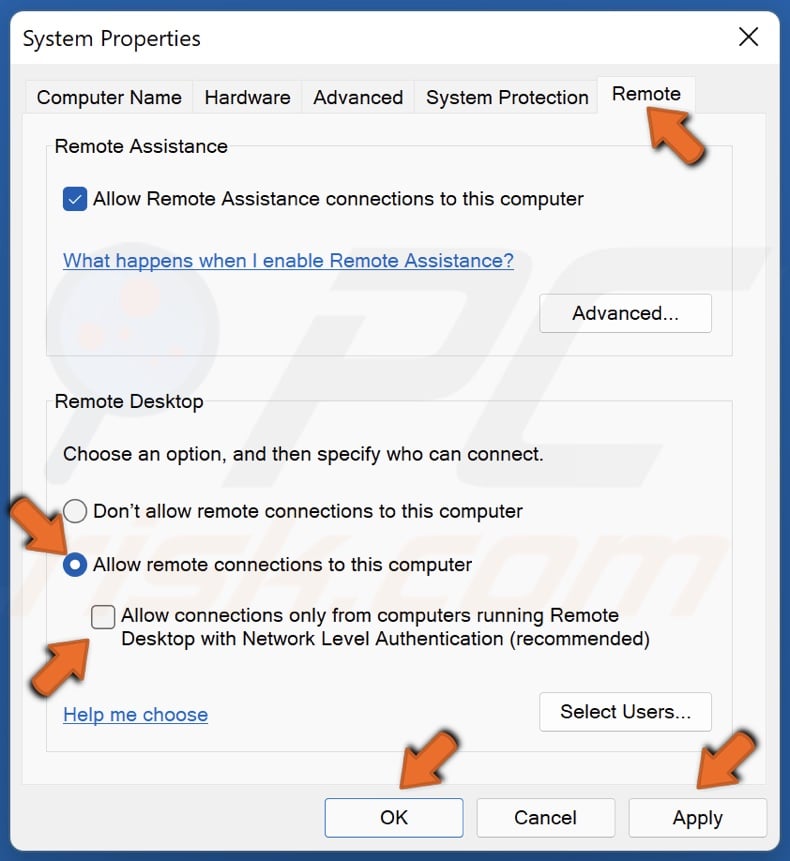
3. Navigate to the Remote tab.
4. Mark the Allow remote connections to this computer checkbox.
5. Deselect Allow connections only from running Remote Desktop with Network Level Authentication (recommended) option.
6. Click Apply and click OK.
Method 2. Allow the Connection in Group Policy Editor
Note that This solution is not applicable to Windows 10 Home Edition since the Home Edition does not have the Group Policy Editor.
1. Hold down Windows+R keys to open Run.
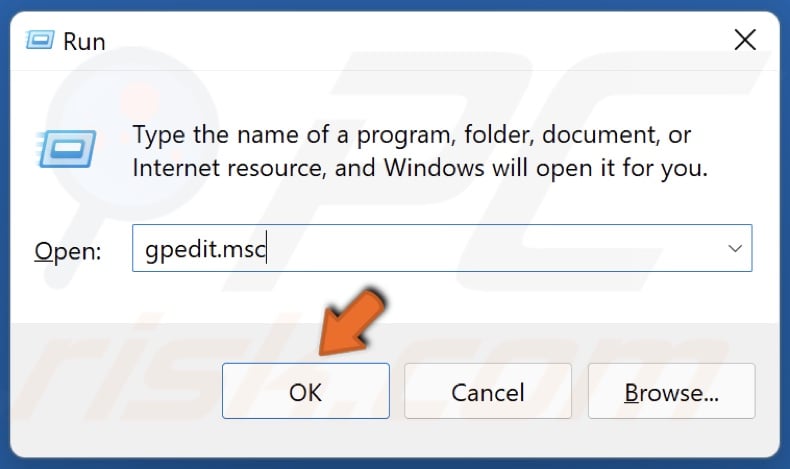
2. In the Run dialog box, type in gpedit.msc and click OK to open the Group Policy Editor.
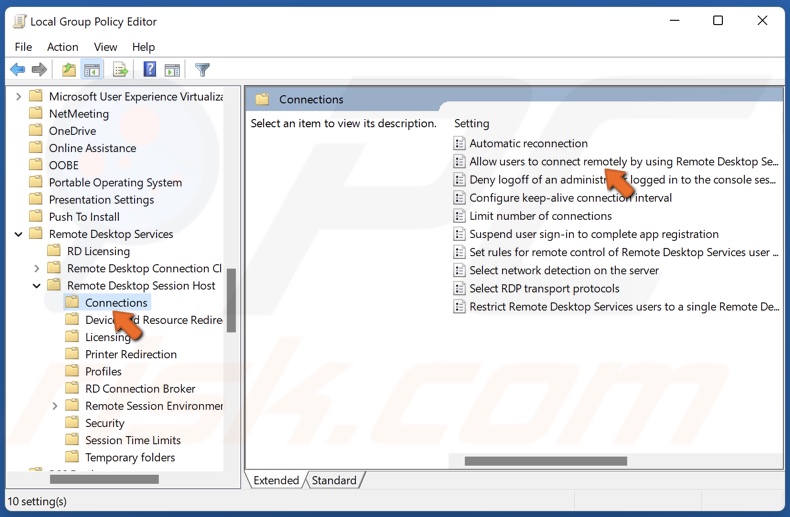
3. Navigate to Computer Configuration\Administrative Templates\Windows Components\Remote Desktop Services\Remote Desktop Session Host\Connections
4. In the right pane, double-click Allow users to connect remotely by using Remote Desktop Services.
5. Tick Enabled.
6. Click Apply and click OK.
Method 3. Change Your DNS Server Address
1. Hold down Windows+R keys to open Run.
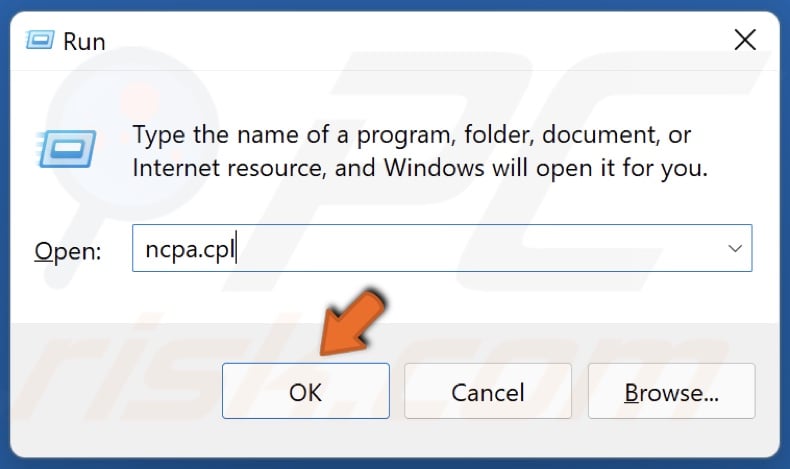
2. In the Run dialog box, type in ncpa.cpl and click OK.
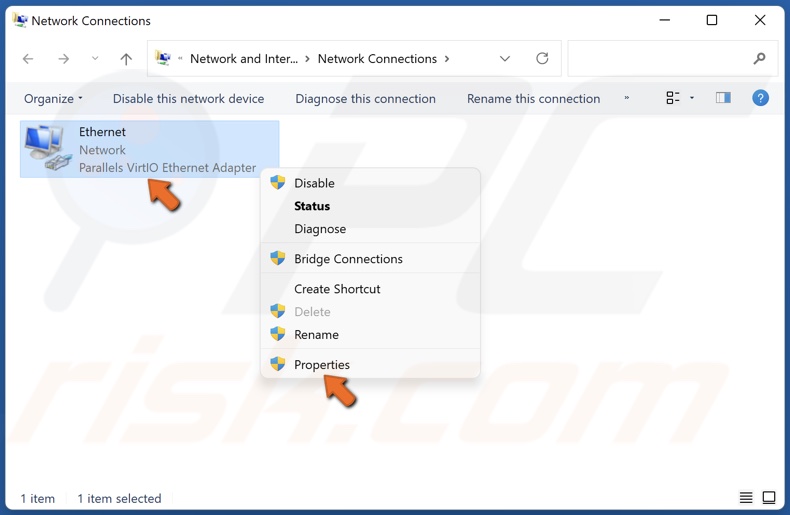
3. Right-click the network adapter and select Properties.
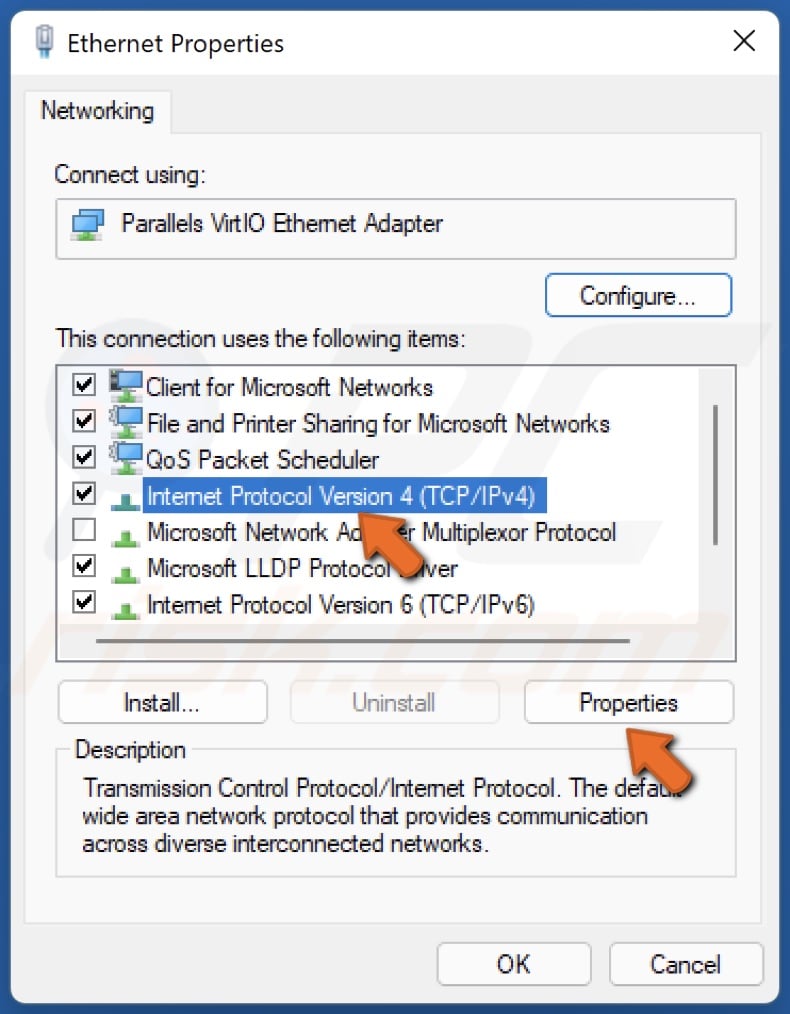
4. Select Internet Protocol Version 4 (TCP/IPv4) and click Properties.
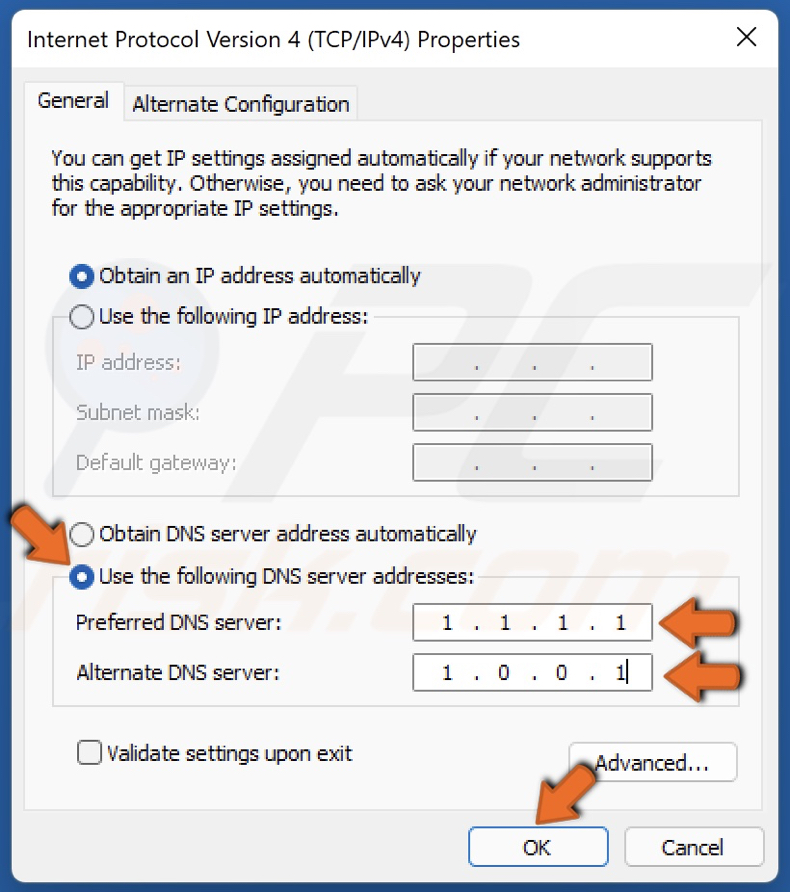
5. Tick the Use the following DNS server addresses option.
6. Enter the following addresses (or your preferred DNS addresses):
- In the Preferred DNS server, type in 1.1.1.1
- In the Alternate DNS server, type in 1.0.0.1
7. Click OK to save settings.
8. Restart your PC for the changes to take effect.
Method 4. Perform a DNS Flush
1. Hold down Windows+R keys to open Run.
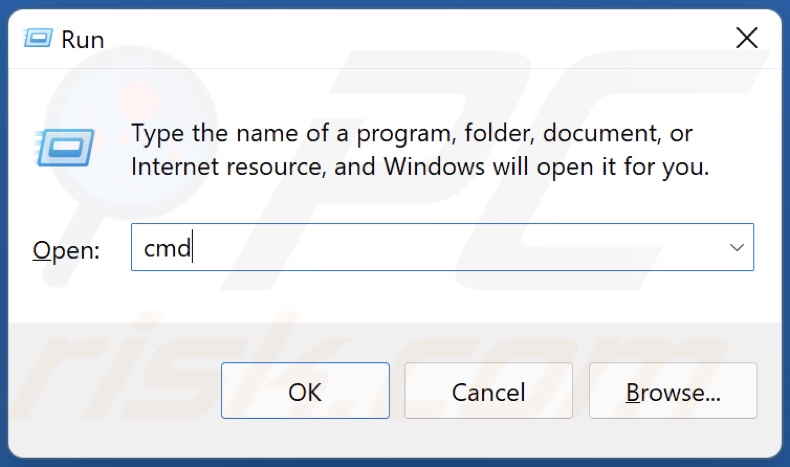
2. In the Run dialog box, type in CMD and hold down Ctrl+Shift+Enter keys to open the elevated Command Prompt.
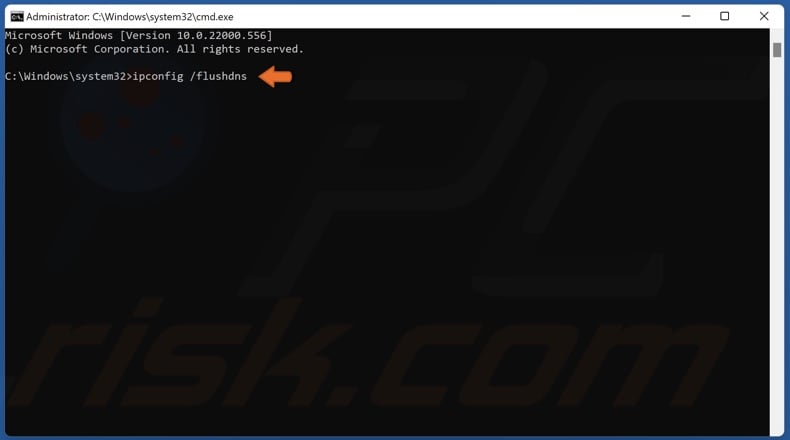
3. In the Command Prompt window, type in ipconfig /flushdns and press the Enter key. Running this command will clear the DNS cache files and reset the DNS resolver cache.
4. Close the Command Prompt.
Share:

Rimvydas Iliavicius
Researcher, author
Rimvydas is a researcher with over four years of experience in the cybersecurity industry. He attended Kaunas University of Technology and graduated with a Master's degree in Translation and Localization of Technical texts. His interests in computers and technology led him to become a versatile author in the IT industry. At PCrisk, he's responsible for writing in-depth how-to articles for Microsoft Windows.

▼ Show Discussion