Razer Cortex Not Opening | 5 Ways to Fix It

Get Free Scanner and check your computer for errors
Fix It NowTo fix found issues, you have to purchase the full version of Combo Cleaner. Free trial available. Combo Cleaner is owned and operated by Rcs Lt, the parent company of PCRisk.com read more.
How to Fix Razer Cortex Not Opening
Many Razer Cortex users often experience various problems with the app. For many, Razer Cortex won’t open. In this article, we will look at the different ways to fix this issue.

For many users, Razer Cortex would refuse to open upon starting it, i.e., nothing would happen. At the same time, the application can be seen running in the background in Task Manager. However, Some have reported getting the following error:
Impossible to connect to Razer Central, be sure to have it installed and try again.
Why Won’t Razer Cortex Open?
Missing administrative permissions. Cortex may not start properly if it’s missing administrative permissions. Starting the application as an administrator should fix the issue.
Corrupt/missing installation files. The program may not run properly if some of its files are missing or corrupt. The simple solution is to reinstall Razer Cortex and see if that fixes the issue.
Software bug. Razer isn’t known for their reliable software. Just like Razer Synapse, Cortex also has plenty of bugs. Users have found that running the program in compatibility mode, terminating all Cortex-related processes and then relaunching the app, and running Cortex from its destination folder sometimes help to get around the various bugs.
Video Guide on How to Fix Razer Cortex Not Opening
Table of Contents:
- Introduction
- Method 1. Run Razer Cortex as an Administrator
- Method 2. Run Razer Cortex in Compatibility Mode
- Method 3. End All Razer Cortex Processes and Relaunch It
- Method 4. Run the Razer Cortex Executable from the Destination Folder
- Method 5. Reinstall Razer Cortex
- Video Guide on How to Fix Razer Cortex Not Opening
Download Computer Malware Repair Tool
It is recommended to run a free scan with Combo Cleaner - a tool to detect viruses and malware on your device. You will need to purchase the full version to remove infections. Free trial available. Combo Cleaner is owned and operated by Rcs Lt, the parent company of PCRisk.com read more.
Method 1. Run Razer Cortex as an Administrator
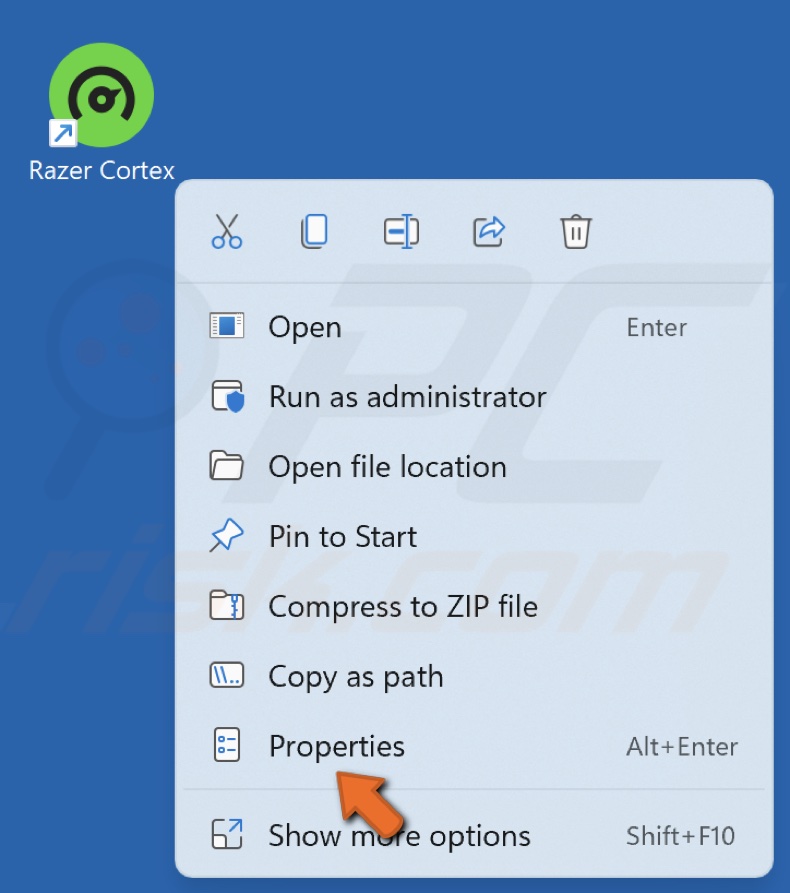
1. Right-click the Cortex desktop shortcut and click Properties.
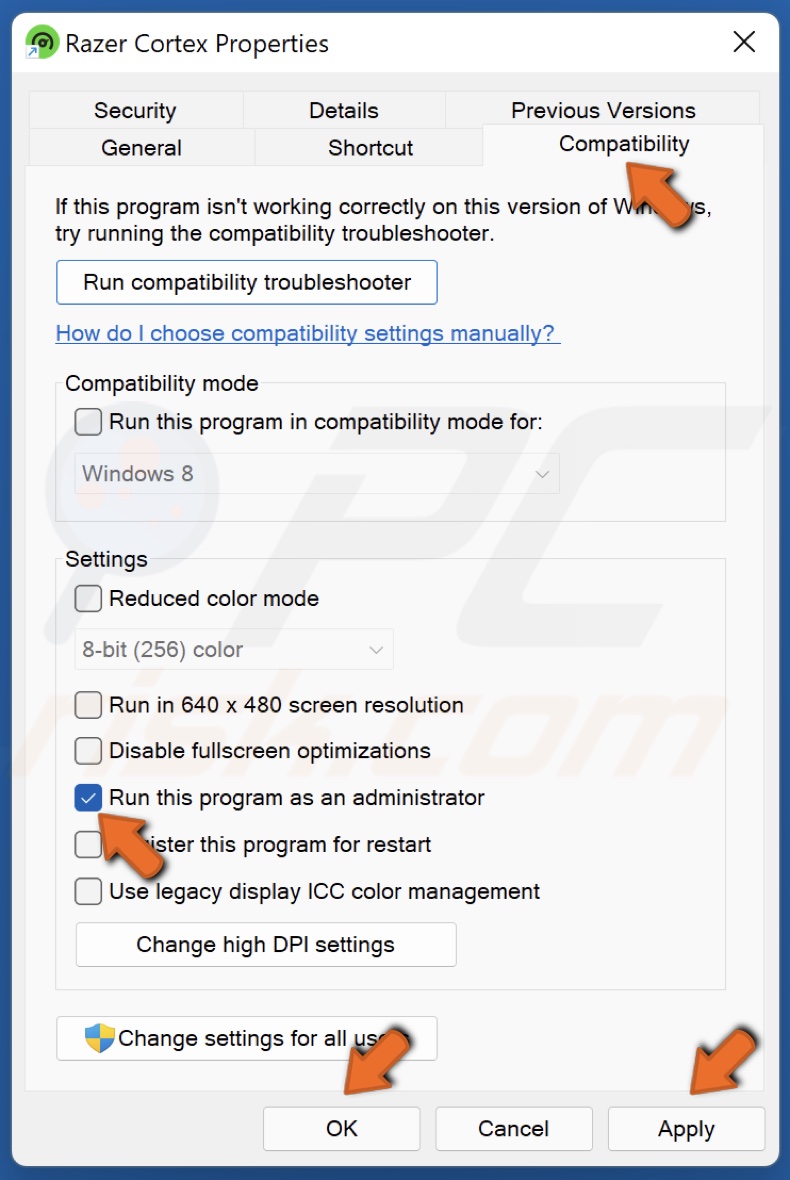
2. Navigate to the Compatibility tab.
3. Mark the checkbox next to the Run this program as an administrator option.
4. Click Apply and click OK.
Method 2. Run Razer Cortex in Compatibility Mode
Running the application in compatibility mode should fix the issue. Try running in compatibility mode as Windows 7 or Windows 8. If you’re running Windows 11, try running it as Windows 8.
1. Right-click the Cortex desktop shortcut and select Properties.
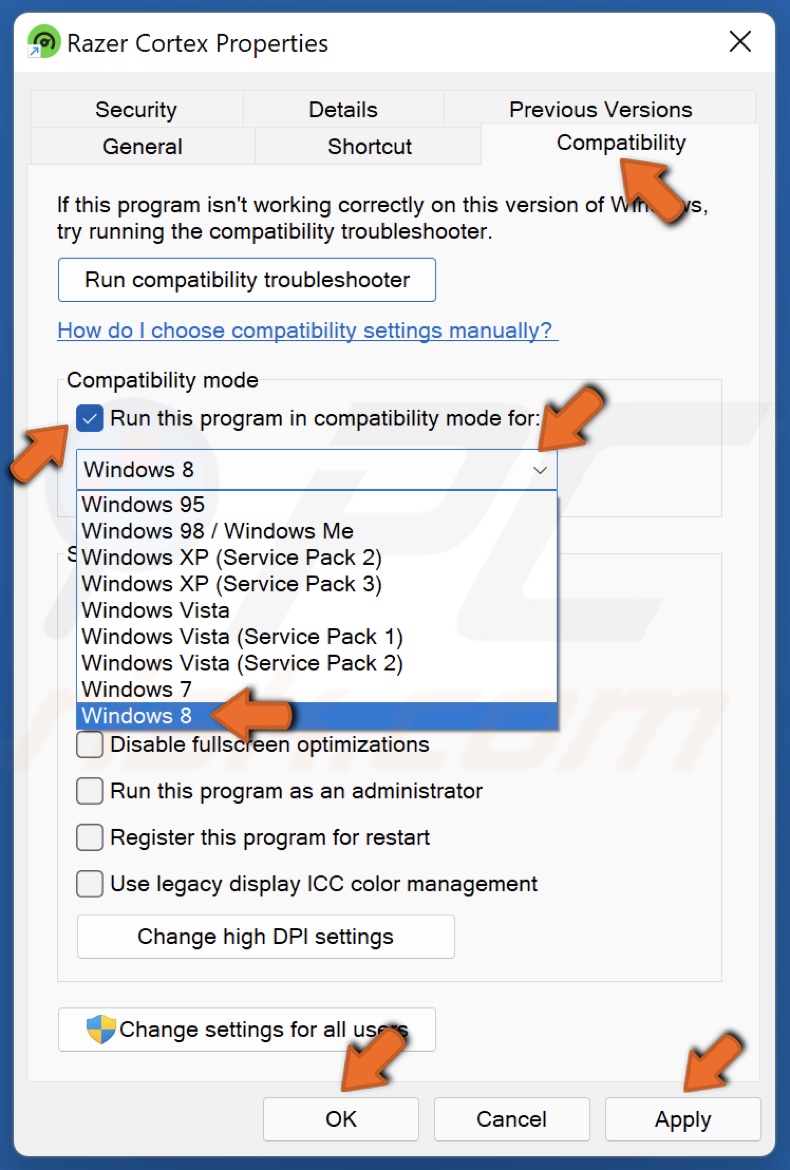
2. Go to the Compatibility tab.
3. Mark the Run this program in compatibility mode for option.
4. Select Windows 8 or Windows 7.
5. Click Apply and click OK.
Method 3. End All Razer Cortex Processes and Relaunch It
1. Hold down Ctrl+Shift+Esc keys to open Task Manager.
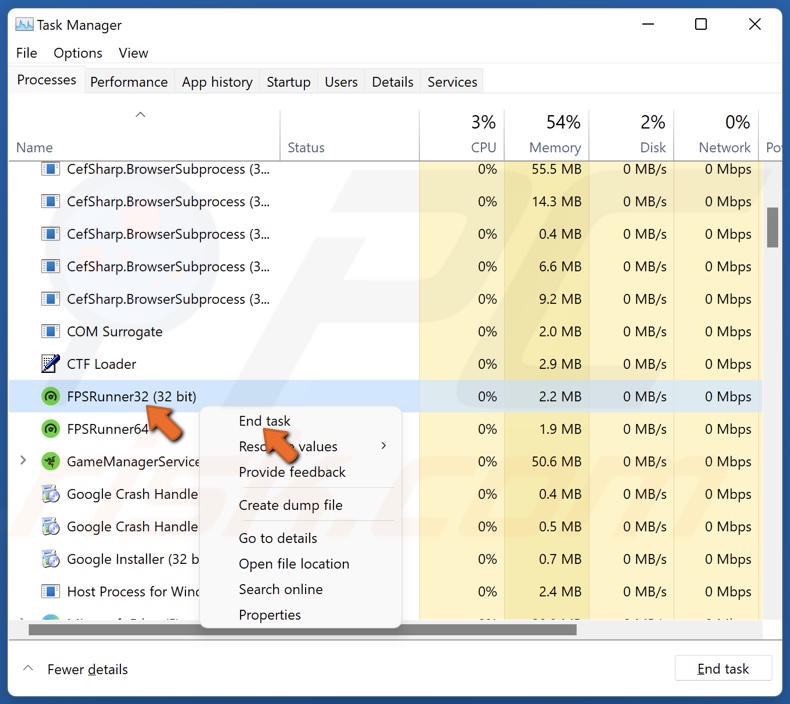
2. In the Processes tab, locate all Razer Cortex-related processes.
3. Right-click each process and click End task.
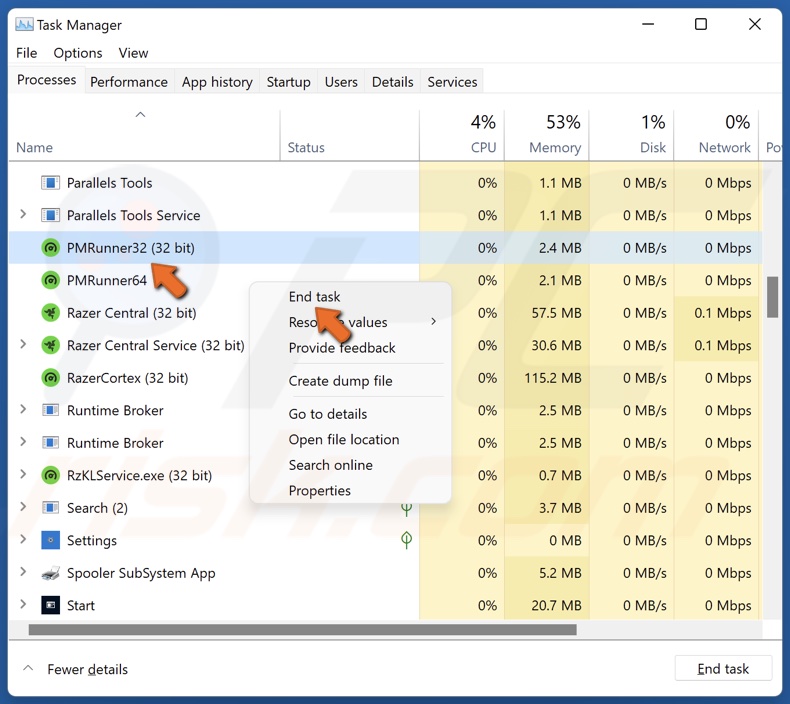
Make sure that no Cortex processes are running.
4. Launch the application again to see if that fixed the problem.
Method 4. Run the Razer Cortex Executable from the Destination Folder
1. Hold down Windows+E keys to open File Explorer.
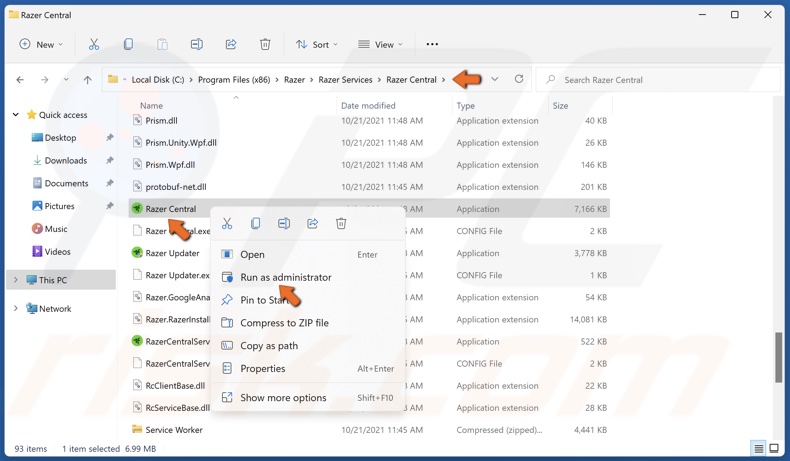
2. In the address bar, type in C:\Program Files (x86)\Razer\Razer Services\Razer Central and press the Enter key.
3. Find Razer Central.exe, right-click it, and click Run as administrator.
Method 5. Reinstall Razer Cortex
![]()
1. Navigate to the icon tray, right-click the Razer Cortex icon and click Exit All Apps.
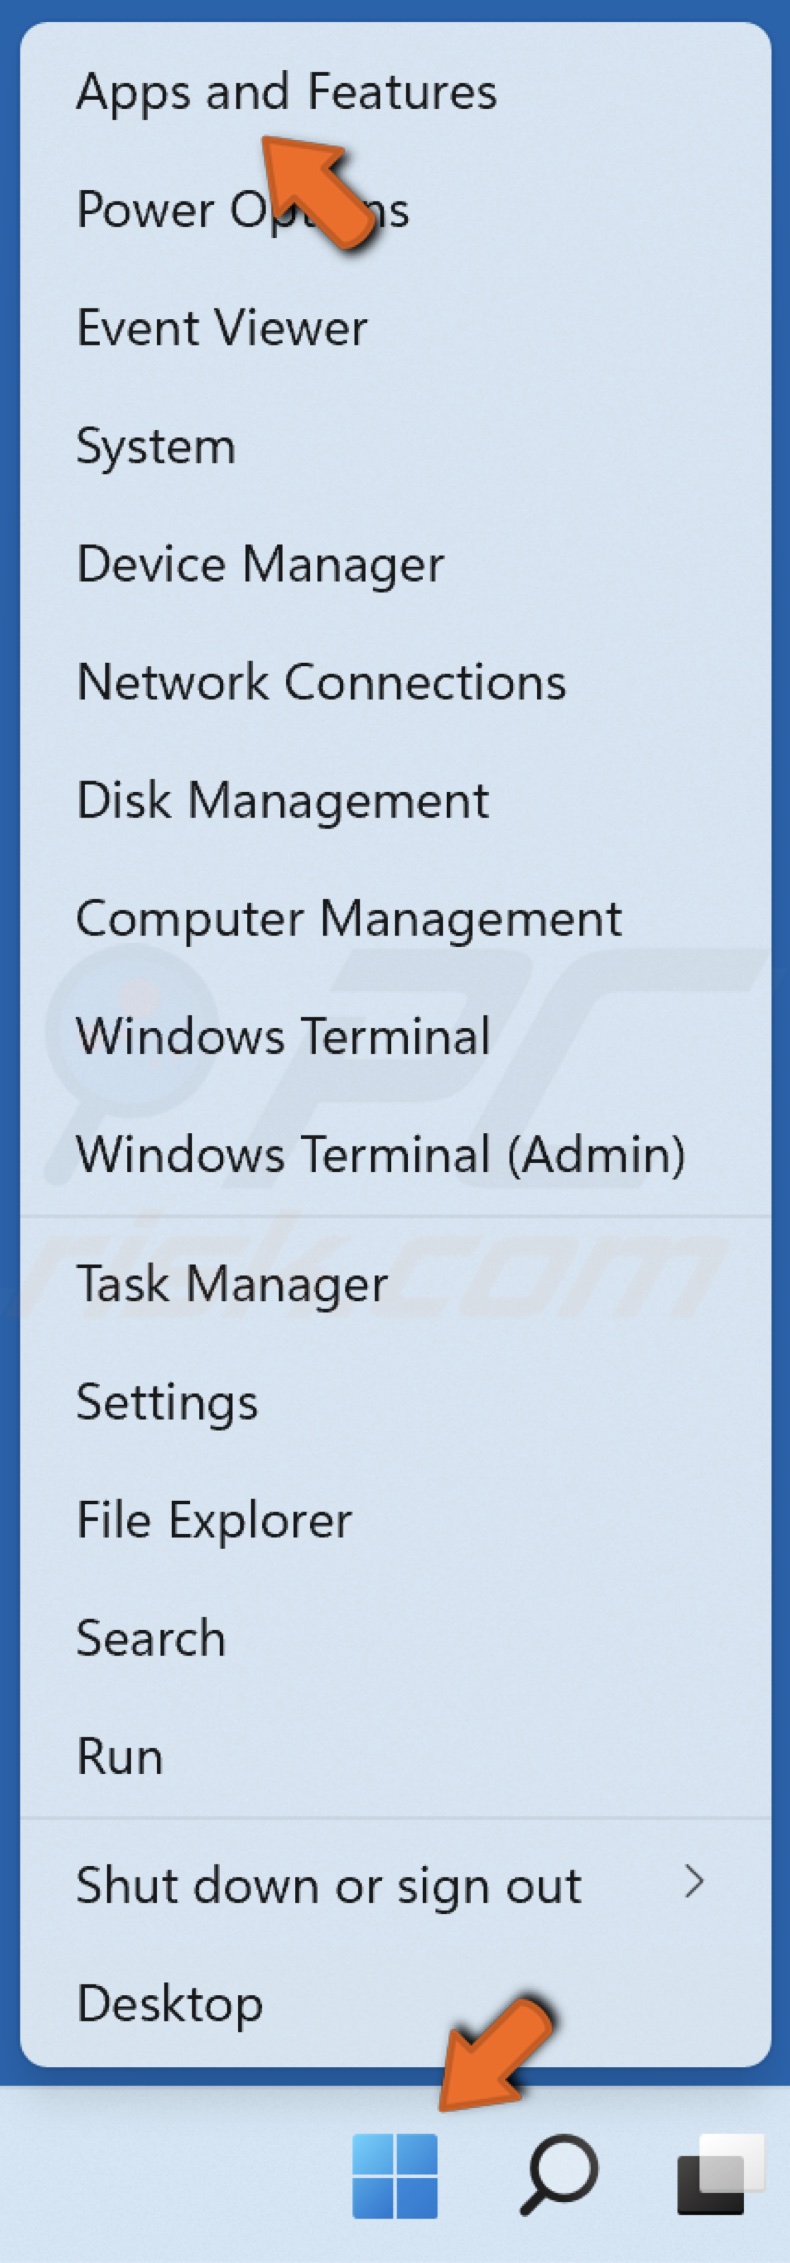
2. Right-click the Start button and select Apps and Features.

3. Find Razer Cortex, click the ellipsis and click Uninstall.

4. Click Uninstall again.
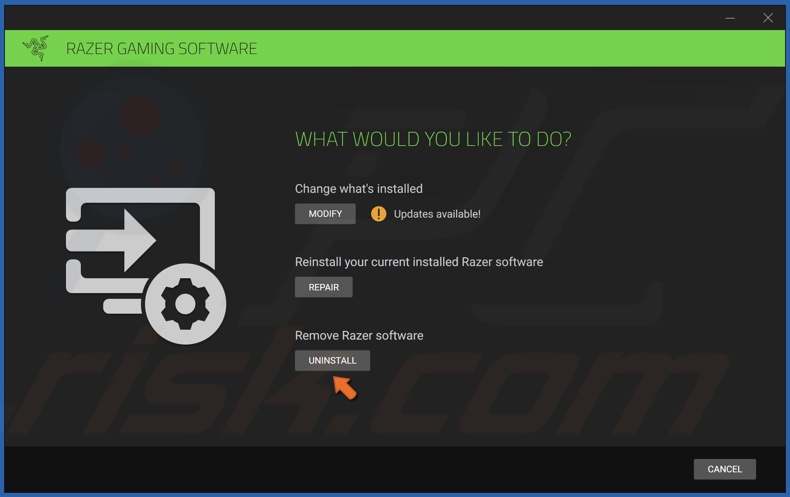
5. Click Uninstall.
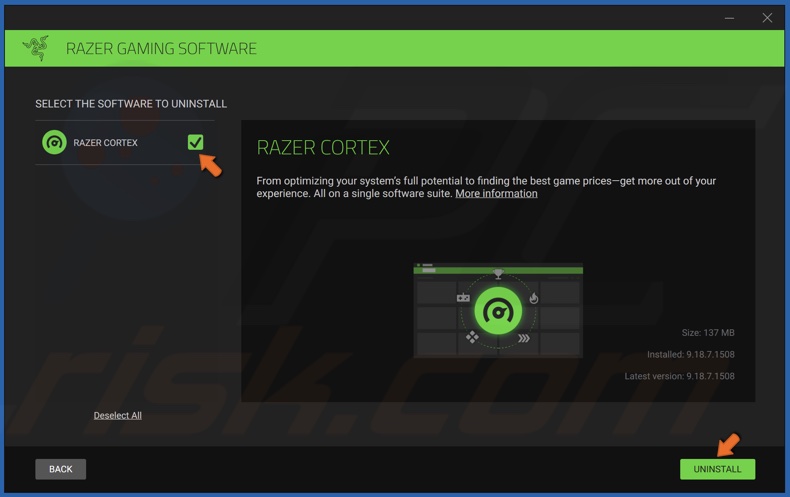
6. Select Razer Cortex and click Uninstall.
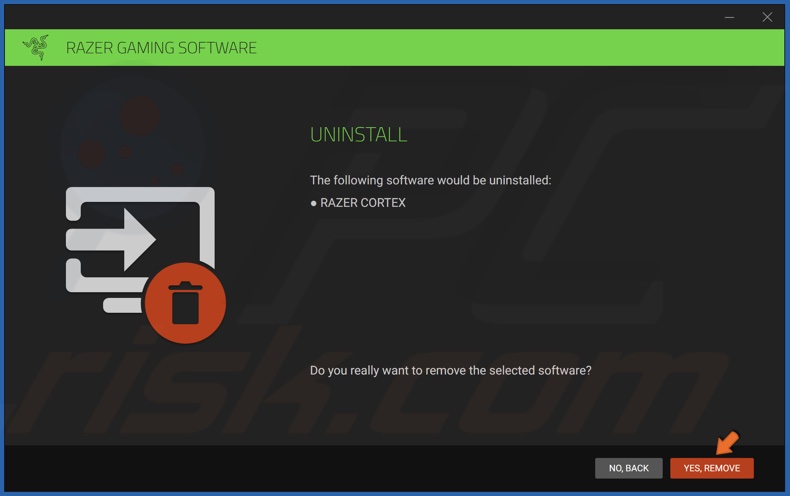
7. Click Yes, Remove.
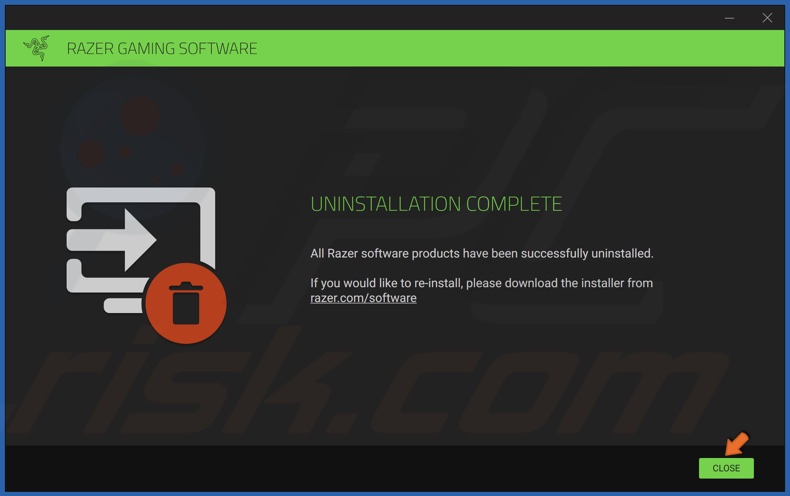
8. Click Close.
9. Hold down Windows+E keys to open File Explorer.
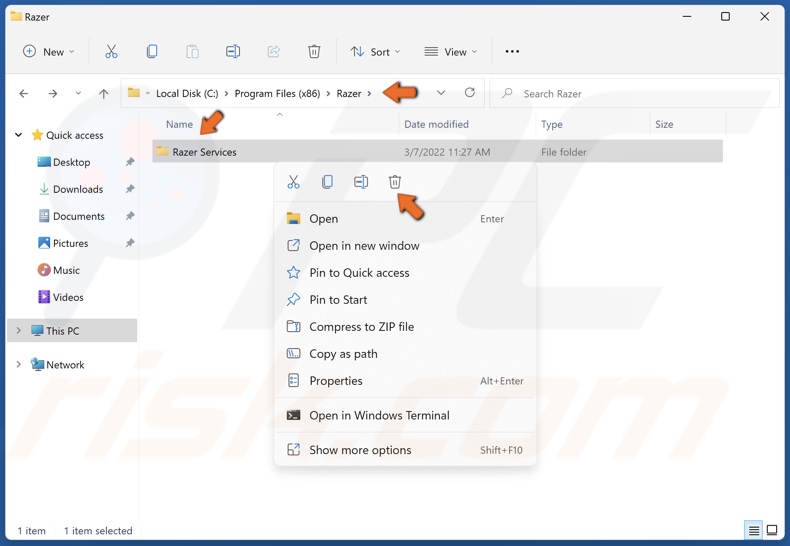
10. In the File Explorer address bar, type in C:\Program Files (x86)\Razer and press Enter.
11. Select all folders inside the Razer folder, right-click the selection, and click Delete.
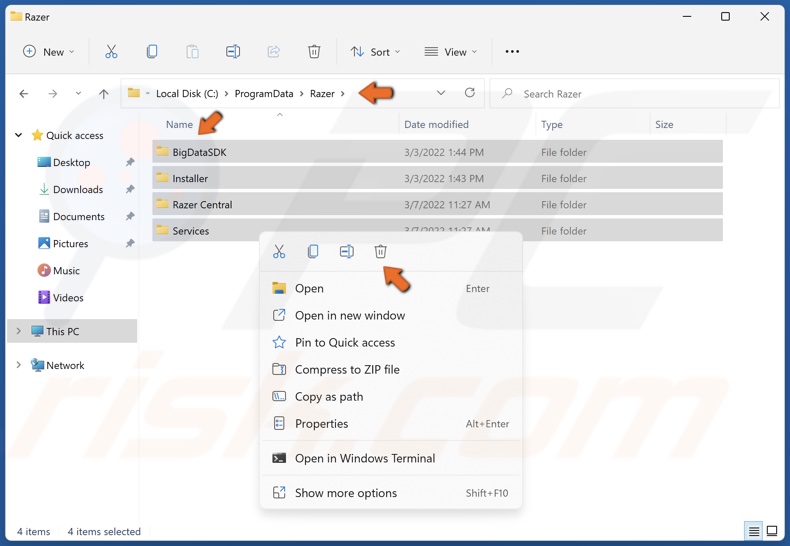
12. Then, in the File Explorer address bar, type in C:\ProgramData\Razer and press Enter.
13. Select all folders, right-click them and click Delete.
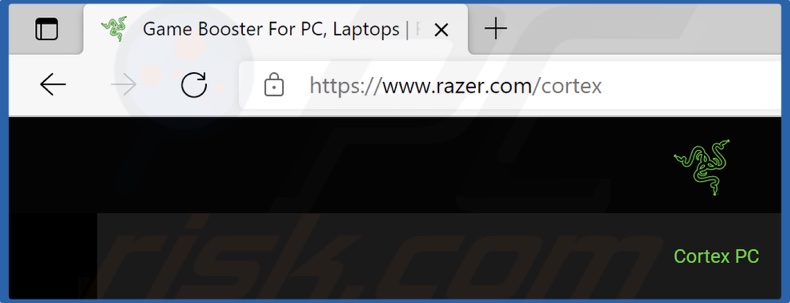
14. Open your web browser and go to the Razer Cortex website.

15. Click Download Now.
16. Run RazerCortexInstaller.exe once it’s downloaded.
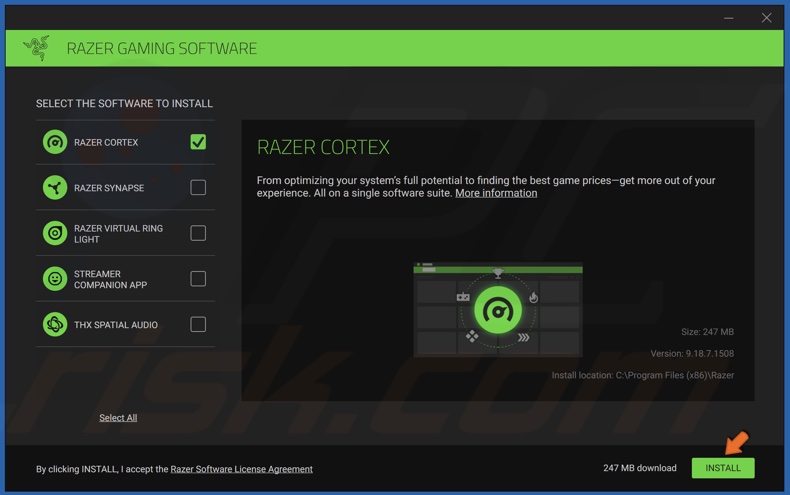
17. Click Install.
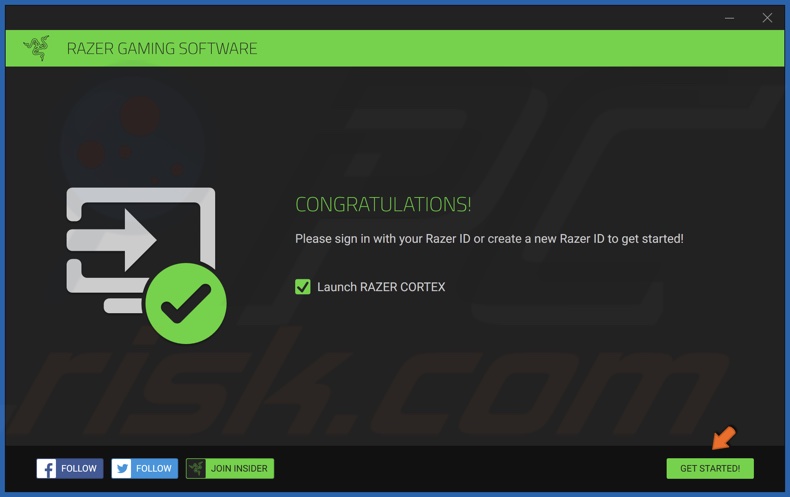
18. Click Get Started.

19. Click Log In.
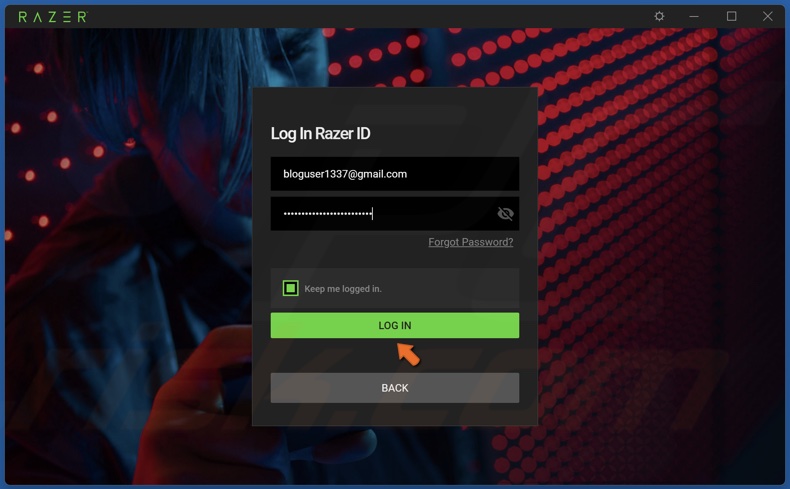
20. Enter your login credentials and click Log In.
Share:

Rimvydas Iliavicius
Researcher, author
Rimvydas is a researcher with over four years of experience in the cybersecurity industry. He attended Kaunas University of Technology and graduated with a Master's degree in Translation and Localization of Technical texts. His interests in computers and technology led him to become a versatile author in the IT industry. At PCrisk, he's responsible for writing in-depth how-to articles for Microsoft Windows.
▼ Show Discussion