How to Register DLL Files in Windows 11/10
Get Free Scanner and check your computer for errors
Fix It NowTo fix found issues, you have to purchase the full version of Combo Cleaner. Free trial available. Combo Cleaner is owned and operated by Rcs Lt, the parent company of PCRisk.com read more.
How to Register/Re-register DLL Files in Windows 10 and Windows 11
Sometimes users experience problems such as running certain applications and need to register a DLL file or multiple DLL files manually. This article will show you how to register DLL files in Windows 10 (64 and 32-bit versions) and Windows 11.
DLL stands for Dynamic Link Library. A DLL file includes a combination of multiple files. DLLs help applications find the right libraries to perform the operations they were designed to perform.
In most cases, the libraries are already on your system, and the DLL files direct the application to the libraries. DLL files are created to prevent duplicate files with the same functions.
However, most DLL files don’t support registration or are already registered. You can’t register DLL files that came pre-installed on Windows because Windows updates fix all outdated and corrupted DLLs.
Third-party libraries and DLL files are registered during installation. Unfortunately, when you install an application, its DLL files may not register and prevent the application from accessing the libraries via DLLs. Registering DLL files can fix startup problems of applications or games that require specific DLL files to work.
Registering DLL files means storing the DLL file information into the Windows registry. DLL files can be registered using the Regsvr32 tool.
The Regsvr32 tool is a command-line utility used for registering and un-registering DLL and OCX files. The tutorial found below will help you register DLL files in Windows 11, Windows 10, in 32-bit and 64-bit versions.
Video Tutorial on How to Register DLL Files in Windows
Table of Contents:
- Introduction
- Register a DLL File in Windows 32-bit
- Register a DLL File in Windows 64-bit
- Re-register All DLL Files on Your System
- Video Tutorial on How to Register DLL Files in Windows
Download Computer Malware Repair Tool
It is recommended to run a free scan with Combo Cleaner - a tool to detect viruses and malware on your device. You will need to purchase the full version to remove infections. Free trial available. Combo Cleaner is owned and operated by Rcs Lt, the parent company of PCRisk.com read more.
Register a DLL File in Windows 32-bit
1. Hold down Windows+R keys to open Run.
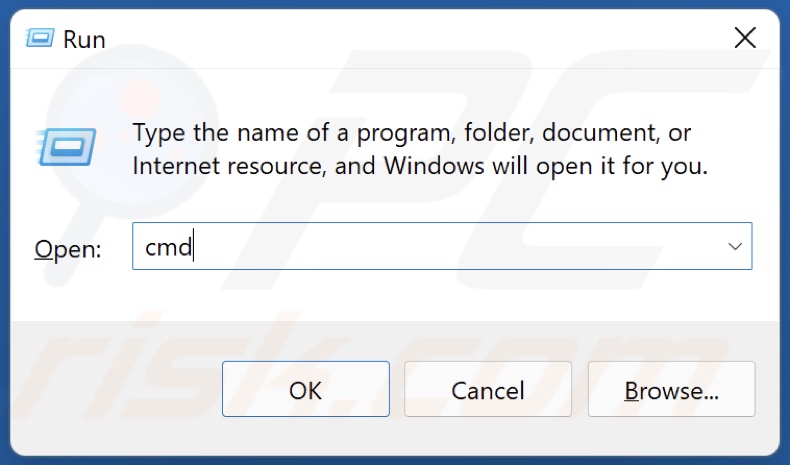
2. In the Run dialog box, type in CMD and hold down Ctrl+Shift+Enter keys to open the Command Prompt as an administrator.
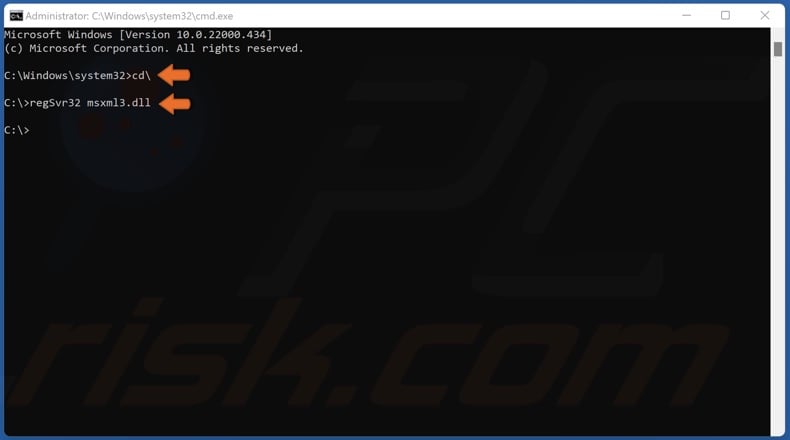
3. In the Command Prompt window, type in cd\ and press the Enter key.
4. Then, type in regSvr32 FileName.dll and press Enter. Substitute “FileName” with the name of the DLL file you want to register. For example, to register the “msxml3.dll” file, type in regSvr32 msxml3.dll and press Enter.
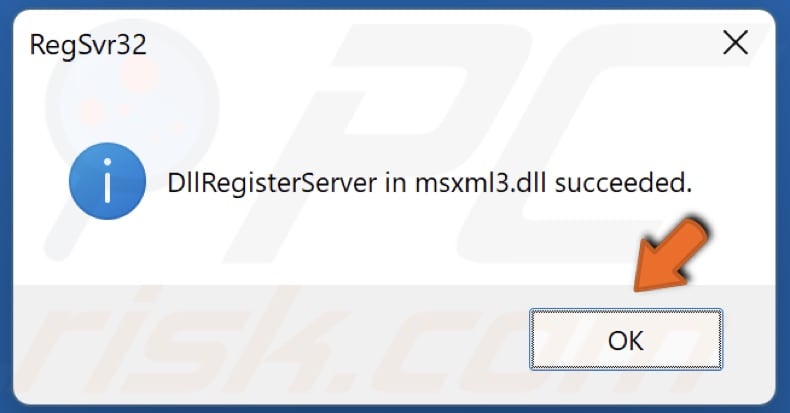
5. Click OK.
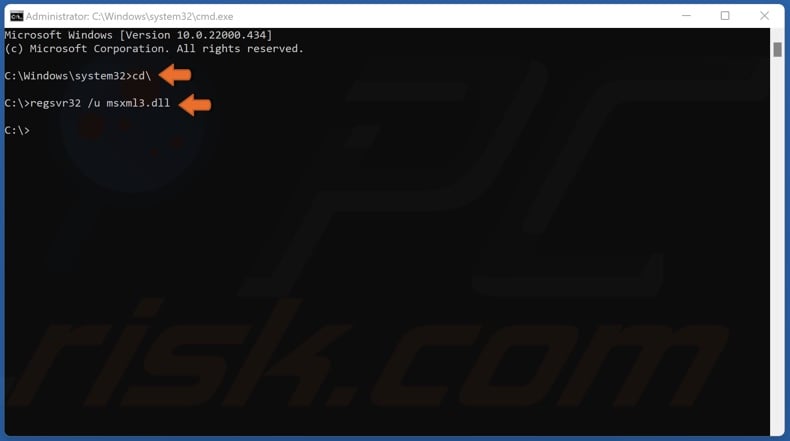
6. To unregister a file type in regSvr32 /u FileName.dll and press Enter.
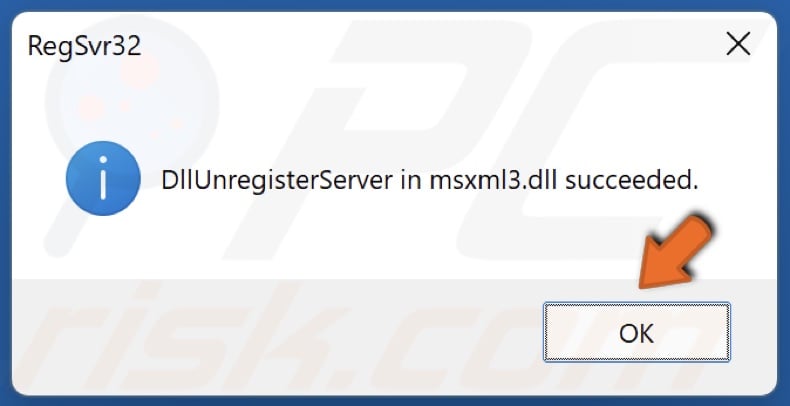
7. Click OK.
Note, if you get “The module “FileName.dll” was loaded but the entry point dllRegisterServer was not found error, it means that the file doesn’t need to be registered.
Register a DLL File in Windows 64-bit
1. Hold down Windows+R keys to open Run.

2. In the Run dialog box, type in CMD and hold down Ctrl+Shift+Enter keys to open the Command Prompt as an administrator.
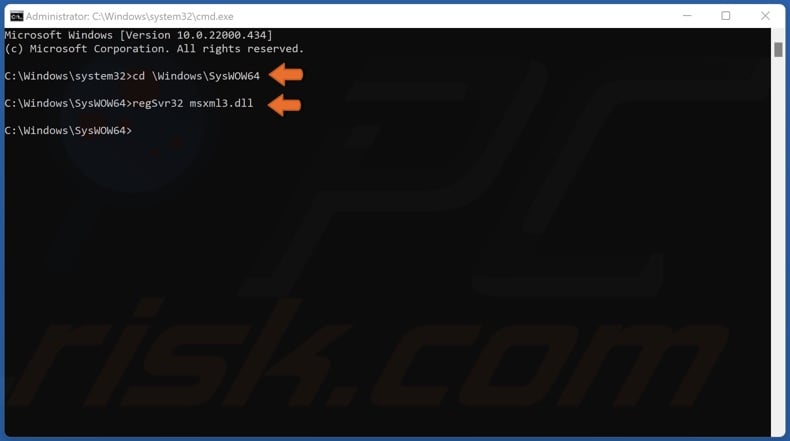
3. in the Command Prompt window, type in cd \Windows\SysWOW64 and press the Enter key.
4. Then, type in regSvr32 FileName.dll and press Enter. Substitute “FileName” with the name of the DLL file you want to register.

5. Click OK.
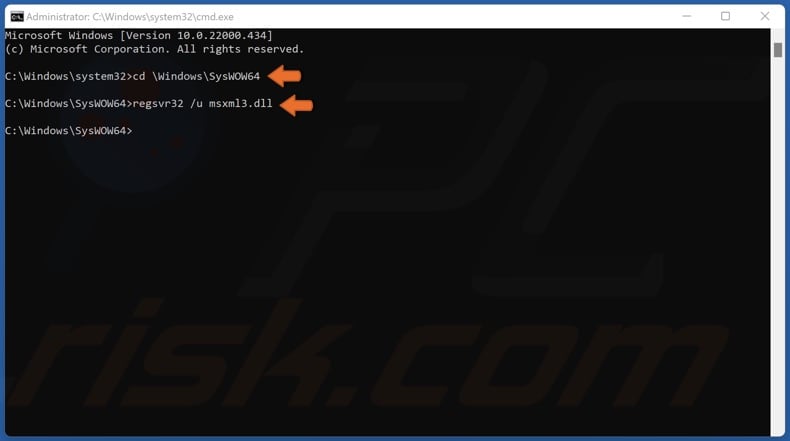
6. To unregister a file type in regSvr32 /u FileName.dll and press Enter.

7. Click OK.
Re-register All DLL Files on Your System
1. Hold down Windows+R keys to open Run.

2. In the run dialog box, type in CMD and hold down Ctrl+Shift+Enter keys to open the Command Prompt as an administrator.
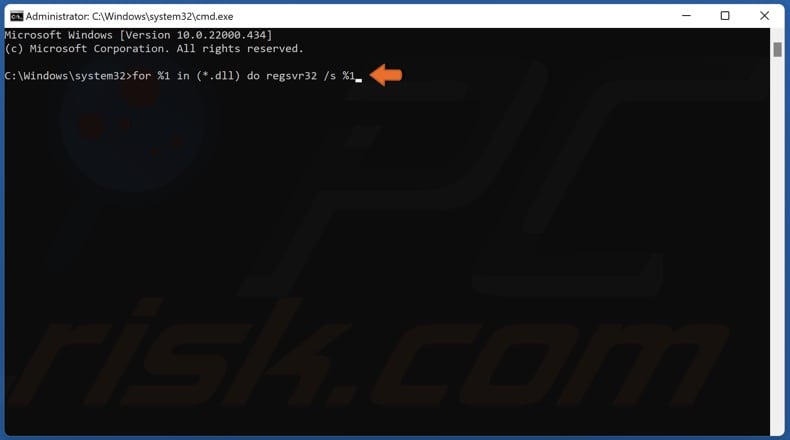
3. In the Command Prompt window, type in for %1 in (*.dll) do regsvr32 /s %1 and press Enter. Re-registering all .dll files will take some time.
Share:

Rimvydas Iliavicius
Researcher, author
Rimvydas is a researcher with over four years of experience in the cybersecurity industry. He attended Kaunas University of Technology and graduated with a Master's degree in Translation and Localization of Technical texts. His interests in computers and technology led him to become a versatile author in the IT industry. At PCrisk, he's responsible for writing in-depth how-to articles for Microsoft Windows.

▼ Show Discussion