5 Ways to Fix "The last USB device you connected to this computer malfunctioned" Error in Windows 11

Get Free Scanner and check your computer for errors
Fix It NowTo fix found issues, you have to purchase the full version of Combo Cleaner. Free trial available. Combo Cleaner is owned and operated by Rcs Lt, the parent company of PCRisk.com read more.
How to Fix "The last USB device you connected to this computer malfunctioned" Error in Windows 11
"USB device not recognized. The last USB device you connected to this computer malfunctioned, and Windows does not recognize it" is an error message that pops up when there's a problem with your USB device. However, that doesn't necessarily mean that the USB device is faulty. This article will show you how to fix this issue.
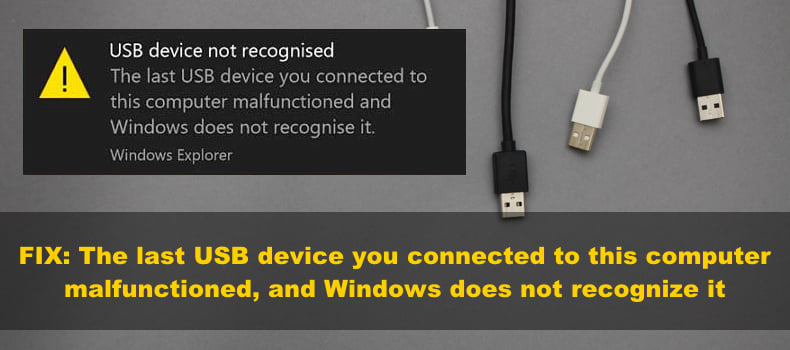
"USB device not recognized. The last USB device you connected to this computer malfunctioned, and Windows does not recognize it"
What Causes This Error
Unfortunately, the error doesn't provide any additional information to help identify the cause of the supposed malfunction. However, most of the time, this error is triggered by:
- An Incorrect device driver.
- A Malfunctioning USB port.
- The connected device is old, and the operating system doesn't recognize it.
If you're getting "USB device not recognized" error when you connect an external hard drive or USB drive, then it might occur because the driver was not partitioned.
Moreover, you may experience this error if you unplug the USB drive or external hard drive from your PC without ejecting it first. Doing this may also corrupt the data on the drive.
How to Fix This Error
To fix this error, follow the step-by-step instructions provided below. However, before you do that, make sure that the USB device is working correctly by connecting it to another USB port (preferably to a USB port at the back of the PC) or a different computer. Also, if the device comes with a separate cable, swap it for another one to make sure that the cable isn't faulty.
Video on How to Fix "The last USB device you connected to this computer malfunctioned" Error
Table of Contents:
- Introduction
- Method 1. Update/Reinstall the USB Root Hub Driver
- Method 2. Repair the USB Root Hub
- Method 3. Disable USB Selective Suspend Settings
- Method 4. Run the Hardware and Devices Troubleshooter
- Method 5. Assign a Letter to the USB Drive
- Video on How to Fix "The last USB device you connected to this computer malfunctioned" Error
Download Computer Malware Repair Tool
It is recommended to run a free scan with Combo Cleaner - a tool to detect viruses and malware on your device. You will need to purchase the full version to remove infections. Free trial available. Combo Cleaner is owned and operated by Rcs Lt, the parent company of PCRisk.com read more.
Method 1. Update/Reinstall the USB Root Hub Driver
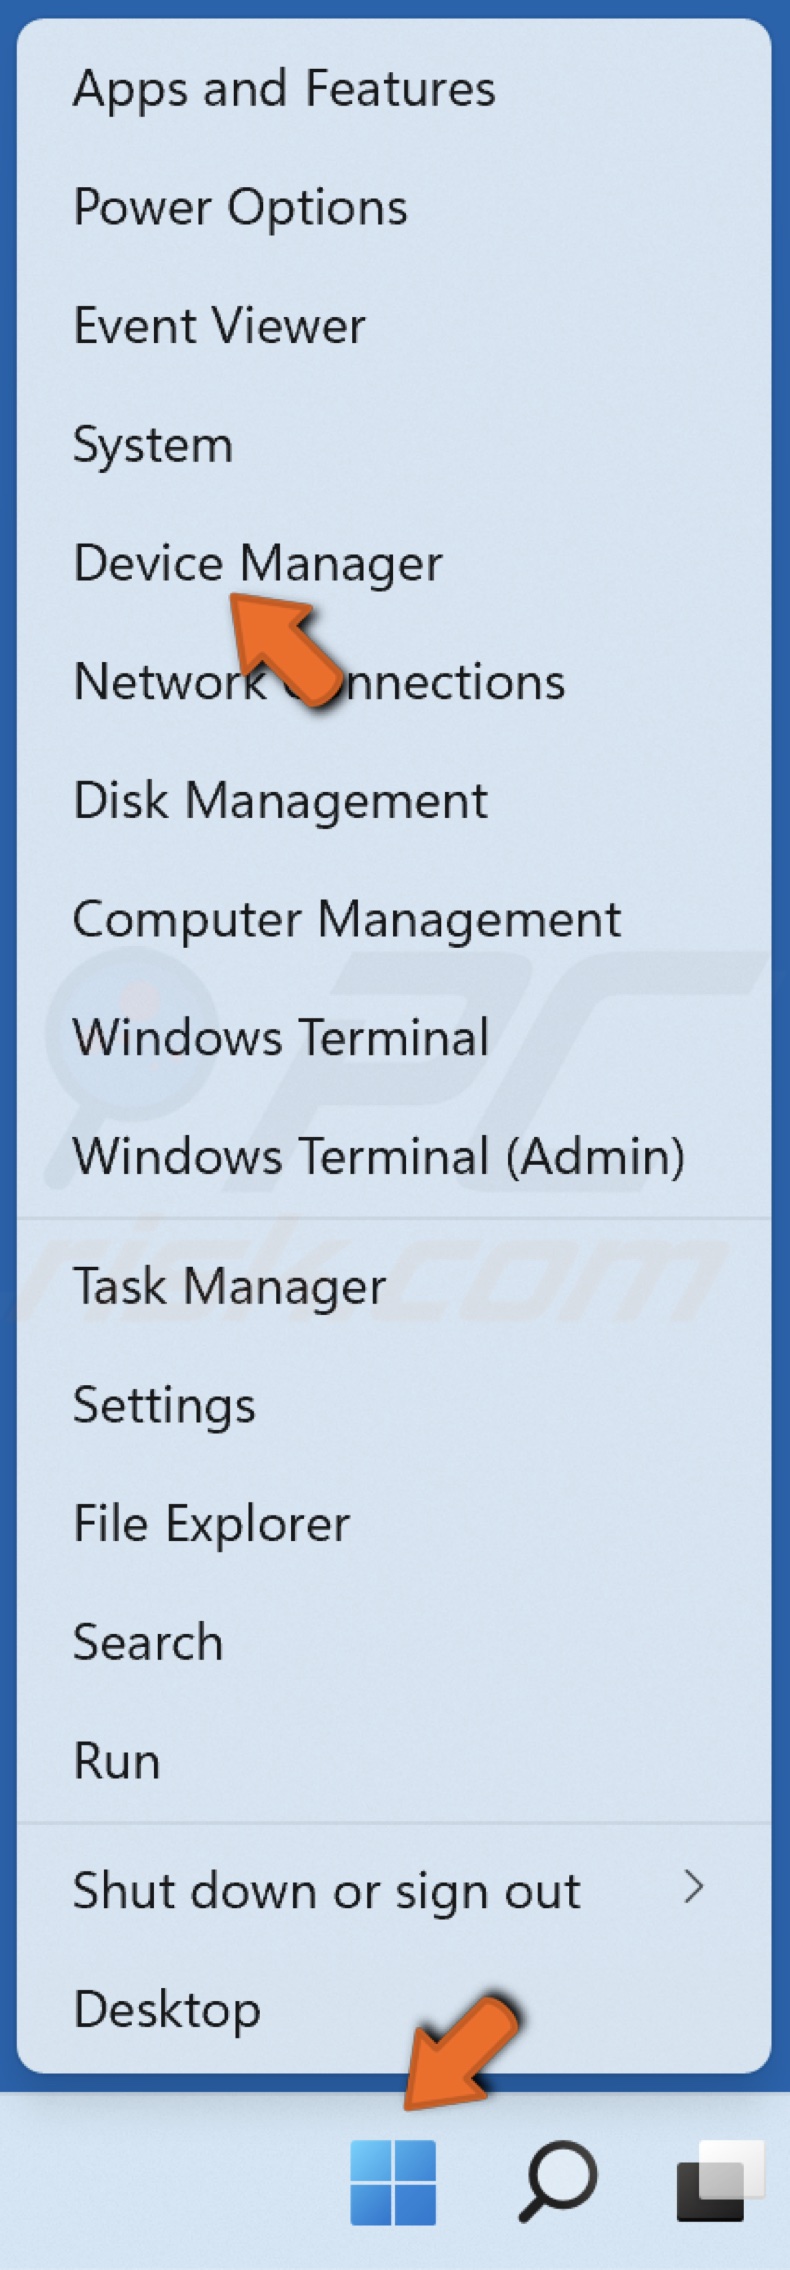
1. Right-click the Start menu button and select Device Manager.
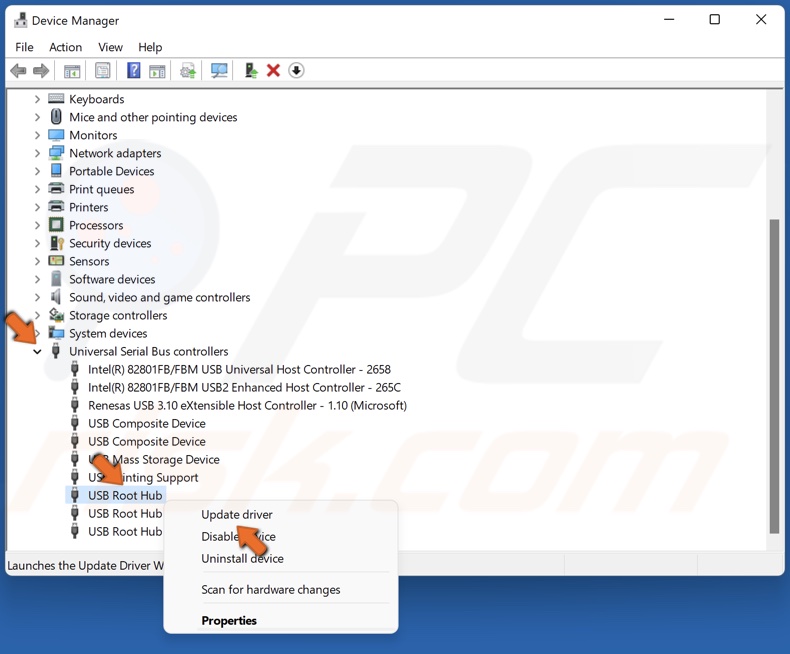
2. Expand the Universal Serial Bus controllers list.
3. Right-click the Generic USB Hub and click Update driver.
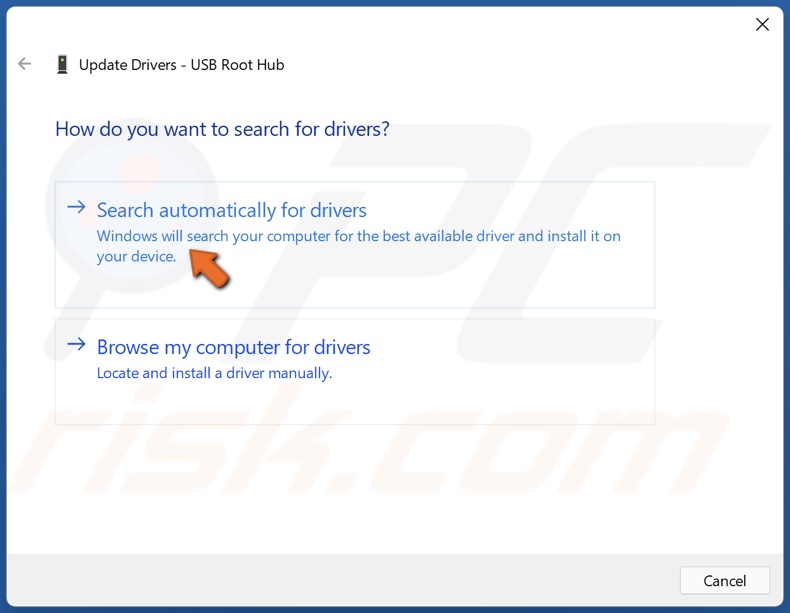
4. Select Search automatically for drivers.
5. Alternatively, you can select Browse my computer for drivers and install the correct driver downloaded from the device manufacturer's website.
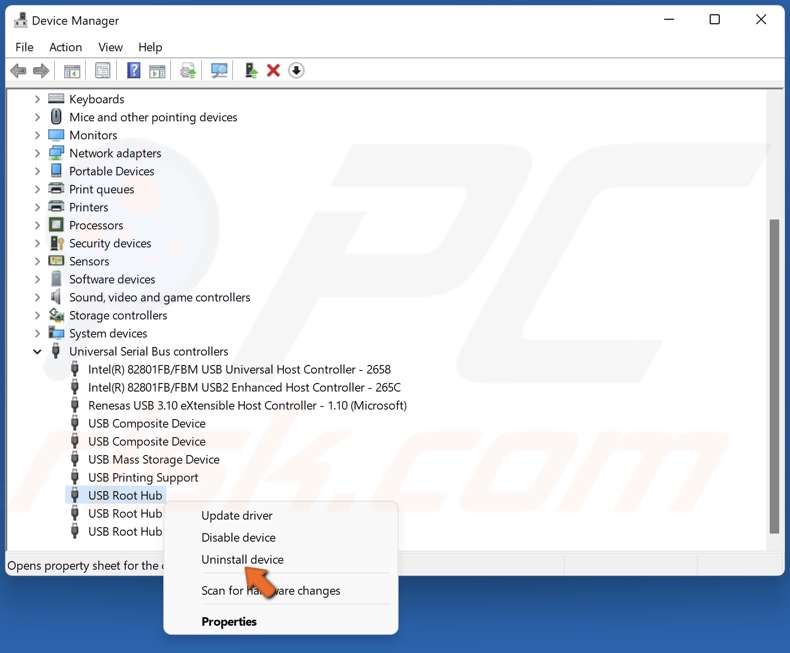
6. If updating the driver doesn’t fix the issue, right-click the Generic USB Hub and click Uninstall device.
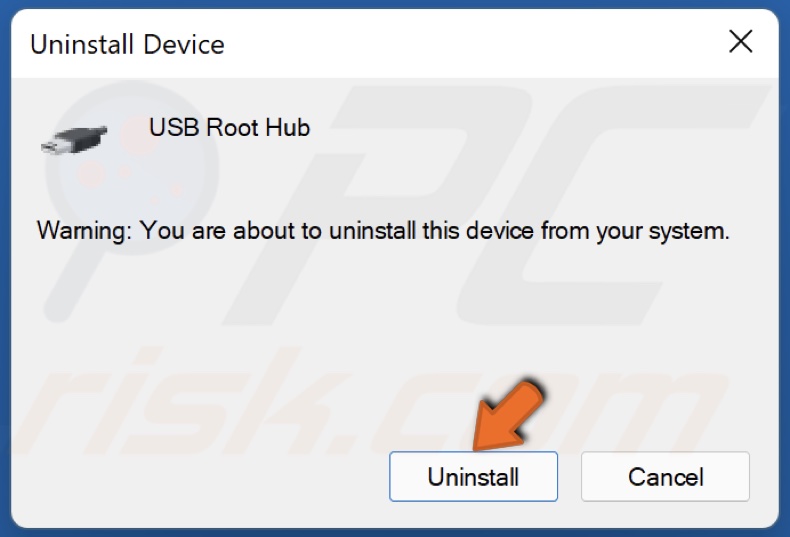
7. Click Uninstall to confirm the action.
8. Restart your PC and Windows will automatically download and install the latest available drivers for the uninstalled device.
Method 2. Repair the USB Root Hub
1. Right-click the Start menu button and select Device Manager.
2. Expand the Universal Serial Bus controllers list.
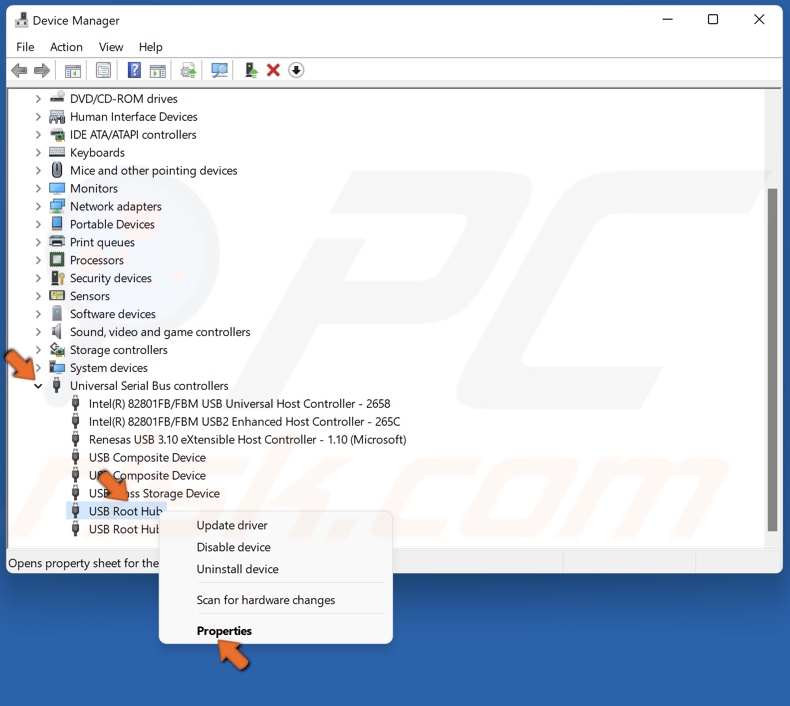
3. Right-click the Generic USB Root Hub and select Properties.
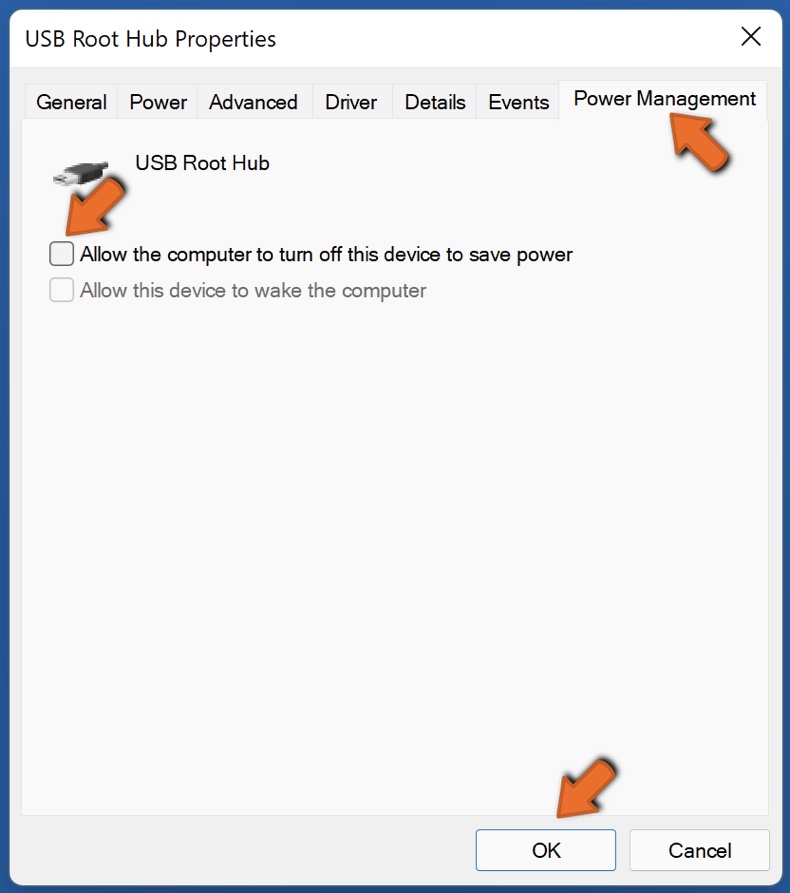
4. Select the Power Management tab.
5. Unmark the checkbox next to Allow the computer to turn off this device to save power.
6. Click OK.
Method 3. Disable USB Selective Suspend Settings
1. Hold down Windows+R keys to open Run.
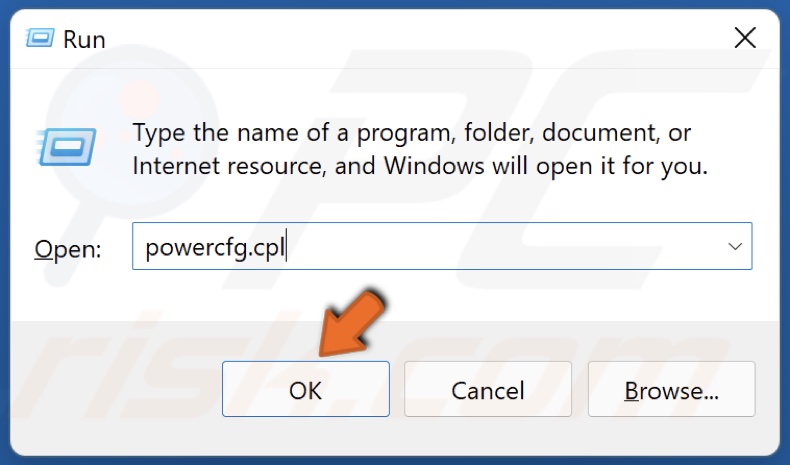
2. In the Run dialog box, type in powercfg.cpl and click OK.
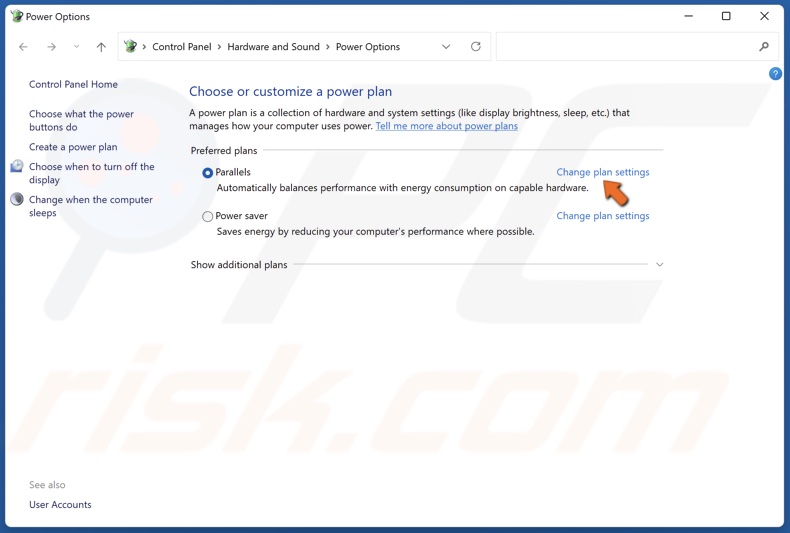
3. In the Power Options window, click Change plan settings.
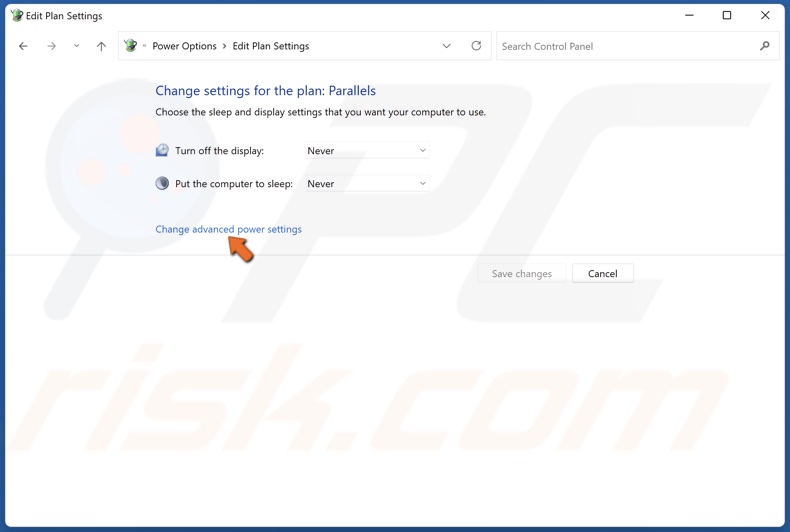
4. Then, click Change advanced power settings.
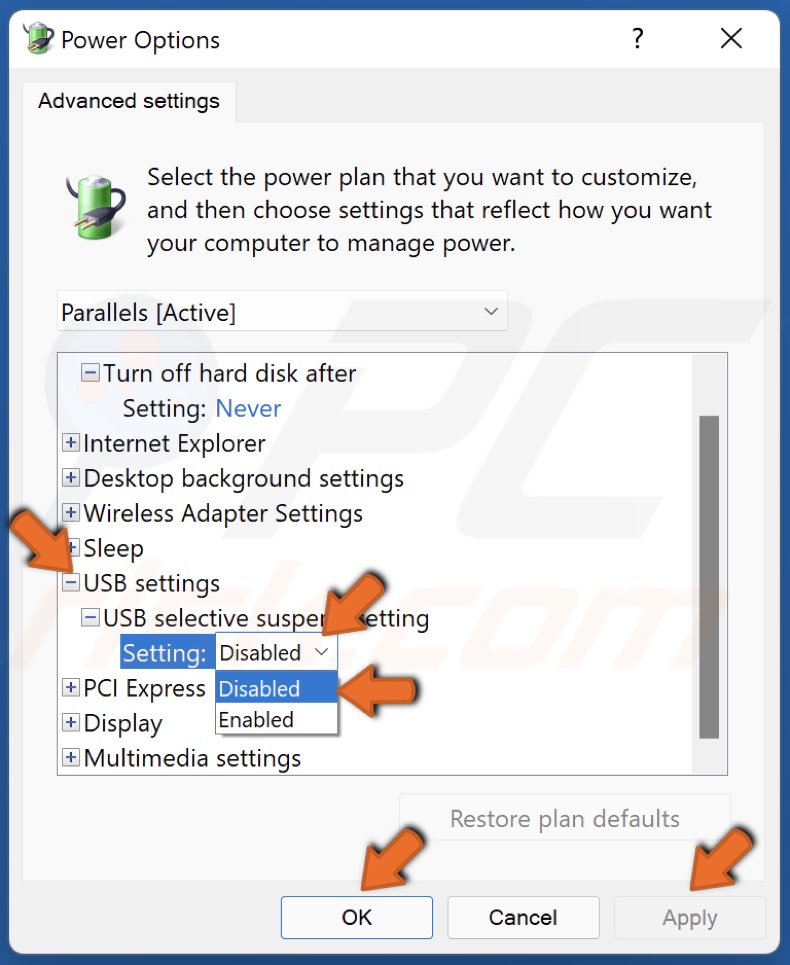
5. Expand the USB settings list.
6. Open the USB selective suspend setting menu and select Disabled.
7. Click Apply and click OK.
Method 4. Run the Hardware and Devices Troubleshooter
1. Hold down Windows+R keys to open Run.
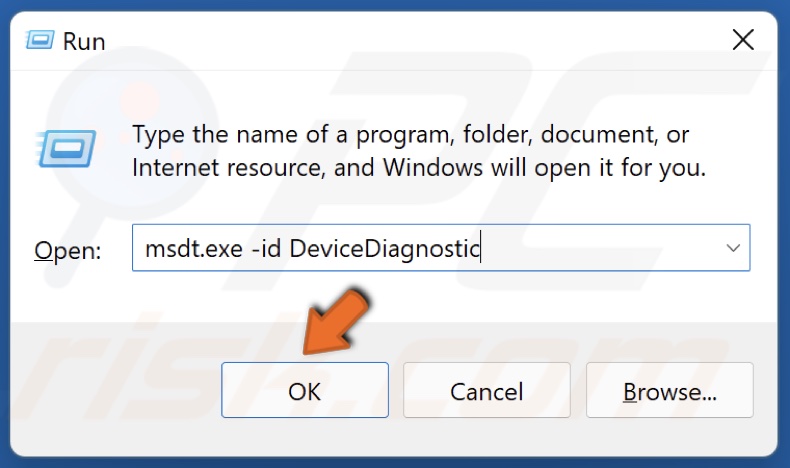
2. In the Run dialog box, type in msdt.exe -id DeviceDiagnostic and click OK.
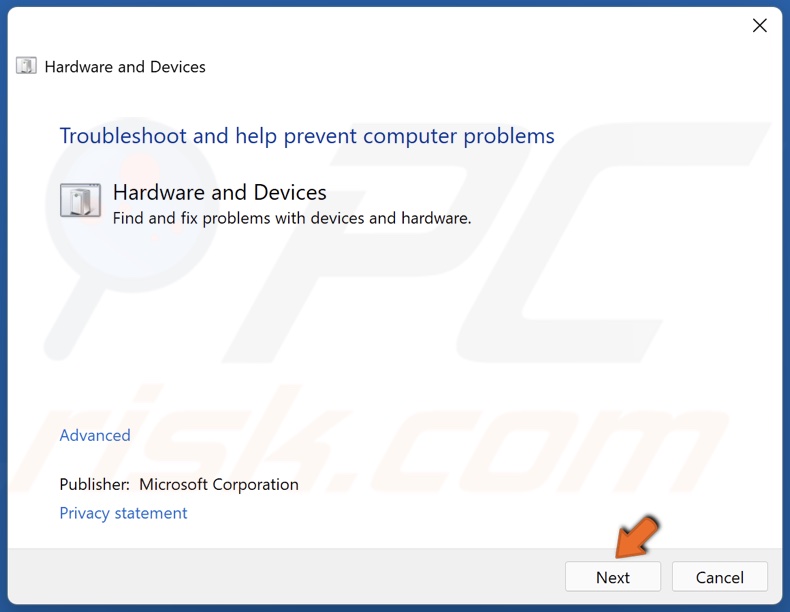
3. Then, in the Hardware and Device troubleshooter window, click Next.
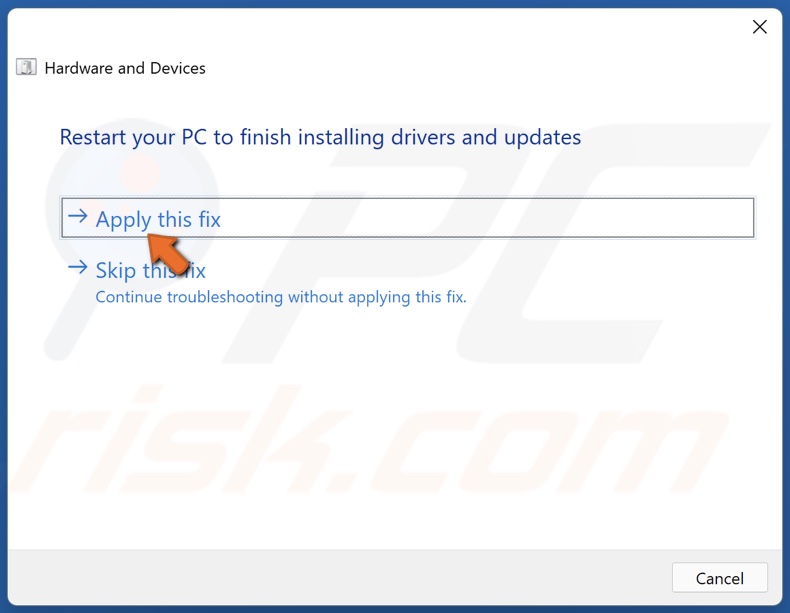
4. Apply the suggested fixes and close the troubleshooter.
Method 5. Assign a Letter to the USB Drive
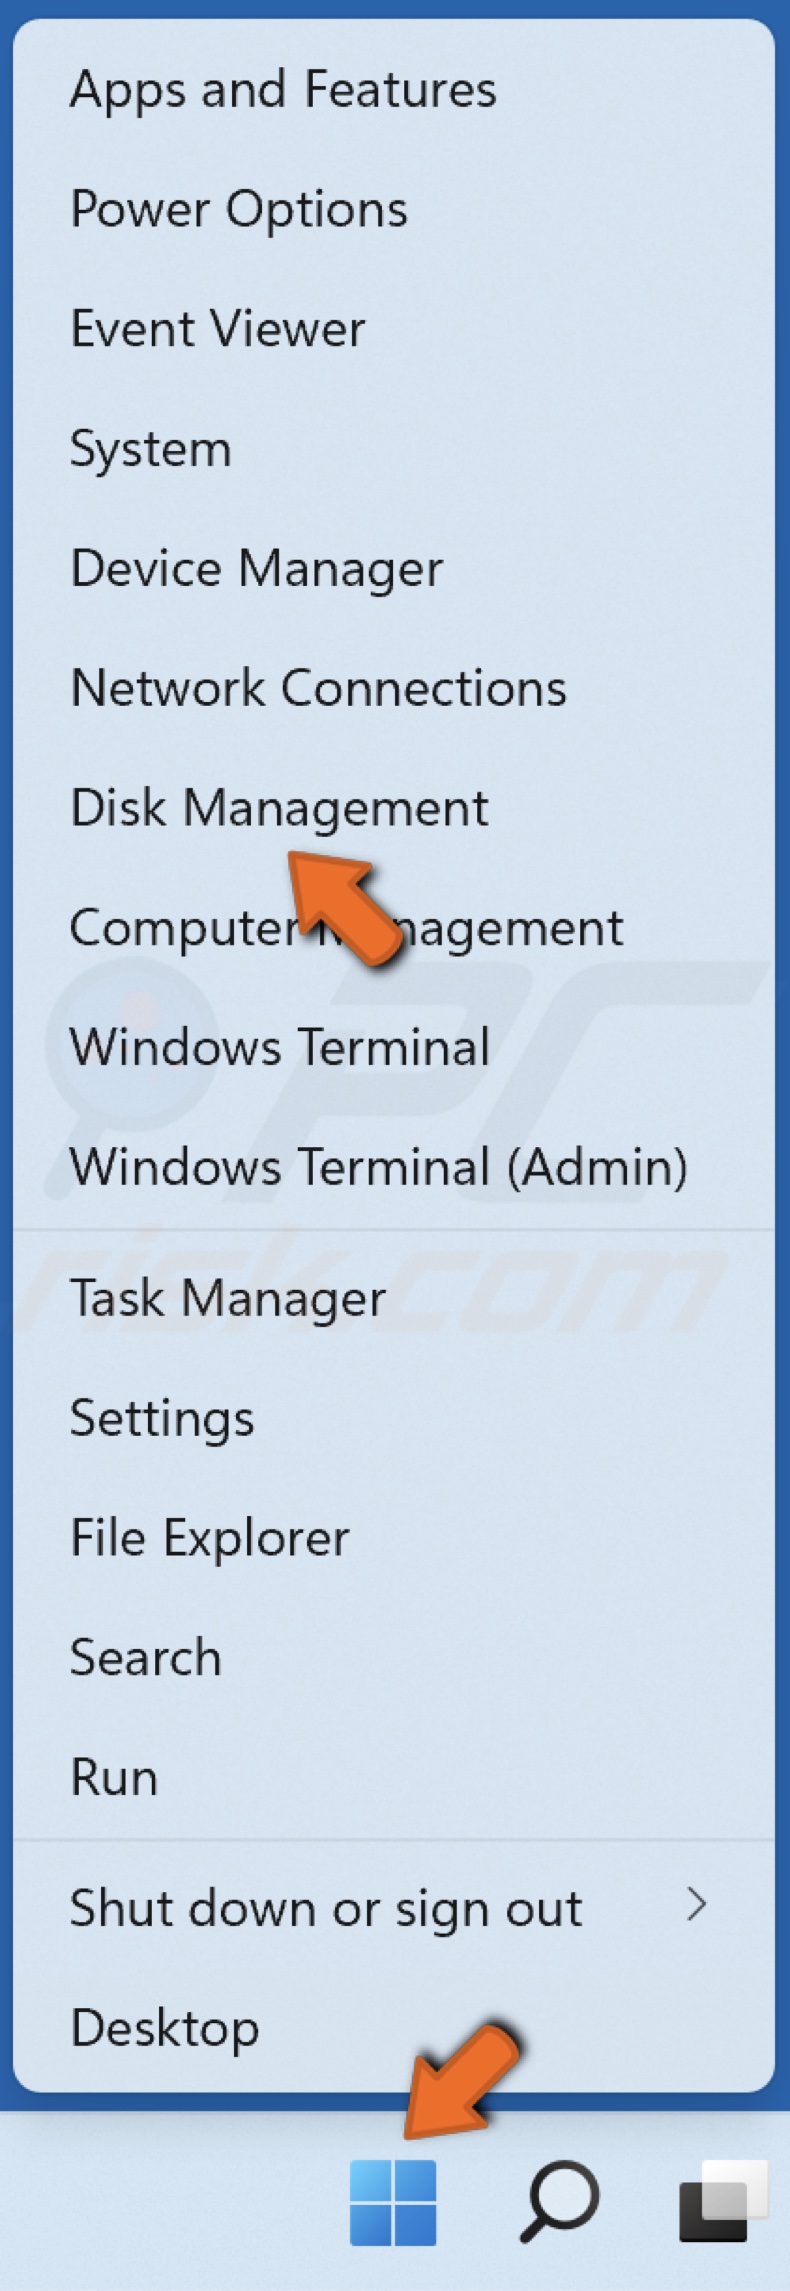
1. Right-click the Start menu button and select Disk Management.
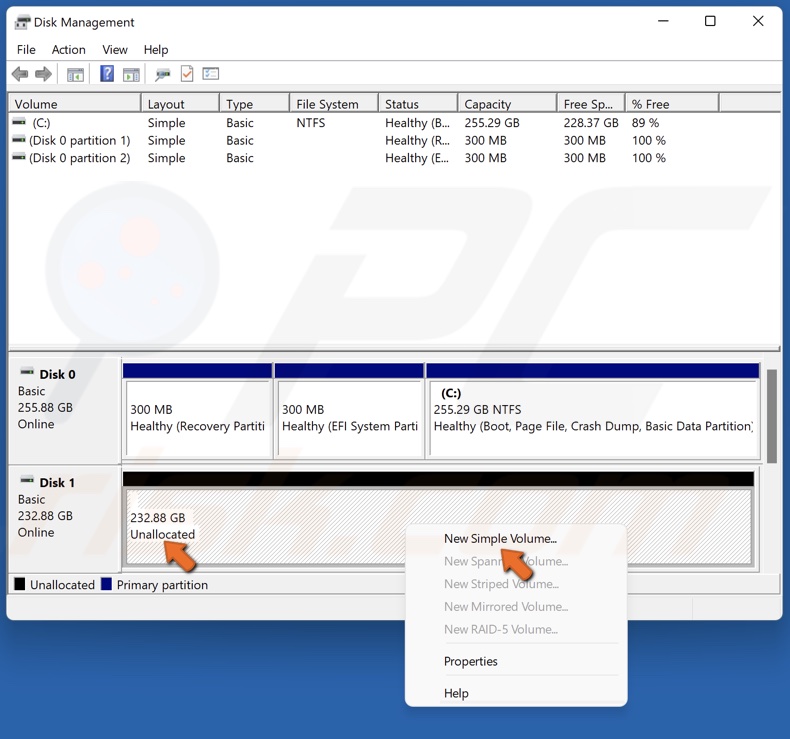
2. If a USB drive has unallocated space, right-click it and select New Simple Volume.

3. In the New Simple Volume Wizard window, click Next.
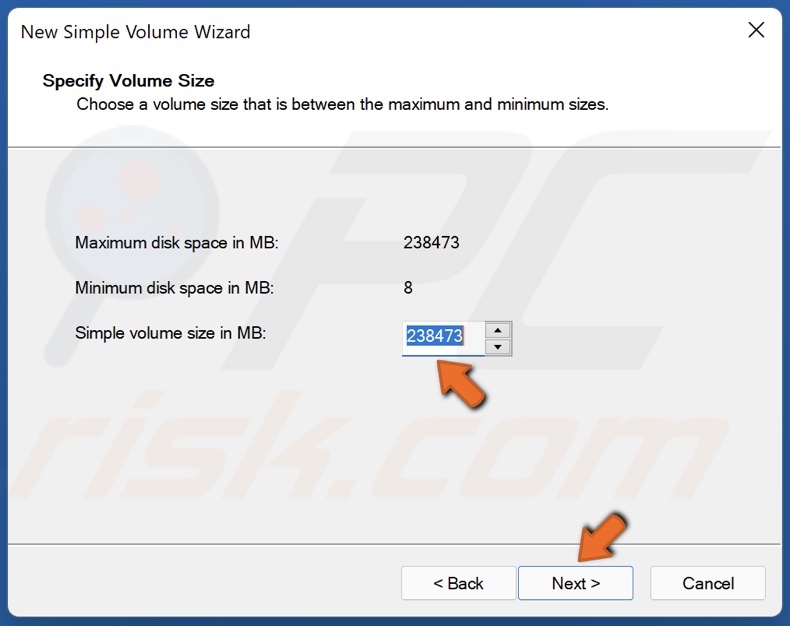
4. Set the volume size or leave it at maximum and click Next.
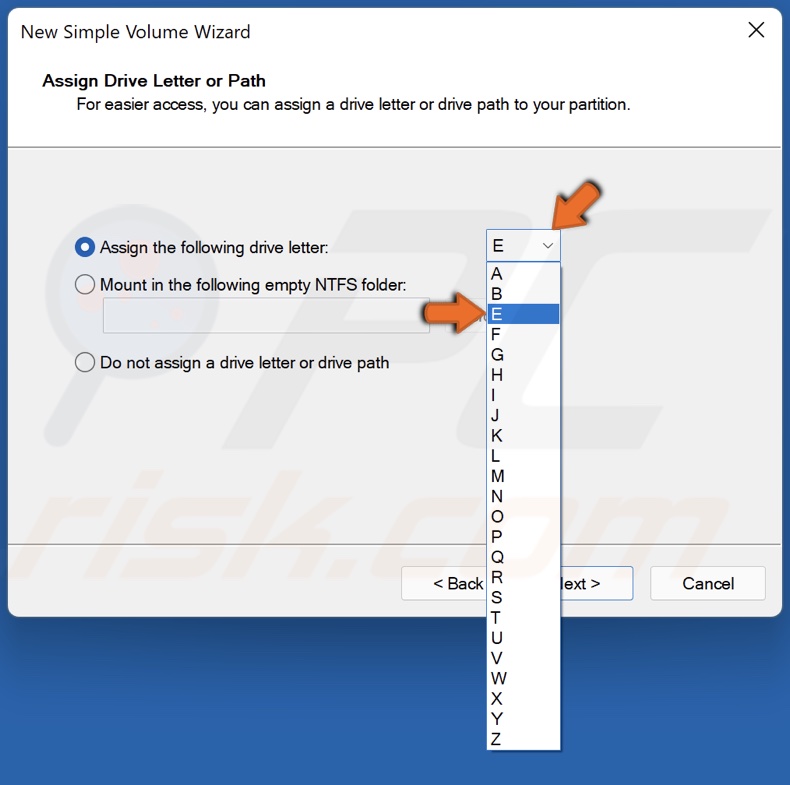
5. Assign a drive letter.
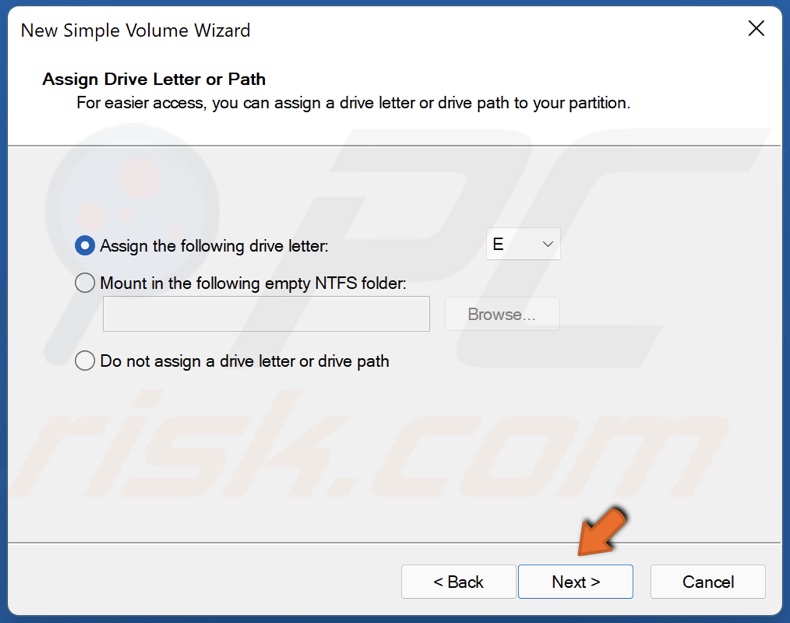
6. click Next.
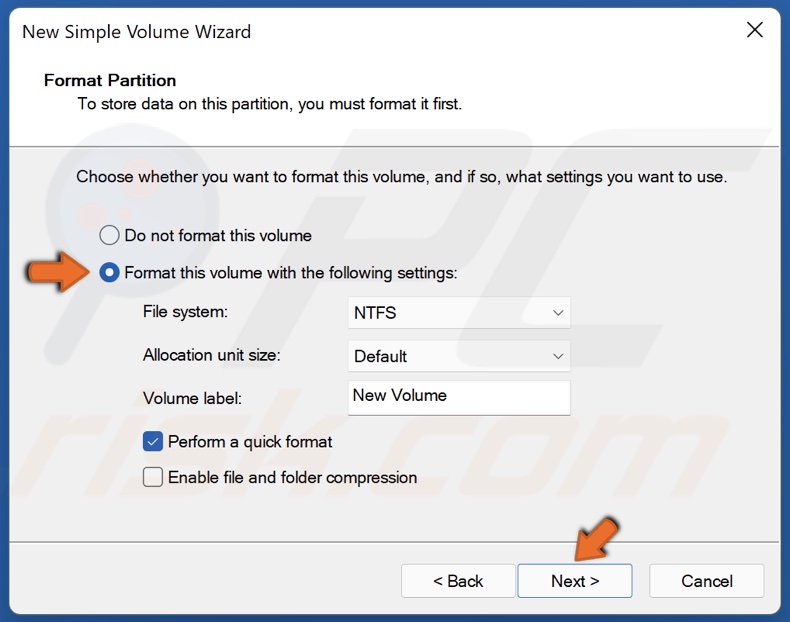
7. If the drive is empty, tick Format this volume with the following settings and click Next. If the drive is not empty, tick the Do not format this volume option and click Next.
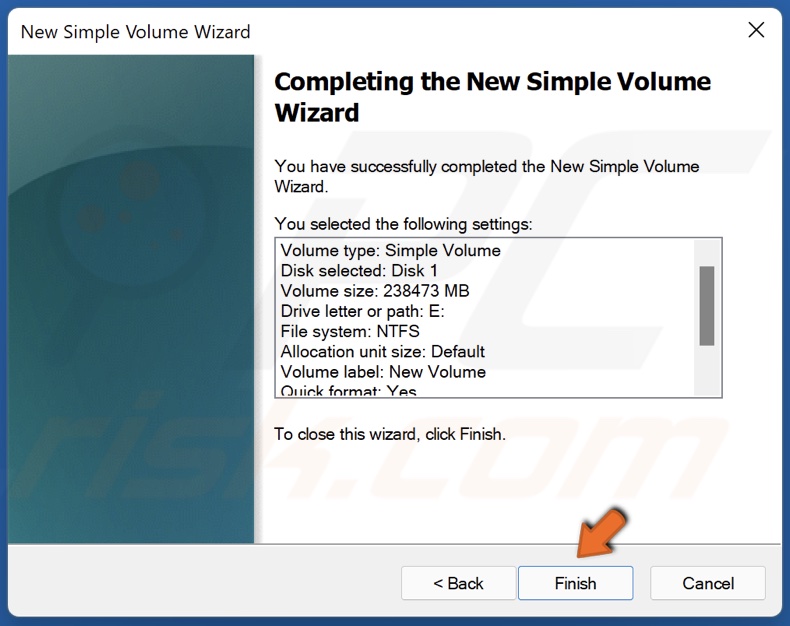
8. Click Finish.
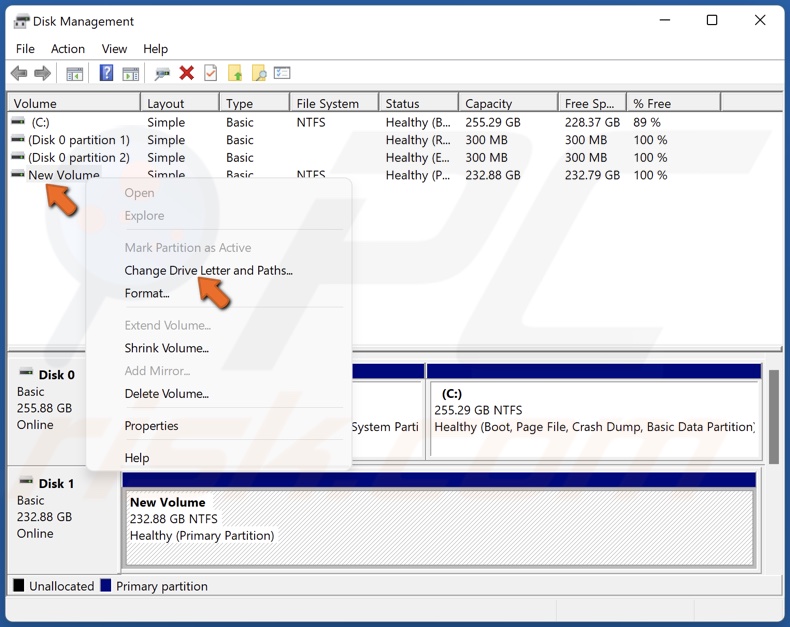
9. If the drive has allocated space, right-click it and select Change Drive Letter and Paths.
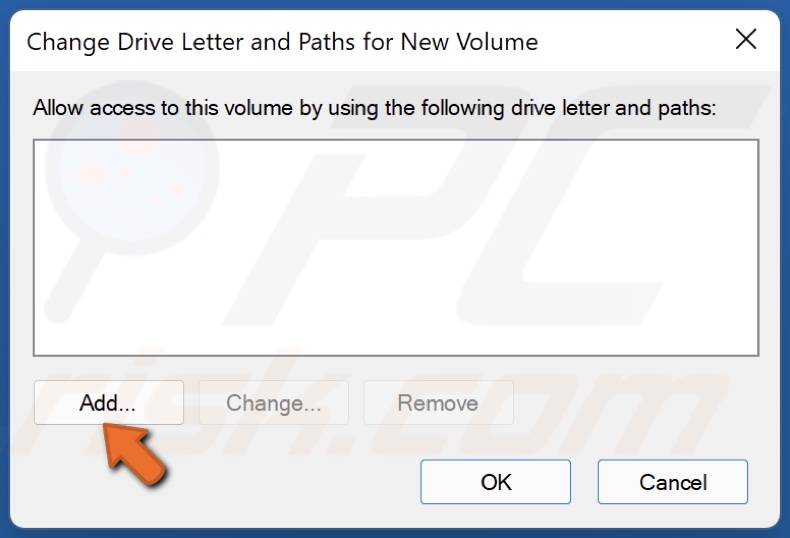
10. Click Add.
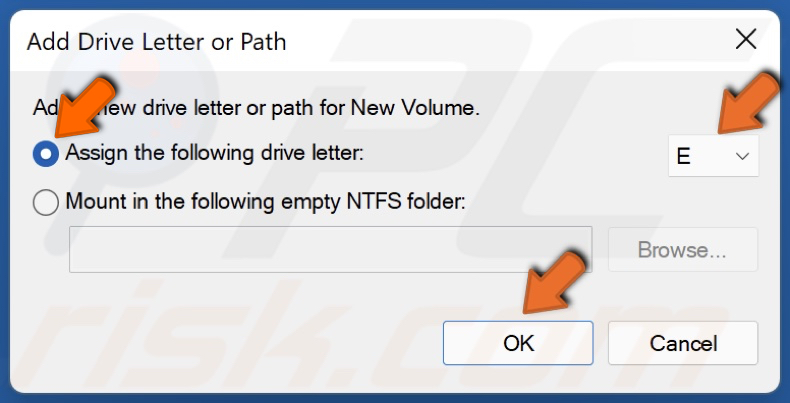
11. Tick Assign the following drive letter and select the letter you want.
12. Click OK.
Did this article help you fix the "The last USB device you connected to this computer malfunctioned" error on your Windows 11 device? Let us know by leaving a comment in the Discussion section below.
Share:

Rimvydas Iliavicius
Researcher, author
Rimvydas is a researcher with over four years of experience in the cybersecurity industry. He attended Kaunas University of Technology and graduated with a Master's degree in Translation and Localization of Technical texts. His interests in computers and technology led him to become a versatile author in the IT industry. At PCrisk, he's responsible for writing in-depth how-to articles for Microsoft Windows.
▼ Show Discussion