How to Flush DNS on Windows 11

Get Free Scanner and check your computer for errors
Fix It NowTo fix found issues, you have to purchase the full version of Combo Cleaner. Free trial available. Combo Cleaner is owned and operated by Rcs Lt, the parent company of PCRisk.com read more.
How to Flush DNS on Windows 11 (and Older Windows Versions)
If you're experiencing Internet connection issues, you might want to clear your DNS cache. In this article, we'll show you how to flush your DNS cache on Windows 11, but the same steps apply to Windows 10, 8.1, and older Windows versions.

Like web browsers, operating systems also store cache files of previous Domain Name System (DNS) lookups in the DNS cache.
The DNS cache stores the IP addresses of web servers containing web pages that you recently visited. When you visit a website for the first time, the operating system stores that website's DNS cache files. Windows will cache IP addresses and other DNS records to fulfill future requests faster.
Performing DNS caching decreases the load on the DNS server during peak traffic. As long as the DNS cache files are valid, they will answer content requests without going through the DNS server.
However, if the DNS cache becomes outdated or corrupted, it can lead to errors and security vulnerabilities. Therefore, if you're having connection issues, can't access specific websites, or getting errors such as error 404 due to a moved domain name or host, you might want to clear your DNS cache.
Other reasons to flush your DNS cache include preventing search behavior tracking, as the information stored in the DNS cache allows cybercriminals to predict your browser history. Also, clearing your DNS cache will prevent DNS spoofing and protect your personal information, such as login credentials.
Video Instructions on How to Flush DNS Cache
Table of Contents:
Download Computer Malware Repair Tool
It is recommended to run a free scan with Combo Cleaner - a tool to detect viruses and malware on your device. You will need to purchase the full version to remove infections. Free trial available. Combo Cleaner is owned and operated by Rcs Lt, the parent company of PCRisk.com read more.
How to Perform a DNS Flush
1. Hold down Windows+R keys to open Run.
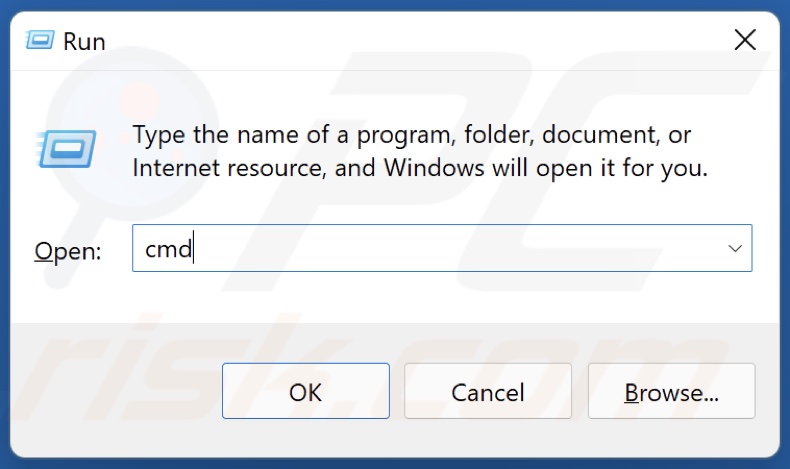
2. In the Run dialog box, type in CMD and hold down Ctrl+Shift+Enter keys to open the elevated Command Prompt.
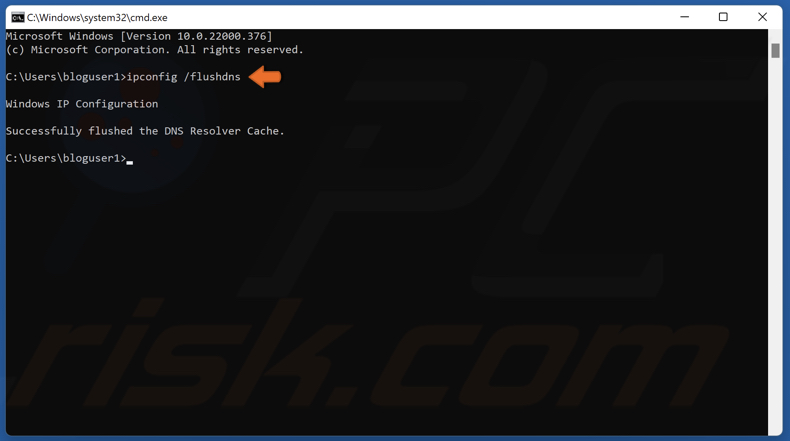
3. In the Command Prompt window, type in ipconfig /flushdns and press the Enter key. Running this command will clear the DNS cache files and reset the DNS resolver cache.
4. Close the Command Prompt.
Share:

Rimvydas Iliavicius
Researcher, author
Rimvydas is a researcher with over four years of experience in the cybersecurity industry. He attended Kaunas University of Technology and graduated with a Master's degree in Translation and Localization of Technical texts. His interests in computers and technology led him to become a versatile author in the IT industry. At PCrisk, he's responsible for writing in-depth how-to articles for Microsoft Windows.
▼ Show Discussion