How to Fix Origin Error Code 20:2
Get Free Scanner and check your computer for errors
Fix It NowTo fix found issues, you have to purchase the full version of Combo Cleaner. Free trial available. Combo Cleaner is owned and operated by Rcs Lt, the parent company of PCRisk.com read more.
Getting Error 20:2 When Installing Origin? This Article Will Help You Fix It
Many Windows users report that they can’t install Origin and get the “Woops - the installer encountered an error” message and an Error Code 20:2. This article features several solutions that will help you fix this error.
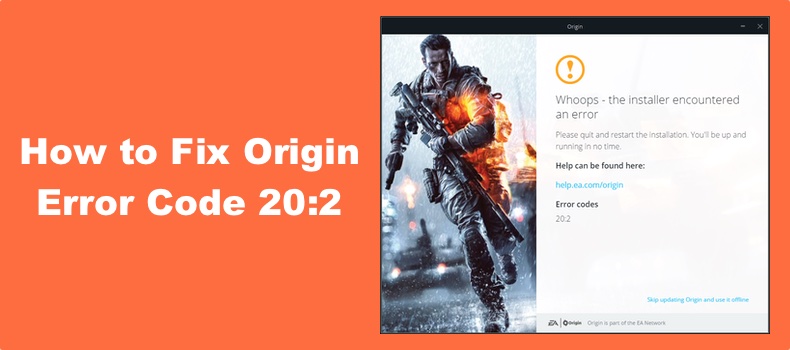
What Causes Error 20:2
In most cases, Error Code 20:2 occurs due to insufficient disk space. Therefore, you need to make space on your drive or install Origin on a different drive if you have more than one.
Insufficient admin permissions is another reason you may experience error 20:2. In this case, the solution is to the Origin client installer as an administrator.
Windows Defender Firewall or a third-party firewall solution may prevent Origin from installing. To fix the error, try to temporarily disable your firewall.
VPN (Virtual Private Network) software can cause Error 20:2, so before installing Origin, try disconnecting from your VPN server or close the application completely.
Origin may also fail to install due to interference from third-party security solutions, such as anti-virus software.
Installing Origin using the OriginThinSetup.exe (online) installer sometimes results in file unpacking errors that result in Error 20:2. To get around this issue, install Origin using the standalone Origin client installer (OriginSetup.exe).
Video Guide on How to Fix Origin Error 20:2
Table of Contents:
- Introduction
- Solution 1. Run the Origin Client Installer as Administrator
- Solution 2. Run Disk Cleanup
- Solution 3. Install Origin Using the Standalone Installer
- Solution 4. Temporarily Disable Windows Defender Firewall
- Video Guide on How to Fix Origin Error 20:2
Download Computer Malware Repair Tool
It is recommended to run a free scan with Combo Cleaner - a tool to detect viruses and malware on your device. You will need to purchase the full version to remove infections. Free trial available. Combo Cleaner is owned and operated by Rcs Lt, the parent company of PCRisk.com read more.
Solution 1. Run the Origin Client Installer as Administrator
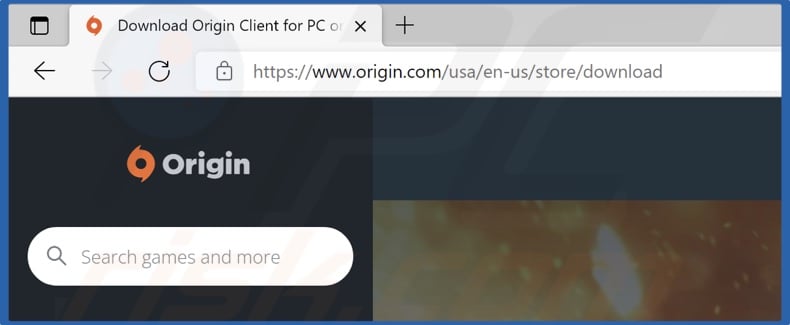
1. Open your web browser and go to the Origin client download page.
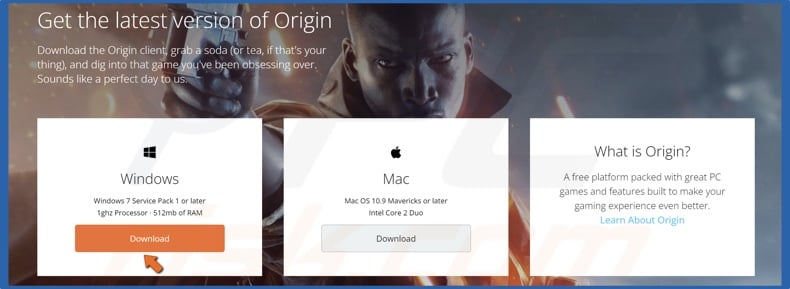
2. Click the Download button for Windows.
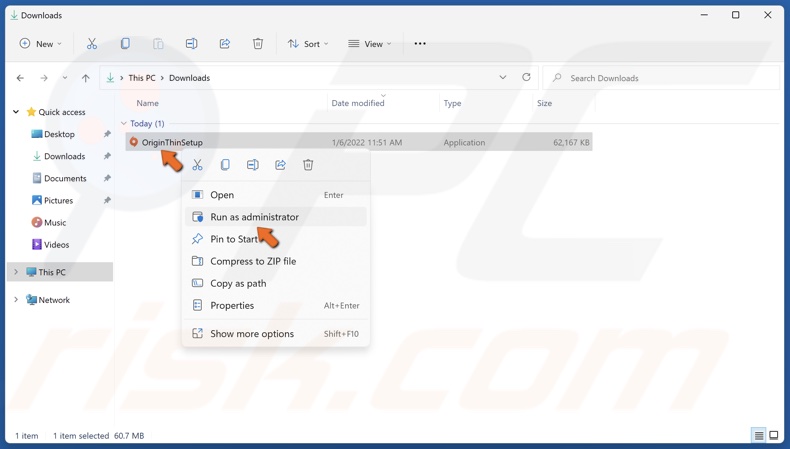
3. Go to your Downloads folder.
4. Right-click the Origin client installer and click Run as administrator.

5. Click Install Origin.
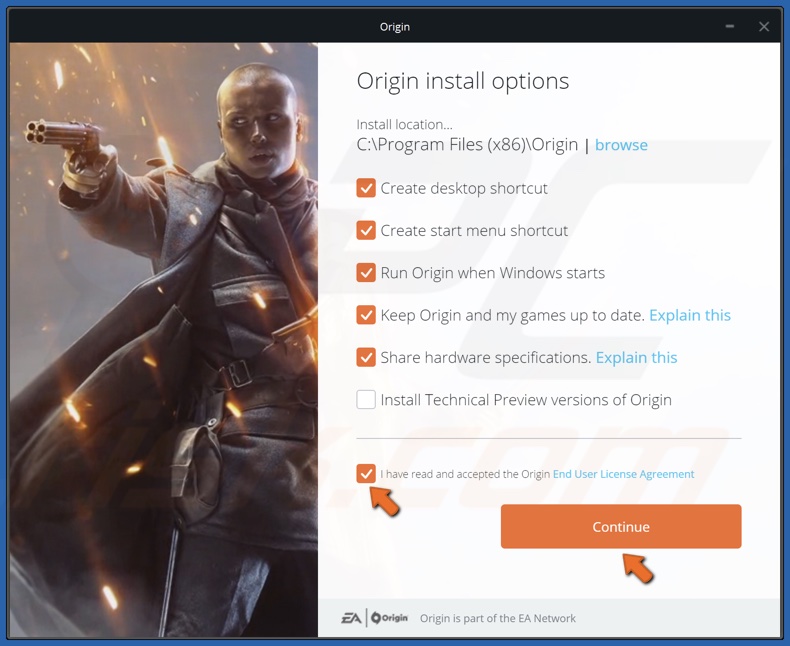
6. Accept the Origin End User License Agreement and click Continue.
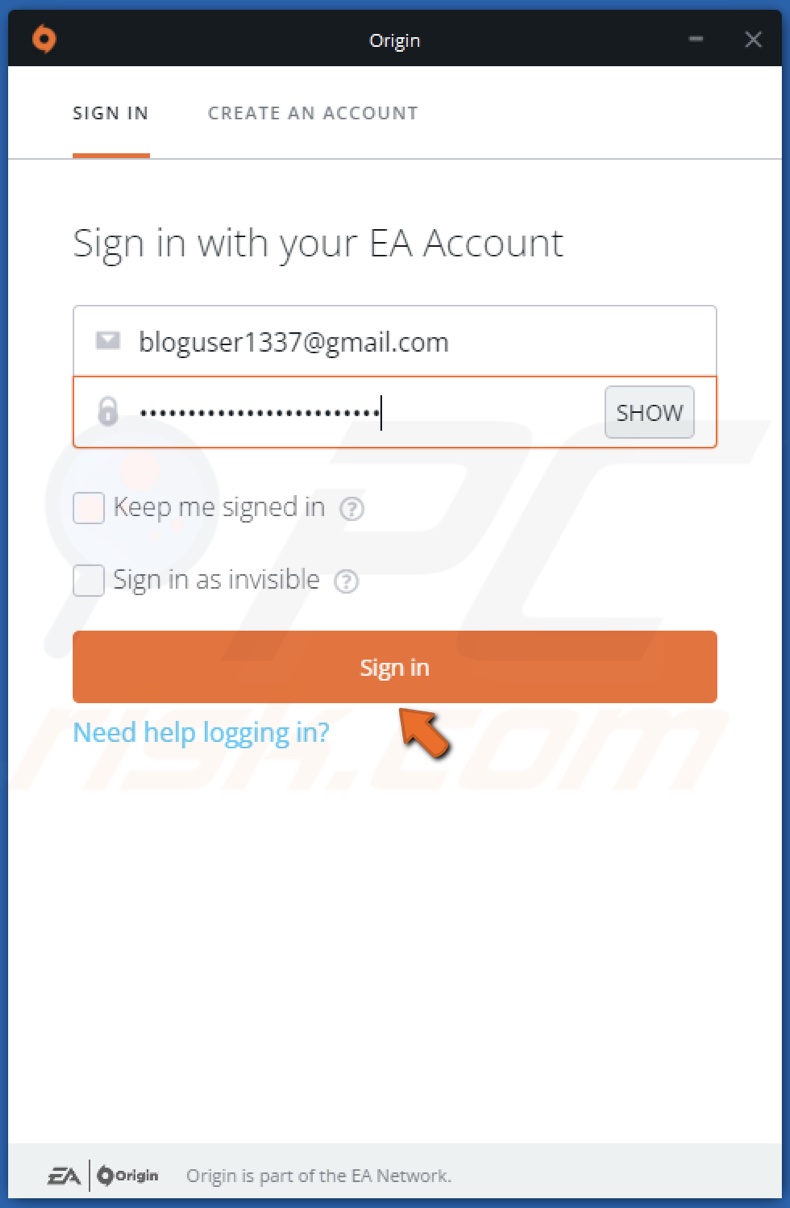
7. Enter your login credentials and click Sign in.
Solution 2. Run Disk Cleanup
In addition to freeing up disk space using Disk Cleanup, delete and uninstall unnecessary files and software.
1. Hold down Windows+R keys to open Run.
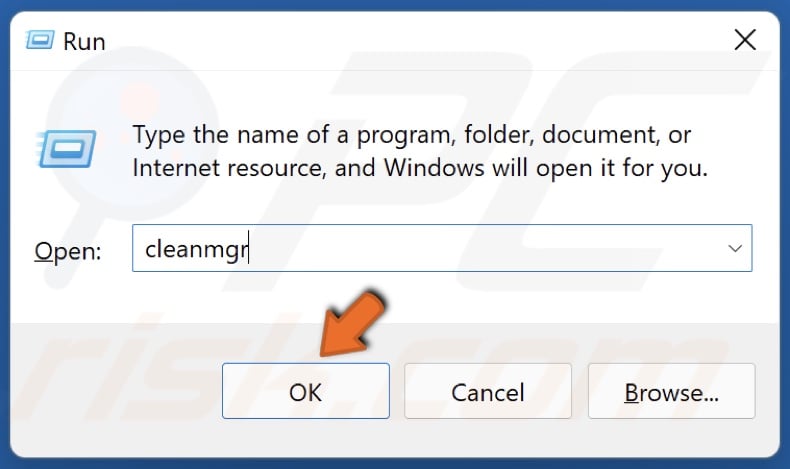
2. In the dialog box, type in cleanmgr and click OK.
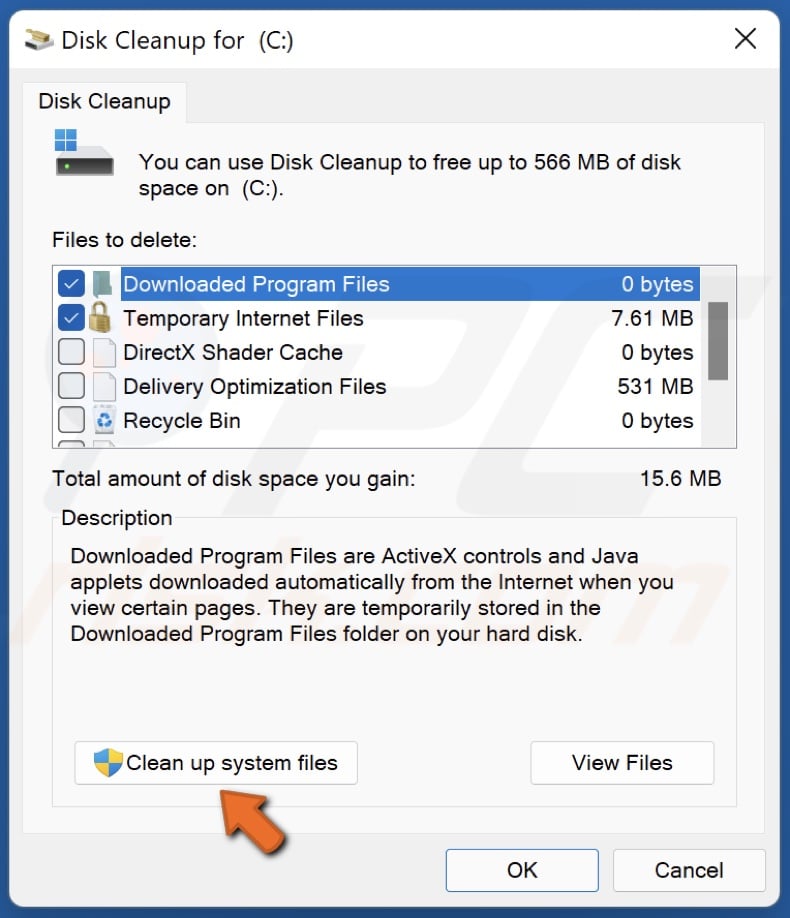
3. Click Clean up system files.
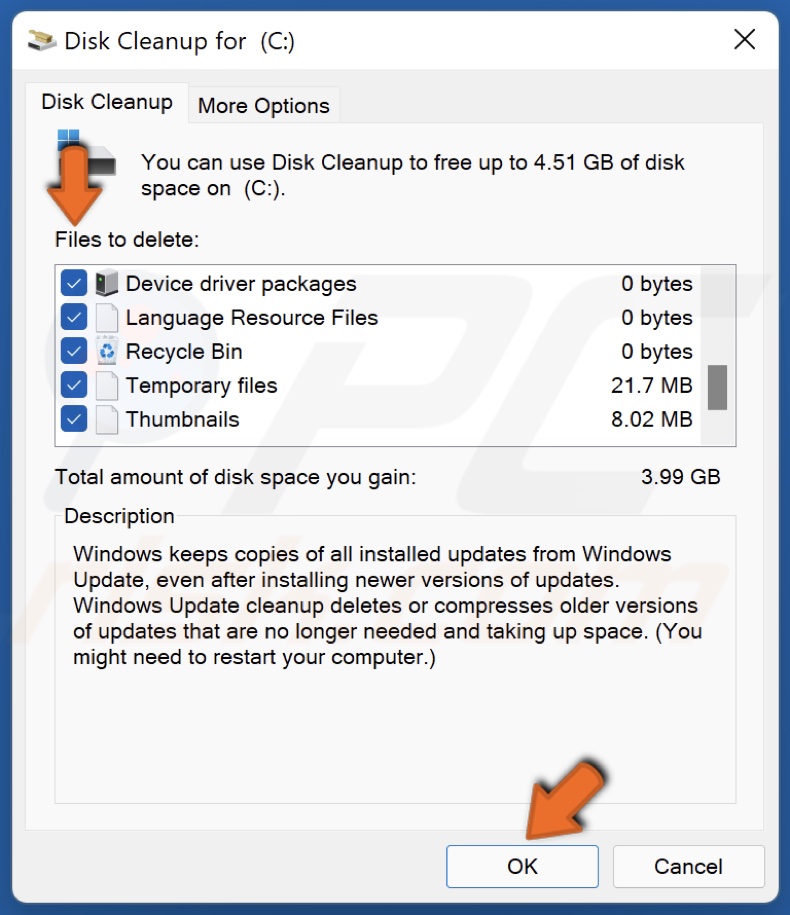
4. Tick the checkboxes of the locations you want to be cleaned and click OK.
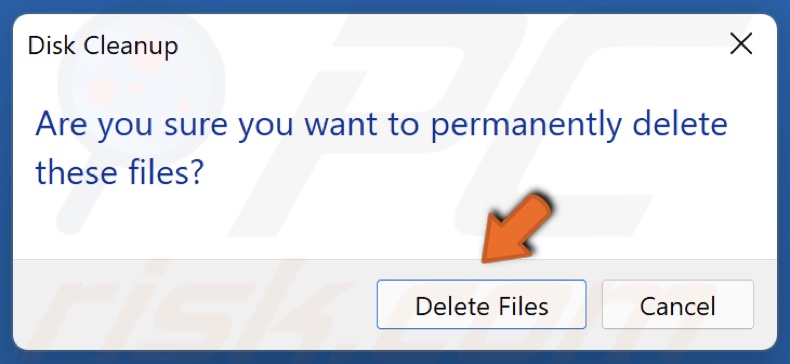
5. Click Delete Files.
6. Wait for the cleaning process to complete.
7. Run the Origin client installer.
Solution 3. Install Origin Using the Standalone Installer
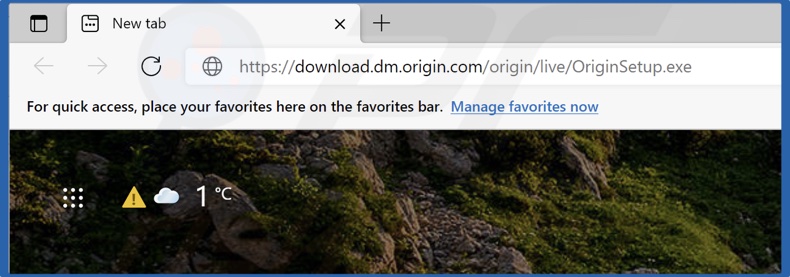
1. Open your web browser and go to the Origin client standalone installer download page.
2. Wait for the installer to download.
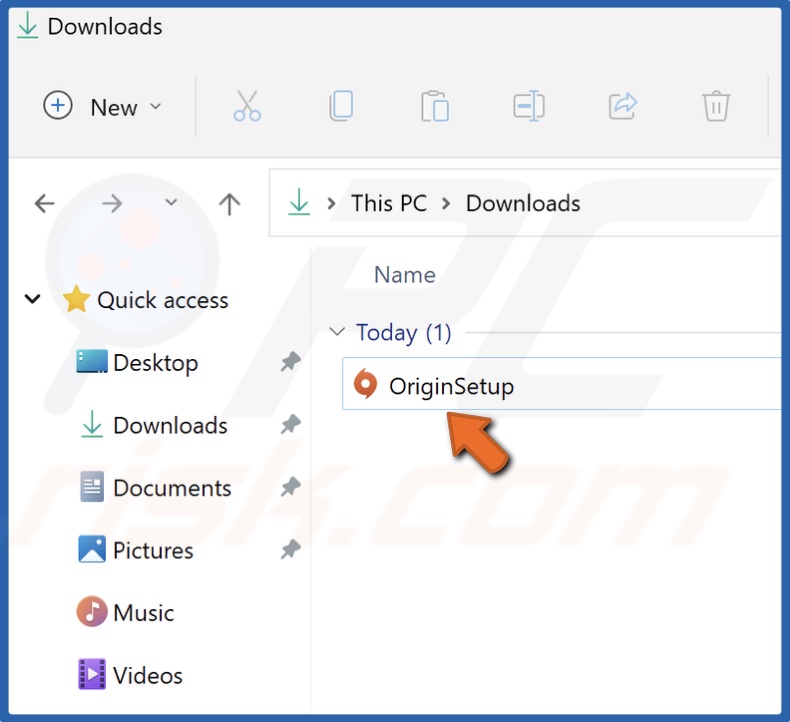
3. Go to your Downloads folder.
4. Run the Origin client installer.

5. Click Install Origin.

6. Accept the Origin End User License Agreement and click Continue.

7. Enter your login credentials and click Sign in.
Solution 4. Temporarily Disable Windows Defender Firewall
1. Hold down Windows+R keys to open the Run dialog box.
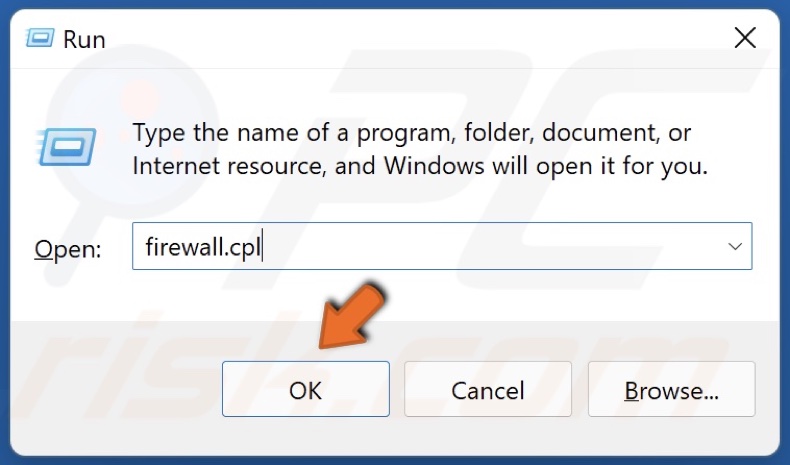
2. In the Run dialog box, type in firewall.cpl and click OK to open Windows Defender Firewall settings.
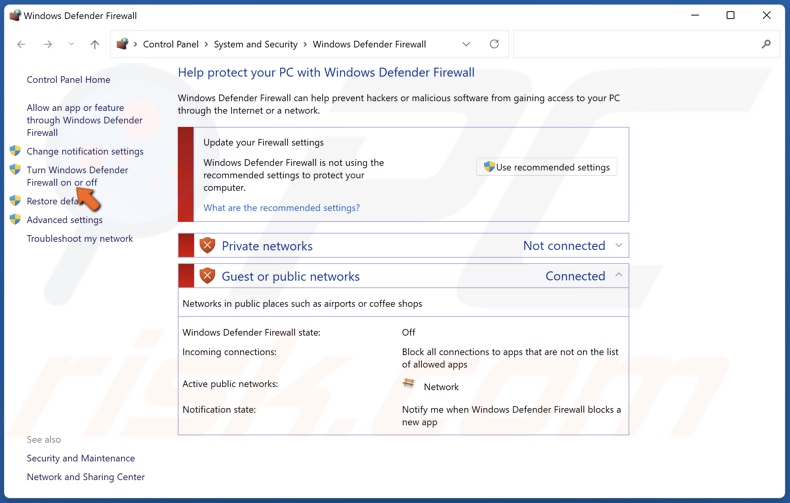
3. Click Turn Windows Defender Firewall on or off.
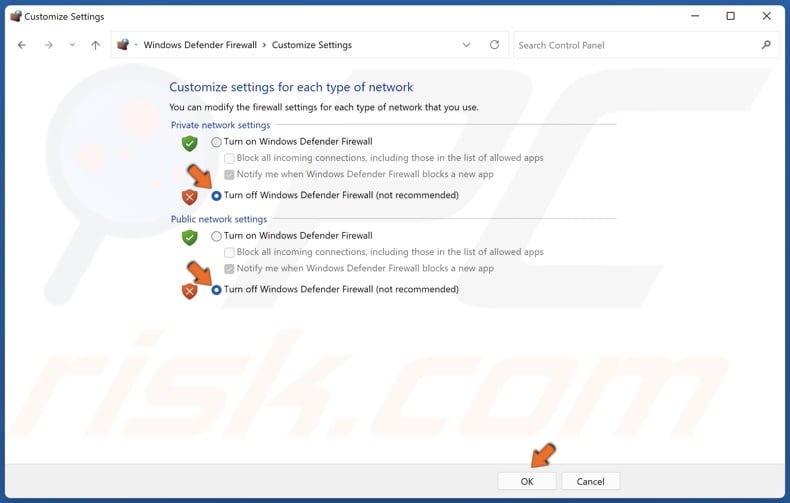
4. Tick the Turn off Windows Defender Firewall checkboxes for both private and public networks.
5. Click OK.
Remember to turn Windows Firewall back on once you’ve successfully installed Origin.
Share:

Rimvydas Iliavicius
Researcher, author
Rimvydas is a researcher with over four years of experience in the cybersecurity industry. He attended Kaunas University of Technology and graduated with a Master's degree in Translation and Localization of Technical texts. His interests in computers and technology led him to become a versatile author in the IT industry. At PCrisk, he's responsible for writing in-depth how-to articles for Microsoft Windows.

▼ Show Discussion