Fix Windows Update Error 0x800703e6
Get Free Scanner and check your computer for errors
Fix It NowTo fix found issues, you have to purchase the full version of Combo Cleaner. Free trial available. Combo Cleaner is owned and operated by Rcs Lt, the parent company of PCRisk.com read more.
Here to Fix Update Error 0x800703e6 on Windows 10
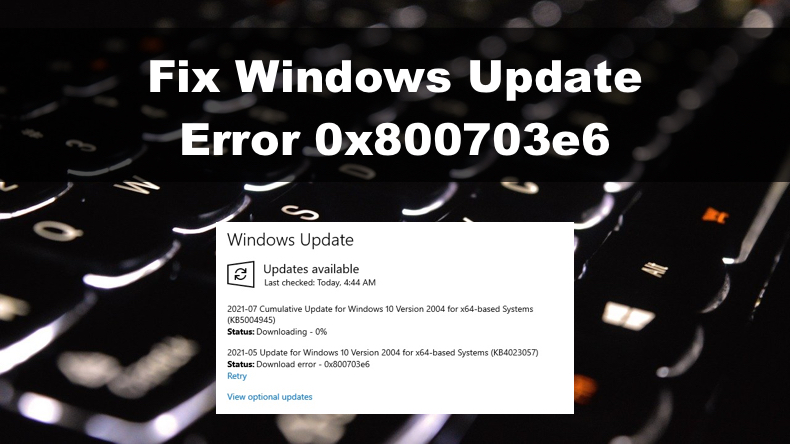
0x800703e6 is yet another Windows Update error that prevents specific updates from installing. This article is dedicated to fixing this specific error.
What is Error 0x800703e6?
Error 0x800703e6 translates to "ERROR_NOACCESS: Invalid access to memory location."
Many Windows 10 users experienced error 0x800703e6 when updating Windows 10 version 1903 to version 1909. Also, there have been reports of users unable to install cumulative updates including, KB4023057, KB5003214, KB5003173 on Windows 10 versions 2004 and 20H2.
Most recently, some users encountered error 0x800703e6 when installing the 2021-08 Cumulative Update for Windows 10 Version 21H1 for x64-based Systems (KB5005033) for the current Windows 10 version 21H1.
What Causes Error 0x800703e6?
- Error 0x800703e6 may occur when the system can't process any application.
- When two applications are using the same memory location.
- Corrupted registry keys. A cluttered Windows Registry, faulty and empty entries are usually the result of improperly uninstalled software, which may come into conflict with Windows Update-related services.
- Corrupted or missing DLL files or missing or corrupted system or Windows Update files may also trigger this error.
- Incorrectly configured system settings and outdated drivers.
Video Instructions on How to Fix Windows Update Error 0x800703e6
Table of Contents:
- Introduction
- Solution 1. Run the Windows Update Troubleshooter
- Solution 2. Perform Disk Cleanup
- Solution 3. Clear the SoftwareDistribution (Windows Update Cache) Folder
- Solution 4. Perform a Clean Boot
- Solution 5. Upgrade Windows 10 Using the Media Creation Tool
- Solution 6. Run the Deployment Imaging and Servicing Management (DISM) Scan
- Solution 7. Run the System File Checker (SFC) Scan
- Video Instructions on How to Fix Windows Update Error 0x800703e6
Download Computer Malware Repair Tool
It is recommended to run a free scan with Combo Cleaner - a tool to detect viruses and malware on your device. You will need to purchase the full version to remove infections. Free trial available. Combo Cleaner is owned and operated by Rcs Lt, the parent company of PCRisk.com read more.
Solution 1. Run the Windows Update Troubleshooter
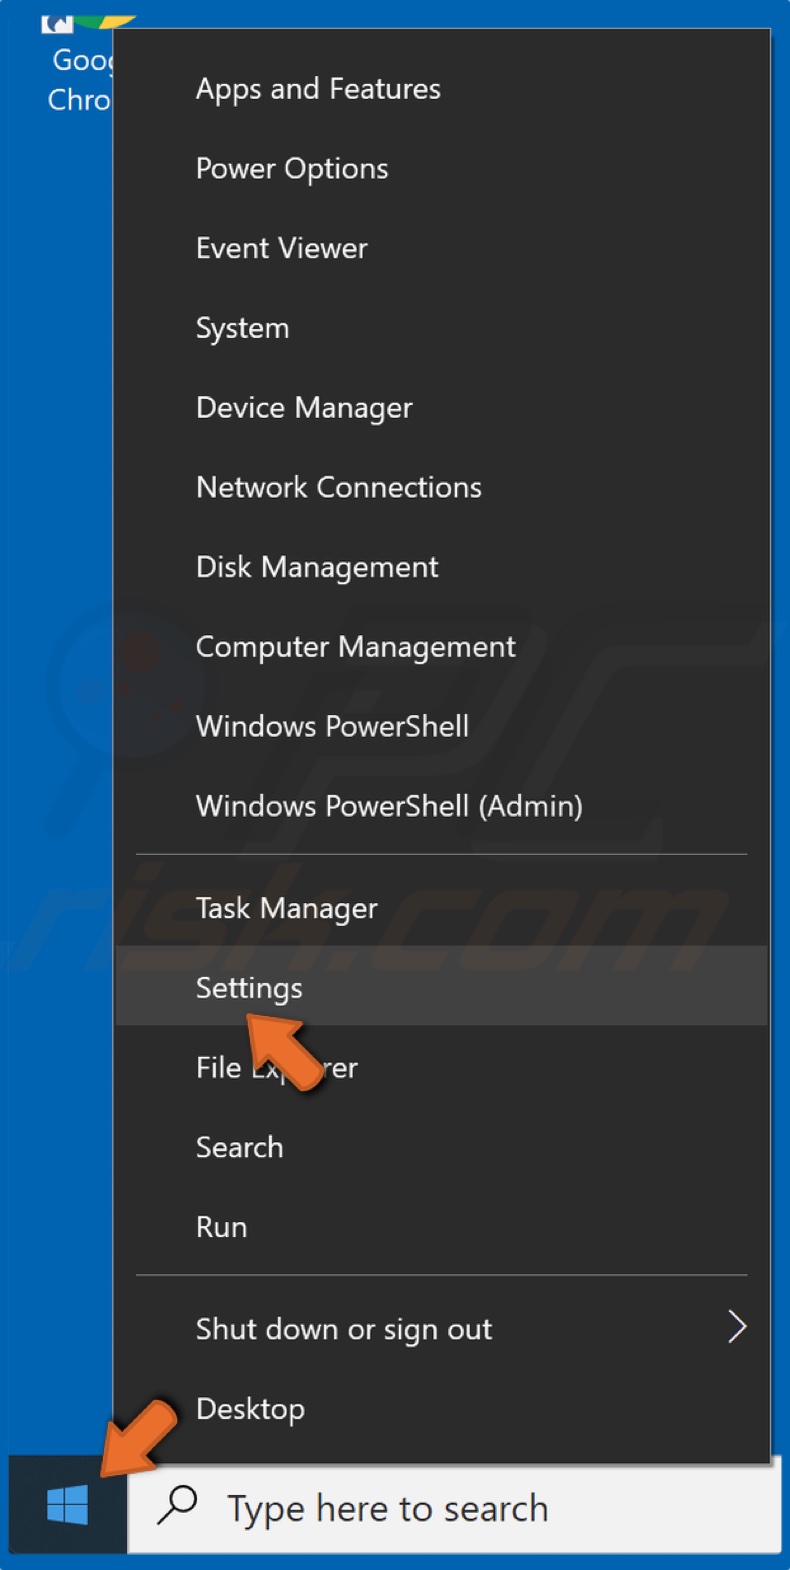
1. Right-click the Windows Start Menu and click Settings.
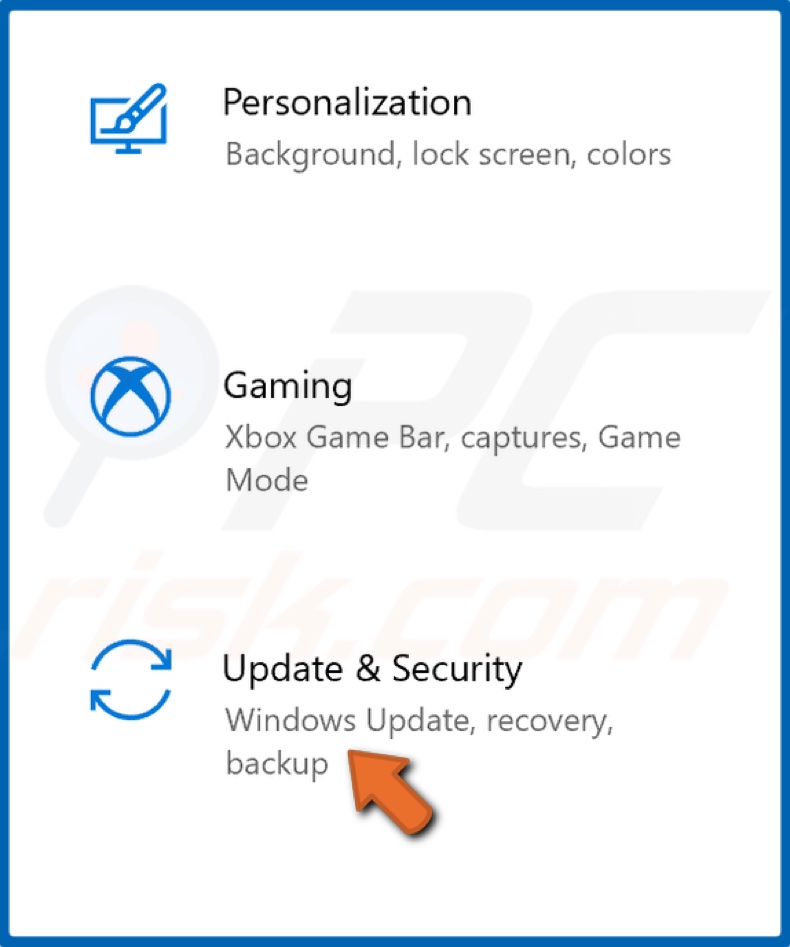
2. In the Settings window, select Update & Security.
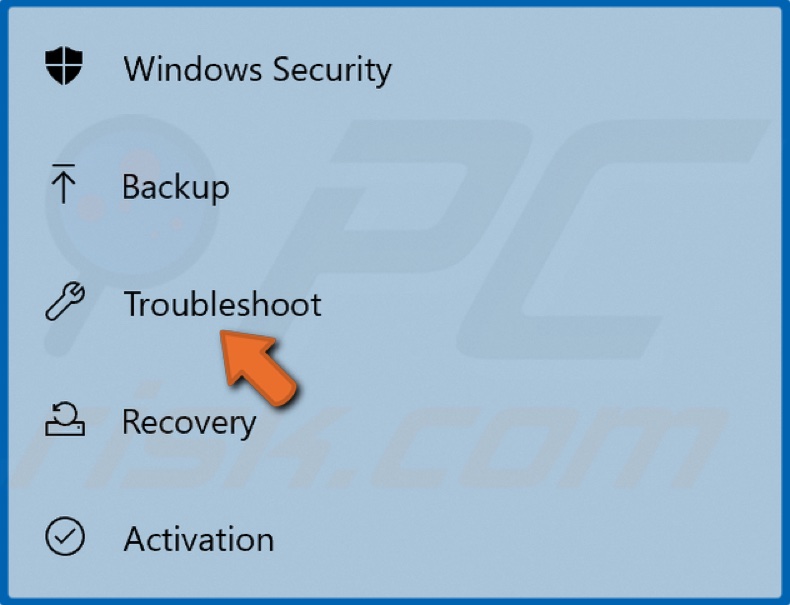
3. In the left pane, select Troubleshoot.
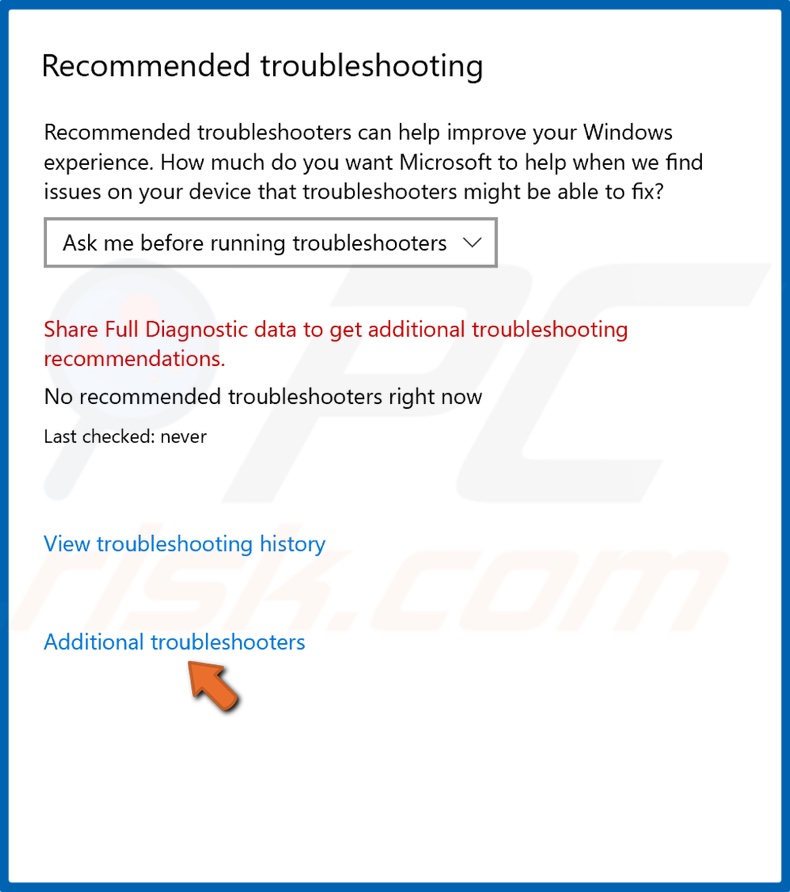
4. Then, click Additional troubleshooters.
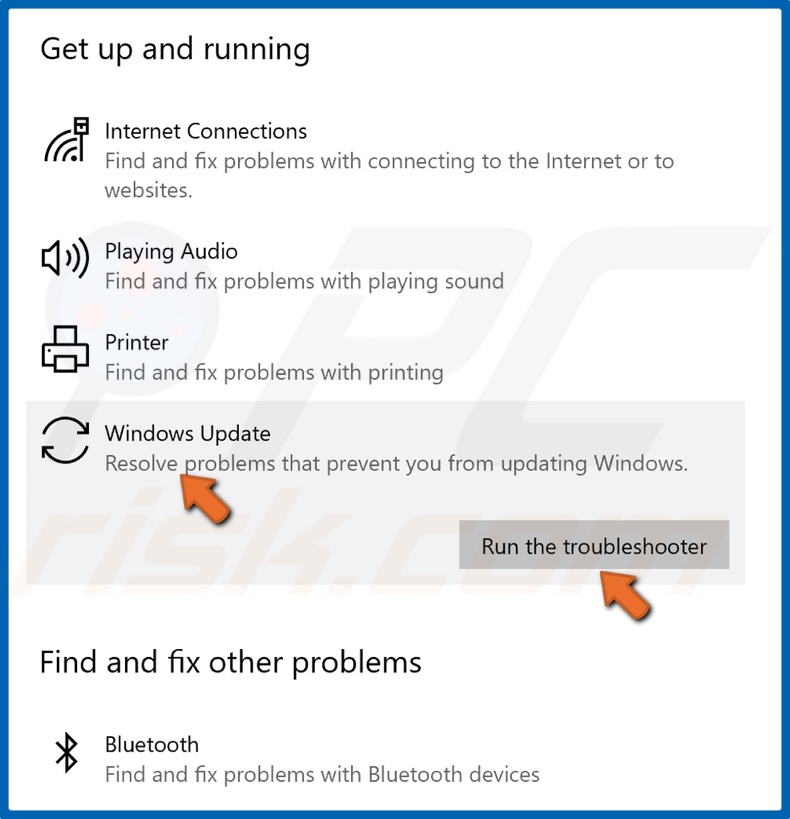
5. Select Windows Update and click Run the troubleshooter.
6. The troubleshooter will select and apply a fix automatically.
7. Try to update Windows.
Solution 2. Perform Disk Cleanup
1. Hold down Windows+R keys to open Run.
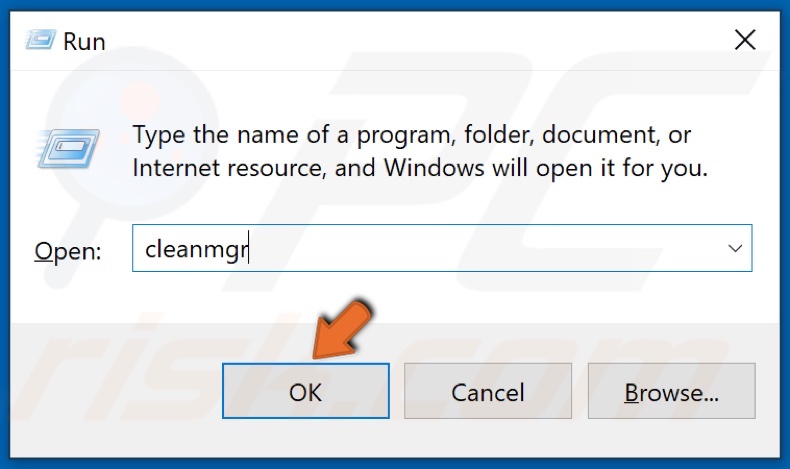
2. In the Run dialog box, type in cleanmgr and click OK.
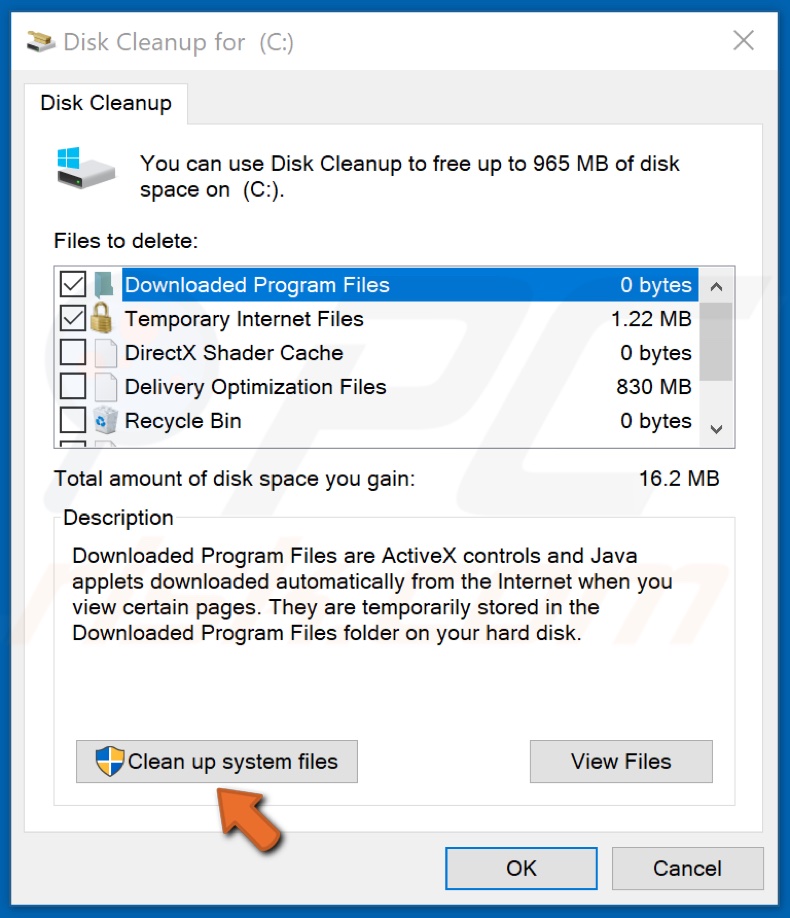
3. Click Clean Up System Files.
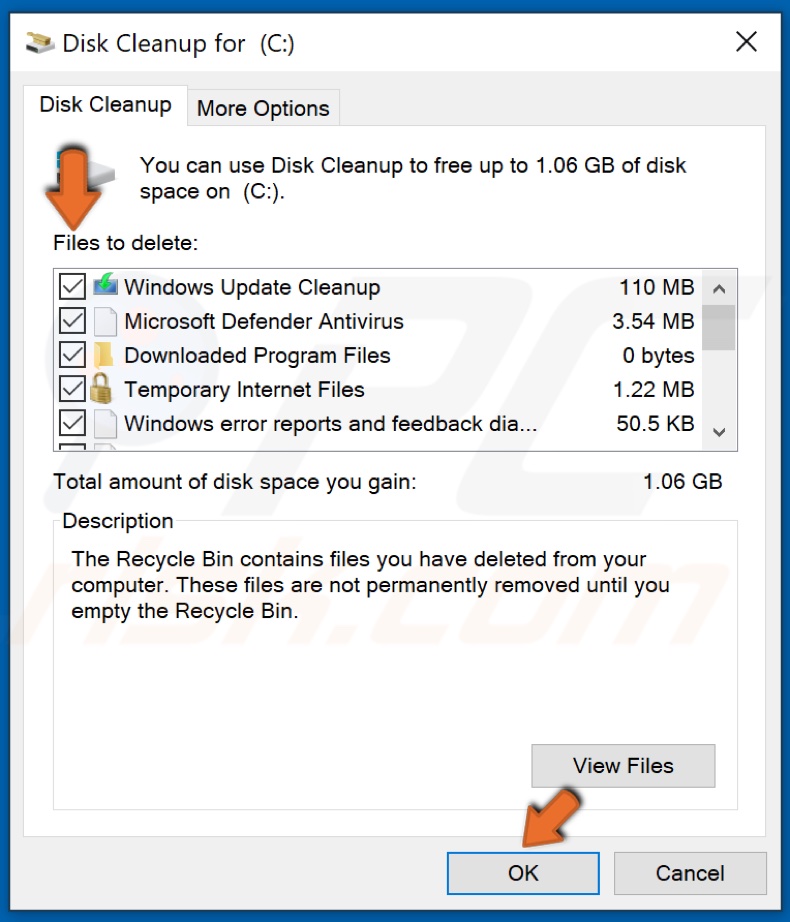
4. Mark the checkboxes of the locations you want to be cleaned and click OK.
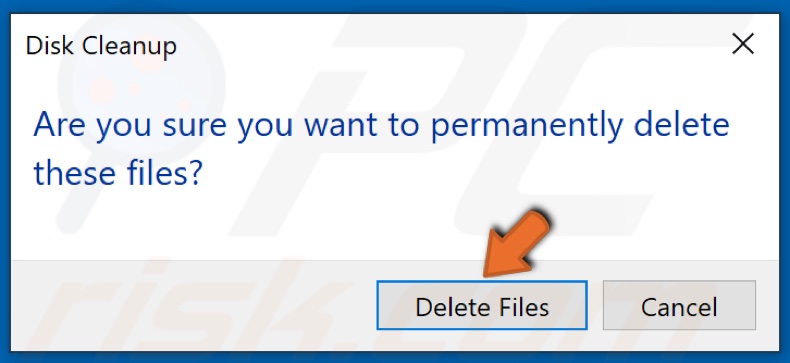
5. Click Delete Files.
6. Wait for the files to be deleted.
7. Try to update Windows.
Solution 3. Clear the SoftwareDistribution (Windows Update Cache) Folder
1. Hold down Windows+R keys to open Run.
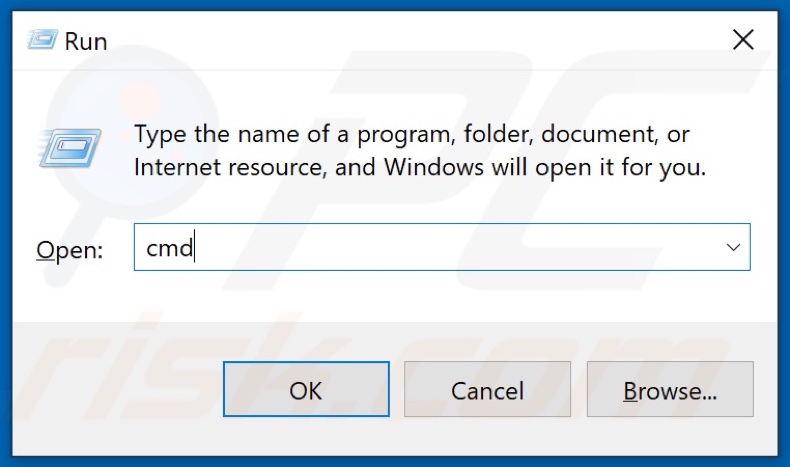
2. In the Run dialog box, type in CMD and hold down Ctrl+Shift+Enter keys to open Command Prompt as an administrator.
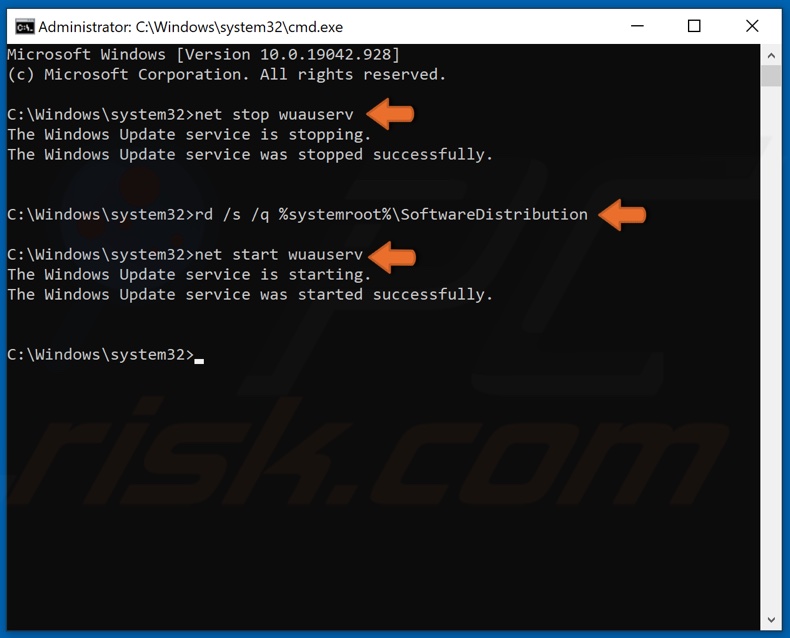
3. In the Command Prompt window, type in net stop wuauserv and press Enter to stop Windows Update Service.
4. Then, type in rd /s /q %systemroot%\SoftwareDistribution and press Enter to clear the Update cache folder.
5. Then, type in net start wuauserv to restart the Windows Update Service.
6. Close the Command Prompt and try updating Windows.
Solution 4. Perform a Clean Boot
1. Hold down Windows+R keys to open Run.
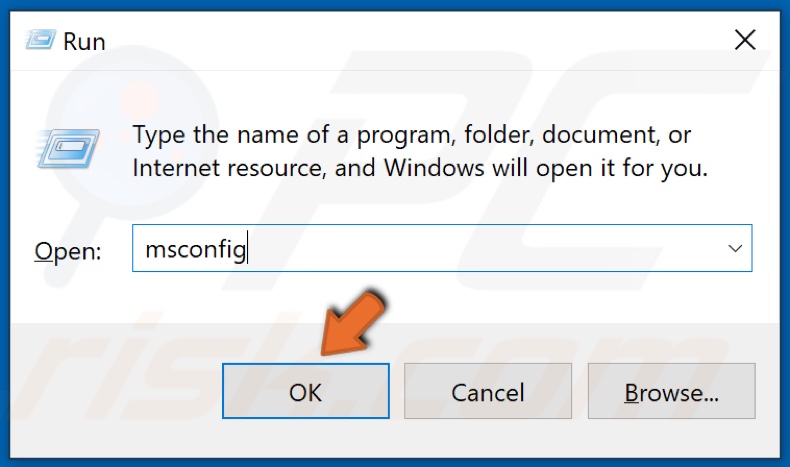
2. In the Run dialog box, type in MSConfig and click OK.
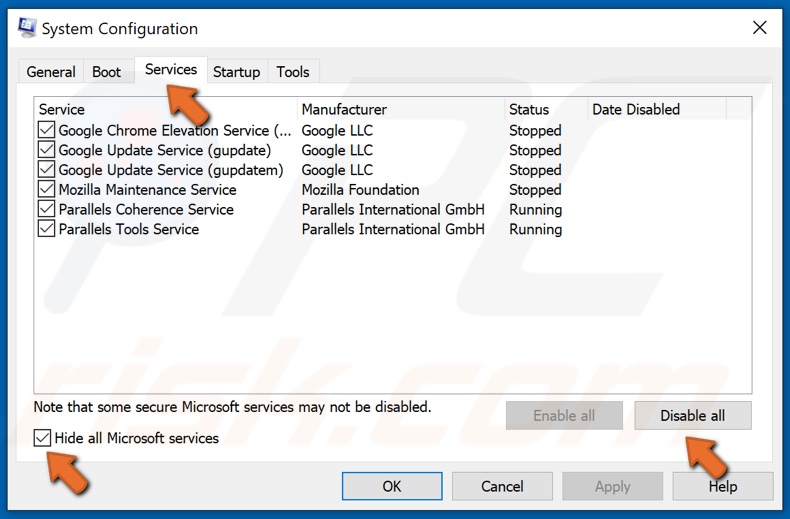
3. In the System Configuration window, select the Services tab.
4. Then, tick the Hide all Microsoft services checkbox.
5. Click Disable all.
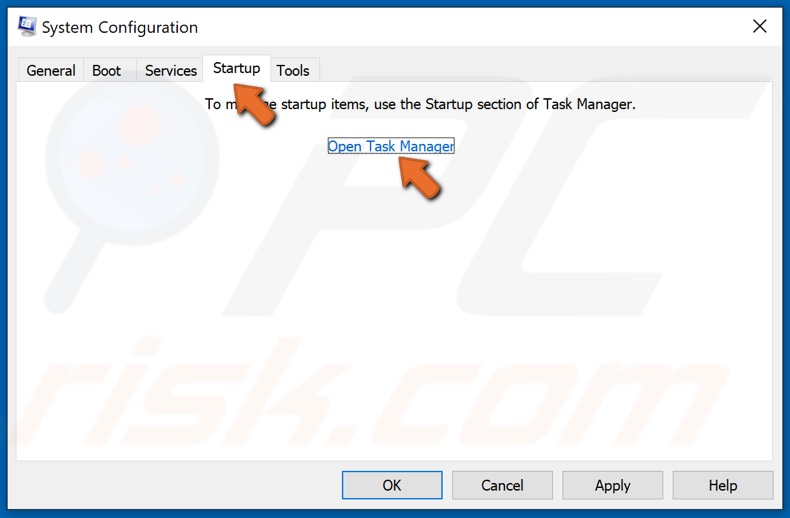
6. Then, Navigate to the Startup tab.
7. Click Open Task Manager.
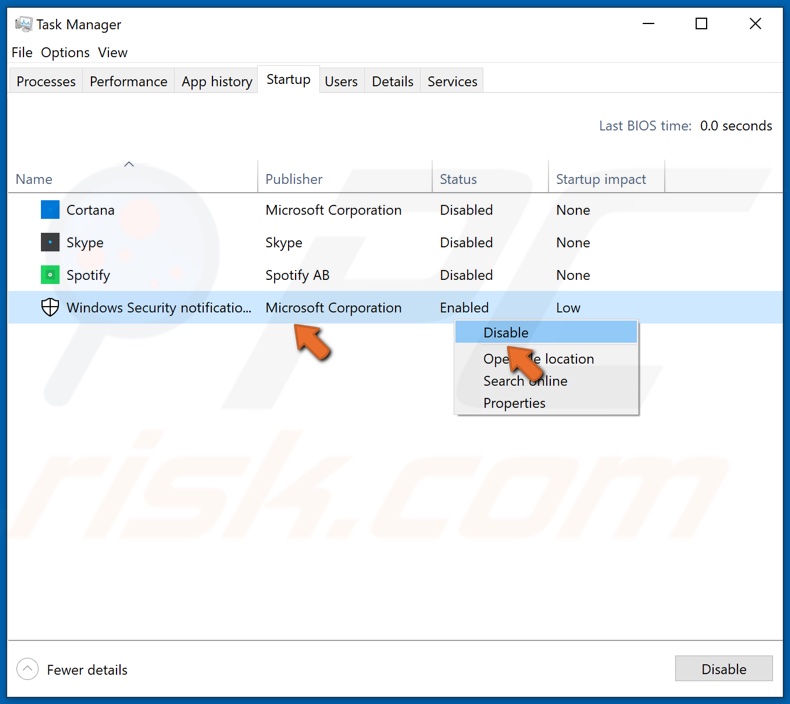
8. Right-click each application, and click Disable.
9. Close the Task Manager.
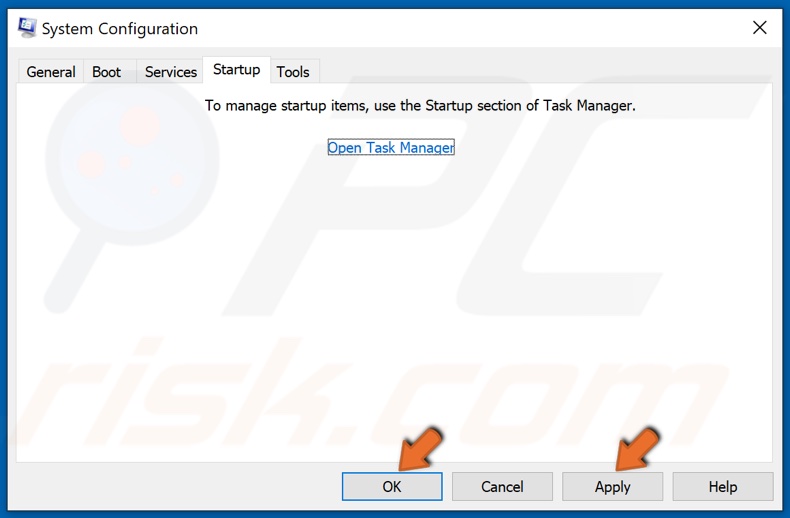
10. In the System Configuration window, click Apply and click OK.
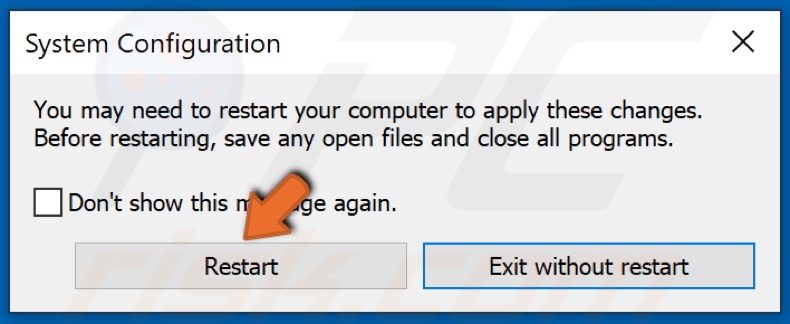
11. Click Restart when prompted.
12. Try updating Windows.
13. After updating Windows, you can revert back to normal boot. Here is how you can do it.
14. Hold down Windows+R keys to open Run.

15. In the Run dialog box, type in MSConfig and click OK.
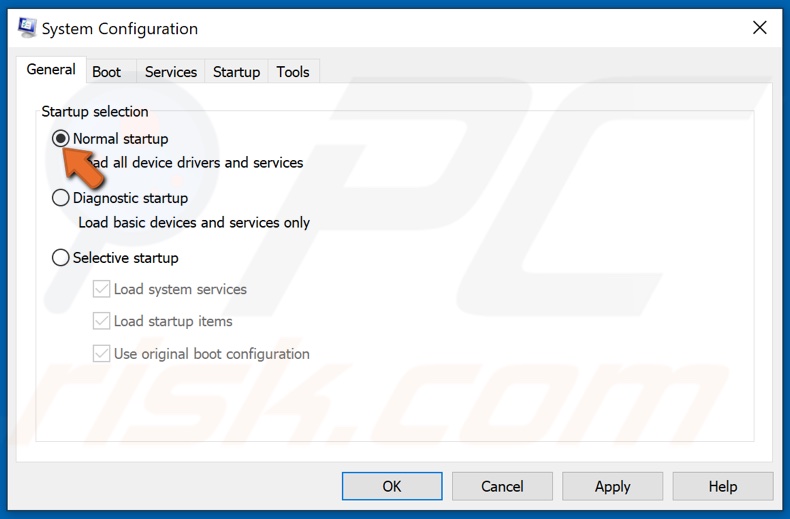
16. In the General tab, select Normal startup.
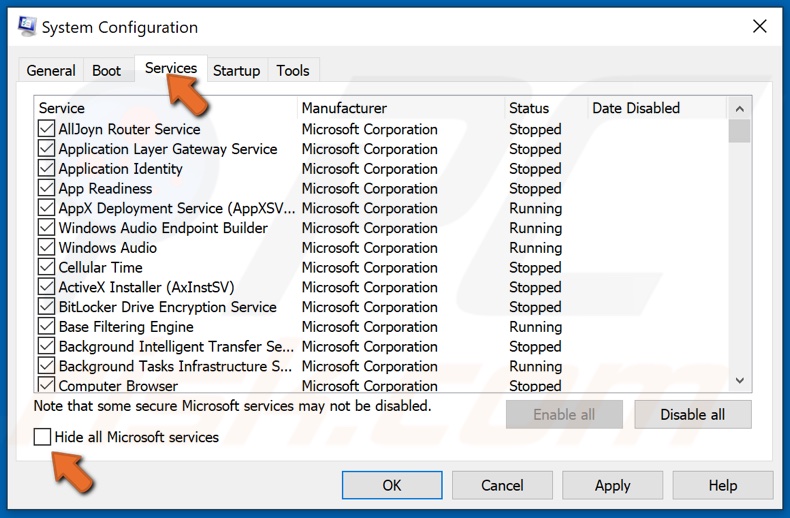
17. Then, click the Services tab and make sure the Hide all Microsoft services option is unchecked.

18. Finally, click the Startup tab and click Open Task Manager.
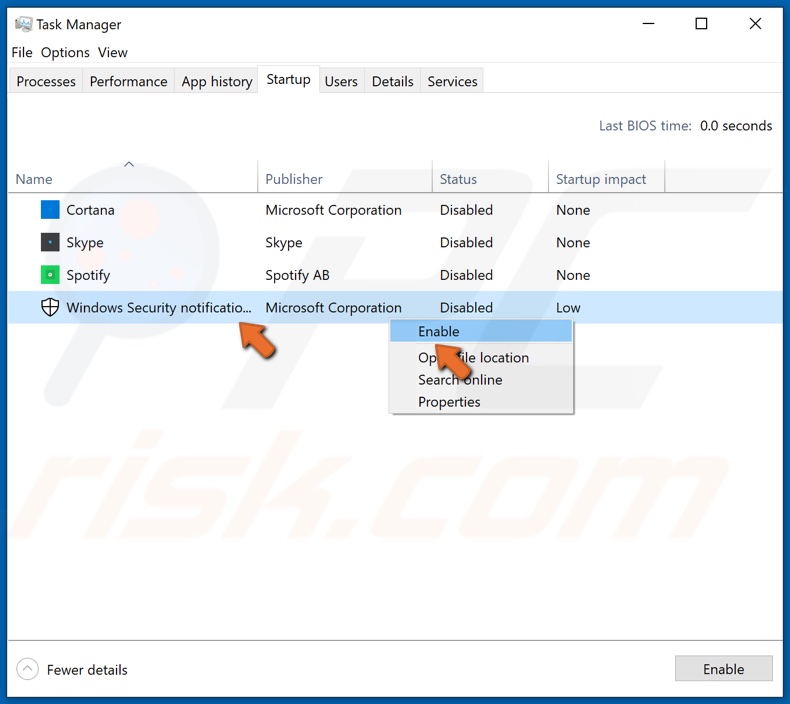
19. Enable all previously disabled applications.
20. Close the Task Manager.

21. In the System Configuration window, click Apply and click OK.

22. Click Restart when prompted.
Solution 5. Upgrade Windows 10 Using the Media Creation Tool
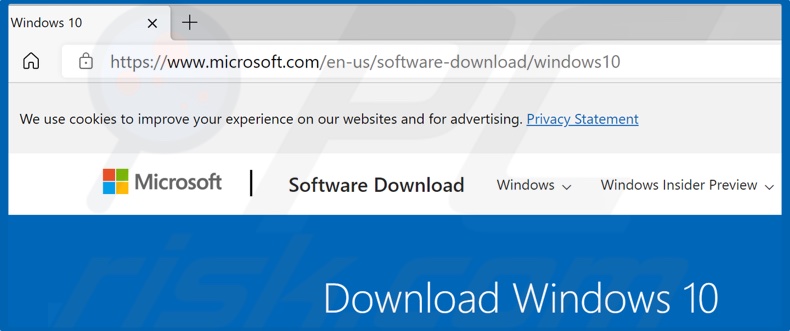
1. Go to Microsoft’s Download Windows 10 web page.
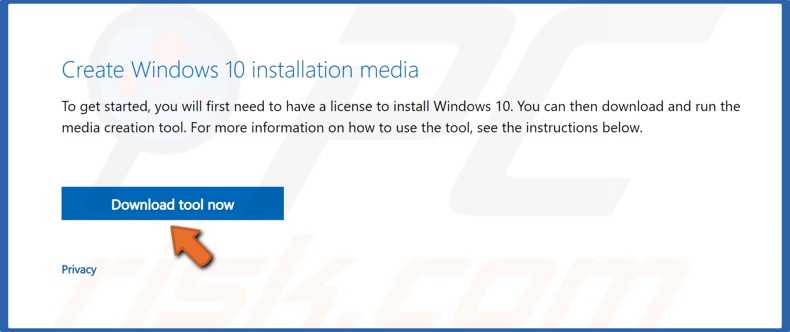
2. Click Download tool now.
3. Run the Media Creation Tool once it’s been downloaded.
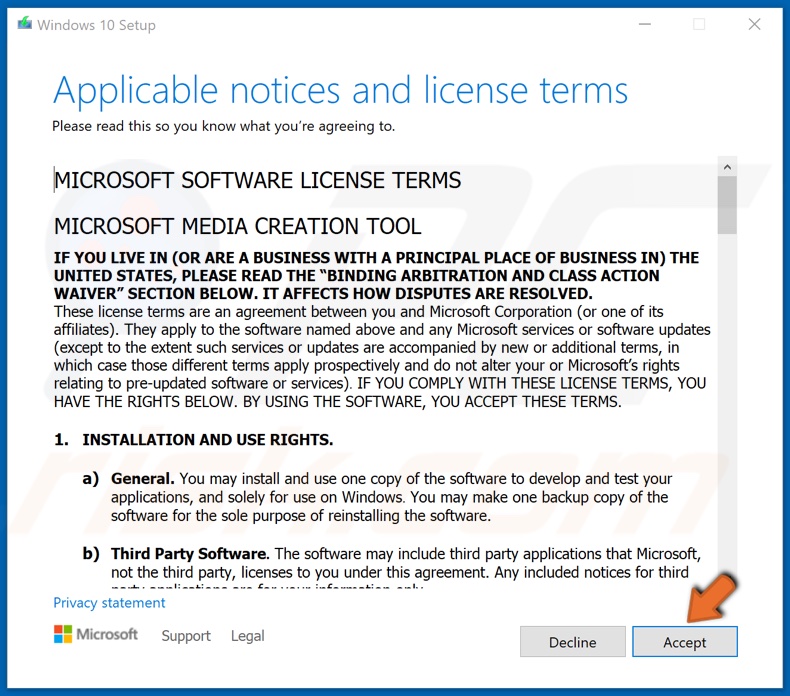
4. Then, Accept the license agreement.
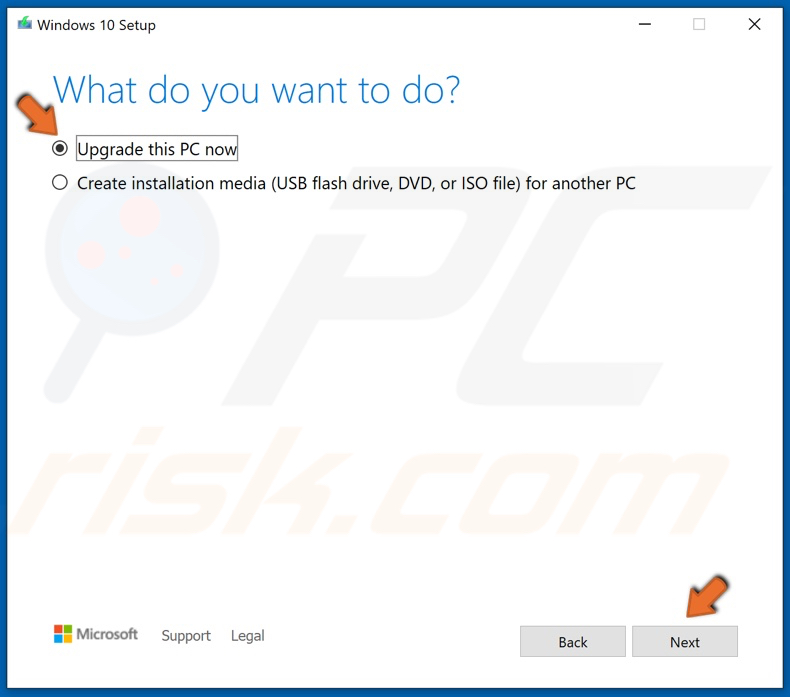
5. Make sure that the Upgrade this PC now is ticked, and click Next.
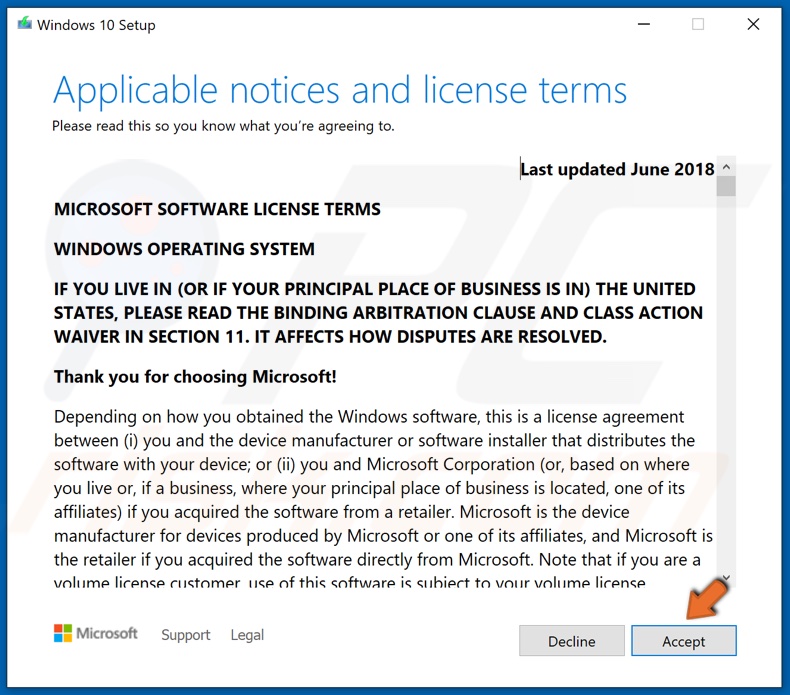
6. Then, Accept the Windows 10 license agreement.
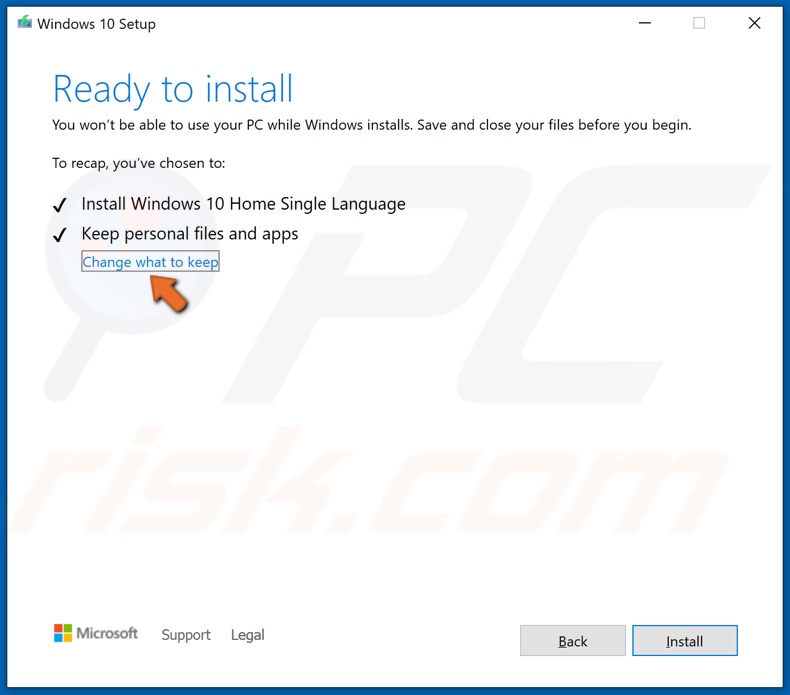
7. You can choose to keep your personal files and apps, but if you want a clean installation of Windows 10, click the Change what to keep button to customize the installation settings.
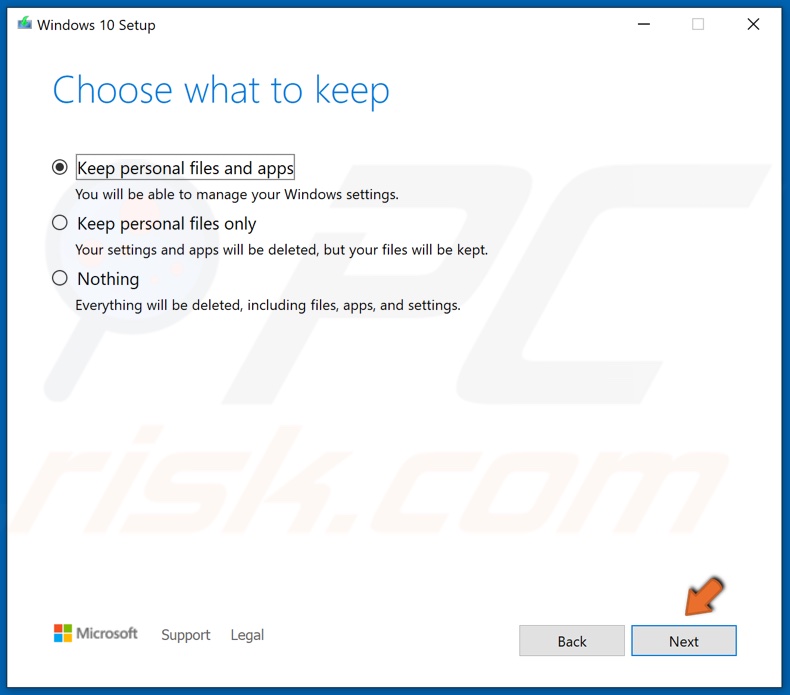
8. Choose what to keep and click Next.
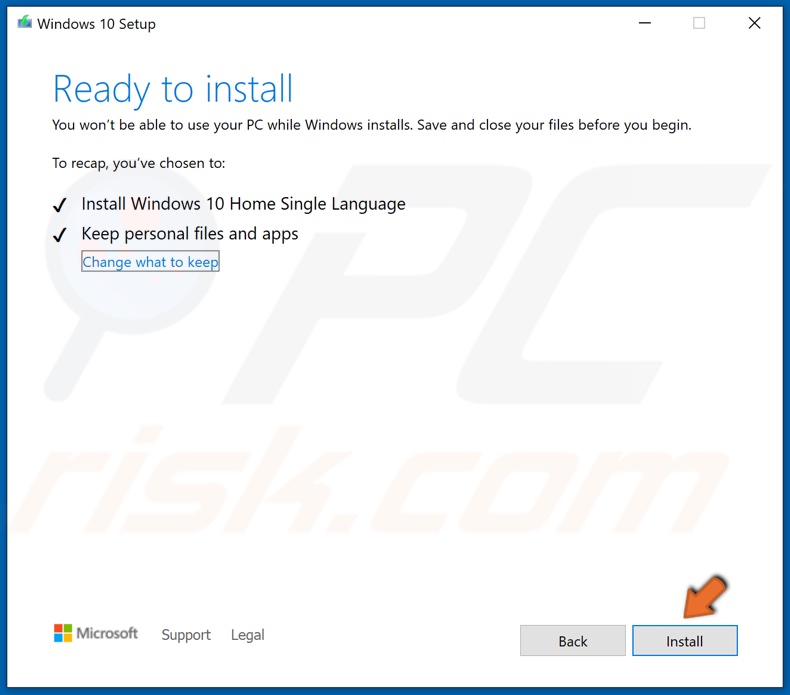
9. Then, click Install, and the setup will begin upgrading Windows 10.
Solution 6. Run the Deployment Imaging and Servicing Management (DISM) Scan
1. Hold down Windows+R keys to open Run.

2. In the Run dialog box, type in CMD and hold down Ctrl+Shift+Enter keys to open Command Prompt as an administrator.
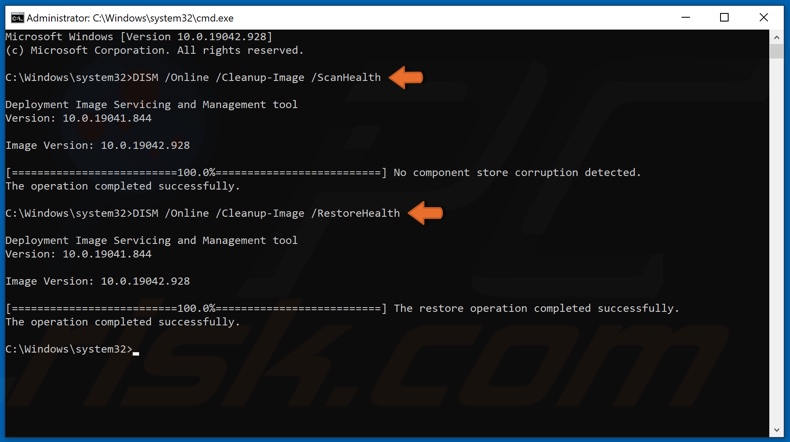
3. In the Command Prompt window, type in DISM /Online /Cleanup-Image /ScanHealth and press the Enter key.
4. Then, type in DISM /Online /Cleanup-Image /RestoreHealth and press Enter.
5. Close the Command Prompt and restart your PC.
6. Try to update Windows.
Solution 7. Run the System File Checker (SFC) Scan
1. Hold down Windows+R keys to open Run.

2. In the Run dialog box, type in CMD and hold down Ctrl+Shift+Enter keys to open Command Prompt as an administrator.
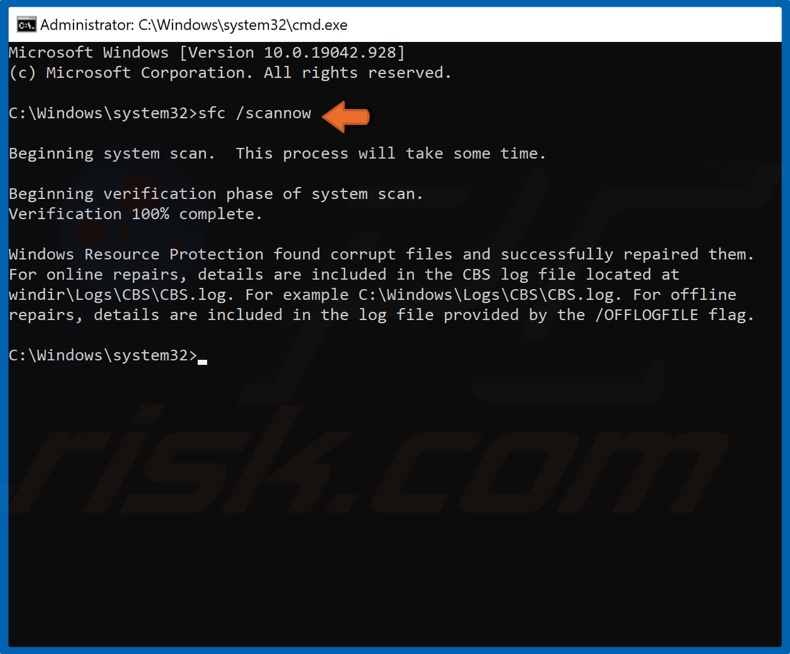
3. In the Command Prompt window, type in SFC /ScanNow and press Enter.
4. Then, close the Command Prompt and restart your PC.
5. Try to update Windows.
Share:

Rimvydas Iliavicius
Researcher, author
Rimvydas is a researcher with over four years of experience in the cybersecurity industry. He attended Kaunas University of Technology and graduated with a Master's degree in Translation and Localization of Technical texts. His interests in computers and technology led him to become a versatile author in the IT industry. At PCrisk, he's responsible for writing in-depth how-to articles for Microsoft Windows.

▼ Show Discussion