Fix Windows Update Error 0x80092004
Get Free Scanner and check your computer for errors
Fix It NowTo fix found issues, you have to purchase the full version of Combo Cleaner. Free trial available. Combo Cleaner is owned and operated by Rcs Lt, the parent company of PCRisk.com read more.
Getting Error 0x80092004 When Updating Windows 10? Our Troubleshooting Guide Will Help You Fix It
Error code 0x80092004 is yet another Windows Update error that prevents users from updating Windows 10. The good news is that it's an easy error to fix.
What is Error 0x80092004?
Error 0x80092004 stands for "CRYPT_E_NOT_FOUND: Cannot find object or property," which means that Windows Update could not find any cryptographic value and rejected the update. The error forces the Windows Update process to fail while searching for new updates or installing updates.
What Causes This Error?
- The most common cause for this error is corrupted update or system files. If important update or system files have become corrupt or are outright missing, the update process will fail and result in error 0x80092004.
- You may get error code 0x80092004 is if there's something wrong with the update itself. Sometimes, Microsoft releases buggy updates that haven't been appropriately tested, and Windows 10 won't accept them, causing the update process to fail and roll back the installation.
- A corrupted SoftwareDistribution folder that temporarily stores files needed to install new updates.
Video Guide on How to Fix Windows Update Error 0x80092004
Table of Contents:
- Introduction
- Solution 1. Run the Windows Update Troubleshooter
- Solution 2. Clear the Windows Update Cache Folder
- Solution 3. Download Servicing Stack Update
- Solution 4. Install Updates Manually
- Solution 5. Run the Deployment Image & Servicing Management (DISM) Scan
- Solution 6. Run the System File Checker (SFC) Scan
- Video Guide on How to Fix Windows Update Error 0x80092004
Download Computer Malware Repair Tool
It is recommended to run a free scan with Combo Cleaner - a tool to detect viruses and malware on your device. You will need to purchase the full version to remove infections. Free trial available. Combo Cleaner is owned and operated by Rcs Lt, the parent company of PCRisk.com read more.
Solution 1. Run the Windows Update Troubleshooter
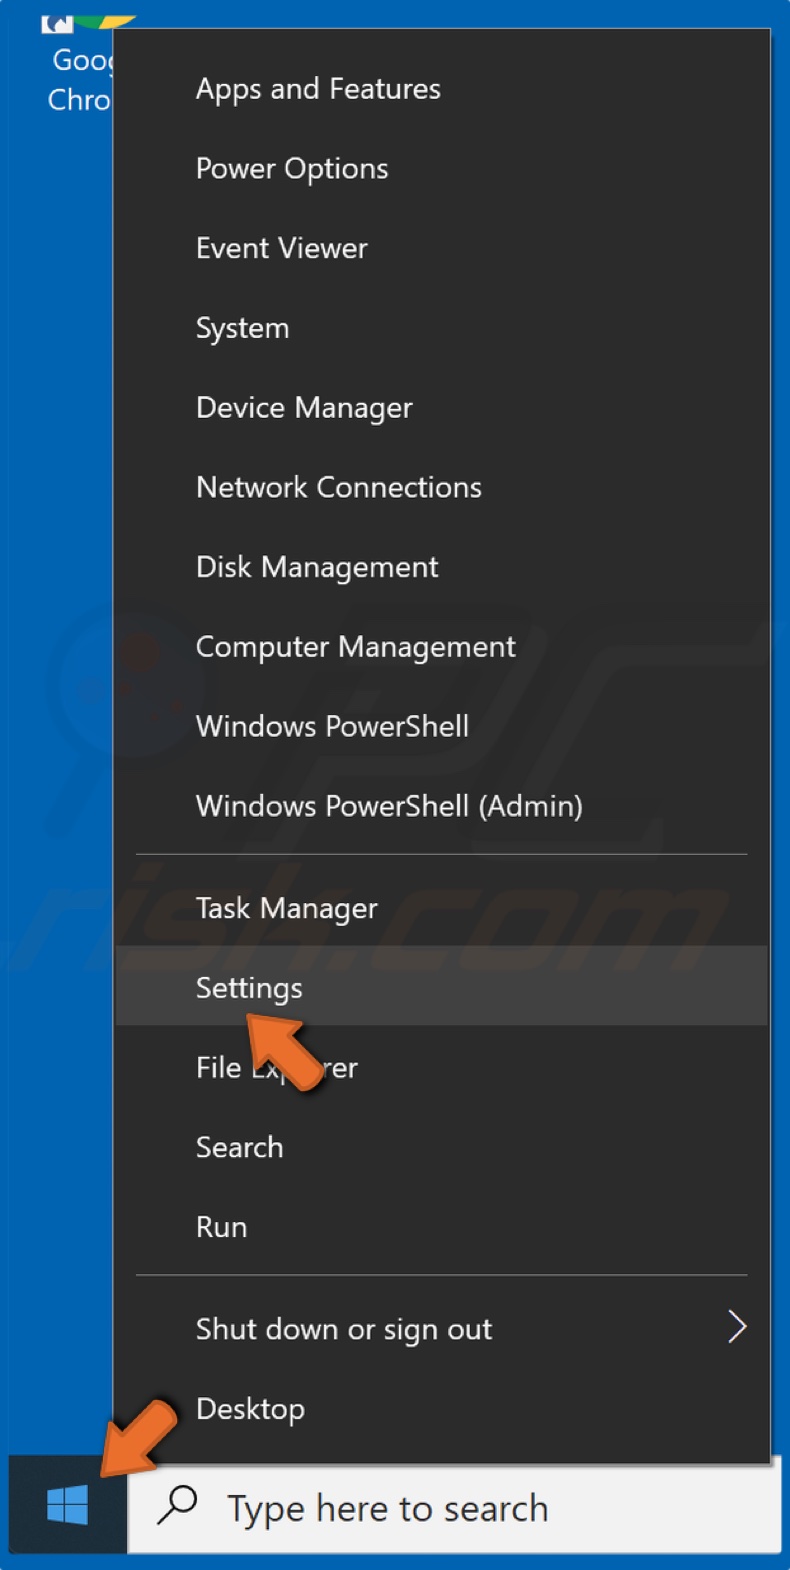
1. Right-click the Windows Start button and click Settings.
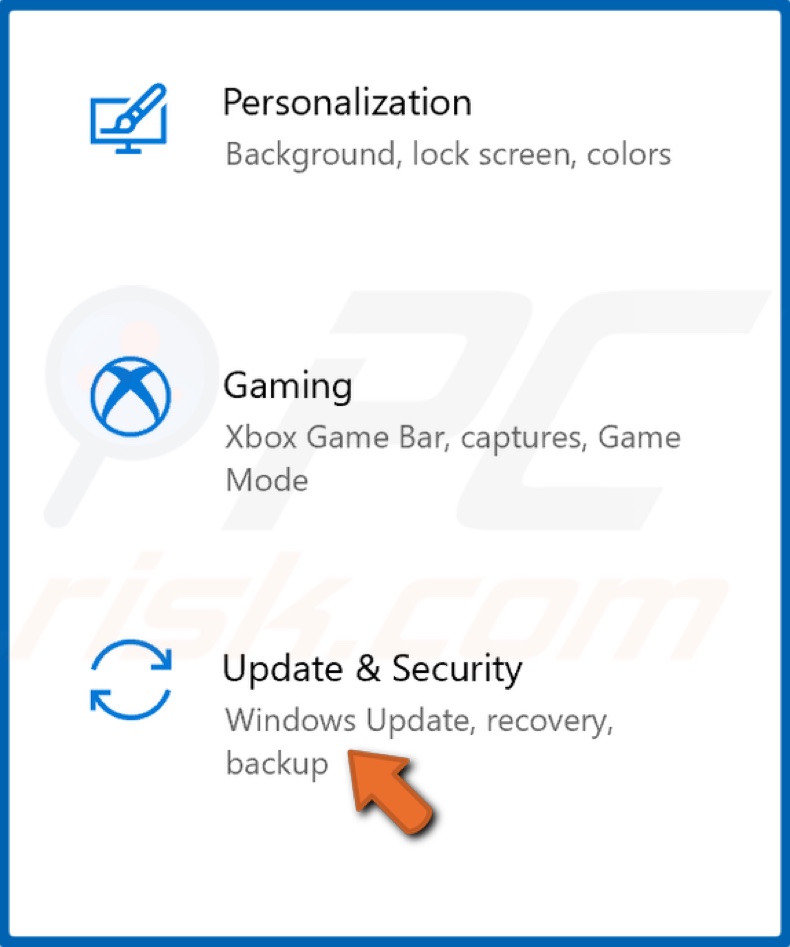
2. In the Settings menu, select Update & Security.
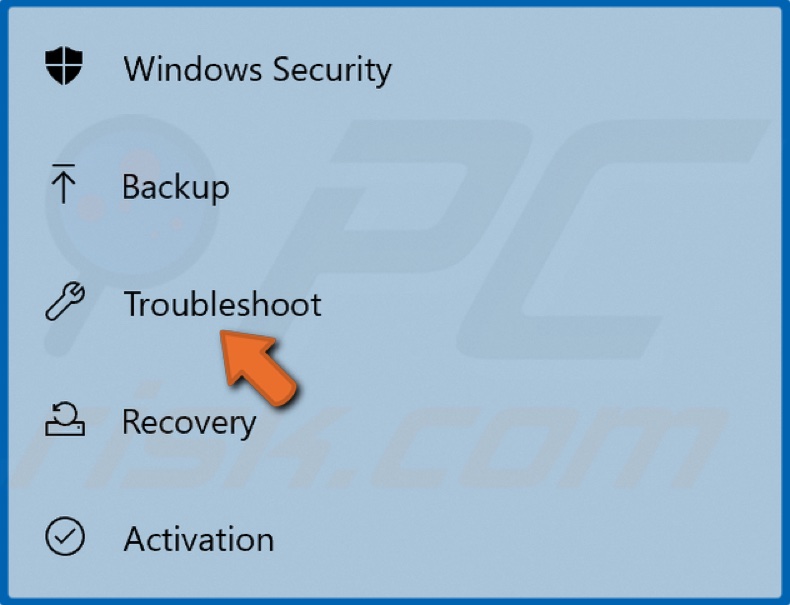
3. In the left pane, click Troubleshoot.
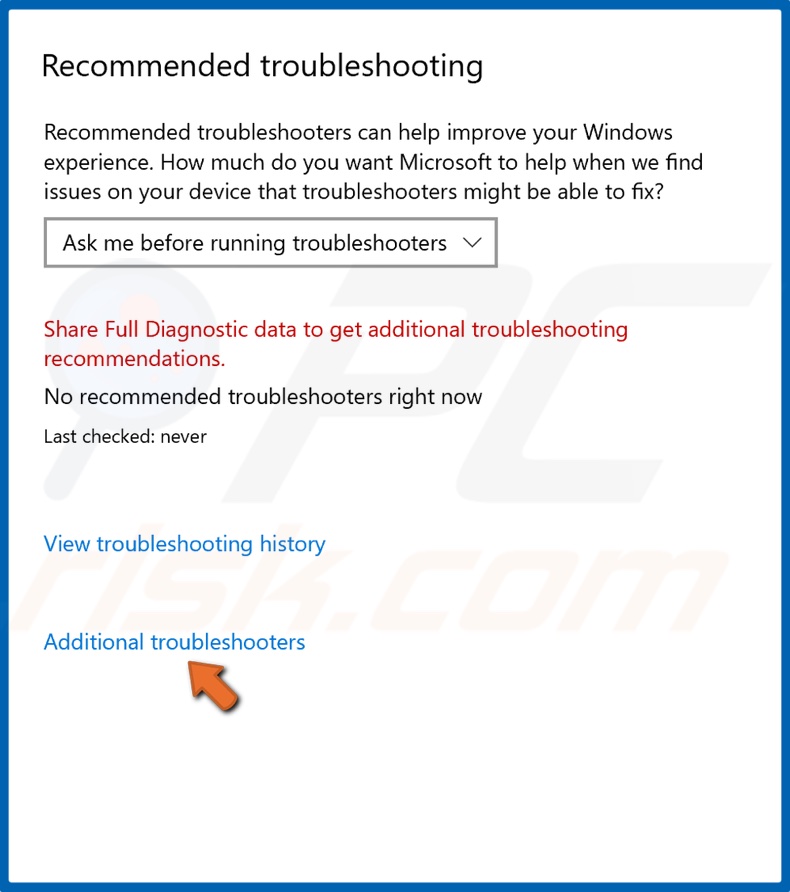
4. Click Additional troubleshooters.
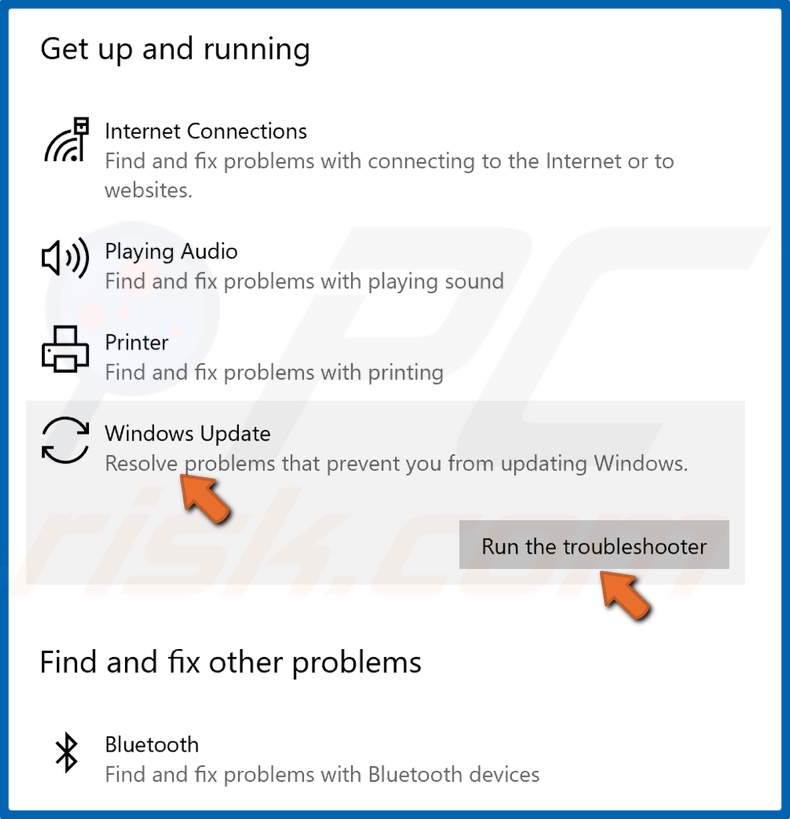
3. Select Windows Update and click Run the troubleshooter.
4. If the troubleshooter detects an issue, it will select and apply a fix automatically.
5. Try updating Windows.
Solution 2. Clear the Windows Update Cache Folder
1. Hold down Windows+R keys to open Run.
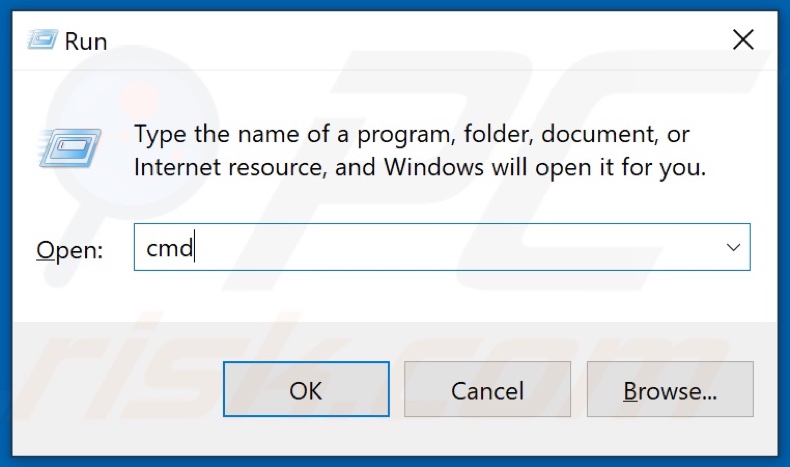
2. In the Run text box, type in CMD and hold down Ctrl+Shift+Enter keys to open the elevated Command Prompt.
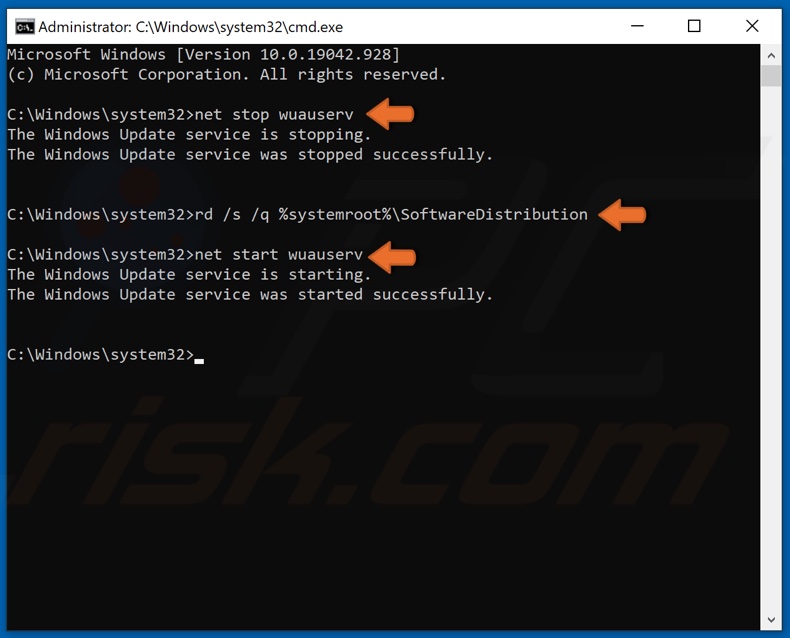
3. In the Command Prompt window, type in net stop wuauserv and hit Enter to stop the Windows Update service.
4. Then, type in rd /s /q %systemroot%\SoftwareDistribution and hit Enter to clear the SoftwareDistribution folder.
5. Lastly, type in net start wuauserv and hit Enter to restart the Windows Update service.
6. Close the Command Prompt and try updating Windows.
Solution 3. Download Servicing Stack Update
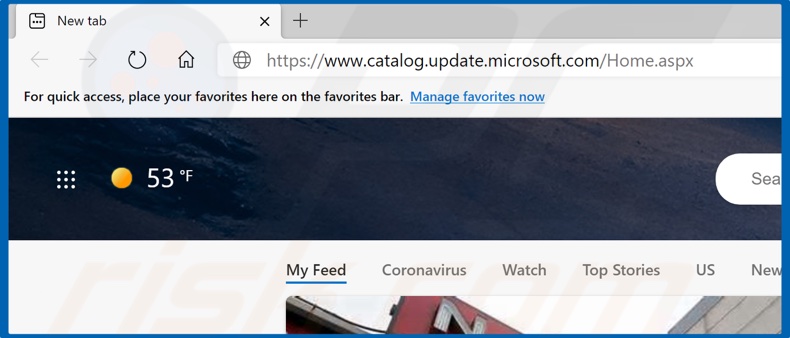
1. Go to the Microsoft Update Catalog webpage.
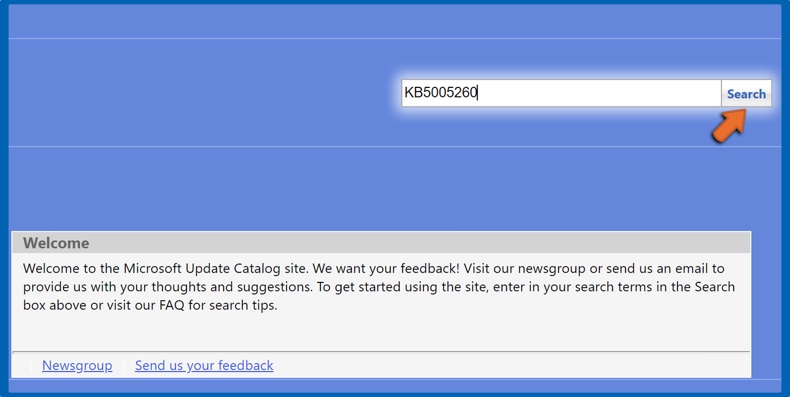
2. In the search box at the top right of the window, type in the servicing stack KB (Knowledge Base) code (e.g., KB5005260 for 2004 and 20H2) and click Search.
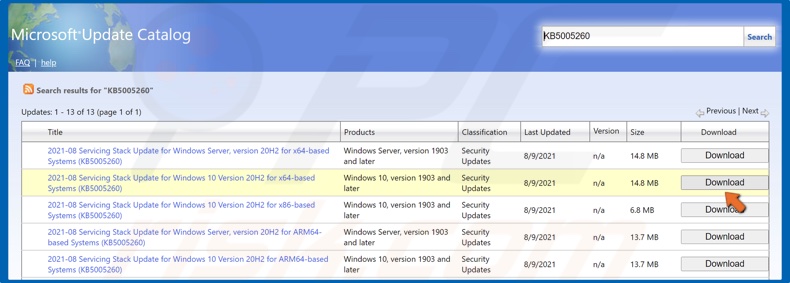
3. Then, select the version for your operating system and CPU architecture, and click Download.
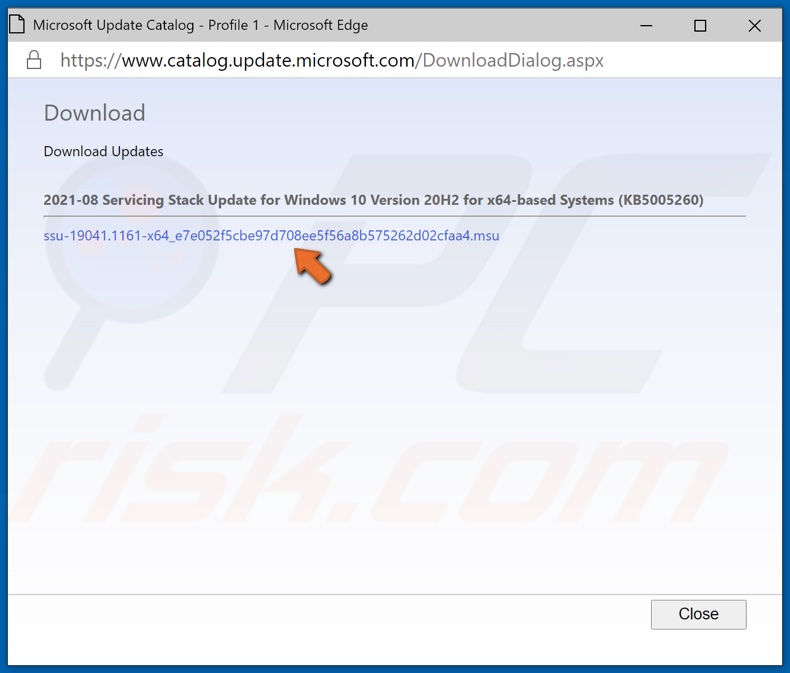
4. A new window will open. Click the update link, and the update will begin downloading.
5. Once the update has been downloaded, run its installer.
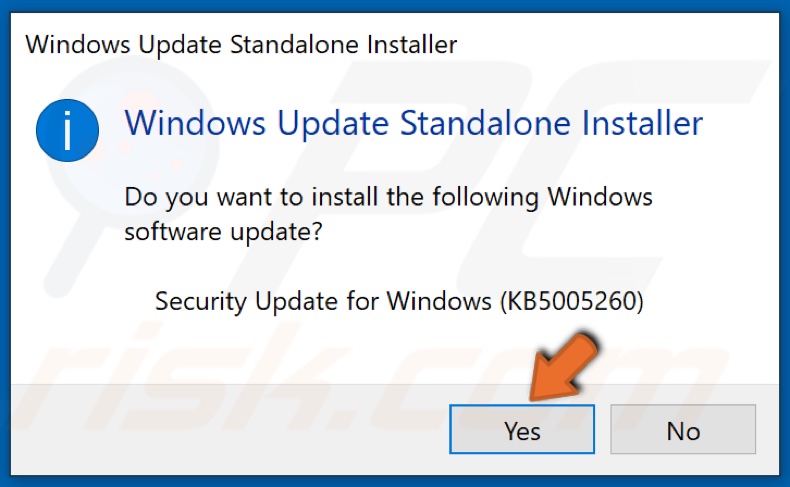
6. The installer will scan your PC for updates and then ask whether you want to install the update. Click Yes.
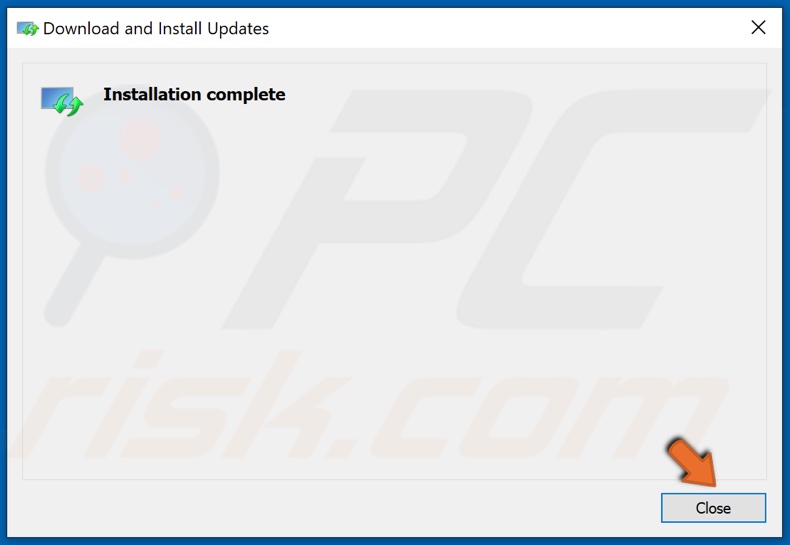
7. Click Close once the servicing stack update is installed.
8. Then try updating Windows.
Solution 4. Install Updates Manually

1. Go to the Microsoft Update Catalog webpage.
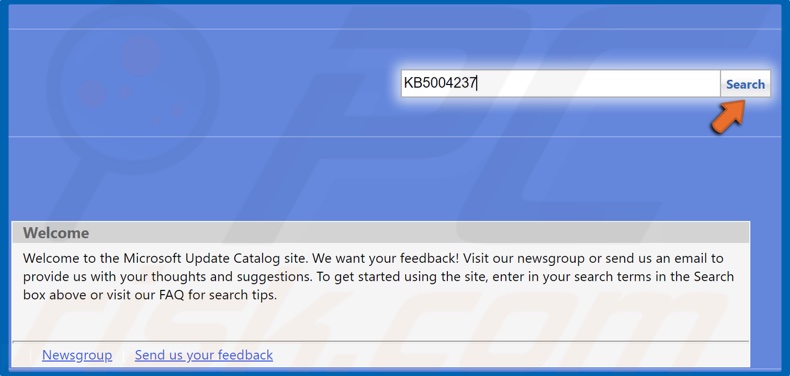
2. In the search box at the top right of the window, type in the KB (Knowledge Base) code (e.g., KB5004237) and click Search.
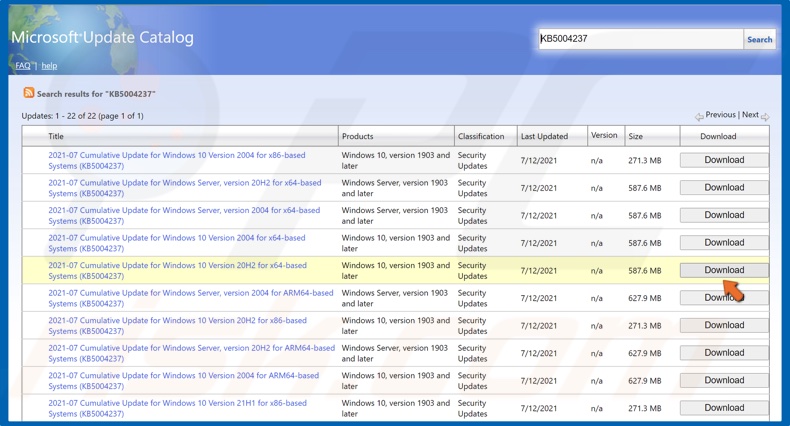
3. Then, select the version for your operating system and CPU architecture, and click Download.
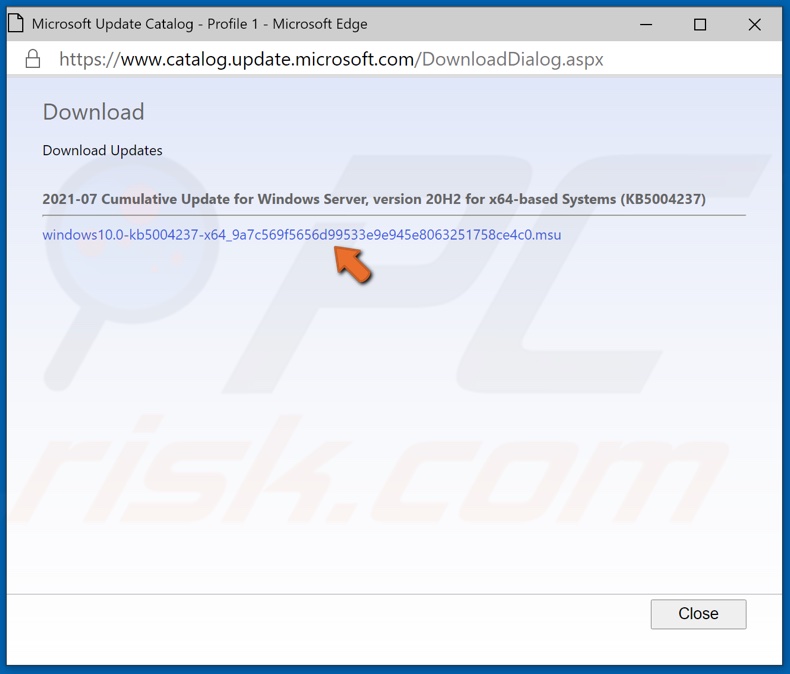
4. A new window will open. Click the update link, and the update will begin downloading.
5. Once the update has been downloaded, run its installer.
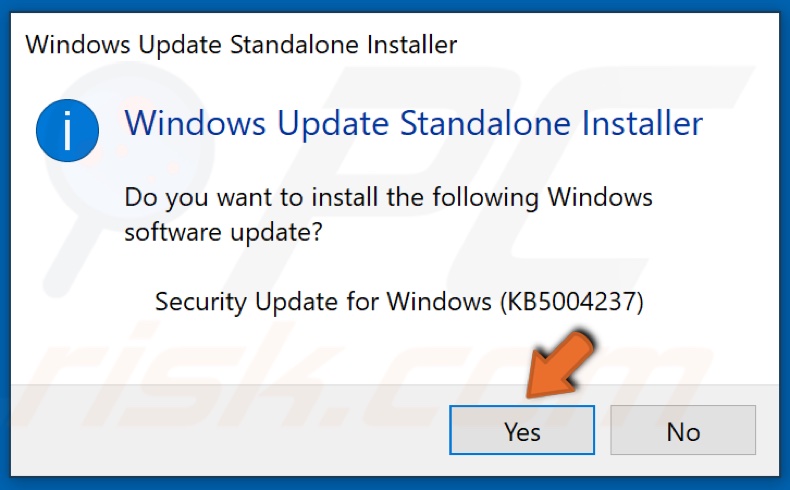
6. The installer will scan your PC for updates and then ask whether you want to install the update. Click Yes.
7. The Standalone installer will begin installing the update.
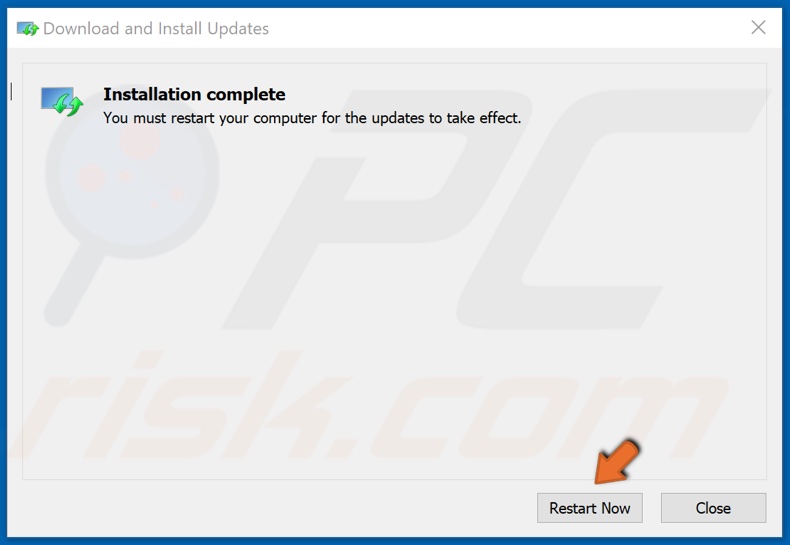
8. Once the update is installed, click Restart now.
Solution 5. Run the Deployment Image & Servicing Management (DISM) Scan
1. Hold down Windows+R keys to open Run.

2. In the Run text box, type in CMD and hold down Ctrl+Shift+Enter keys to open the elevated Command Prompt.
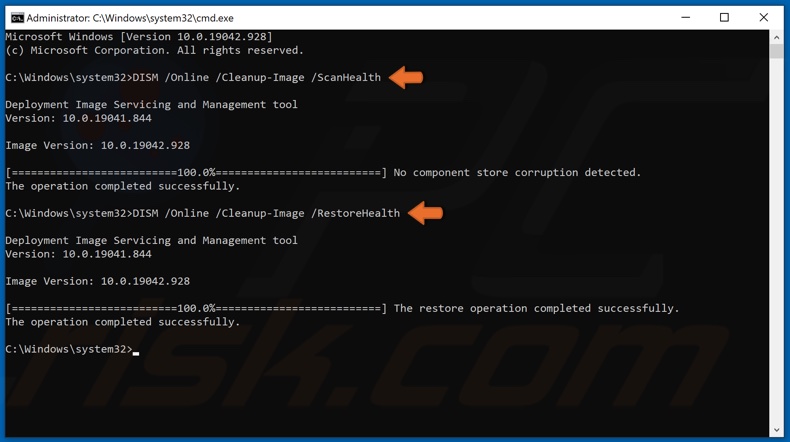
3. In the Command Prompt window, type in DISM /Online /Cleanup-Image /ScanHealth and hit the Enter key. This parameter will scan the component store for corruption.
4. Type in DISM /Online /Cleanup-Image /RestoreHealth and hit the Enter key.
5. Once the process has been completed, try updating Windows.
Solution 6. Run the System File Checker (SFC) Scan
1. Hold down Windows+R keys to open Run.

2. In the Run text box, type in CMD and hold down Ctrl+Shift+Enter keys to open the elevated Command Prompt.
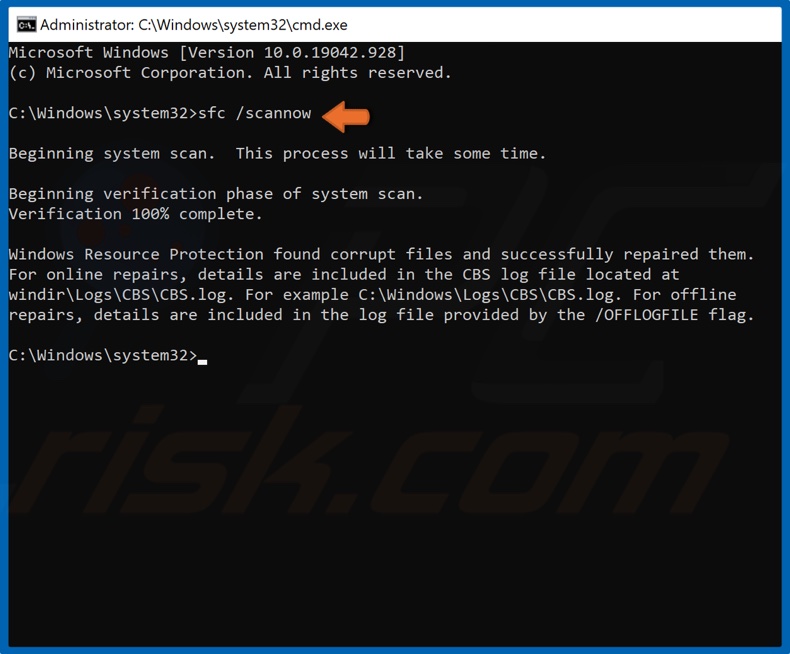
3. In the Command Prompt window, type in SFC /ScanNow and hit the Enter key.
4. Wait for the scan to complete.
5. Once the scan has been completed, restart your PC.
6. After the restart, try updating Windows.
Share:

Rimvydas Iliavicius
Researcher, author
Rimvydas is a researcher with over four years of experience in the cybersecurity industry. He attended Kaunas University of Technology and graduated with a Master's degree in Translation and Localization of Technical texts. His interests in computers and technology led him to become a versatile author in the IT industry. At PCrisk, he's responsible for writing in-depth how-to articles for Microsoft Windows.

▼ Show Discussion