Fix Windows Update Error 0x8007000d

Get Free Scanner and check your computer for errors
Fix It NowTo fix found issues, you have to purchase the full version of Combo Cleaner. Free trial available. Combo Cleaner is owned and operated by Rcs Lt, the parent company of PCRisk.com read more.
How to Fix Windows Update Error 0x8007000d in Windows 10
Error 0x8007000d occurs specifically when system files become corrupt, or Windows Update components become outdated. Despite that, there are ways you can fix error 0x8007000d, which we will explain in this article.
What is Error 0x8007000d
Many users experienced error 0x8007000d when installing the Cumulative Update for Windows 10 Version 1511 for x64-based Systems (KB3124200). Most recently, people witnessed the resurgence of the error again when attempting to update Windows 10 version 20H2. Specifically, many got error 0x8007000d when trying to install updates KB4586853 and KB4592438.
On a side note, many users get this same error code (0x8007000d) when trying to activate Windows 10.
What Causes Error 0x8007000d
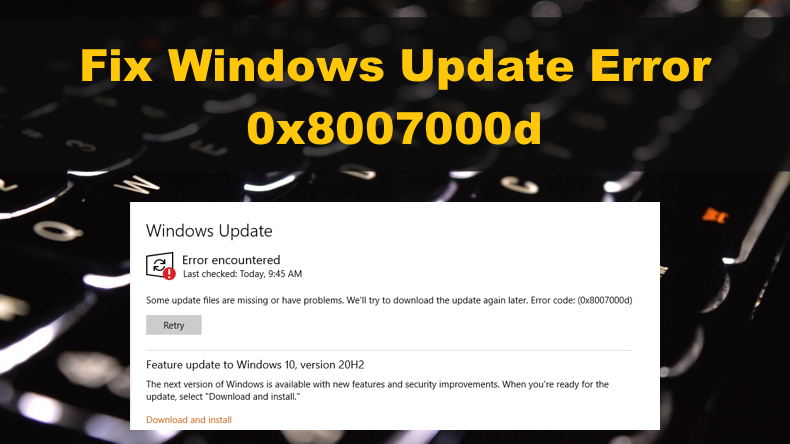
0x8007000d may occur due to any number of reasons. The problem is that this error message doesn't provide much information about what triggered it. However, error 0x8007000d is usually accompanied by the following message:
Some update files are missing or have problems. We'll try to download the update again later. Error code: (0x8007000d)
According to our research, this error may occur for two reasons:
- Some system files have become corrupt.
- Some Windows Update components have become outdated.
Video Instructions on How to Fix Windows Update Error 0x8007000d
Table of Contents:
- Introduction
- Solution 1. Run the Windows Update Troubleshooter
- Solution 2. Update Windows 10 Using the Windows Update Assistant
- Solution 3. Clear the Windows Update Cache Folder
- Solution 4. Run the Deployment Image & Servicing Management (DISM) Scan
- Solution 5. Run the System File Checker (SFC) Scan
- Solution 6. Reset Windows Update Components Manually
- Solution 7. Configure the Group Policy Setting
- Video Instructions on How to Fix Windows Update Error 0x8007000d
Download Computer Malware Repair Tool
It is recommended to run a free scan with Combo Cleaner - a tool to detect viruses and malware on your device. You will need to purchase the full version to remove infections. Free trial available. Combo Cleaner is owned and operated by Rcs Lt, the parent company of PCRisk.com read more.
Solution 1. Run the Windows Update Troubleshooter
If Windows Update components fail due to corruption, you can run the Windows Update Troubleshooter to repair the files and many other issues. We recommend running the troubleshooter twice in a row for the result.

1. Right-click the Start Menu button and click Settings.
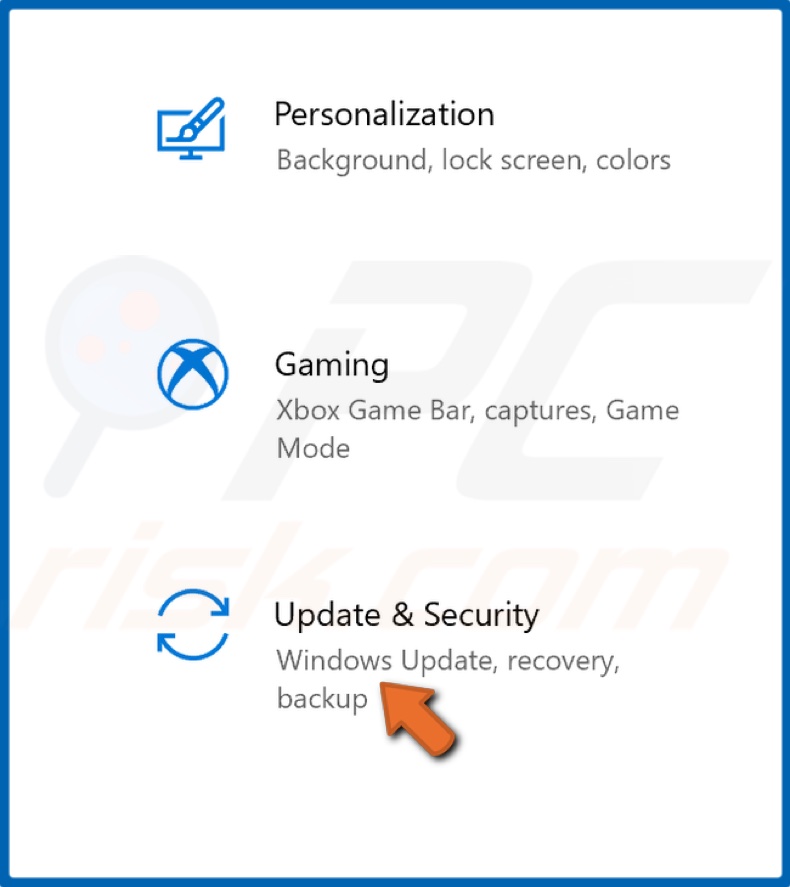
2. Select Update & Security.
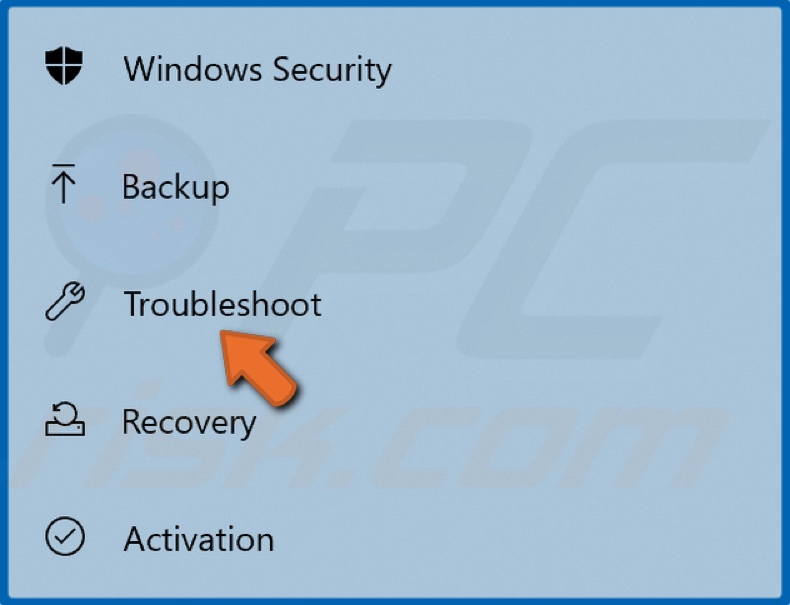
3. Click Troubleshoot.
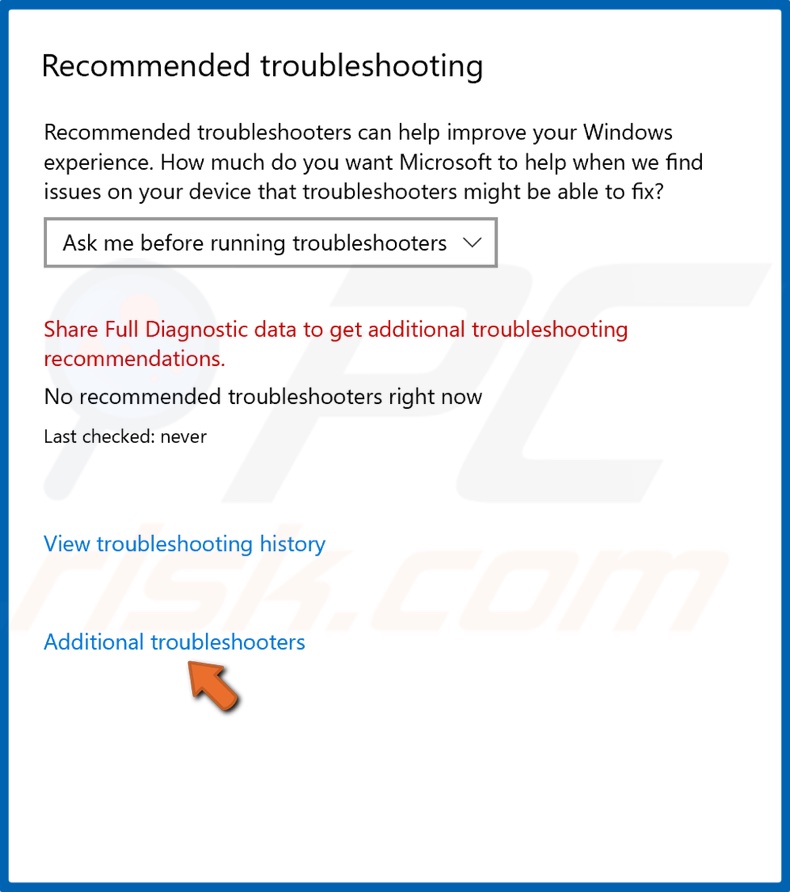
4. Click Additional troubleshooters.
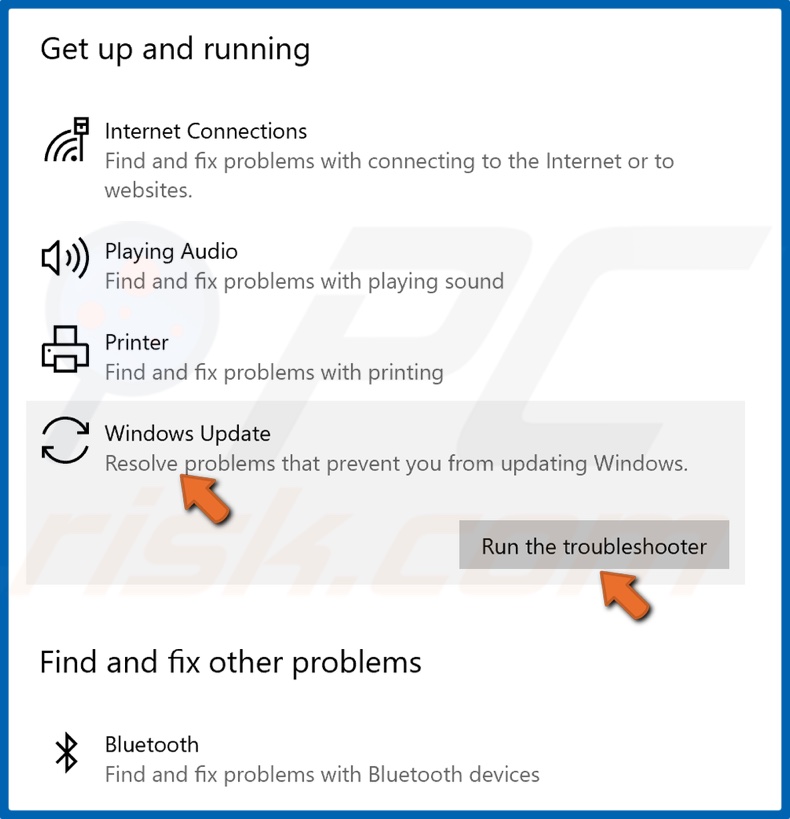
5. Select Windows Update and click Run the troubleshooter.
6. If the troubleshooter detects an issue, it will select and apply a fix automatically.
7. Try updating Windows.
Solution 2. Update Windows 10 Using the Windows Update Assistant
Windows 10 Update Assistant is designed to install the latest Windows 10 updates that users might miss or choose not to install. The Update Assistant ensures that you have the latest Windows 10 version running on your computer.
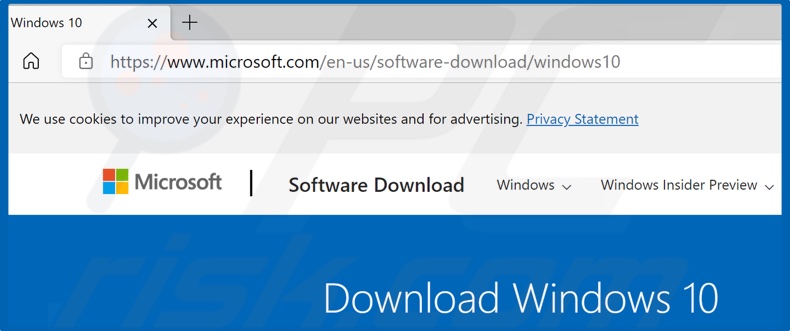
1. Open your web browser and go to the Windows 10 Update Assistant download page.
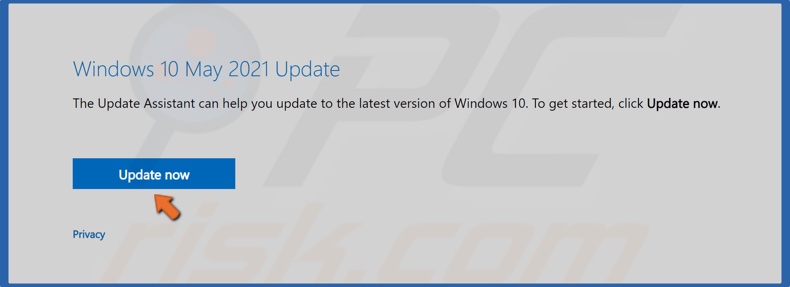
2. Click Update now to get the Windows 10 Update Assistant.
3. Once downloaded, Run the Update Assistant executable file.
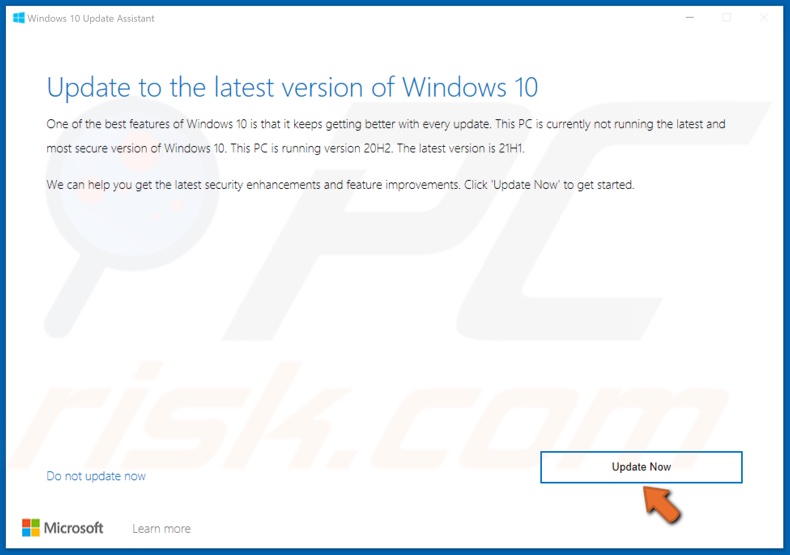
4. Then, click Update Now.
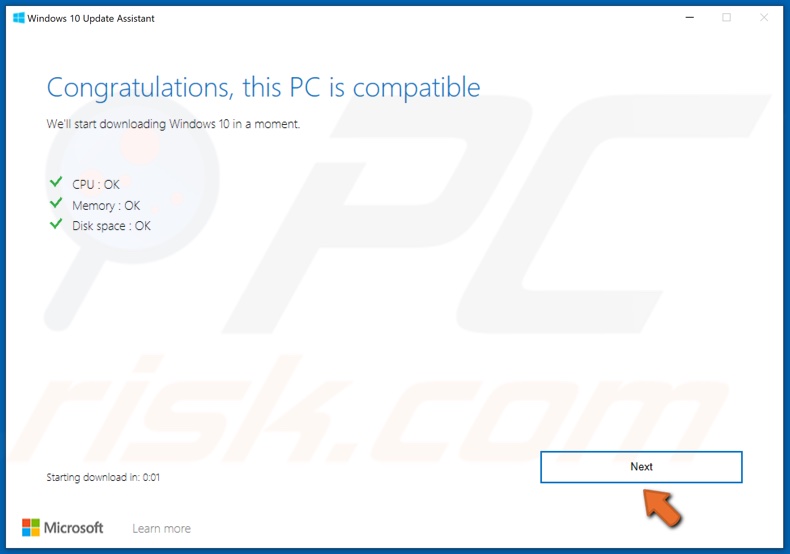
5. Click Next.
6. Allow Windows to update. The update process may take a while.
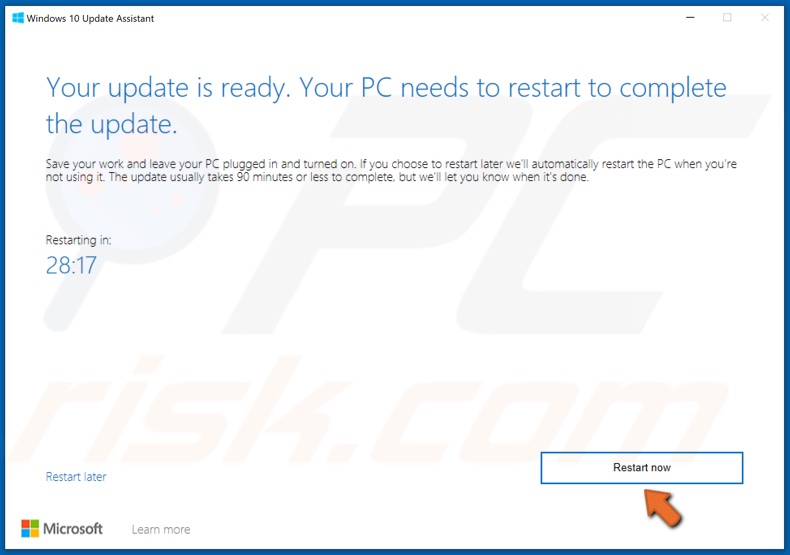
7. Click Restart now when prompted.
Solution 3. Clear the Windows Update Cache Folder
1. Hold down Windows+R keys to open Run.
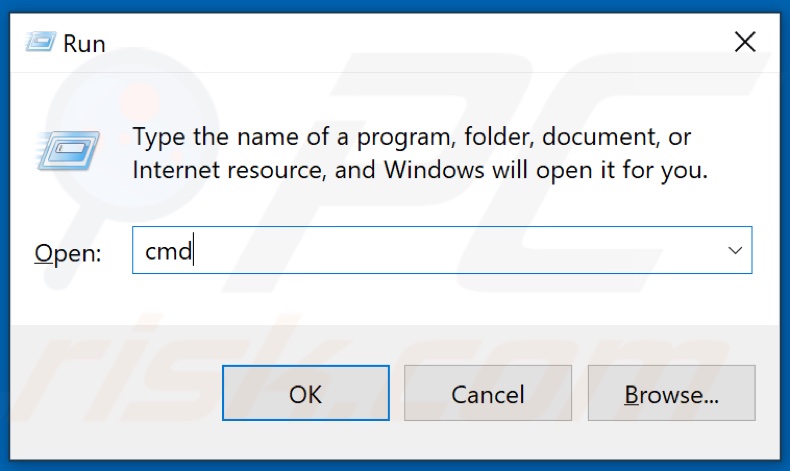
2. In the Run dialog box, type in CMD and hold down Ctrl+Shift+Enter keys to open the elevated Command Prompt.
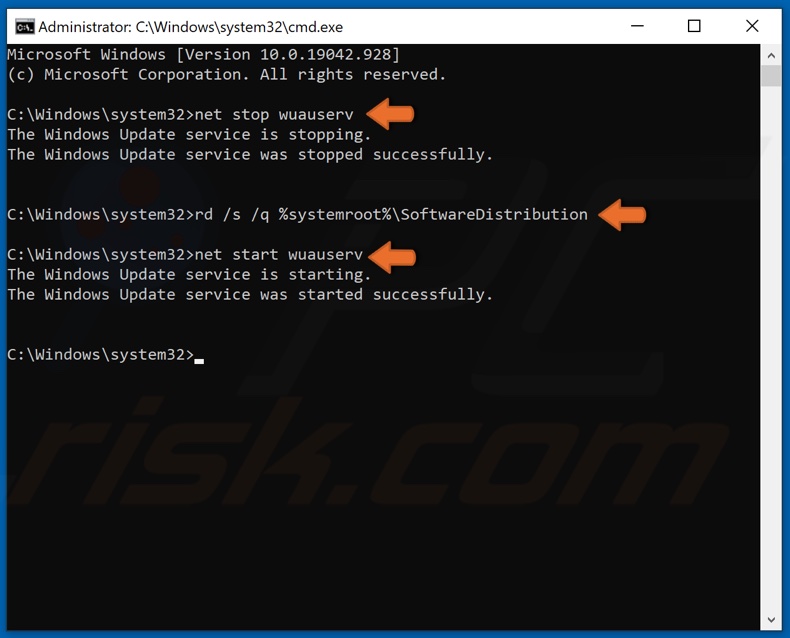
3. In the Command Prompt window, type in net stop wuauserv and press Enter to stop Windows Update Service.
4. Then, type in rd /s /q %systemroot%\SoftwareDistribution and press Enter to clear the Update cache folder.
5. Then, type in net start wuauserv to restart the previously stopped Windows Update Service.
6. Close the Command Prompt and try updating Windows.
Solution 4. Run the Deployment Image & Servicing Management (DISM) Scan
1. Hold down Windows+R keys to open Run.
2. In the Run dialog box, type in CMD and hold down Ctrl+Shift+Enter keys to open the elevated Command Prompt.
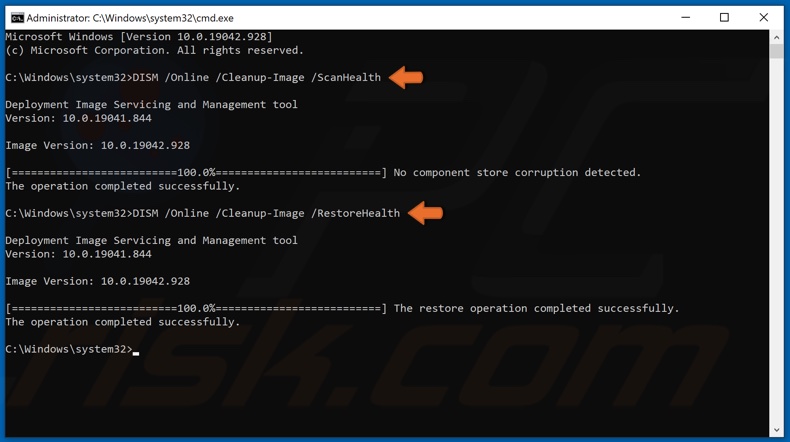
3. In the Command Prompt window, type in DISM /Online /Cleanup-Image /ScanHealth and press the Enter key. This parameter will scan the component store for corruption.
4. Type in the DISM /Online /Cleanup-Image /RestoreHealth and press Enter.
5. Once the process has been completed, close the Command Prompt and try updating Windows 10.
Solution 5. Run the System File Checker (SFC) Scan
1. Hold down Windows+R keys to open Run.
2. In the Run dialog box, type in CMD and hold down Ctrl+Shift+Enter keys to open the elevated Command Prompt.
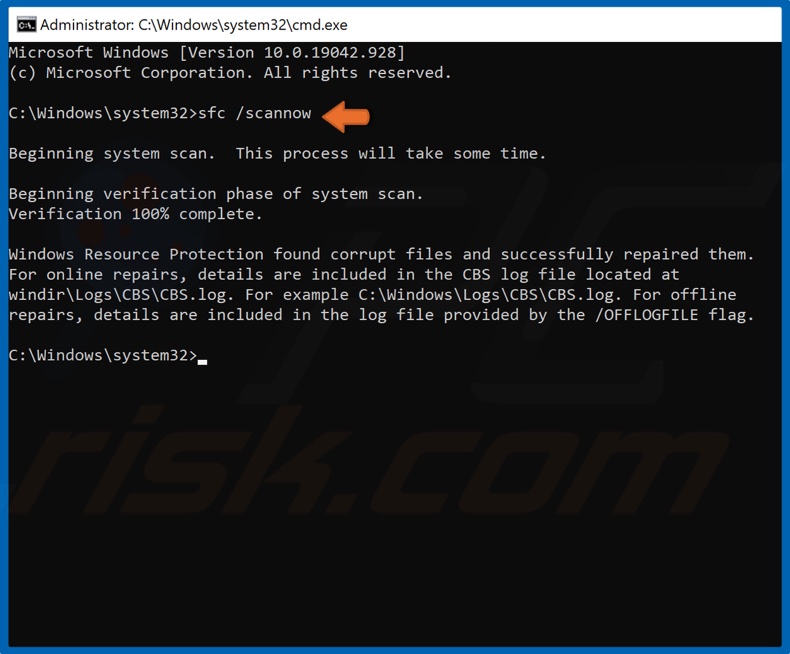
3. In the Command Prompt window, type in SFC /ScanNow and press the Enter key to start the scan and repair missing or corrupt files.
4. Once the scan has been completed, restart your PC and try updating Windows.
Solution 6. Reset Windows Update Components Manually
1. Hold down Windows+R keys to open the Run.
2. In the Run dialog box, type in CMD and then hold down Shift+Ctrl+Enter keys to open Command Prompt with administrative privileges.
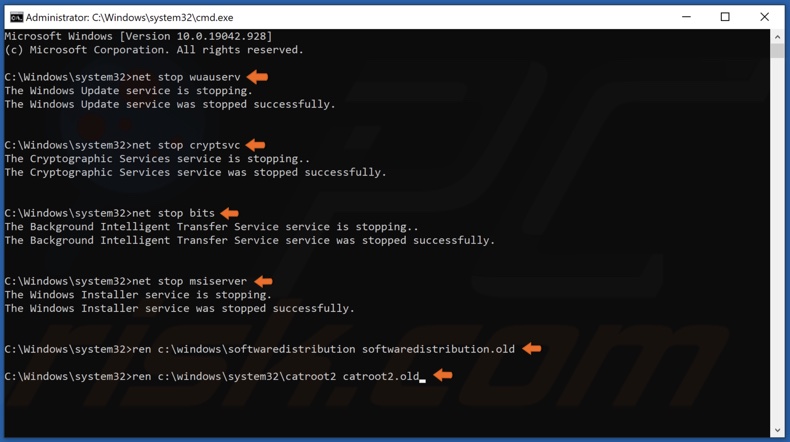
3. Type in the following commands and press Enter after typing in each one:
- net stop wuauserv
- net stop cryptSvc
- net stop bits
- net stop msiserver
After the services have been disabled, rename the SoftwareDistribution and Catroot2.
4. Type in ren C:\Windows\SoftwareDistribution SoftwareDistribution.old and press Enter.
5. Then, type in ren C:\Windows\System32\catroot2 Catroot2.old and press Enter.
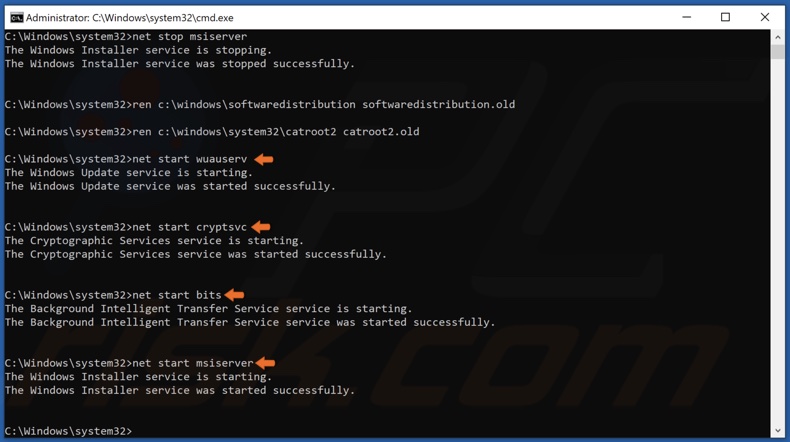
6. Type in the following commands and press Enter after typing in each one:
- net start wuauserv
- net start cryptSvc
- net start bits
- net start msiserver
7. Close the Command Prompt and try updating Windows
Solution 7. Configure the Group Policy Setting
This solution is not possible on Windows 10 Home Edition since the Home Edition does not have the Group Policy Editor.
1. Hold down Windows+R keys to open the Run.
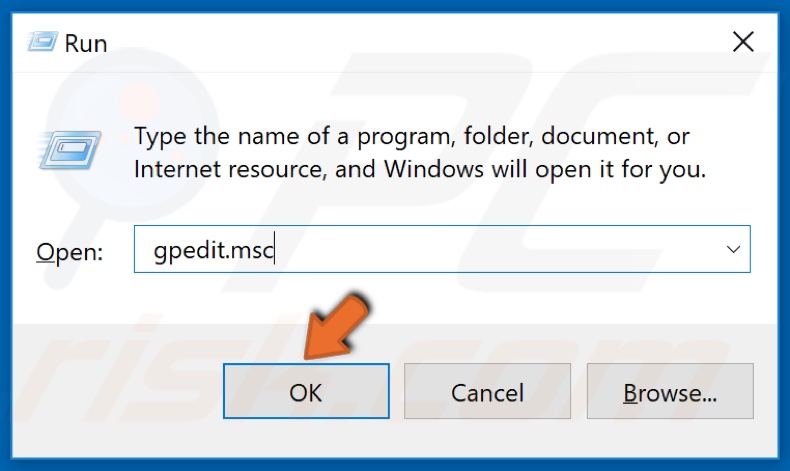
2. In the Run dialog box, type in gpedit.msc and click OK.
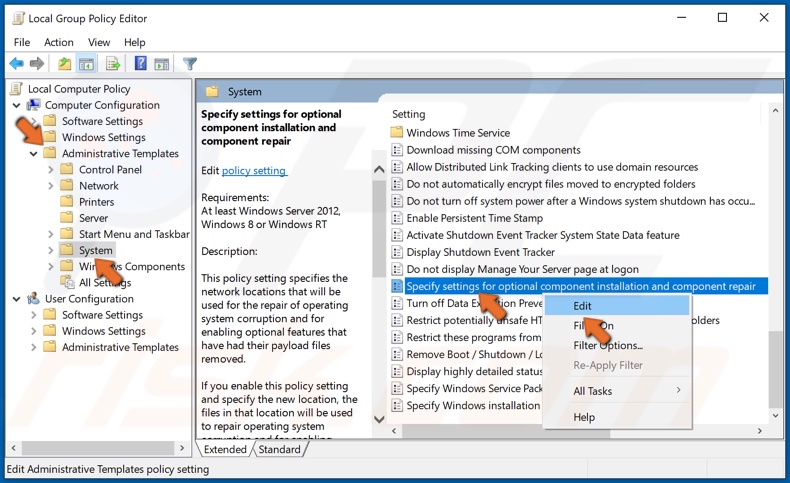
3. In the left pane, expand Administrative Templates and select System.
5. In the right pane, right-click Specify Settings for Optional Content Installation and click Edit.
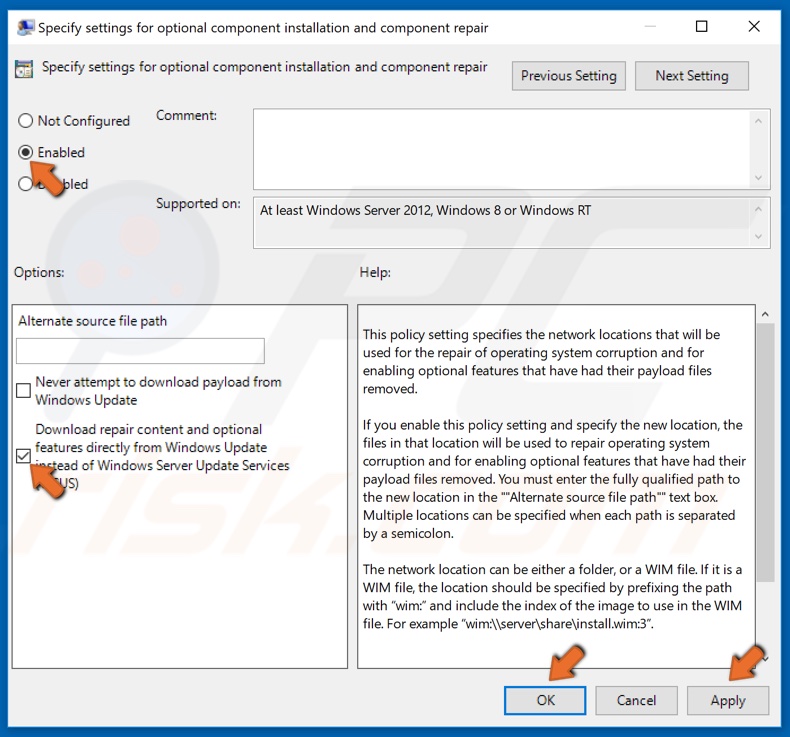
6. At the top-right of the window, select the Enabled option.
7. Then, mark the Download Repair Content and options features directly from Windows Update instead of Windows Server Update Services (WSUS) checkbox.
8. Click Apply and click OK to save the changes.
Share:

Rimvydas Iliavicius
Researcher, author
Rimvydas is a researcher with over four years of experience in the cybersecurity industry. He attended Kaunas University of Technology and graduated with a Master's degree in Translation and Localization of Technical texts. His interests in computers and technology led him to become a versatile author in the IT industry. At PCrisk, he's responsible for writing in-depth how-to articles for Microsoft Windows.
▼ Show Discussion