Fix Windows Update Error 0x8007045b
Get Free Scanner and check your computer for errors
Fix It NowTo fix found issues, you have to purchase the full version of Combo Cleaner. Free trial available. Combo Cleaner is owned and operated by Rcs Lt, the parent company of PCRisk.com read more.
How to Fix Error 0x8007045b in Windows 10
Did you get error 0x8007045b when trying to update Windows 10? If so, we invite you to follow our five guides that will help you fix this error.
What is Error 0x8007045b
Code 0x8007045b stands for ERROR_SHUTDOWN_IN_PROGRESS. You may get this error due to many different factors, including incorrect system settings, improper system shutdown, deletion of necessary system files, and so on.
What Causes This Error
- The most common cause for error 0x8007045b is corrupted system files. System files (that Windows Update needs to access) may become corrupt due to user intervention or if an anti-virus program puts system files in quarantine.
- This error may also occur due to corrupted Windows Update related-services.
- Third-party anti-virus programs may interrupt and block the Windows Update service from connecting to Microsoft's update servers. In such an event, the solutions are to turn off real-time protection, temporarily disable your AV or uninstall it.
- Other third-party applications may also cause error 0x8007045b. Previously, many users linked getting this error with using applications such as Classic Shell and menu altering applications from the company Stardock. Uninstalling such applications may fix the error.
- Also, you may get this error if the update installation becomes stuck due to a glitch.
Video Guide on How to Fix Fix Windows Update Error 0x8007045b
Table of Contents:
- Introduction
- Solution 1. Run the Windows Update Troubleshooter
- Solution 2. Clear the Windows Update Cache Folder
- Solution 3. Run the Deployment Image & Servicing Management (DISM) Scan
- Solution 4. Run the System File Checker (SFC) Scan
- Solution 5. Reset Windows Update Components Manually
- Video Guide on How to Fix Fix Windows Update Error 0x8007045b
Download Computer Malware Repair Tool
It is recommended to run a free scan with Combo Cleaner - a tool to detect viruses and malware on your device. You will need to purchase the full version to remove infections. Free trial available. Combo Cleaner is owned and operated by Rcs Lt, the parent company of PCRisk.com read more.
Solution 1. Run the Windows Update Troubleshooter
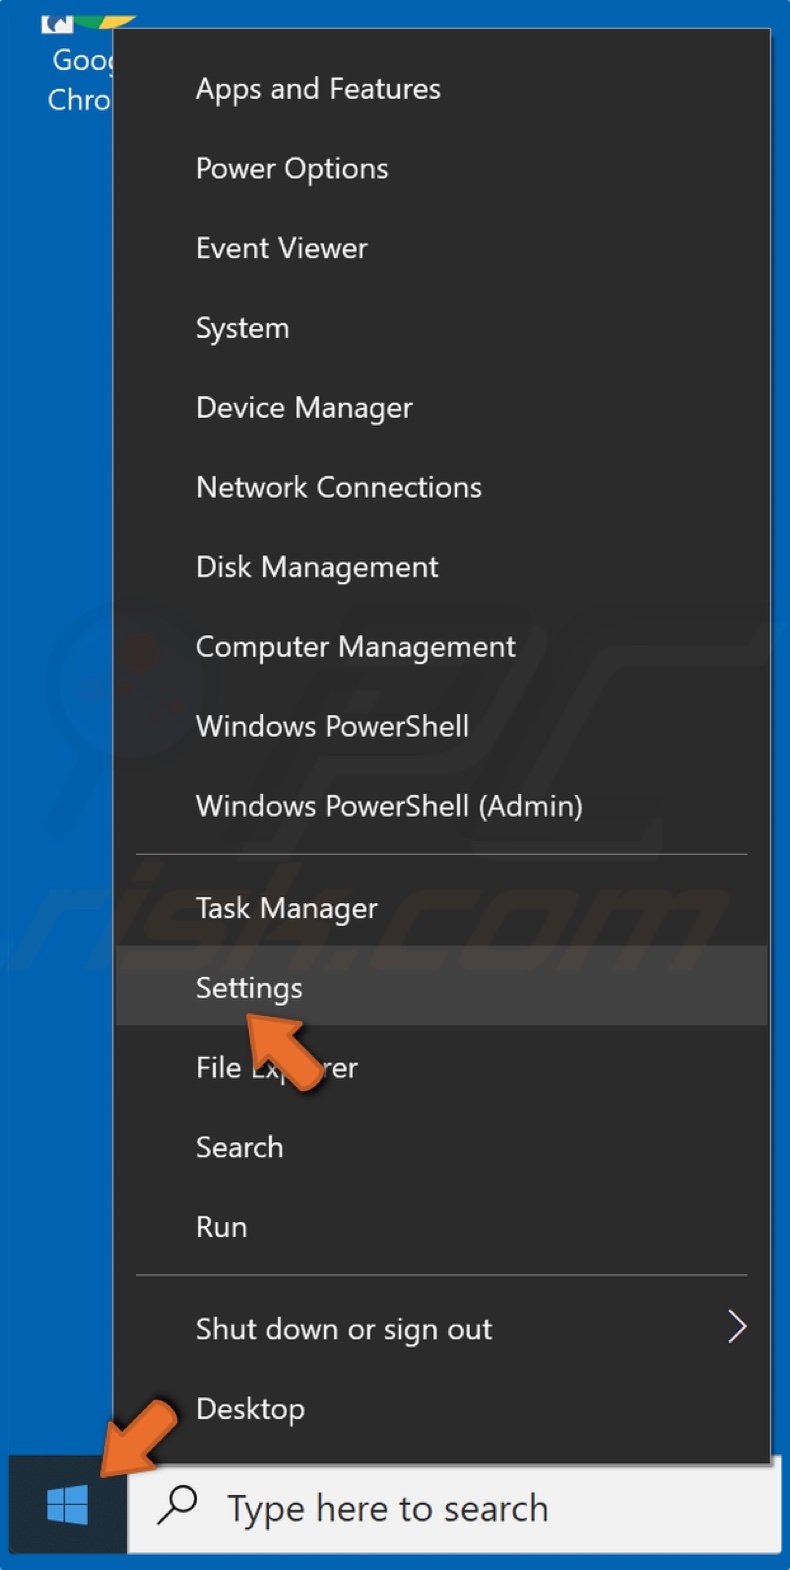
1. Right-click the Start Menu button and click Settings.
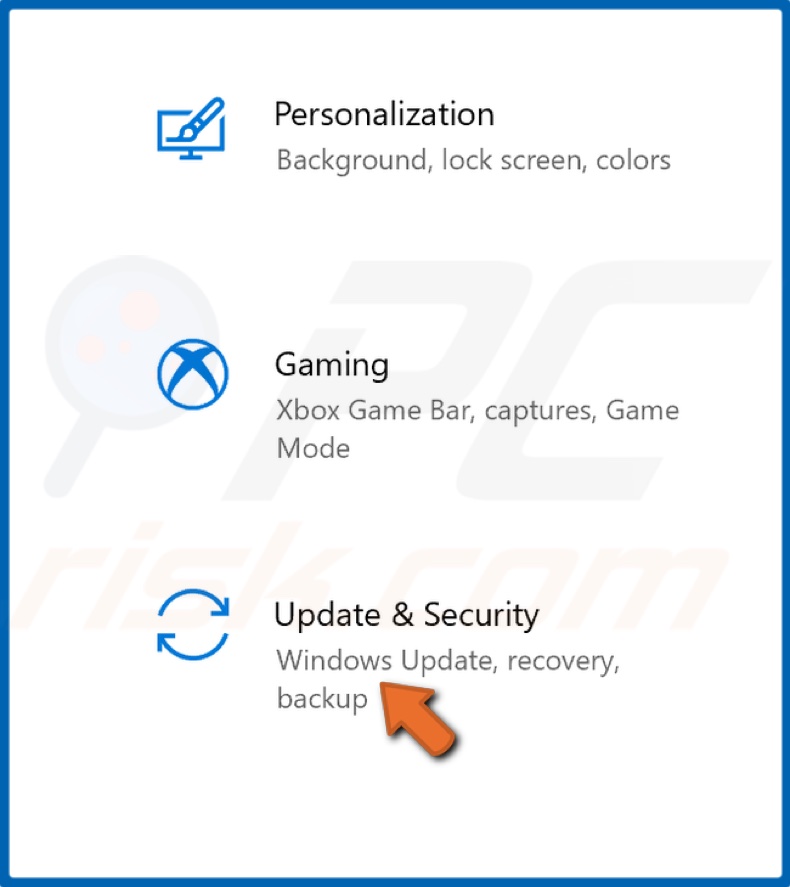
2. Choose Update & Security.
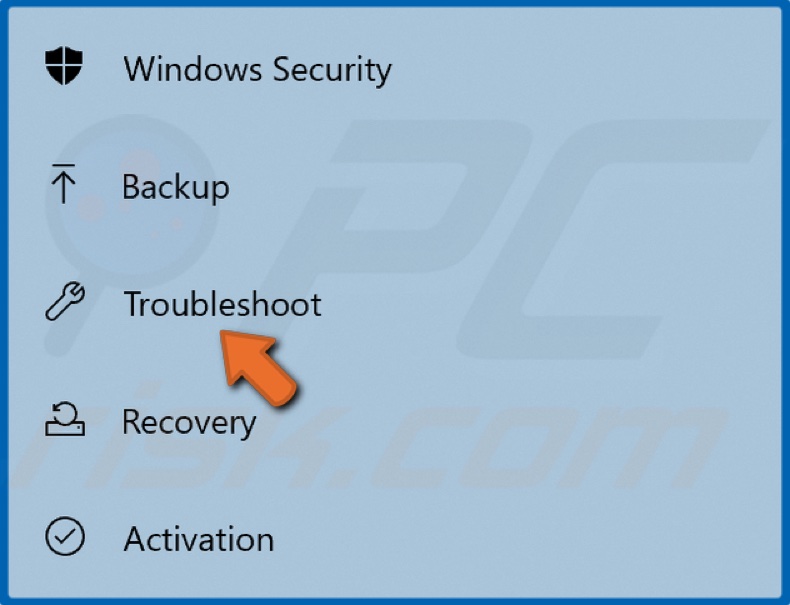
3. Click Troubleshoot.
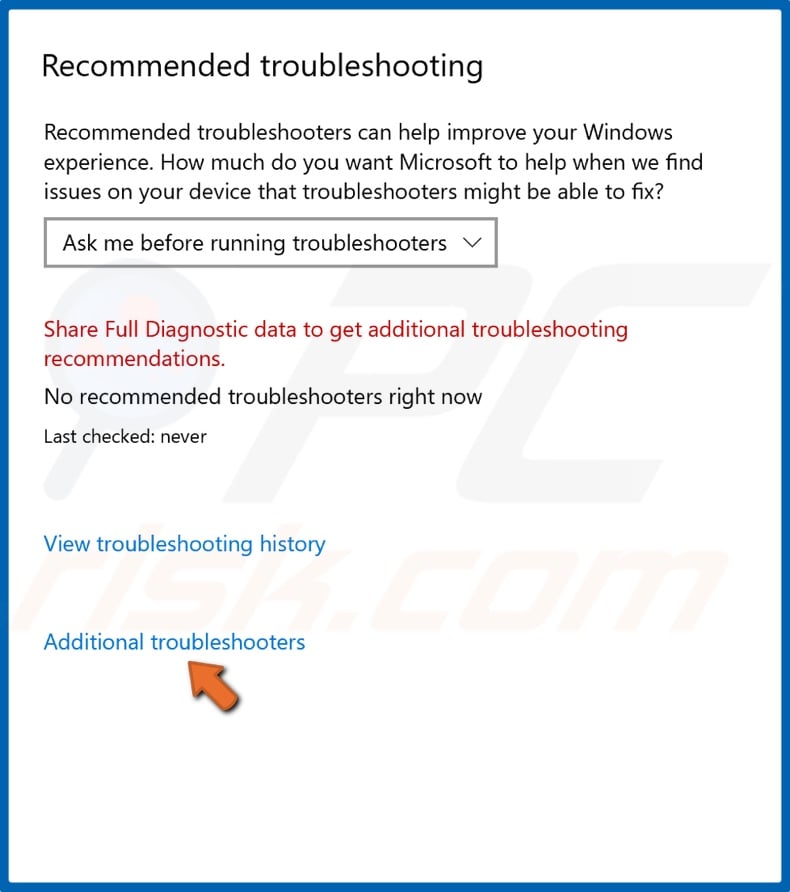
4. Then, select Additional troubleshooters.
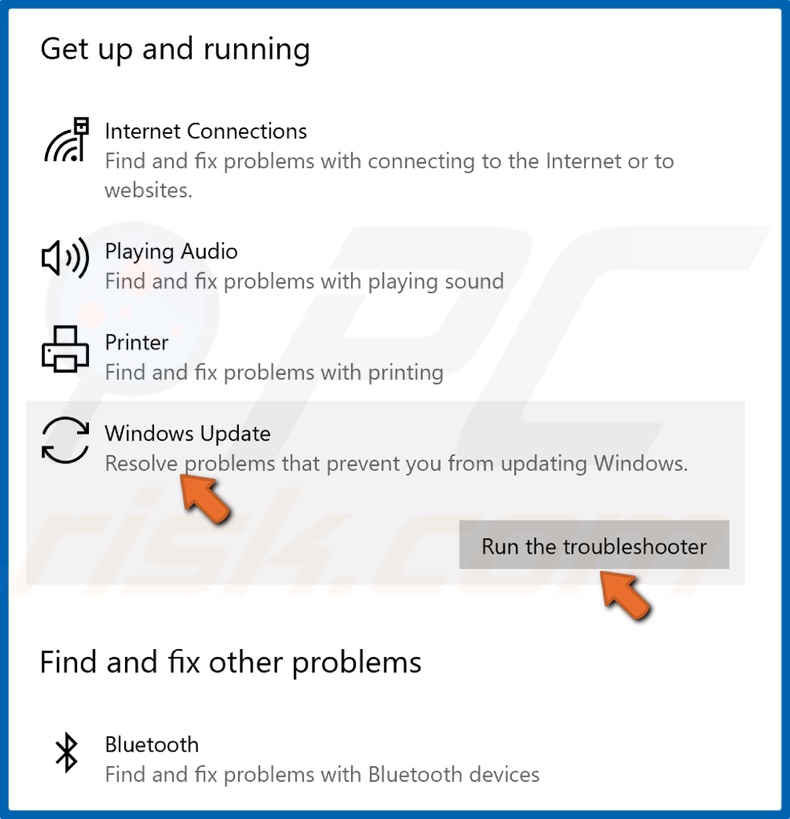
5. Under the Get up and running section, select Windows Update.
6. Click Run the troubleshooter.
7. The Troubleshooter will scan the service for issues and apply fixes automatically.
8. Try updating Windows.
Solution 2. Clear the Windows Update Cache Folder
1. Hold down Windows+R keys to open Run.
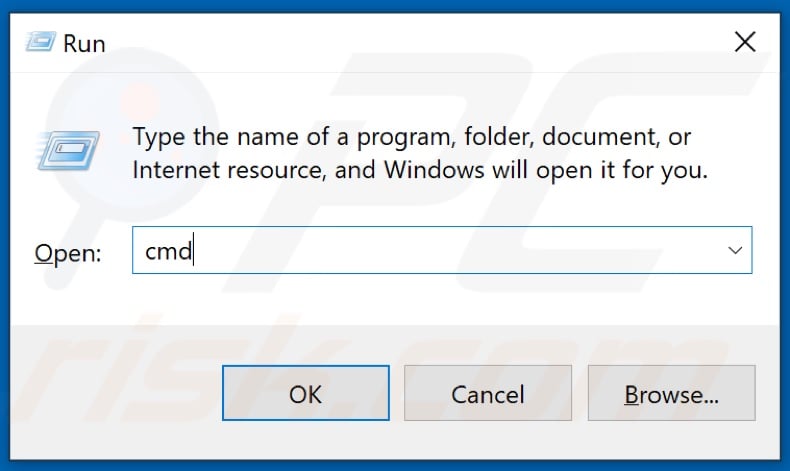
2. In the Run dialog box, type in CMD and hold down Ctrl+Shift+Enter keys to open the elevated Command Prompt.
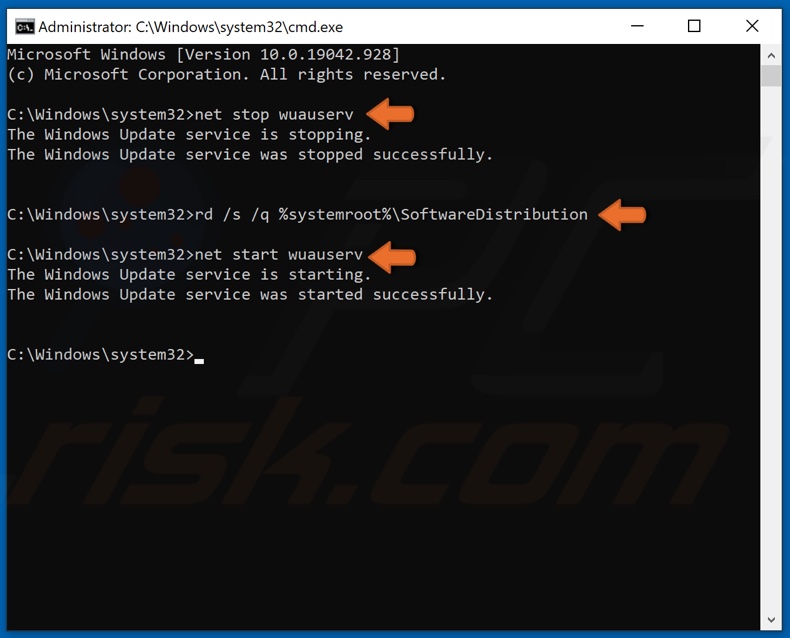
3. In the Command Prompt window, type in net stop wuauserv and press Enter to stop Windows Update Service.
4. Then, type in rd /s /q %systemroot%\SoftwareDistribution and press Enter to clear the Update cache folder.
5. Then, type in net start wuauserv to restart the previously stopped Windows Update Service.
6. Close the Command Prompt and try updating Windows.
Solution 3. Run the Deployment Image & Servicing Management (DISM) Scan
1. Hold down Windows+R keys to open Run.

2. In the Run dialog box, type in CMD and hold down Ctrl+Shift+Enter keys to open the elevated Command Prompt.
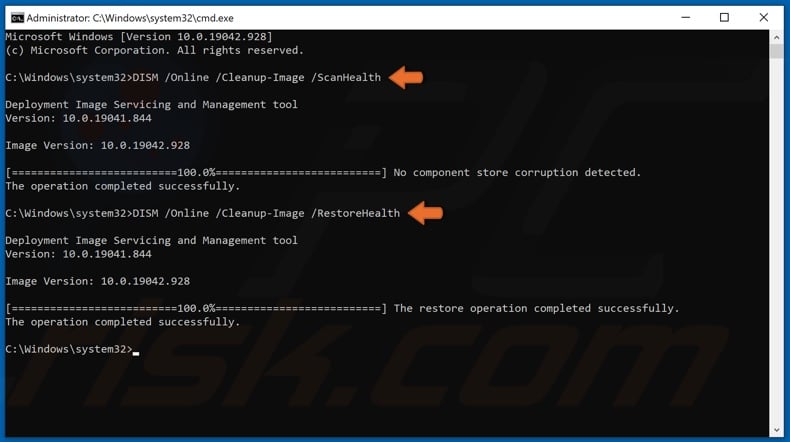
3. In the Command Prompt window, type in DISM /Online /Cleanup-Image /ScanHealth and press the Enter key. This parameter will scan the component store for corruption.
4. Type in the DISM /Online /Cleanup-Image /RestoreHealth and press Enter.
5. Once the process has been completed, try updating Windows 10.
Solution 4. Run the System File Checker (SFC) Scan
1. Hold down Windows+R keys to open Run.

2. In the Run dialog box, type in CMD and hold down Ctrl+Shift+Enter keys to open the elevated Command Prompt.
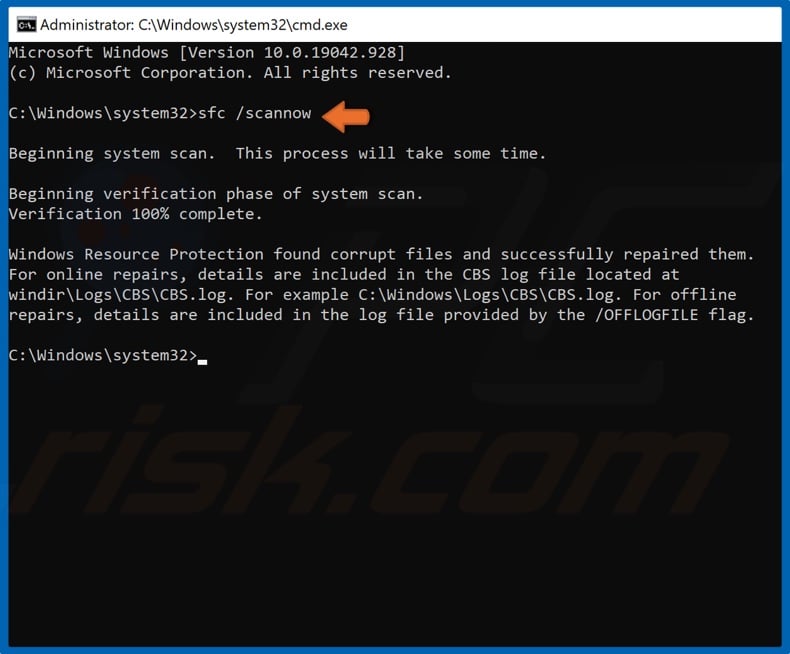
3. In the Command Prompt window, type in SFC /ScanNow and press the Enter key to start the scan.
4. Once the scan has been completed, restart your PC and try updating Windows.
Solution 5. Reset Windows Update Components Manually
1. Hold down Windows+R keys to open Run.

2. In the Run dialog box, type in CMD and hold down Ctrl+Shift+Enter keys to open the elevated Command Prompt.
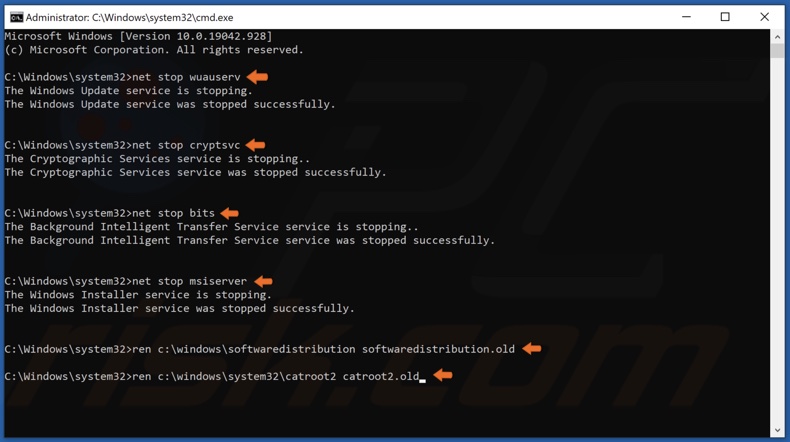
3. Here, you will have to stop BITS, Cryptographic, MSI Installer, and Windows Update services. Type in the commands listed below and press Enter after entering each one:
- net stop wuauserv
- net stop cryptSvc
- net stop bits
- net stop msiserver
Once the services have been disabled, rename the SoftwareDistribution and Catroot2 folders.
4. Type in ren C:\Windows\SoftwareDistribution SoftwareDistribution.old and press Enter.
5. Then, type in ren C:\Windows\System32\catroot2 Catroot2.old and press Enter.
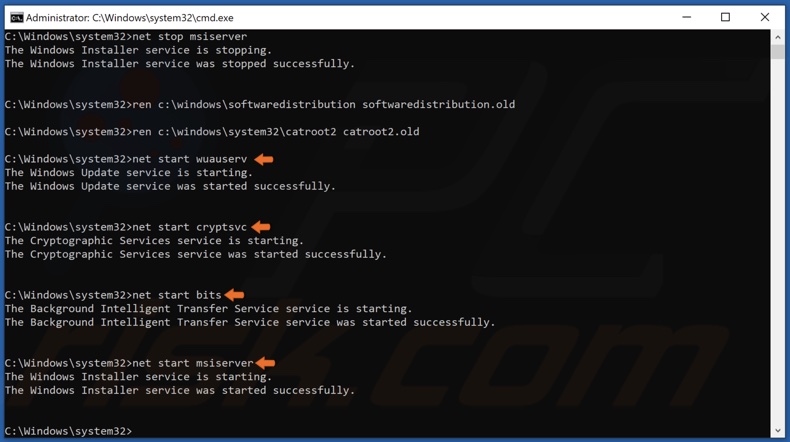
6. Restart BITS, Cryptographic, MSI Installer, and Windows Update services. Type in the commands listed below and press Enter after entering each one:
- net start wuauserv
- net start cryptSvc
- net start bits
- net start msiserver
7. Try updating Windows to see if that fixed the problem.
Share:

Rimvydas Iliavicius
Researcher, author
Rimvydas is a researcher with over four years of experience in the cybersecurity industry. He attended Kaunas University of Technology and graduated with a Master's degree in Translation and Localization of Technical texts. His interests in computers and technology led him to become a versatile author in the IT industry. At PCrisk, he's responsible for writing in-depth how-to articles for Microsoft Windows.

▼ Show Discussion