How to Fix WaasMedic Agent Exe High CPU and Disk Usage
Get Free Scanner and check your computer for errors
Fix It NowTo fix found issues, you have to purchase the full version of Combo Cleaner. Free trial available. Combo Cleaner is owned and operated by Rcs Lt, the parent company of PCRisk.com read more.
How to Fix WaasMedic Agent Exe High CPU and Disk Usage
WaasMedic Agent Exe or Windows Update Medic Service (WaaSMedicSVC) is a Windows 10 Update component that protects and repairs damaged Windows Update components to ensure that updates get downloaded and installed without issues. Unfortunately, WaasMedic is known to cause high Disk and CPU usage, but you can fix it using this troubleshooting guide.

Why Does WaasMedic Agent Exe Cause High CPU/Disk Usage?
Many people have pointed out that WaasMedic Agent causes high Disk or CPU usage. When it does that, your CPU, Disk, and sometimes Memory usage may spike to as much as 100%.
WaasMedic Agent Exe high Disk, CPU, and Memory usage can occur due to incorrect system configurations, removable drive-related (external hard drive or USB drive) bugs, or a conflict between the system and a third-party anti-virus program.
How to Fix WaasMedic Agent Exe High CPU/Disk Usage?
Windows Update can function without WaasMedic always running in the background, so you should consider disabling it.
Since WaasMedic Agent Exe is a Windows Update component, you can't completely remove it from the system, but you can disable it. You can't disable Windows Update Medic Service through the Services Manager because it will prompt you with an "Access is denied" dialog box.
Fortunately, there are a few workarounds to disable WaasMedic. These include using the Windows Registry Editor to prevent Windows Update Medic Service from starting.
If your anti-virus program conflicts with WaasMedic Agent, you can try adding the service to your anti-virus program's exceptions list.
Video Guide on How to Fix WaasMedic High CPU and Disk Usage
Table of Contents:
- Introduction
- Solution 1. Perform Disk Cleanup
- Solution 2. Pause Windows Updates for 35 Days
- Solution 3. Disable WaasMedic Using Windows Registry Editor
- Video Guide on How to Fix WaasMedic High CPU and Disk Usage
Download Computer Malware Repair Tool
It is recommended to run a free scan with Combo Cleaner - a tool to detect viruses and malware on your device. You will need to purchase the full version to remove infections. Free trial available. Combo Cleaner is owned and operated by Rcs Lt, the parent company of PCRisk.com read more.
Solution 1. Perform Disk Cleanup
1. Hold down Windows+R keys to open Run.
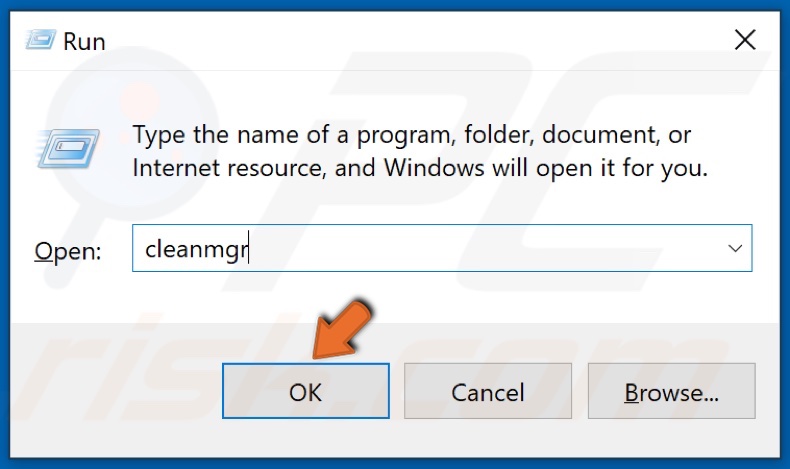
2. In the dialog box, type in cleanmgr and click OK.
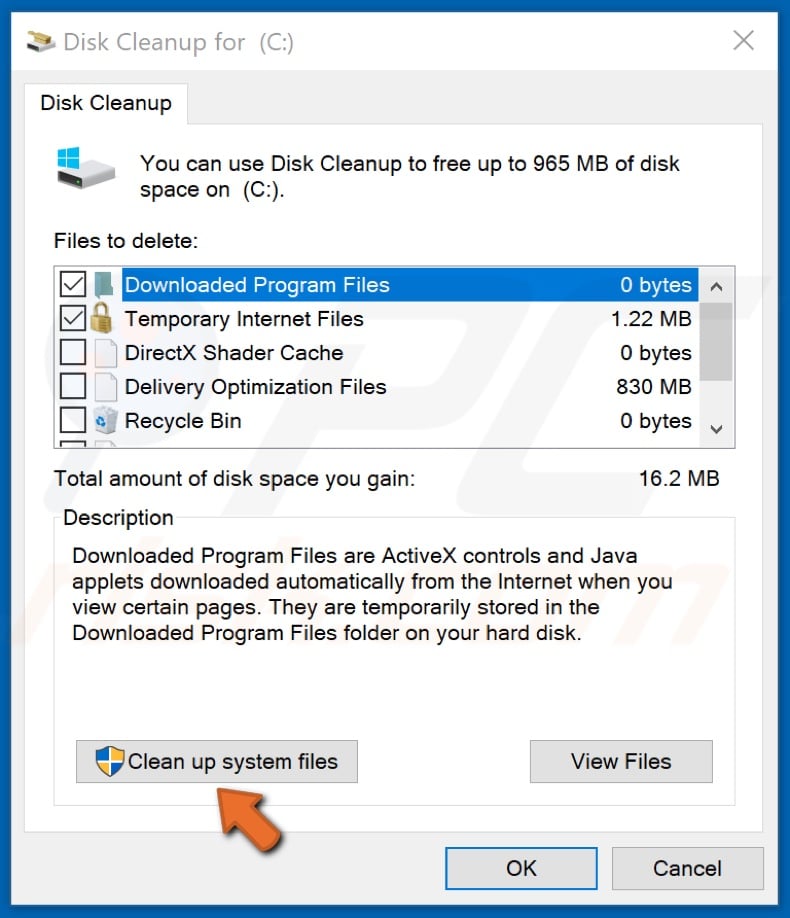
3. Click Clean Up System Files.
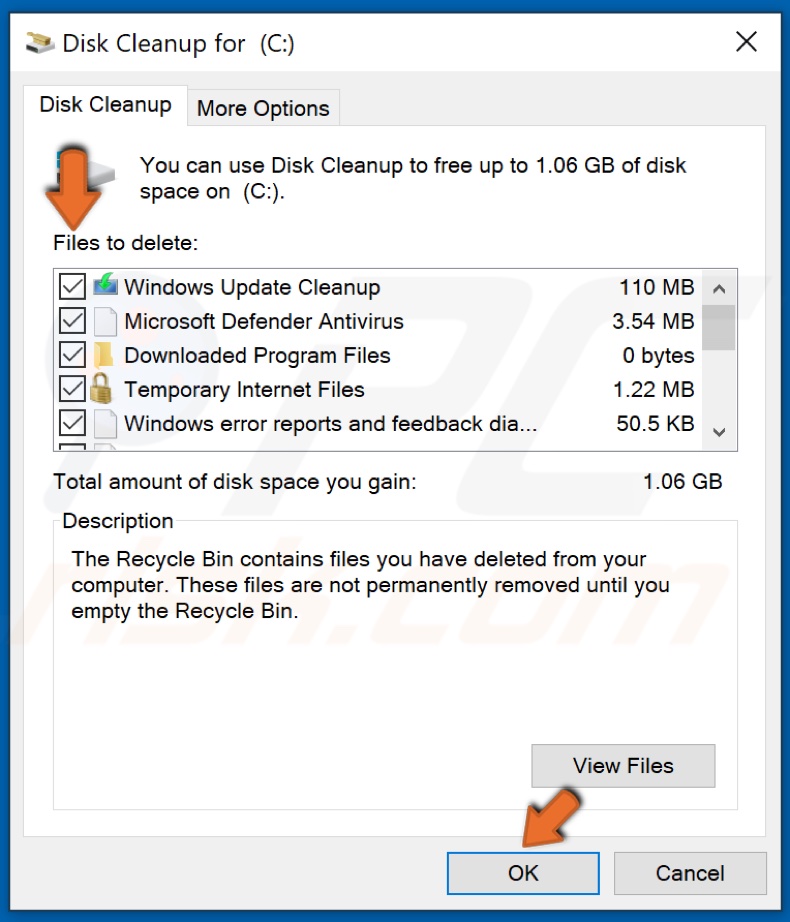
4. Tick the checkboxes of the locations you want cleaned and click OK.

5. Click Delete Files.
6. Wait for the cleaning process to complete.
Solution 2. Pause Windows Updates for 35 Days
Microsoft has made it increasingly difficult to opt out of Windows updates. Now, all you can do is postpone the updates for 35 days at the most.
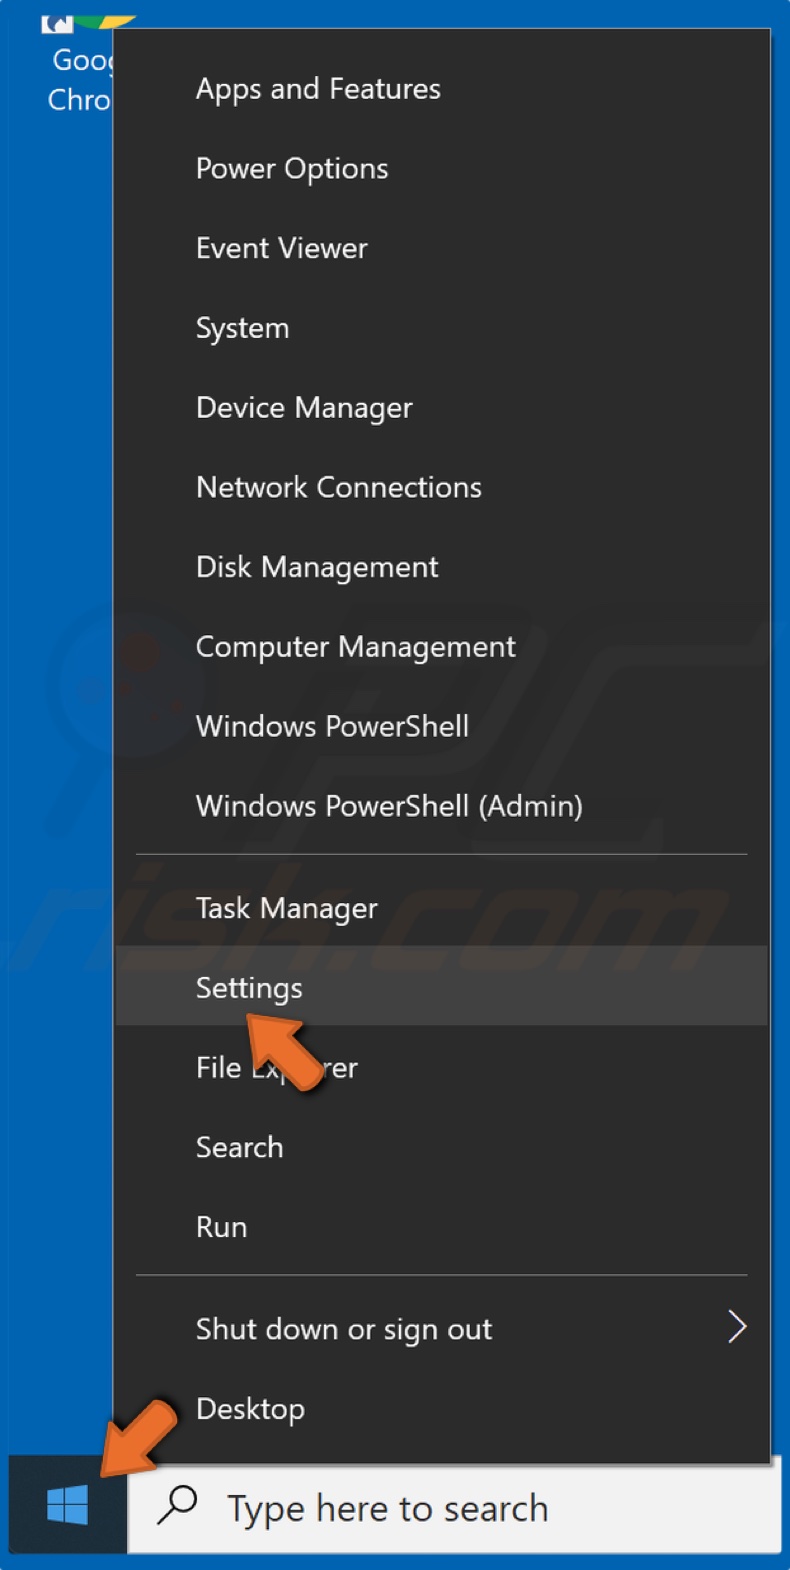
1. Right-click the Start Menu button and click Settings.
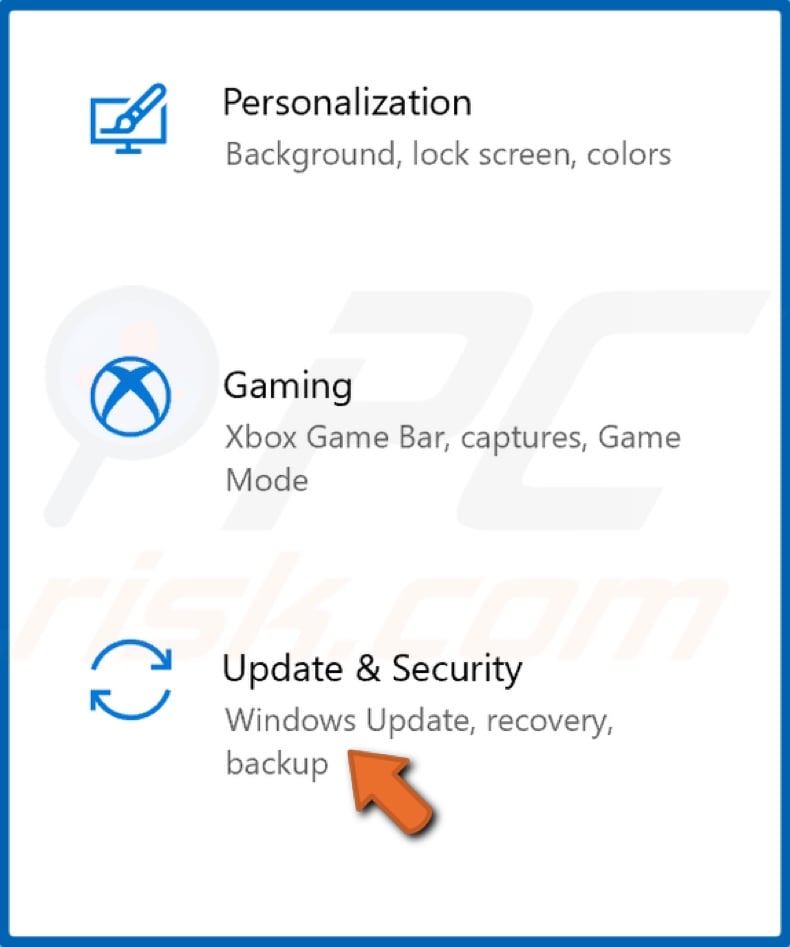
2. Click Update & Security.
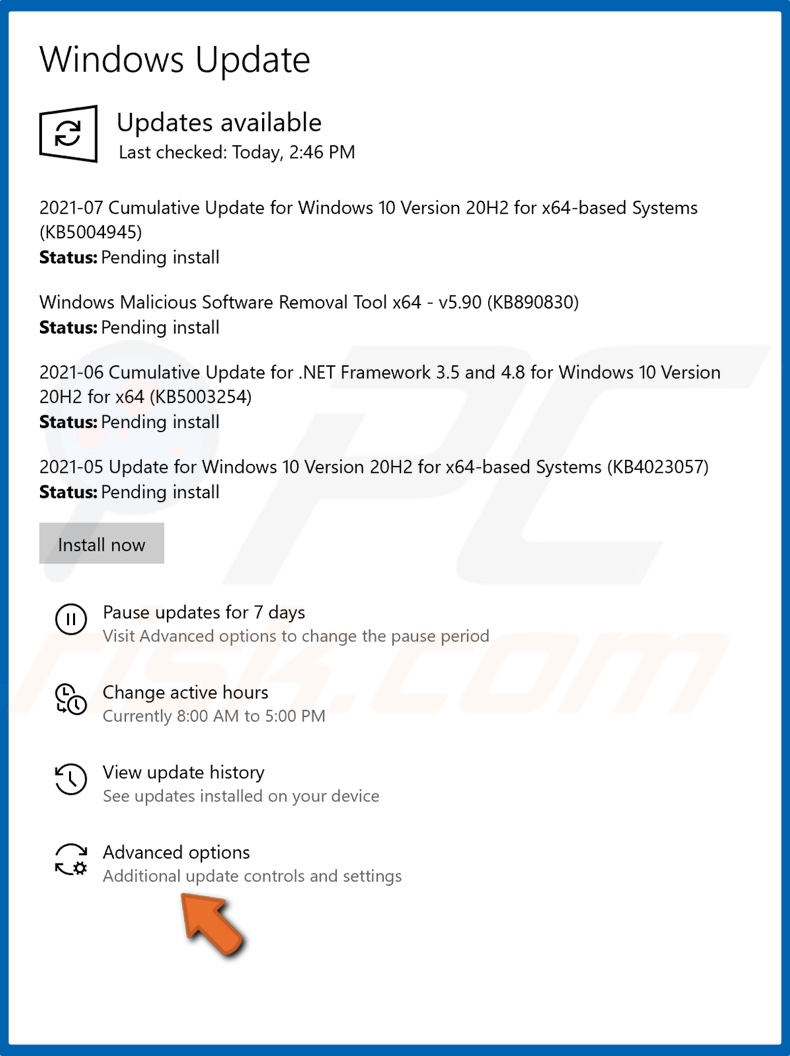
3. Click Advanced Options.

4. Under the Pause updates section, open the drop-down menu.
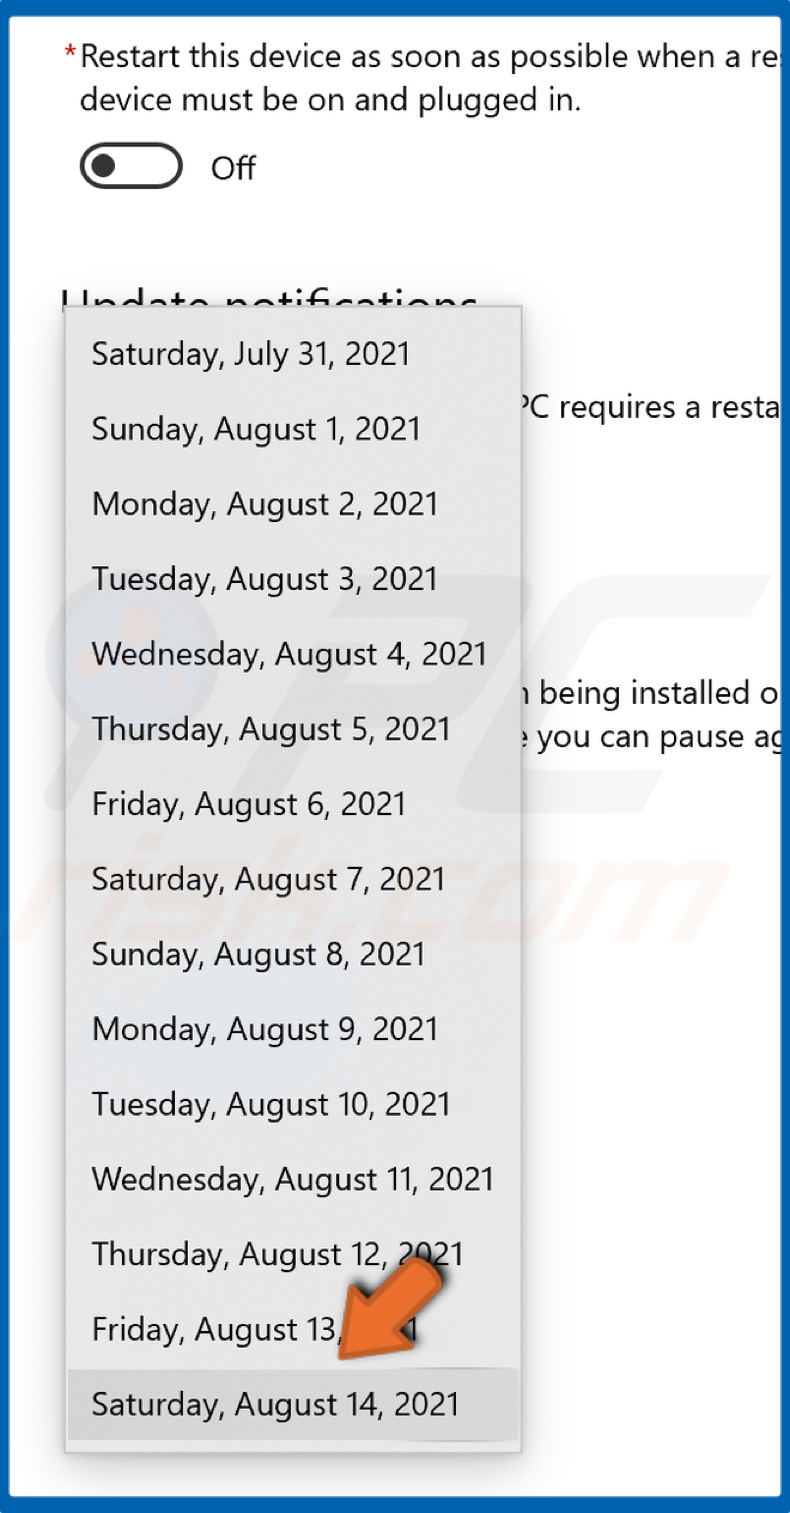
5. Select the furthest available date.
6. Now, Windows won't install updates for the next 35 days. However, You may resume updates at any time.
7. Close the Settings window.
Solution 3. Disable WaasMedic Using Windows Registry Editor
1. Hold down Windows+R keys to open the Run dialog box.
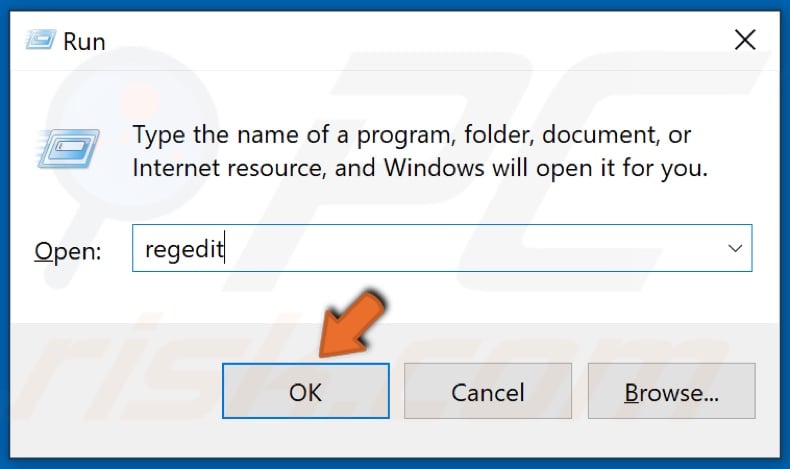
2. In the dialog box, type in Regedit and click OK.
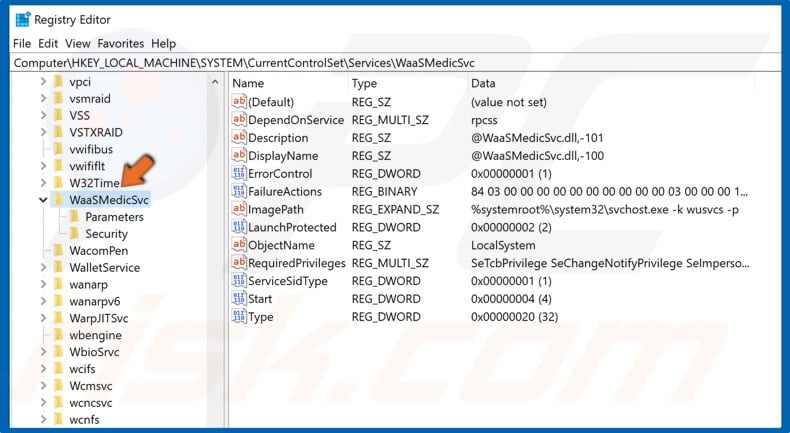
3. Once in the Registry Editor, navigate to HKEY_LOCAL_MACHINE\SYSTEM\CurrentControlSet\Services\WaaSMedicSvc
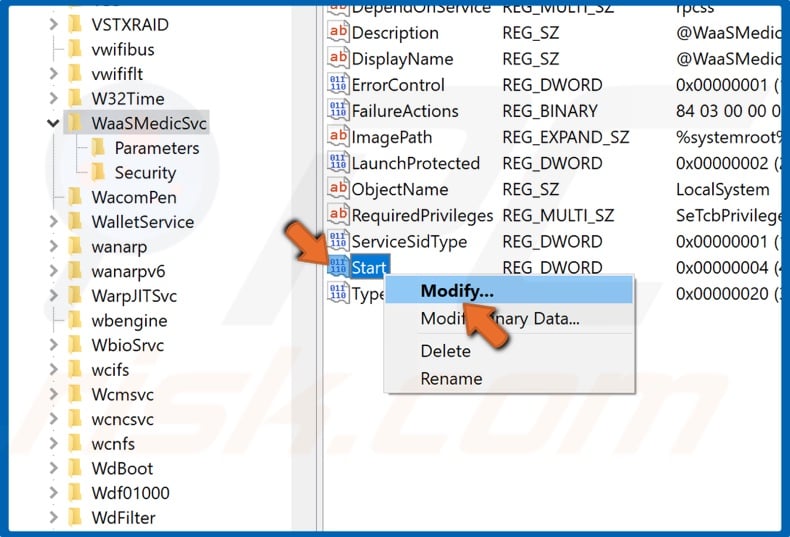
4. In the right pane, right-click Start and click Modify.

5. In the Value data section, set the value to 4 and click OK.
6. Close the Registry Editor and restart your PC.
Did this article help you fix WaasMedic Agent Exe high Disk or CPU usage on your PC? Let us know in the comments below.
Share:

Rimvydas Iliavicius
Researcher, author
Rimvydas is a researcher with over four years of experience in the cybersecurity industry. He attended Kaunas University of Technology and graduated with a Master's degree in Translation and Localization of Technical texts. His interests in computers and technology led him to become a versatile author in the IT industry. At PCrisk, he's responsible for writing in-depth how-to articles for Microsoft Windows.

▼ Show Discussion