Fix Windows Update Error 0x80240031

Get Free Scanner and check your computer for errors
Fix It NowTo fix found issues, you have to purchase the full version of Combo Cleaner. Free trial available. Combo Cleaner is owned and operated by Rcs Lt, the parent company of PCRisk.com read more.
How to Fix Error 0x80240031 in Windows 10
Like all Windows Update errors, error code 0x80240031 prevents you from installing updates. Fortunately, there are several ways to fix this error, which you will find in this article.
When Does Error 0x80240031 Occur
The earliest case of error 0x80240031 occurred with the Windows 10 Anniversary Update release that updated the operating system to version 1607.
Many users got error 0x80240031 when installing the Windows 10 Insider Preview 14257, 14332, and 14986. However, this error isn't exclusive to Insider Previews.
Users often encountered this error when updating Windows 10 to version 1703, version 1709, and later version 1803. Many have noticed that this error typically occurs when installing a big update, such as a feature update, and when trying to update Windows 10 to a newer build.
What Causes This Error
Error 0x80240031 may occur due to software and hardware conflicts. Therefore, before you try any of our solutions to fix this error, you should disconnect all external storage devices and drives, including USB Flash Drives and docks. You should also disconnect other hardware, such as Bluetooth receivers, external card readers, and gaming controllers.
In addition, close any unnecessary software that may conflict with Windows Update services. Then, try running the update.
Windows Update files may also become corrupt if you had network-related issues during the update process. In such a case, the best thing to do is clear the Windows Update cache, which will prompt Windows to re-download the corrupted files.
Video Guide on How to Fix Windows Update Error 0x80240031
Table of Contents:
- Introduction
- Solution 1. Perform a Clean Boot
- Solution 2. Run Windows Update Troubleshooter
- Solution 3. Clear Windows Update Cache
- Solution 4. Run Deployment Imaging and Servicing Management (DISM) Scan
- Solution 5. Run System File Checker (SFC) Scan
- Video Guide on How to Fix Windows Update Error 0x80240031
Download Computer Malware Repair Tool
It is recommended to run a free scan with Combo Cleaner - a tool to detect viruses and malware on your device. You will need to purchase the full version to remove infections. Free trial available. Combo Cleaner is owned and operated by Rcs Lt, the parent company of PCRisk.com read more.
Solution 1. Perform a Clean Boot
Error 0x80240031 may occur due to third-party applications interfering with the process. Therefore, the solution is to disable third-party services.
1. Hold down Windows+R keys to open Run.
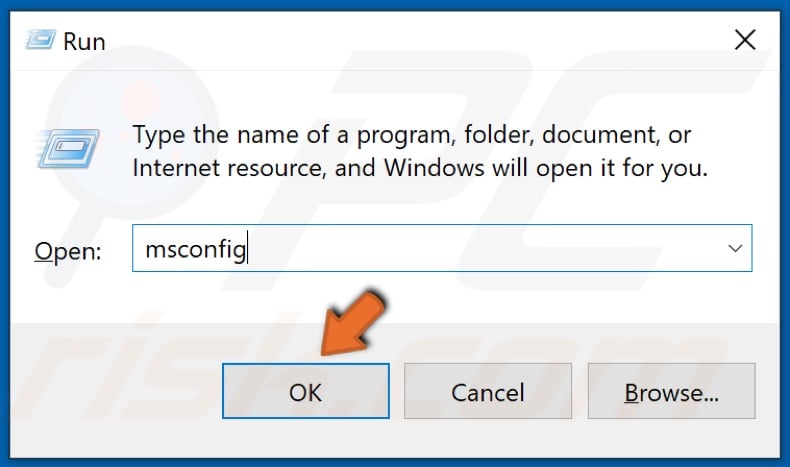
2. In the Run dialog, type in MSConfig and click OK.

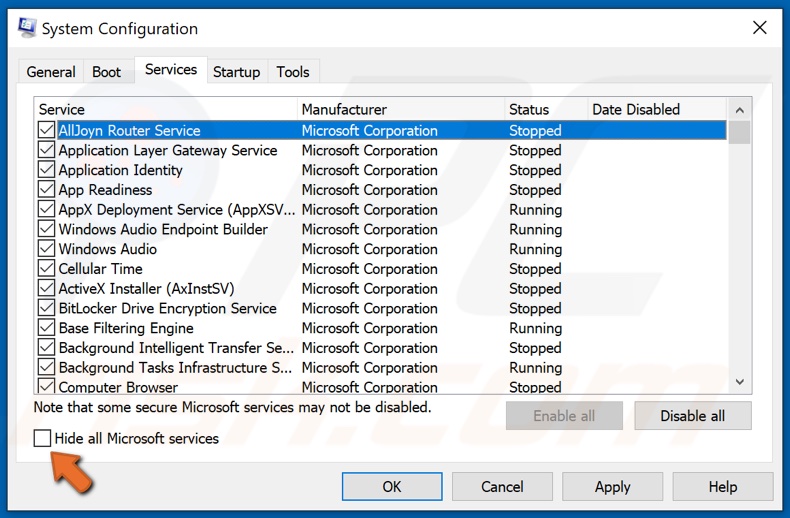
3. In the resulting System Configuration window, select the Services tab.
4. Then, mark the Hide all Microsoft services checkbox at the bottom left corner of the window.
5. Click Disable all.
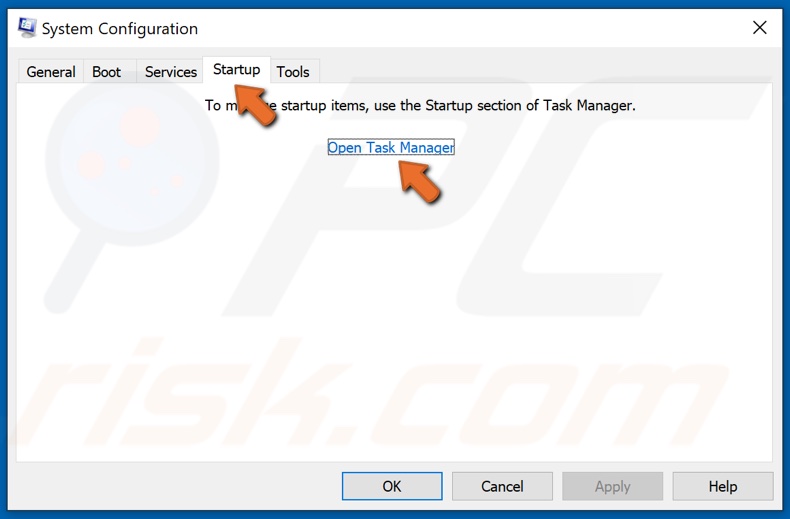
6. Then, Navigate to the Startup tab.
7. Click Open Task Manager.

8. Select each application, and click Disable.
9. Close the Task Manager.
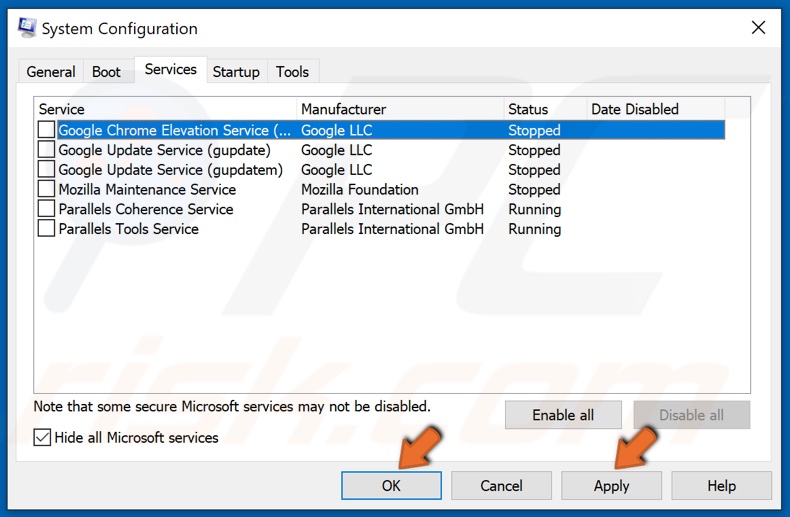
10. In the System Configuration window, click Apply and click OK.
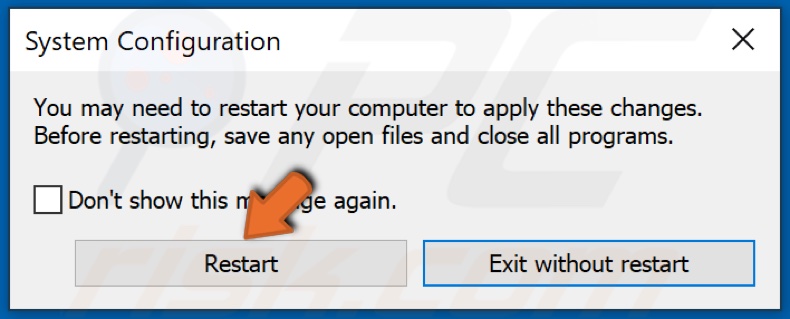
11. Click Restart when prompted.
12. Now, try updating Windows.
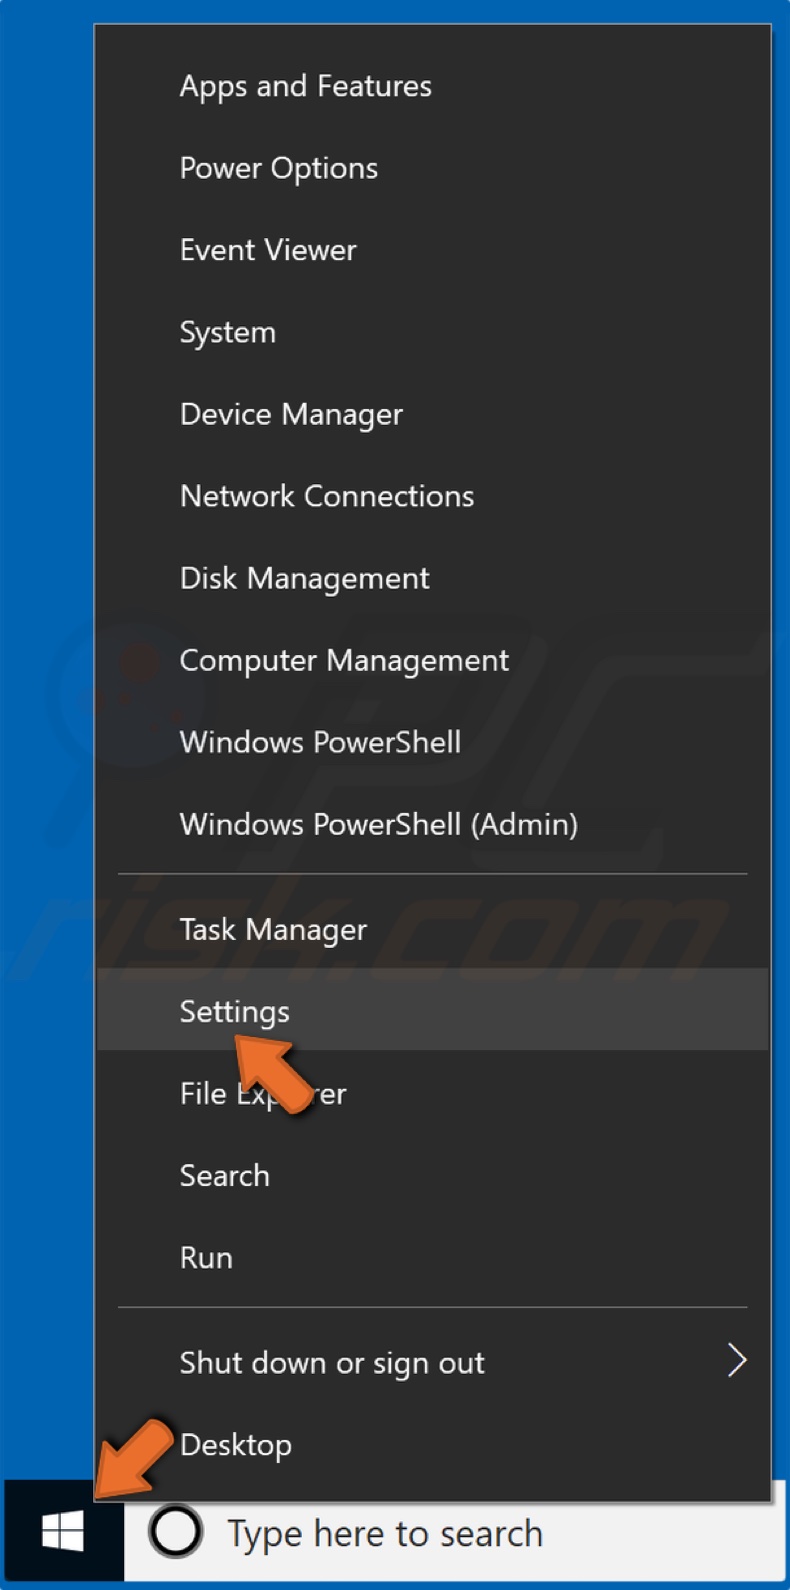
13. Right-click the Start Menu button and click Settings.
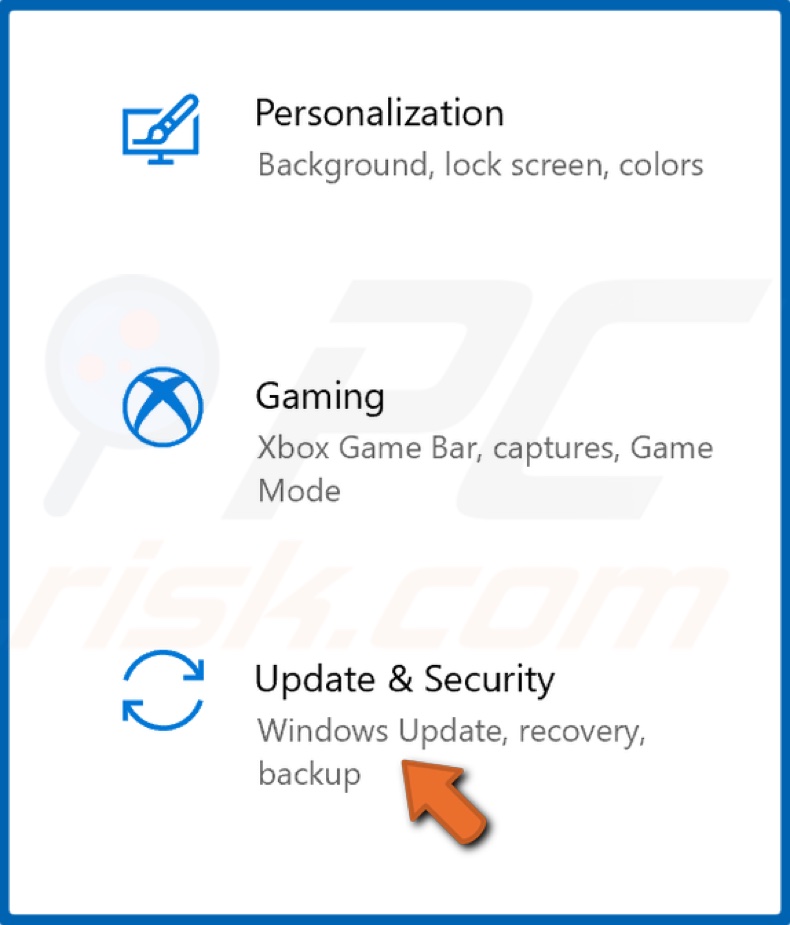
14. Go to Update & Security.
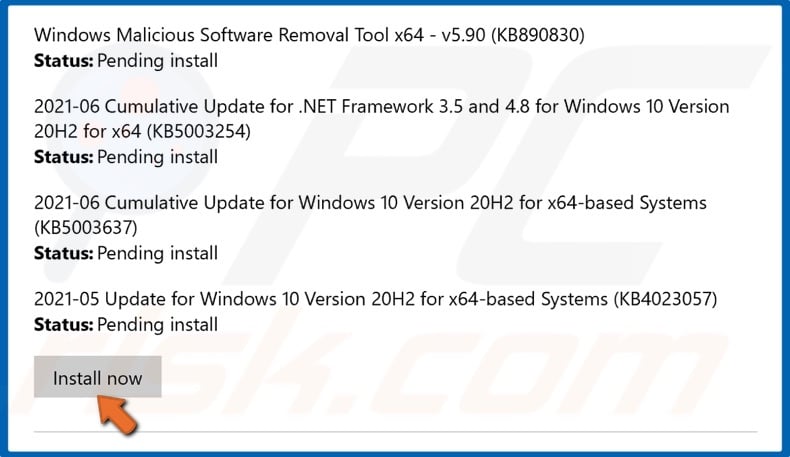
15. To begin installing updates, click Install now.
16. If the update is successful, you can restart your PC in regular mode.
17. Hold down Windows+R keys to open Run.
18. In the Run dialog, type in MSConfig and click OK.
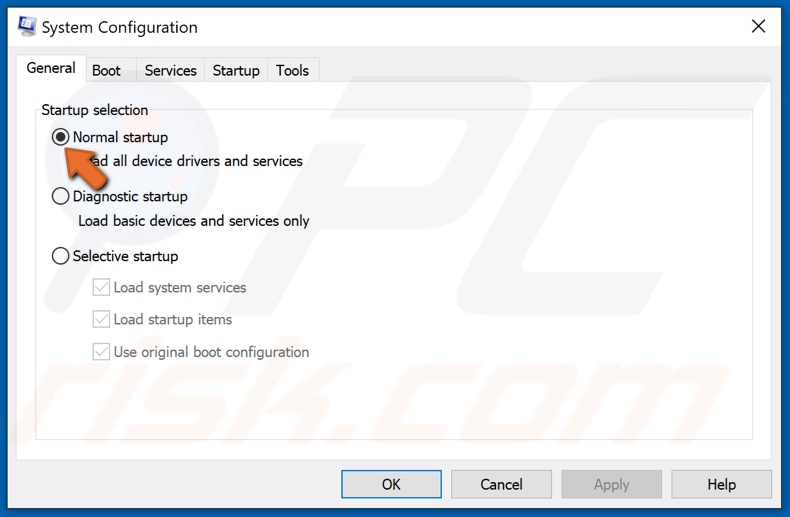
19. In the General tab, select Normal startup.
20. Then, go to the Services tab and ensure that the Hide all Microsoft services option is unchecked.
21. Lastly, go to the Startup tab and click Open Task Manager.
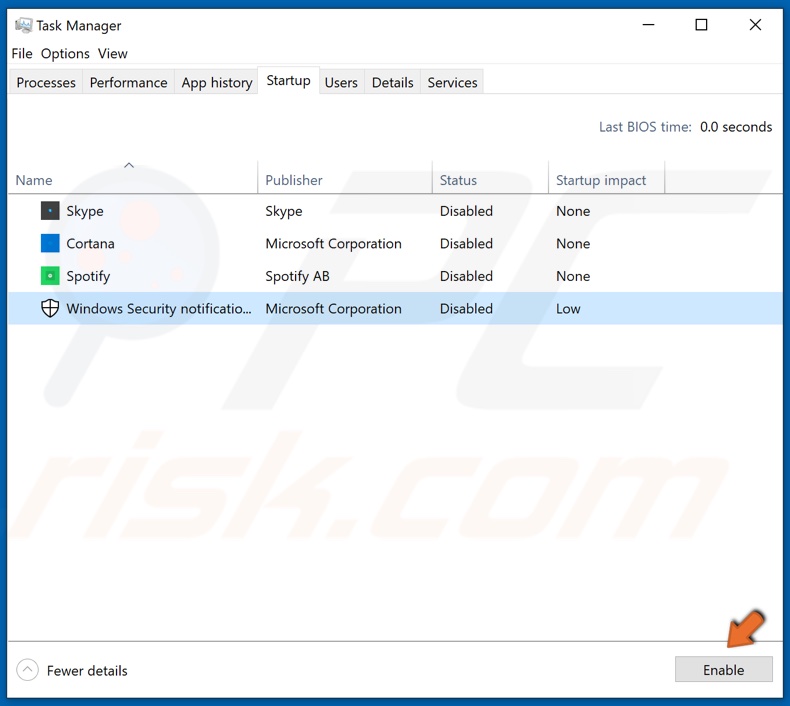
22. Select and enable the previously disabled applications.
23. Close the Task Manager.

24. In the System Configuration window, click Apply and click OK.
25. Click Restart when prompted.
Solution 2. Run Windows Update Troubleshooter
1. Right-click the Start Menu and click Settings.
2. Select Update & Security.
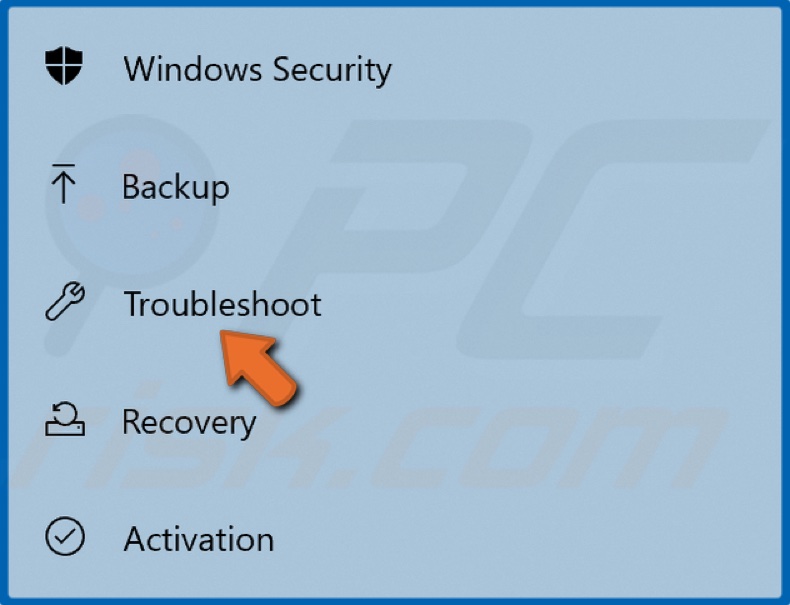
3. Select Troubleshoot.
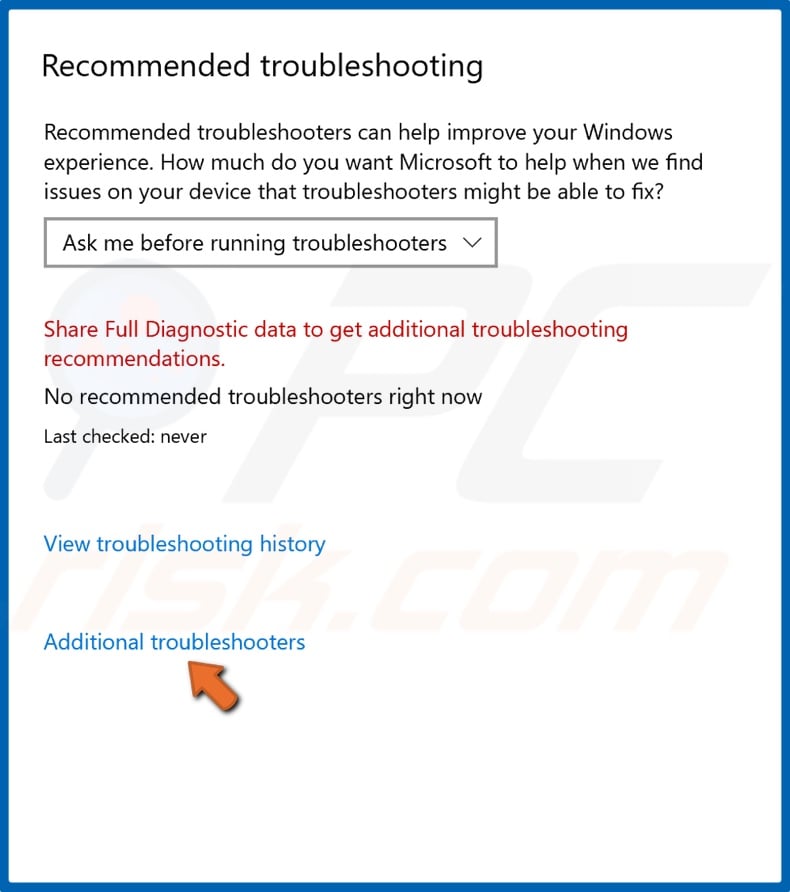
4. Click Additional troubleshooters.
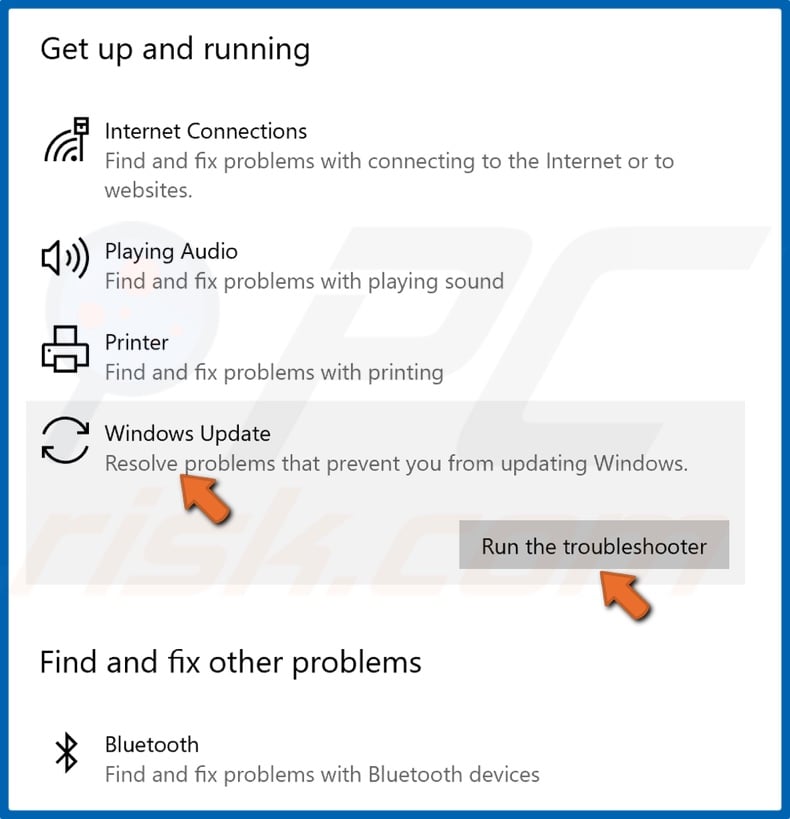
5. Select Windows Update and click Run the troubleshooter.
6. The troubleshooter will identify the issue and apply a fix automatically.
Solution 3. Clear Windows Update Cache
Clearing the Windows Update cache is an effective way to fix Windows Update-related issues. The SoftwareDistribution folder is where all of the update-related files are cached. The SoftwareDistribution folder is an essential component for Windows Update as it temporarily stores files needed to install new updates.
1. Hold down Windows+R keys to open Run.
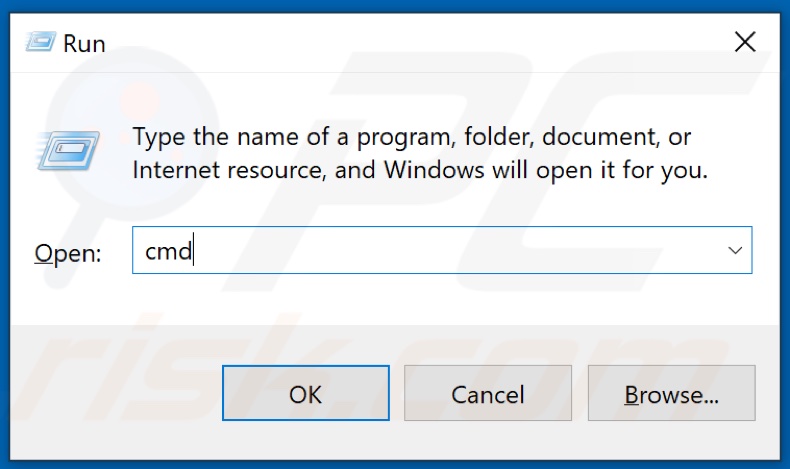
2. In the Run dialog, type in CMD and hold down Ctrl+Shift+Enter keys to open the elevated Command Prompt.
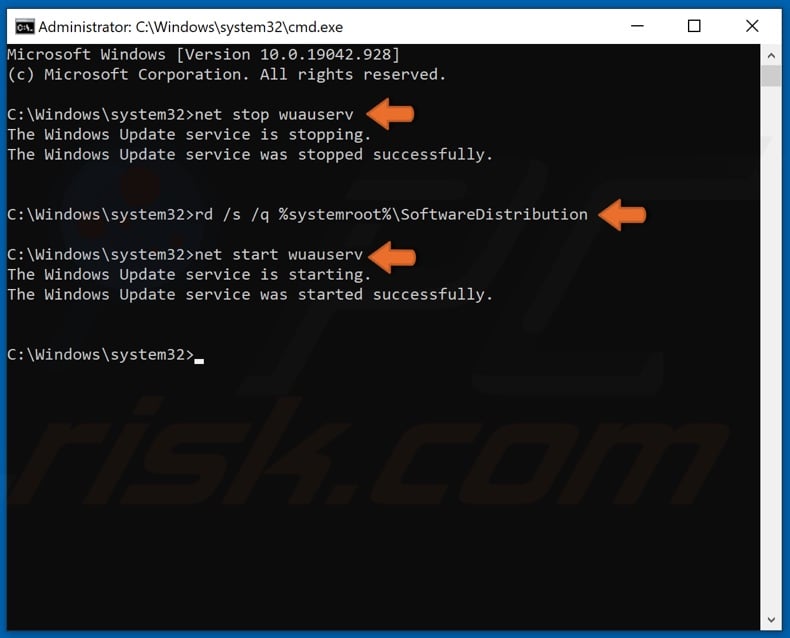
3. In the Command Prompt window, type in net stop wuauserv and hit Enter.
4. Then, type in rd /s /q %systemroot%\SoftwareDistribution and hit Enter.
5. Lastly, type in net start wuauserv and hit Enter.
6. Close the Command Prompt and try updating Windows.
Solution 4. Run Deployment Imaging and Servicing Management (DISM) Scan
The Deployment Image Servicing and Management (DISM) is a command-line tool designed to prepare, modify, and repair system images. You can try running a DISM scan, which will identify and repair corrupted Windows system image files. As a result, repairing the image may fix error 0x80240034.
1. Hold down Windows+R keys to open Run.
2. In the Run dialog, type in CMD and hold down Ctrl+Shift+Enter keys to open the elevated Command Prompt.
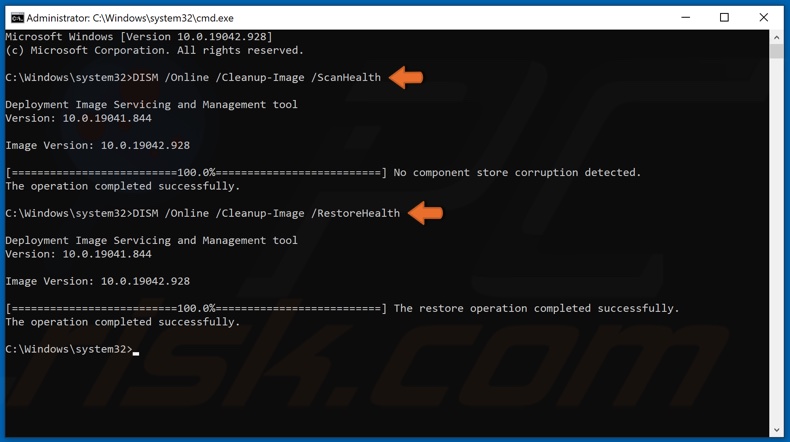
3. Then, type in DISM /Online /Cleanup-Image /ScanHealth in the Command Prompt window, and hit Enter.
4. Lastly, type in DISM /Online /Cleanup-Image /RestoreHealth and press the Enter key.
5. Close the Command Prompt, restart your PC, and try updating Windows.
Solution 5. Run System File Checker (SFC) Scan
You can also run the System File Checker tool to repair missing or corrupted system files. The SFC /ScanNow command scans all protected system files and replaces corrupted files with a cached copy found in a compressed folder at %WinDir%\System32\dllcache.
1. Hold down Windows+R keys to open Run.
2. In the Run dialog, type in CMD and hold down Ctrl+Shift+Enter keys to open the elevated Command Prompt.
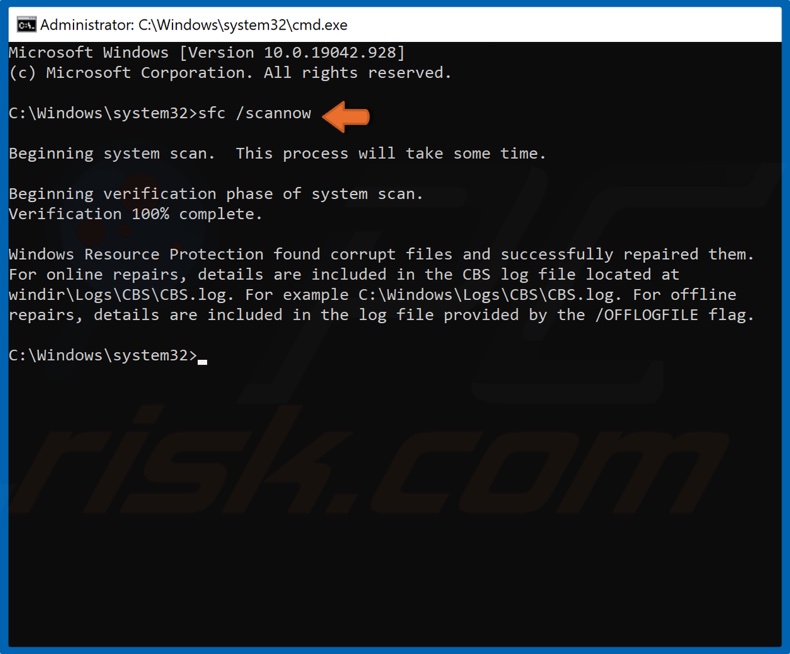
3. In the Command Prompt window, type in SFC /ScanNow and hit the Enter key to start the scan.
4. Once the scan is complete, close the Command Prompt, restart your PC, and try updating Windows.
Share:

Rimvydas Iliavicius
Researcher, author
Rimvydas is a researcher with over four years of experience in the cybersecurity industry. He attended Kaunas University of Technology and graduated with a Master's degree in Translation and Localization of Technical texts. His interests in computers and technology led him to become a versatile author in the IT industry. At PCrisk, he's responsible for writing in-depth how-to articles for Microsoft Windows.
▼ Show Discussion