4 Ways to Fix Twitch Buffering and Lagging
Get Free Scanner and check your computer for errors
Fix It NowTo fix found issues, you have to purchase the full version of Combo Cleaner. Free trial available. Combo Cleaner is owned and operated by Rcs Lt, the parent company of PCRisk.com read more.
Twitch Keeps Buffering or Stuttering? Our Troubleshooting Guide Will Help You Fix That
Twitch is the go-to place for watching gaming streams. However, many people get frustrated when they can't watch their favorite streamers because Twitch constantly buffers. This guide will show you how to troubleshoot endless Twitch buffering on Windows computers.

Unfortunately, people encounter problems where Twitch keeps buffering, stuttering, and lagging. Sometimes users experience constant buffering, making Twitch unusable.
Why Does Twitch Keep Buffering?
Twitch buffering issues occur for three primary reasons: web browser issues, Twitch service issues, and network problems. All of these causes have a significant impact on user experience.
Twitch will continue to buffer if your Internet speed isn't fast enough. Nevertheless, having a stable and speedy Internet connection is not enough as you may still experience buffering issues.
Malicious software may throttle your Internet bandwidth. Therefore, you should scan your computer for malware.
It's been widely agreed that Twitch may start having buffering issues while Steam is updating certain games. Therefore, you should ensure that Steam isn't downloading anything.
Like any streaming platform, Twitch may experience server issues resulting in Twitch not functioning correctly, causing lag, stuttering, and buffering issues. We've put together some user-tested solutions to solve these issues.
Video Guide on How to Fix Twitch Buffering on Windows 10
Table of Contents:
- Introduction
- Solution 1. Clear Web Browser Cache
- Solution 2. Disable Google Chrome Hardware Acceleration
- Solution 3. Change Your DNS
- Solution 4. Block Specific IP Range
- Video Guide on How to Fix Twitch Buffering on Windows 10
Download Computer Malware Repair Tool
It is recommended to run a free scan with Combo Cleaner - a tool to detect viruses and malware on your device. You will need to purchase the full version to remove infections. Free trial available. Combo Cleaner is owned and operated by Rcs Lt, the parent company of PCRisk.com read more.
Solution 1. Clear Web Browser Cache
Clear Cache in Microsoft Edge
1. Open Microsoft Edge.
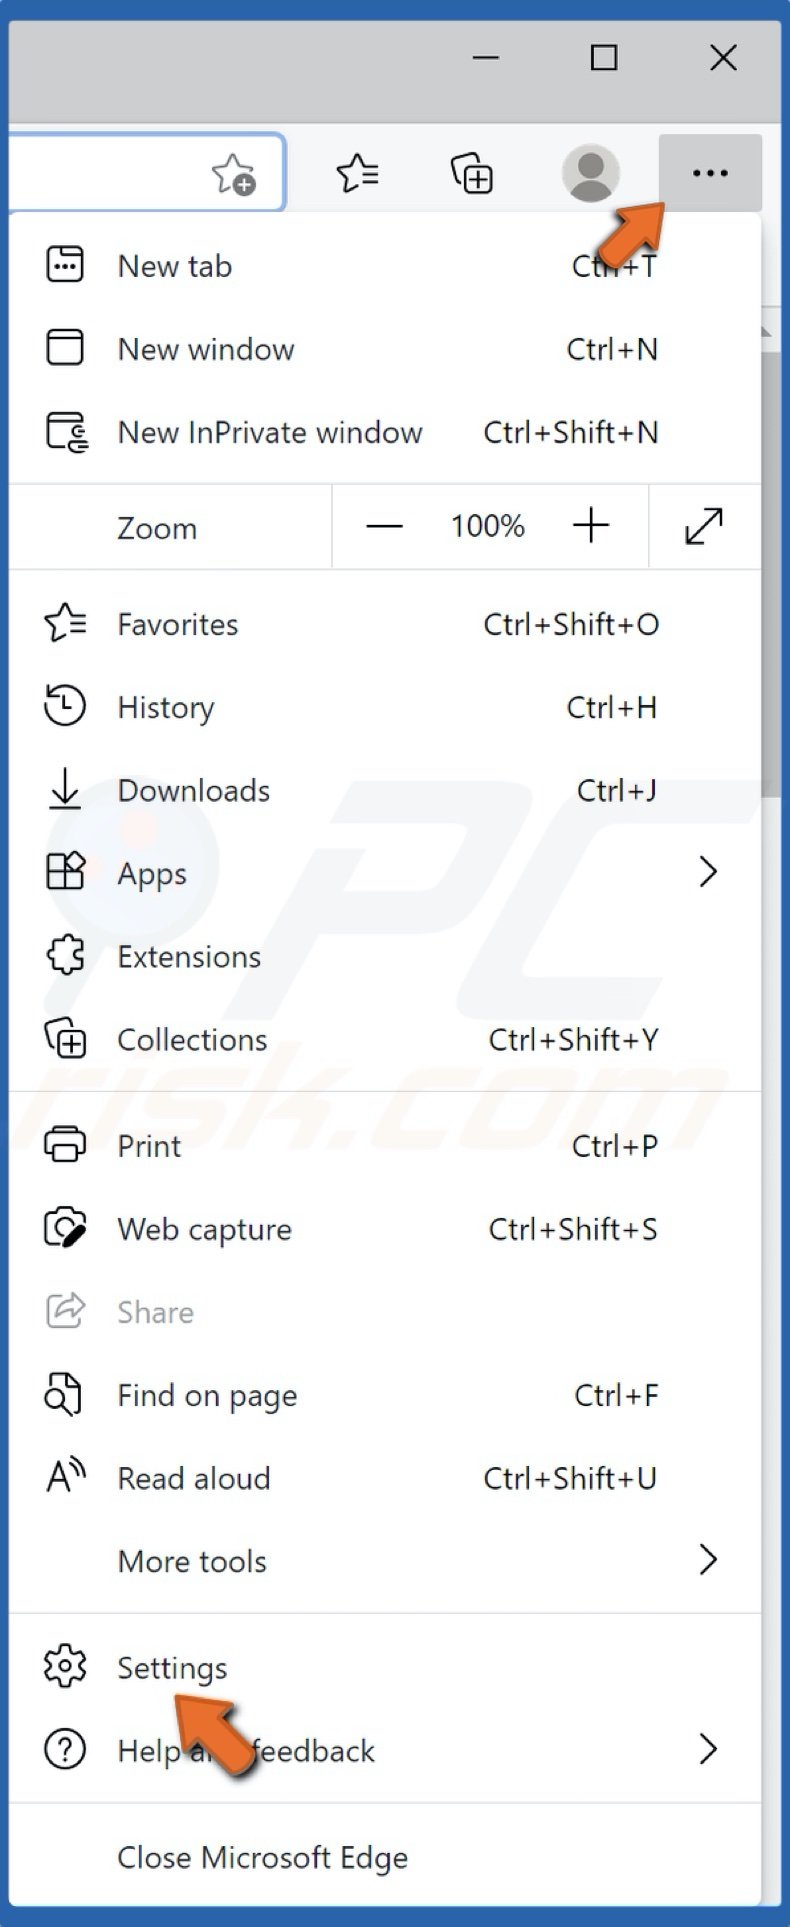
2 . Open the Menu (3 dots icon at the top right corner of the browser), and select Settings.
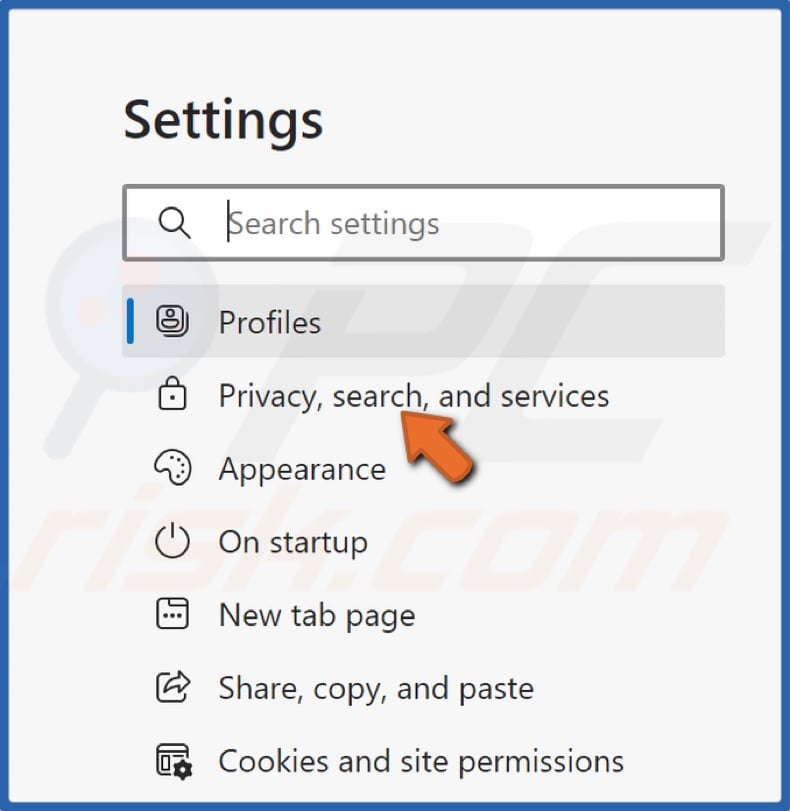
3. Then, in the right pane, click Privacy, search, and services.
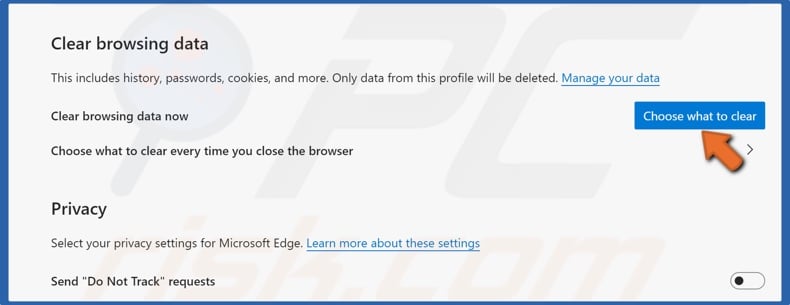
4. Under Clear browsing data, click the Choose what to clear button.
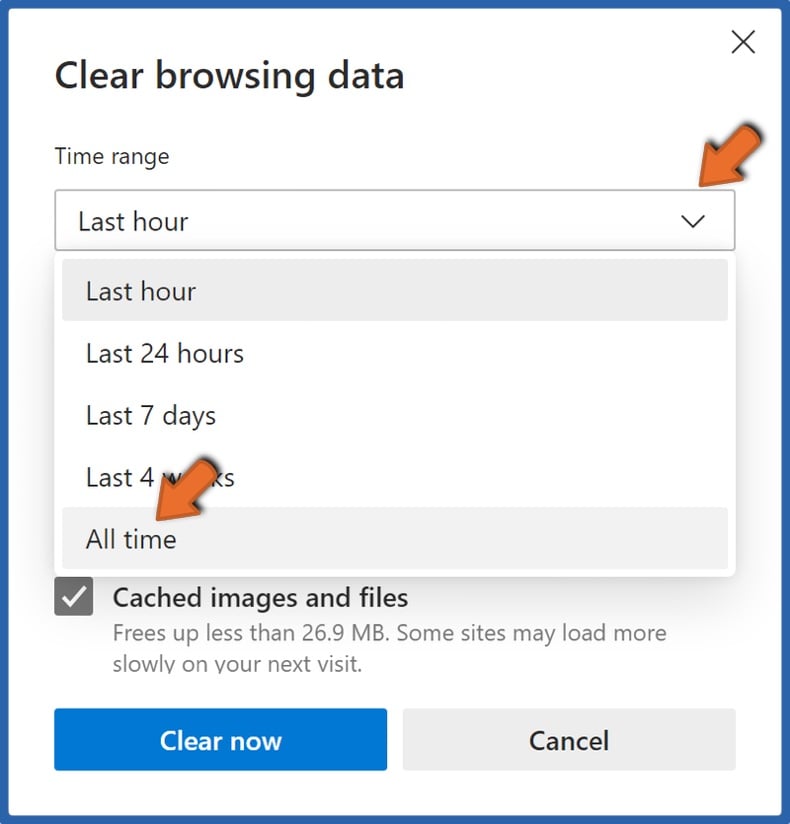
5. Open the Time range drop-down menu and select All time.
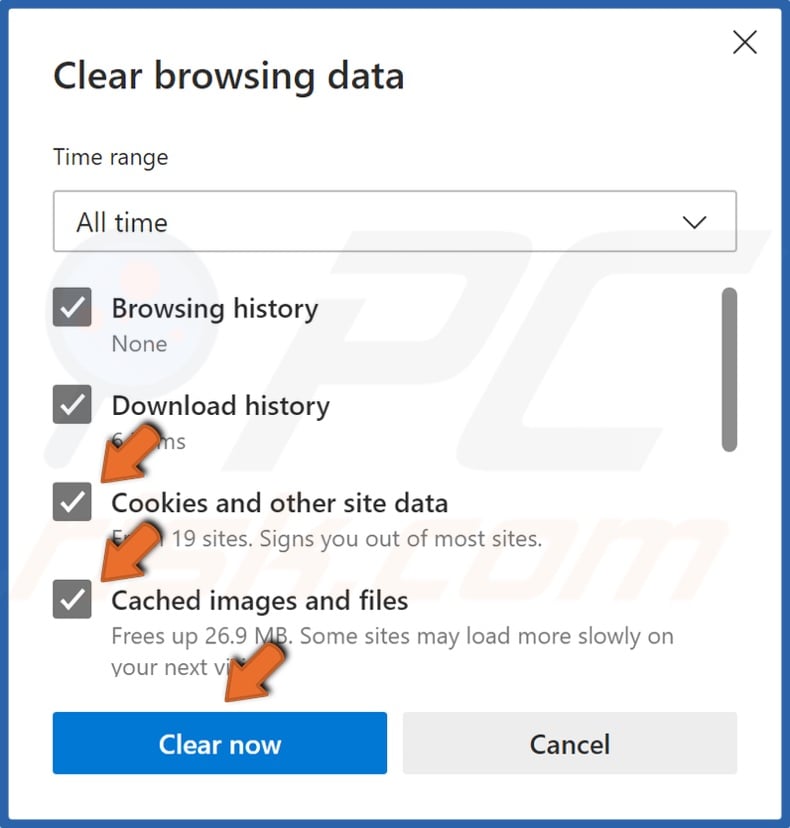
6. Then, mark the Cookies and other site data and Cached images and files checkboxes and click Clear now.
Clear Cache in Google Chrome
1. Open Google Chrome.
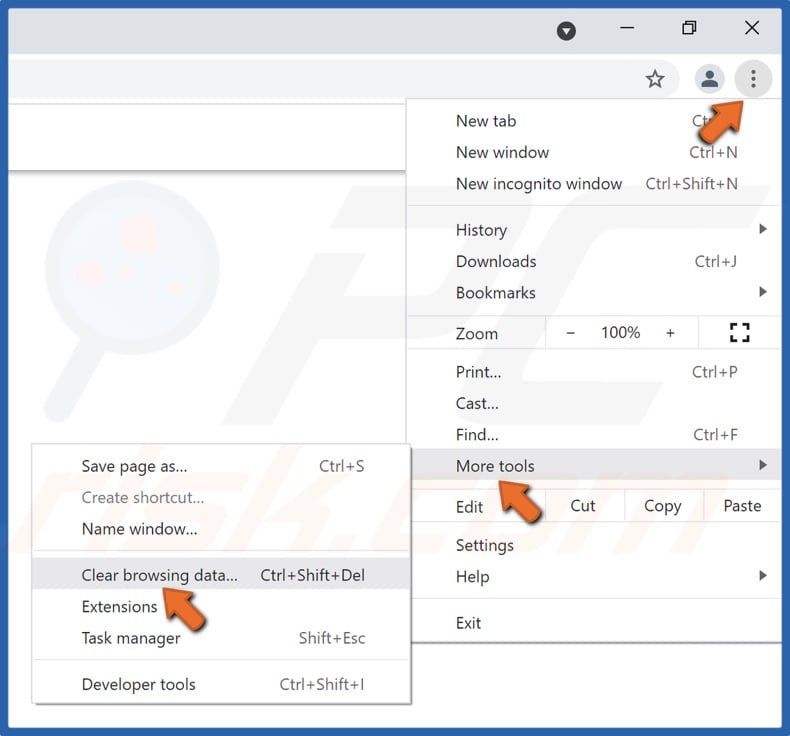
2. Open the More menu, navigate to More tools, and click Clear browsing data.
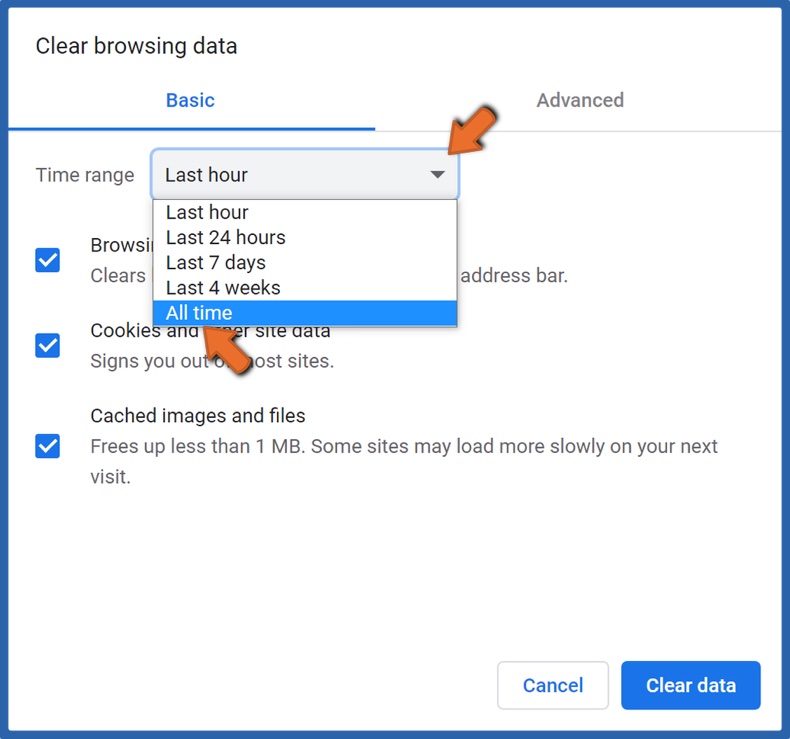
3. Open the Time range drop-down menu and select All time.
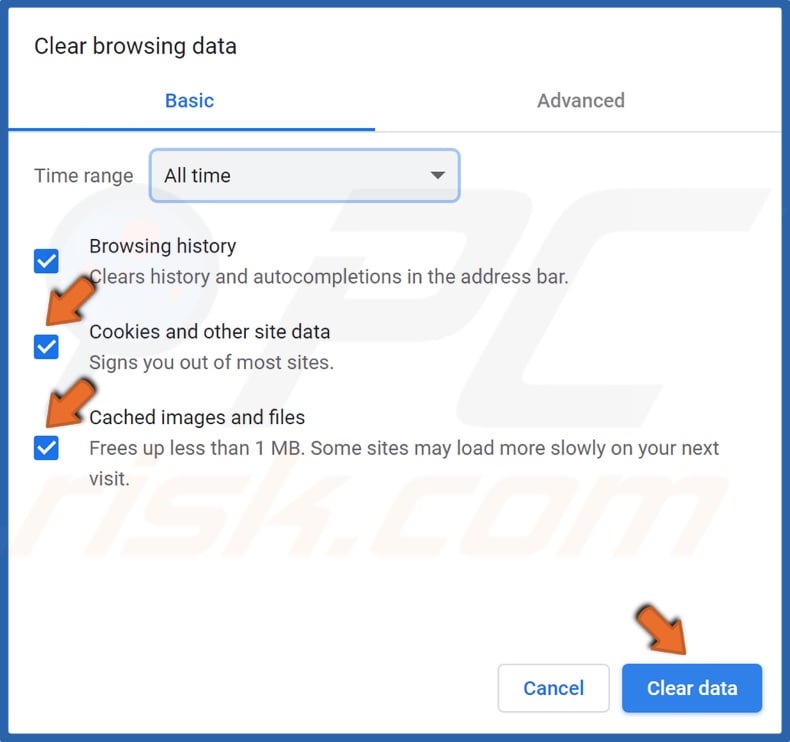
4. Then, mark the checkboxes next to Cookies and other site data and Cached images and files, and click Clear data.
Clear Cache in Mozilla Firefox
1. Open Mozilla Firefox.
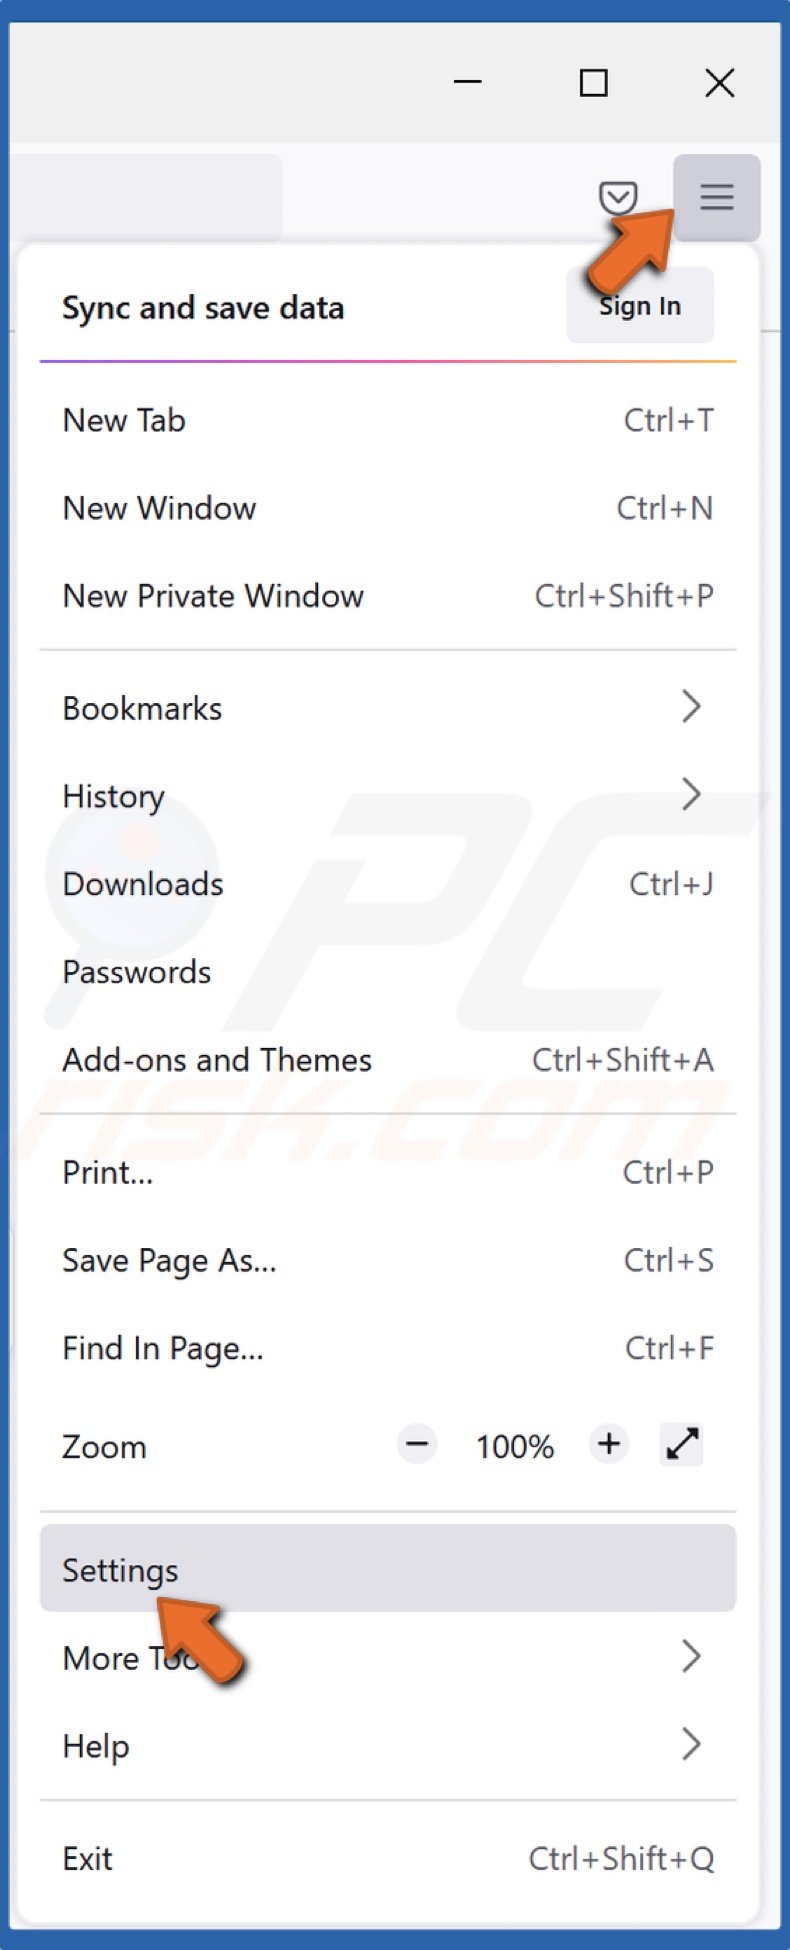
2. Open the Menu and select Settings.
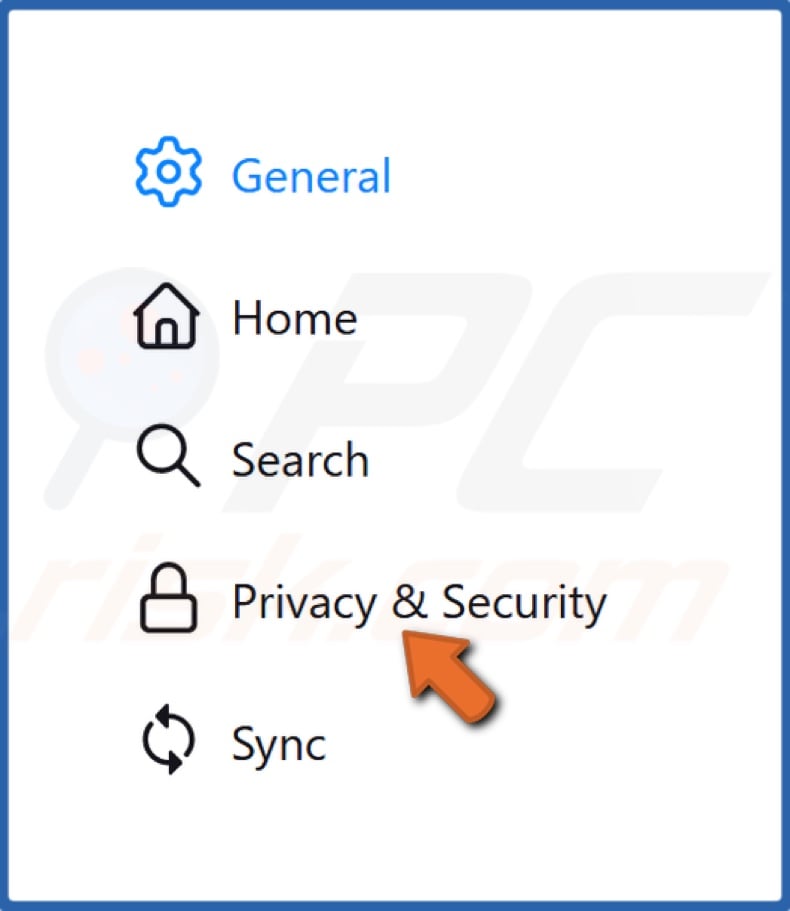
3. Select the Privacy & Security panel.
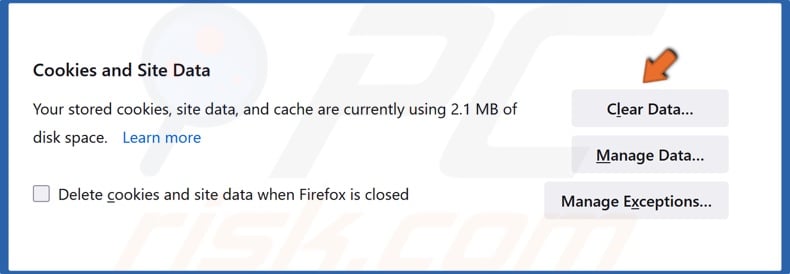
4. Scroll down and in the Cookies and Site Data section, click Clear Data.
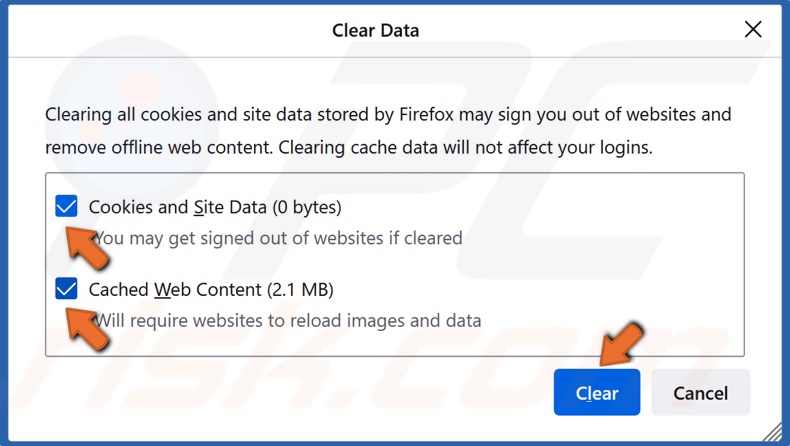
5. Mark the checkboxes next to Cookies and Site Data and Cached Web Content and click Clear.

6. Then, click the Clear Now button.
Solution 2. Disable Google Chrome Hardware Acceleration
If you watch Twitch using Google Chrome, then disable Use hardware acceleration when available option.
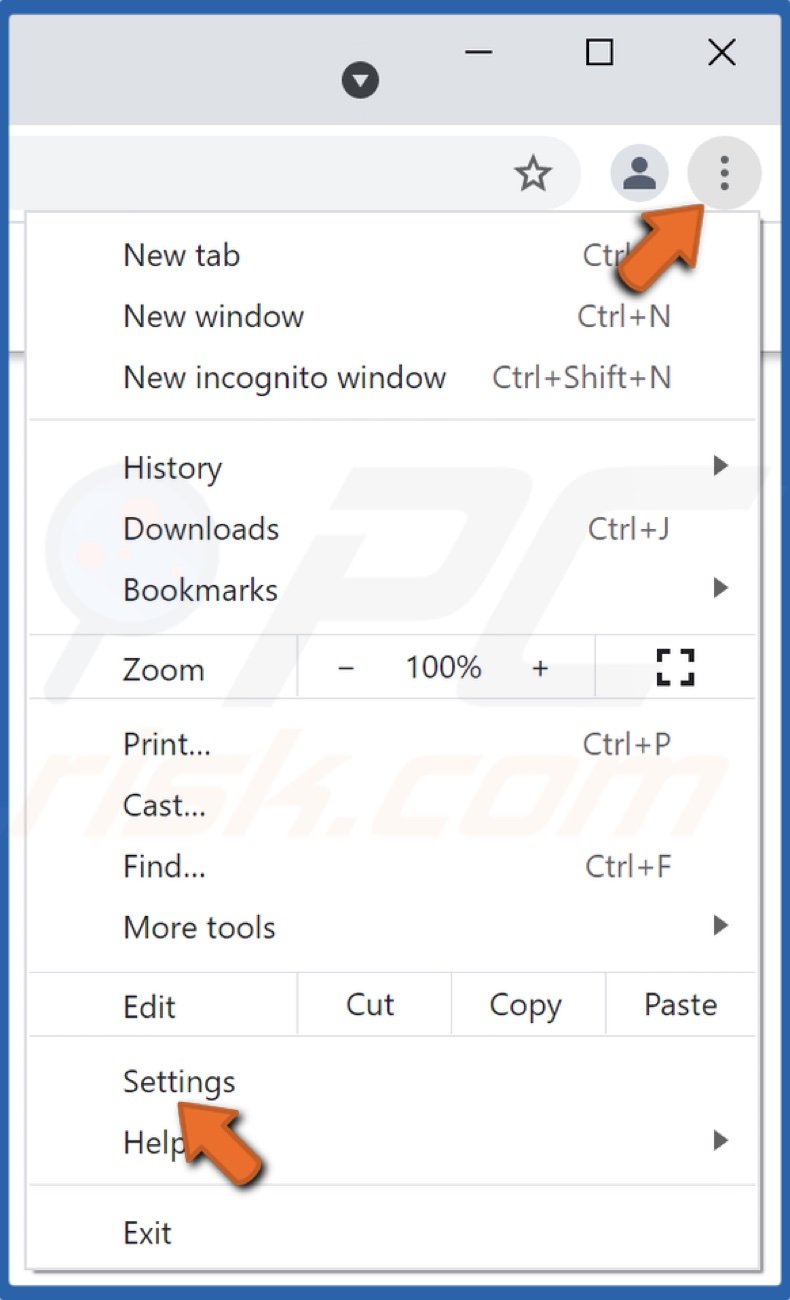
1. Open Google Chrome and click the Menu icon at the top right corner of the window.
2. In the drop-down menu, click Settings.
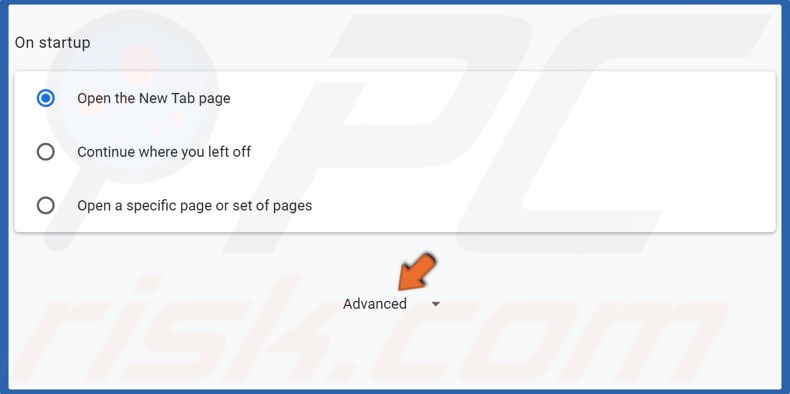
3. In the Settings menu, scroll down and click Advanced.
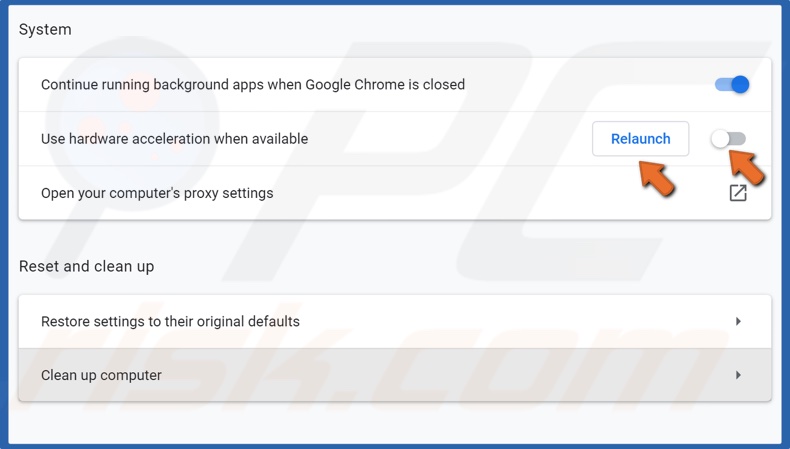
4. Scroll down to the bottom again, and uncheck the Use hardware acceleration when available option.
5. Click the relaunch button for the changes to take effect.
Solution 3. Change Your DNS
1. Hold down Windows+R keys to open Run.
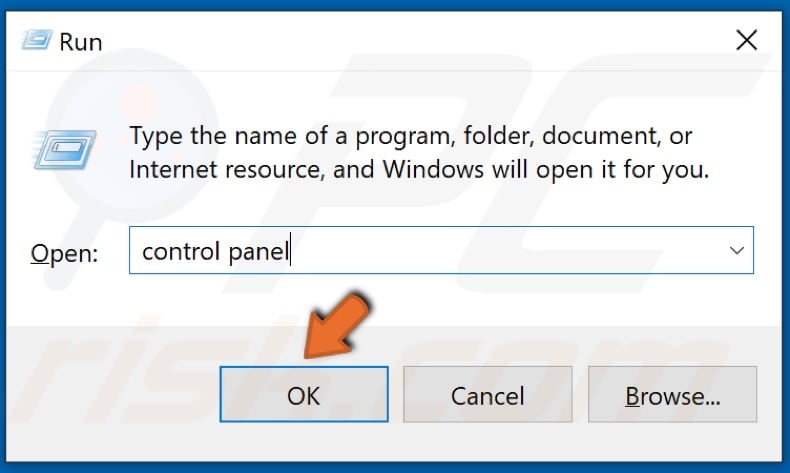
2. Type in Control Panel and click OK.
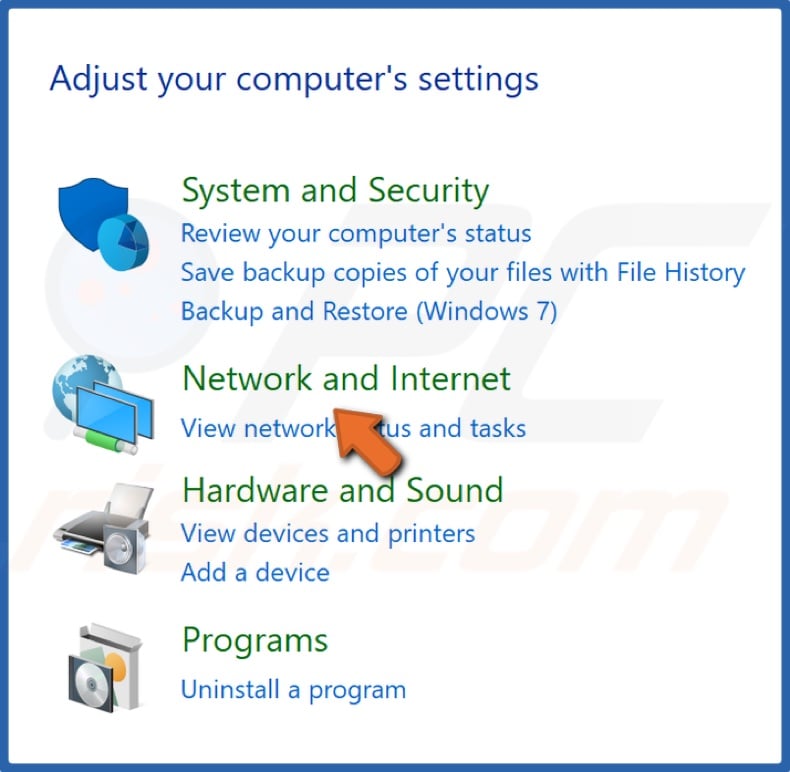
3. Once in the Control Panel, click Network and Internet.
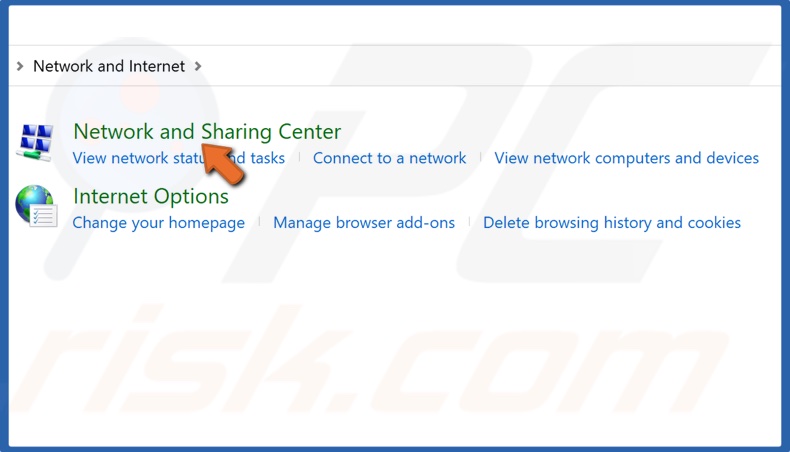
4. Select Network and Sharing Center.
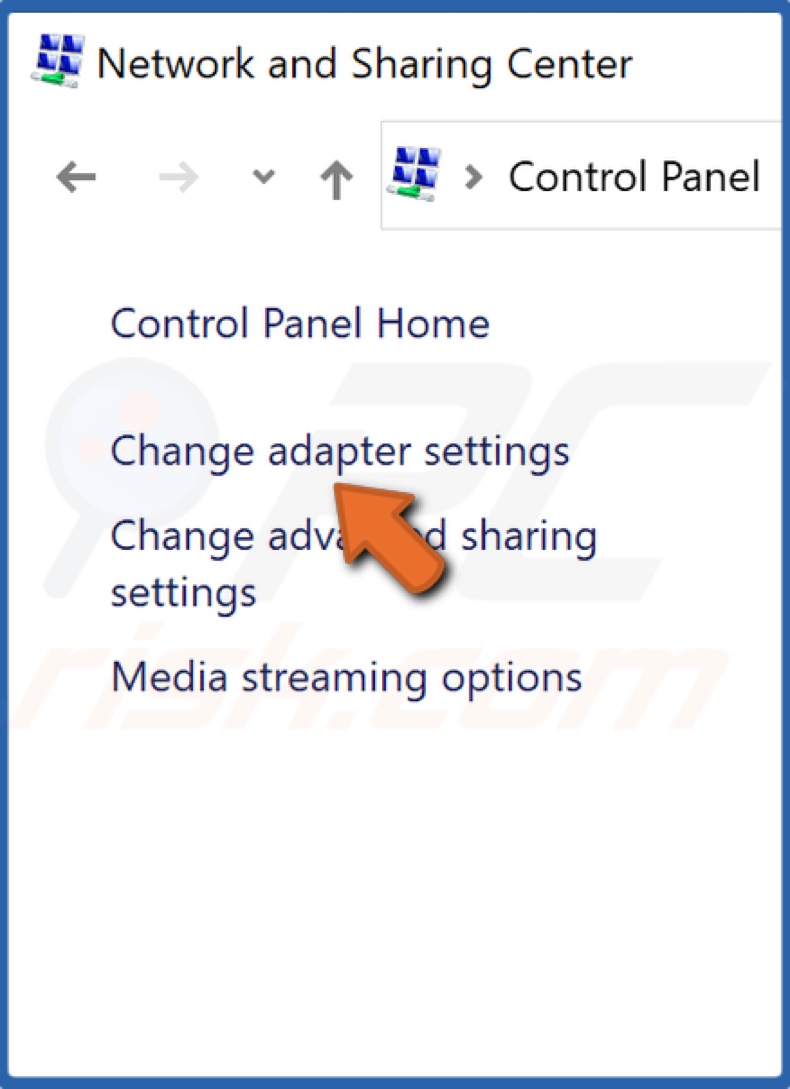
5. Click Change adapter settings.
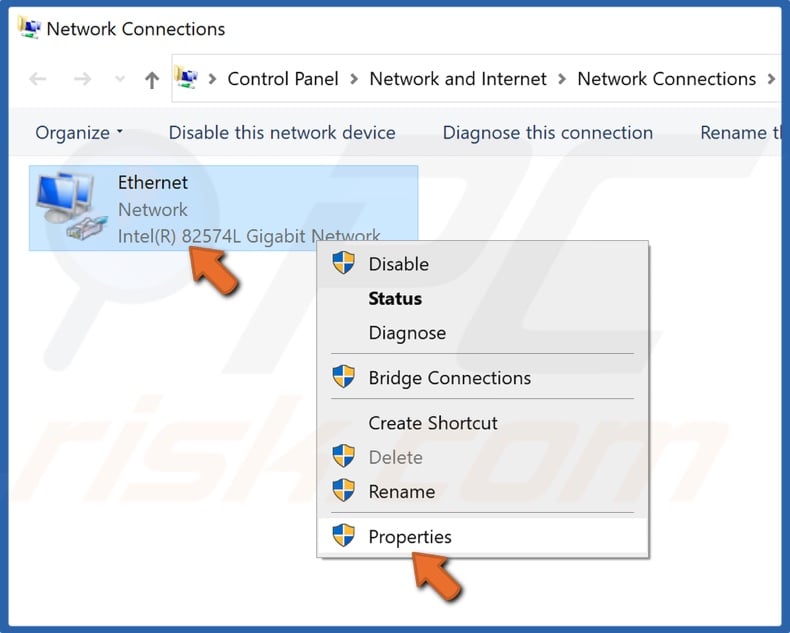
6. Right-click your network adapter and select Properties.
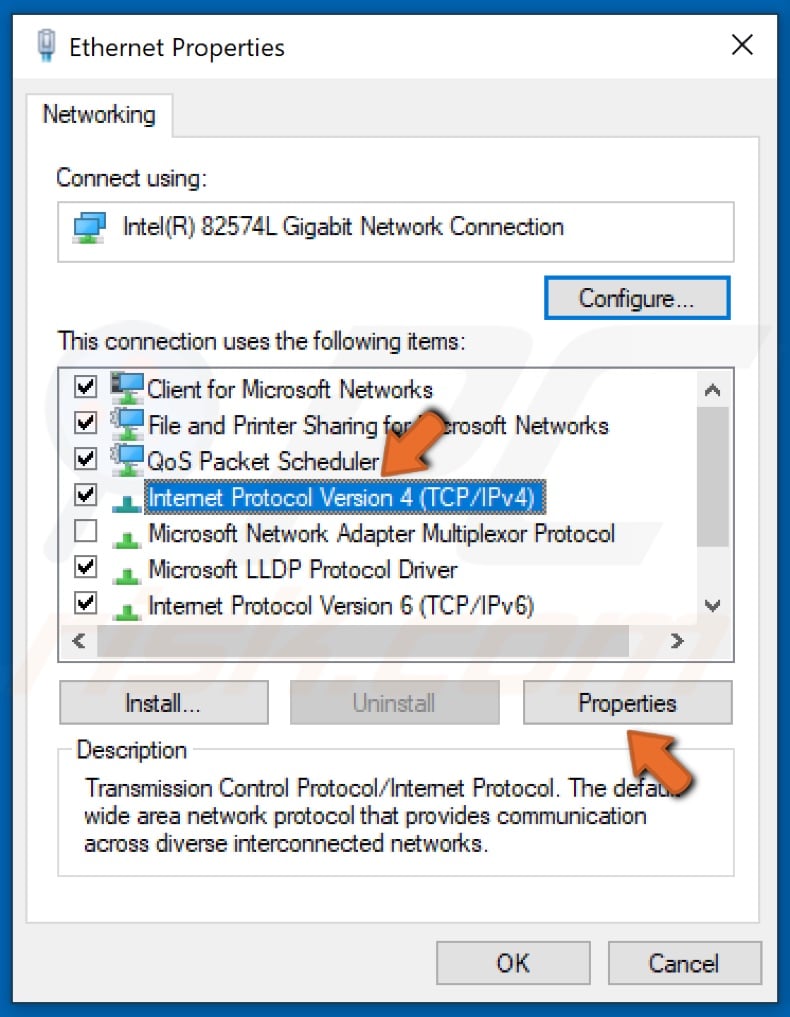
7. Select Internet Protocol Version 4 (TCP/IPv4) and click Properties.
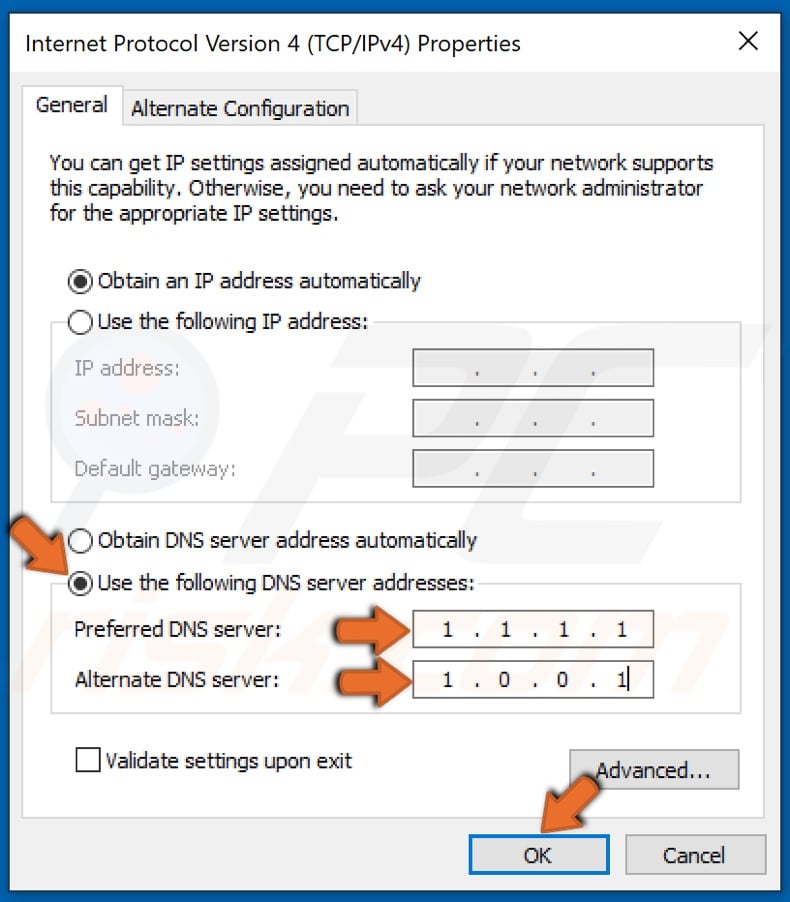
8. Tick the Use the following DNS server address.
9. Enter the following addresses:
We will use Cloudflare DNS
In the Preferred DNS server, type in 1.1.1.1
In the Alternate DNS server, type in 1.0.0.1
10. Click OK to save settings.
11. Restart your PC for the changes to take effect.
Solution 4. Block Specific IP Range
1. Hold down Windows+R keys to open Run.
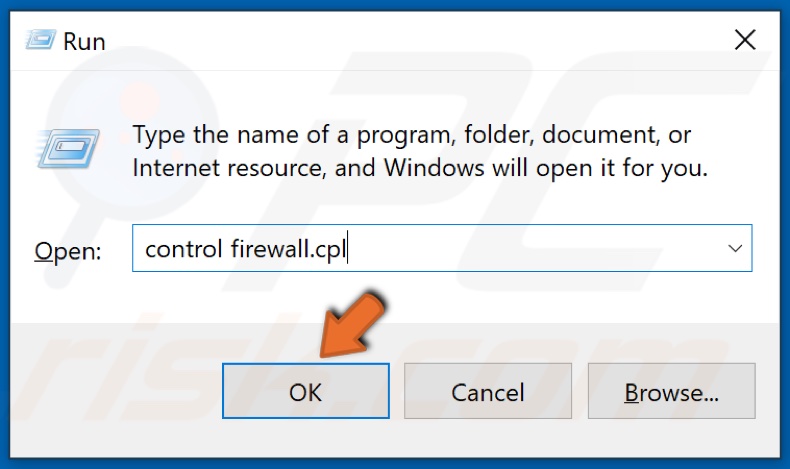
2. In the Run dialog box, type control firewall.cpl, and click OK to open Windows Defender Firewall settings.
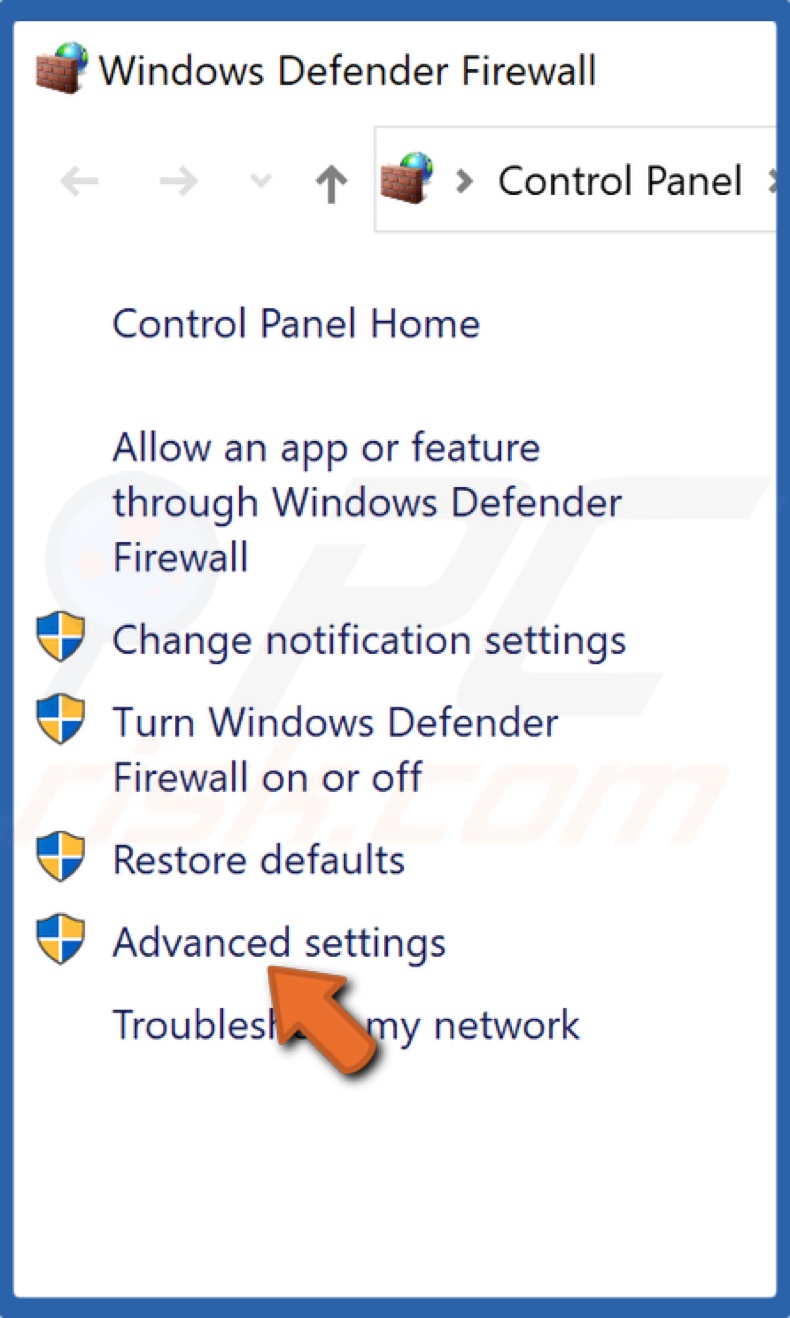
3. Click Advanced settings in the left pane.
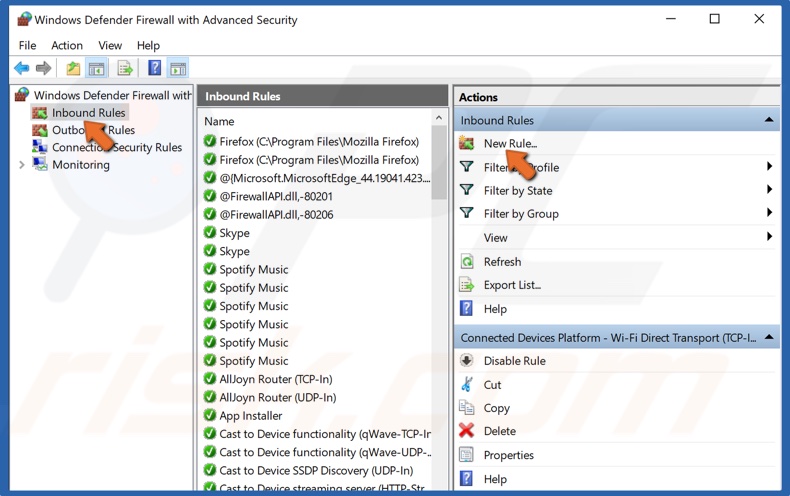
4. Click Inbound Rules in the left pane and select New Rule in the right pane.
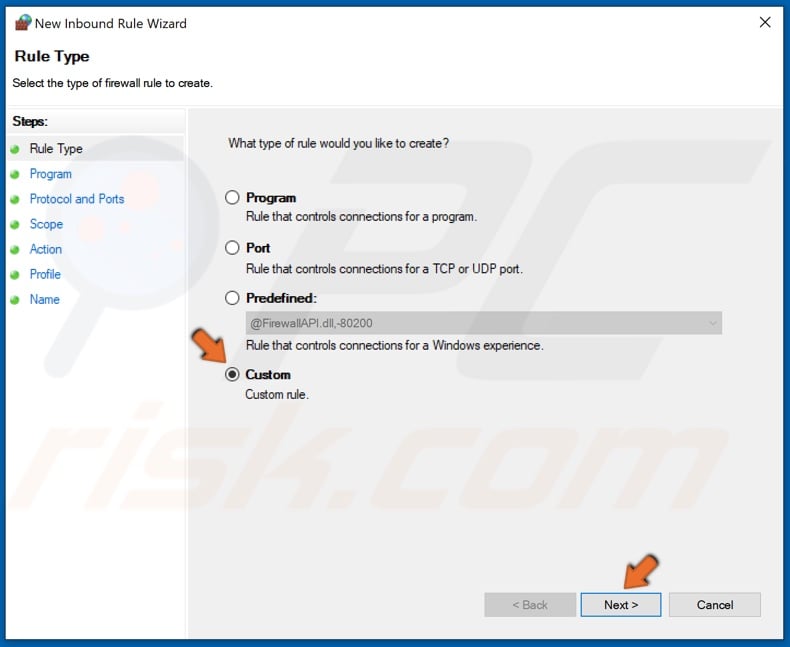
5. Then, tick Custom rule and click Next.
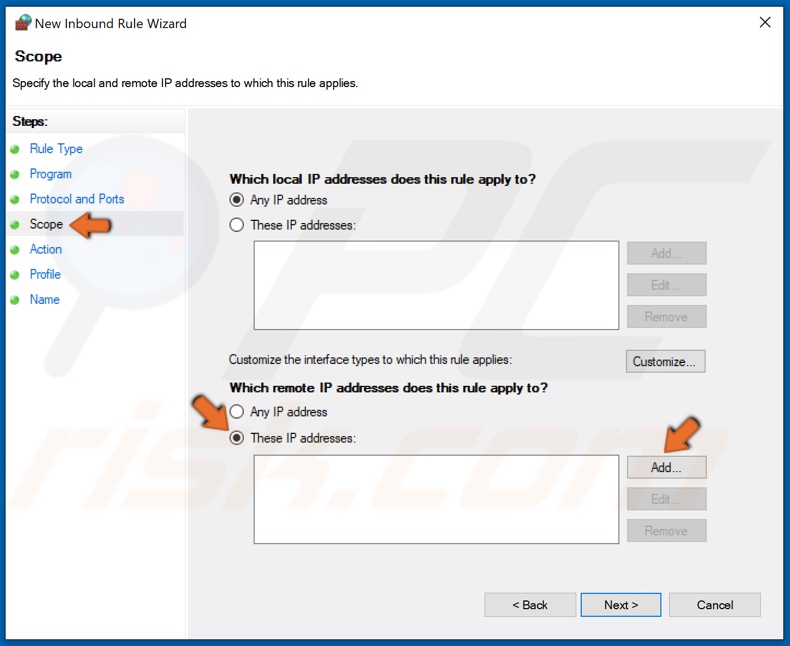
6. Select Scope and tick Which remote IP addresses does this rule apply to.
7. Tick These IP addresses and click Add.
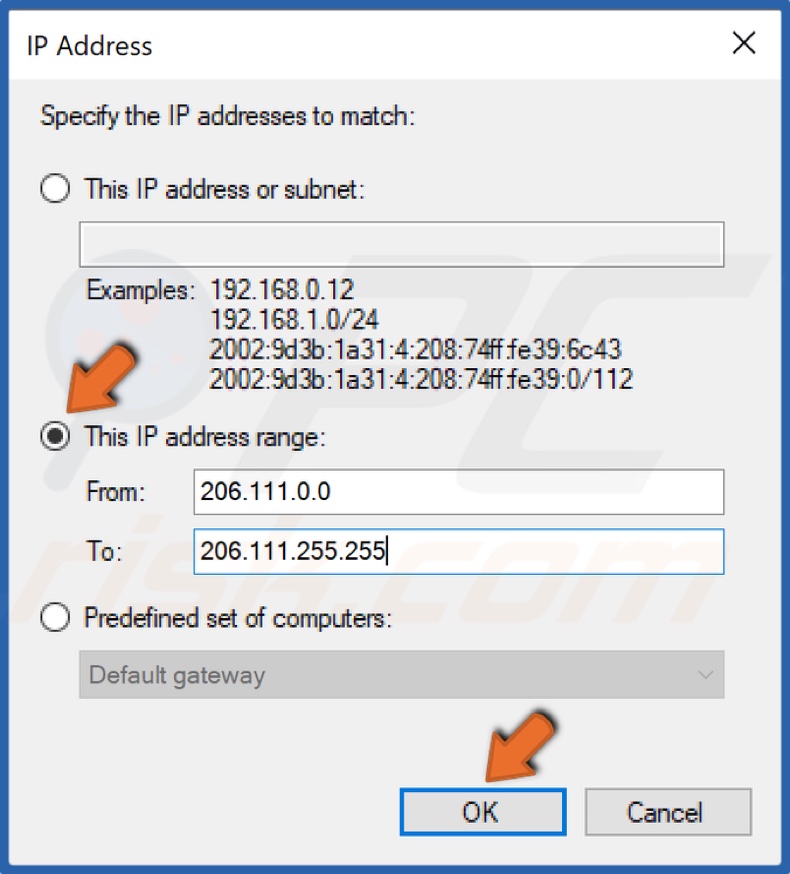
8. Then, tick This IP range.
9. In the From text box, type in 206.111.0.0
10. In the To text box, type in 206.111.255.255
11. Click OK.
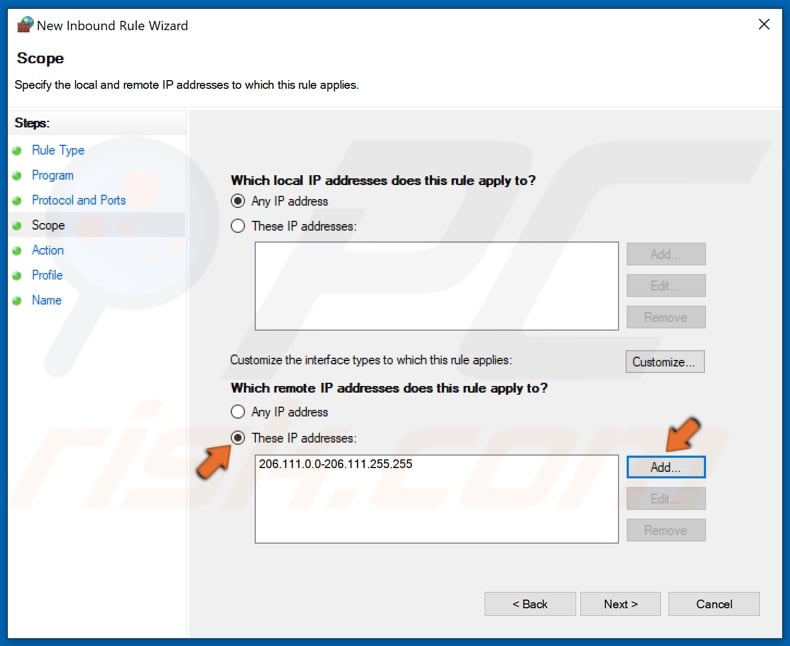
12. Then, click Add again.
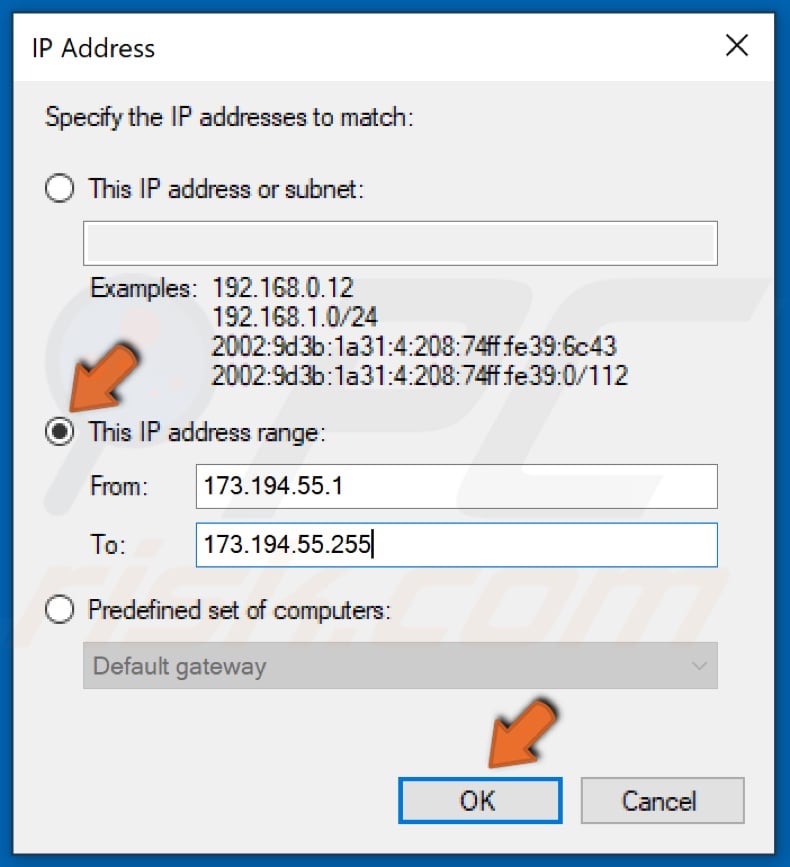
13. In the From text box, type in 173.194.55.1
14. In the To text box, type 173.194.55.255
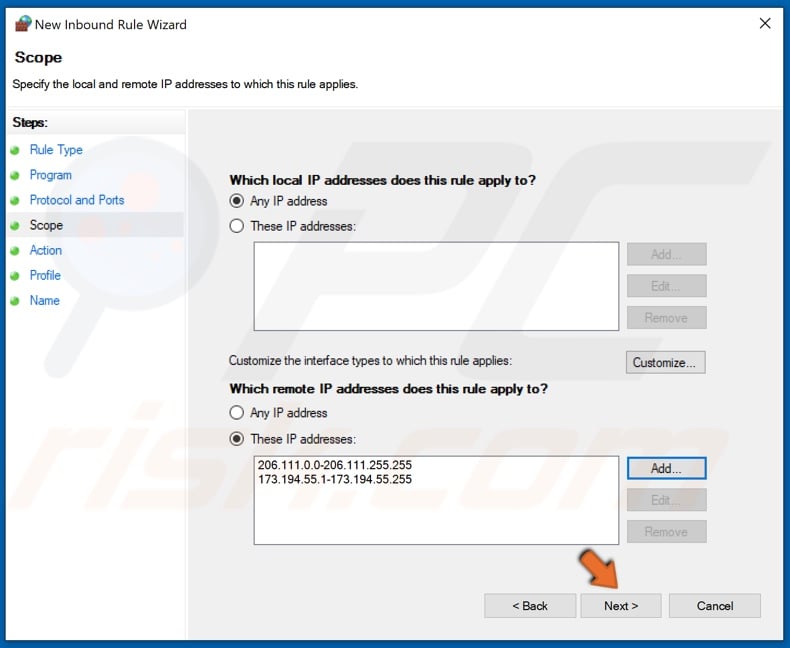
15. Then, click Next.
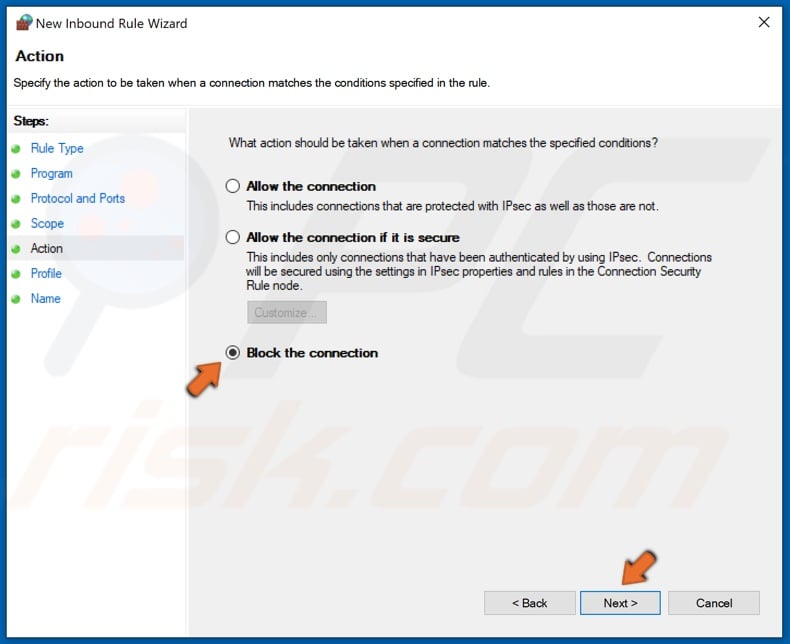
16. Tick Block the connection and click Next.
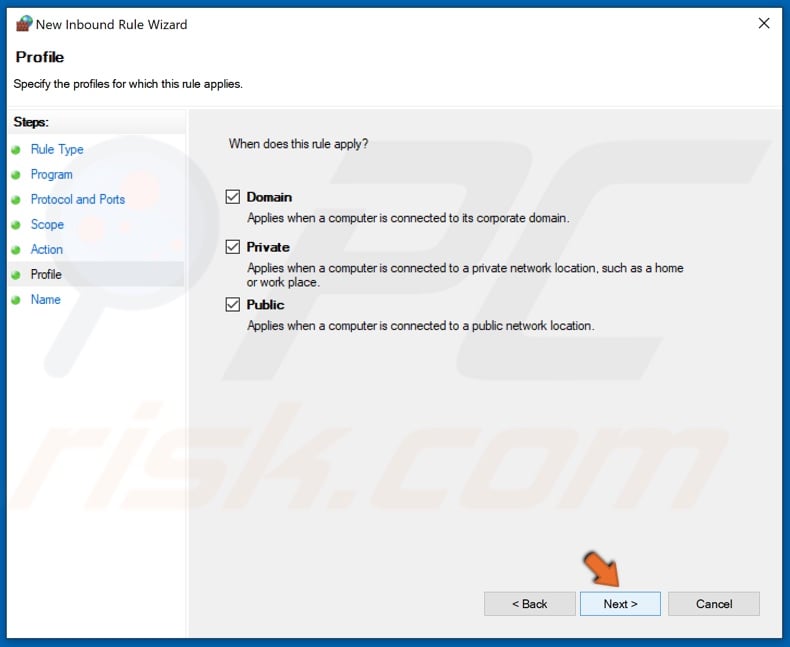
17. In the "When does this rule apply?" window, click Next.
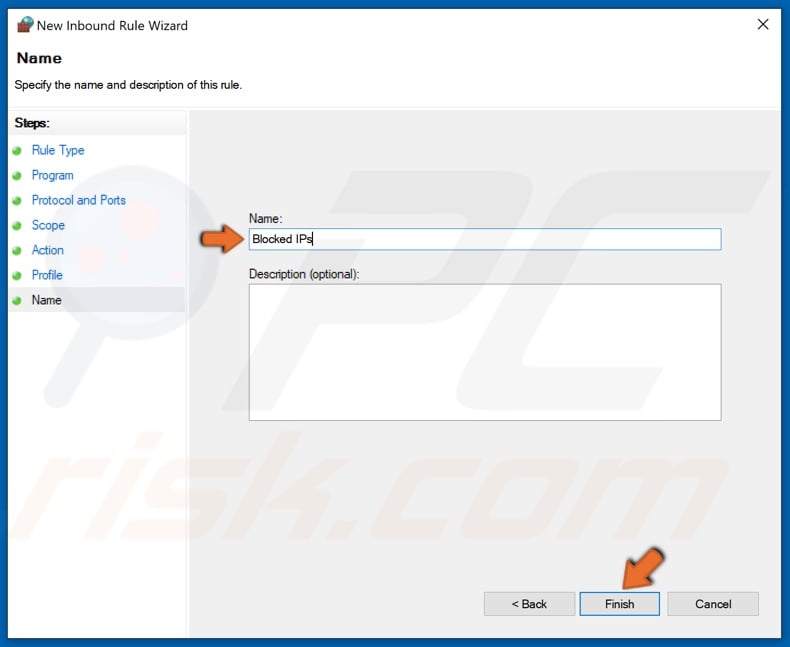
18. Enter a name for the new rule and click Finish.
19. Restart your PC.
Share:

Rimvydas Iliavicius
Researcher, author
Rimvydas is a researcher with over four years of experience in the cybersecurity industry. He attended Kaunas University of Technology and graduated with a Master's degree in Translation and Localization of Technical texts. His interests in computers and technology led him to become a versatile author in the IT industry. At PCrisk, he's responsible for writing in-depth how-to articles for Microsoft Windows.

▼ Show Discussion