4 Ways to Fix "Audio Services Not Responding" Error

Get Free Scanner and check your computer for errors
Fix It NowTo fix found issues, you have to purchase the full version of Combo Cleaner. Free trial available. Combo Cleaner is owned and operated by Rcs Lt, the parent company of PCRisk.com read more.
How to Fix "Audio services not responding" Error on Windows 10
If you run the Windows audio troubleshooter, hoping it will quickly fix your audio-related issues, but get an "Audio services not responding" error message, then that means that your audio device is not responding.
There is little to no information about the causes for the "Audio services not responding" error. All we know is that this error may occur after upgrading your version of Windows 10 using Windows Update.
Therefore, it's usually not the fault of the sound device itself, as is likely the result of Windows Update tampering with the audio services.
In Windows 10, the Audio service depends on three other Windows services: RPC Endpoint Mapper, Remote Procedure Call (RPC), and DCOM Server Process Launcher. To have audio on your PC, all three of these services must be running and running correctly.
How to Fix the "Audio services not responding" Error
- Restart the audio services.
- Update the audio drivers.
- Re-add your user account to your system using the elevated Command Prompt.
- Use the Windows Registry Editor to modify the Windows Audio Endpoint Builder service's registry key.
Video Guide on How to Fix "Audio Services Not Responding" Error in Windows 10
Table of Contents:
- Introduction
- Method 1. Restart Windows Audio Services
- Method 2. Update the Audio Drivers
- Method 3. Fix Local Account Configurations
- Method 4. Modify Windows Audio Endpoint Builder Registry Key
- Video Guide on How to Fix "Audio Services Not Responding" Error in Windows 10
Download Computer Malware Repair Tool
It is recommended to run a free scan with Combo Cleaner - a tool to detect viruses and malware on your device. You will need to purchase the full version to remove infections. Free trial available. Combo Cleaner is owned and operated by Rcs Lt, the parent company of PCRisk.com read more.
Method 1. Restart Windows Audio Services
Since the Windows audio troubleshooter can't do anything about the "Audio services not responding" error, the first thing you should try is to manually restart the audio-related services responsible for managing the audio on your PC. As well as other services, including Remote Procedure Call (RPC), RPC Endpoint Mapper, and DCOM Server Process Launcher, are required to run for the Windows Audio service to run properly.
1. Hold down Windows+R keys to open the Run dialog box.
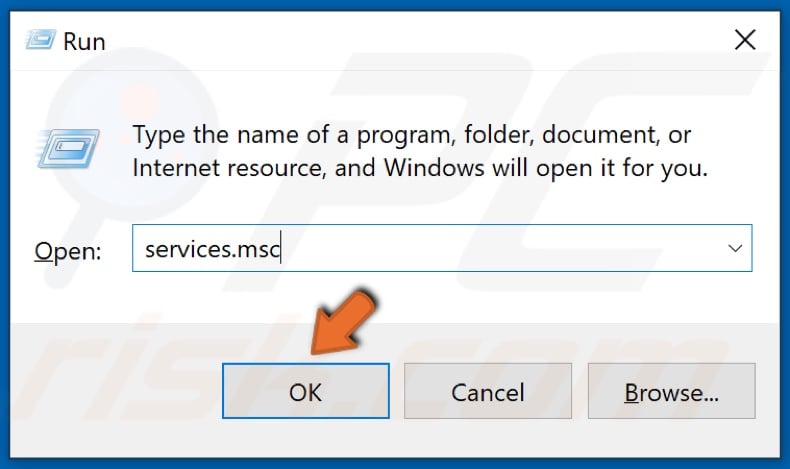
2. Type in services.msc and click OK.
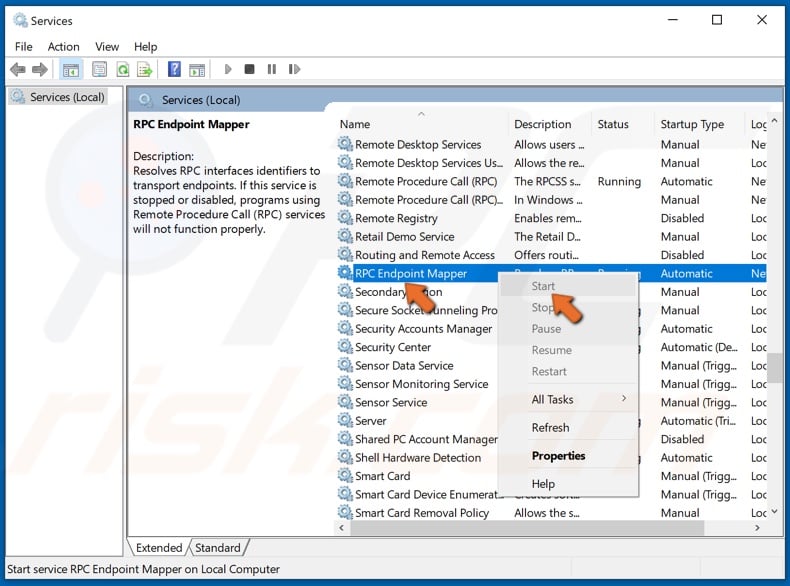
3. Scroll through the services list and find RPC Endpoint Mapper. If it's not running, right-click it and click Start.
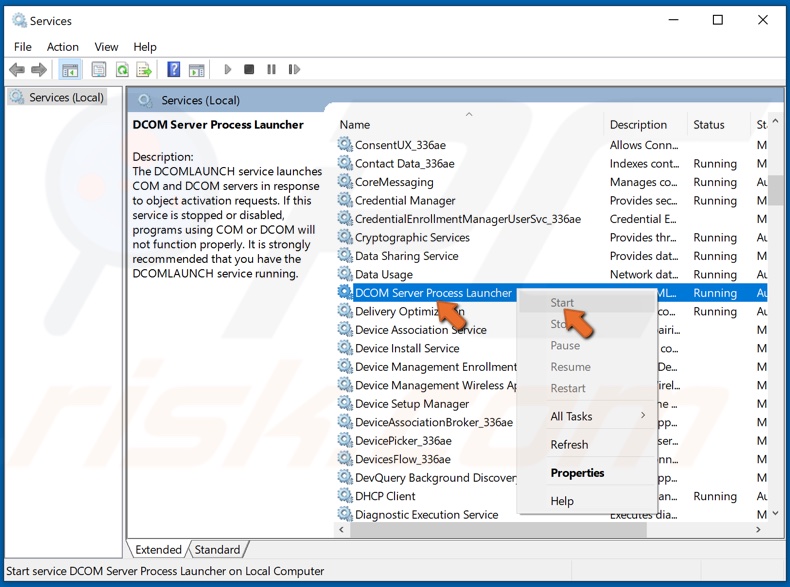
4. Find DCOM Server Process Launcher. If it's not running, right-click it and click Start.
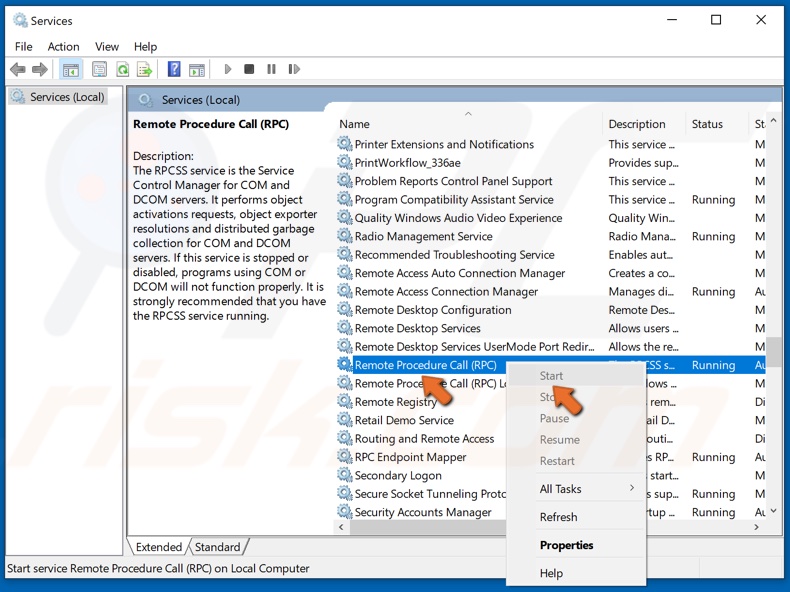
5. Find Remote Procedure Call (RPC). If it's not running, right-click it and click Start.
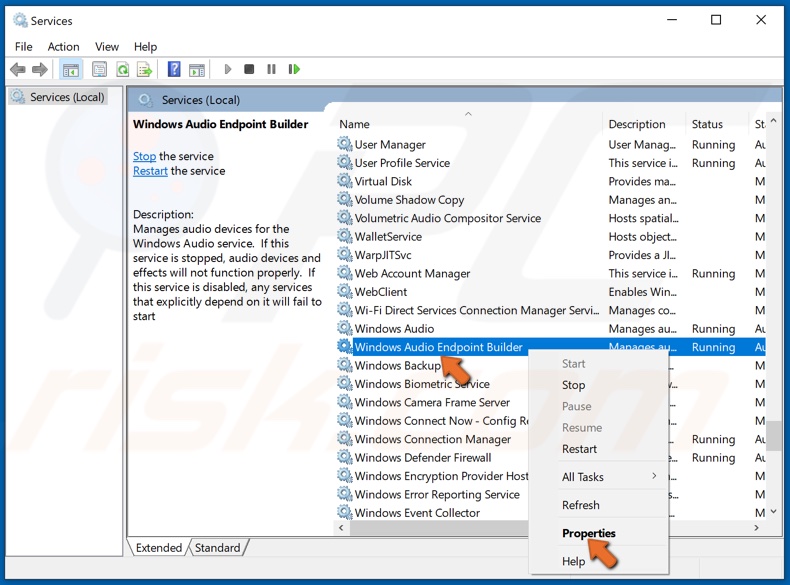
6. Scroll through the services list and find Windows Audio Endpoint Builder. Right-click it and click Properties.
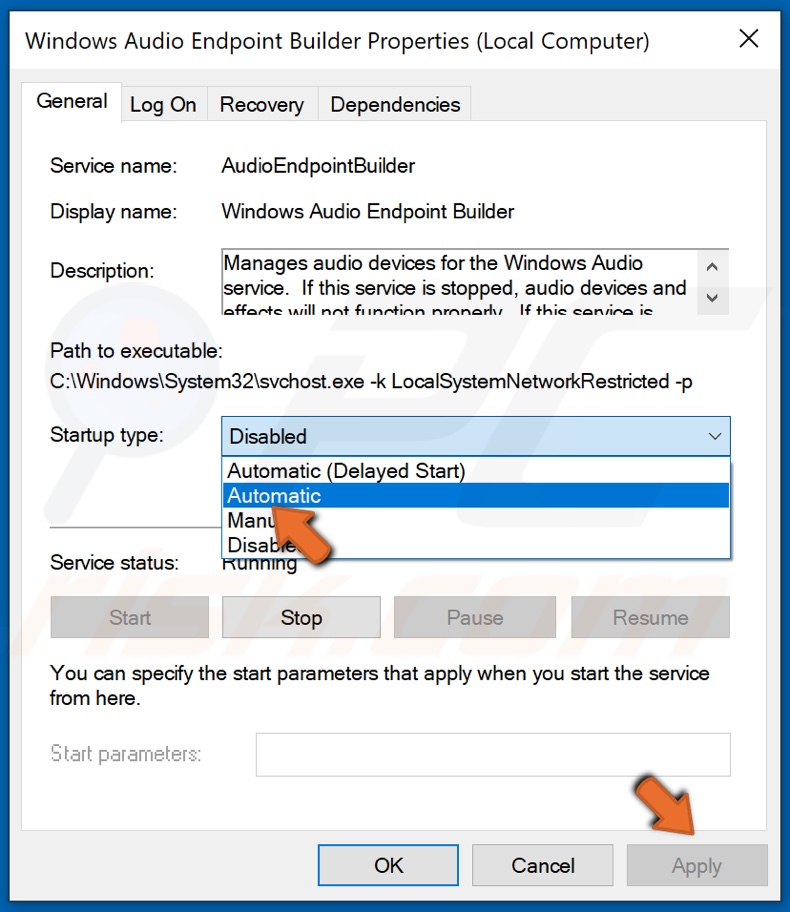
7. Open the Startup-type drop-down menu and select Automatic and click Apply.
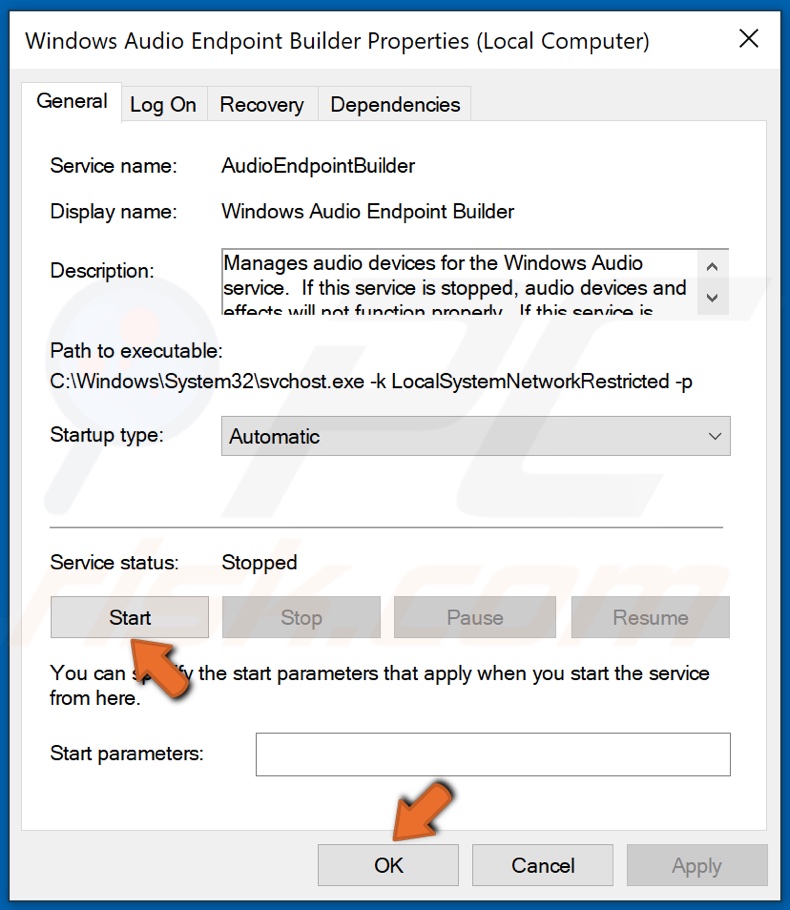
8. Then, click Start and click OK to close Properties.
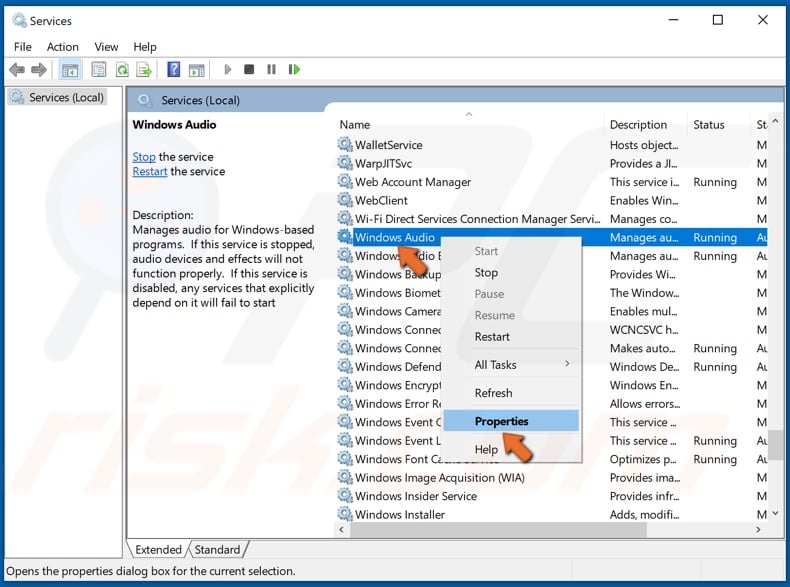
9. Then, find Windows Audio. Right-click it and click Properties.

10. Open the Startup-type drop-down menu and select Automatic and click Apply.
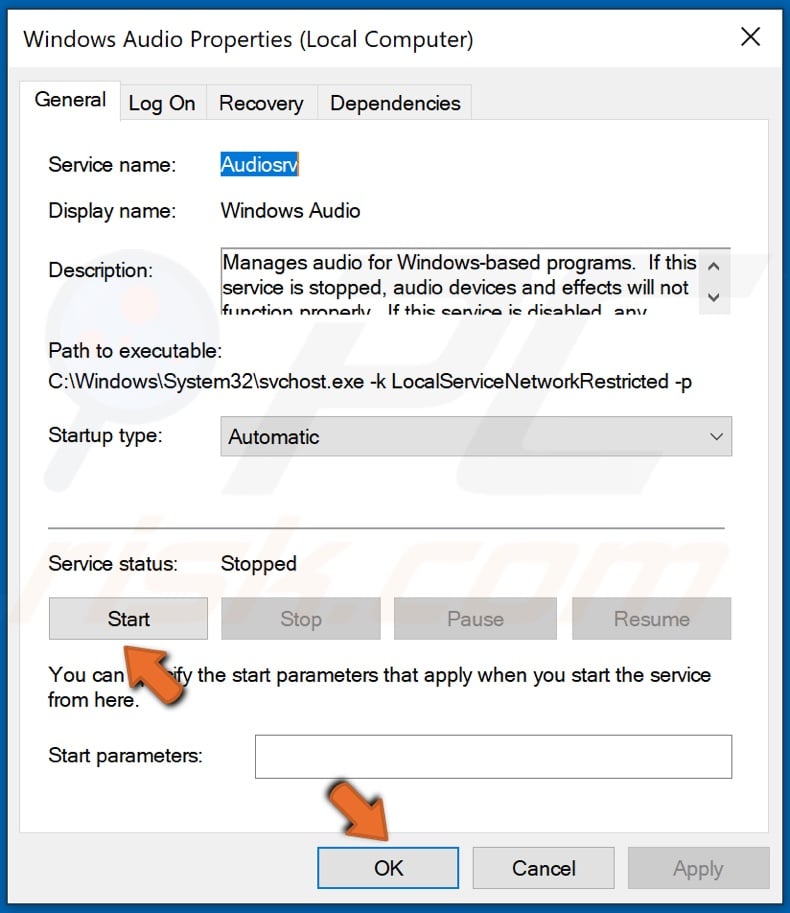
11. Then, click Start and click OK to close Properties.
Method 2. Update the Audio Drivers
If you started having audio issues after updating the audio drivers, it might be because you installed incompatible drivers. Also, the drivers may have been installed incorrectly. Therefore, you can try updating or rolling back the drivers using Windows Device Manager.
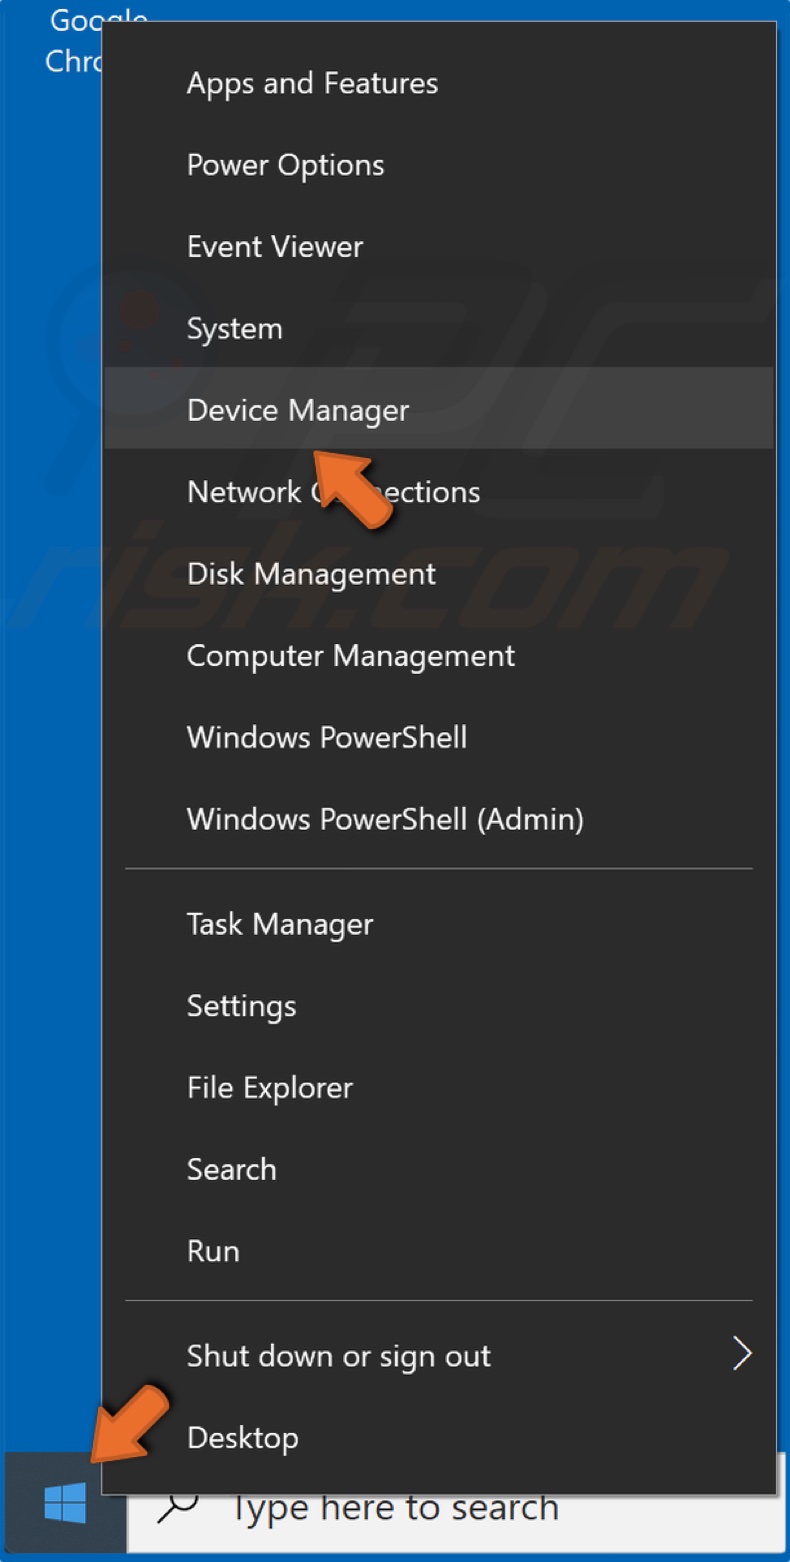
1. Right-click the Start Menu button and click Device Manager.
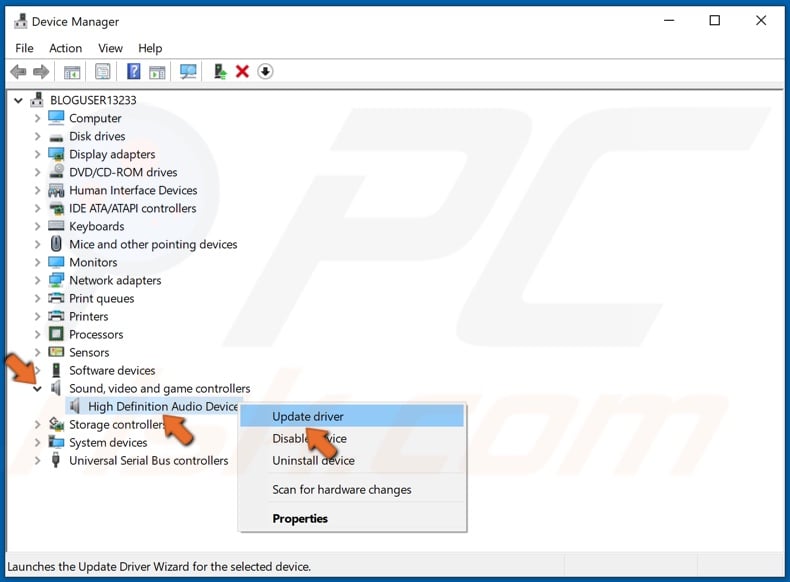
2. Expand the Sound, video and game controllers list.
3. Identify your audio device as there might be more than one.
4. Right-click the audio adapter and click Update driver.
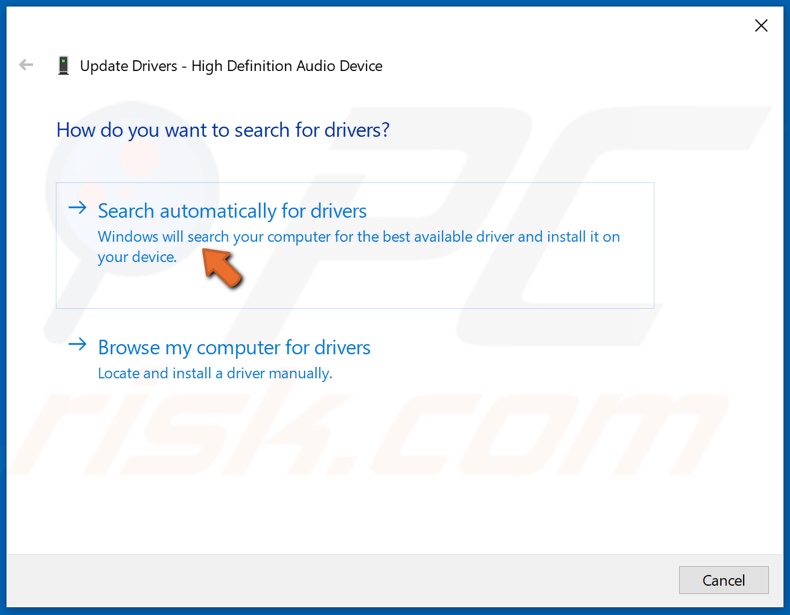
5. Click Automatically search for drivers. Windows will check for the latest driver version for your device and install it automatically.
6. If updating the audio drivers doesn't fix the issue, you can try reinstalling them.

7. Right-click the audio device and click Uninstall Device.
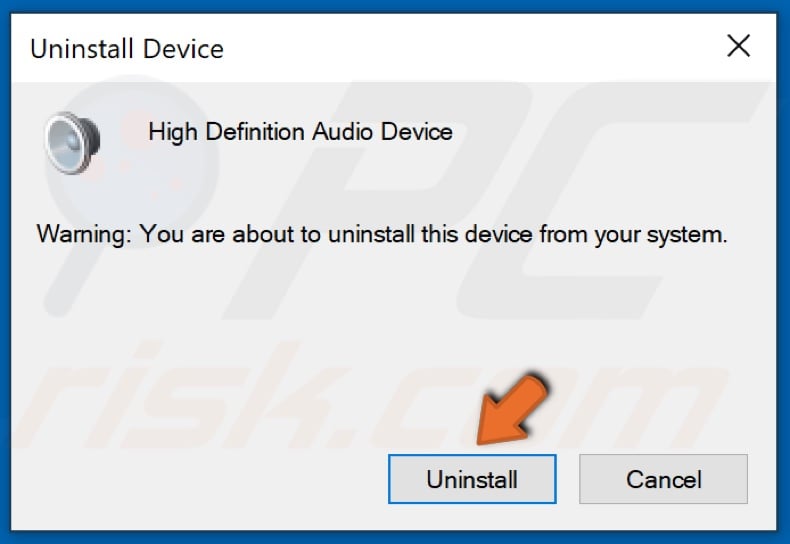
8. Click Uninstall to confirm the action.
9. Then, Restart your PC and allow Windows to automatically download and install the audio drivers.
Method 3. Fix Local Account Configurations
If your local account configurations have been tampered with, open the Command prompt and enter the commands provided below to fix them and automatically start the audio service.
1. Hold down Windows+R keys to open Run.

2. Type in CMD in the Run dialog box and hold down Shift+Ctrl+Enter to open the elevated Command Prompt.
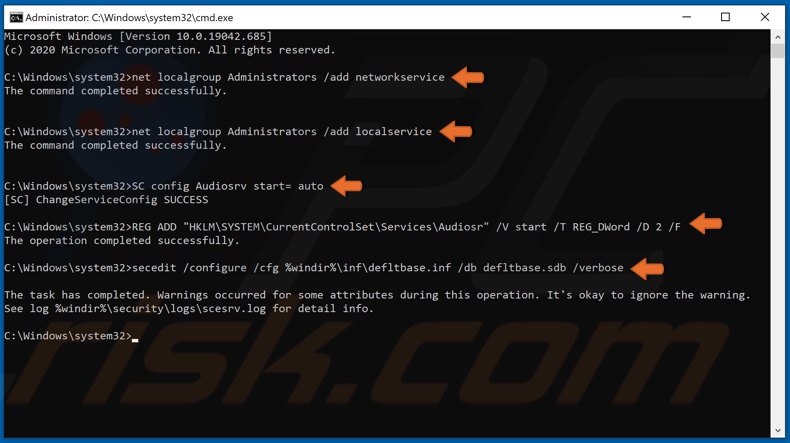
3. In the Command prompt window, type in net localgroup Administrators /add networkservice and hit Enter.
4. Type in net localgroup Administrators /add localservice and hit Enter.
5. Type in SC config Audiosrv start= auto and hit Enter.
6. Type in REG ADD “HKLM\SYSTEM\CurrentControlSet\Services\Audiosr” /V start /T REG_DWord /D 2 /F and hit Enter.
7. Lastly, type in secedit /configure /cfg %windir%\inf\defltbase.inf /db defltbase.sdb /verbose and hit Enter.
You can copy-paste all of the commands shown from the article linked in the video description.
Method 4. Modify Windows Audio Endpoint Builder Registry Key
The Windows Registry contains a collection of low-level settings that can be used to reconfigure or fix specific issues related to audio. This method includes modifying the value data of the Windows Audio Endpoint Builder service. Note that you should exercise caution when modifying the Windows Registry to avoid creating more problems.
1. Hold down Windows+R keys to open Run.
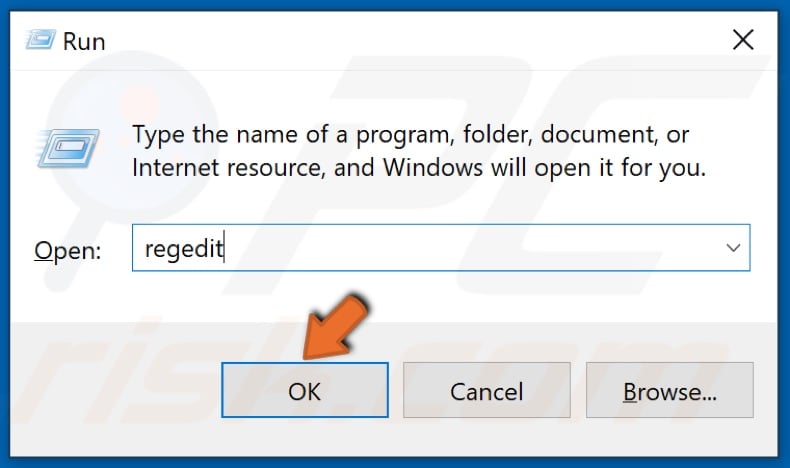
2. Type in regedit in the Run dialog box and click OK.
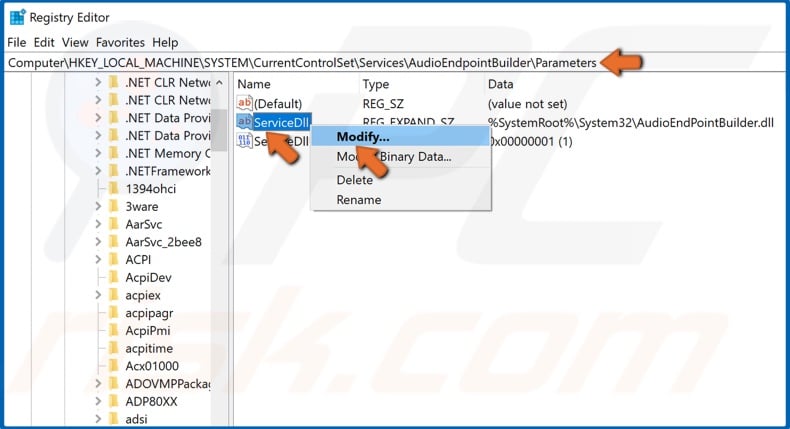
3. Navigate to HKEY_LOCAL_MACHINE\SYSTEM\CurrentControlSet\Services\AudioEndPointBuilder\Parameters.
4. Find and right-click ServiceDll and click Modify.
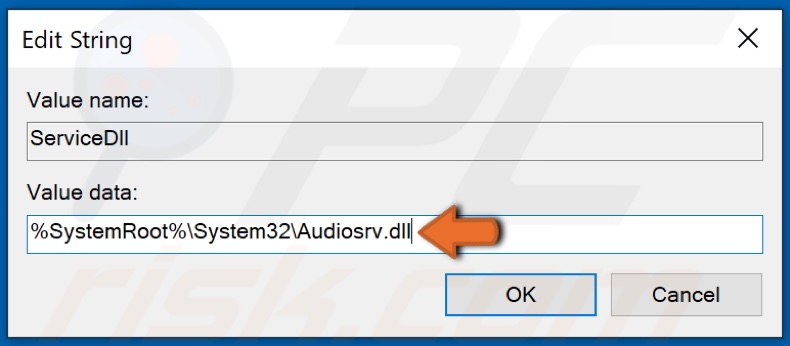
5. If the set value is %SystemRoot%\System32\Audiosrv.dll, then erase it.
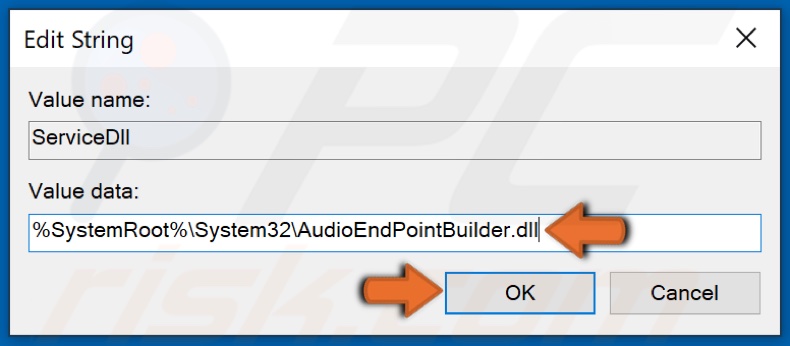
6. Replace the value with %SystemRoot%\System32\AudioEndPointBuilder.dll and click OK.
7. Restart your PC to apply the changes.
Share:

Rimvydas Iliavicius
Researcher, author
Rimvydas is a researcher with over four years of experience in the cybersecurity industry. He attended Kaunas University of Technology and graduated with a Master's degree in Translation and Localization of Technical texts. His interests in computers and technology led him to become a versatile author in the IT industry. At PCrisk, he's responsible for writing in-depth how-to articles for Microsoft Windows.
▼ Show Discussion