Fix Windows Update Error 0x800704c7
Get Free Scanner and check your computer for errors
Fix It NowTo fix found issues, you have to purchase the full version of Combo Cleaner. Free trial available. Combo Cleaner is owned and operated by Rcs Lt, the parent company of PCRisk.com read more.
How to Fix Windows Update Error 0x800704c7 on Windows 10
If you get error 0x800704c7 when trying to install a feature update on Windows 10, then you have come to the right place. We will show you how to fix this error.
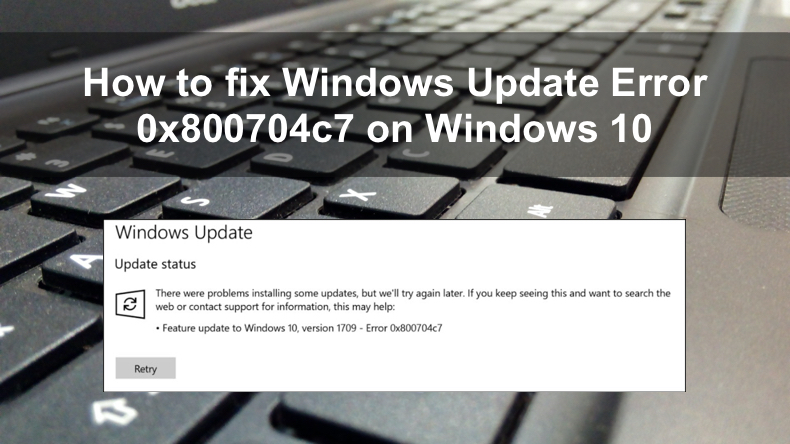
The error occurs while Windows is busy installing updates but can also occur under different circumstances. We've found that Error 0x800704c7 may occur when attempting to access Microsoft OneDrive or create a Windows file backup.
What Causes Error 0x800704c7
Our research has shown two primary causes: missing or corrupted system files and third-party software interference.
Some users started getting Error 0x800704c7 when updating Windows 10 version 1607 to version 1709. As mentioned earlier, this may be due to corrupt or missing files within Windows 10.
The second reason you got this error might be third-party applications, particularly antivirus programs that often block programs they deem as threats from connecting to the Internet.
How to Fix This Error
Before trying any of our fixes, check whether your antivirus application has false positives, i.e., detects clean files as malicious and blocks them from working and accessing the Internet. If that's the case, temporarily disable your antivirus program.
One of the things you can do to resolve Windows Update Error 0x800704c7 is to wait it out. If the Windows Update process becomes stuck, you might want to wait for the issue to sort itself out as there might be a delay from the server-side. If the update process didn't budge, feel free to use one of the methods provided below to fix this error.
Video Guide on How to Fix Windows Update Error 0x800704c7 on Windows 10
Table of Contents:
- Introduction
- Method 1. Run the Windows Update Troubleshooter
- Method 2. Use the System File Checker (SFC) Tool
- Method 3. Run Deployment Image & Servicing Management (DISM)
- Method 4. Reset Windows 10 Using the Recovery Tool
- Video Guide on How to Fix Windows Update Error 0x800704c7 on Windows 10
Download Computer Malware Repair Tool
It is recommended to run a free scan with Combo Cleaner - a tool to detect viruses and malware on your device. You will need to purchase the full version to remove infections. Free trial available. Combo Cleaner is owned and operated by Rcs Lt, the parent company of PCRisk.com read more.
Method 1. Run the Windows Update Troubleshooter
If your PC is running Windows 10, you can run its built-in Windows Update troubleshooter. The troubleshooter is dedicated to resolving various problems, including Windows Update-related issues.
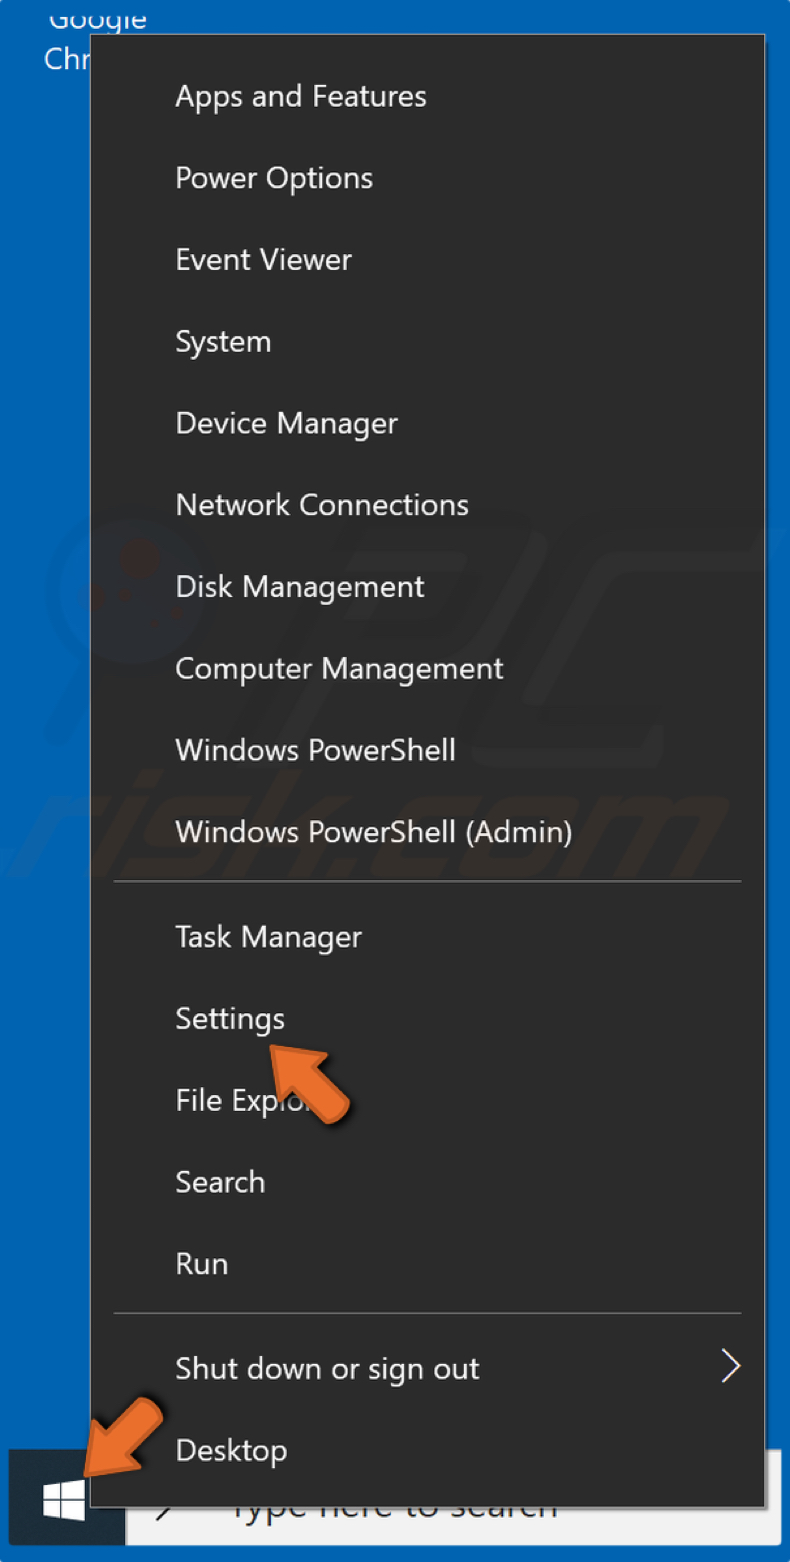
1. Right-click the Start menu and click Settings.
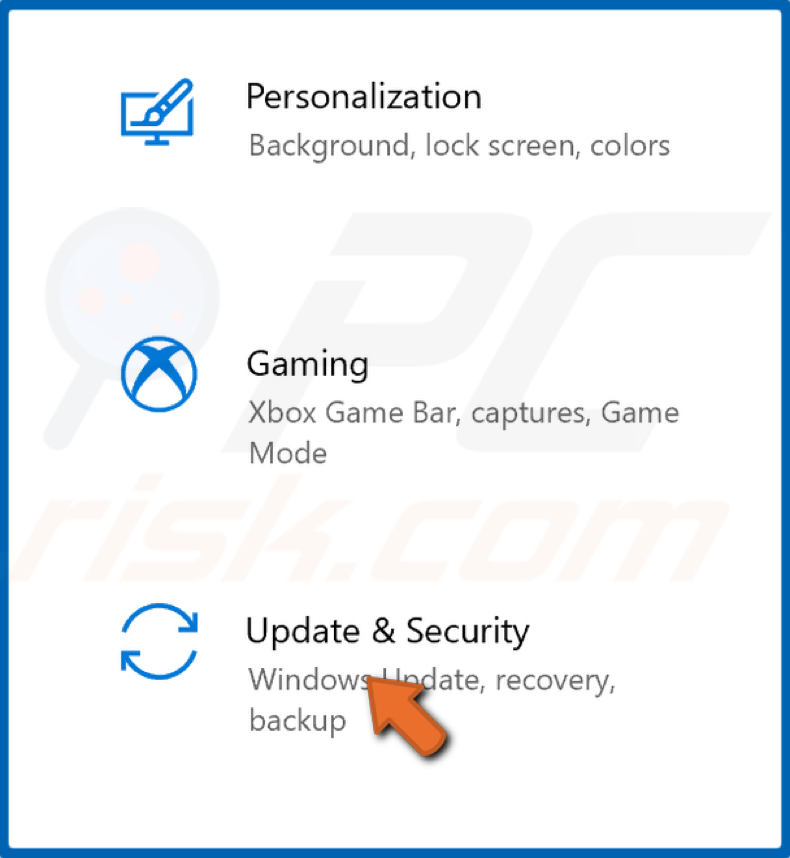
2. Select Update & Security.

3. Click Troubleshoot.
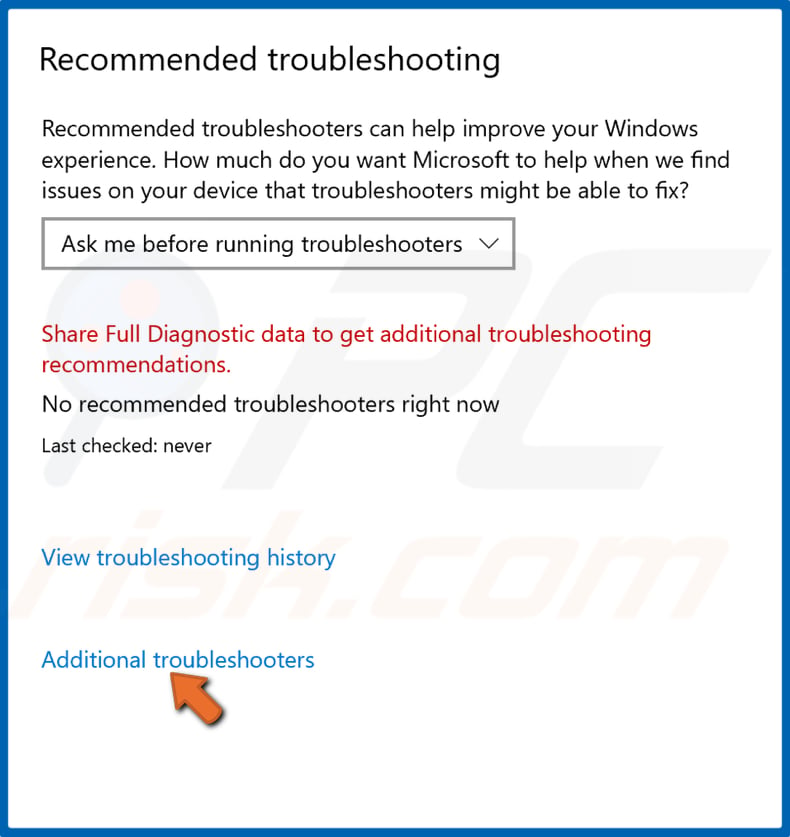
4. Click Additional troubleshooters.
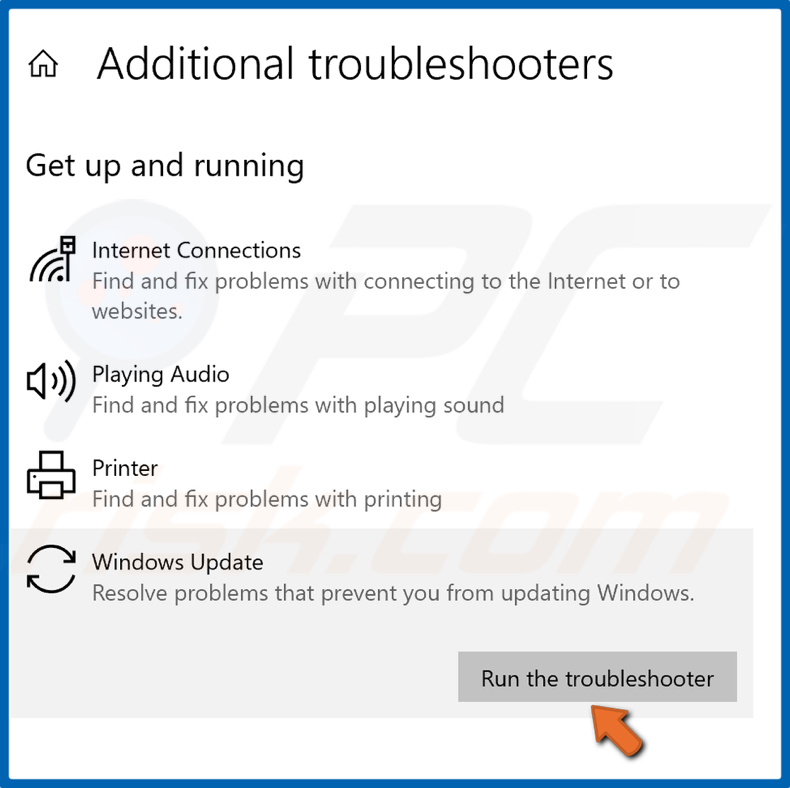
5. Select Windows Update and click Run the troubleshooter.
6. If the troubleshooter detects an issue, it will select and apply a fix automatically.
Method 2. Use the System File Checker (SFC) Tool
The SFC tool has been specifically designed for situations like this. It has been purpose-built to fix corrupted or missing system files with which you might be dealing in this particular case. You can perform the scan by opening the Command prompt with administrative privileges and executing the "sfc /scannow" command.
Don't be intimidated by the process, as SFC cannot damage your computer. Follow the steps below to fix Windows Update Error 0x800704c7.
1. Simultaneously hold down Windows+R keys to open the Run dialog box.
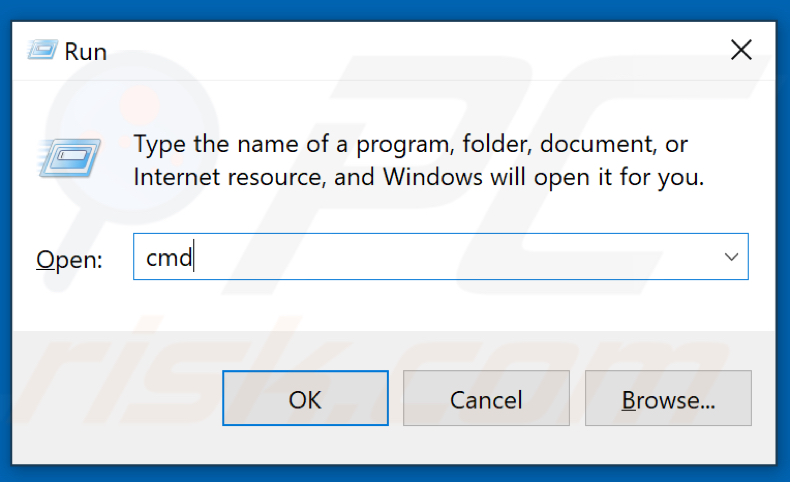
2. Type in CMD in the dialog box and then simultaneously hold down Shift+Ctrl+Enter keys to open Command Prompt with administrative privileges.
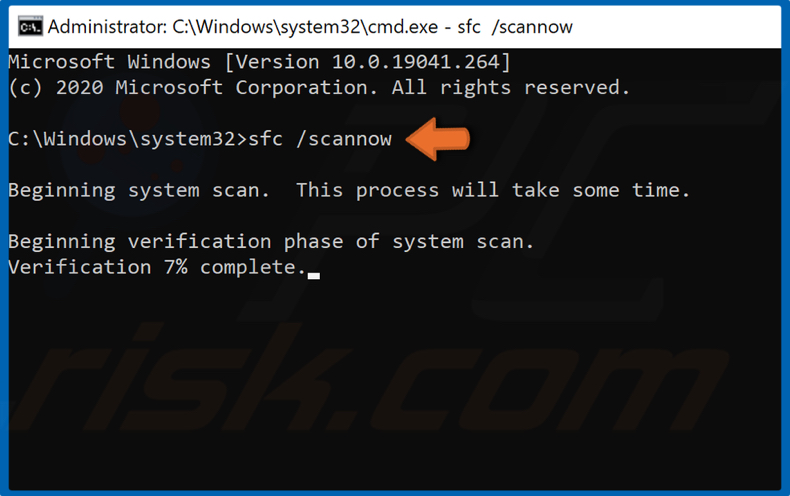
3. Type in the sfc /scannow command in the Command prompt and hit the Enter key to start the scan.
4. Once the scan has been completed, restart your PC.
Method 3. Run Deployment Image & Servicing Management (DISM)
Run Deployment Image & Servicing Management (DISM) is another of Microsoft's tools that have been baked into Windows 10. It's a versatile tool that can prepare, modify, and repair system images, but it's also good at fixing common problems with your computer's hidden recovery image.
1. Simultaneously hold down Windows+R keys to open the Run dialog box.

2. Type in CMD in the dialog box and simultaneously hold down Shift+Ctrl+Enter keys to open Command Prompt with administrative privileges.
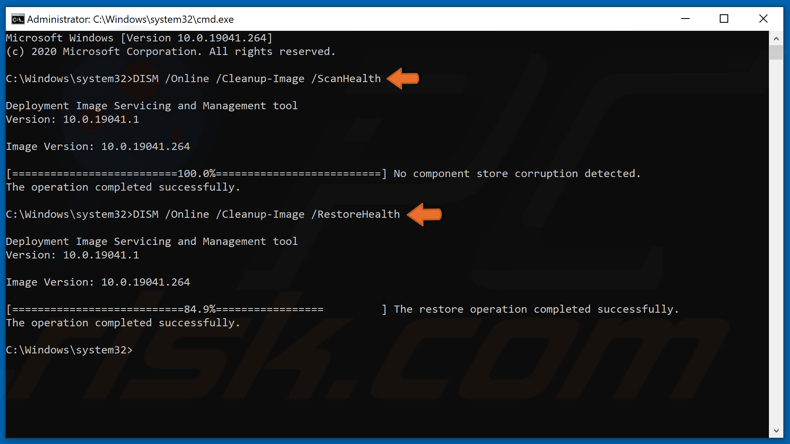
3. Type in DISM /Online /Cleanup-Image /ScanHealth and hit Enter. This parameter will scan the component store for corruption.
4. Type in the DISM /Online /Cleanup-Image /RestoreHealth command and hit Enter.
5. Once the process has been completed, try updating Windows 10.
Method 4. Reset Windows 10 Using the Recovery Tool
Try reinstalling Windows 10 using Windows Recovery. Note that while you can choose to keep your personal files, the reinstallation process will remove all of your installed applications.

1. Right-click the Start Menu and click Settings.

2. Click Update & Security.
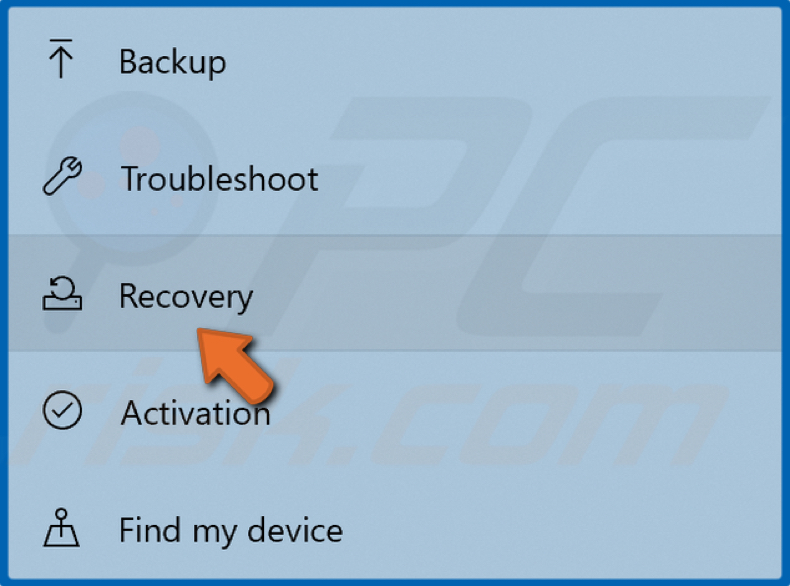
3. Click Recovery located on the left side of the window.

4. Click Get Started.
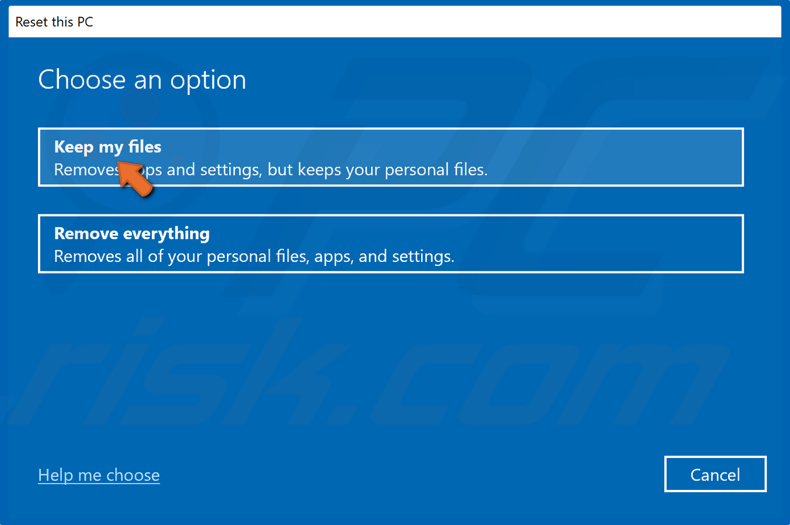
5. Select Keep My Files.
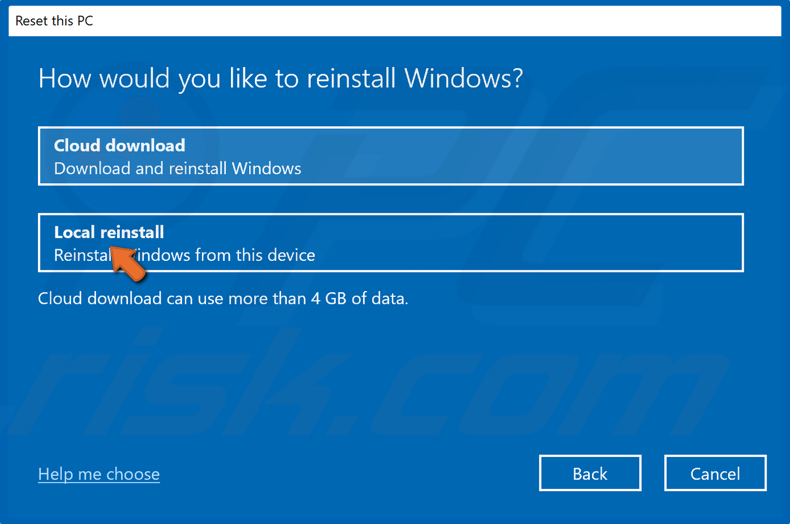
6. Select Local reinstall.
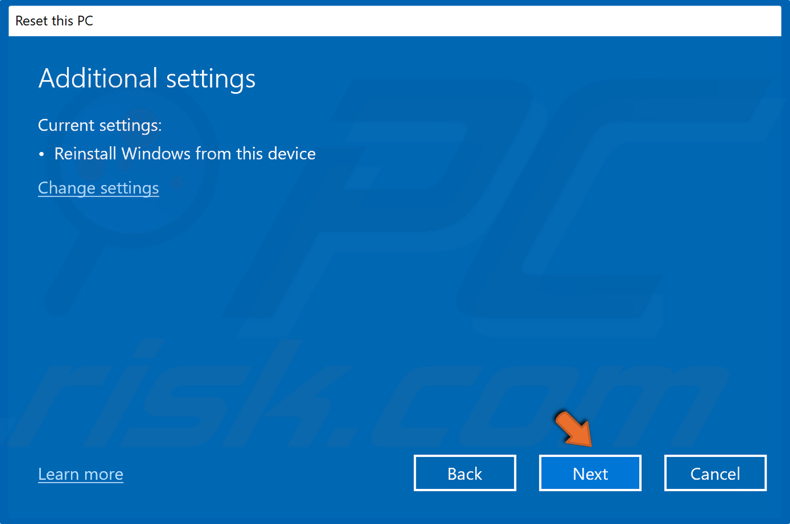
7. Click Next.
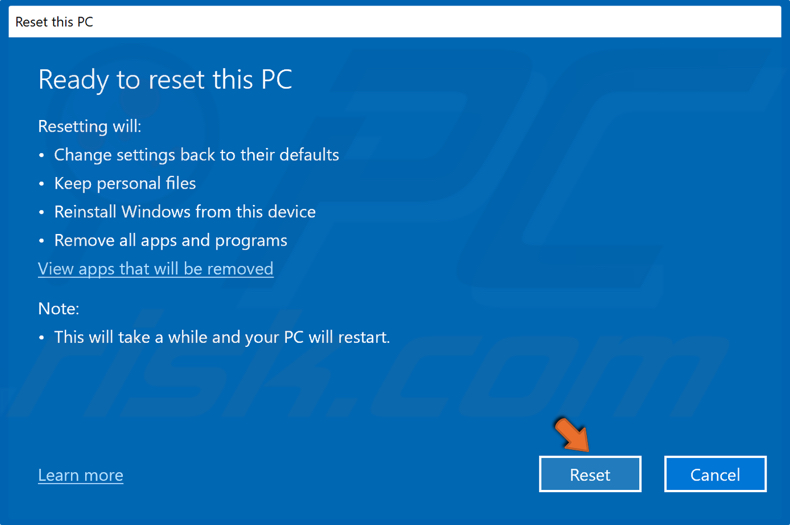
8. Click Reset.
9. Wait for the resetting process to complete.
10. Once the reset process is complete, you might have to set the display resolution manually.
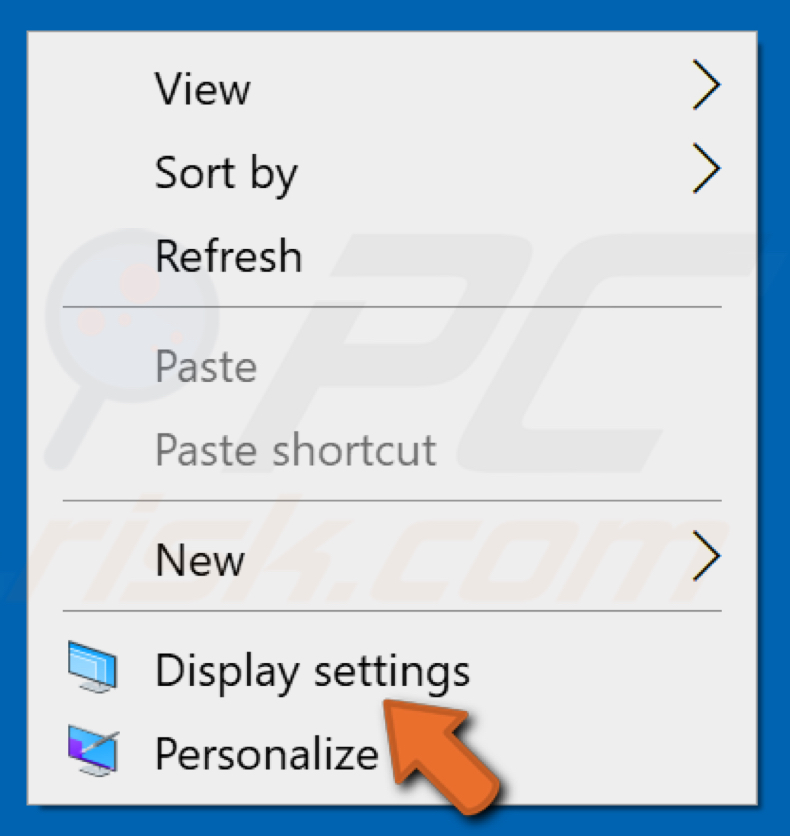
11. To do that, right-click anywhere on the desktop and click Display Settings.
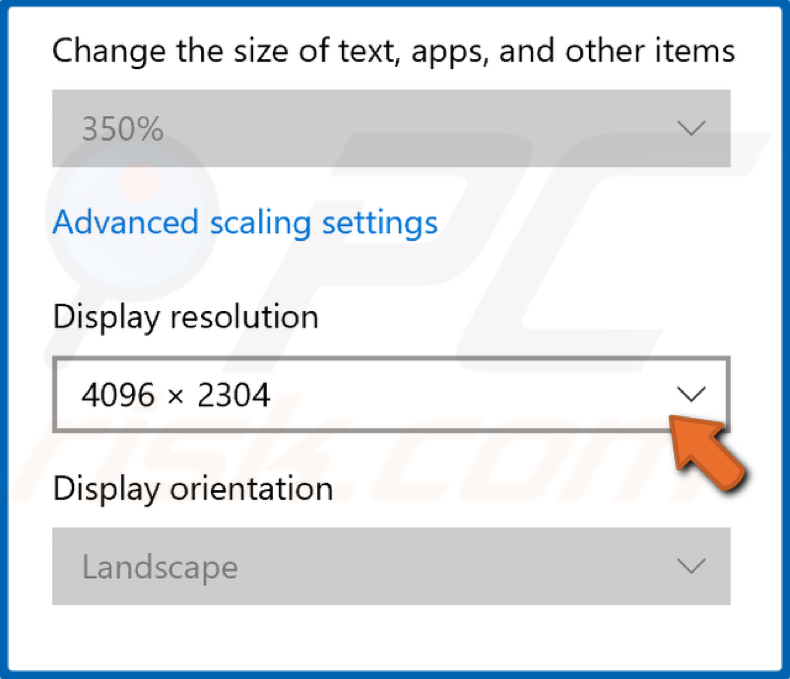
12. Go to the Display Resolution dropdown menu and select your preferred resolution.

13. The resolution will be changed. Click Keep changes.
Share:

Rimvydas Iliavicius
Researcher, author
Rimvydas is a researcher with over four years of experience in the cybersecurity industry. He attended Kaunas University of Technology and graduated with a Master's degree in Translation and Localization of Technical texts. His interests in computers and technology led him to become a versatile author in the IT industry. At PCrisk, he's responsible for writing in-depth how-to articles for Microsoft Windows.

▼ Show Discussion