How to Fix .NET Runtime Optimization Service High CPU Usage

Get Free Scanner and check your computer for errors
Fix It NowTo fix found issues, you have to purchase the full version of Combo Cleaner. Free trial available. Combo Cleaner is owned and operated by Rcs Lt, the parent company of PCRisk.com read more.
How to Fix .NET Runtime Optimization Service High CPU Usage on Windows 10
It’s a known issue that .NET Runtime Optimization Service can randomly, and also after updating .NET Framework, start utilizing an unreasonable amount of a computer’s CPU processing power. Here, we will discuss this issue and provide proven methods for fixing this issue.

.NET Runtime Optimization Service is a component of the Windows 10 operating system. Its purpose is to optimize .NET Framework, which, in turn, optimizes applications that require .NET Framework to launch and run faster. Its executable is called mscorsvw.exe, but you will typically see it in Task Manager as .NET Runtime Optimization Service.
Under normal conditions, .NET Runtime Optimization Service doesn’t cause high CPU usage. However, if, for some reason, the process takes longer than it should, that might cause this service to utilize more CPU resources than necessary. You may see multiple .NET Runtime Optimization Service (mscorsvw.exe) processes when you open Task Manager.
There are a few likely reasons why .NET Runtime Optimization Service causes high CPU utilization.
- The optimization process runs too slow, taking more than the usual 5-10 minutes to complete its task.
- The service might have been corrupted and needs to be restarted.
- .NET Runtime Optimization Service might have been infected by malware. Alternatively, your PC might have been infected with malware disguised as .NET Runtime Optimization Service.
Before you attempt to tackle the issue of .NET Runtime Optimization Service hogging your CPU’s resources, you should install anti-malware software and scan your computer for threats that may have been disguised as this service.
Video on How to Fix .NET Runtime Optimization Service High CPU Usage
Table of Contents:
- Introduction
- Method 1. Optimize .NET Runtime Optimization Service
- Method 2. Run the Official Script Made By Microsoft
- Video on How to Fix .NET Runtime Optimization Service High CPU Usage
Download Computer Malware Repair Tool
It is recommended to run a free scan with Combo Cleaner - a tool to detect viruses and malware on your device. You will need to purchase the full version to remove infections. Free trial available. Combo Cleaner is owned and operated by Rcs Lt, the parent company of PCRisk.com read more.
Method 1. Optimize .NET Runtime Optimization Service
1. Hold down Windows+R keys to open Run.
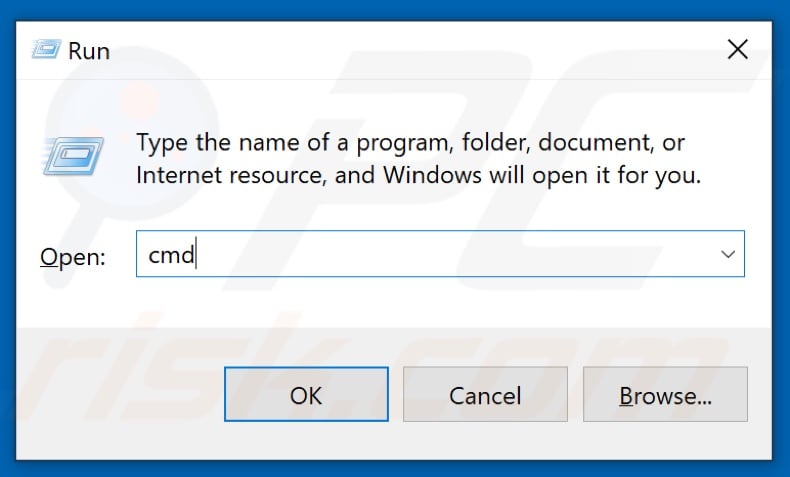
2. Type CMD and hold down Shift+Ctrl+Enter keys to open Command prompt with administrative privileges.

3. Type in the cd c:\Windows\Microsoft.NET\Framework64\v4.0.30319 command in the Command prompt and hit Enter.
Note: If you’re running the 32-bit version of Windows type in cd c:\Windows\Microsoft.NET\Framework\v4.0.30319 instead and hit Enter.
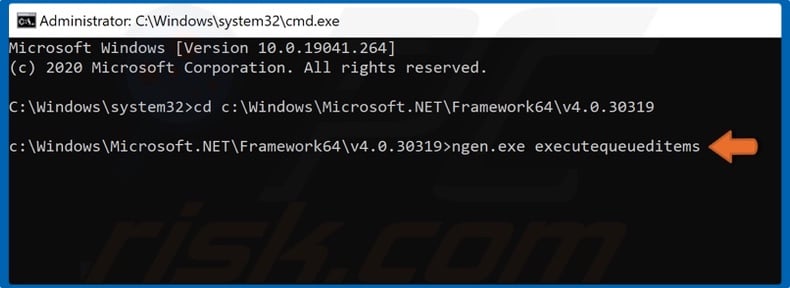
4. Then, type in ngen.exe executequeueditems and hit Enter.
Method 2. Run the .NET Runtime Optimization Speed Up Script

1. Go to Microsoft's GitHub page to download the official script.

2. Right-click the Raw button and select Save link as.
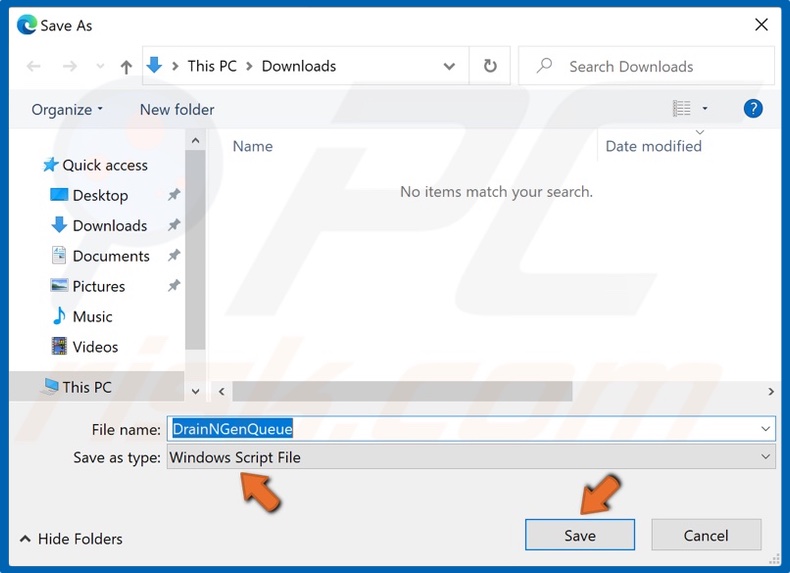
3. Make sure that the Save as type is Windows Script file and click Save to download DrainNGenQueue on your PC.
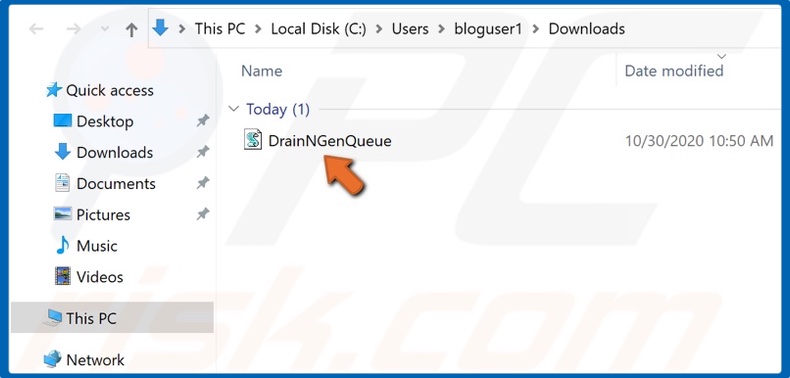
4. Then, open the script file, and the Command prompt will execute the script and close automatically.
Did this article help you fix .NET Runtime Optimization Service high CPU usage? Let us know by leaving a comment in the discussion section below.
Share:

Rimvydas Iliavicius
Researcher, author
Rimvydas is a researcher with over four years of experience in the cybersecurity industry. He attended Kaunas University of Technology and graduated with a Master's degree in Translation and Localization of Technical texts. His interests in computers and technology led him to become a versatile author in the IT industry. At PCrisk, he's responsible for writing in-depth how-to articles for Microsoft Windows.
▼ Show Discussion