How to Delete Broken Registry Items on Windows 10
Get Free Scanner and check your computer for errors
Fix It NowTo fix found issues, you have to purchase the full version of Combo Cleaner. Free trial available. Combo Cleaner is owned and operated by Rcs Lt, the parent company of PCRisk.com read more.
Here’s You Can Clean Up Broken Registry Entries on Windows 10
The Windows Registry is a database used to store low-level Windows settings and application settings. The registry is used to store the settings of device drivers, the kernel, the user interface, and so on. Over time, the registry accumulates empty and corrupt registry entries. This article will show you how to clean them up.
Windows Registry is not perfect as it tends to accumulate empty and corrupt registry entries. Windows OS creates new registry entries each time you boot up and use your PC. The problem is that Windows often doesn’t delete old, redundant registry entries.
Therefore, when you run Windows OS for a long while, installing and uninstalling applications, it will gradually accumulate thousands of useless and often broken registry entries.
While registry entries consume negligible amounts of hard disk space, they can noticeably slow down your PC as they can bloat up the system, consume resources, and lead to conflicts. Therefore, it’s necessary to delete corrupted, empty, and duplicate registry entries to optimize your system’s performance.
While many third-party applications can do that for you automatically, you must be aware that such applications can remove valid registry entries, creating additional problems, such as your operating system or applications failing to work correctly.
Remember that Windows Registry is a sensitive archive, so tampering with it can do more harm than good. Therefore, we recommend deleting broken registry entries using the methods listed below.
Video on How to Delete Broken Registry Items on Windows 10:
Table of Contents:
- Introduction
- Method 1. Perform Disk Cleanup
- Method 2. Run DISM
- Method 3. Reset the PC Using Recovery
- Video on How to Delete Broken Registry Items on Windows 10
Download Computer Malware Repair Tool
It is recommended to run a free scan with Combo Cleaner - a tool to detect viruses and malware on your device. You will need to purchase the full version to remove infections. Free trial available. Combo Cleaner is owned and operated by Rcs Lt, the parent company of PCRisk.com read more.
Method 1. Perform Disk Cleanup
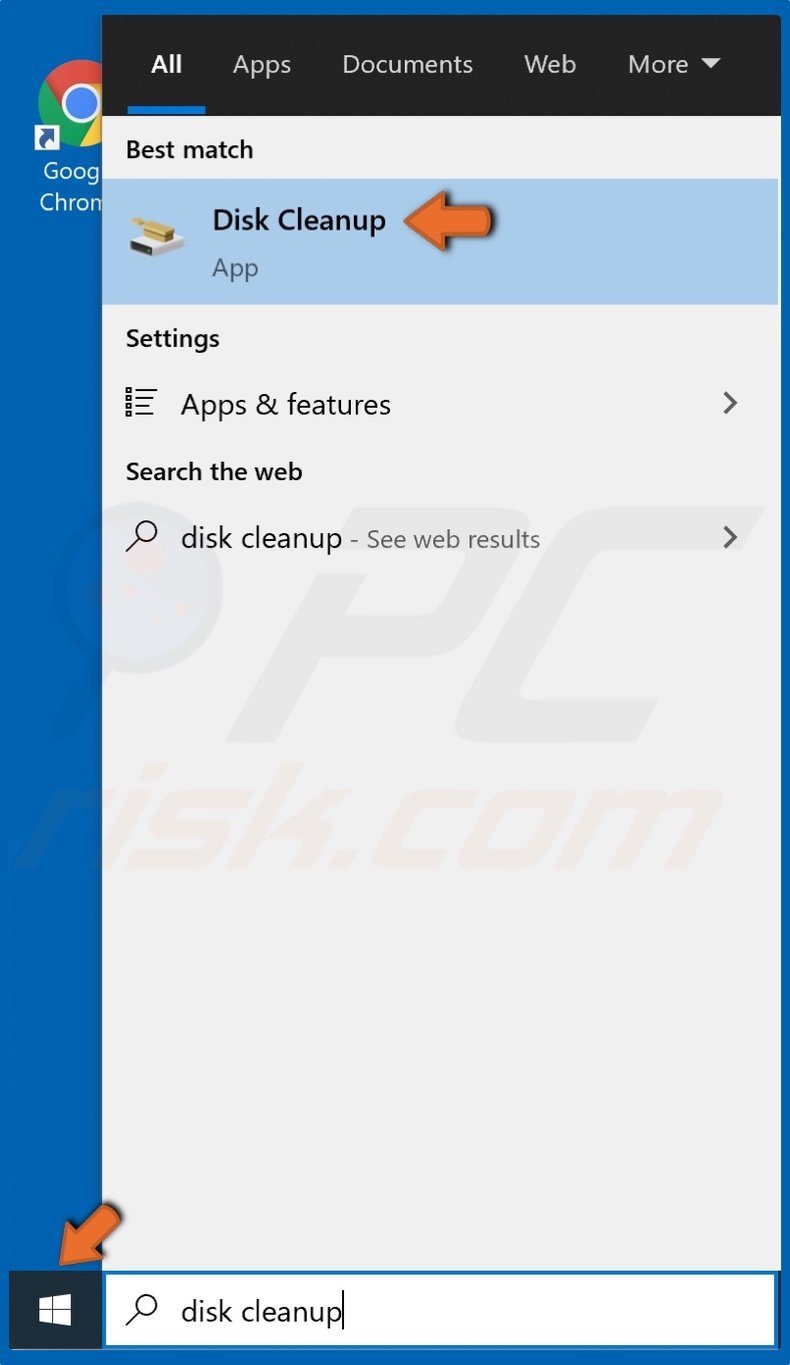
1. Open the Start menu, type Disk Cleanup, and click the result.
2. Open the drop-down menu and select the Drive on which Windows was installed and click OK.
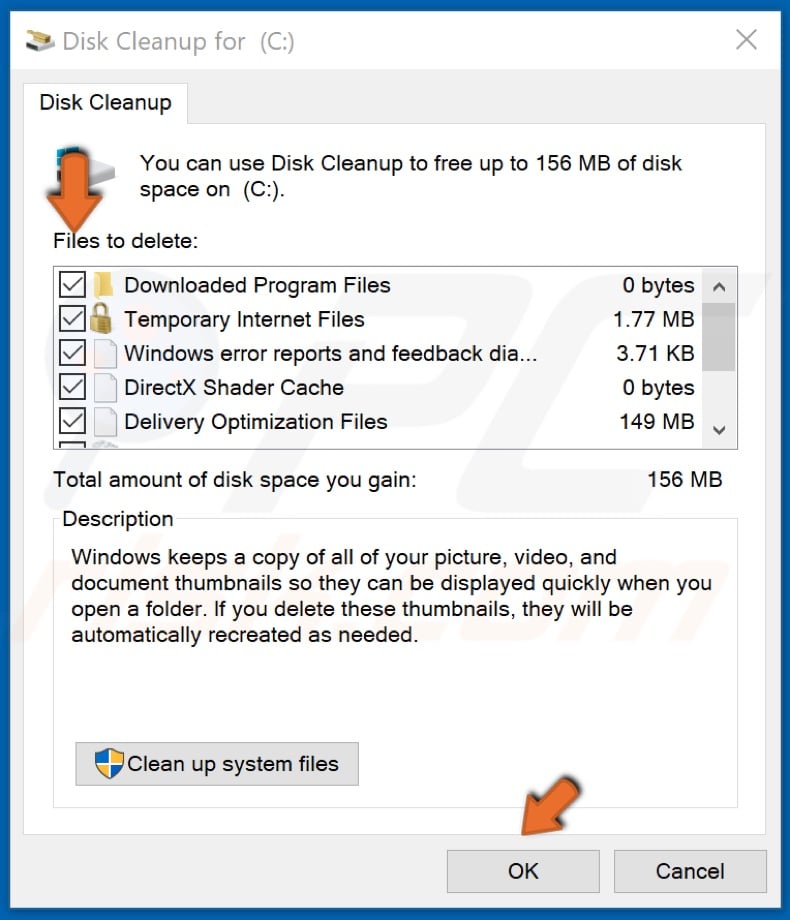
3. Tick the checkboxes of the locations you want to be cleaned.
4. Click OK.
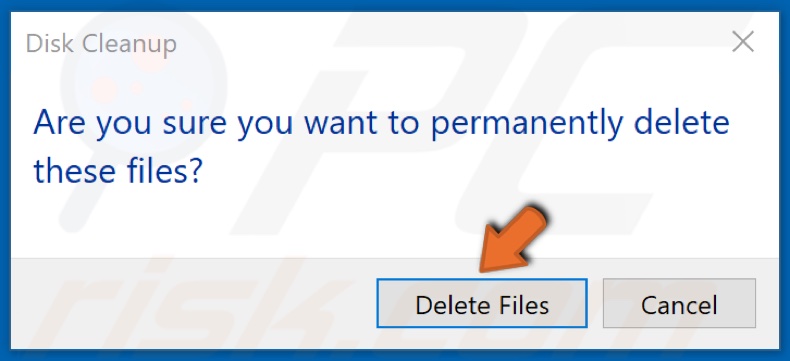
5. Click Delete Files.
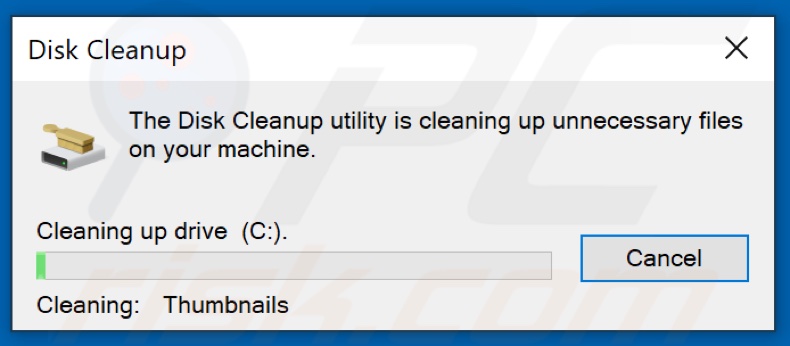
6. Wait for the cleaning process to complete.
Method 2. Run DISM
1. Hold down Windows+R keys to open Run.
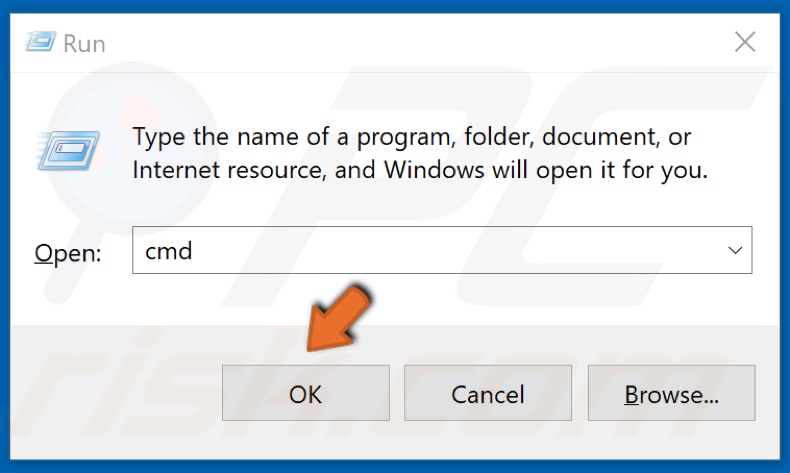
2. Type CMD and hold down Shift+Ctrl+Enter keys to open Command prompt with administrative privileges.
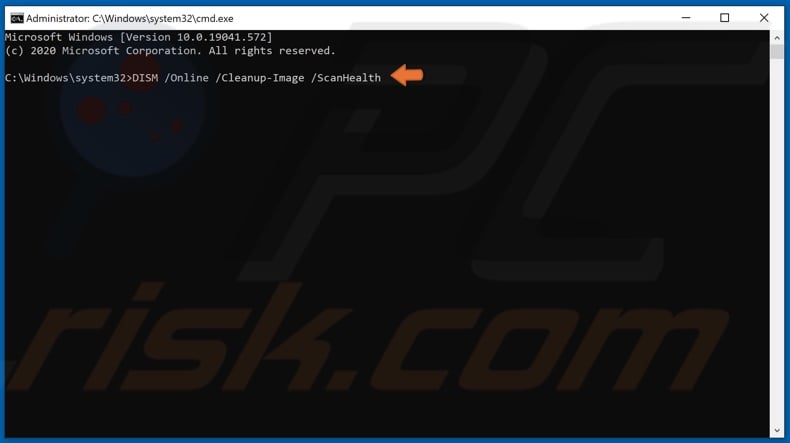
3. In the Command prompt, type DISM /Online /Cleanup-Image /ScanHealth and hit Enter.

4. Wait for the scan process to complete.
Method 3. Reset the PC Using Recovery
Note that using this method will allow you to keep all of your files but will remove all of the applications you’ve installed
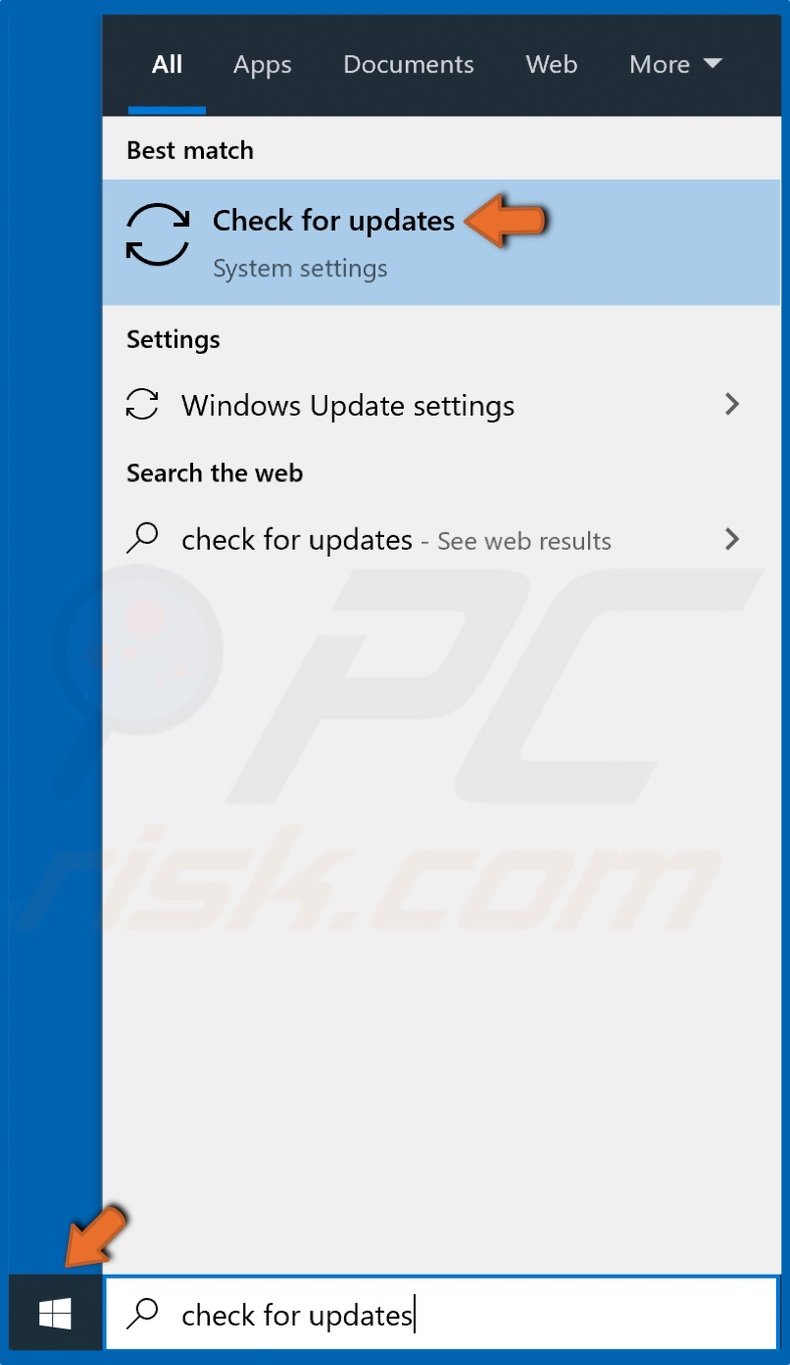
1. Open the Start menu, type Check for Updates, and click the result.
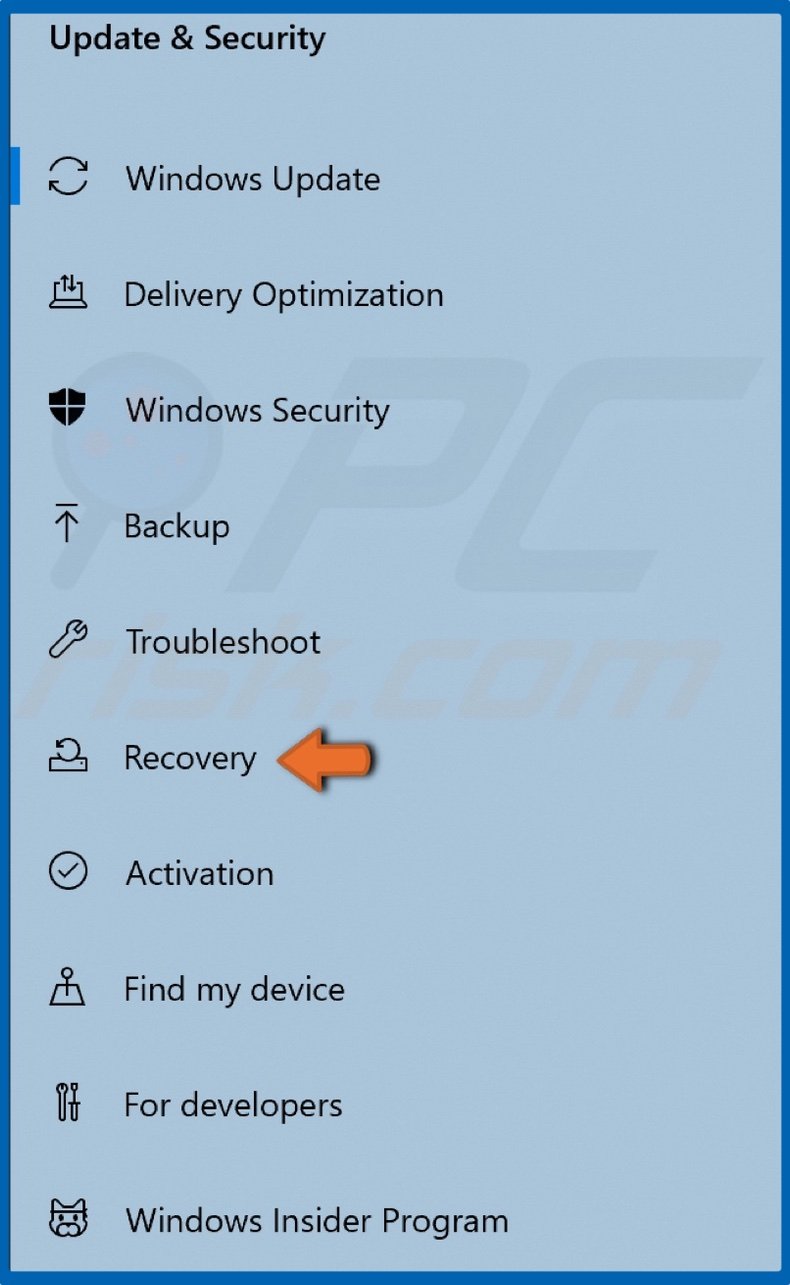
2. Click Recovery located on the left side of the window.
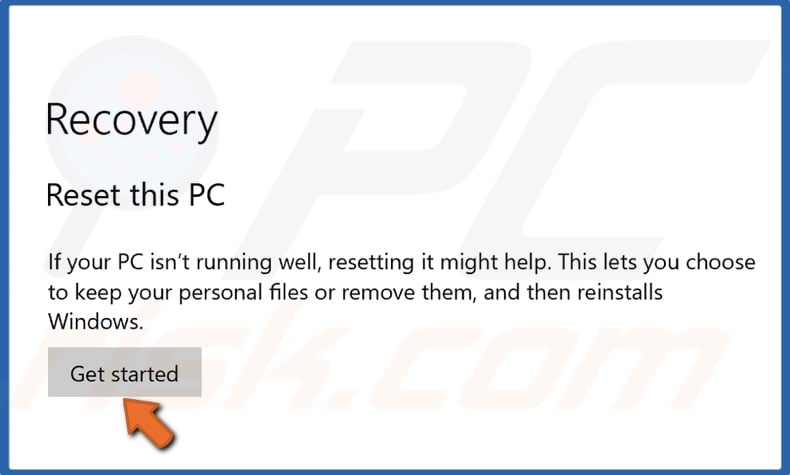
3. Click Get Started.
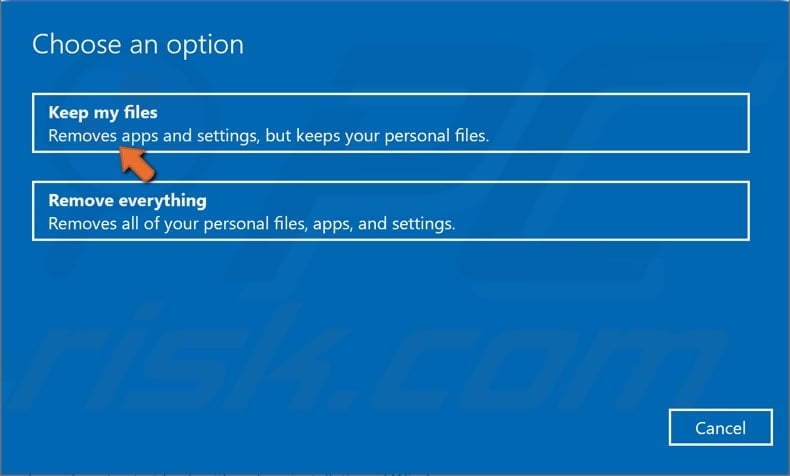
4. Select Keep My Files.
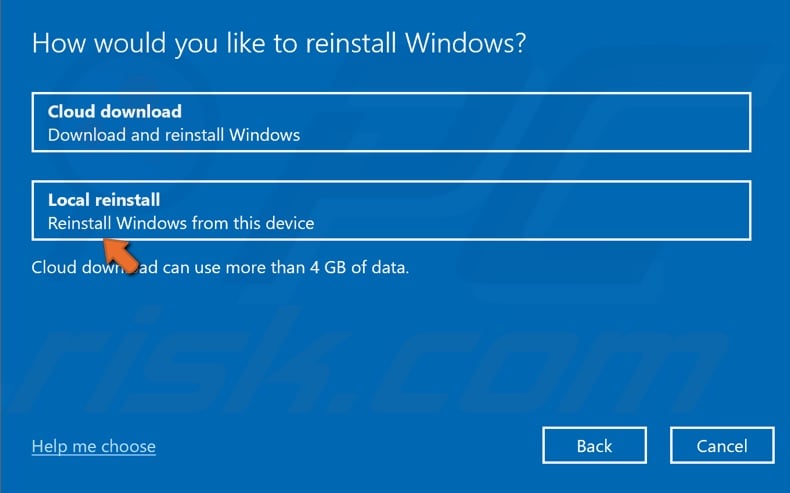
5. Select Local reinstall.
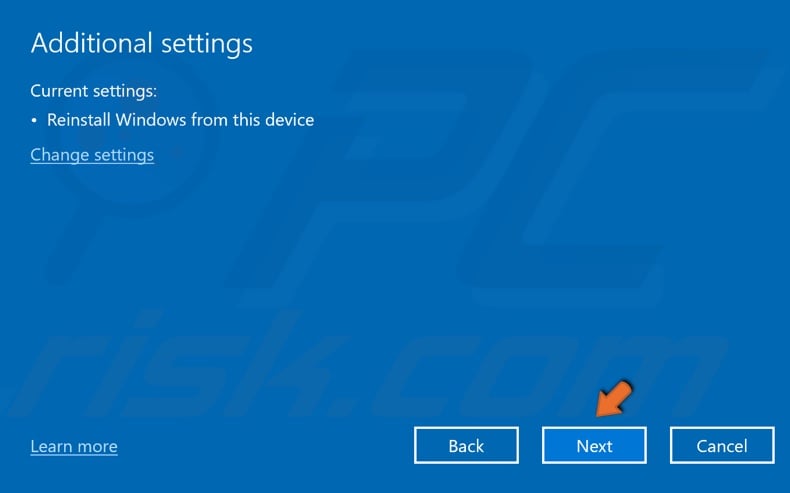
6. Click Next.
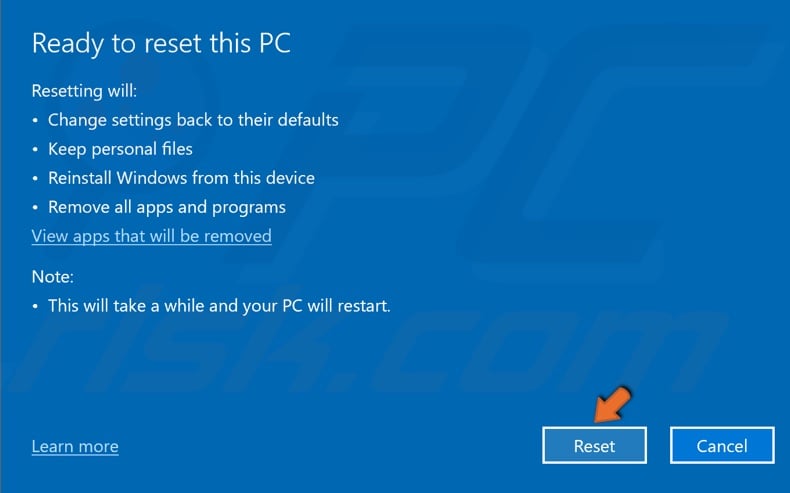
7. Click Reset.
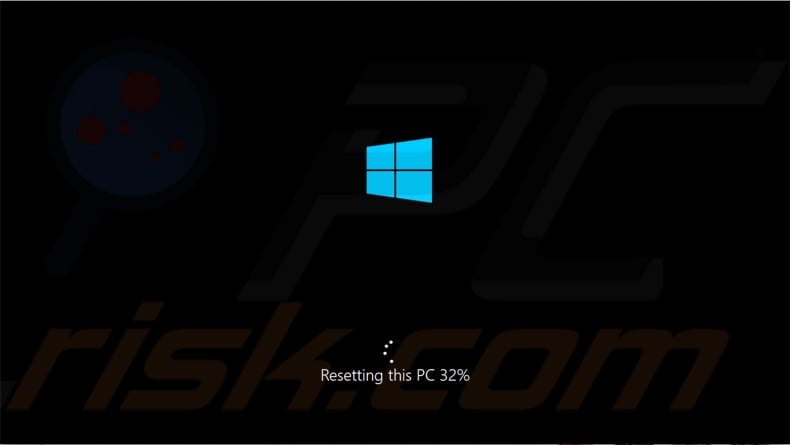
8. Wait for the resetting process to complete.
Share:

Rimvydas Iliavicius
Researcher, author
Rimvydas is a researcher with over four years of experience in the cybersecurity industry. He attended Kaunas University of Technology and graduated with a Master's degree in Translation and Localization of Technical texts. His interests in computers and technology led him to become a versatile author in the IT industry. At PCrisk, he's responsible for writing in-depth how-to articles for Microsoft Windows.

▼ Show Discussion