Make a Transparent Background in MS Paint and Paint 3D

Get Free Scanner and check your computer for errors
Fix It NowTo fix found issues, you have to purchase the full version of Combo Cleaner. Free trial available. Combo Cleaner is owned and operated by Rcs Lt, the parent company of PCRisk.com read more.
Find Out How You Can Make Image Background Transparent in Microsoft Paint and Paint 3D
Thanks to its simplicity, MS Paint is widely used for simple image manipulations, such as editing pictures imported from digital cameras and mobile phones. However, many users struggle with making transparent image backgrounds, and this article will show you how to do this.
![]()
Microsoft Paint has a feature that makes a white background transparent but doesn’t allow you to save images with transparent backgrounds.
Microsoft Paint features a “Transparent selection” option that you can toggle on or off. Many users think that enabling this option will make the background of their picture transparent, but that’s not what happens. For the background to become transparent, the background must first be white.
Creating a transparent image in Microsoft Paint is relatively easy. Basically, all you have to do is trace the original image section you want to insert into another image, and voila!
If you want to learn how to make transparent images in MS Paint and Paint 3D, see the step-by-step guide below.
Video on How to Make an Image With Transparent Background in Microsoft Paint and Paint 3D:
Table of Contents:
- Introduction
- Method 1. Make an Image With Transparent Background in Microsoft Paint 3D
- Method 2. Make an Image With Transparent Background in Microsoft Paint
- Video on How to Make an Image With Transparent Background in Microsoft Paint and Paint 3D
Download Computer Malware Repair Tool
It is recommended to run a free scan with Combo Cleaner - a tool to detect viruses and malware on your device. You will need to purchase the full version to remove infections. Free trial available. Combo Cleaner is owned and operated by Rcs Lt, the parent company of PCRisk.com read more.
Method 1. Make an Image With Transparent Background in Microsoft Paint 3D
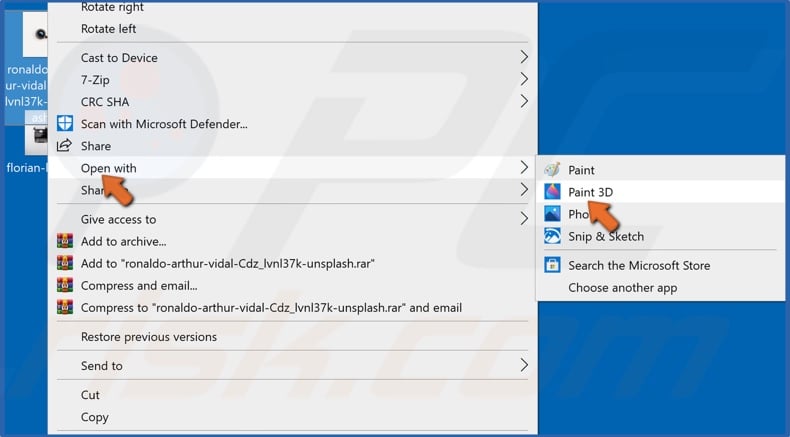
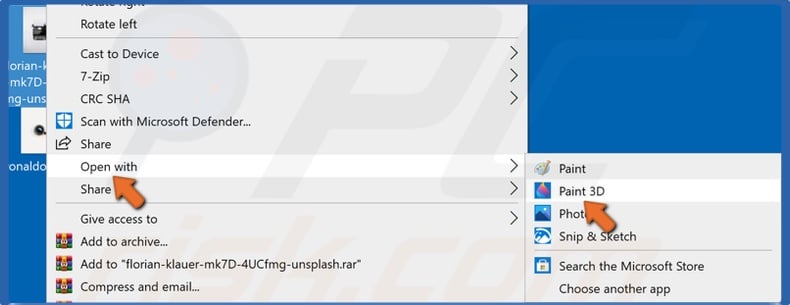
1. Right-click the image, go to Open With, and click Paint 3D.
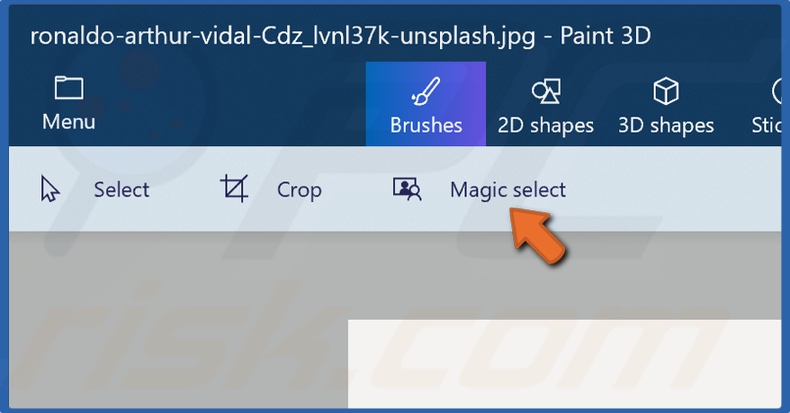
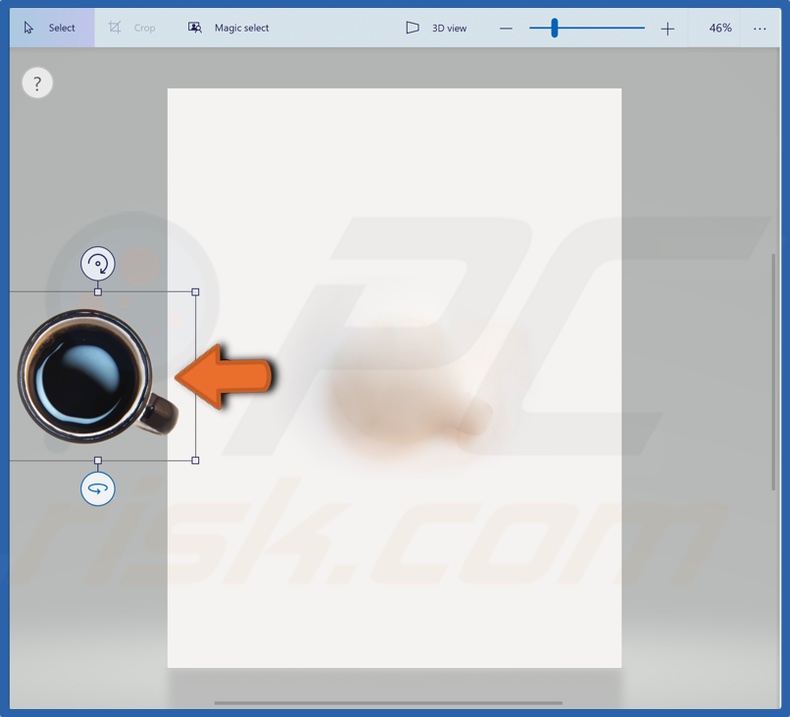
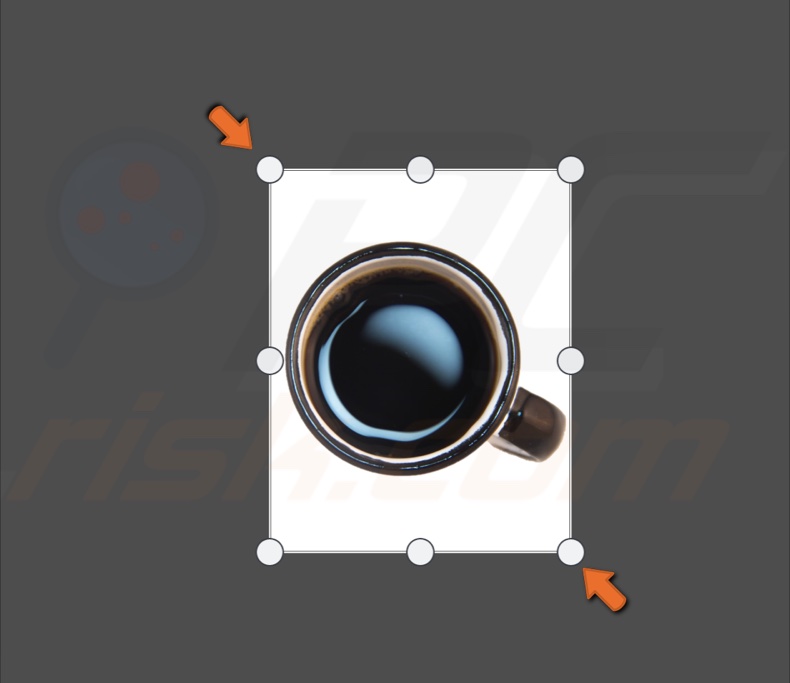
2. Click Magic Select.

3. Then, drag the bound box around the object you want to cut out from your original image.
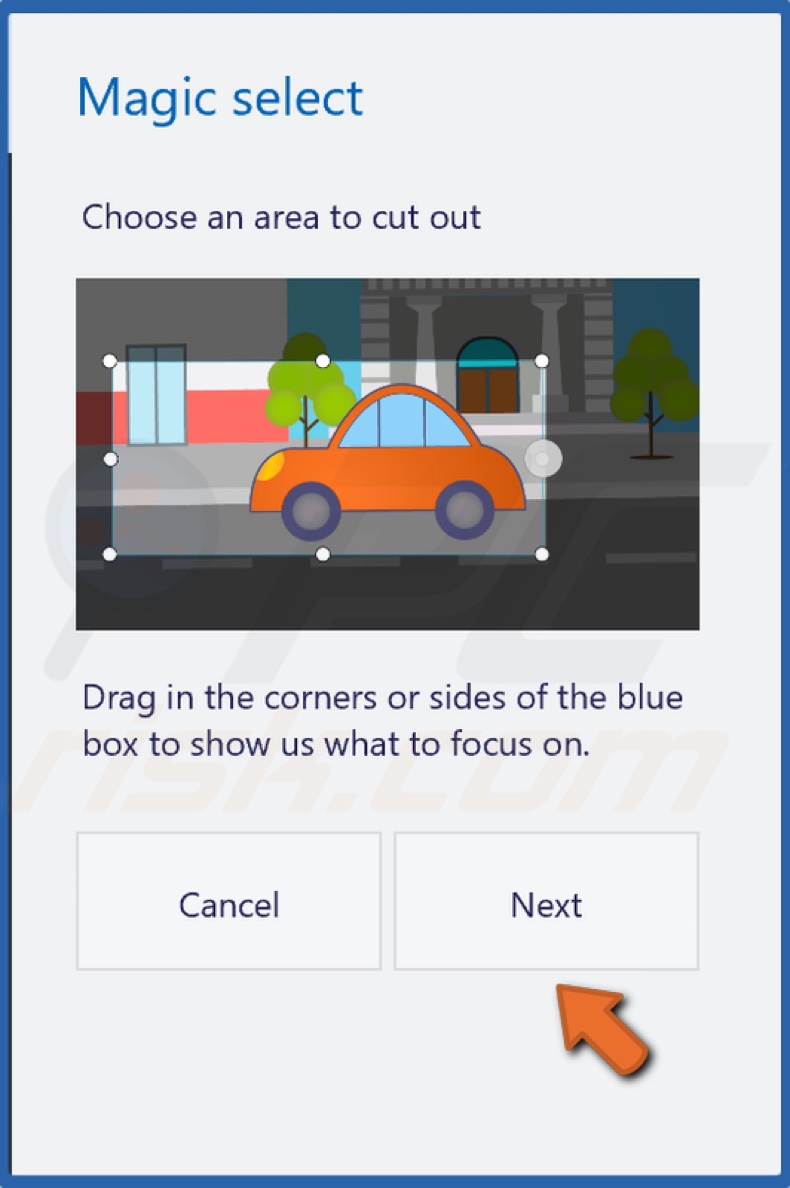
4. Click Next.
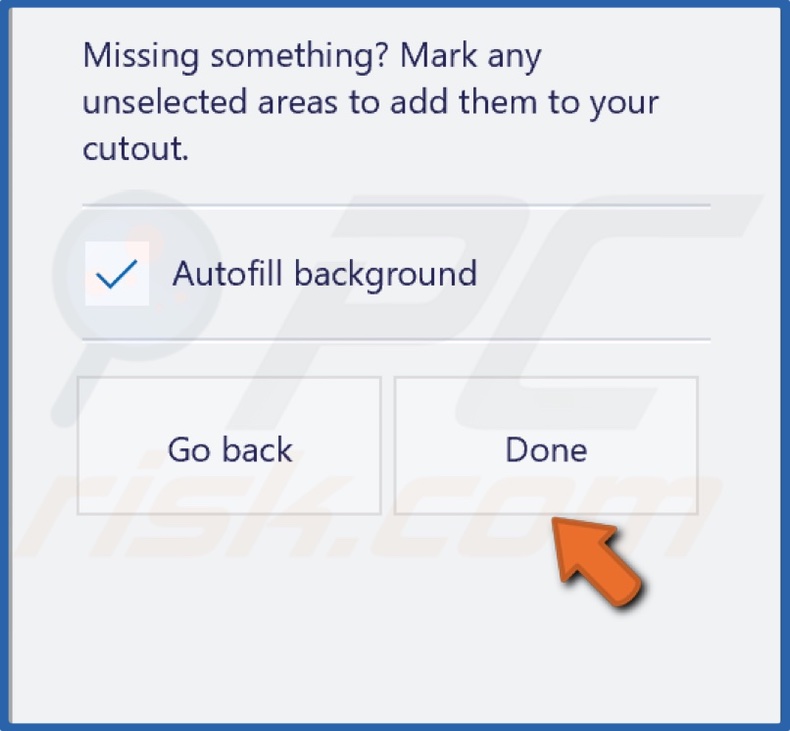
5. click Done.
6. The selected object will pop up and move it aside.
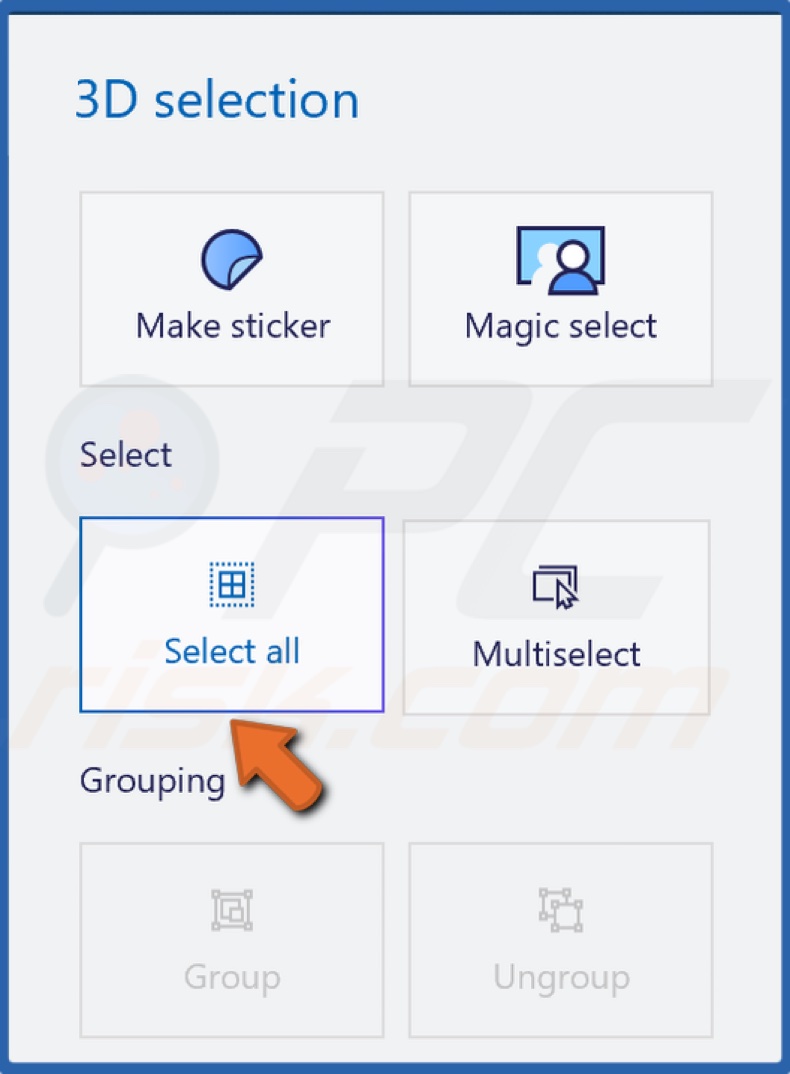
7. To remove the background, click Select all.
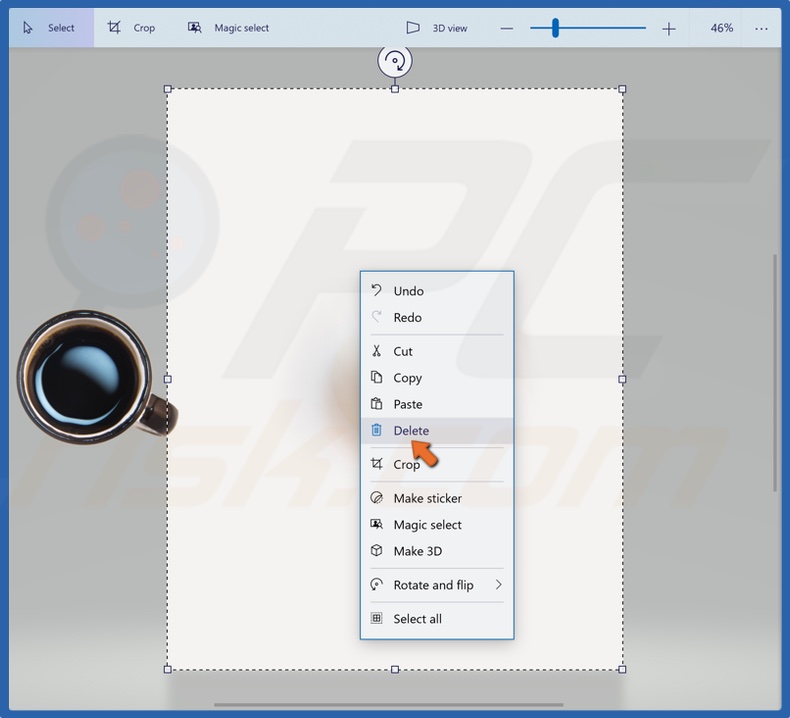
8. When the rectangular box appears, right-click it and click Delete.
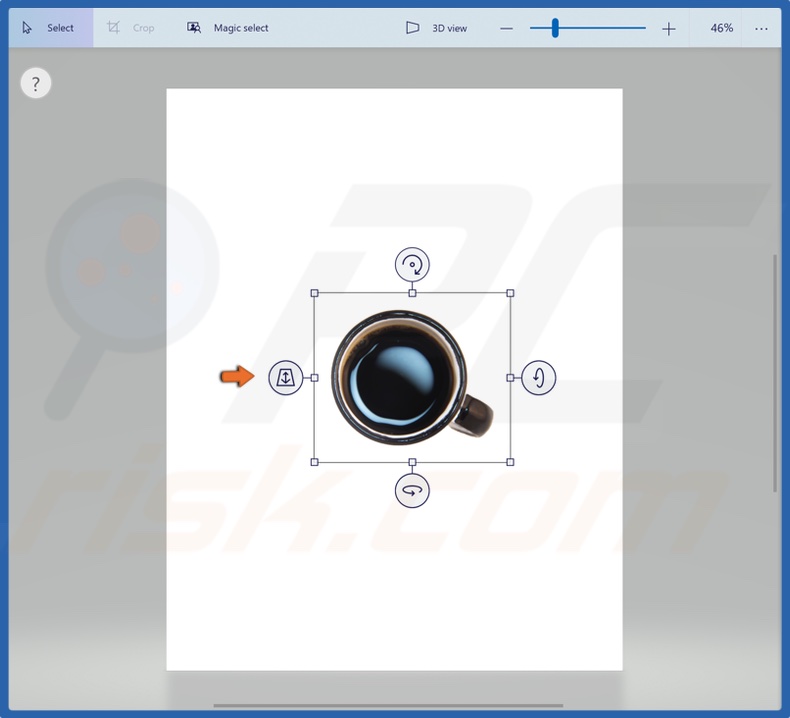
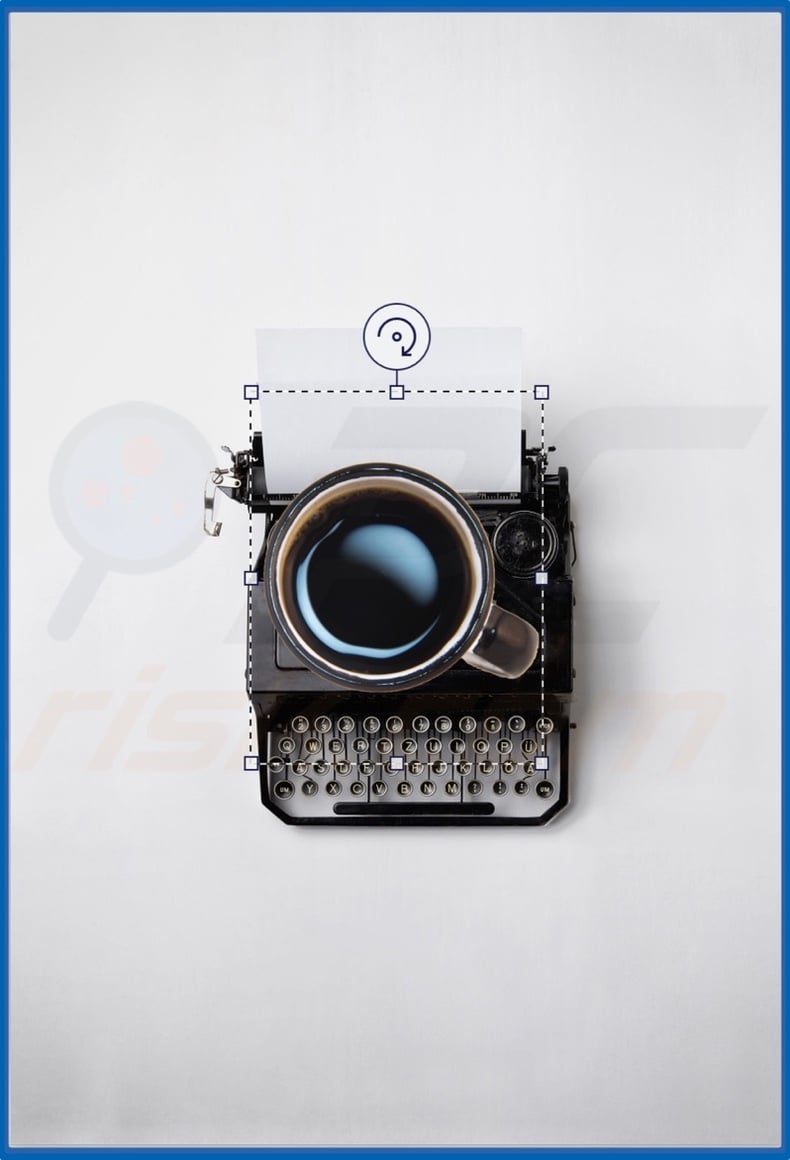
9. Move the object you cut out back on the canvas.

10. Click Crop.
11. Reduce the size of the canvas around the object.
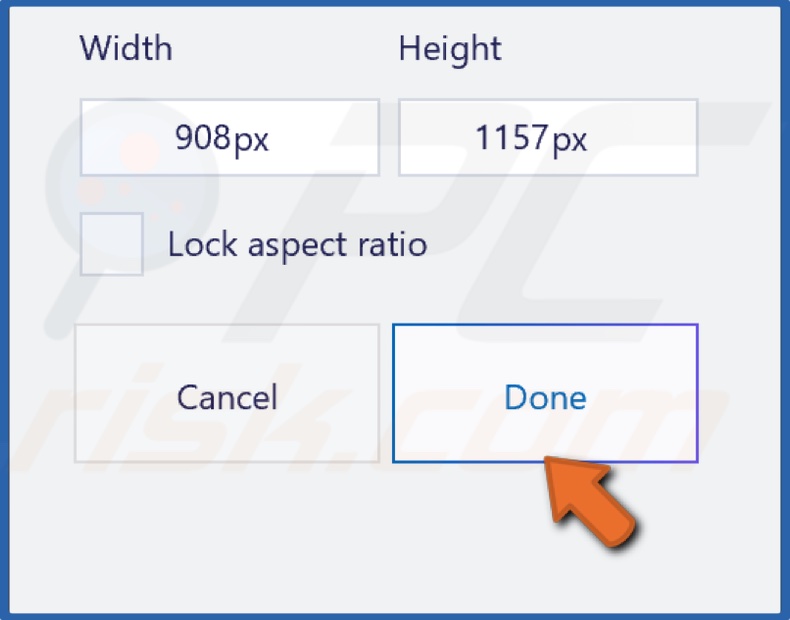
12. Click Done.
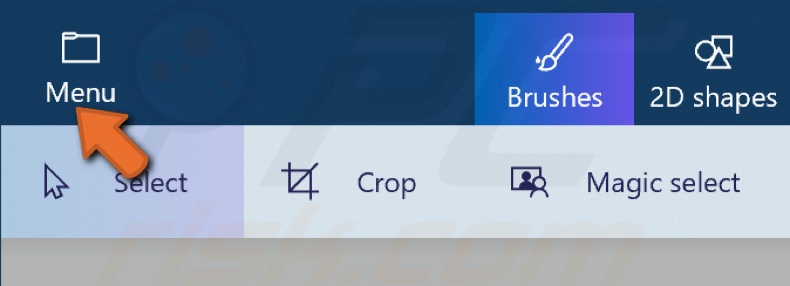
13. Click Menu at the top-right corner of the Paint window.
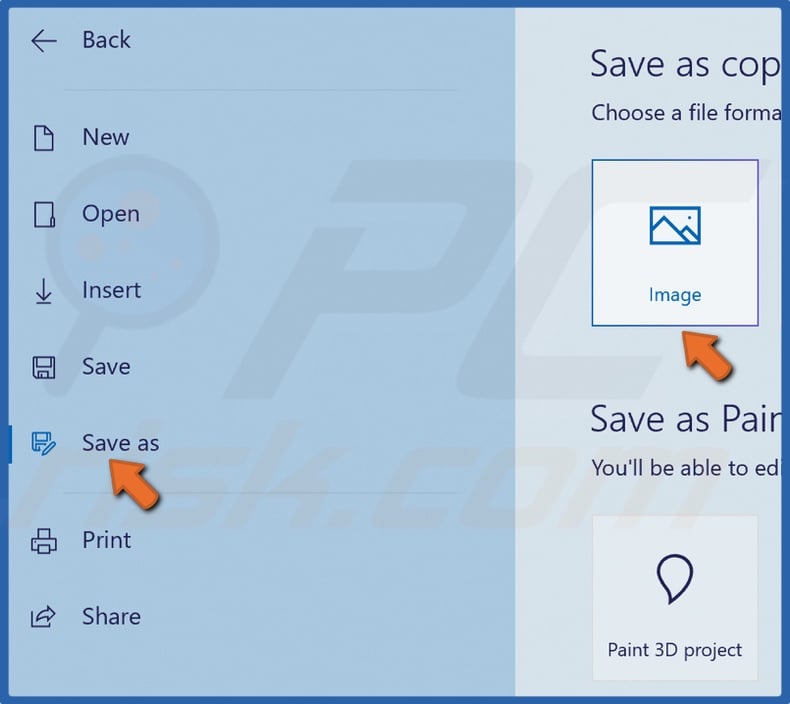
14. Click Save as and select Image.
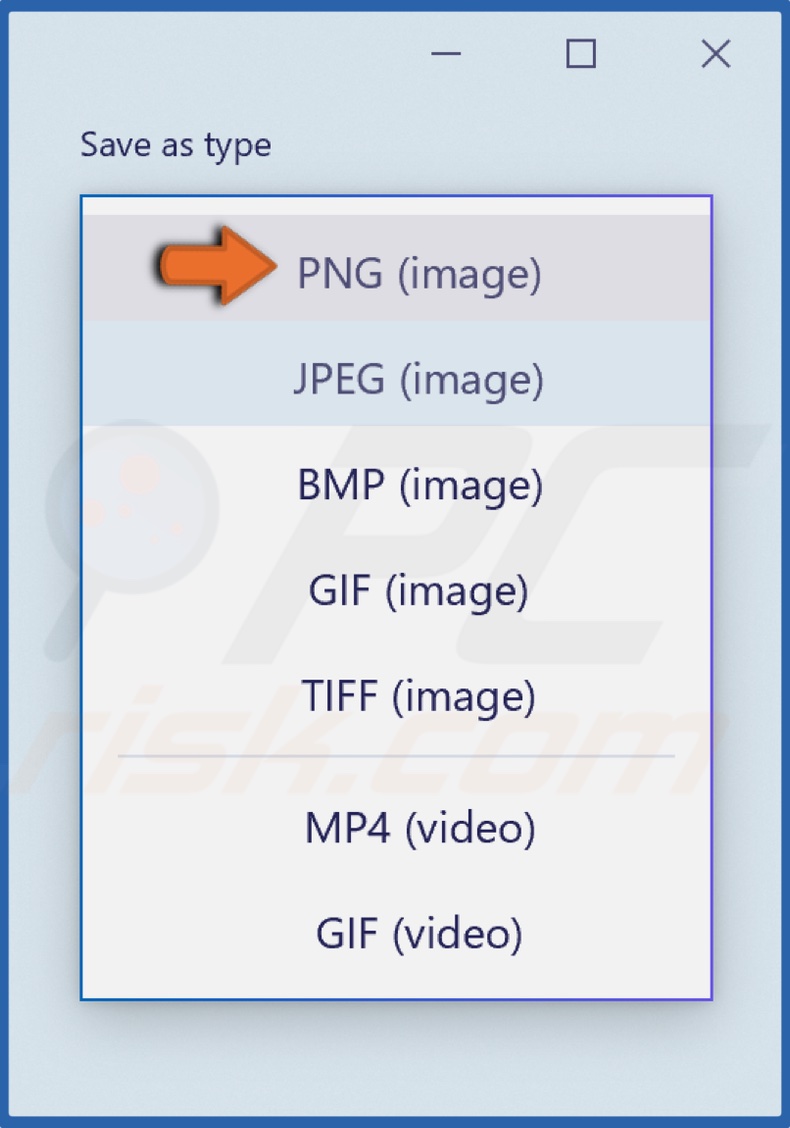
15. Open the Save as type drop-down menu and select PNG.
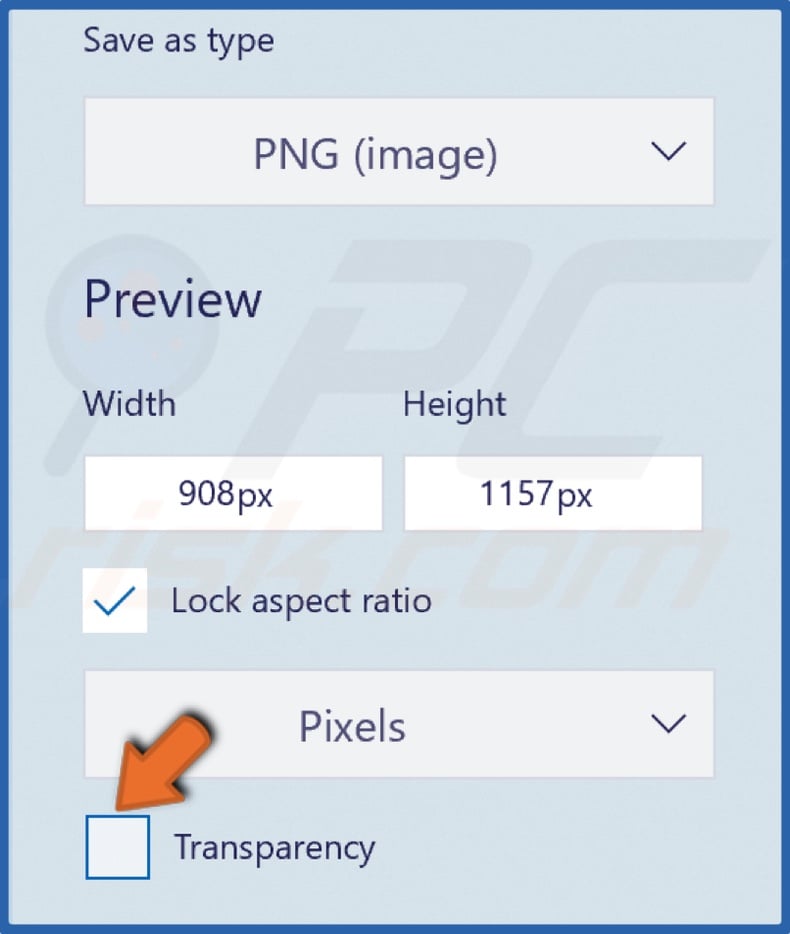
16. Make sure to tick the Transparency checkbox.

17. Click Save.

18. Enter a filename, and click Save.
19. If you want to insert the object you cut out in another image, right-click destination image, go to Open with and click Paint 3D.
20. Drag the cut-out object and place it on the image.

21. Move it around and resize it as necessary.
22. Click Menu.
23. Click Save.
Method 2. Make an Image With Transparent Background in Microsoft Paint
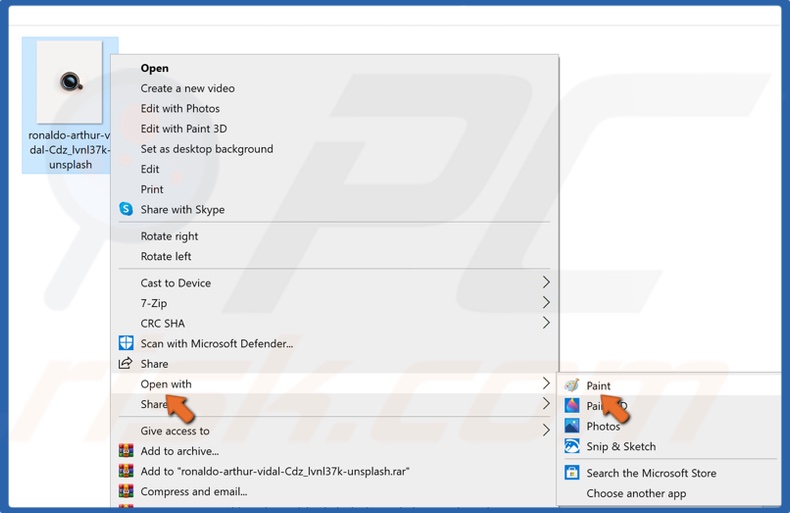
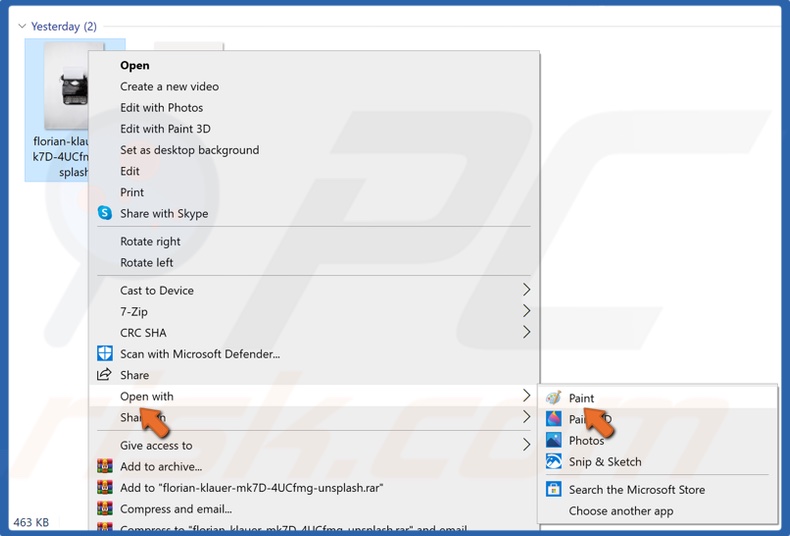
1. Right-click the image, go to Open with, and click Paint.

2. Use the Zoom in/out bar and adjust it so that the required object covers most of the screen.
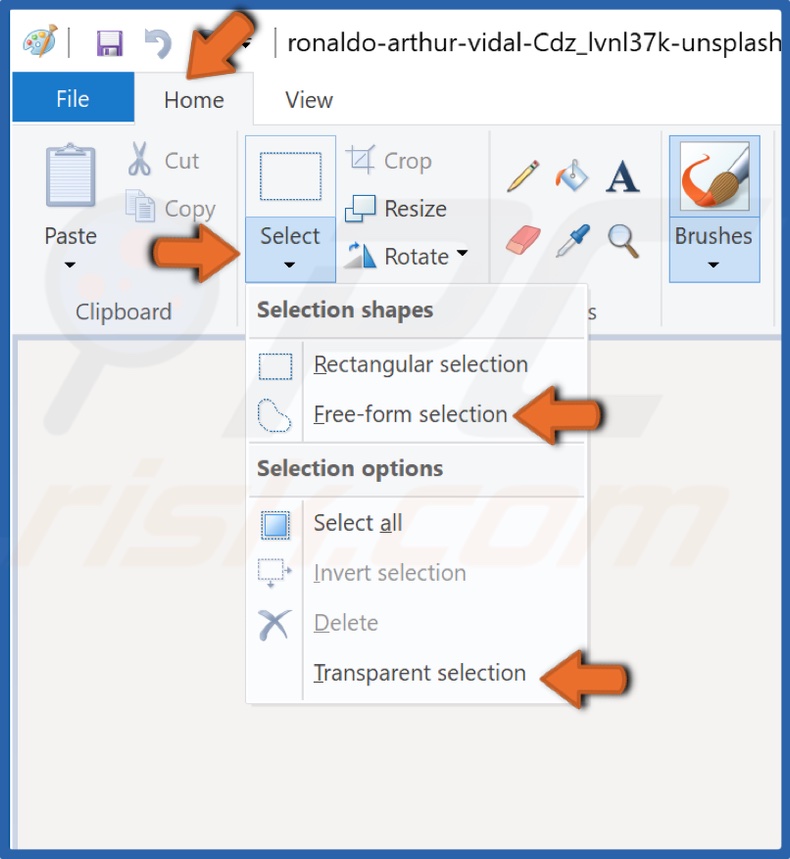
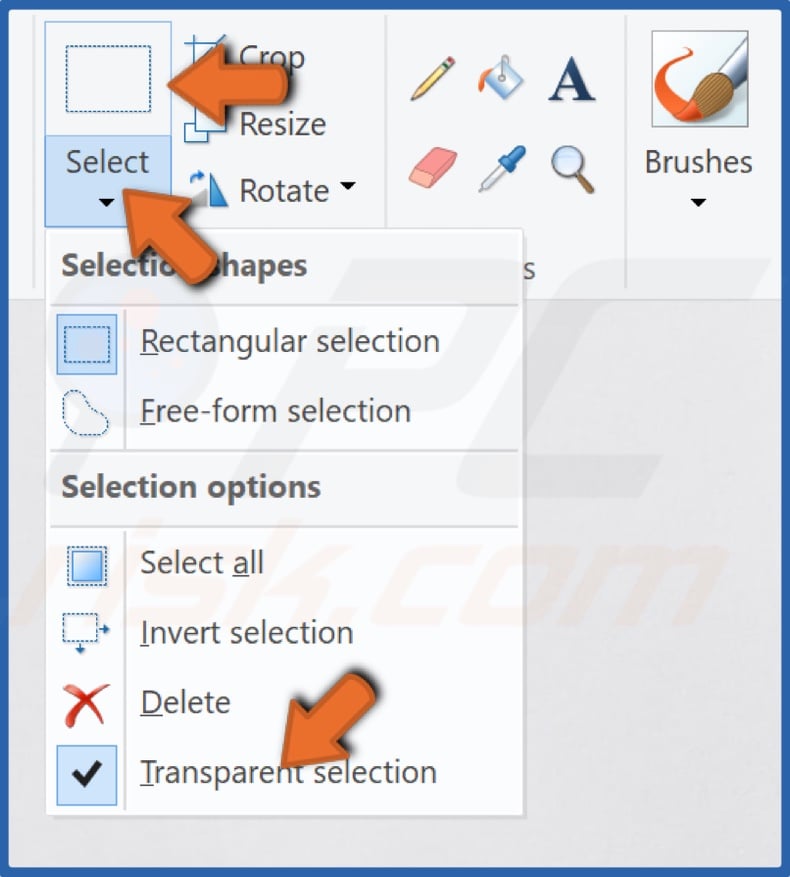
3. Under the Home tab, select Image options. Click Select to open the drop-down menu.
4. In the drop-down menu, enable the Transparent Selection option and select either Rectangle Selection or Free-form Selection, depending on the shape you’re trying to extract.
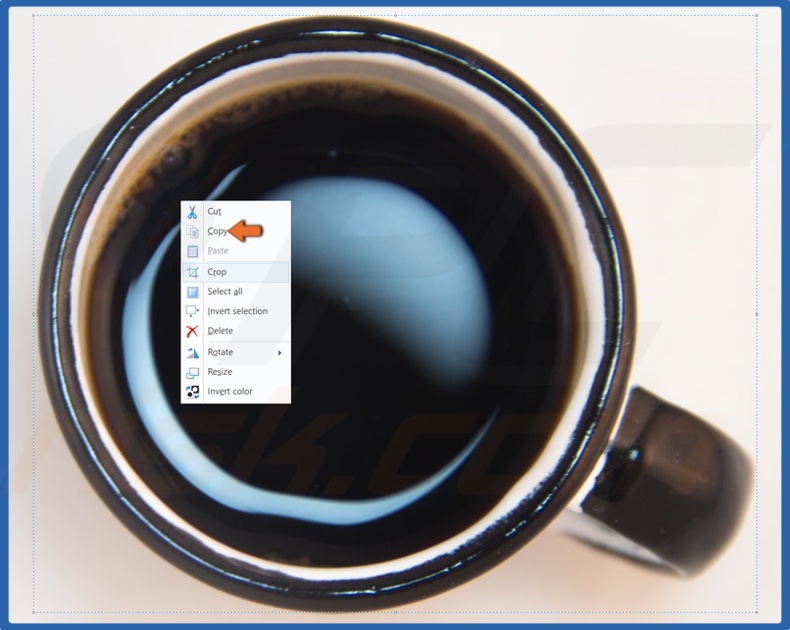
5. While holding the left mouse button, trace around the object with your mouse.
6. When the beginning and the end of your tracing meet, a rectangular box will appear around the object allowing your selection.
7. Right-click your selection and click Copy.
8. Right-click another image, go to Open with, and click Paint.
9. Under the Home tab, click Select to open the drop-down menu.
10. In the drop-down menu, enable the Transparent Selection option.
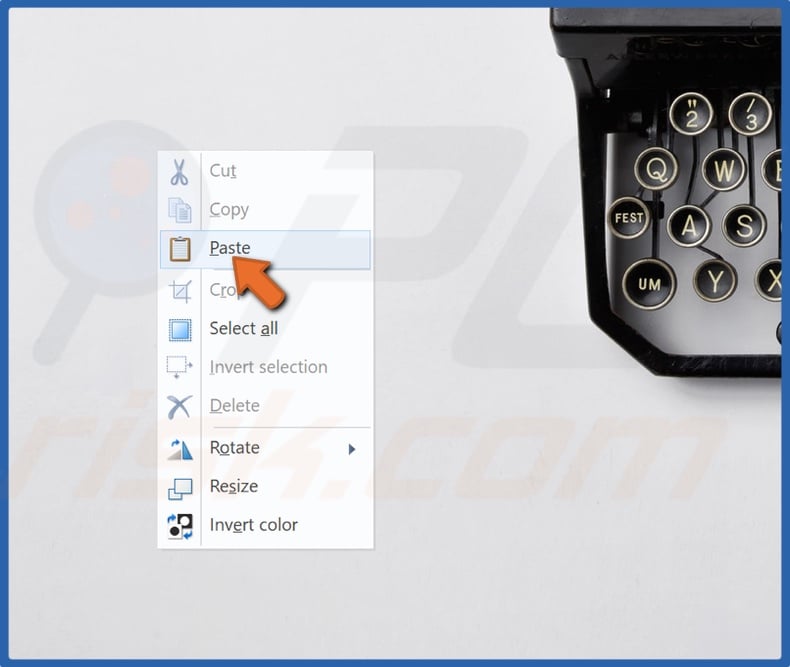
11. Right-click anywhere on the image and click Paste, which will insert your copied object onto the new image.
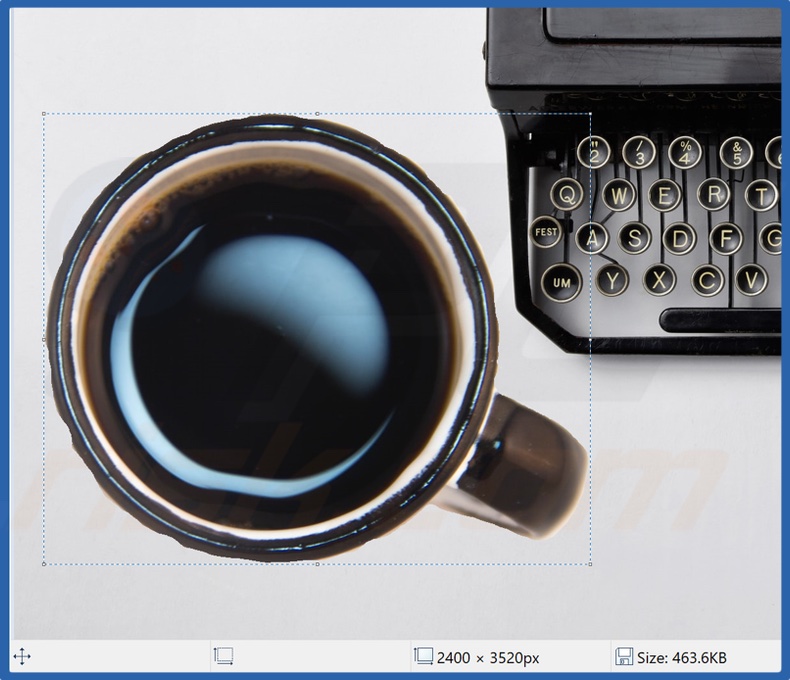
12. You can move and resize the inserted object according to your needs.
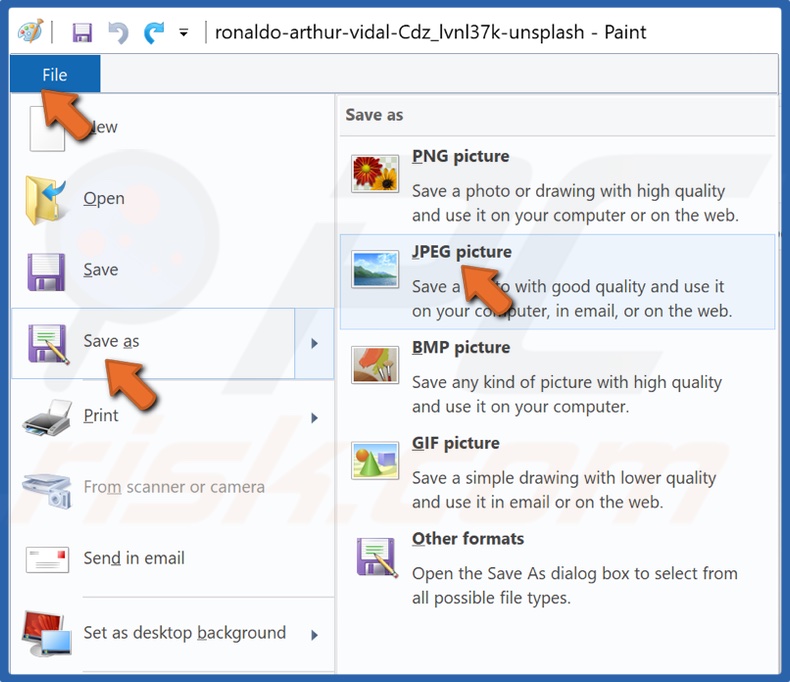
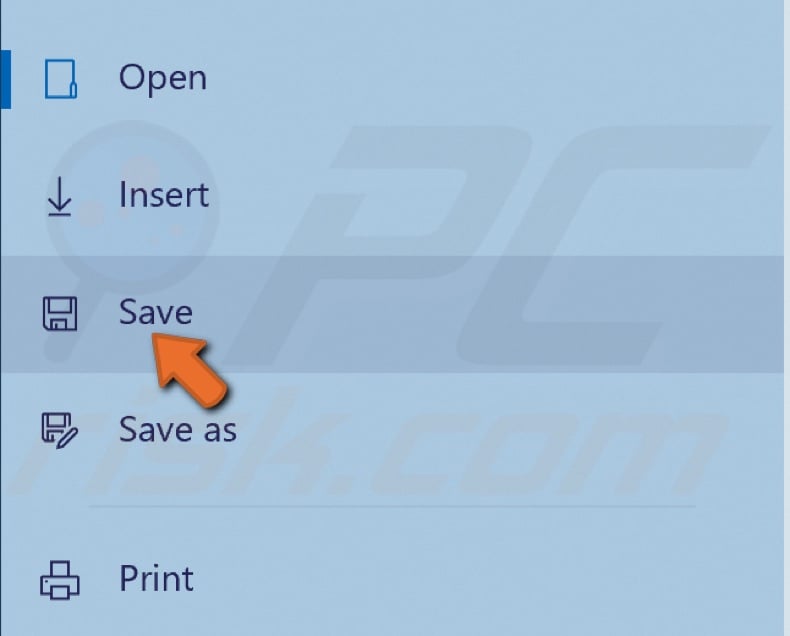
13. Then, click File in the top-left corner and click Save as.
14. Select the file format you want to save to, enter a new filename, and click Save again.
Share:

Rimvydas Iliavicius
Researcher, author
Rimvydas is a researcher with over four years of experience in the cybersecurity industry. He attended Kaunas University of Technology and graduated with a Master's degree in Translation and Localization of Technical texts. His interests in computers and technology led him to become a versatile author in the IT industry. At PCrisk, he's responsible for writing in-depth how-to articles for Microsoft Windows.
▼ Show Discussion