Fix Minecraft io.netty.channel.abstractchannel$annotatedconnectexception Error

Get Free Scanner and check your computer for errors
Fix It NowTo fix found issues, you have to purchase the full version of Combo Cleaner. Free trial available. Combo Cleaner is owned and operated by Rcs Lt, the parent company of PCRisk.com read more.
How to Fix Minecraft io.netty.channel.abstractchannel$annotatedconnectexception Error
An estimated 20% of Minecraft players experience an error known as io.netty.channel.abstractchannel$annotatedconnectexception, which doesn’t allow them to connect to a co-op game via a local network or the Internet. This article will show you how to fix this error.
Depending on your Minecraft version, you may get an error that reads:
io.netty.channel.ConnectTimeoutException connection timed out
io.netty.channel.AbstractChannel$AnnotatedConnectException: Connection timed out
io.netty.channel.AbstractChannel$AnnotatedConnectException: Connection refused: no further information
The error text doesn’t give much information, but it means that there’s a connection issue. This error may come about for several reasons, such as your Windows Defender Firewall or third-party Antivirus software preventing Minecraft from connecting to the Internet.
What Causes io.netty.channel.abstractchannel$annotatedconnectexception Error and How to Fix it?
If you’re using a VPN, it may block the host server, so try disabling it. You can also get this error if your ISP provides you with a dynamic IP address, so you need to contact your ISP and ask them to give you a static IP address. Furthermore, you may get this error due to a wrong IP port.
Incompatible software such as Hamachi may interfere with Minecraft, so you might want to disable or remove it from your PC.
As Minecraft requires Java software to work correctly, you may get this error if Java is outdated. Therefore, you should update Java before employing complex solutions to fix the io.netty.channel.abstractchannel$annotatedconnectexception Minecraft error.
Video on How to Fix io.netty.channel.abstractchannel$annotatedconnectexception Minecraft Error
Table of Contents:
- Introduction
- Method 1. Whitelist Java on Windows Defender Firewall
- Method 2. Turn off Windows Defender Firewall
- Method 3. Switch to Google’s DNS
- Video on How to Fix io.netty.channel.abstractchannel$annotatedconnectexception Minecraft Error
Download Computer Malware Repair Tool
It is recommended to run a free scan with Combo Cleaner - a tool to detect viruses and malware on your device. You will need to purchase the full version to remove infections. Free trial available. Combo Cleaner is owned and operated by Rcs Lt, the parent company of PCRisk.com read more.
Method 1. Whitelist Java on Windows Defender Firewall
1. Hold down Windows+R keys to open the Run dialog box.
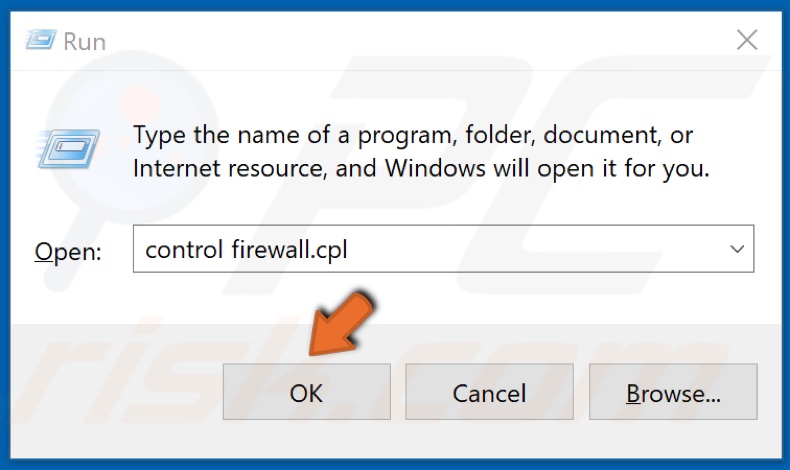
2. In the Run dialog box, type control firewall.cpl and click OK to open Windows Defender Firewall settings.
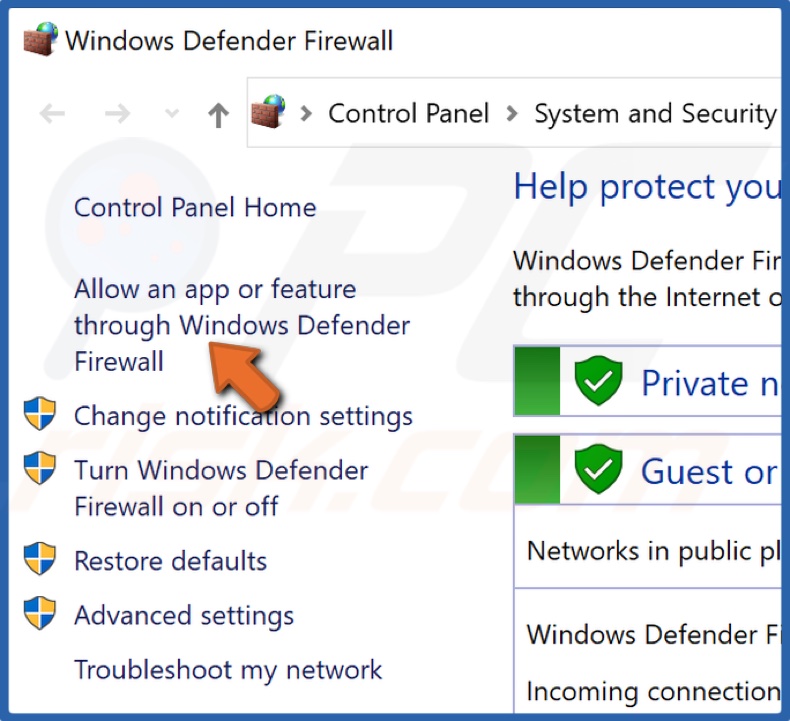
3. Click Allow an app or feature through Windows Defender Firewall.
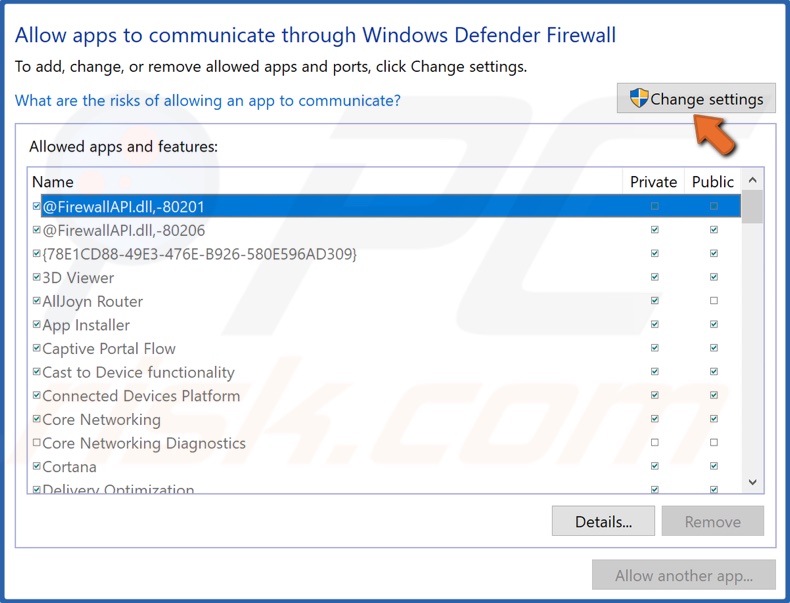
4. Click the Change settings button (click Yes at the User Account Control (UAC)).
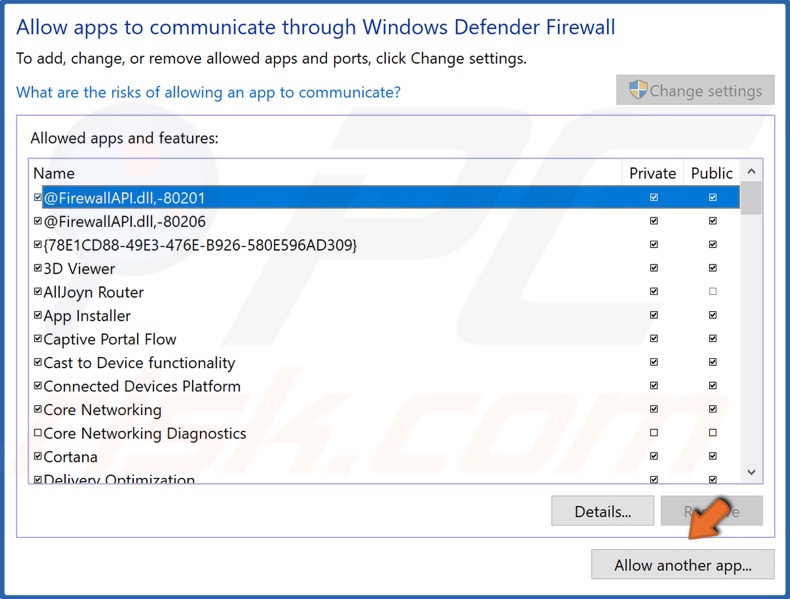
5. See if the Java Runtime Environment is on the list of allowed apps. If it isn’t, click Allow another app.
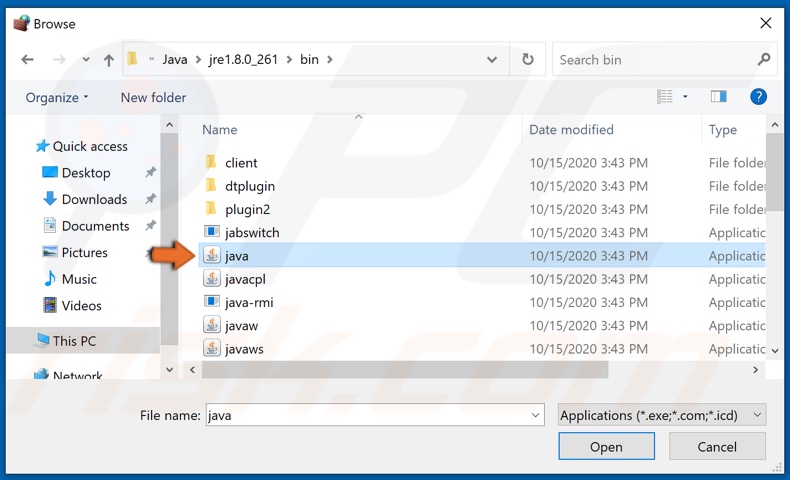
6. Click Browse, navigate to C:\Program Files (x86)\Java\[Java Version]\bin
7. Select Java.exe and click Open.
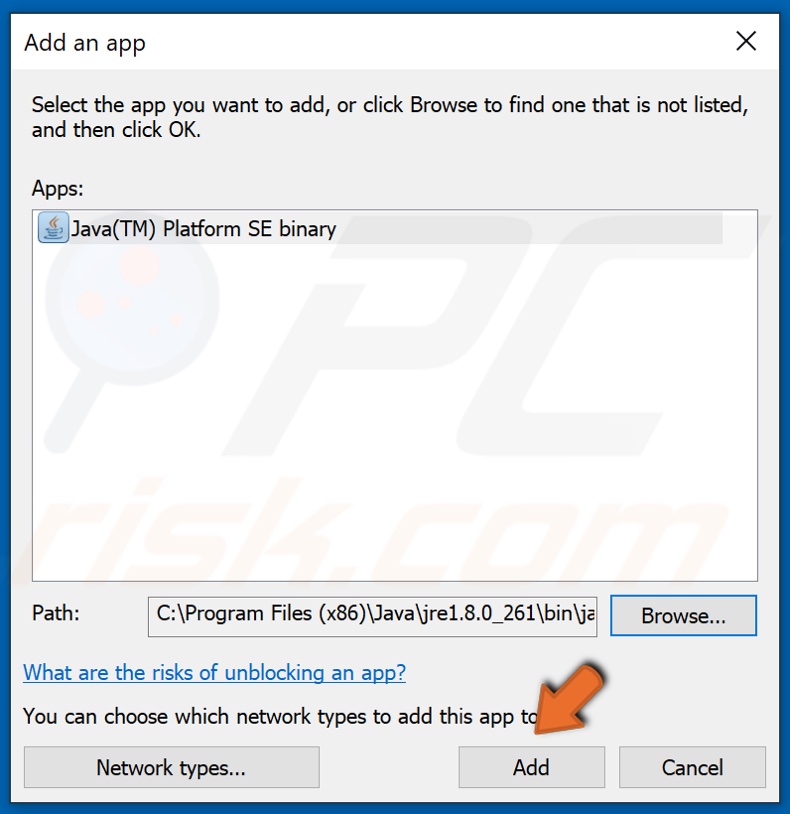
8. Then, click Add to include the item into the list of Allowed Apps.
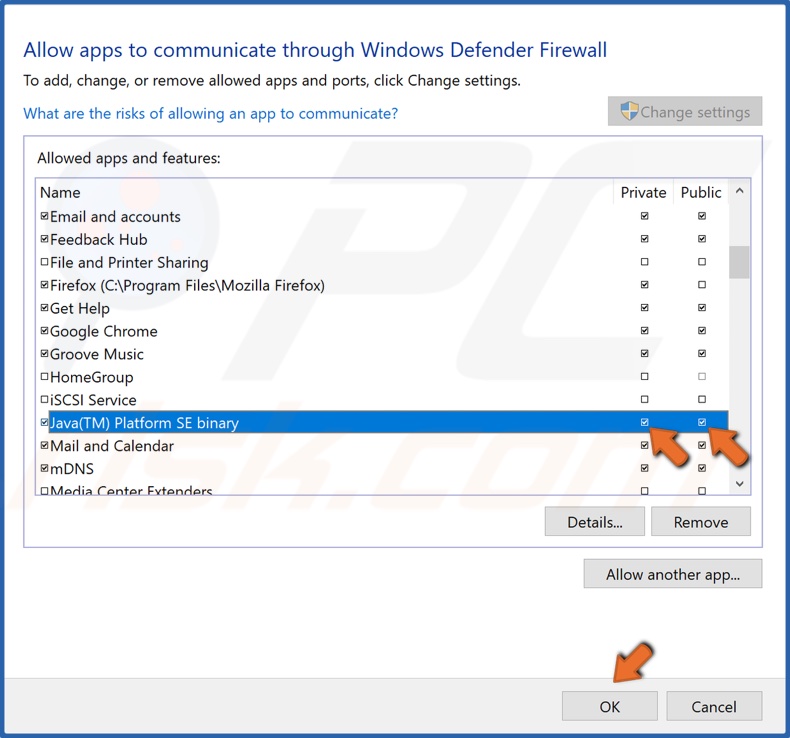
9. Tick the Private and Public checkboxes associated with the Java Platform SE Binary, and click OK.
10. Launch Minecraft.
Method 2. Turn off Windows Defender Firewall
1. Hold down Windows+R keys to open the Run dialog box.
2. In the Run dialog box, type control firewall.cpl and click OK to open Windows Defender Firewall settings.
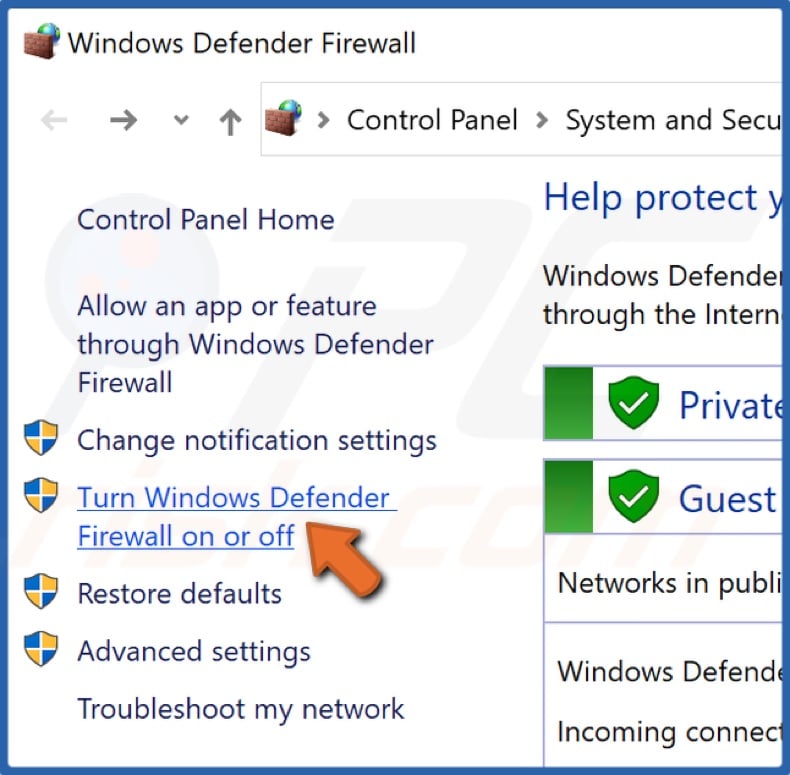
3. Click Turn Windows Defender Firewall on or off.

4. Tick the Turn off Windows Defender Firewall (not recommended) for both Private and Public networks. To turn Windows Defender Firewall back on later, tick Turn on Windows Defender Firewall for Private and Public networks.
5. Click the OK button to confirm.
6. Launch Minecraft.
Method 3. Switch to Google’s DNS
1. Hold down Windows+R keys to open Run.
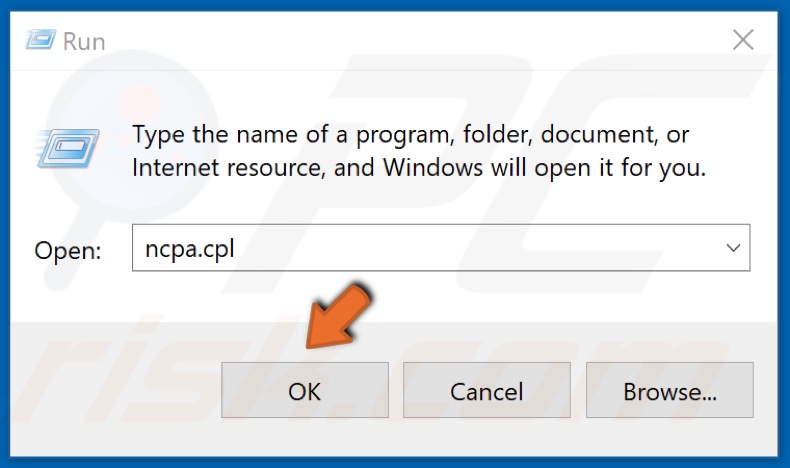
2. Type ncpa.cpl and click OK to open the Network Connections menu.
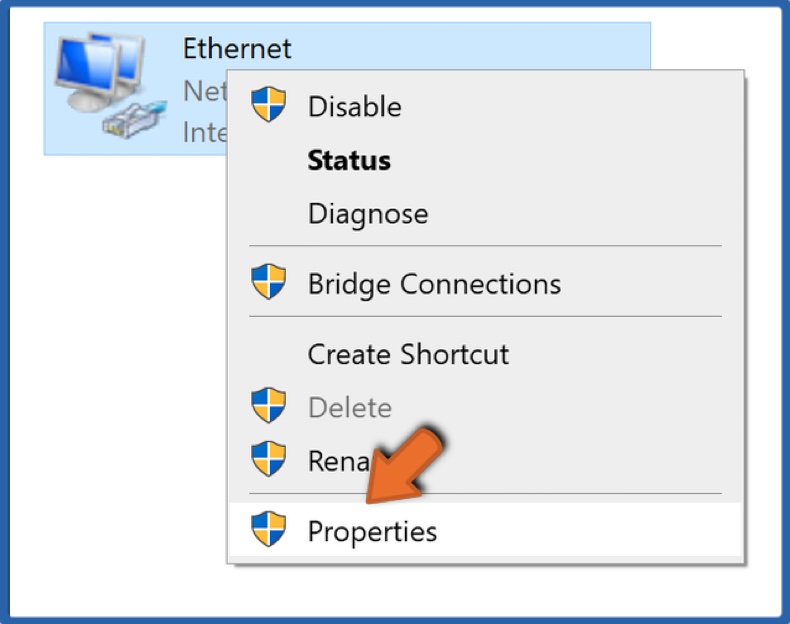
3. In the Network Connections window, right-click your network device and click Properties.
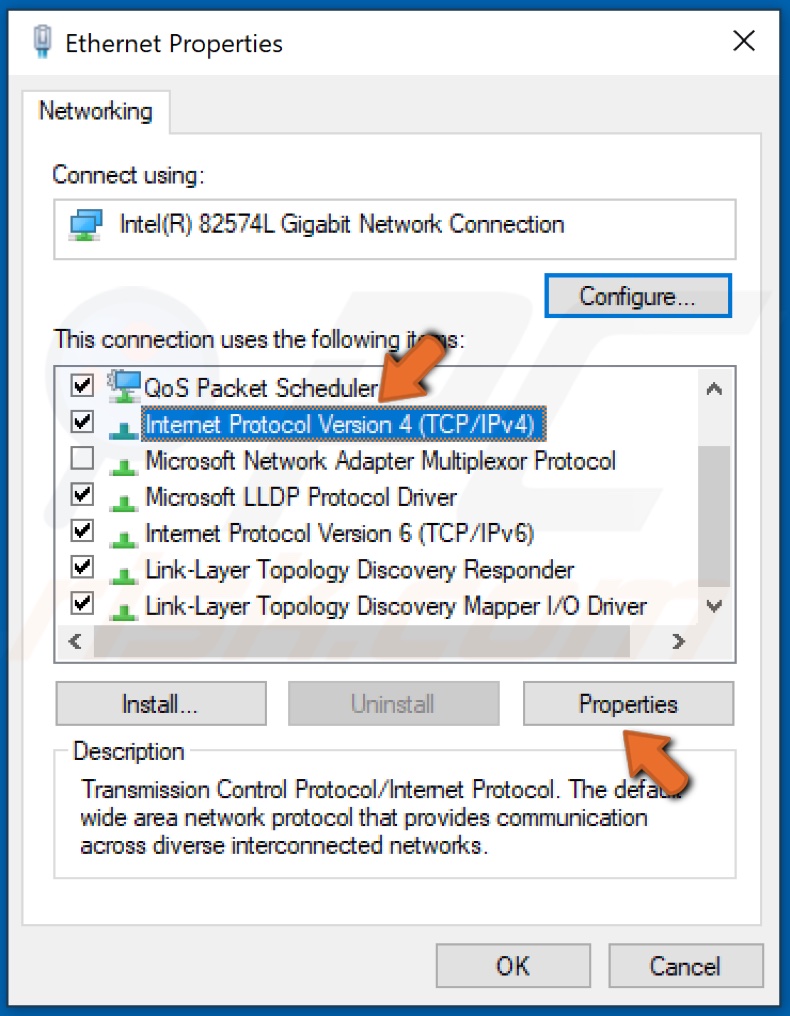
4. Under the Networking tab, in This connection uses the following item section, select Internet Protocol Version 4 (TCP / IPv4), and click the Properties button.
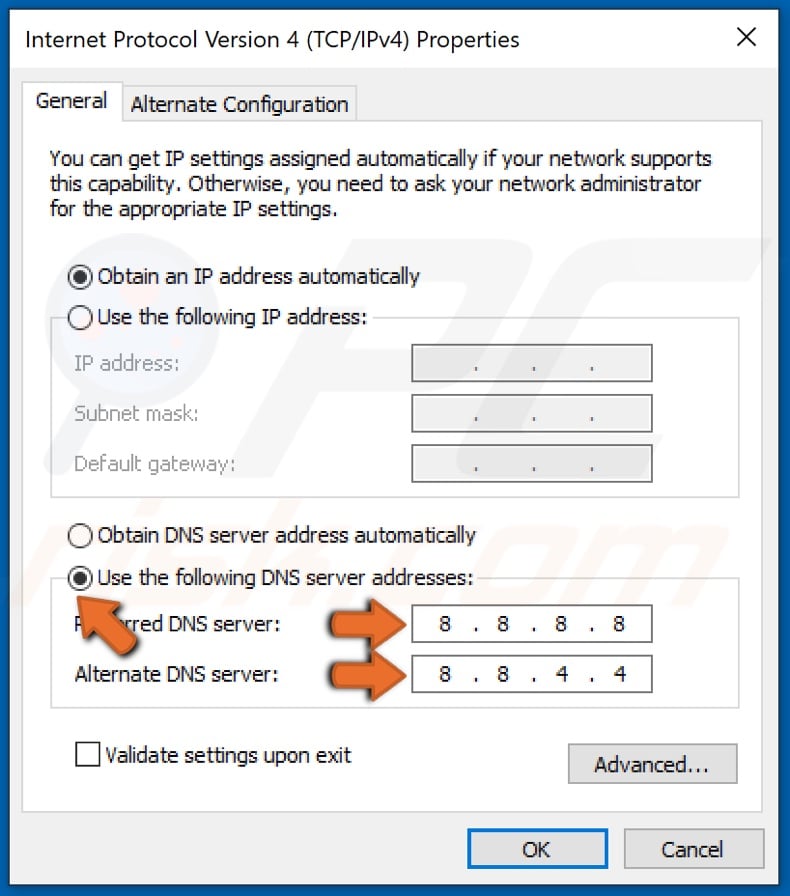
5. In the General tab, tick Use the following DNS server address and replace Preferred DNS server and Alternate DNS server with the following addresses:
- 8.8.8.8
- 8.8.4.4
6. Click OK.
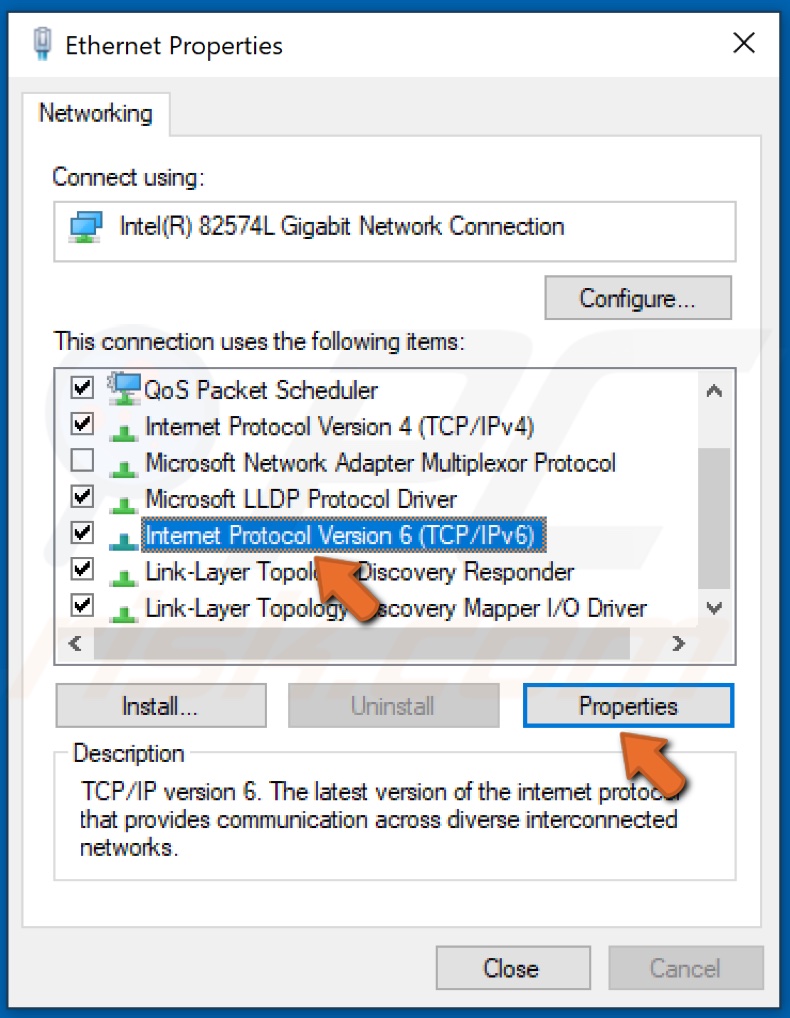
7. Then, select Internet Protocol Version 6 (TCP / IPv6), and click the Properties button.
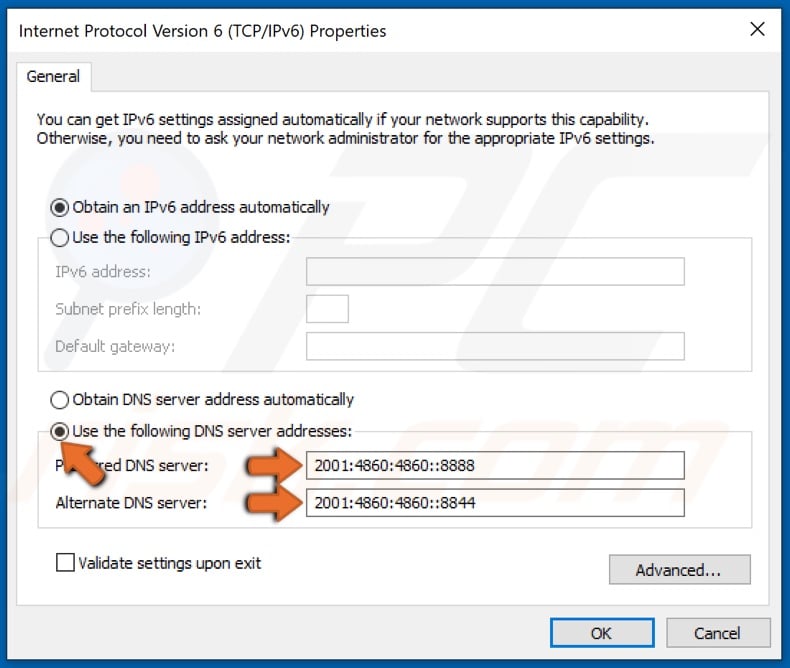
8. In the General tab, tick Use the following DNS server address and replace Preferred DNS server and Alternate DNS server with the following addresses:
- 2001:4860:4860::8888
- 2001:4860:4860::8844
9. Click OK.
10. Close the Internet Properties window.
11. Then, reboot your PC, and launch Minecraft.
Did this article help you fix error io.netty.channel.abstractchannel$annotatedconnectexception in Minecraft on your PC? Let us know by commenting below
Share:

Rimvydas Iliavicius
Researcher, author
Rimvydas is a researcher with over four years of experience in the cybersecurity industry. He attended Kaunas University of Technology and graduated with a Master's degree in Translation and Localization of Technical texts. His interests in computers and technology led him to become a versatile author in the IT industry. At PCrisk, he's responsible for writing in-depth how-to articles for Microsoft Windows.
▼ Show Discussion