How to Fix Sedlauncher.exe High CPU Usage on Windows 10

Get Free Scanner and check your computer for errors
Fix It NowTo fix found issues, you have to purchase the full version of Combo Cleaner. Free trial available. Combo Cleaner is owned and operated by Rcs Lt, the parent company of PCRisk.com read more.
How to Fix Sedlauncher.exe High CPU Usage on Windows 10
With the KB4023057 update package, Microsoft included Windows Remediation Service, which was designed to improve the update speed and reliability of the Windows Update Service. Ironically, installing the KB4023057 update may cause high CPU and Disk usage.

The culprits for this unreasonable amount of CPU or Disk utilization are the "SedSvc.exe" service and the "SedLauncher.exe" launcher (stored in the "Rempl" folder in "Program Files"). Note that a file named rempl.exe also plays a role in this issue.
All three files are part of the Windows Remediation Service, an update for specific Windows 10 build versions to handle the Windows update process smoothly.
The Windows Remediation Service is part of the KB4023057 Windows update package for 1507, 1511, 1607, 1703, 1709, and 1803 versions of Windows 10. It's installed as an application and can be found in Apps and Features as "Update for Windows 10 for x64-based systems (KB4023057)" or "Windows Setup Remediations (x64) (KB4023057)".
High CPU or Disk utilization can occur when SedLauncher.exe and SedSvc.exe are in the process of downloading or installing large feature updates. It can also happen if the service encounters a problem during this process.
If you want to install the latest updates on your Windows 10 PC, you should keep Windows Remediation Service. However, if you don't care about the updates, you can temporarily stop the service from running and resume it when you want or remove it from your PC altogether.
Video on How to Fix Sedlauncher.exe High CPU Usage:
Table of Contents:
- Introduction
- Method 1. Disable Windows Remediation Service
- Method 2. Delete REMPL Task Schedule
- Method 3. Block Windows Remediation Service on Windows Defender Firewall
- Video on How to Fix Sedlauncher.exe High CPU Usage
Download Computer Malware Repair Tool
It is recommended to run a free scan with Combo Cleaner - a tool to detect viruses and malware on your device. You will need to purchase the full version to remove infections. Free trial available. Combo Cleaner is owned and operated by Rcs Lt, the parent company of PCRisk.com read more.
Method 1. Disable Windows Remediation Service
1. Hold down Windows+R keys to open Run.

2. In the Run dialog box, type services.msc and click OK.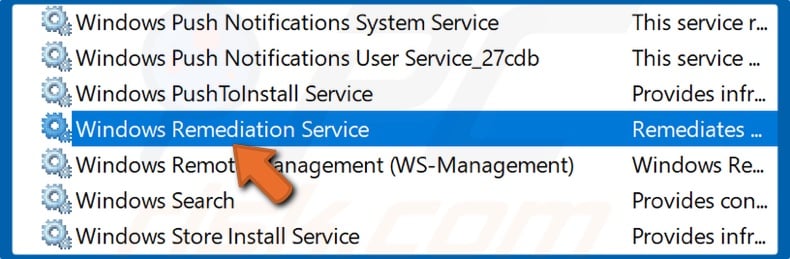
3. In the services window, find Windows Remediation Service.
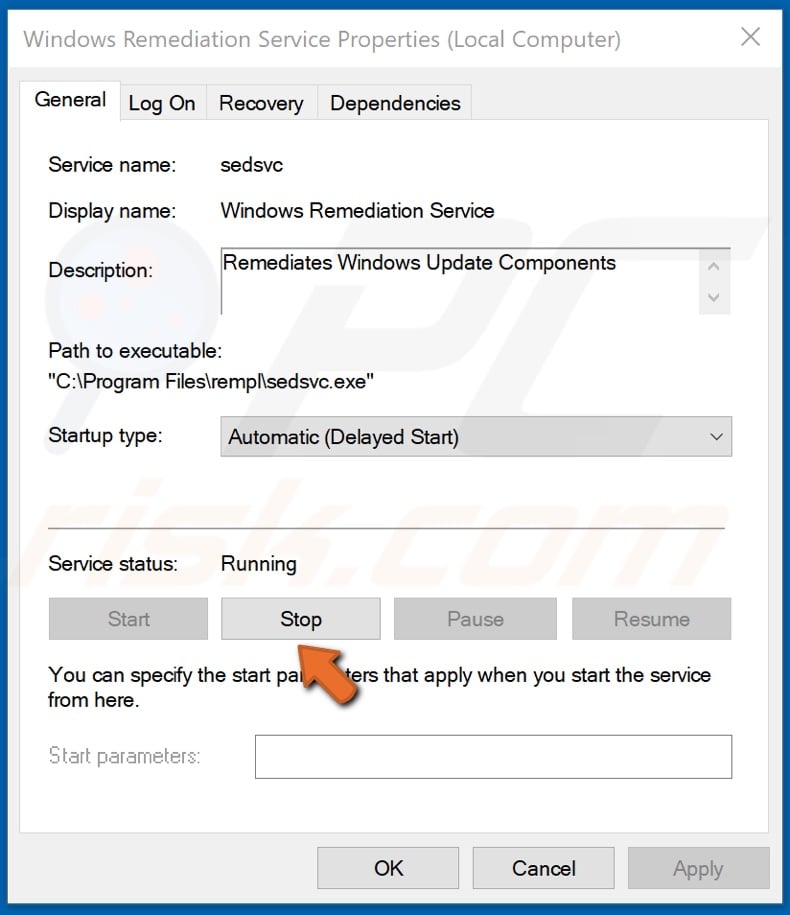
4. Double-click Windows Remediation Service and click the Stop button.
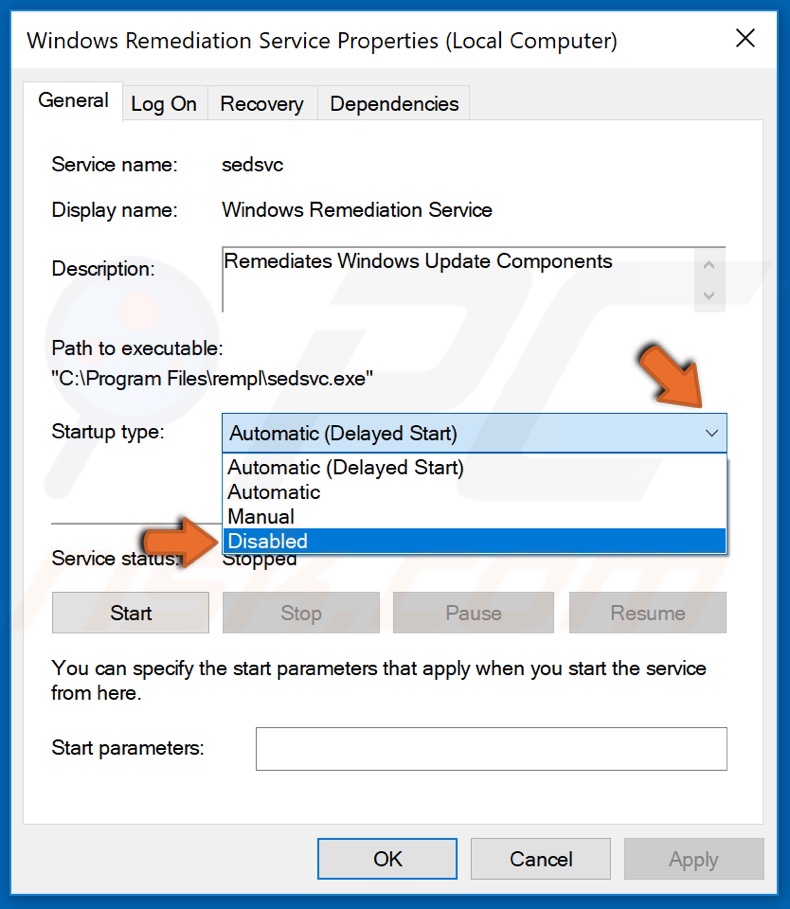
5. Then, open the Startup Type dropdown menu and select Disabled.
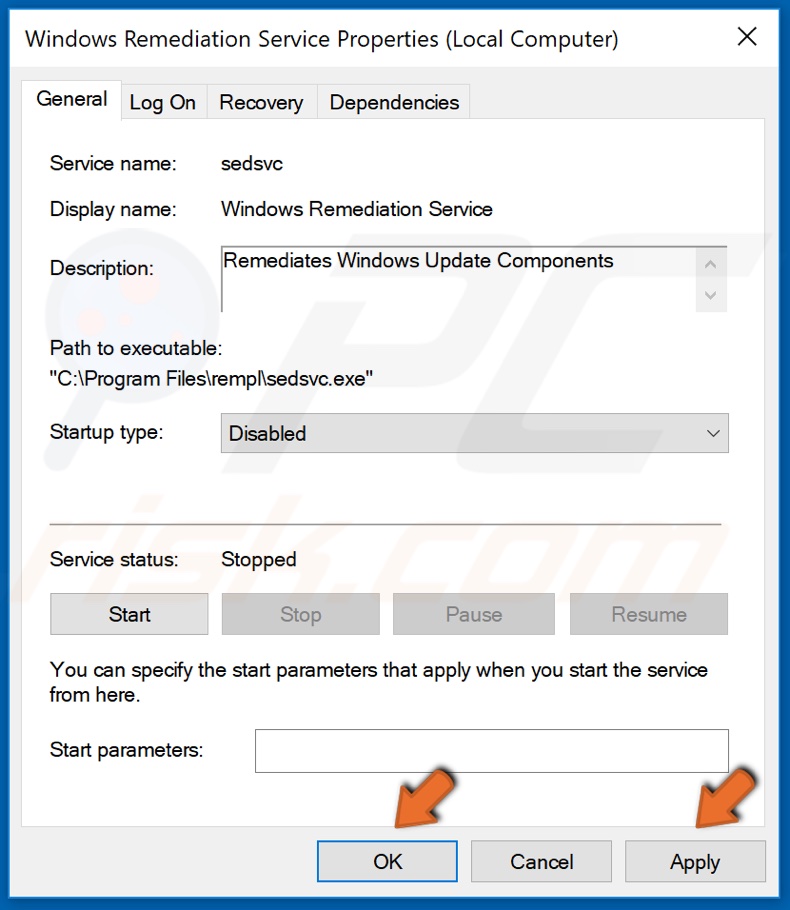
6. Click Apply and click OK.
Method 2. Delete REMPL Task Schedule
1. Hold down Windows+R to open Run.
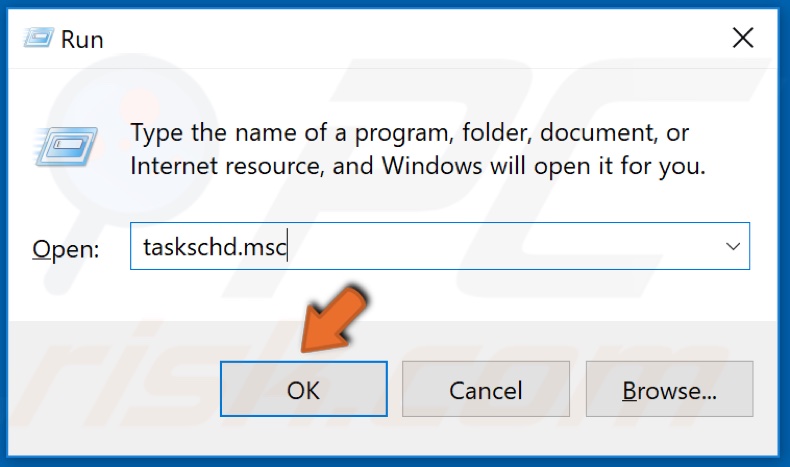
2. In the Run dialog box, type taskschd.msc and click OK.
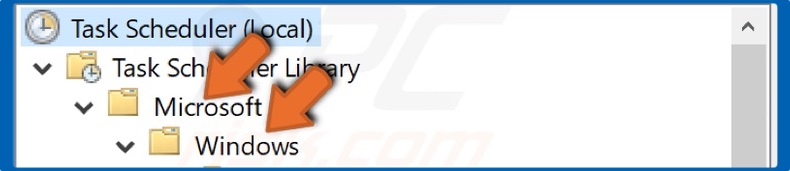
3. Navigate to Microsoft>Windows>rempl folder.
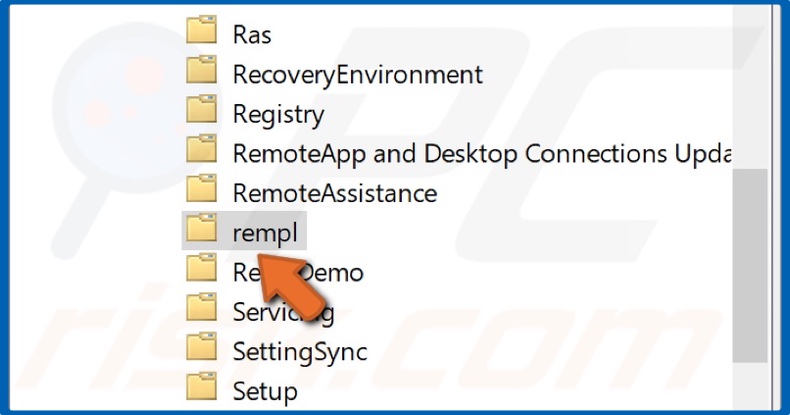
4. Click the rempl folder.
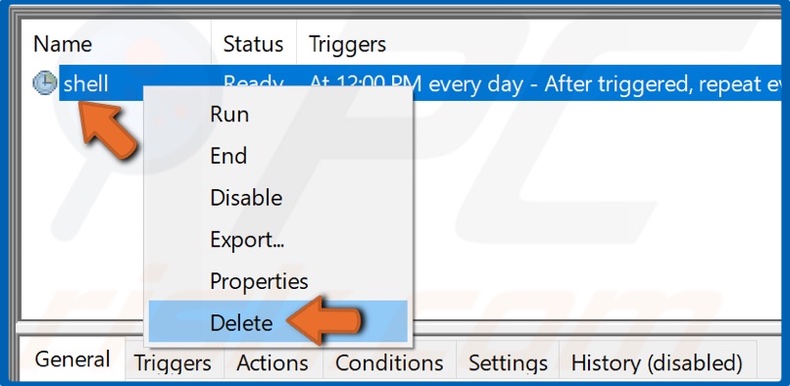
5. Select the Shell task on the right, right-click it, and click Delete.
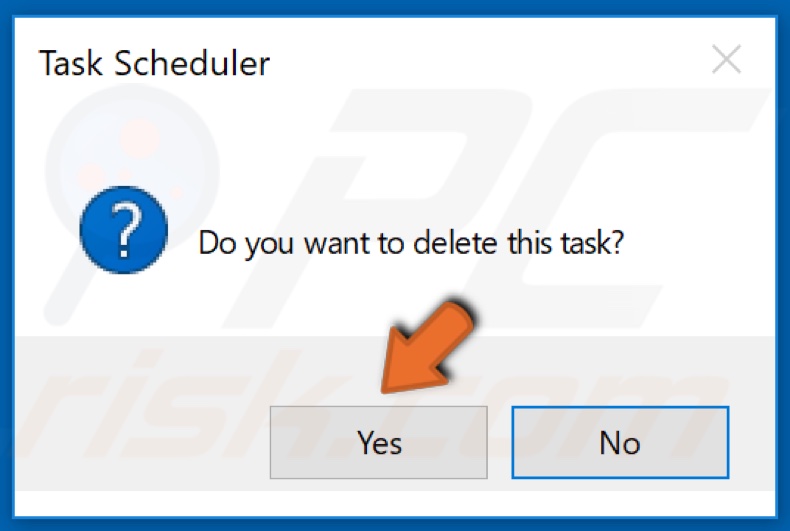
6. Click Yes in the prompt dialog box.
Method 3. Block Windows Remediation Service on Windows Defender Firewall
1. Hold down Windows+R to open Run.
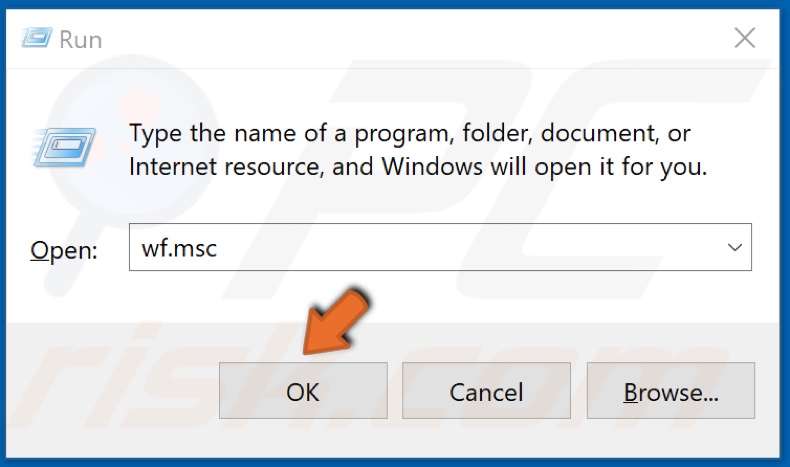
2. In the Run dialog box, type wf.msc and click OK.
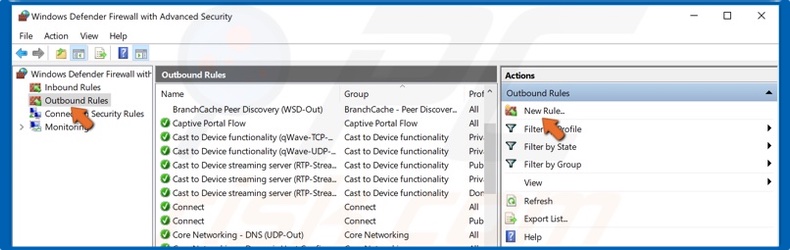
3. Select Outbound Rules located on the left-hand side of the window, and click New Rule.
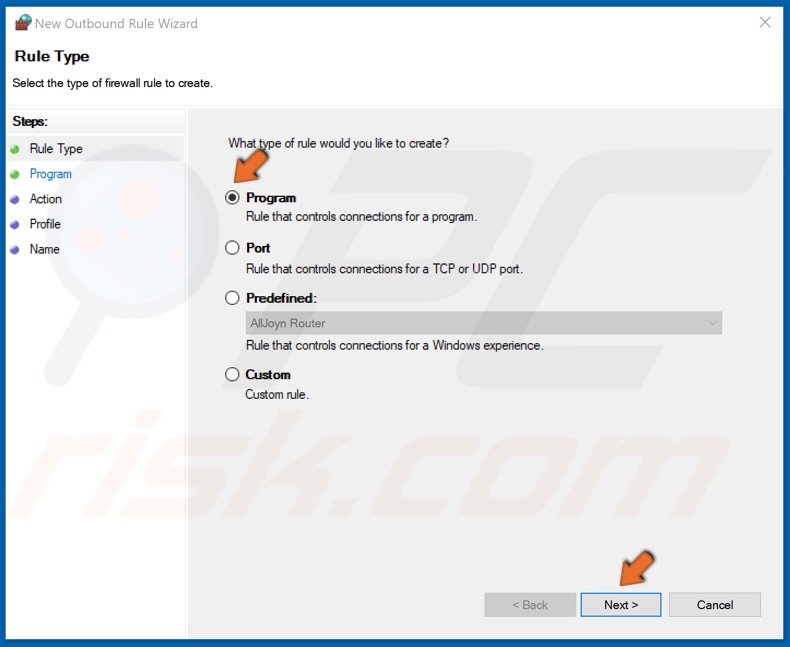
4. Make sure that a rule for Program is selected, and click Next.
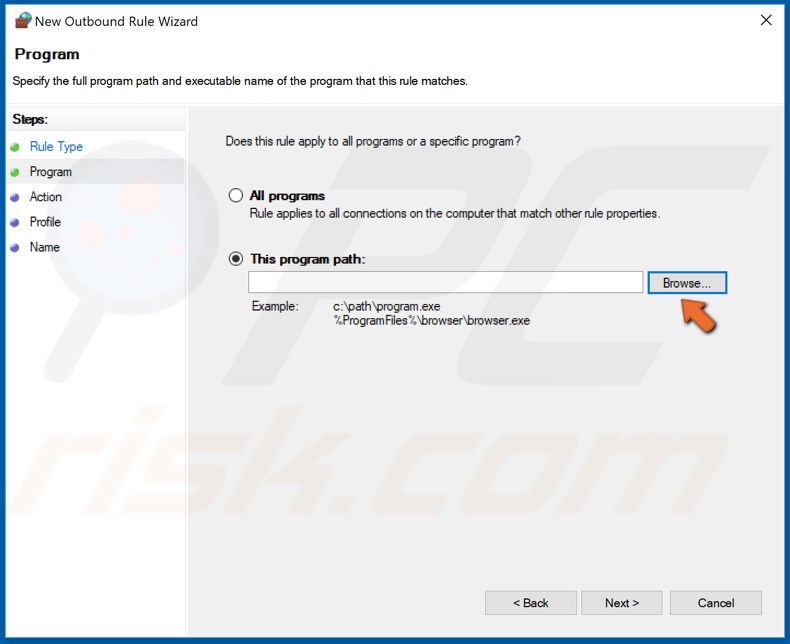
5. Click Browse, and navigate to C:\Program Files\rempl.
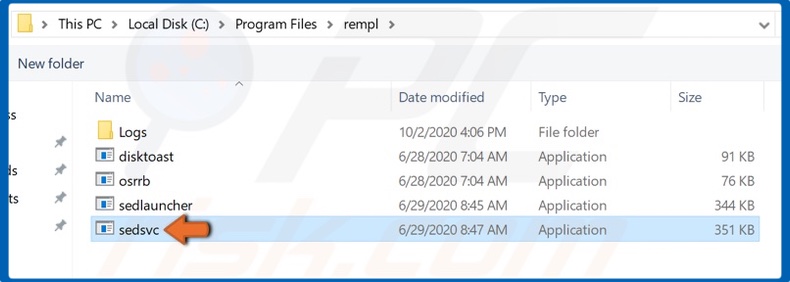
6. Locate sedsvc.exe and double-click it.
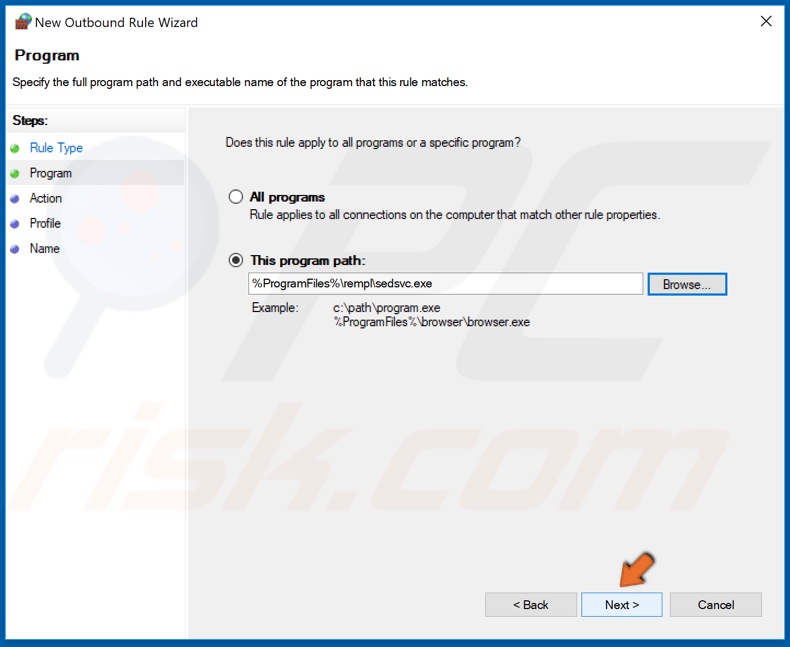
7. Click Next.
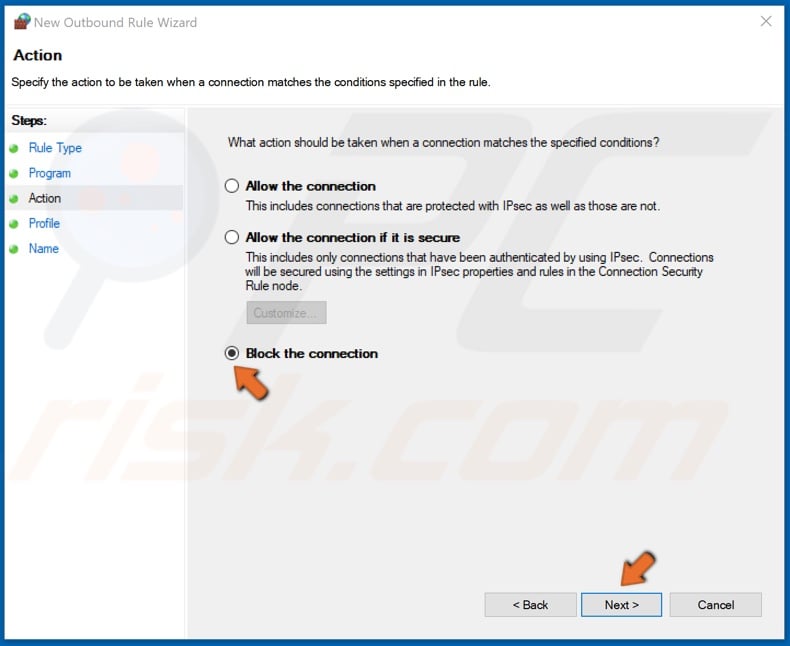
8. Make sure that Block the connection option is selected, and click Next.
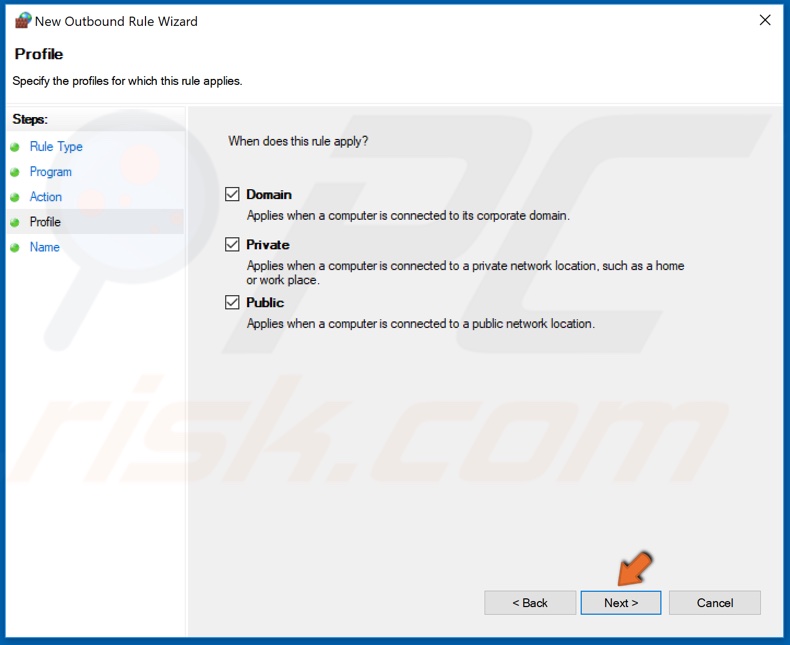
9. Make sure that the new rule applies to Domain, Private and Public networks, and click Next.
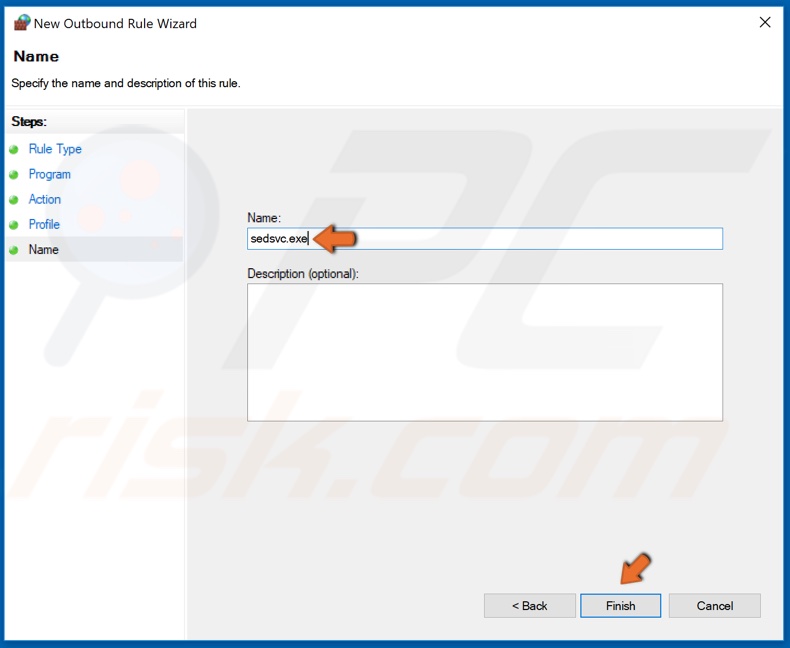
10. Then, name the new rule sedsvc.exe and click Finish.
Share:

Rimvydas Iliavicius
Researcher, author
Rimvydas is a researcher with over four years of experience in the cybersecurity industry. He attended Kaunas University of Technology and graduated with a Master's degree in Translation and Localization of Technical texts. His interests in computers and technology led him to become a versatile author in the IT industry. At PCrisk, he's responsible for writing in-depth how-to articles for Microsoft Windows.
▼ Show Discussion