How to Fix Kernel-Power (Event ID 41) Error
Get Free Scanner and check your computer for errors
Fix It NowTo fix found issues, you have to purchase the full version of Combo Cleaner. Free trial available. Combo Cleaner is owned and operated by Rcs Lt, the parent company of PCRisk.com read more.
How to Fix Kernel-Power (Event ID 41) Critical Error
You may have experienced a Kernel-Power critical error associated with Event ID 41. In the guide below, there are several possible solutions to fix Kernel-Power errors.

This error is usually seen in the Windows Event Viewer, which shows a log of system and application messages, including warnings, information messages, and errors.
What Causes Kernel-Power Event 41?
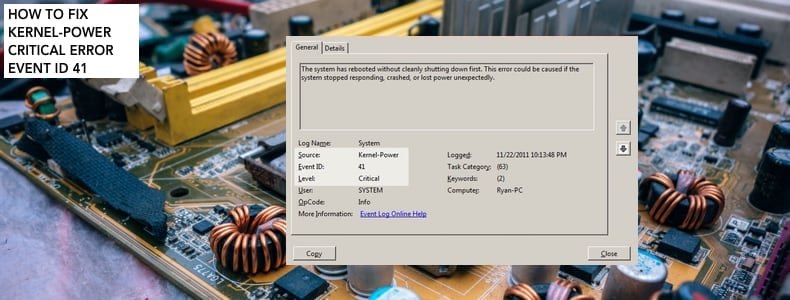
The Kernel-Power (ID 41) error message states that the system has rebooted without cleanly shutting down. It can be caused if the system stops responding, crashes, or loses power unexpectedly. The Kernel-Power 41 critical error is generated when a Windows computer starts after its last shutdown and Windows finds that the computer was not previously shut down cleanly.
The error message does provide much information. However, an underpowered or failing power supply might be one reason. For example, if you recently added Random Access Memory (RAM), additional devices, or hard disks when this problem arose, the power supply might be the cause.
Video Showing How to Fix Kernel-Power (Event ID 41) Critical Error
Table of Contents:
- Introduction
- Customize Power Settings
- Update All Drivers
- Update BIOS
- Turn off Fast Startup
- Other Solutions
- Video Showing How to Fix Kernel-Power (Event ID 41) Critical Error
Download Computer Malware Repair Tool
It is recommended to run a free scan with Combo Cleaner - a tool to detect viruses and malware on your device. You will need to purchase the full version to remove infections. Free trial available. Combo Cleaner is owned and operated by Rcs Lt, the parent company of PCRisk.com read more.
Customize Power Settings
The Power Plan feature in Windows 10 is not new and was available in earlier versions of the operating system. Power Plan is a collection of hardware and system settings that manage how your computer uses power.
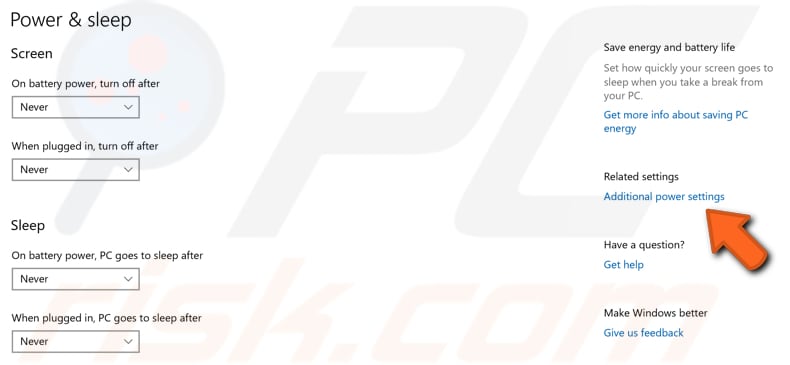
Here, we show how to change the advanced power settings and customize hard disk power management and sleep mode settings. Type "power options" in Search and click the "Power & sleep settings" result.

Now click "Additional power settings" under Related settings on the right pane.

In the Power Options window, find and click the "Change when the computer sleeps" option on the left pane.

Now click "Change advanced power settings".

Now expand the "Hard disk" and "Turn off hard disk after" sections and make sure that both "On battery" and "Plugged in" are set to "Never". If these settings are configured differently and there is no "Never" option, type 0 and change to Never.
Expand the "Sleep" and "Sleep after" sections and ensure both "On battery" and "Plugged in" are set to "Never". Click "Apply" to save the changes.

Update All Drivers
A device driver informs the operating system and other software how to interact with particular hardware. If the appropriate driver is not installed, the device might not function properly and cause Kernel-Power critical errors. Updates for drivers are usually installed together with Windows Updates.
To update your drivers manually, open Device Manager by right-clicking the Start button and selecting the "Device Manager" result from the contextual menu, or type "device manager" in Search and click the "Device Manager" result.

In Device Manager, you will see a list of devices connected to your computer. Expand the device in question by right-clicking the arrow near it and right-click the device, select "Update driver" from the contextual menu.

You will be asked if you want to search for updated driver software automatically or to browse your computer for driver software. If you select the first option, Windows will search your computer and the Internet for the latest driver software for your device.
If you select the second option, you must locate and install the drivers manually. Using this option requires having previously downloaded drivers on your computer or USB flash drive - this is a longer process because you will have to manually download the latest drivers for all devices by visiting the device manufacturer's official websites. Select the option you prefer and follow the instructions.

You can also use third-party software to update your drivers automatically. In this case, we recommend Snappy Driver Installer (SDI), a powerful free driver updater tool for Windows. You can download Snappy Driver Installer from here.
Additionally, we suggest you check that there are no duplicate audio drivers installed. Expand the "Sound, video and game controllers" section and check if there are any duplicate audio driver entries. If there are duplicate entries, right-click one and select "Disable" from the contextual menu. Repeat for other duplicates.

Update BIOS
BIOS (Basic Input Output System) is software stored on a small memory chip on the motherboard. To update the BIOS, go to the motherboard manufacturer's website and download the latest BIOS version for the motherboard. There should be a manual describing how to update the BIOS - ensure that you read this carefully.
Bear in mind that updating the BIOS is a procedure for advanced users, and if not performed properly, can cause permanent hardware damage. If you do not know how to update the BIOS, find an expert to avoid damage to your computer.
Turn off Fast Startup
Turning off the Fast Startup feature could prevent your computer from shutting down unexpectedly and receiving Kernel-Power critical errors. With the fast startup feature enabled, shutting down your computer might seem like you are completely shutting it down, but this is not entirely true since it moves into a state between hibernation and shutdown.
Leaving fast startup enabled should not harm your PC since it is a Windows feature, but it could cause this problem. To disable Fast Startup, go to Search and type "power". Click on the "Choose power plan" result to open it.

In the Power Options window, click "Choose what the power button do".

Click on "Change settings that are currently unavailable" and then uncheck the "Turn on fast startup (recommended)" option if it is enabled. Click "Save changes" to save the changes made, restart your computer, and check if the unexpected shutdown problems are resolved.

Other Solutions
The Kernel-Power critical error is usually power-related and indicates something wrong with the computer's PSU (Power Supply Unit). Oxidation on the back of the PSU switch might be the cause. In this case, contact a technician to check the PSU - replacing it could solve the problem.
Another possible reason for this critical error is overheating. A computer usually shuts down when the temperature is too high. You can download the SpeedFan program, which monitors temperatures and checks if the hardware is overheating when your computer is turned on.
It is also possible that the RAM chip is not connected properly or the slot (or chip) is dusty. If you know how to detach and replace RAM, we recommend that you try this. Remove the RAM chip, clear any dust/dirt, and replace it.
Do not do this when your computer is turned on or connected to a power source. When you have finished, reconnect your computer to the power supply and turn it on. Check if you still receive the Kernel-Power errors.
Check that all wires are connected properly (inside and outside the computer box), and check if the power connectors are properly connected for both GPU and mainboard (motherboard). Also, remove the CPU and reseat it (if you have these expertise).
We hope this guide was useful and helped fix the Kernel-Power critical error (ID 41). If none of the methods mentioned above solved the problem, it might be a hardware-related issue, and you should contact a computer technician to check the system.
Share:

Rimvydas Iliavicius
Researcher, author
Rimvydas is a researcher with over four years of experience in the cybersecurity industry. He attended Kaunas University of Technology and graduated with a Master's degree in Translation and Localization of Technical texts. His interests in computers and technology led him to become a versatile author in the IT industry. At PCrisk, he's responsible for writing in-depth how-to articles for Microsoft Windows.

▼ Show Discussion